It’s time for Block 2 in the BlockBase+ Sew Along! I loved seeing everyone’s sewn blocks in the link up on Friday. If you haven’t added your first block to the link up yet, you can do so at any time in the Block 1 Link Up post. Don’t have the BlockBase+ software yet? It’s not too late to join in! Find the BlockBase+ software here > In this post, we’ll practice navigating through the categories and subcategories again to find the block. Then we’ll take a look at the Display settings and go through the steps of printing the templates for our next block. Let’s get started! Double-click the BlockBase+ icon to open the software. If you see the Getting Started window, click the Close button. (If you’d like to turn off the tour, check the box next to “Don’t show again” and then click Close.) In the Navigation
Sew Alongs
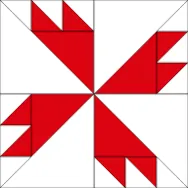
BlockBase+ Sew Along: Block 2
Posted 04-12-2021 by Jenny | Posted in: Block 2 BlockBase+ BlockBase+ Sew Along 2021 Sew Alongs
BlockBase+ Sew Along: Block 1 Link Up
Posted 04-09-2021 by Jenny | Posted in: Block 1 BlockBase+ BlockBase+ Sew Along 2021 Sew Alongs
Is everyone ready to show off their first block for the sew along? I’m so excited to see everyone’s fabric choices! Here’s mine: My block finishes at 6″ and I used both the rotary cutting chart and the foundation pattern printouts to make my block. I use the dimensions from the rotary cutting chart to cut my patches, then I piece them together using the foundation pattern. I’m a *bit* of a perfectionist and using the foundation pattern is how I keep myself from ripping apart the block multiple times until I’m happy with my piecing! When you post your photo below, please tell us what size you made the block, which printout you used from BlockBase+, and anything else you’d like to share about the block! To Link Up Your Photo Scroll down to the comment form at the end of this post. Fill in your info and then
BlockBase+ Sew Along: Block 1
Posted 03-29-2021 by Jenny | Posted in: Block 1 BlockBase+ BlockBase+ Sew Along 2021 Sew Alongs
Welcome to the first block post in the new BlockBase+ Sew Along! I can’t wait to start sewing along with all of you and help you get to know the new BlockBase+ software. Don’t have the BlockBase+ software yet? It’s not too late to join in! Find the BlockBase+ software here > In this first post, we’ll take a little “scroll” around the software and then go through the steps of printing the rotary cutting chart for the first block. Let’s get started! Double-click the BlockBase+ icon to open the software. If you haven’t clicked through the Getting Started tour that appears when you open the software yet, take a minute to read through the tour. Click the Finish or Close button to close the Getting Started tour. There are three main areas in the BB+: Navigation Panel, Block Viewer, and Notecard Panel. Also, take note of the Navigation Buttons
BlockBase+ Sew Along Starts Next Week!
Posted 03-22-2021 by Jenny | Posted in: BlockBase+ Sew Alongs
The BlockBase+ Sew Along starts on Monday, March 29! If you don’t have the new BlockBase+ software yet, you can find it here > Here’s a little re-cap of how the sew along works, along with a few new details: How the Sew Along Works This sew along may be a little different than some other sew alongs you have participated in previously. One of the great benefits of BB+ is that you can print the templates, rotary cutting charts, and foundations for the blocks at whatever size you like. So, we will all be making the same blocks during this sew along. But the size of those blocks and the quilt you create in the end, is up to you! You will need to have the BB+ software installed on your computer so you can print the sew along patterns. We will feature a block to sew from BB+
BlockBase+ Sew Along Announcement!
Posted 03-01-2021 by Jenny | Posted in: BlockBase+ Sew Alongs
BlockBase+ is now available! You can order BB+ here. To celebrate, we’re hosting a new BlockBase+ Sew Along here on the blog and we hope you can join us. Following along with this series will be a great way to get comfortable with your new software and make some fun blocks too! The sew along starts Monday, March 29th! About BlockBase+ BlockBase+ (BB+ for short) is the software version of Barbara Brackman’s Encyclopedia of Pieced Quilt Patterns book. Electric Quilt published the new, full-color third edition of this beloved book in the fall of 2020. We decided the software needed an update too, along with lots of new features! You can read about the new features in the BlockBase+ Top Ten series here on the blog! (Own a previous version of the BlockBase software? The original BlockBase software was released in 1996. Check out this comparison chart to see if
Design and Sew Along 3 – Lesson Six
Posted 10-11-2020 by Yvonne | Posted in: Design and Sew Along EQ8 Lessons with Yvonne Favorite Posts Lesson 6
Welcome to DESIGN AND SEW ALONG 3- LESSON SIX Lessons with Yvonne. I hope you have enjoyed the first five lessons of this series. In this final lesson, we will work with the quilt layout worktable to bring our lesson block designs together to create quilt design options. The name of this class is DESIGN AND SEW ALONG. I do hope you are stitching some of the designs we have created in our EQ8 program. I would love to see some of the designs that are sewn. Remember to watch the video at the end of the blog to start with to familiarize yourself with the steps we will be taking during these class written lessons. A picture is worth a thousand words and visual learning is helpful for any of the classes. Remember to save an image of your favorite quilt from this class to post to the EQ blog page in the comment
Design and Sew Along 3 – Lesson Five
Posted 10-04-2020 by Yvonne | Posted in: Design and Sew Along EQ8 Lessons with Yvonne Favorite Posts Lesson 5
Welcome to DESIGN AND SEW ALONG 3- LESSON Five Lessons with Yvonne. I hope you have enjoyed the first four lessons of this series. In this lesson, we will explore the Summer months and the holidays of July 4 (USA) July 1 (Canada). Each set of lessons explores some different tools to use to create the 16-inch blocks we determined to be the size of all the blocks in our continuing lessons. The name of this class is DESIGN AND SEW ALONG. I do hope you are sewing some of the designs we have created in our EQ8 program. I would love to see some of the designs that are sewn. Remember to watch the video at the end of the blog to start with to familiarize yourself with the steps we will be taking during these class written lessons. A picture is worth a thousand words and visual learning is helpful for


