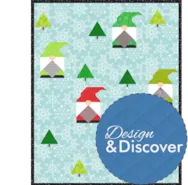
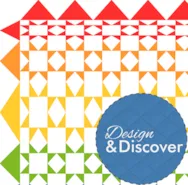
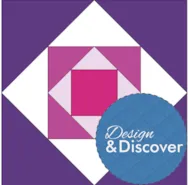
In this lesson we’ll be learning about sashing without cornerstones but, also be sure to check out these other posts about designing with sashing. Design & Discover – Sashing! – learn how to design these quilts and some basics (and beyond) about sashing. Design & Discover – Using Blocks in the Sashing! – this lesson explains how to use blocks in the sashing to create designs. But let’s get started with designing quilts with sashing and no cornerstones. The easiest and quickest way is to use quilts from the Layout Library. Click Libraries > Layout Libraries Click Layouts by Style > Sashing Take a look at all the options and select one Click Edit to Quilt Worktable If you click the LAYOUT tab you’ll see a “blank” quilt. This is because technically this is a Custom Set quilt. That means if you would like to resize the quilt you
Design & Discover
Design & Discover – Sashing without Cornerstones!
Posted 12-01-2023 by Heidi | Posted in: Design & Discover
Design & Discover – Working with Add-ons + Free Coloring Page!
Posted 11-01-2023 by Heidi | Posted in: Design & Discover
EQ8 has lots of add-ons available. Some include blocks, some include quilts, and some include fabrics! Here’s how to download and install add-ons and if you have any trouble, you can always contact us. Once your add-on is installed, depending on the specific add-on, there are different ways to access it. If the add-on includes quilts… Click Open an existing project then choose a project from the list and click OK. The quilt above is from Heather Valentine Four Seasons Spring Quilts. If your add-on includes blocks… Click Libraries > Block Library Then you can click either Edit to Block Worktable, Select All Blocks, or Add to Sketchbook. If you don’t see any blocks make sure your Block Library is fully open. The blocks above are from Heather Valentine Four Seasons Spring Quilts. If your add-on includes fabrics… Click Libraries > Fabric Library If you don’t see any fabrics make sure your
Design & Discover – The Swath Tool!
Posted 10-01-2023 by Heidi | Posted in: Design & Discover
The Swath tool is fun to experiment with but can also make some awesome blocks! The Swath tool draws a stylized stroke surrounding a line. The line or “spine” of the stroke can be edited and shaped like any curve or line segment. The stroke or “hull” surrounding the spine can have varying widths and end styles. So, it’s great for making blocks with Flying Geese! First let’s find the Swath tool. Open EQ8 and click Block Worktable Click NEW BLOCK > Applique > Block (you could also choose Motif but in this example we’re using Block). Click the DRAW tab > Drawing Tools > Draw > Swath Position the cursor where you want to begin. Press and hold the left mouse button. Still holding the left mouse button, drag in any direction. (To make the “flying geese” fly right, draw your stroke from left to right. To make
Design & Discover – Special Borders!
Posted 09-01-2023 by Heidi | Posted in: Design & Discover
This month we’ll be learning more about making borders to go with specific quilt designs. Although EQ8 has LOTS of border options it has even more quilt design options so sometimes you may need to get a little creative with how you design the border. You can use the concepts in this lesson to create unlimited types of borders. Also, make sure you check out this past lesson about borders, too! Let’s start with a basic quilt, and in this example we’re going to extend the Nine Patch design into the borders. Click the BORDERS tab Under Select a Border Style choose Blocks Change the size of the border, in the example the inner border is 1 inch. Change the number of blocks in the border, in the example there are 12 Horizontal and 12 Vertical. If a Nine Patch is set in this border it will be skewed and
Design & Discover – Landscape Quilts!
Posted 08-01-2023 by Heidi | Posted in: Design & Discover
In this lesson we’ll cover just a couple landscape quilts, but the general ideas and techniques can be applied to design many different types of landscape quilts. Let’s get started! For the first example we’re basically drawing the whole quilt as one block. Open EQ8 and click Block Worktable Click NEW BLOCK > Pieced & Applique > Easy + Applique Change the size of the block to the size or the same proportions you want for your quilt. In this example, the block is 12 inches x 6 inches (which is in proportion to the finished size of the quilt, set in step 11). The snaps are 24 x 12 (every half inch). The snaps should always be multiples of the block size.You can just make the block the size you want the finished quilt to be but here are some things to take into consideration… • The maximum block
Design & Discover – Optical Illusion and 3D Quilts
Posted 07-01-2023 by Heidi | Posted in: Design & Discover
Many optical illusion and 3D quilts can be designed with 60° triangles, which means you can use 60° triangle rulers! Also, if you’re interested in triangle quilts you may also want to check out Design & Discover – Quilts with Triangles! Let’s get started! Click Design a quilt from scratch Click either Horizontal Strip or Vertical Strip. (I’ll be using Vertical Strip.) Click the LAYOUT tab Under Select a strip style choose Points A If you don’t want your triangles to be 60° skip down to step 8. If you want 60° (isometric) triangles for a Strip Quilt: Use this calculator to figure out the width and height you would need. For example, if your strip is 50 inches long, with 10 triangles they would be 5 inches on one side…because 50/10=5. According to the calculator if one side is 5 inches the width needs to be 4.33 inches.In other
Design & Discover – EasyDraw Tips and Tricks
Posted 06-01-2023 by Heidi | Posted in: Design & Discover
EasyDraw is for pieced blocks. You can also use PolyDraw, or Applique. With EasyDraw all the lines must touch each other and/or the edges of the block. Think of your lines as seams. For example, in the first block the lines do not touch the edges. The center pieces are “floating”. When you click the COLOR tab you won’t see the diamond. You couldn’t piece the first block, so you can’t draw it that way in EasyDraw either! In the second block, lines are added. Now, you could sew it, and it appears correctly on the COLOR tab. There are a few other things you want to consider BEFORE you start drawing your block: the block size and the precision bar settings. Block Size Let’s say you want to draw the log cabin block below and want the finished block to be 12 inches x 12 inches. If you analyze


