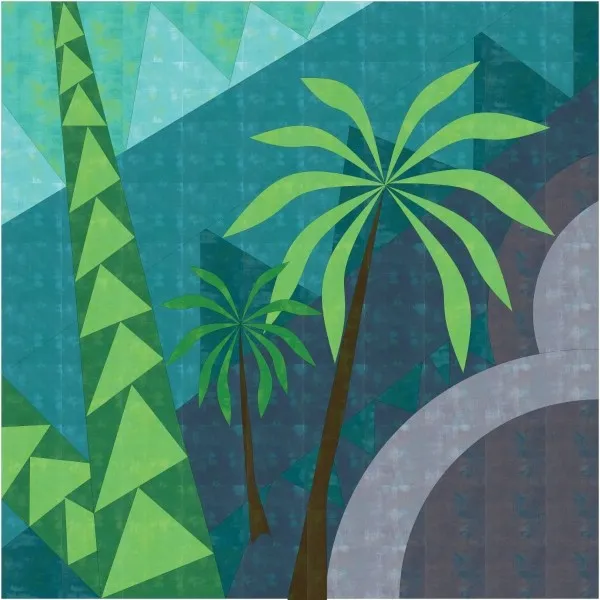
In this lesson we’ll cover just a couple landscape quilts, but the general ideas and techniques can be applied to design many different types of landscape quilts.
Let’s get started!
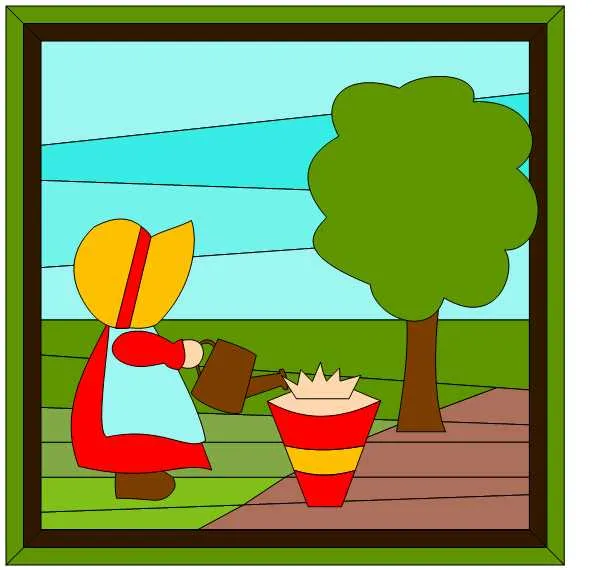
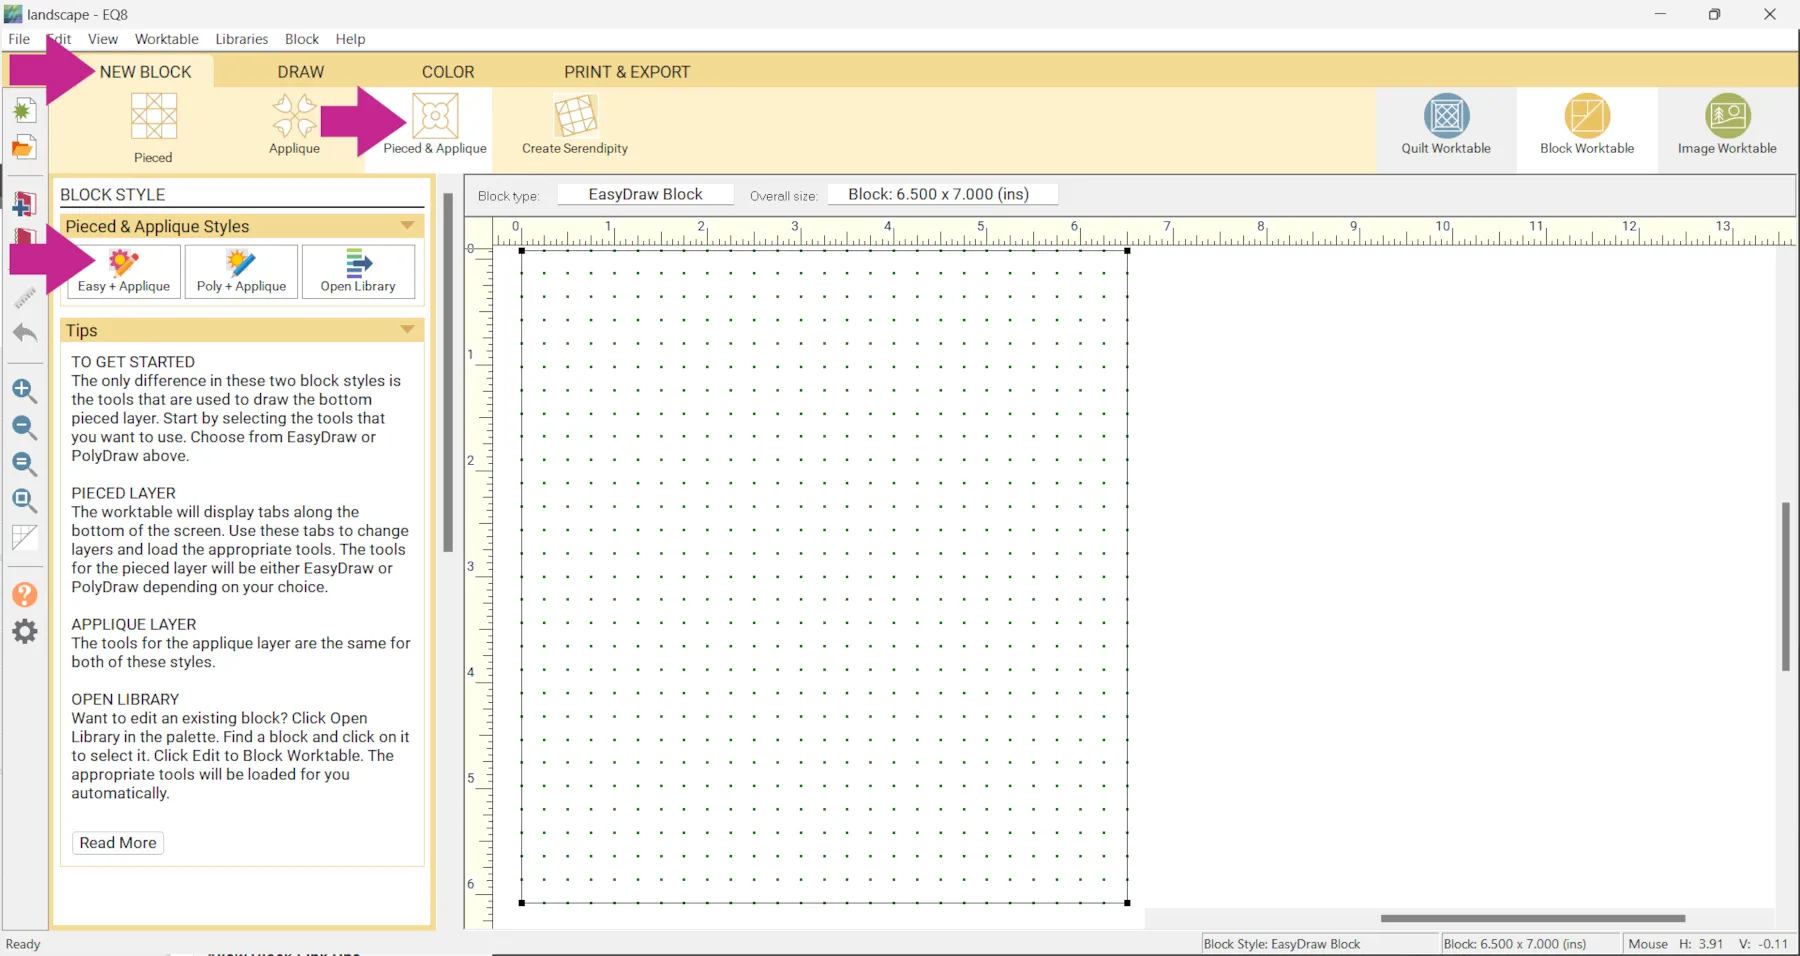
For the first example we’re basically drawing the whole quilt as one block.
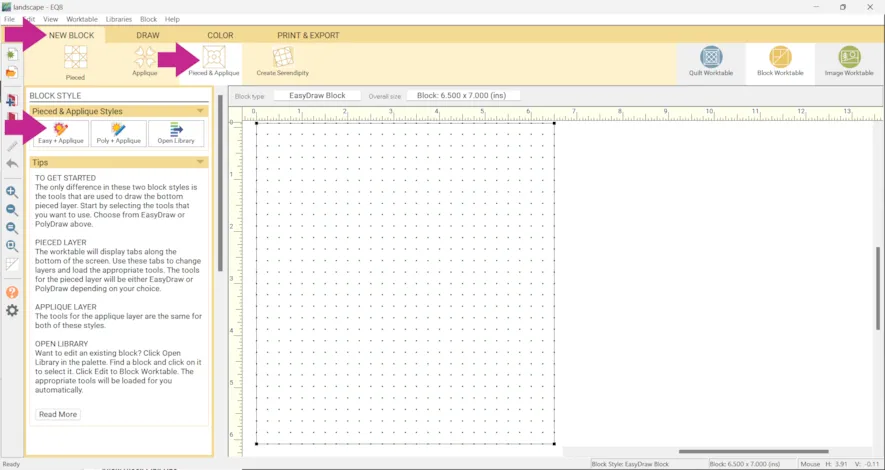
- Open EQ8 and click Block Worktable

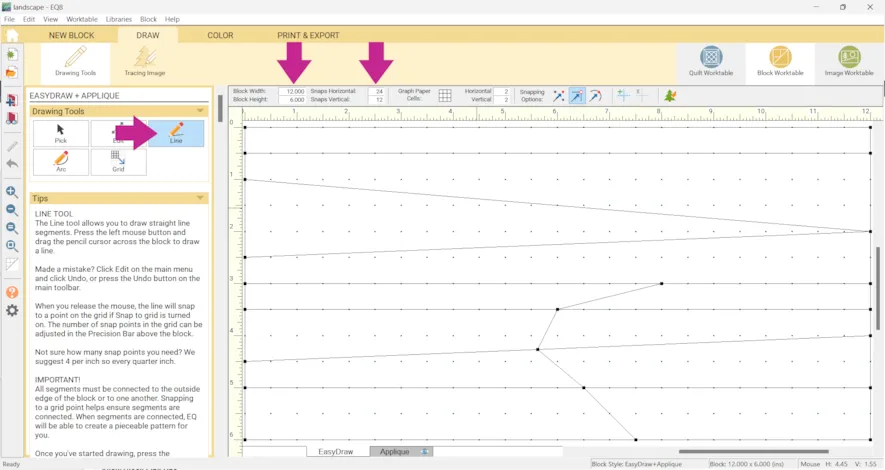
- Click NEW BLOCK > Pieced & Applique > Easy + Applique
- Change the size of the block to the size or the same proportions you want for your quilt.
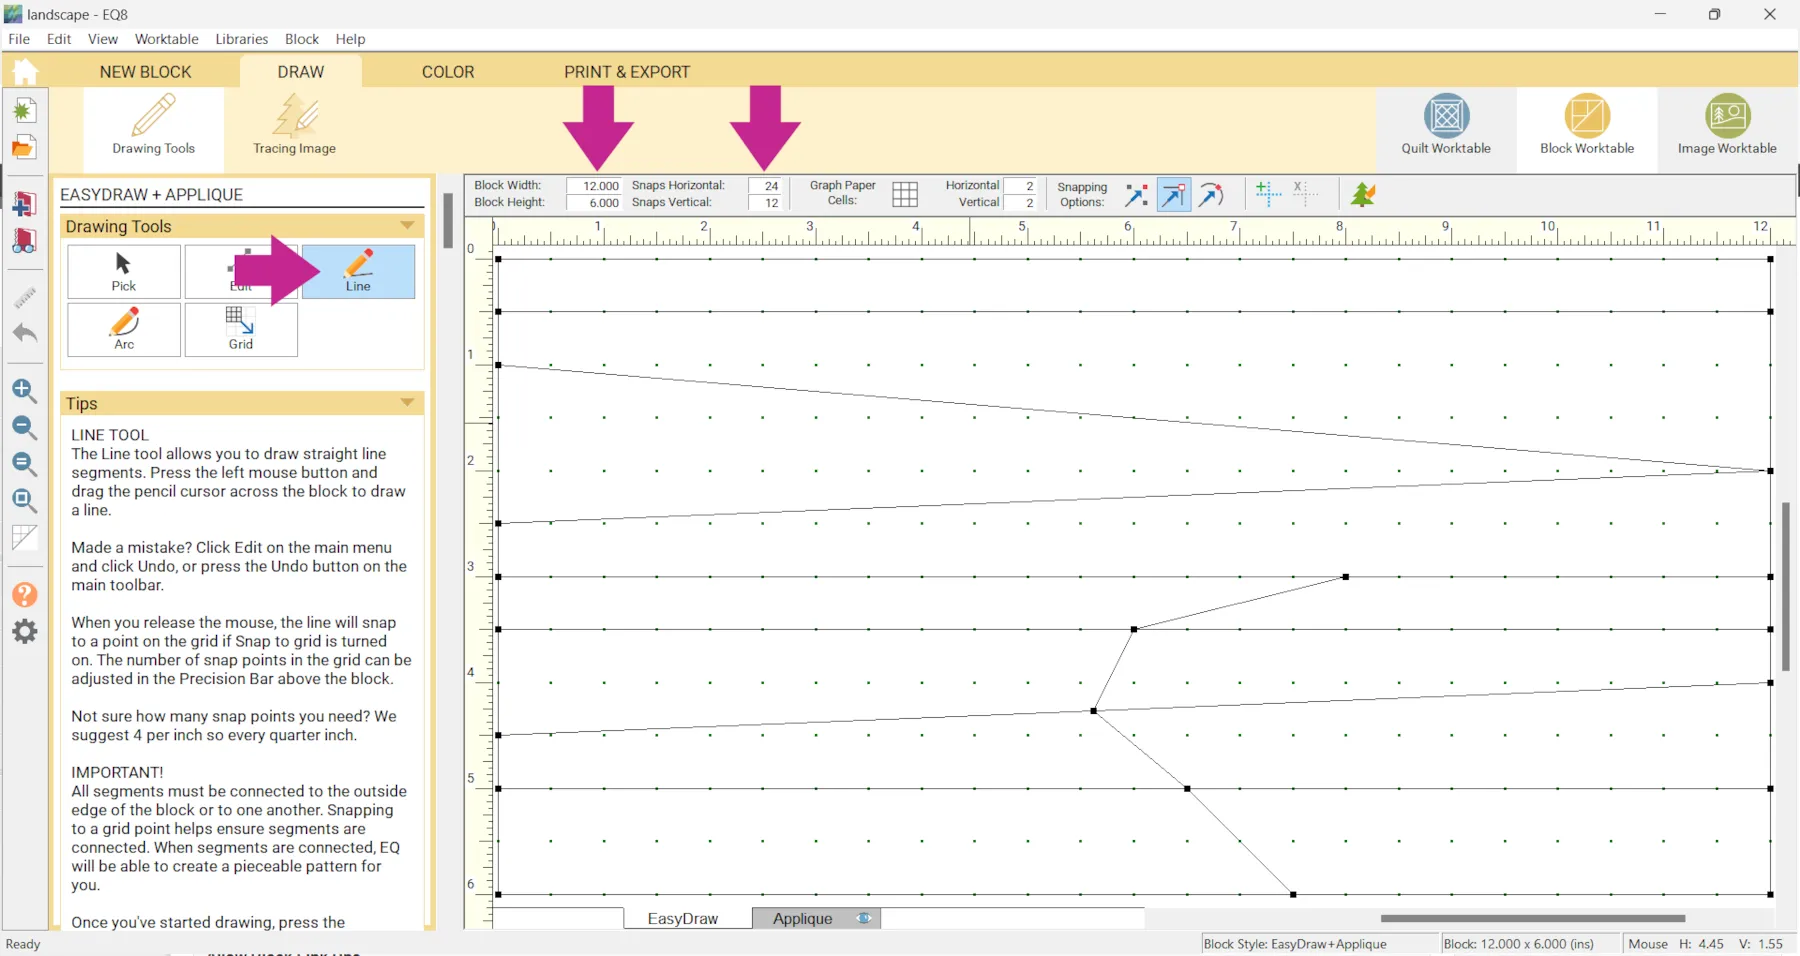
In this example, the block is 12 inches x 6 inches (which is in proportion to the finished size of the quilt, set in step 11). The snaps are 24 x 12 (every half inch).
The snaps should always be multiples of the block size.You can just make the block the size you want the finished quilt to be but here are some things to take into consideration…
• The maximum block size is 200 inches x 200 inches.
• The maximum snap setting is 240 x 240.So, for example, if you made the block 120 x 60 you couldn’t set snap setting to 480 x 240 (which would mean every quarter inch) because 480 is higher than 240.
Here is more information about how Snap Setting work. Regardless of the block size you choose, when a block is set into a quilt the block resizes to fit the space, or size, of the quilt layout. - Use the Line tool to start drawing in the lines/seams of your landscape. Here are some tips to keep in mind when drawing in EasyDraw.
You can also import an image to trace, if you would like to.
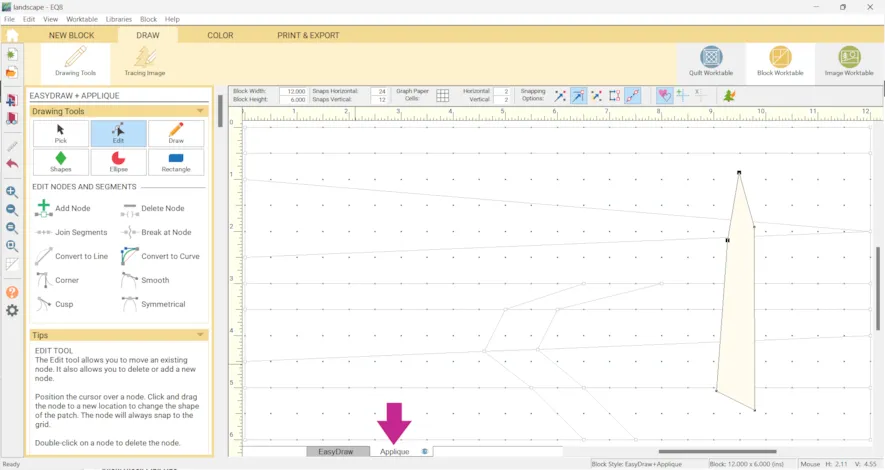
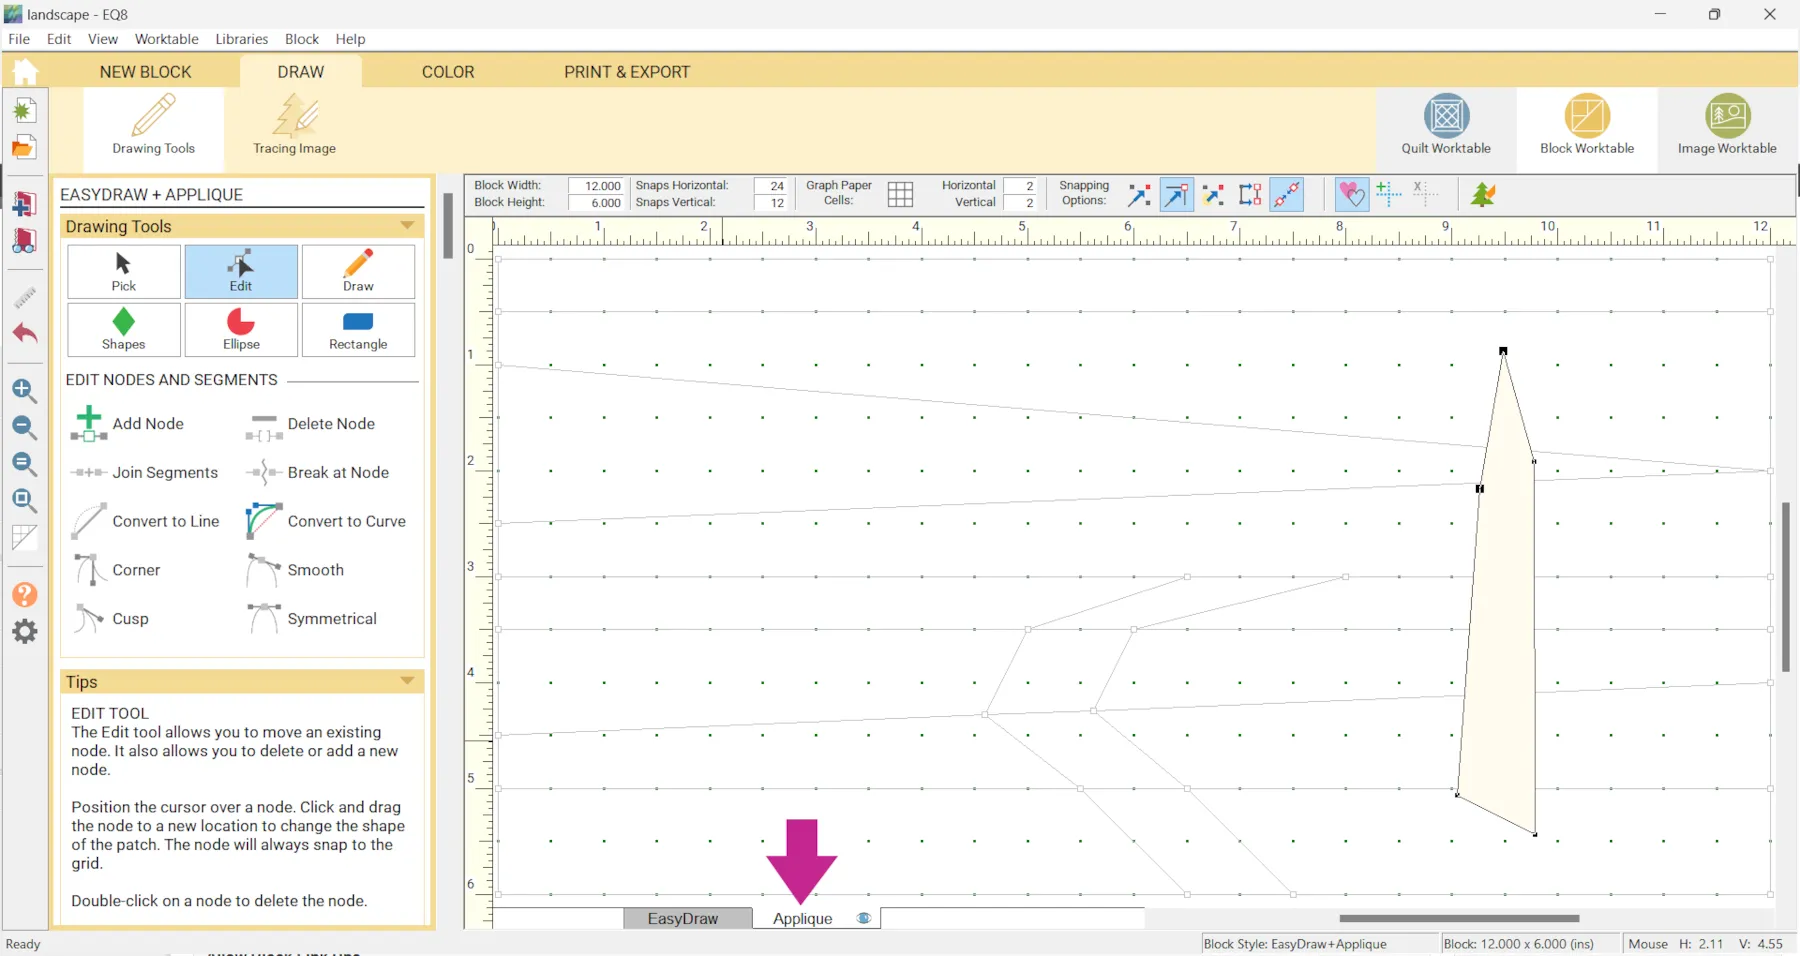
- Click the Applique tab at the bottom of your screen and use the Drawing Toolsto draw some applique shapes.You can also use the Shapes tool and Edit tool to create the applique patch you want.
Here’s a lesson on Drawing Applique blocks.
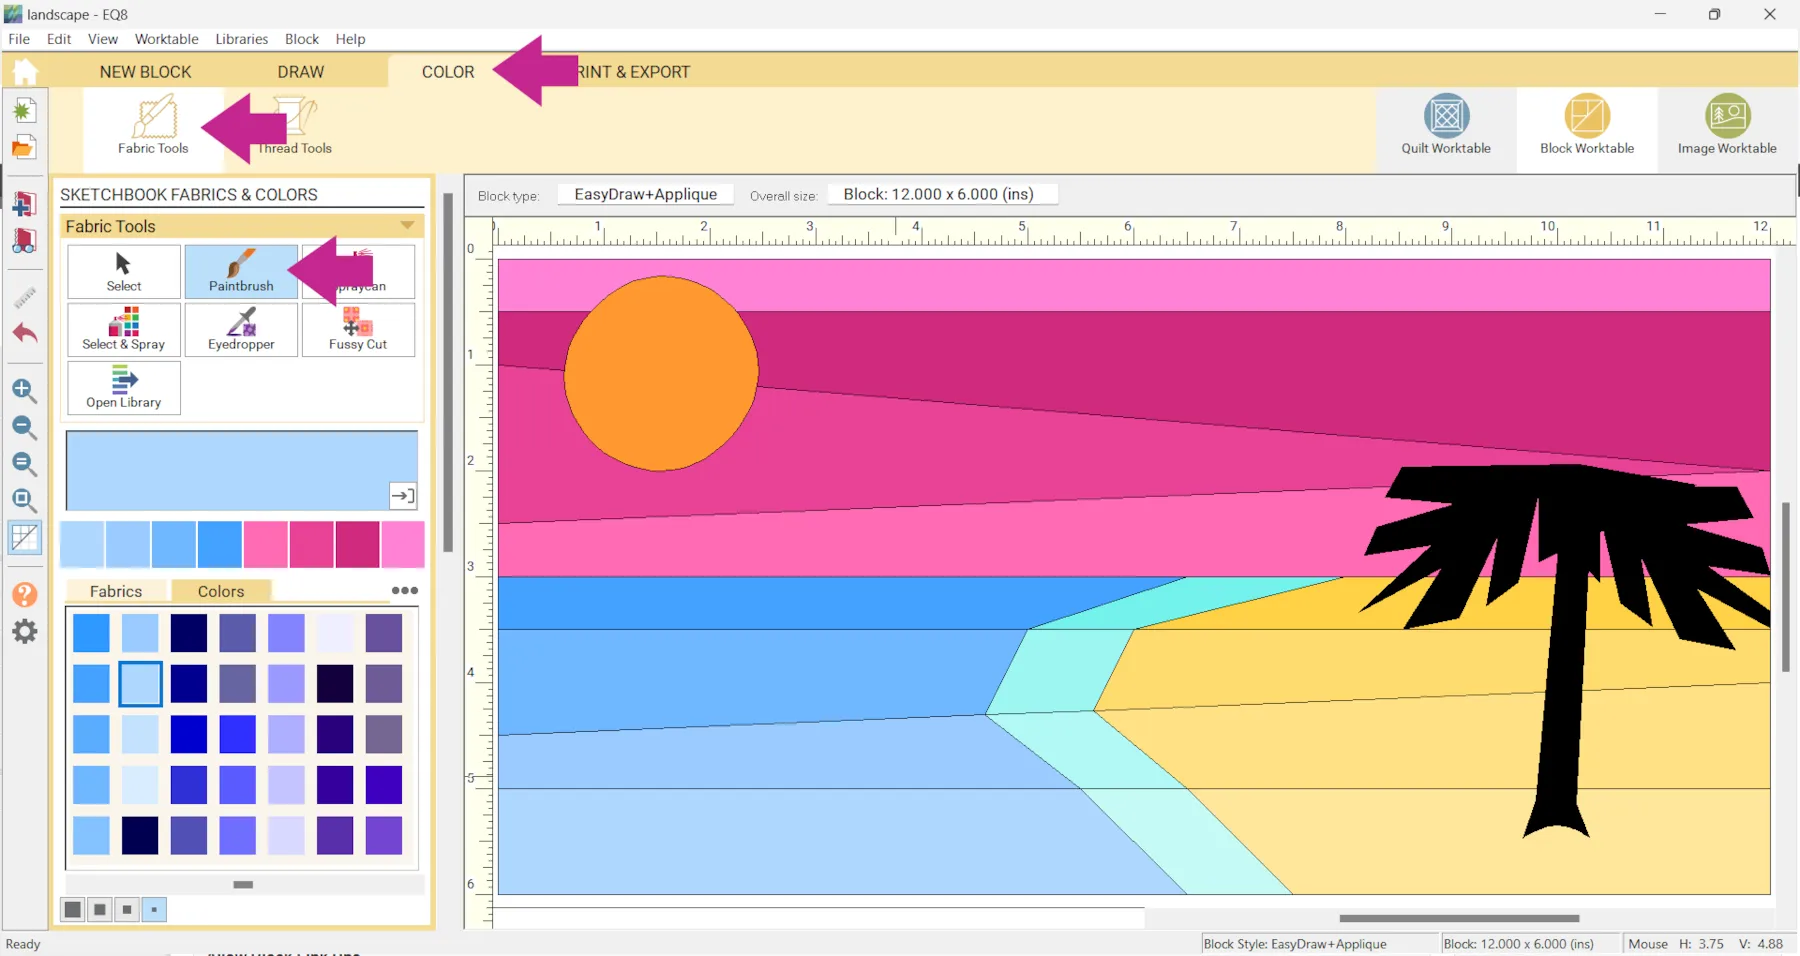
- Click the COLOR tab > Fabric Tools > Paintbrush and color as desired.

- Click Add to Project Sketchbook
 for anything you’d like to save. If you haven’t named your project yet, EQ8 will prompt you to do so. (To be saved, your item needs to be in the Sketchbook AND your project needs to be named. Here is more information.)
 - Click Quilt Worktable
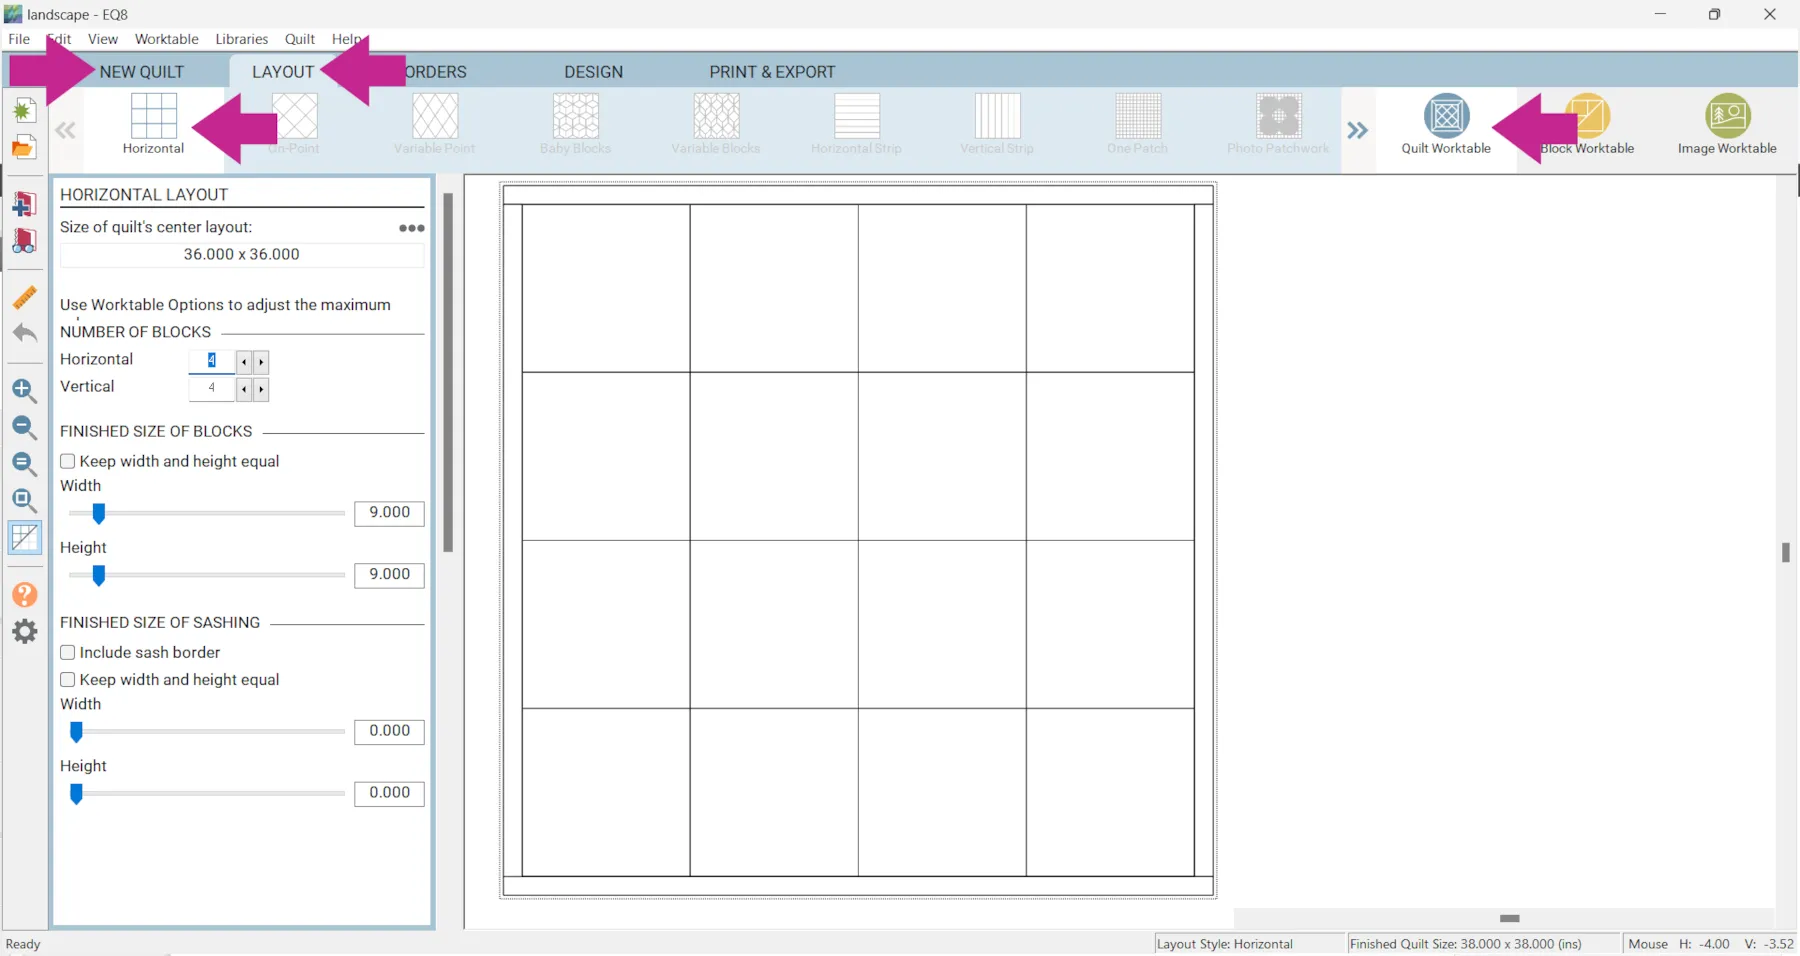
- Click the NEW QUILT tab > Horizontal > LAYOUT tab
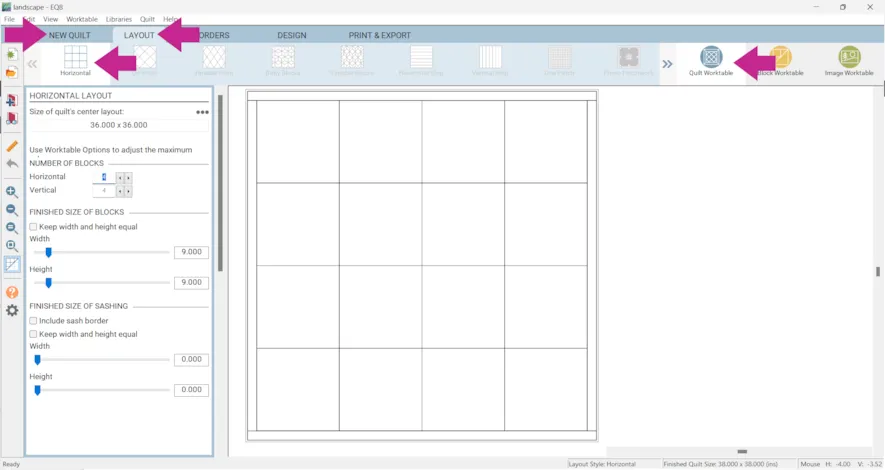
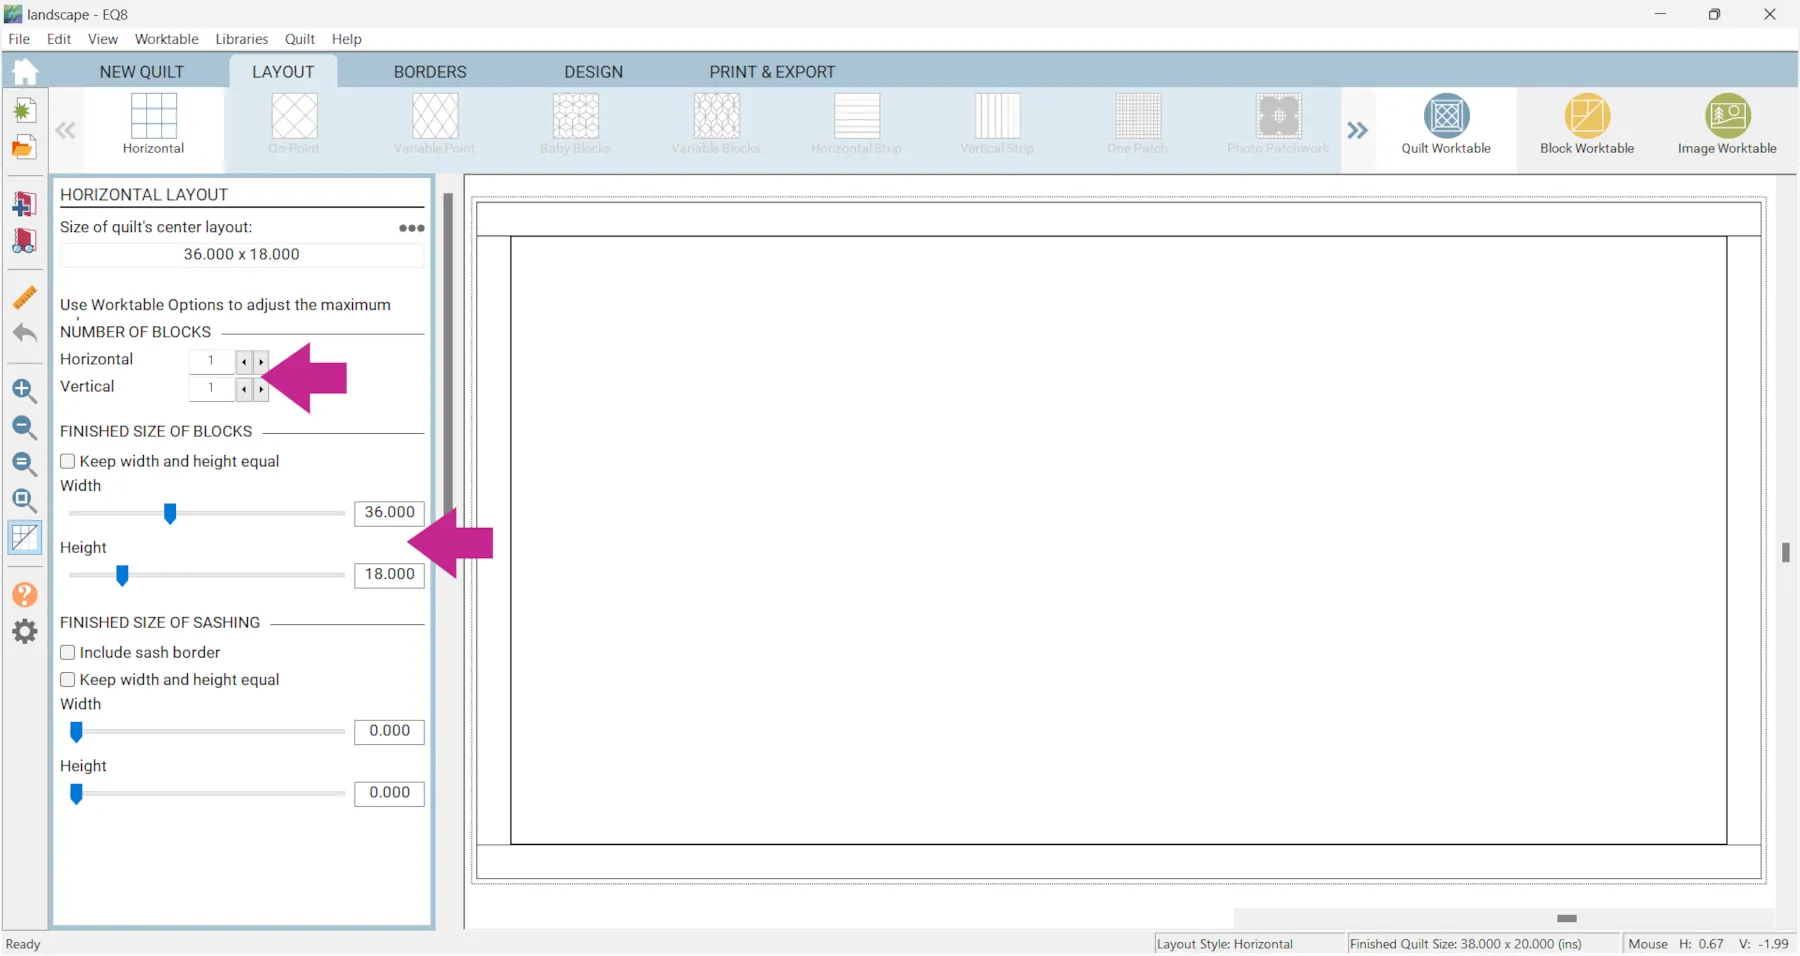
- Under NUMBER OF BLOCKS enter…
Horizontal: 1
Vertical: 1 - Under FINISHED SIZE OF BLOCKS enter what you would like but for this example I’m using…
Horizontal: 36
Vertical: 18

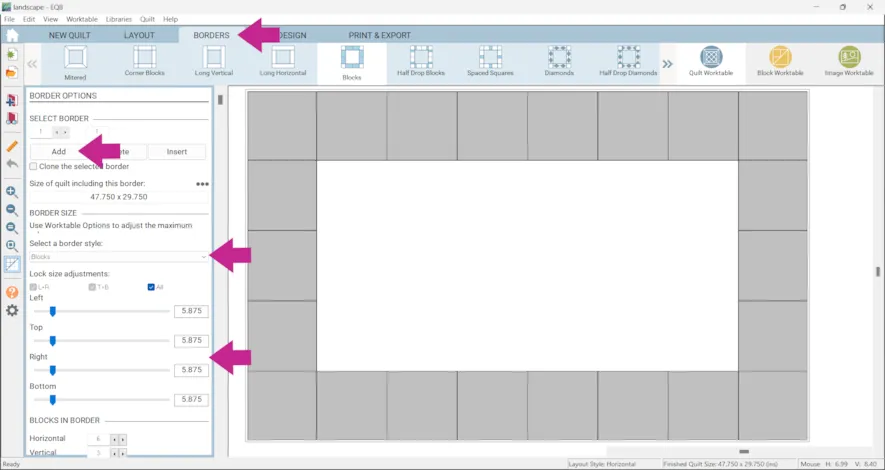
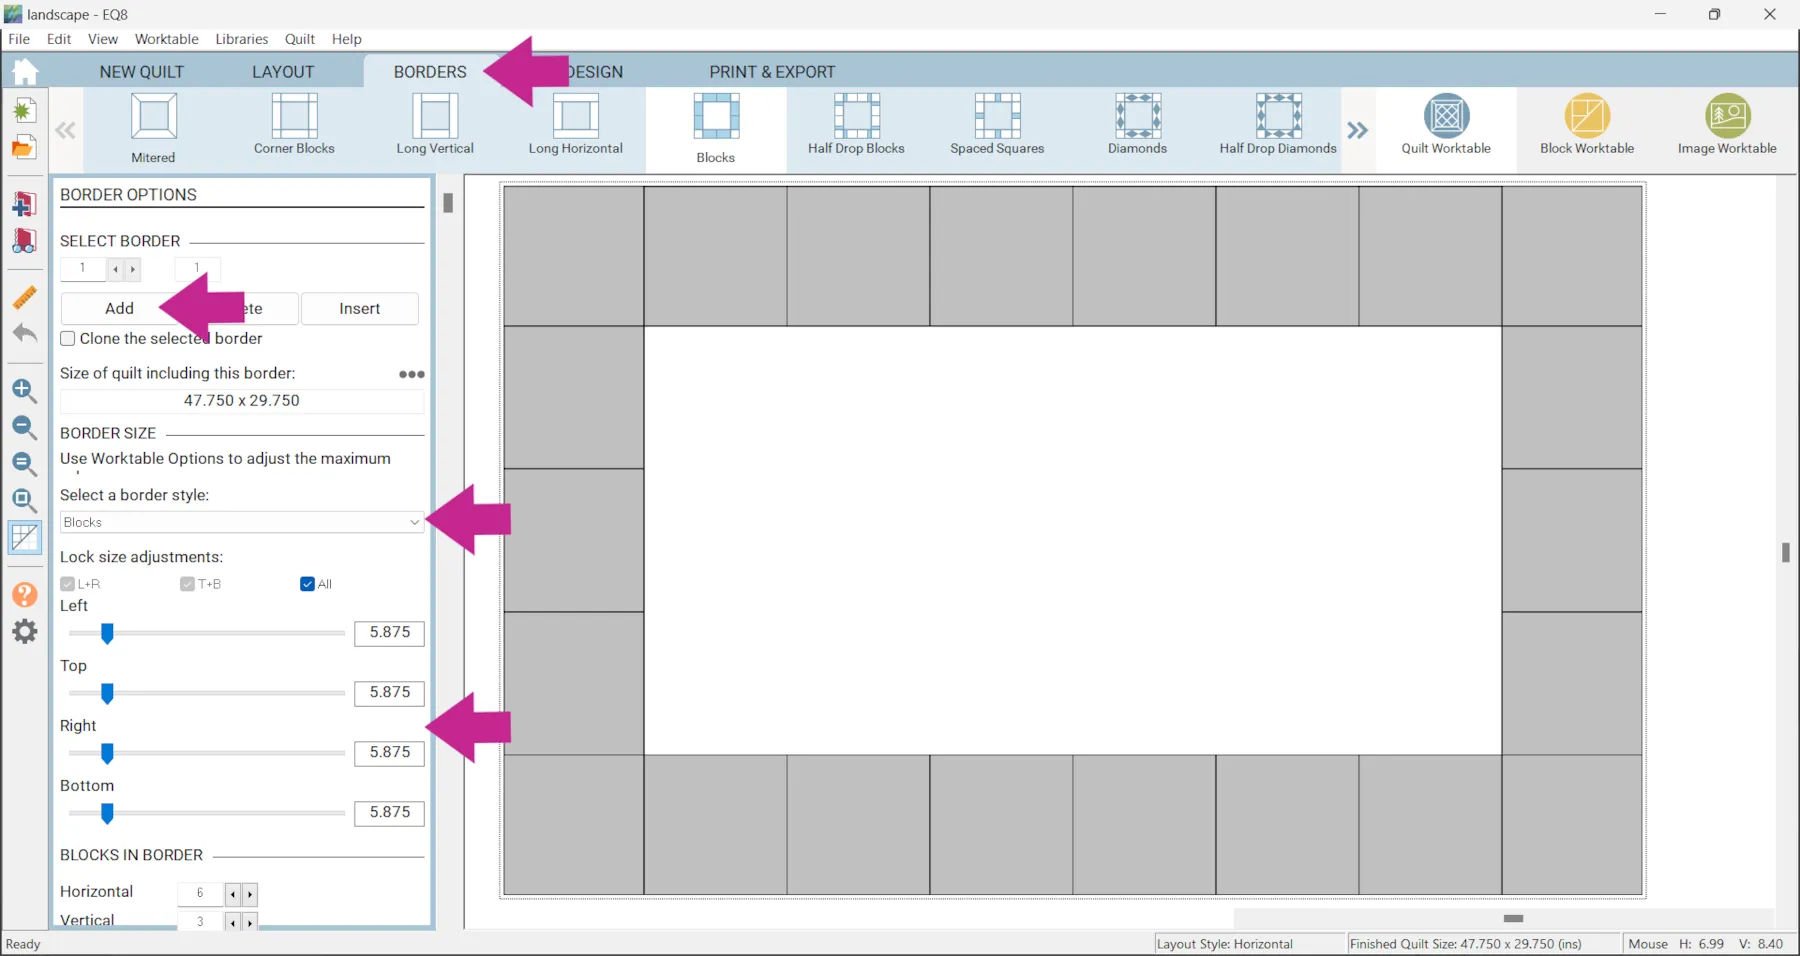
- Click the BORDERS tab
- If you would like…
Click Add to add borders
Change the Border Style (shown here is Blocks style)
Change the size of the border(s)
- Click the DESIGN tab > Block Tools > Set Block and set your block(s) into the quilt.
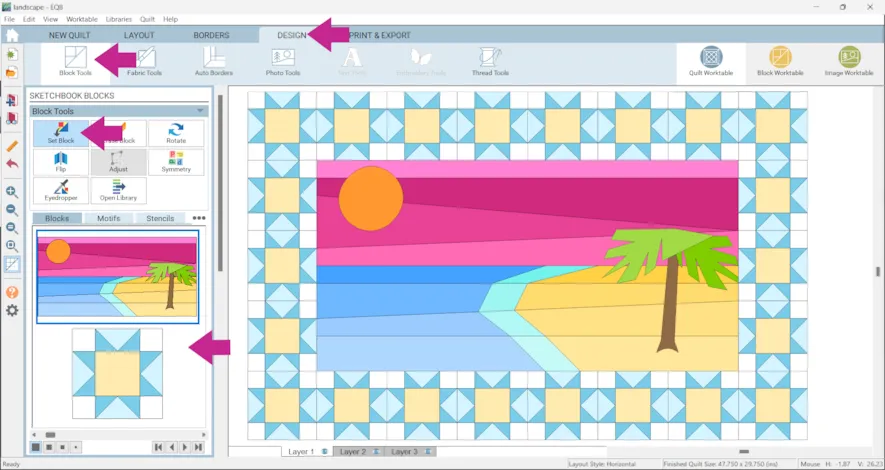
- Click Fabric Tools and color as desired.
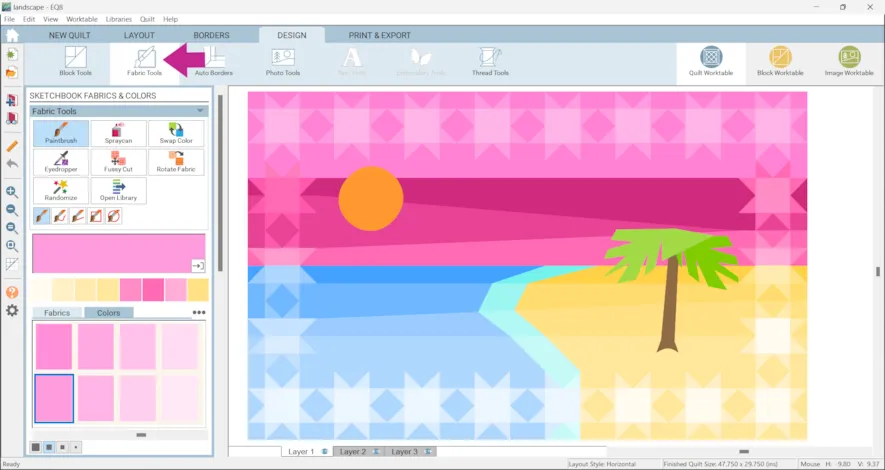
- Click Add to Project Sketchbook
for anything you’d like to save!
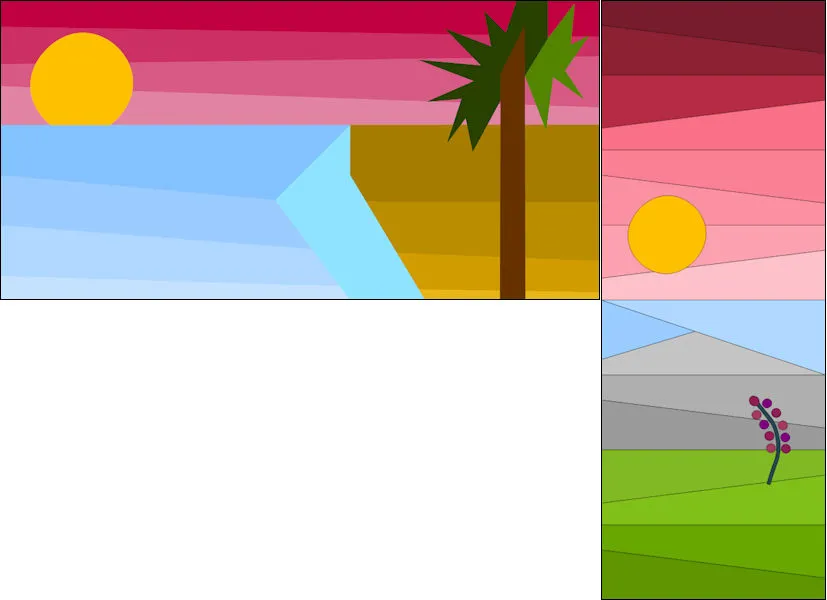
Let’s try it with a strip quilt!
- Start with a basic Horizontal Strip Quilt.
- Set blocks into the strip quilt. In the example I used half-square triangles and another similar block.

- Then on Layer 2 you can place Motifs onto the quilt.
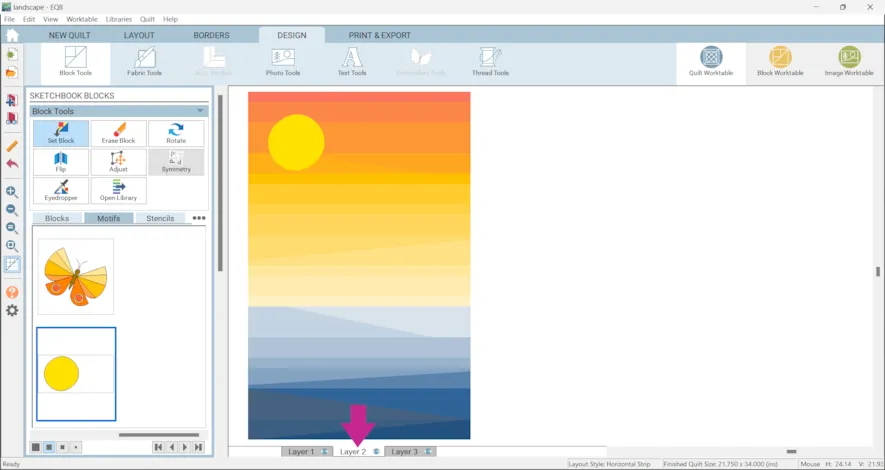
- Have fun experimenting with blocks!
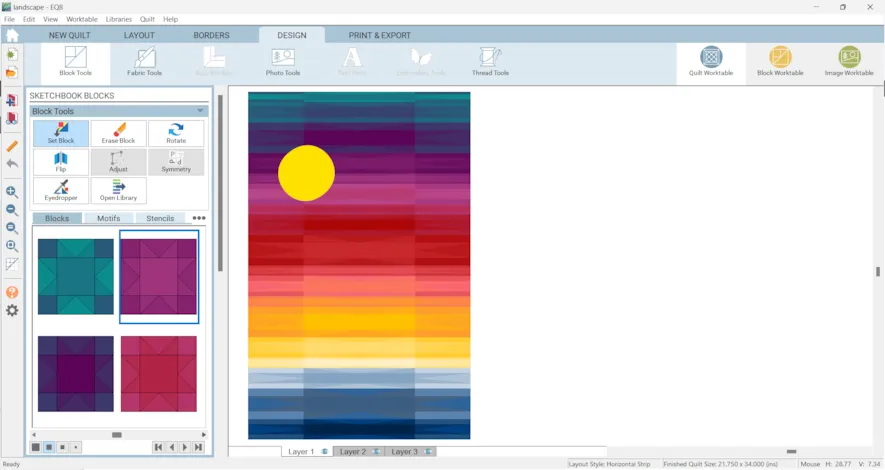
Here’s the same quilt with a Variable Star block in all the strips.


If you want to post images of your quilts, here is how to export the images.
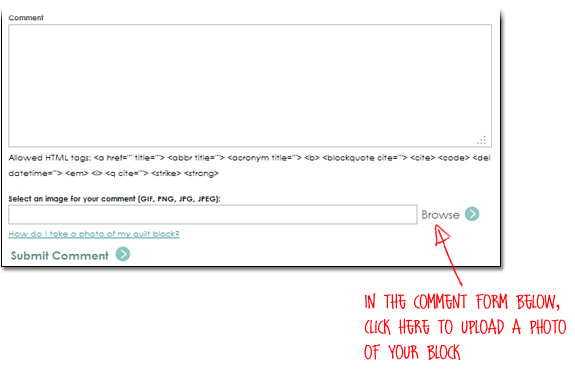
To post your image click to comment on this post. Fill in your info and then click Browse.
Go to: Documents\My EQ8\Images
I can’t wait to see what you’ve done! I hope you enjoyed the lesson!
If you have questions about the lesson feel free to post them below.
If you have questions about something else EQ related, please contact techsupport@electricquilt.com.
If you have suggestions for new Design & Discover lessons feel free to comment below or email Heidi@electricquilt.com