
I have so many ideas bubbling up in my head. I like to teach decorative stitching with a standard sewing machine, digitizing for an embroidery machine, and using the EQ8 program to create the background blocks to work with. I can’t see all my steps in EQ8 but I can get a good feel for how the blocks will look that I can add further stitch embellishments to later.
Open your EQ8 program. ![]()
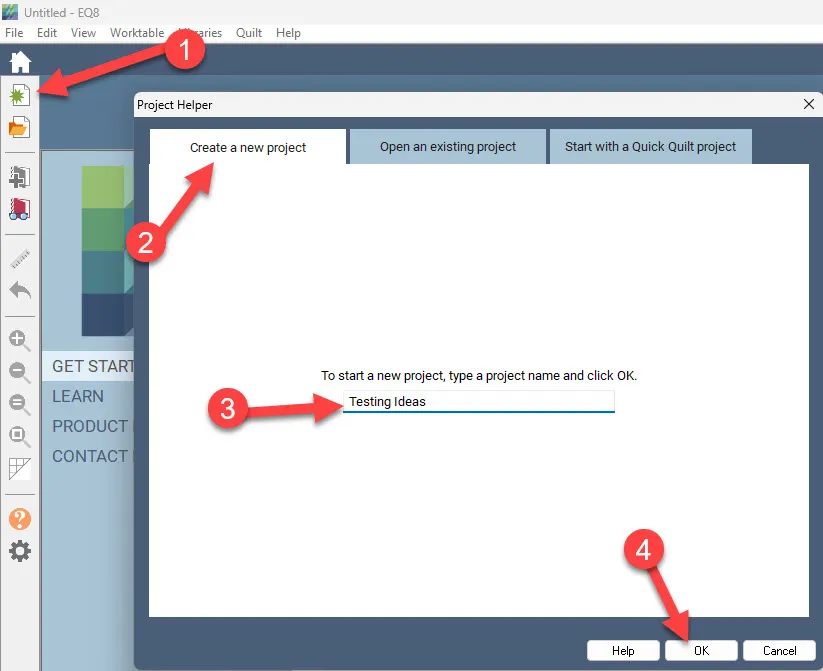
Name your new project “Testing Ideas”. Click the OK at the bottom of the box to name the new project.
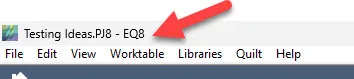
You will see the name of the new project at the top of the screen.
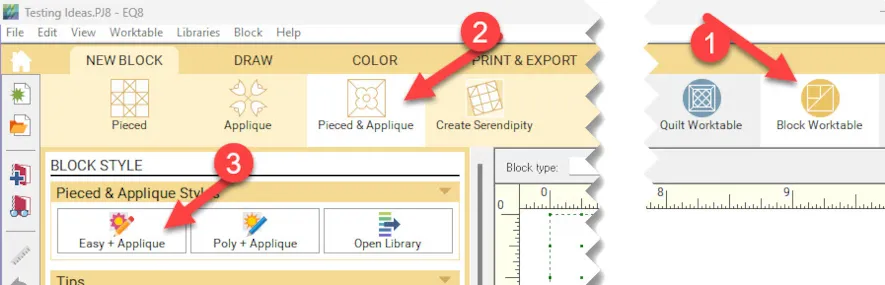
Click on the block worktable icon on the upper right side of the screen. On the ribbon at the top of the screen, select the ‘pieced & applique’ icon and then select the ‘easy + applique’ icon.
My idea is to teach students how to use a bias tape maker tool to create different widths of bias tape from their scraps. These can then be used on blocks and can be stitched into place with decorative stitches. I am not concerned about the fabric for the strips to be bias cut as they are all going to be straight lines. I just want the students to learn how to make their own bias tape in various sizes.
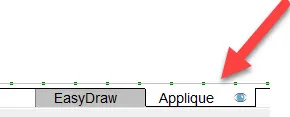
On the block worktable, I will work with the default size of a 6-inch block. My background block will be one solid piece of fabric and not pieced together so I can go straight to the applique tab at the bottom of the screen to set the images of what the bias tape strips would look like on the block in various sizes.
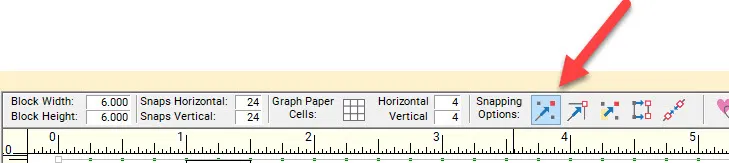
On the property bar at the top of the block, click on the ‘snap to grid’ icon. The feature is turned on when you see a blue box behind it.
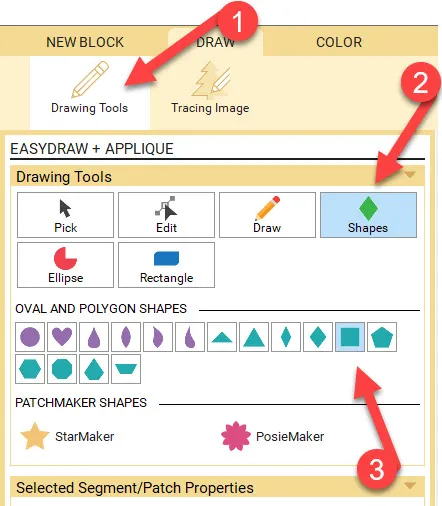
Click on the shapes tool icon ![]() to select it. In the ‘oval and polygon shapes’ menu, select the square tool.
to select it. In the ‘oval and polygon shapes’ menu, select the square tool.
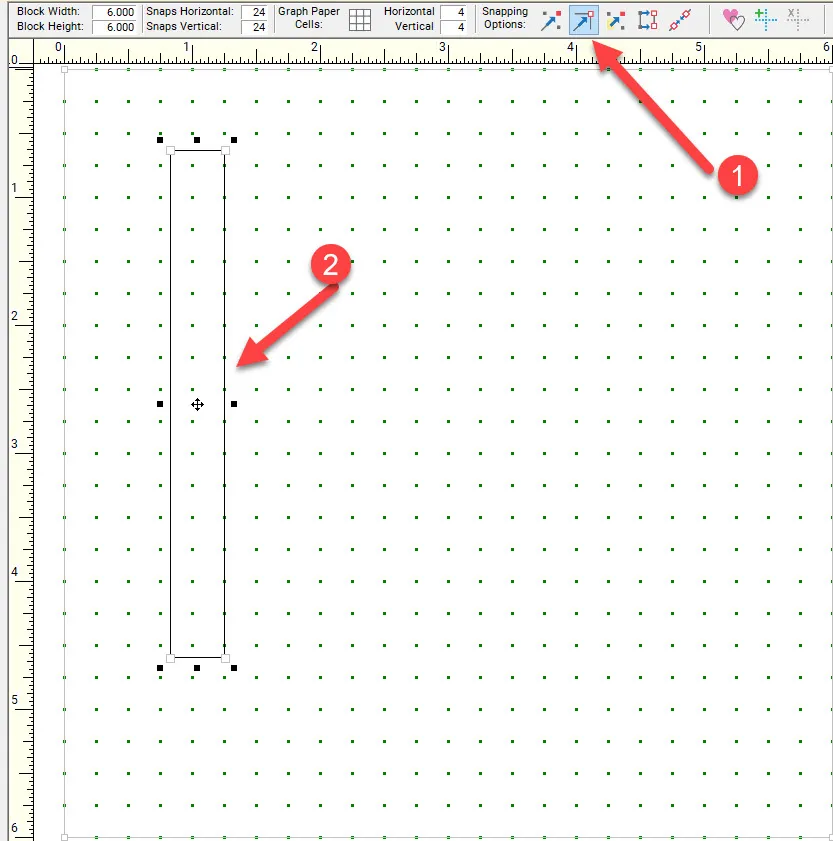
Move the cursor over to the block area and click/hold/drag/release a rectangular shape onto the block. Don’t worry about the size or position yet. You will edit this.
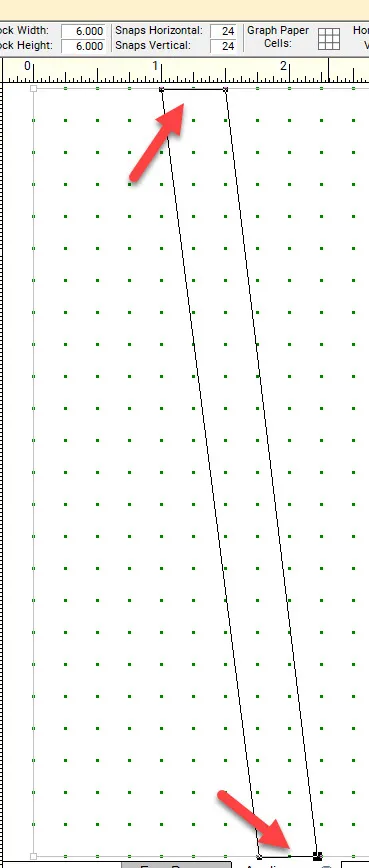
Click on the edit tool ![]() to select it. Move the cursor over to the worktable and click on the outline of the rectangle. You will now see edit nodes on each corner.
to select it. Move the cursor over to the worktable and click on the outline of the rectangle. You will now see edit nodes on each corner.
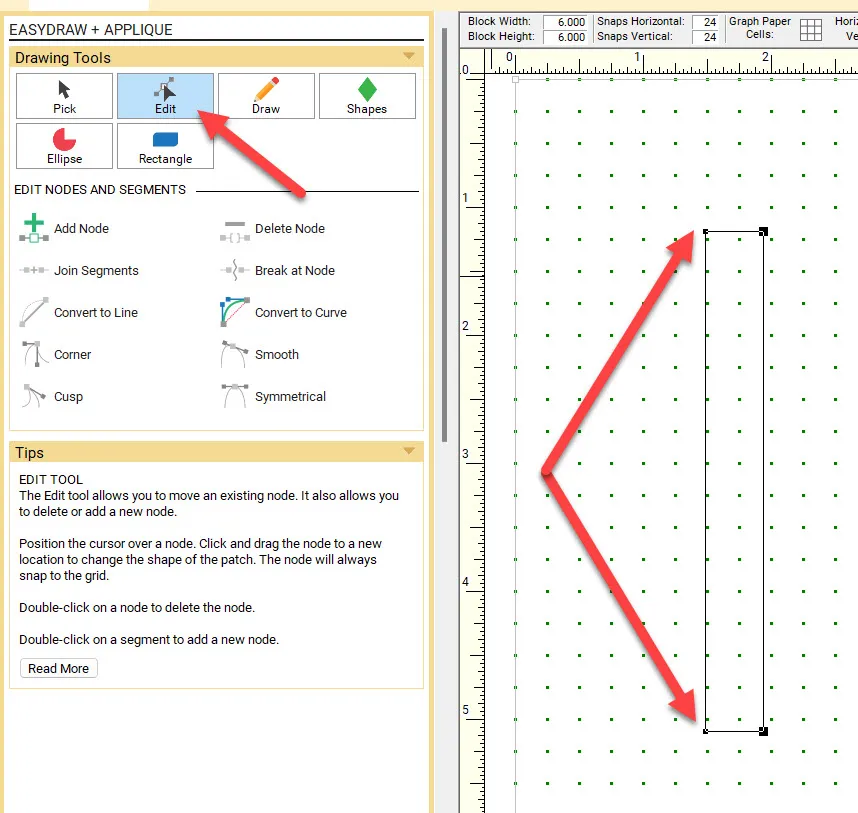
Using the edit tool, click on each of the corner edit nodes and drag them to the outside edge of the block. Make the lines the same spacing apart at the top and the bottom of the rectangle so the lines are parallel.
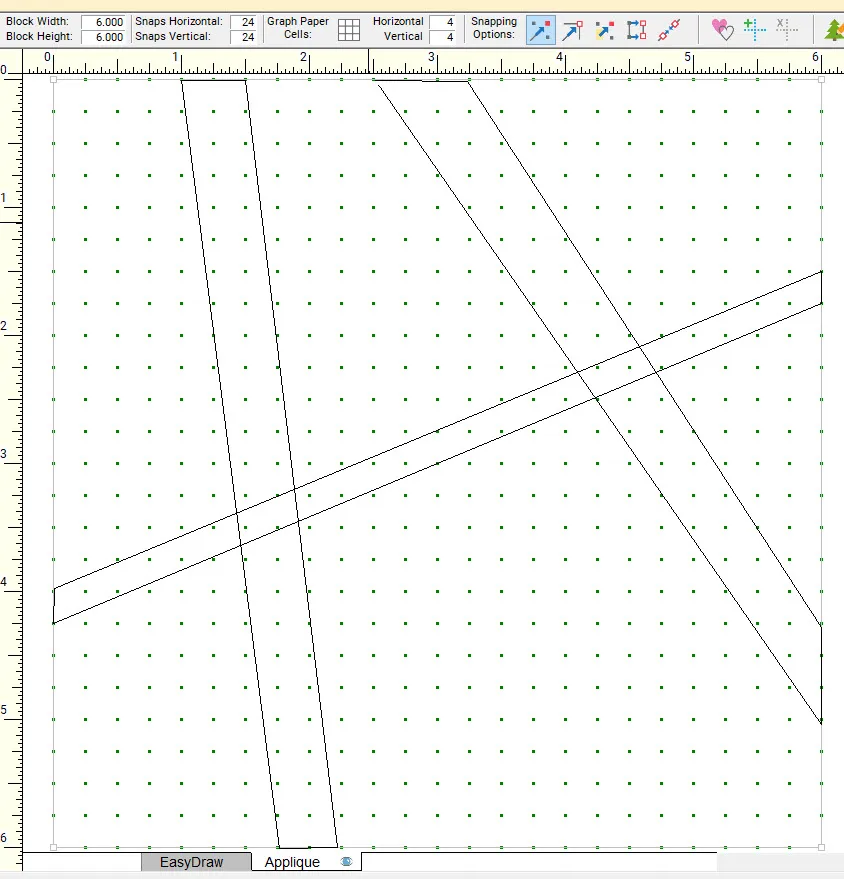
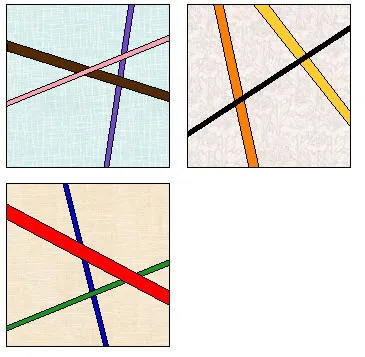
Repeat this same process making a total of 3 rectangles on the block crossing over each other but not falling into the corners of the block. I don’t like to draw into the corners as this makes for too much bulk when you piece the blocks together. Make them different widths to simulate small, medium, and large bias tape widths.
 Add to sketchbook
 ![]()
I am not really making appliques in EQ8. I only want the image of the block to show to students so they will have an idea as to how the blocks will look.
Try creating two more blocks with the square shape tool with the ‘bias tape’ shapes in different widths and places on each of the blocks. Add each design to the sketchbook as you go.
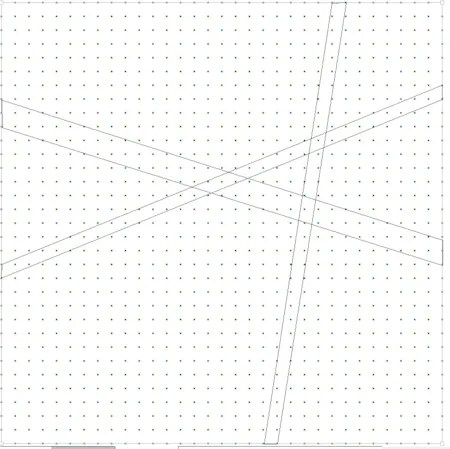
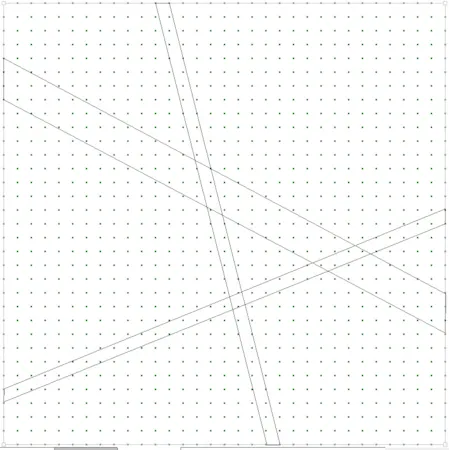 Add to sketchbook
 ![]()
Color each of the blocks by clicking on the color tab at the top of the screen and selecting the fabric colors of your choice. Bias tape is traditionally a solid color. Background block color should be a tone-on-tone or solid color. I want these selections as I am going to add decorative stitches to the blocks and onto the bias tape to secure them to the block background.
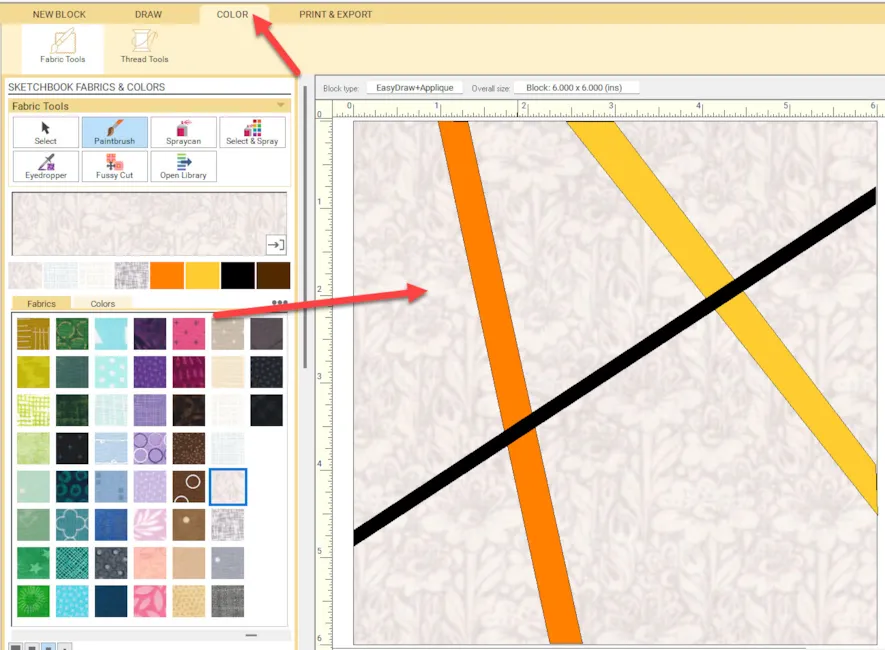
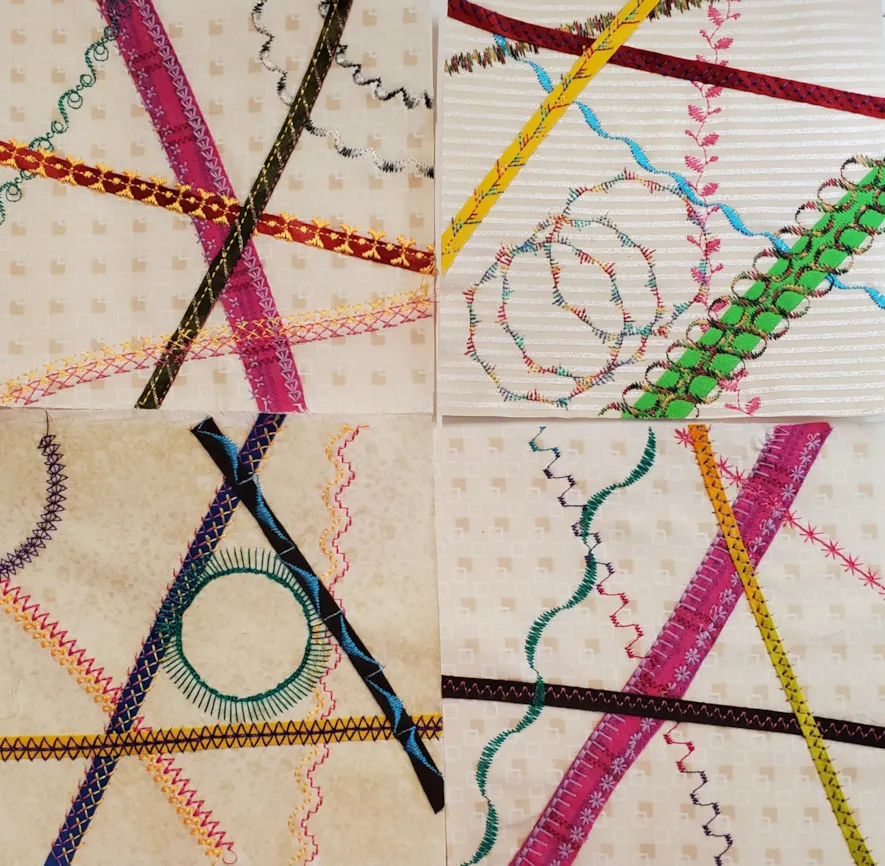
After the students make the ‘bias tape’ blocks they will add their decorative stitches. Using the images from my EQ8 it helps me in writing the step-by-step lesson for the basic sewing machine class I will teach. I often use more than one program to create lessons with the pictures I need so it is a visual guide to what they can create.


07-16-2023
11:29 am
Thank you for this! It’s another way EQ can make our creativity show. I’m also a teacher and love to use EQ for some of my diagrams as I write lesson notes.
07-16-2023
11:31 am
Thank you for this! It’s an application I hadn’t thought of. I’m also a teacher and us EQ often to make teaching notes, but this is a new one for me.
07-16-2023
11:52 am
Yvette the EQ program is so versatile. I love using it in various ways beyond just creating quilt blocks and layouts.
07-16-2023
12:37 pm
Great article and ideas!
07-16-2023
2:08 pm
Thanks, JoAnn. I am glad you enjoyed it.
07-16-2023
10:33 pm
This looks like fun!! Thanks for the inspiration, gotta love EQ!
07-17-2023
12:17 pm
Marylyn yes EQ is the inspiration for what can be done creatively with our sewing machines!
07-17-2023
8:20 am
This is a great idea for using all the decorative stitches on our sewing machine. I will certainly give it a try. Thanks Yvonne for a new design idea.
07-17-2023
12:19 pm
Nancy–I often start with a small design area (block, small quilt, placemat, etc.) and then determine what I will use that for when teaching classes for sewing, quilting, and machine embroidery. I love my EQ for my source of inspiration.
07-17-2023
10:03 am
Great idea.I’ve used EQ since it began and design all my quilts with it. I’ve used this block many times and never thought of adding decorative stitches. Thanks so much.
07-17-2023
12:20 pm
Barbara I saw a jacket recently that was all blocks of stitches sewn together. I was really inspired by it and I knew I could use my EQ8 program to help me with my planning process.
07-18-2023
9:02 am
So useful! I learned so much from these lessons.
07-18-2023
6:47 pm
Julia–I love learning. The smallest little tip is so useful to me. I am glad you are getting something from these blogs.