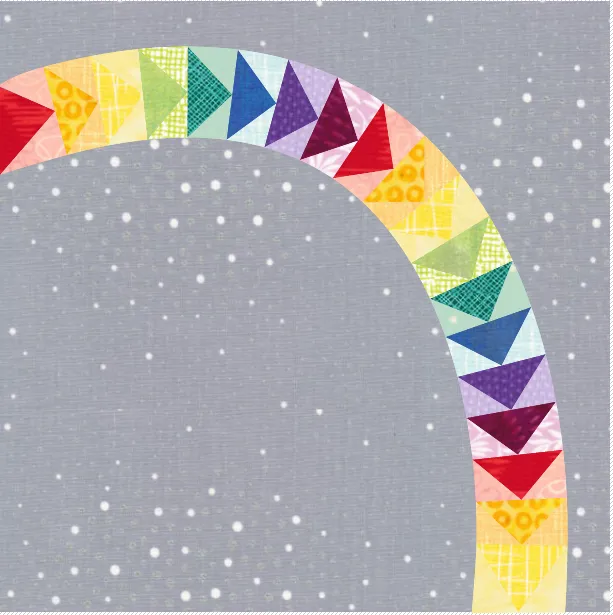
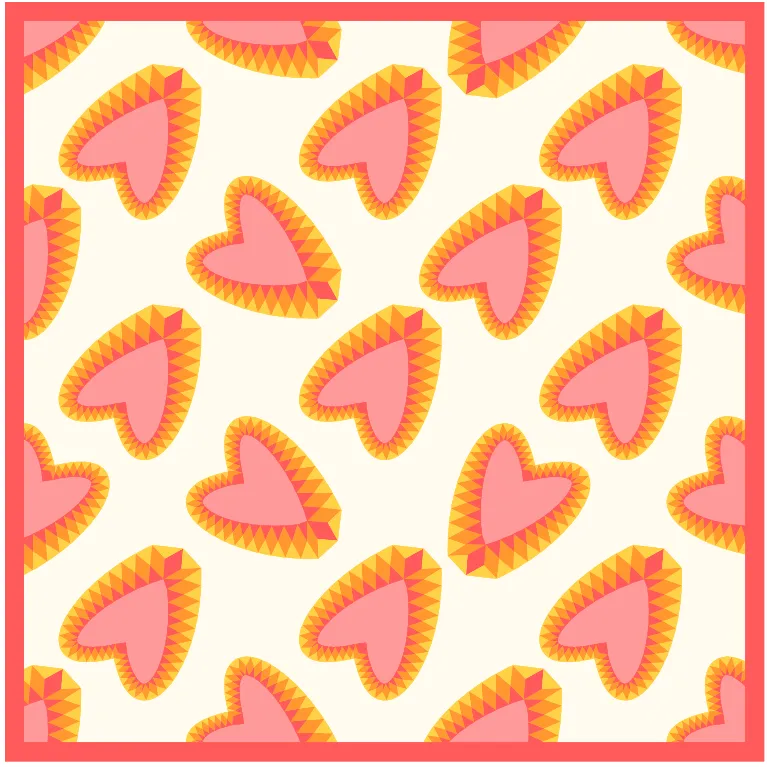
 The Swath tool is fun to experiment with but can also make some awesome blocks! The Swath tool draws a stylized stroke surrounding a line. The line or “spine” of the stroke can be edited and shaped like any curve or line segment. The stroke or “hull” surrounding the spine can have varying widths and end styles. So, it’s great for making blocks with Flying Geese!
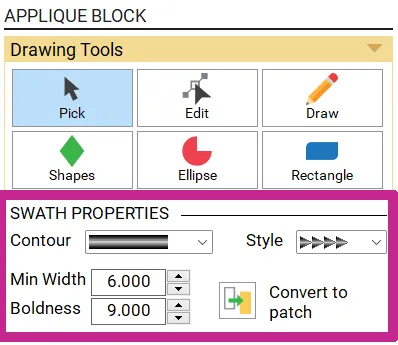
First let’s find the Swath tool.
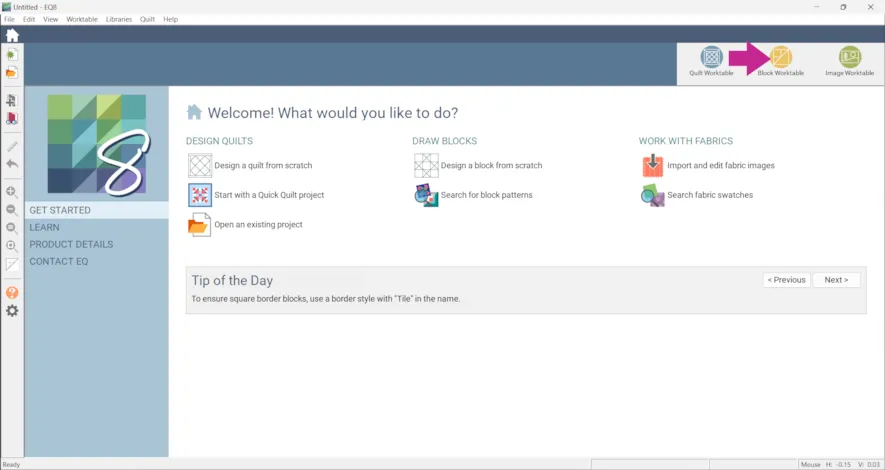
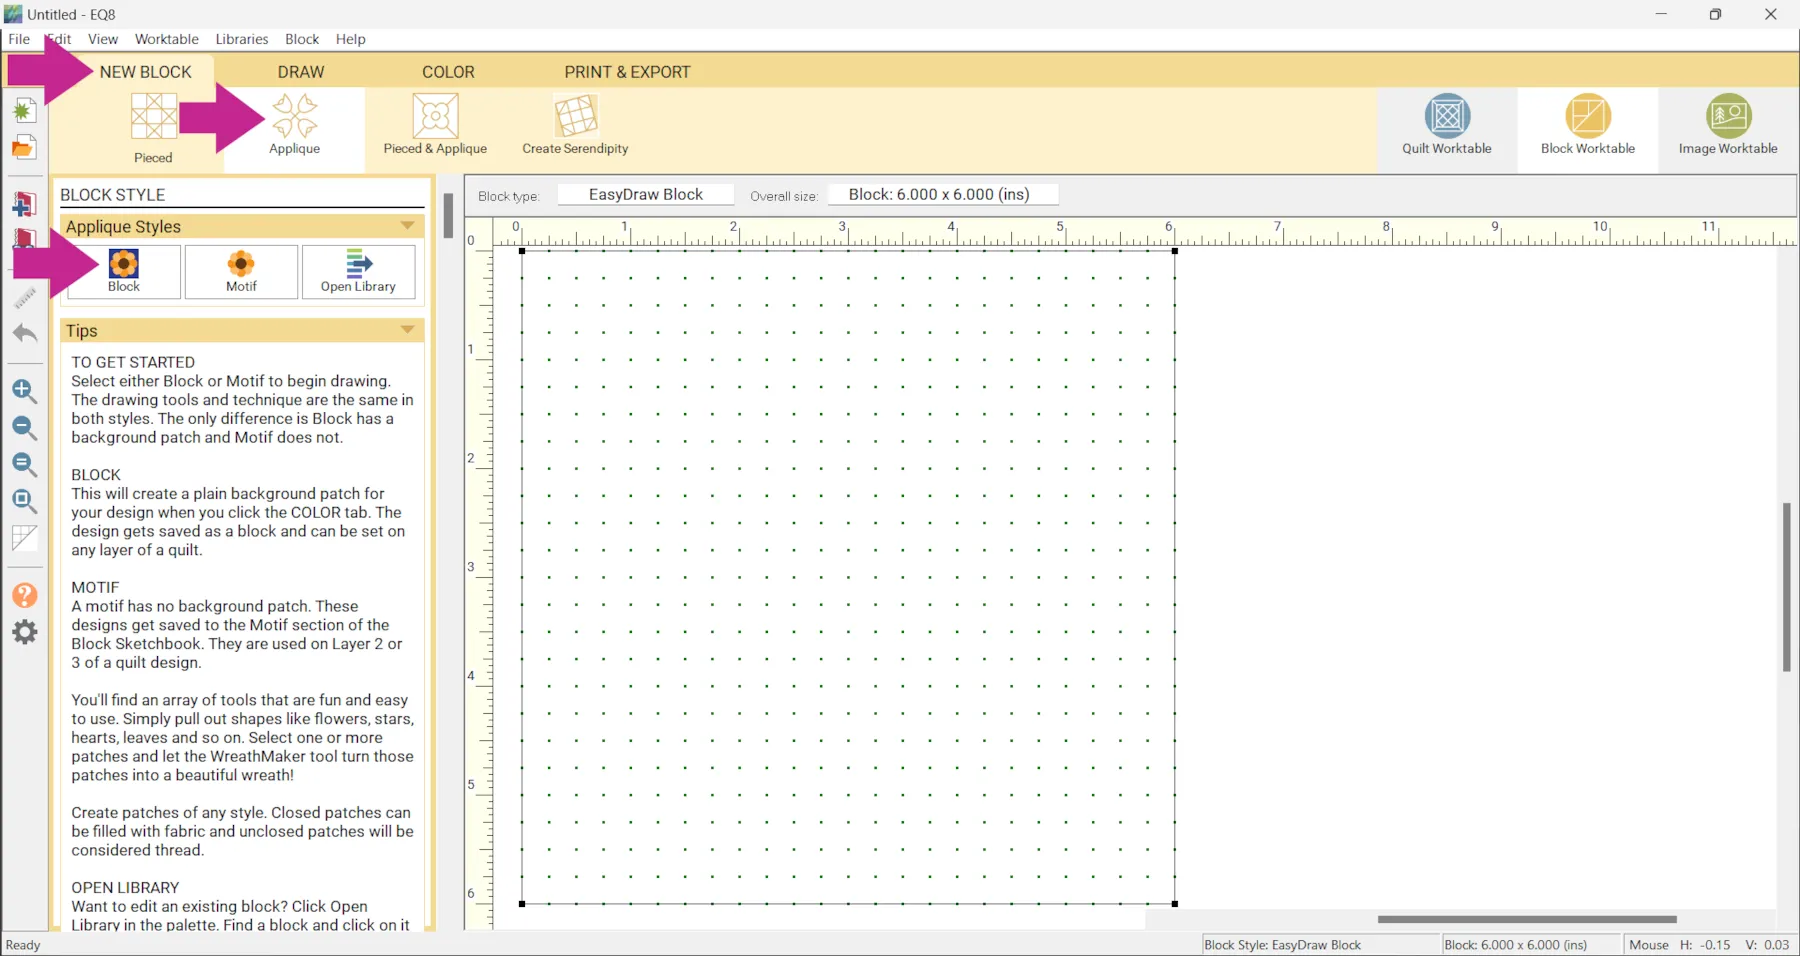
- Open EQ8 and click Block Worktable
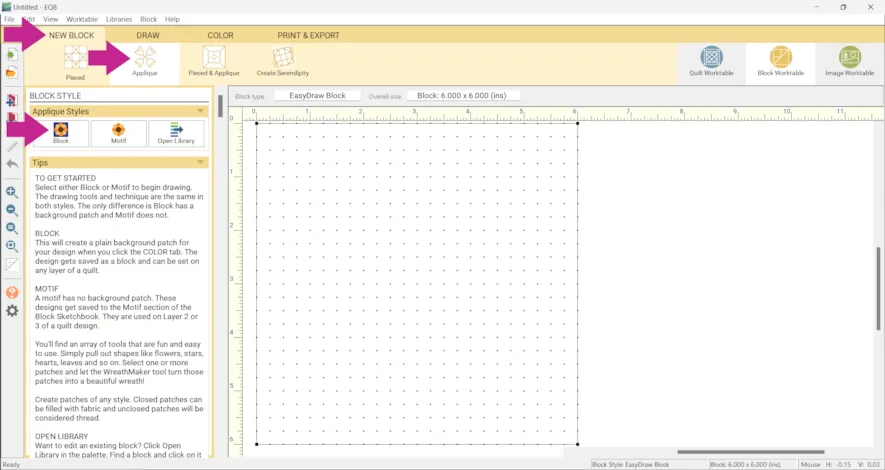
- Click NEW BLOCK > Applique > Block (you could also choose Motif but in this example we’re using Block).
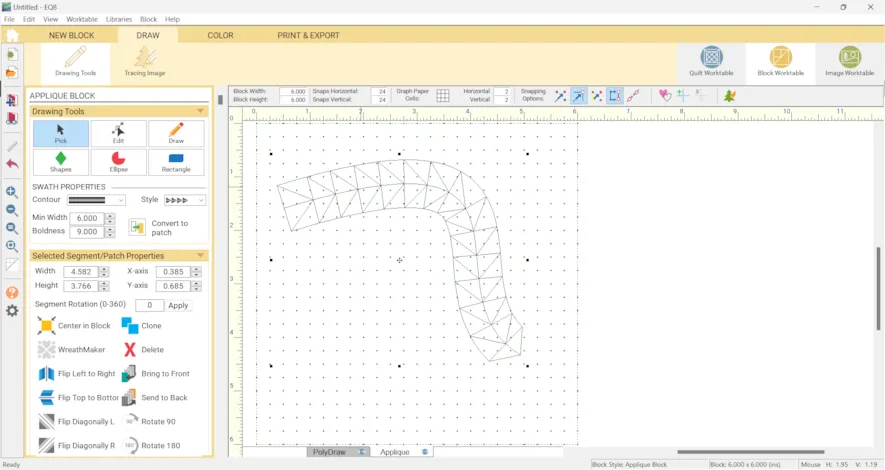
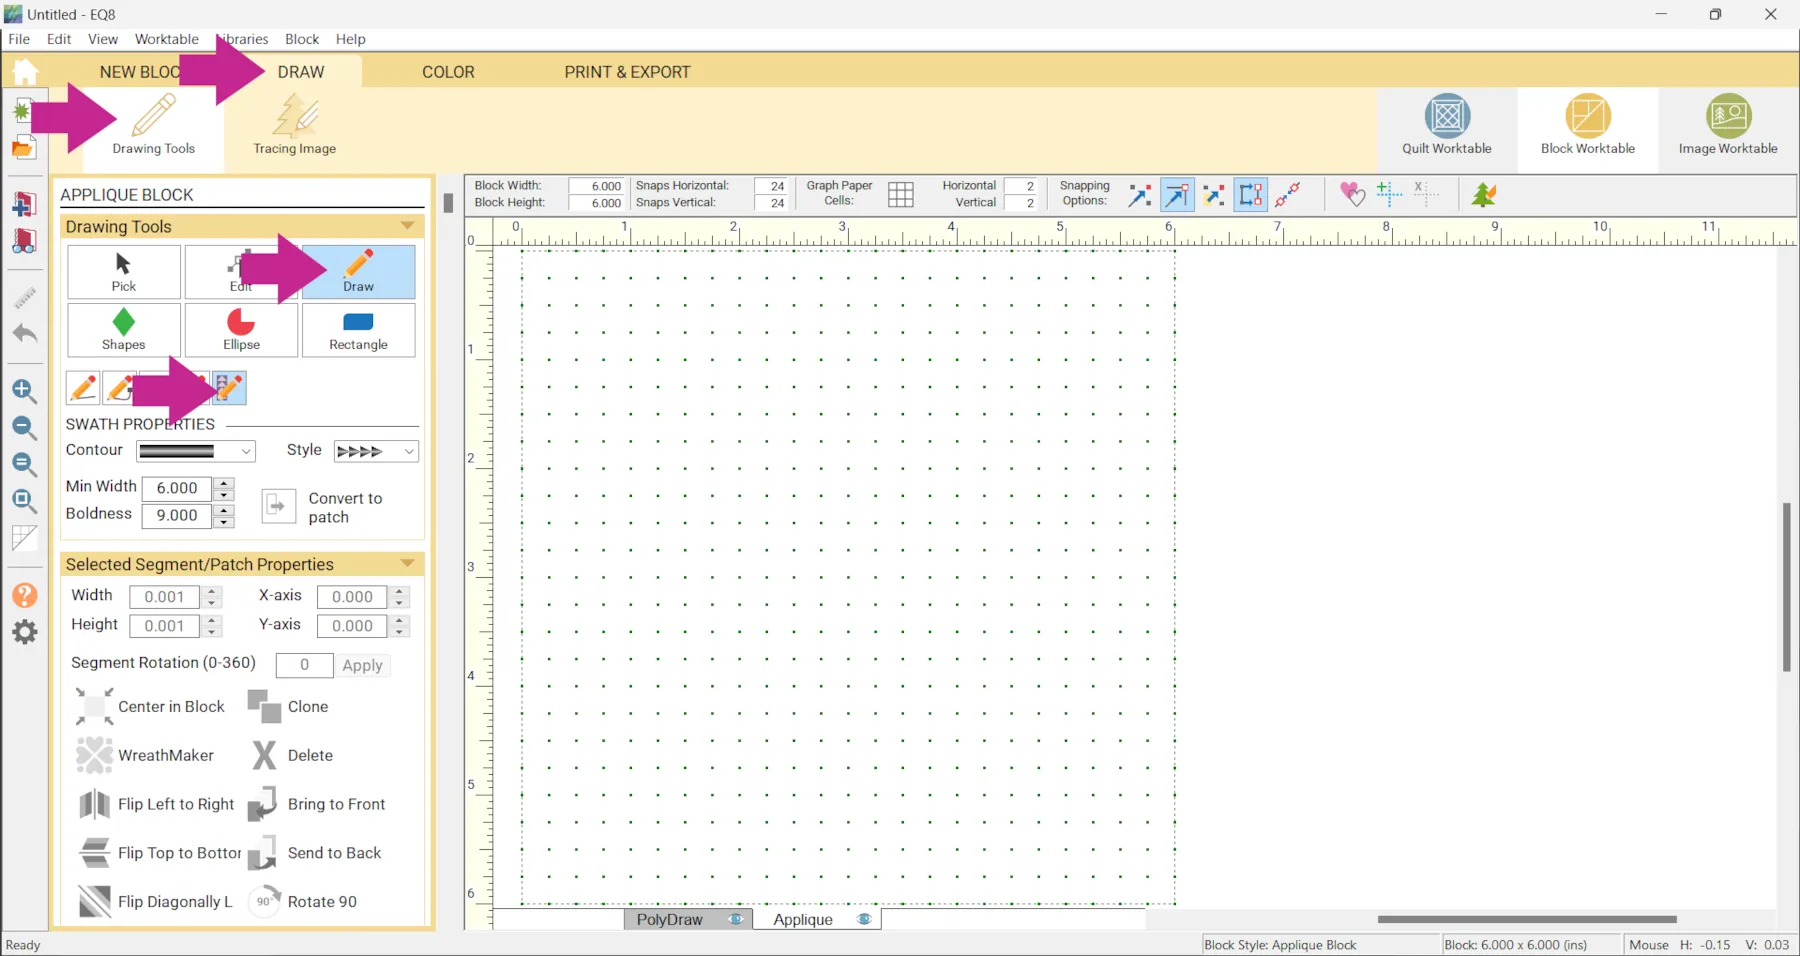
- Click the DRAW tab > Drawing Tools > Draw > Swath

- Position the cursor where you want to begin. Press and hold the left mouse button.
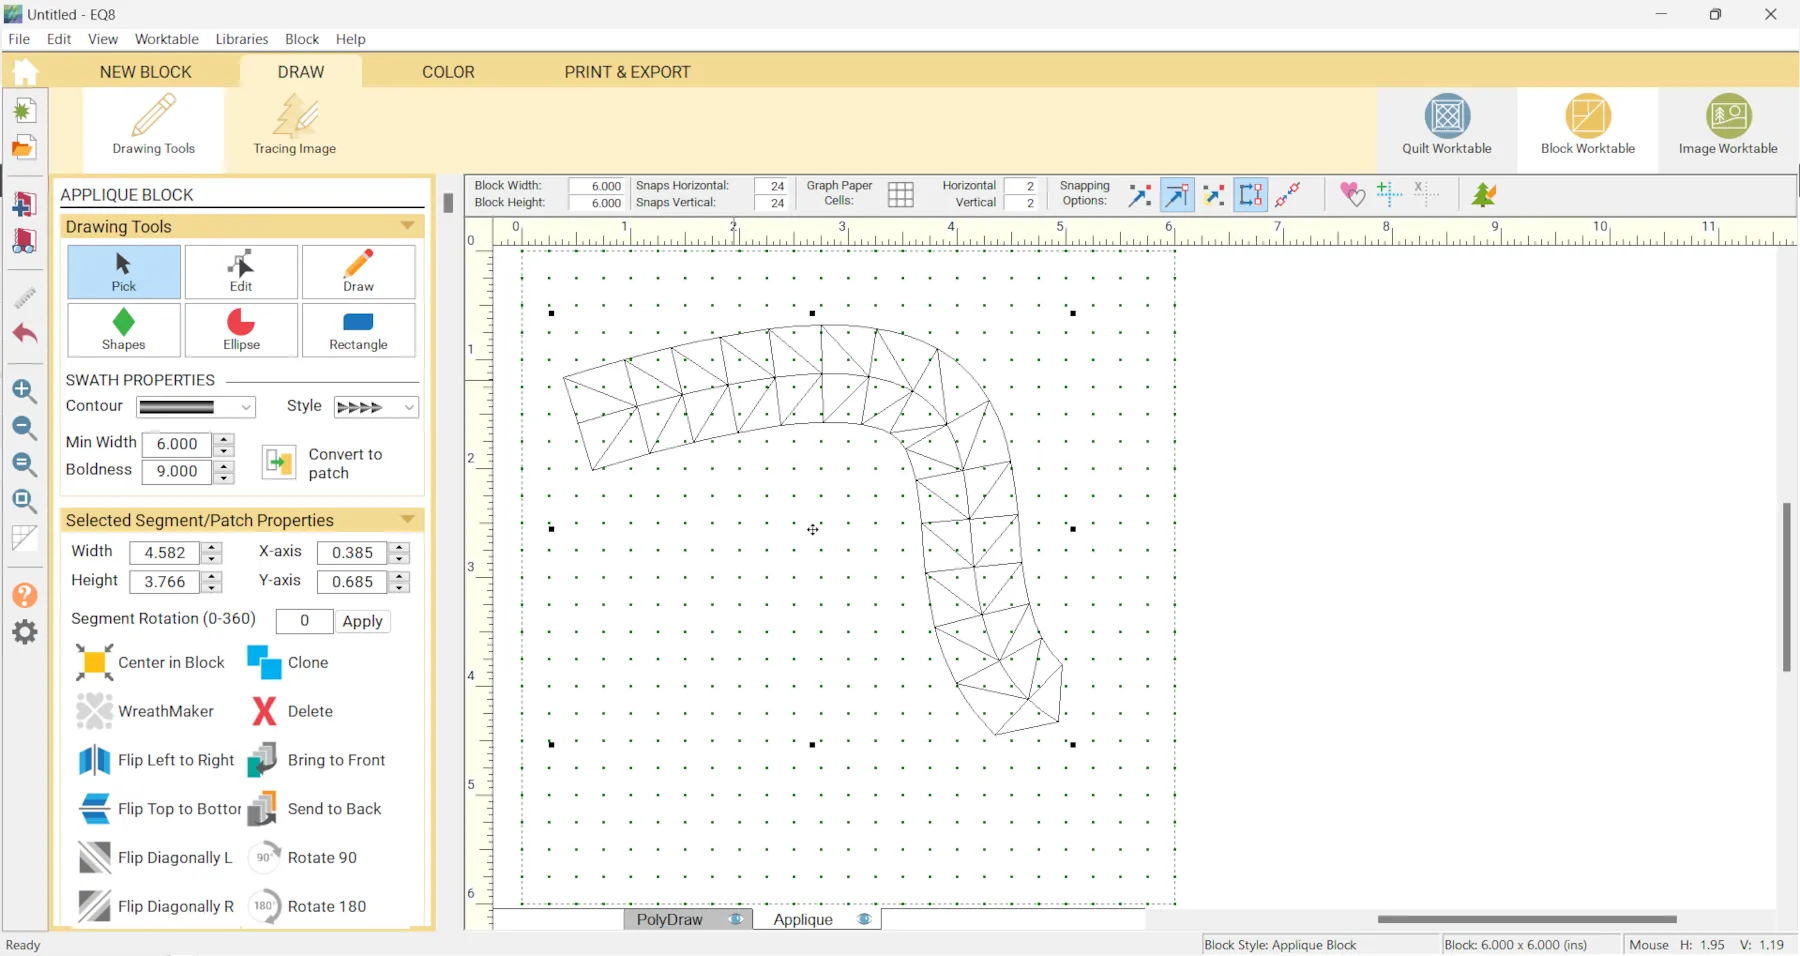
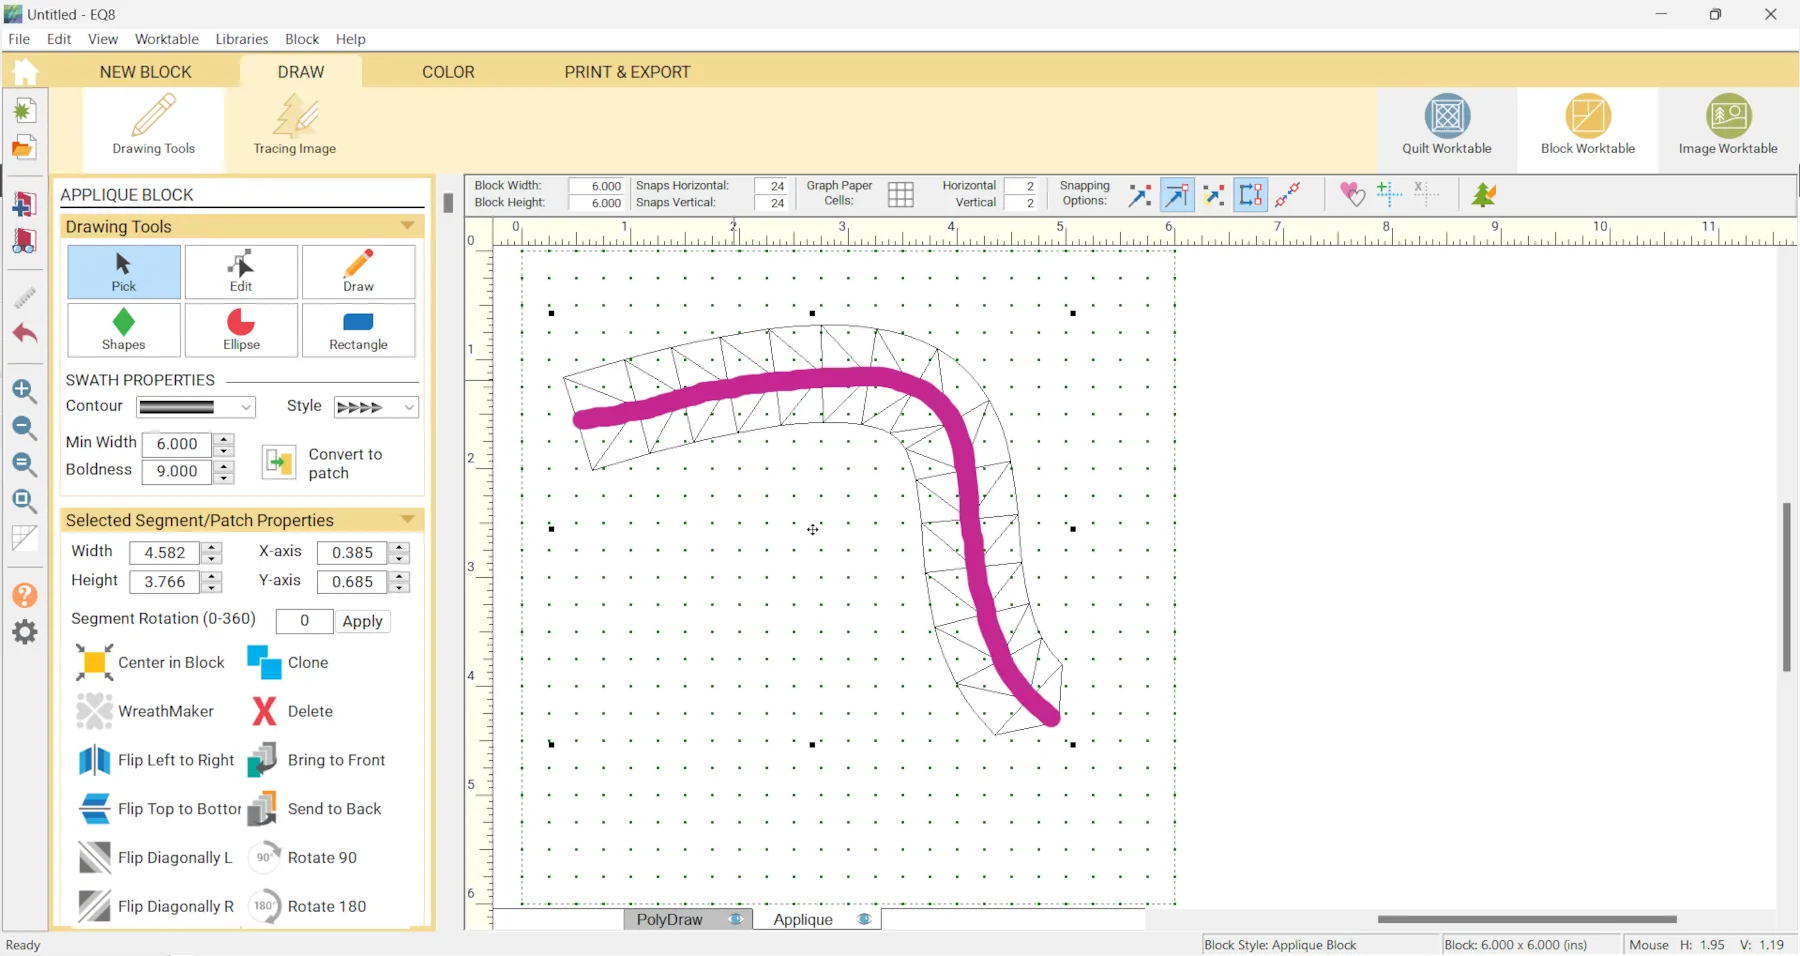
- Still holding the left mouse button, drag in any direction. (To make the “flying geese” fly right, draw your stroke from left to right. To make the “flying geese” fly left, draw your stroke from right to left.) A blue line will display the path of your mouse.
- Release the mouse to drop and anchor the end node.
- The swath should still be selected, if so use the handles or drag directly from the curve itself to change the curve.
If it is not click the Pick tool and draw a selection box around the Swath.
(The “spine” is shown below.)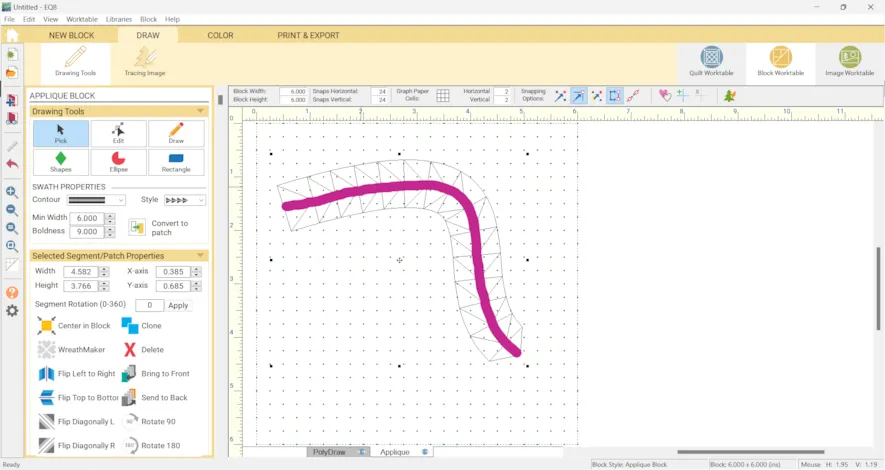
When you release the mouse, the “hull” will adjust to fit the “spine.”
(The “hull” is shown below.)
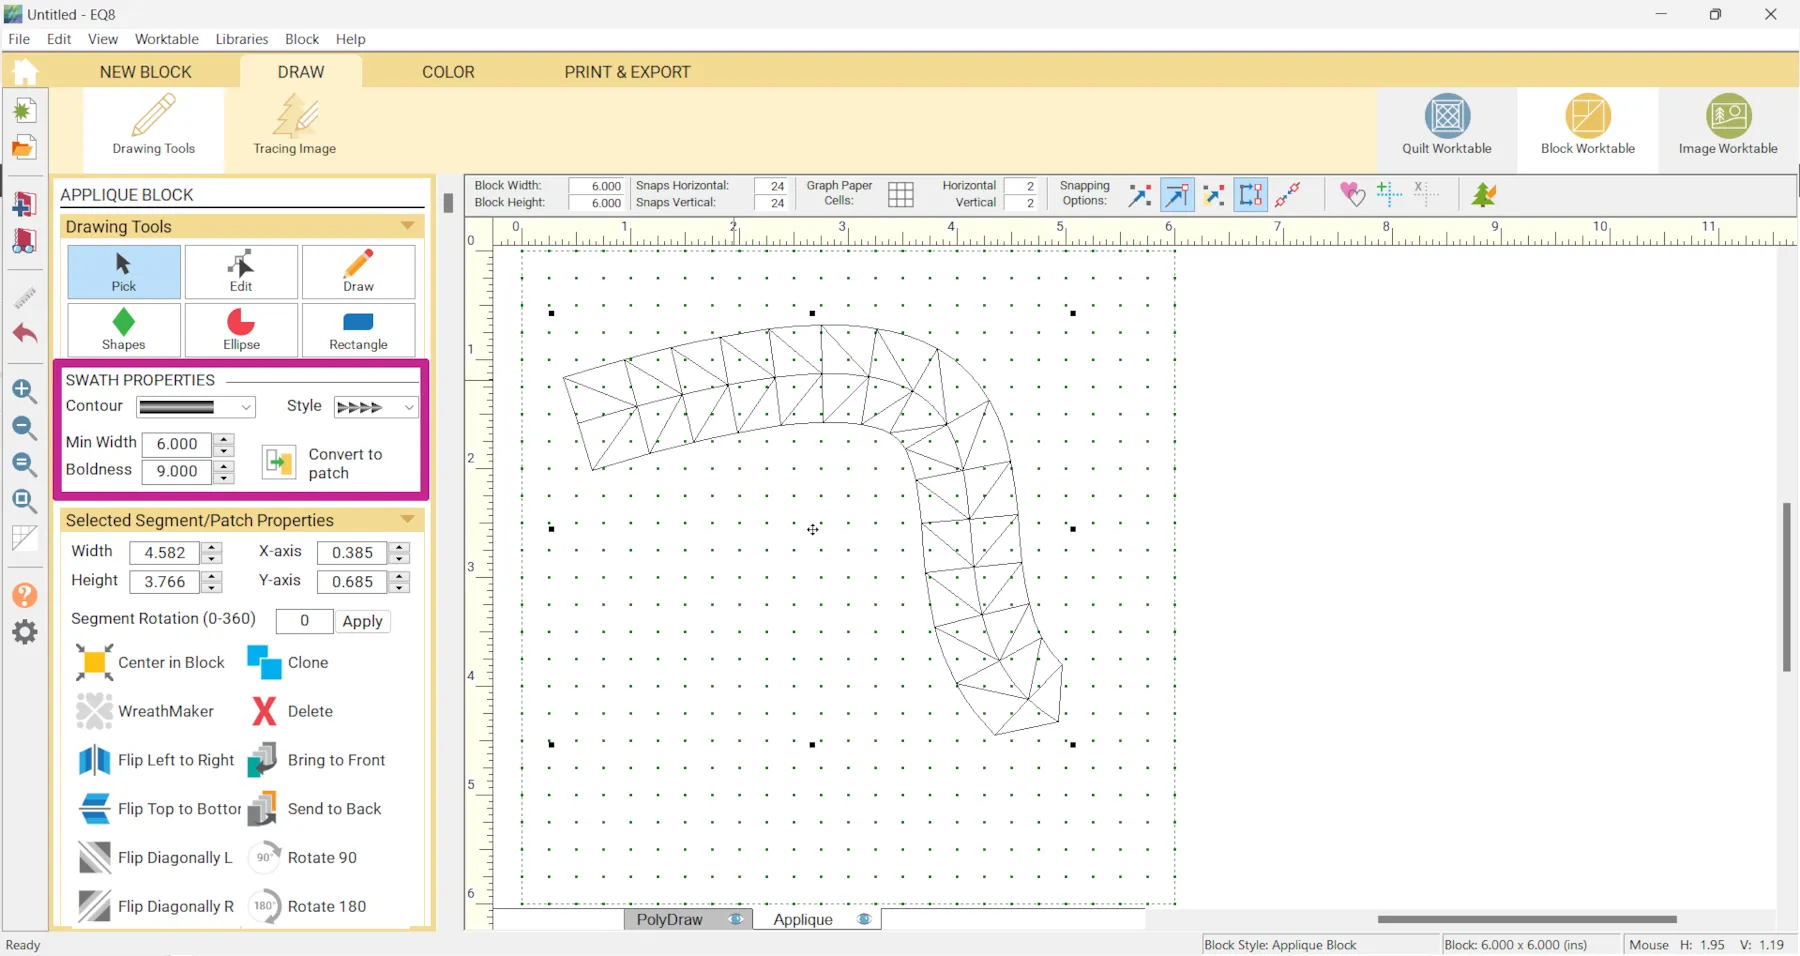
Experiment with the Swath Properties
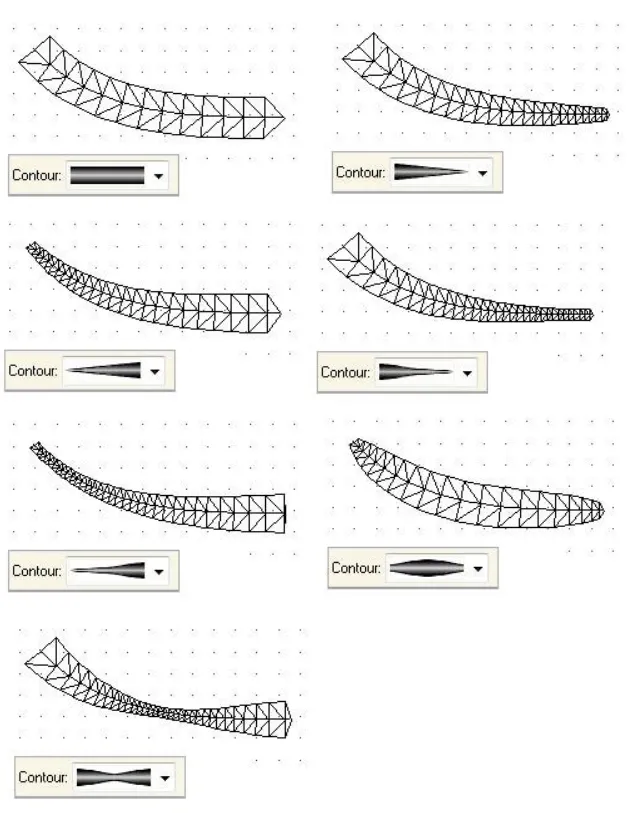
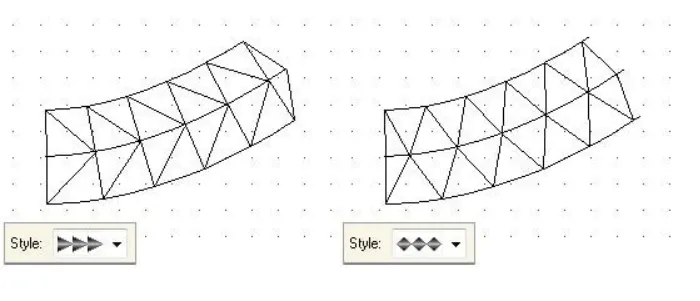
- Make sure the Swath is selected first. (If it is not click the Pick tool and draw a selection box around the Swath.) The pictures below illustrate what the Swath will look like if you choose any of the respective Contours or Styles.

Contour
Style
Minimum Width and Boldness
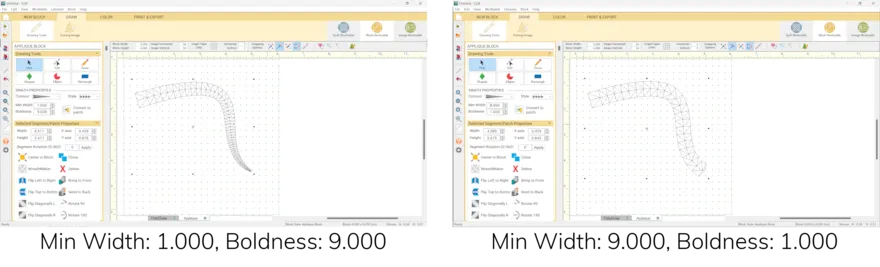
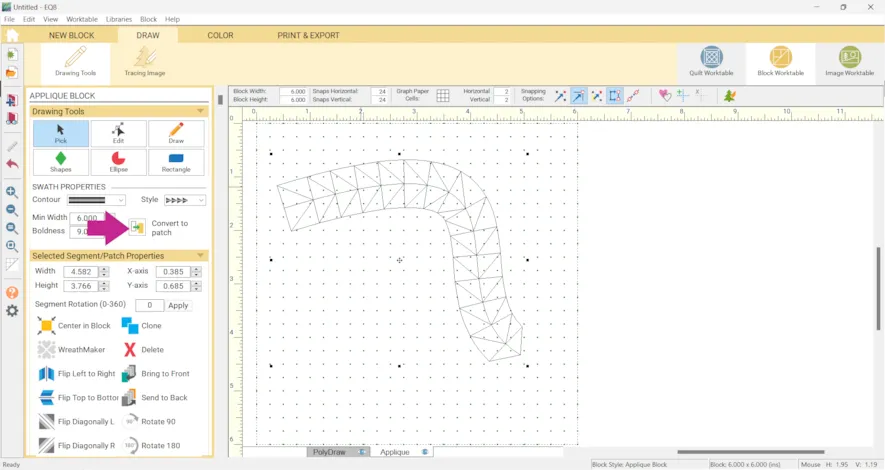
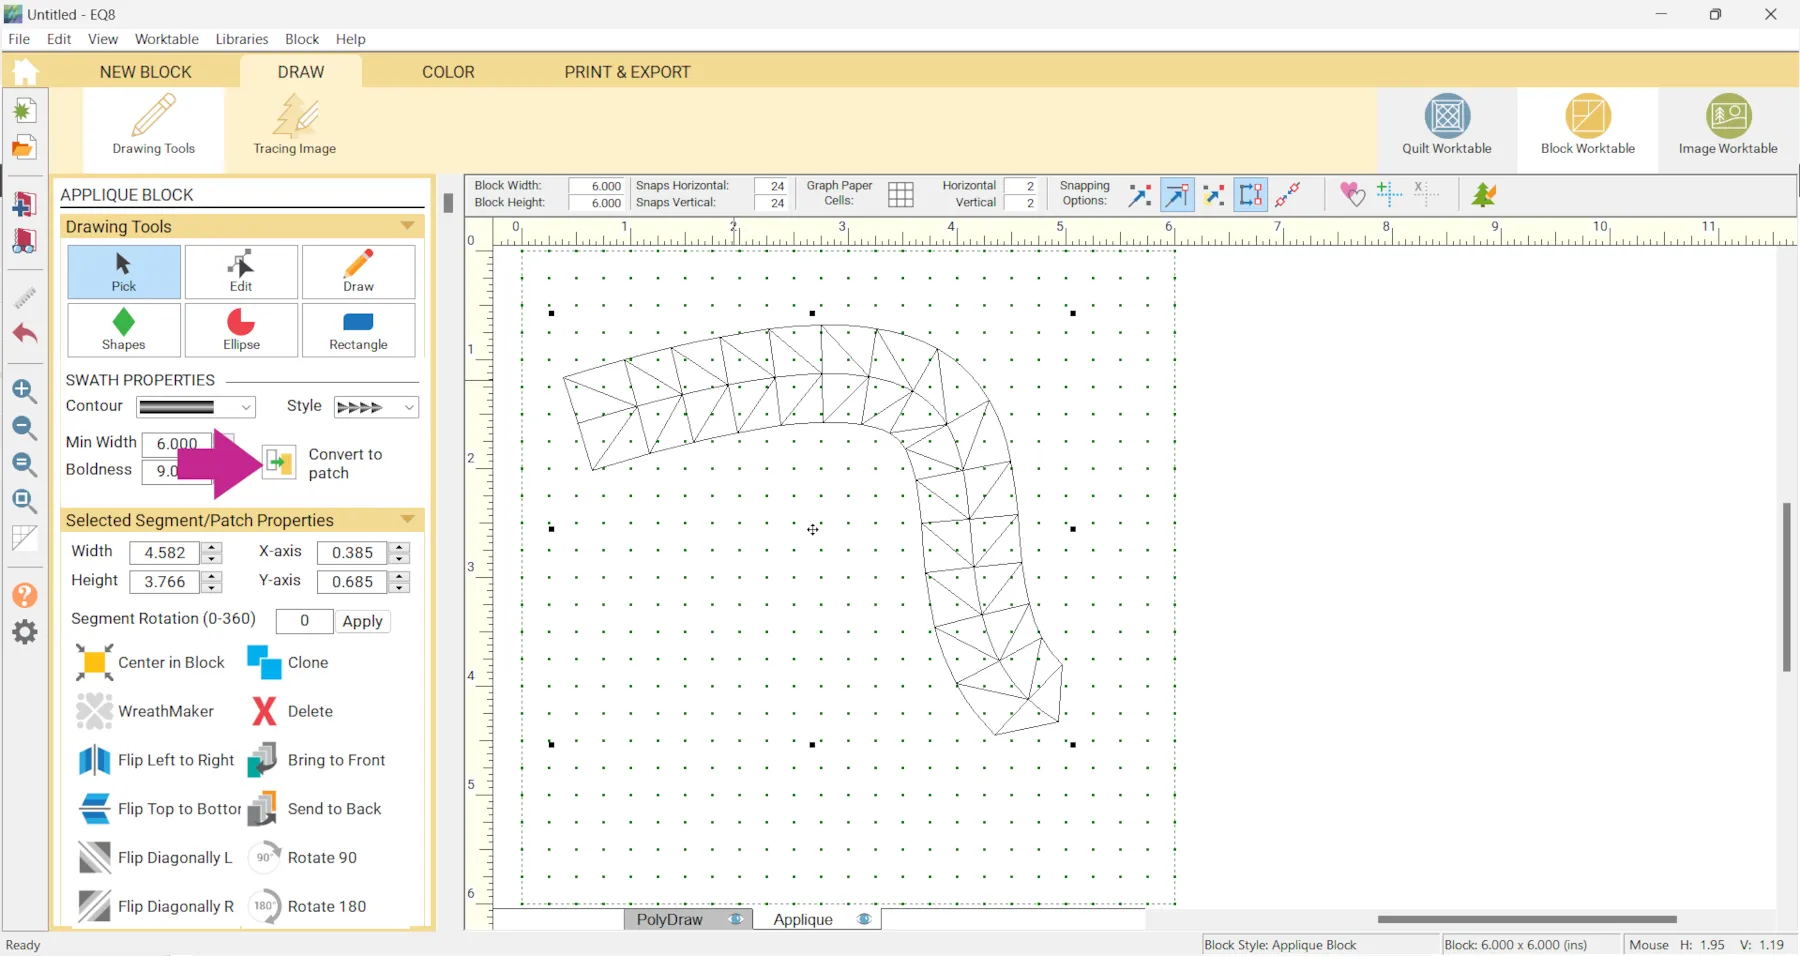
Some of the contour styles of the swath taper at one or both ends. The Minimum Width refers to this tapered-down area of the swath. If the width is zero, this area is basically flat. As this number increases, the width of this part of the swath increases.The Boldness refers to the area surrounding the entire spine of the swath. As the number increases, the fatter or bolder the swath becomes. - Click Convert to Patch (to change the object into a set of Bezier curves).
- Click the COLOR tab and color your block as desired.
- Click Add to Project Sketchbook
 . If you haven’t named your project yet, EQ8 will prompt you to do so. (To be saved, your item needs to be in the Sketchbook AND your project needs to be named. Here is more information.)
 - Mix the Swath block with other blocks or use it on it’s own for some interesting quilts. Make sure to try to the Symmetry tool!

- Click Add to Project Sketchbook
.
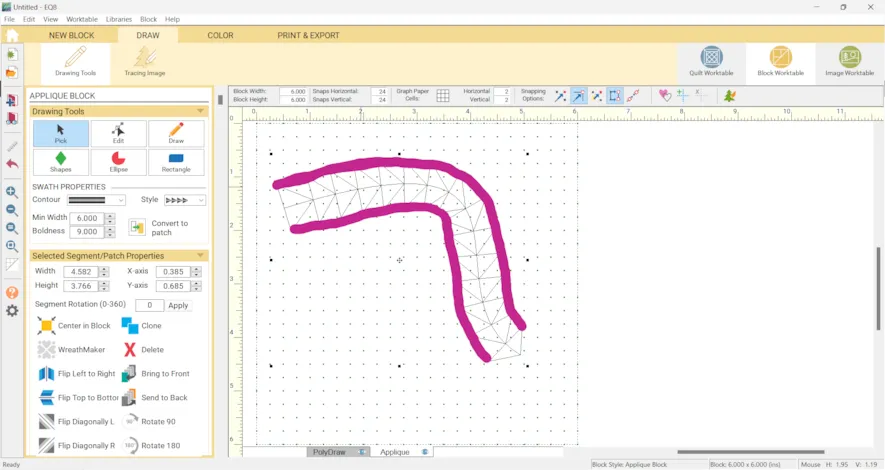
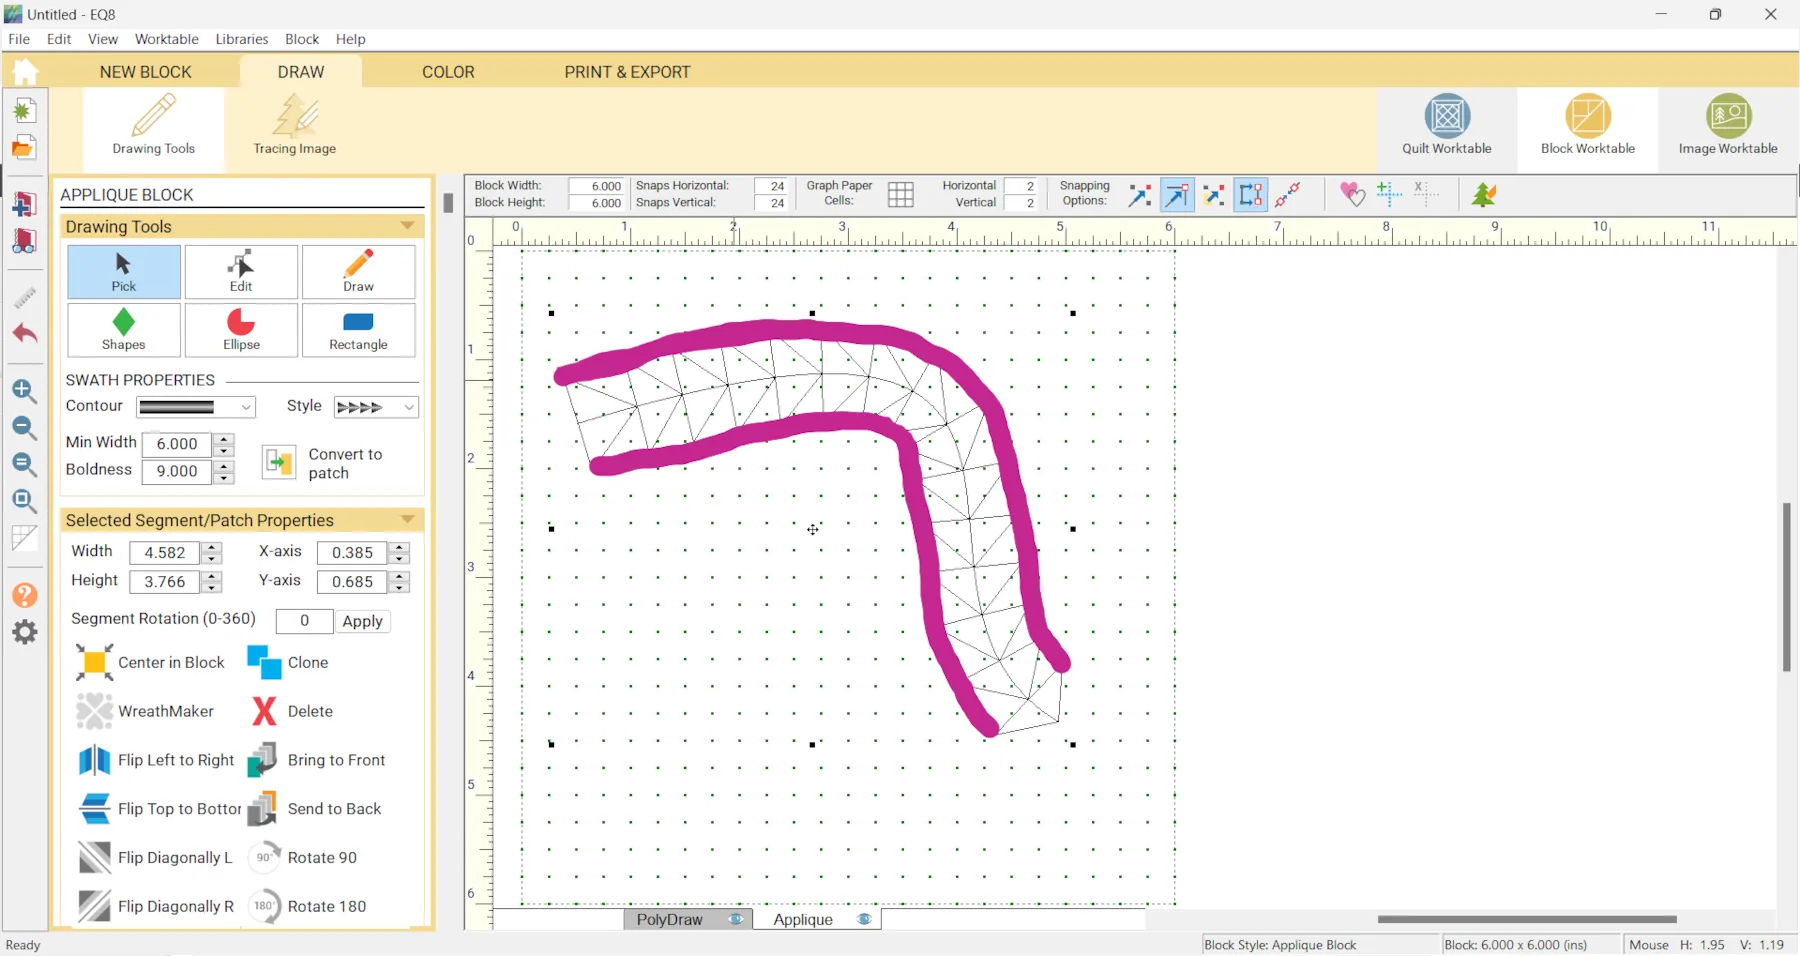
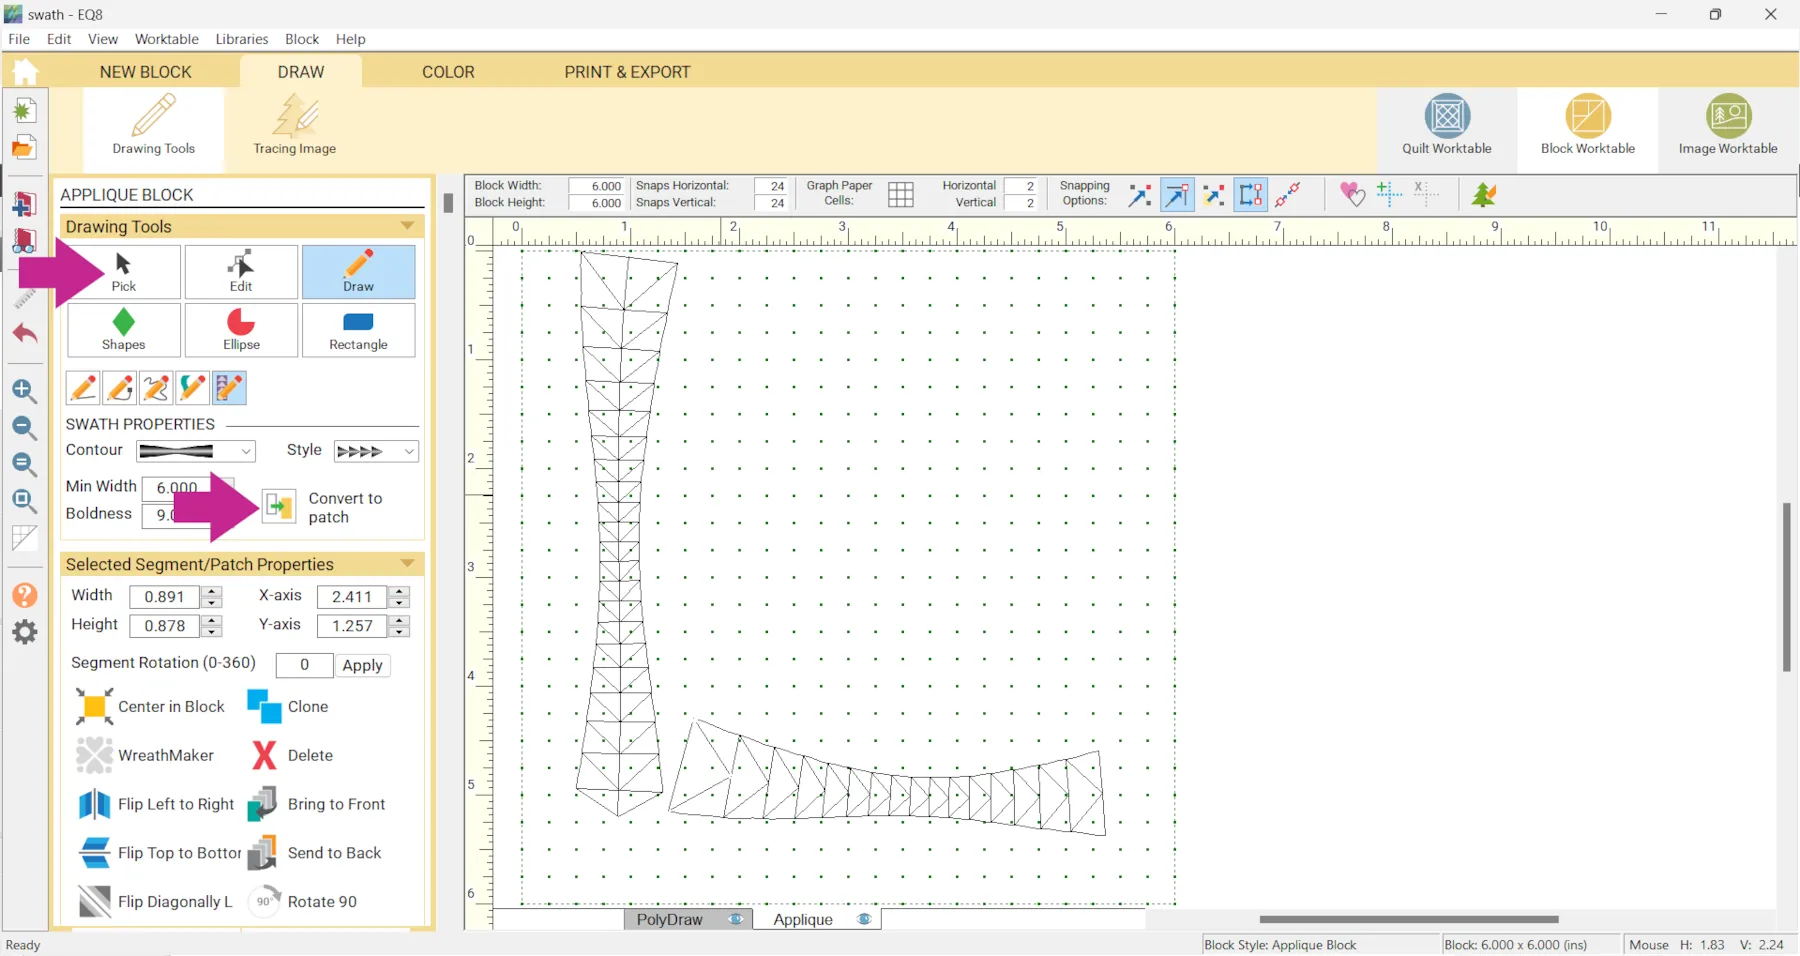
The Swath tool works best with smooth, gentle curves. It is not intended for use with sharp curves. If your design requires a sharp curve, it is best achieved by creating separate swaths.
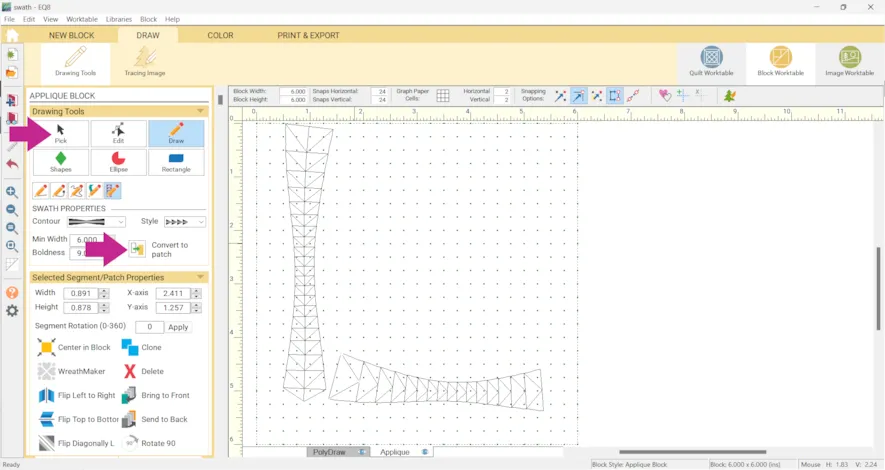
- Click Block Worktable > NEW BLOCK > Applique > Block > DRAW tab > Drawing Tools > Draw > Swath (like shown in steps 1-3)
- After drawing two lines (and experimenting with Swath Properties if you would like), click Convert to Patch
- Use the Pick tool to select the other swath and click Convert to Patch again.
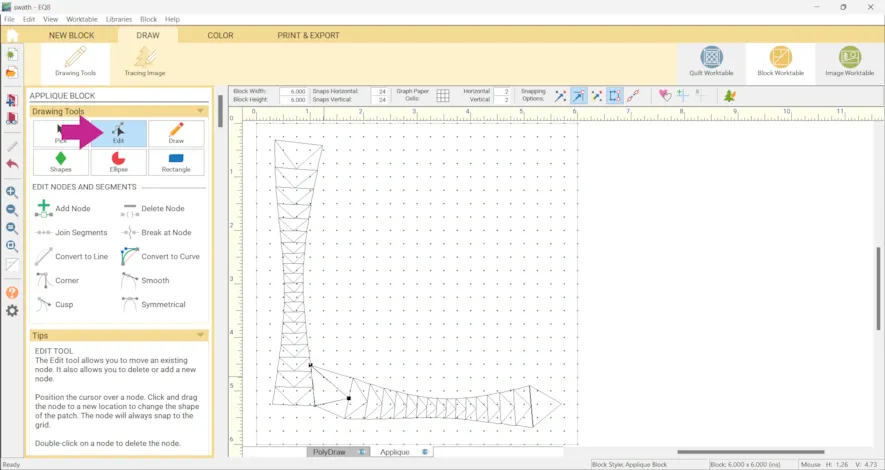
- Then use the Edit tool to manipulate the shapes, if you would like.
- Click the COLOR tab and color your block as desired.
- Click Add to Project Sketchbook
.
- Have fun experimenting with your block!
- Click Add to Project Sketchbook
for any quilts you would like to save.
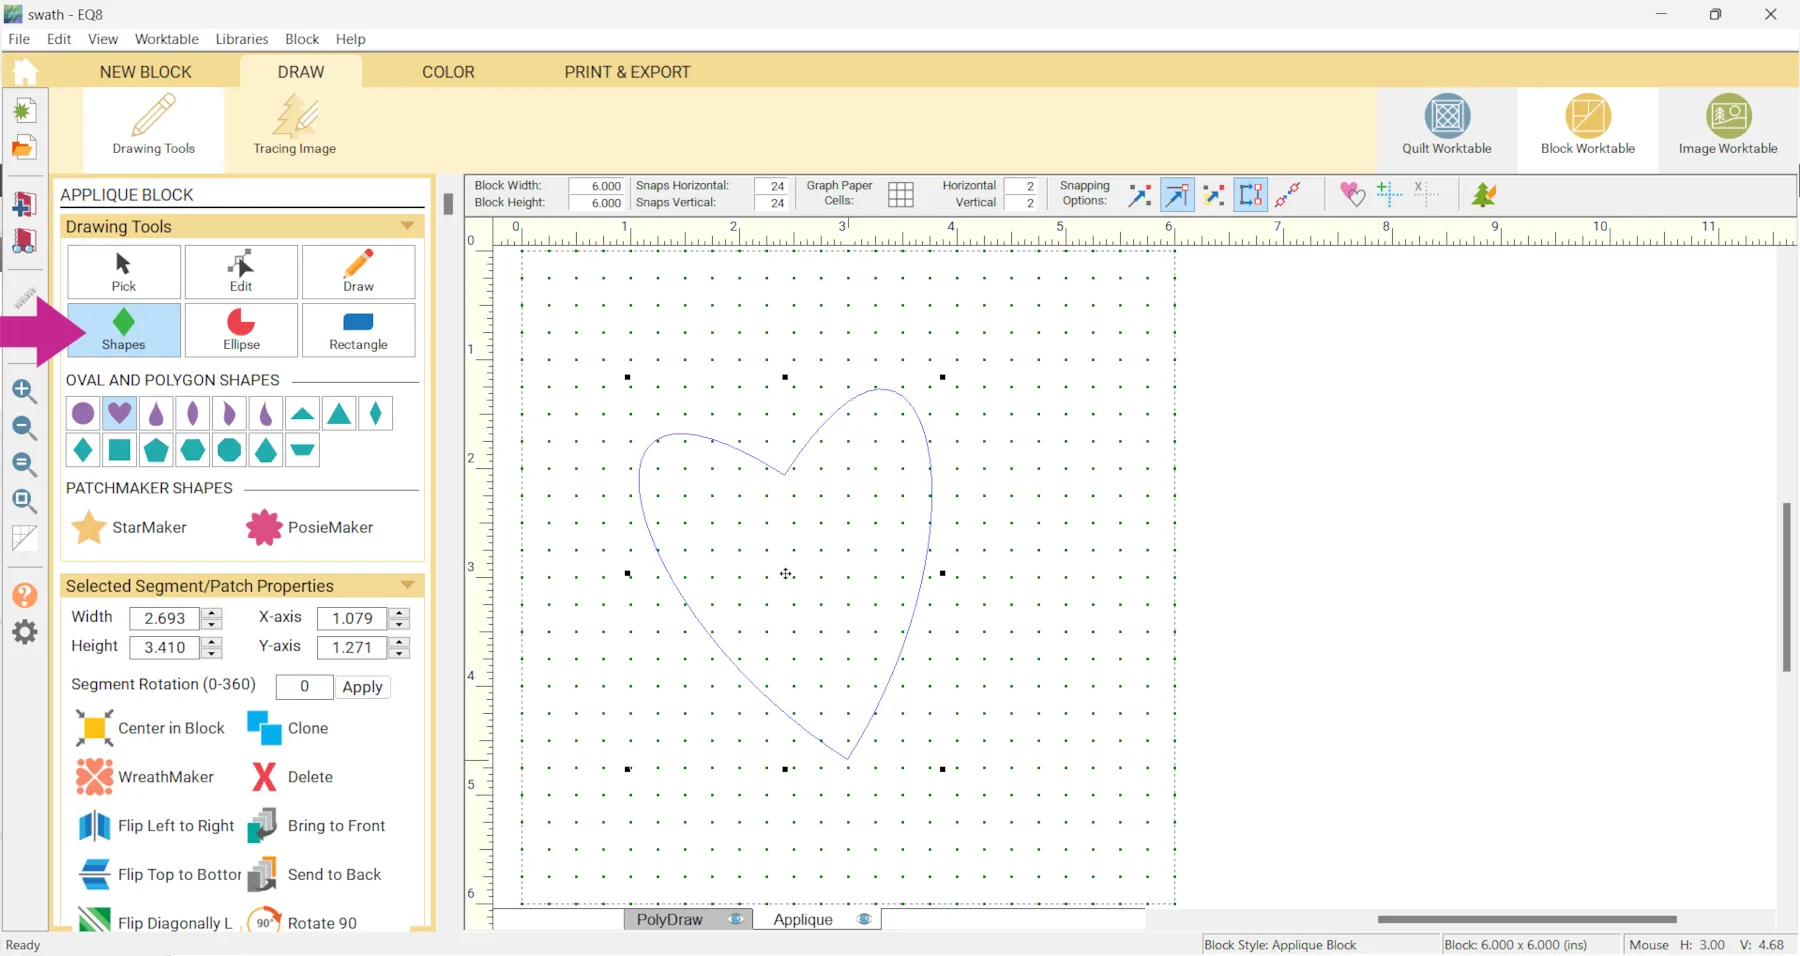
Another way to use the Swath tool is to draw a shape first then add the swath.
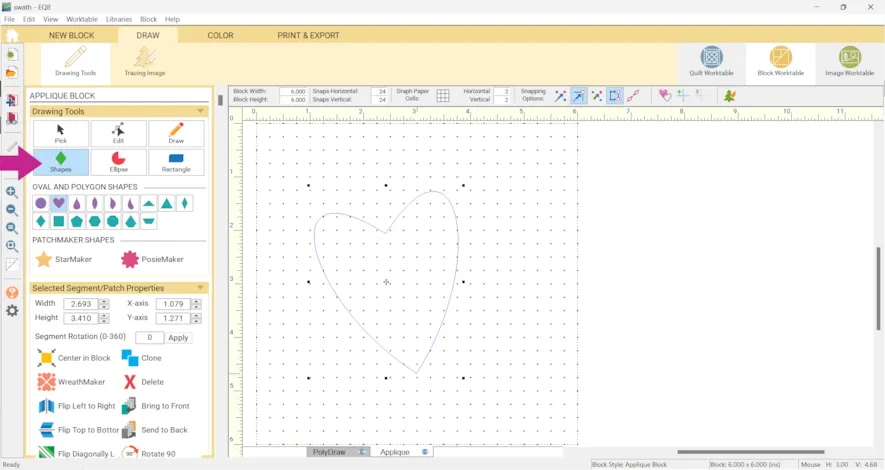
- Click Block Worktable > NEW BLOCK > Applique > Block > DRAW tab > Drawing Tools (like shown in steps 1-3)
- Click the Shapes tool, choose one of the shapes subtools and click and drag on the block to create a shape.
- Click Edit and click on a node.
- Click on Break at node

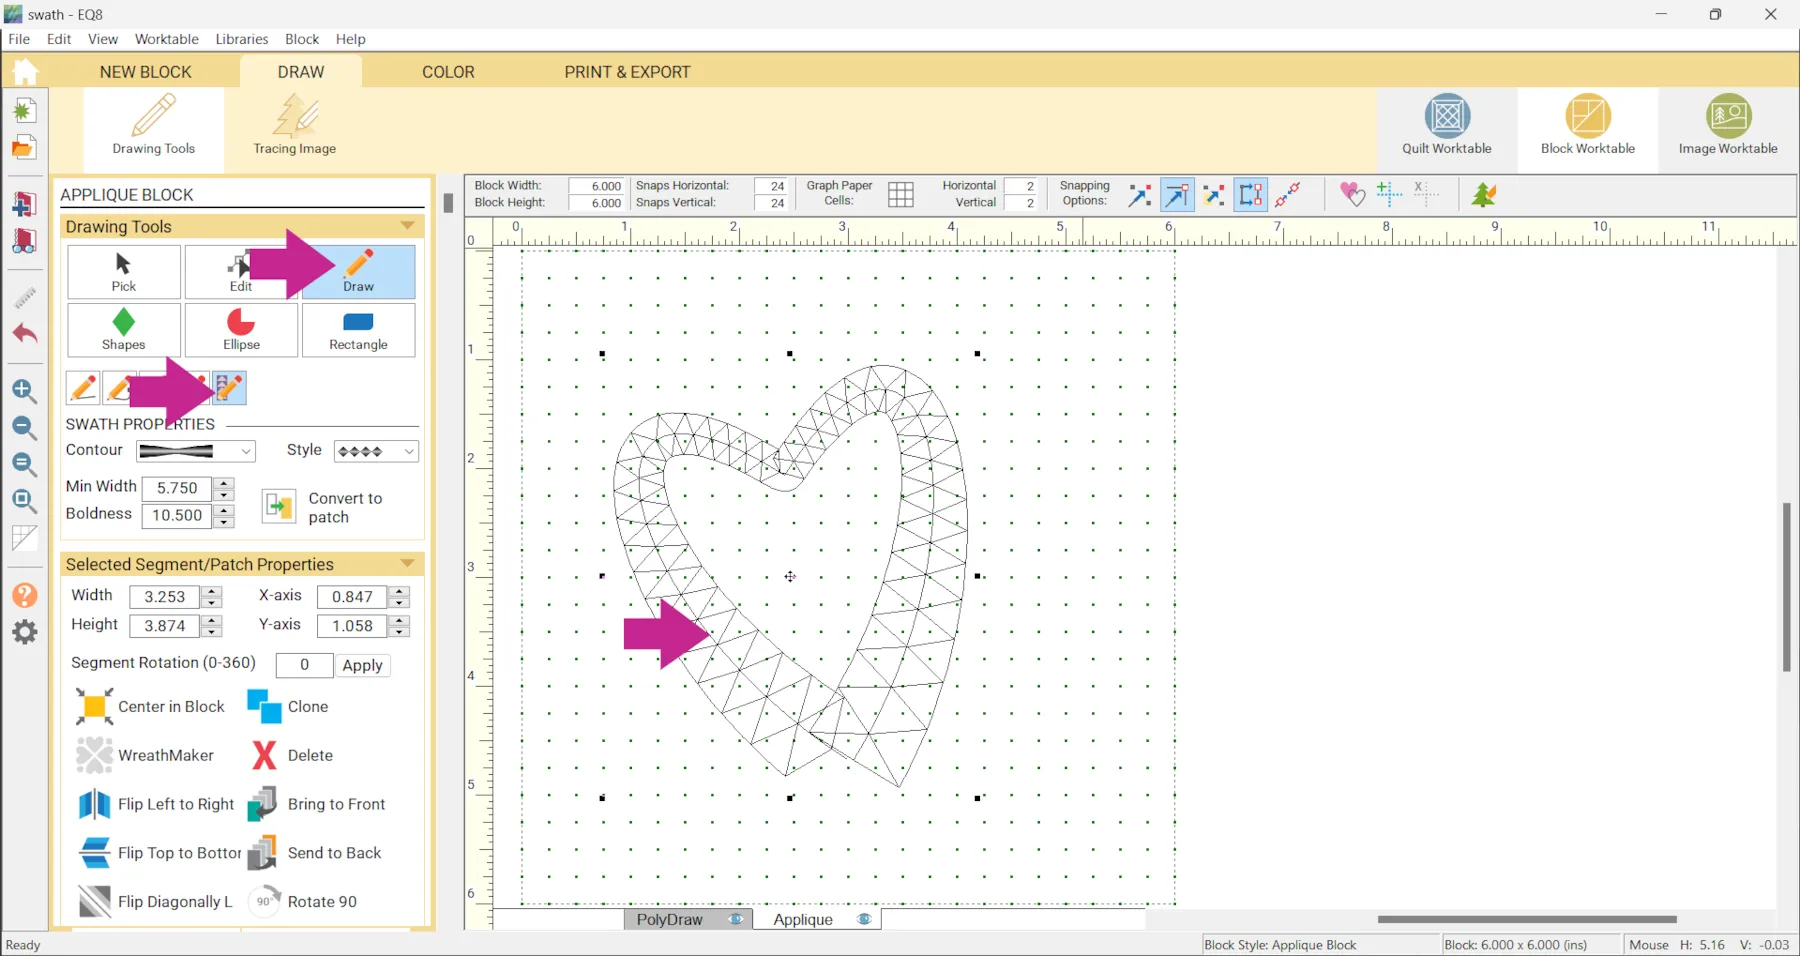
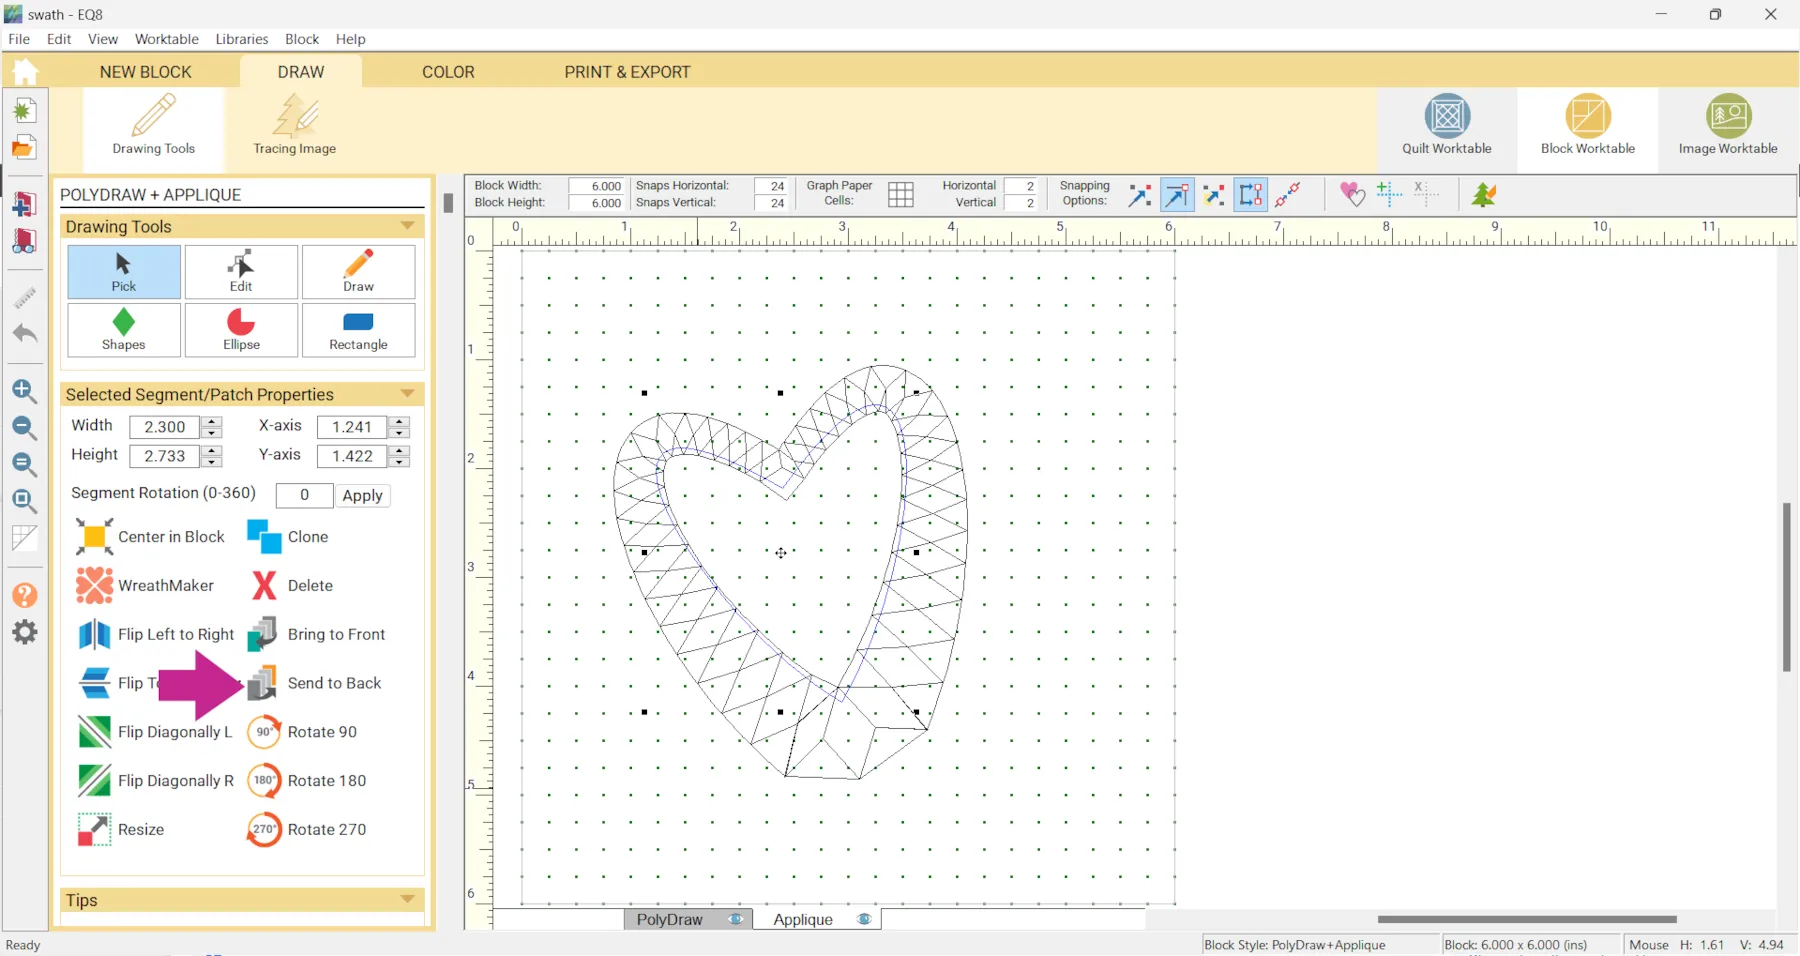
- Click Draw > Swath and double-click on the shape.
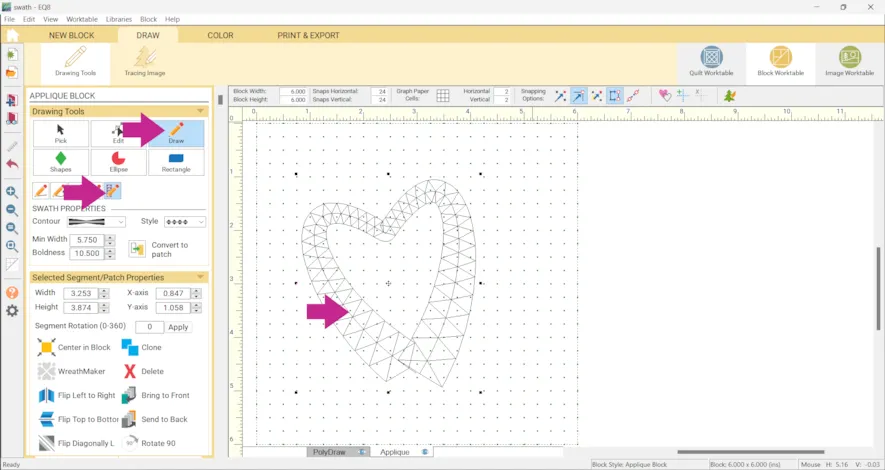
- Experiment with the Swath Properties, if you would like.
- Click Convert to Patch.
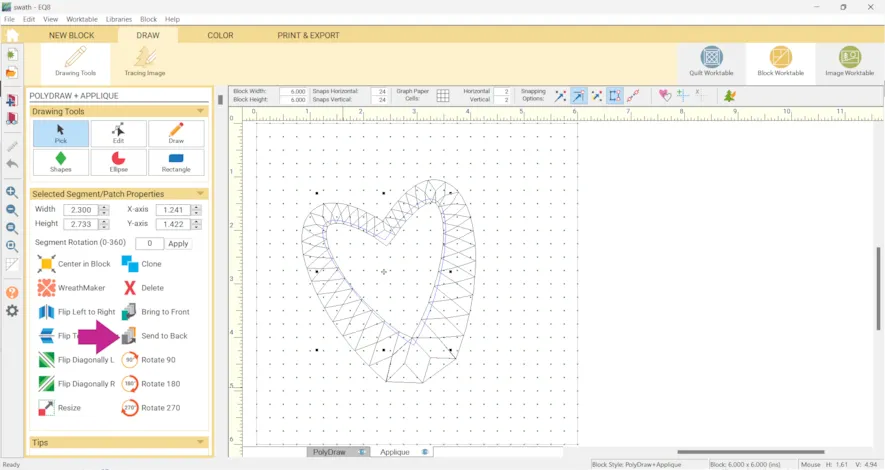
- Use the Edit tool to manipulate the shapes.
In the example I also drew another heart and clicked Send to back so I could color the center of the heart a different color.
- Click the COLOR tab and color your block as desired.
- Click Add to Project Sketchbook
.
- Set your block into different layouts to see what you like.
- Click Add to Project Sketchbook
for anything you would like to save.


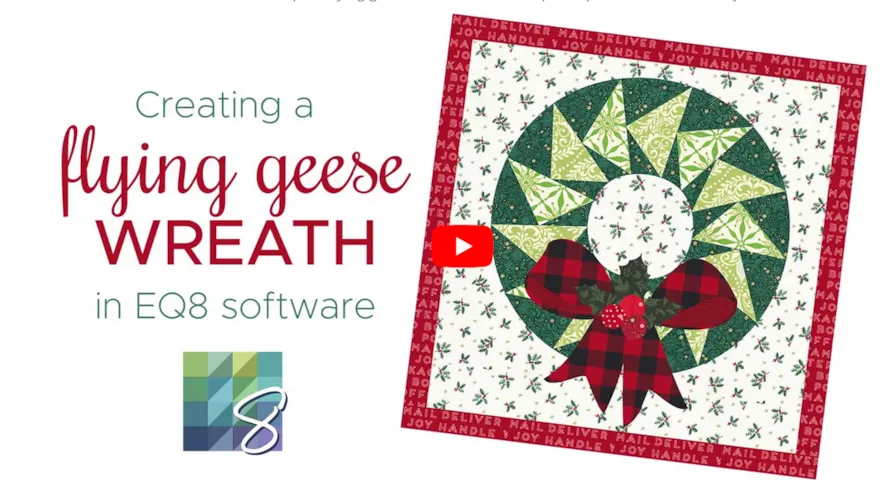
Here is a video about how to make a Flying Geese Wreath with the Swath tool that uses a similar method.
Also, here are some tips about printing a block made with the swath tool.
If you want to post images of your quilts, here is how to export the images.
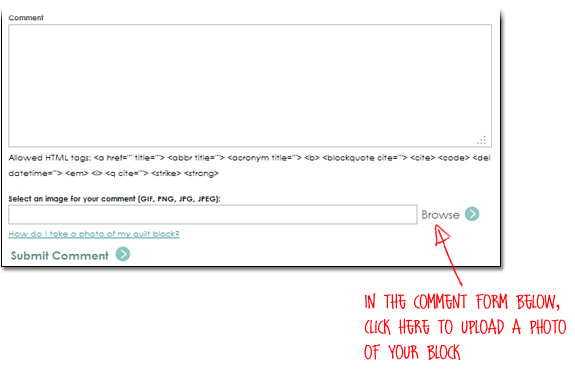
To post your image click to comment on this post. Fill in your info and then click Browse.
Go to: Documents\My EQ8\Images
I can’t wait to see what you’ve done! I hope you enjoyed the lesson!
If you have questions about the lesson feel free to post them below.
If you have questions about something else EQ related, please contact techsupport@electricquilt.com.
If you have suggestions for new Design & Discover lessons feel free to comment below or email Heidi@electricquilt.com


10-18-2023
9:27 am
Game changer! Something new for me to play with, never knew it was there–so now I am finished drawing these by hand, thank you EQ! Keep up the good work.