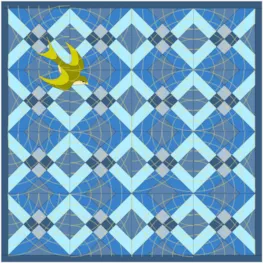
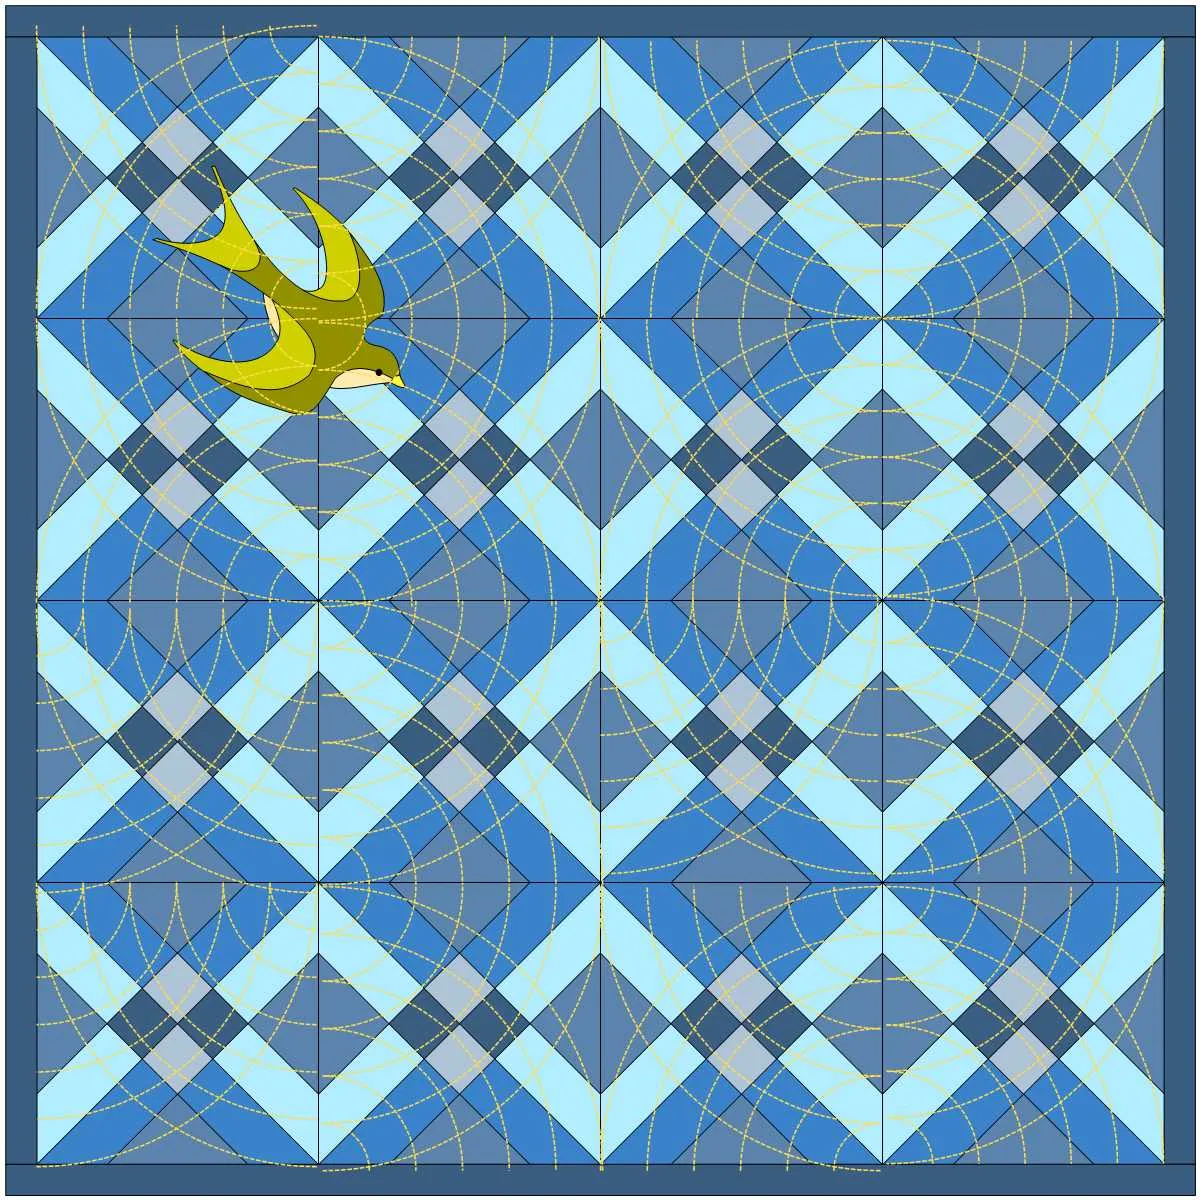
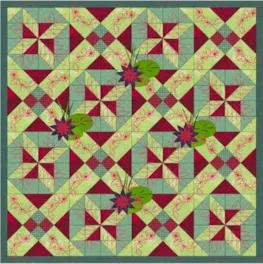
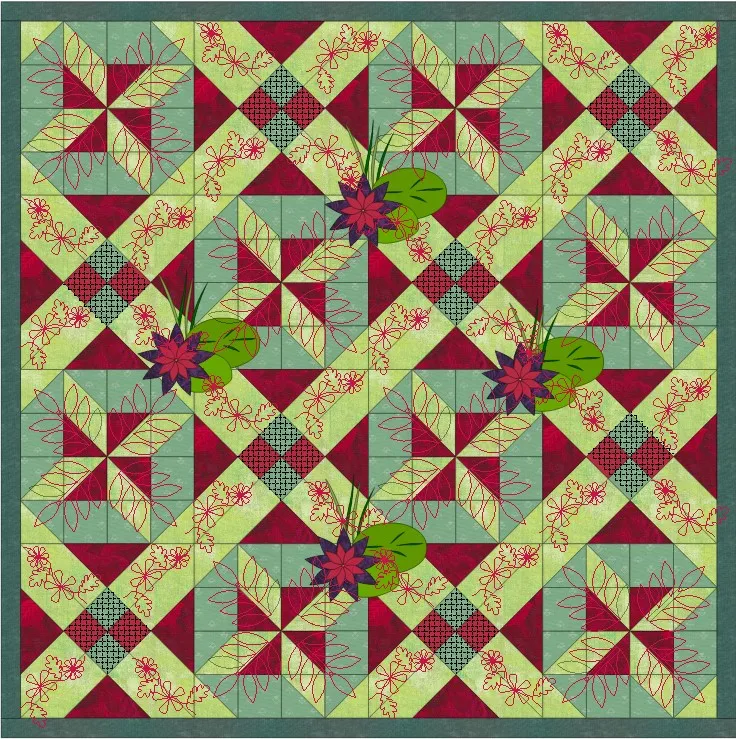
This lesson is great for anyone starting off with EQ8, or if you want a refresher on the basics! We have lots of other resources available for learning EQ8, as well.
Let’s get started!
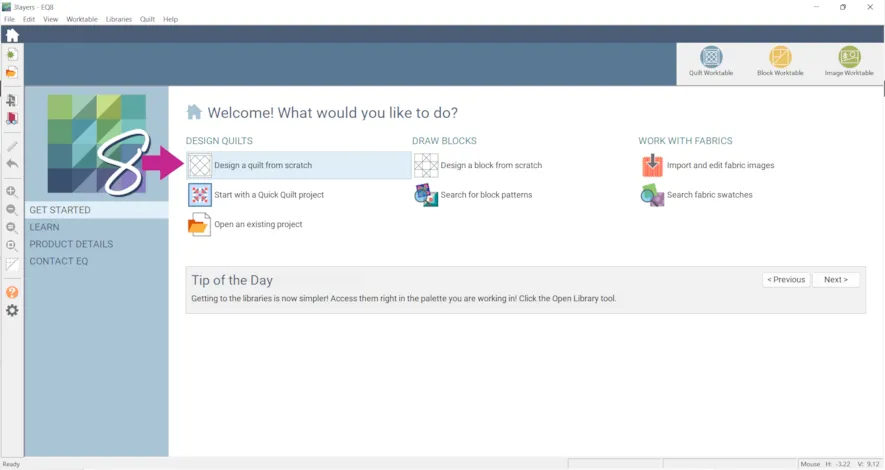
- Open EQ8 and click Design a Quilt from scratch
For this lesson we are using the default layout and border, but you can learn more about Layouts here and more about Borders here. Please note that in EQ8 always works with finished sizes. When you are choosing sizes for blocks, or anything else, EQ8 adds the seam allowance for you.
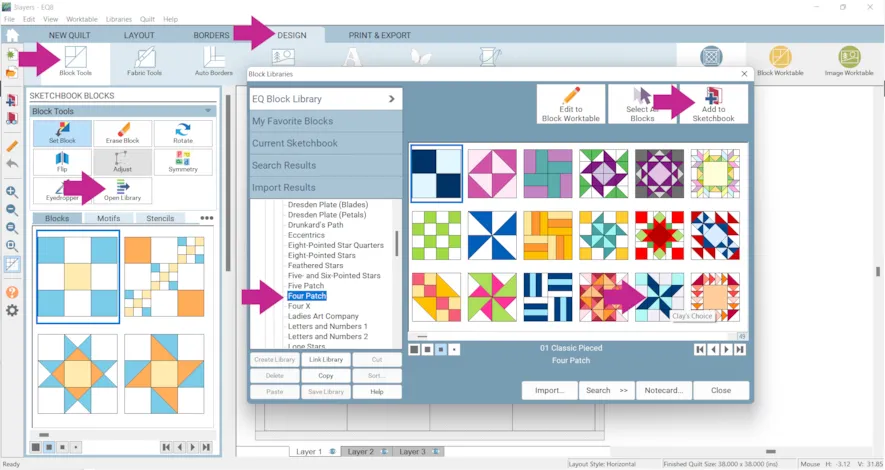
- Click the DESIGN tab > Block Tools > Open Library
- Beside 01 Classic Pieced click the plus sign + to open that category, then click the Four Patch style
- Click on Clay’s Choice and click Add to Sketchbook
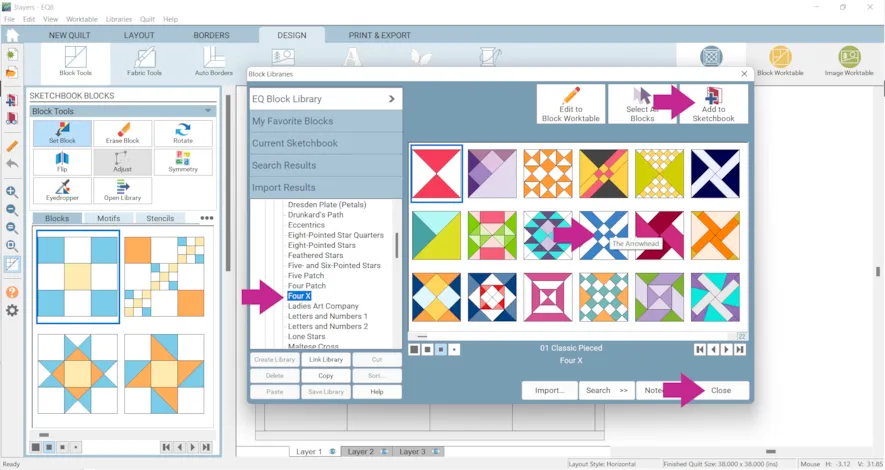
- Click Four X to open that style
- Click on The Arrowhead
- Click Add to Sketchbook
- Click Close
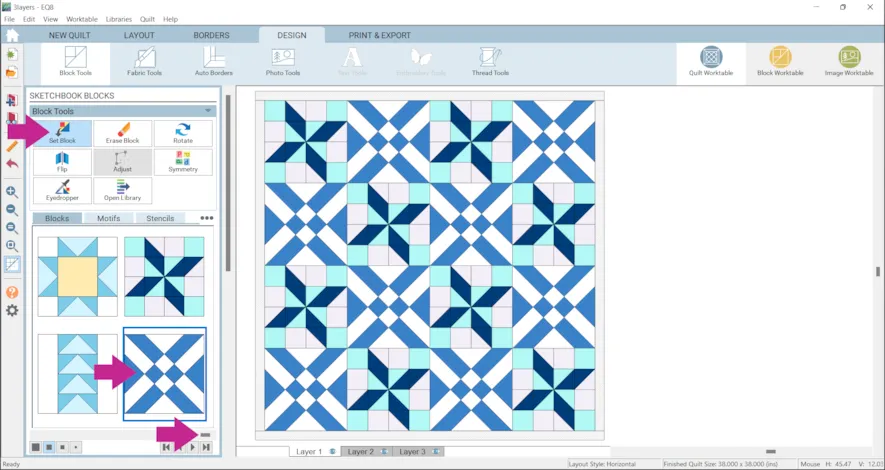
- Click Set Block
- Scroll to the end of all of your blocks to see the new blocks
- Click on one of the new blocks, hold down the Alt/left Option (for Macs) key on your keyboard, and click on a block space in the quilt.
- Repeat with the other block.
For this quilt I want to add half-square triangles to the Clay’s Choice block. - Right click on Clay’s Choice and choose Edit Block. This will open the block on the Block Worktable.
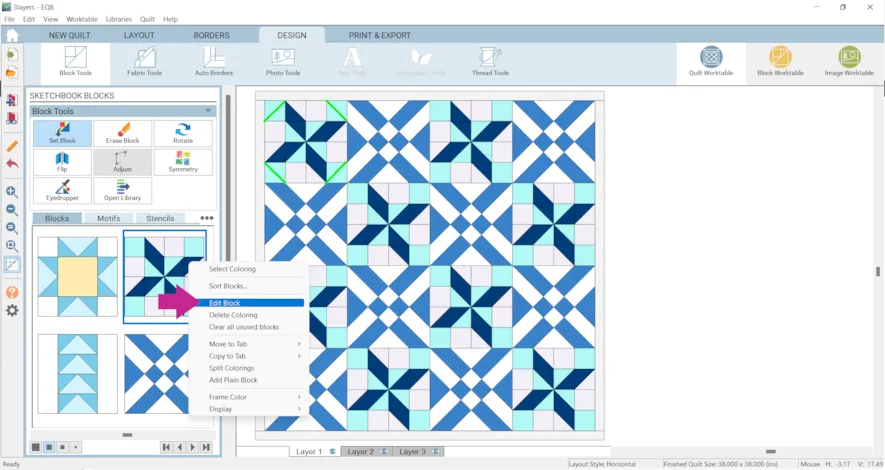 Please note
: Because this block is from the Block Library it will open with appropriate snap settings and size. If you draw your own block you would need to figure out which snap settings and size is best.
- Click the Line tool and draw lines to create HST in the corners of the block.
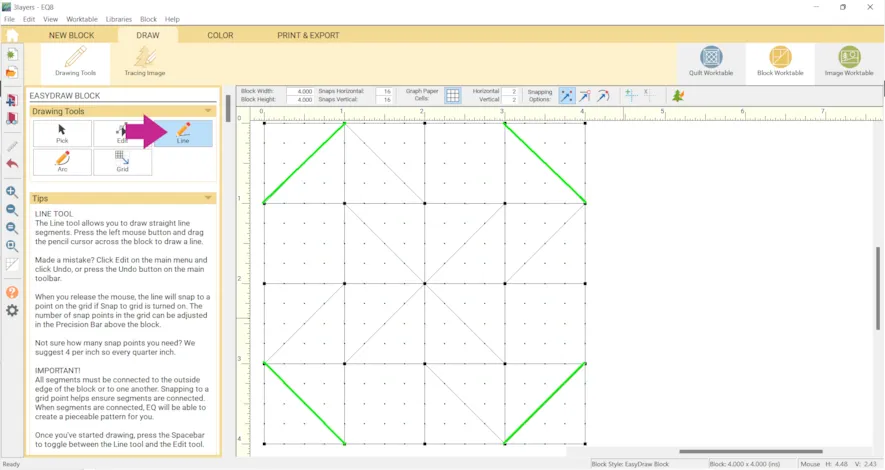
- Click Add to Project Sketchbook
 . If the project is unnamed EQ8 will prompt you to do so. (To be saved, your item needs to be in the Sketchbook AND your project needs to be named. Here is more information.)
Let’s also add some information to the Notecard. - Click View Sketchbook > Blocks
- Click on the edited block
- Click Edit Notecard
- Type in whatever information you would like to edit the notecard.
- Click the X in the upper right corner of the Notecard
- Click Close
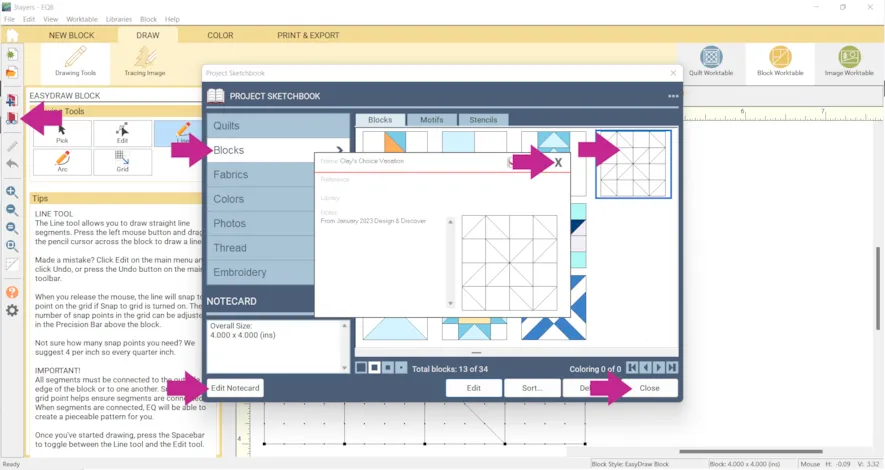
- Click Quilt Worktable
- Click on the new block you drew and hold down the Alt/left Option key on your keyboard.
- Click on a space that has the original Clay’s Choice block.
The new block that replaces it may have a thick outline. That’s ok, it just means it’s uncolored.
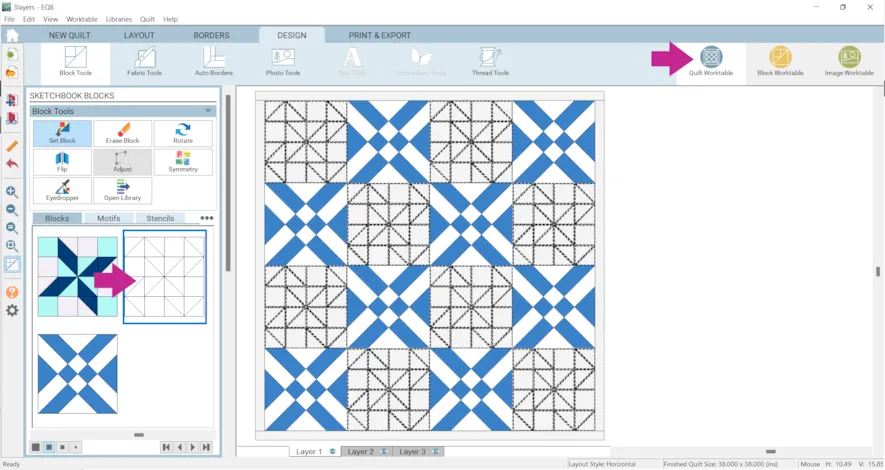
- Click the Fabric Tools and have fun recoloring! Here is more information about how the different coloring tool work.
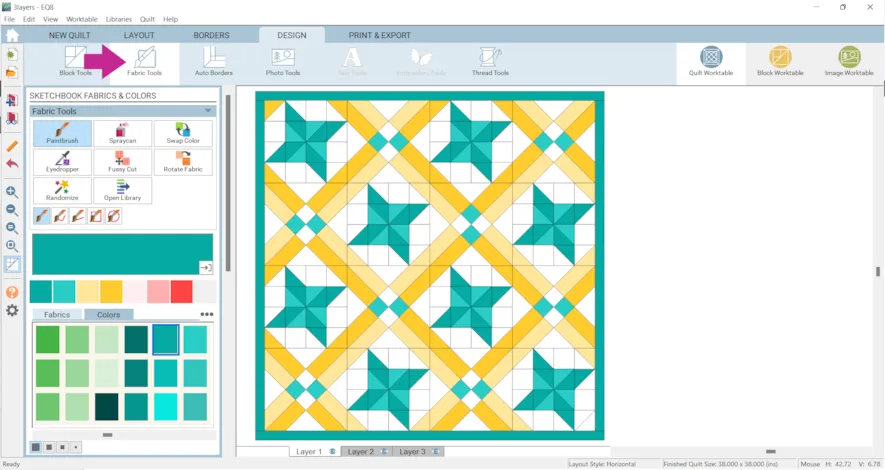
- Click Add to Project Sketchbook
 for any variations you would like to keep.
Now we’re moving on to Layer 2!
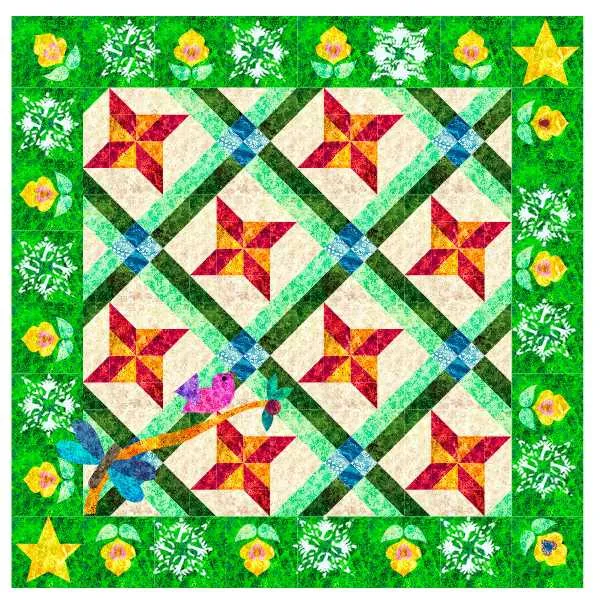
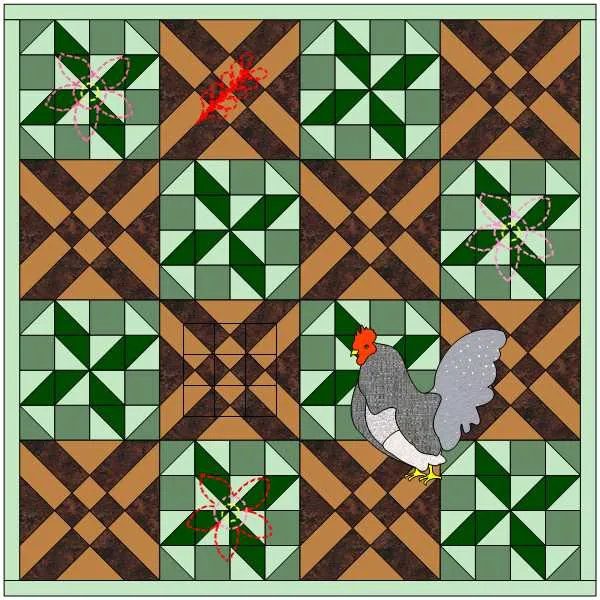
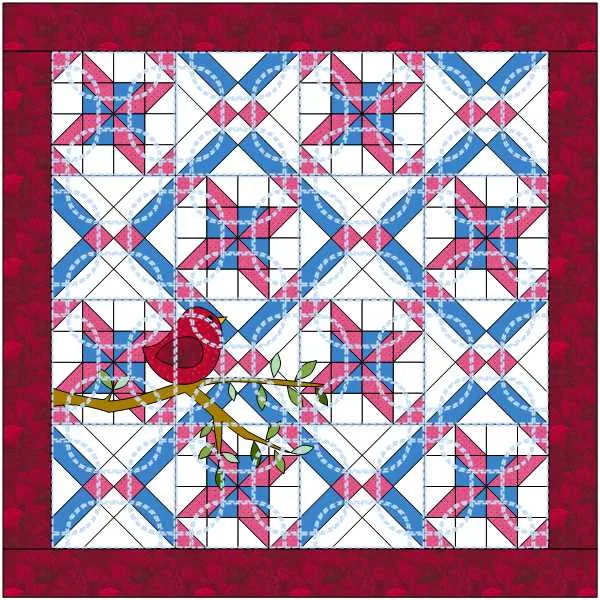
Anything placed on Layer 2 will show up on top of Layer 1. Any block can be placed on Layer 2.
If the block has a background it will display with the background on Layer 2, as shown with the first heart on the left.
However, Motifs do not have backgrounds, so they display as shown with the second heart on the right.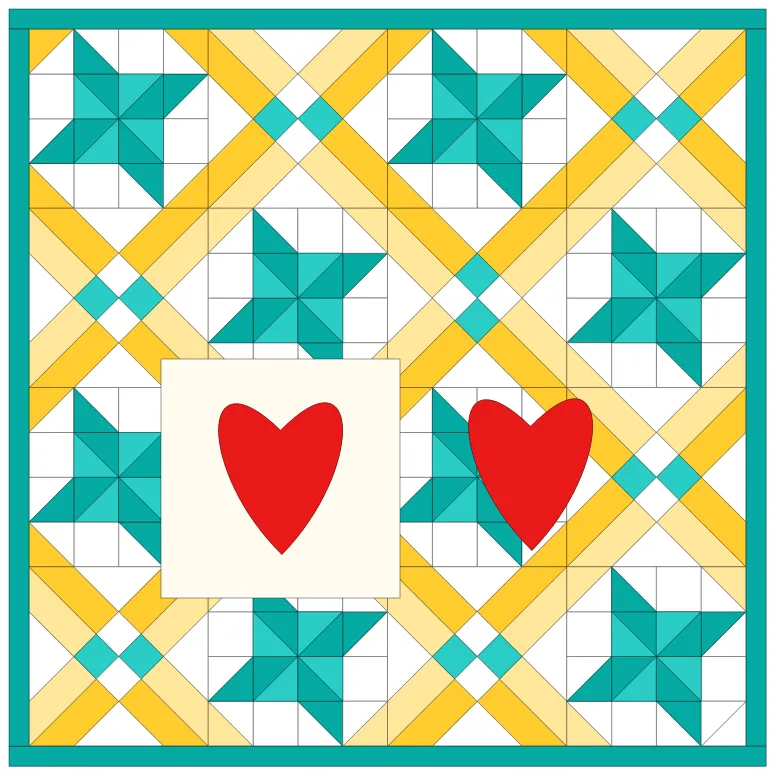
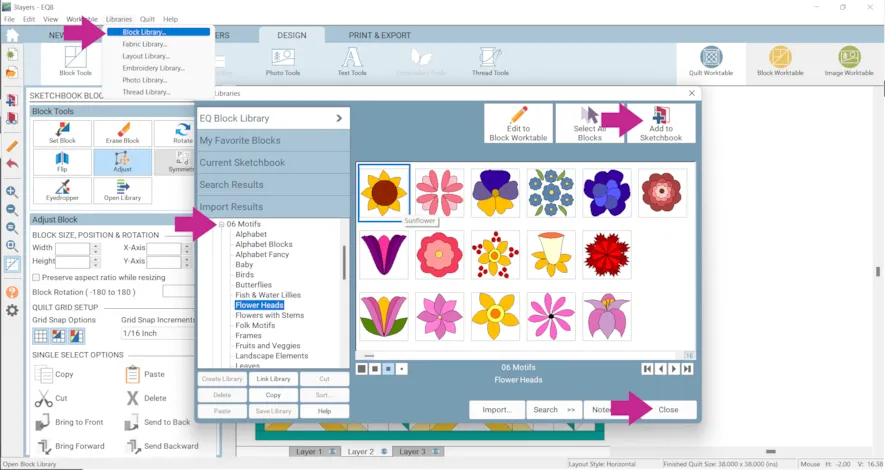
- Click Libraries > Block Library > 06 Motifs
- Choose any motif you would like and click Add to Sketchbook
- Click Close
- Click Block Tools > Set Block > Motifs tab
- Click the Layer 2 tab at the bottom of the screen
- Click on your motif and drag it onto the quilt. Don’t worry about size and location right now.
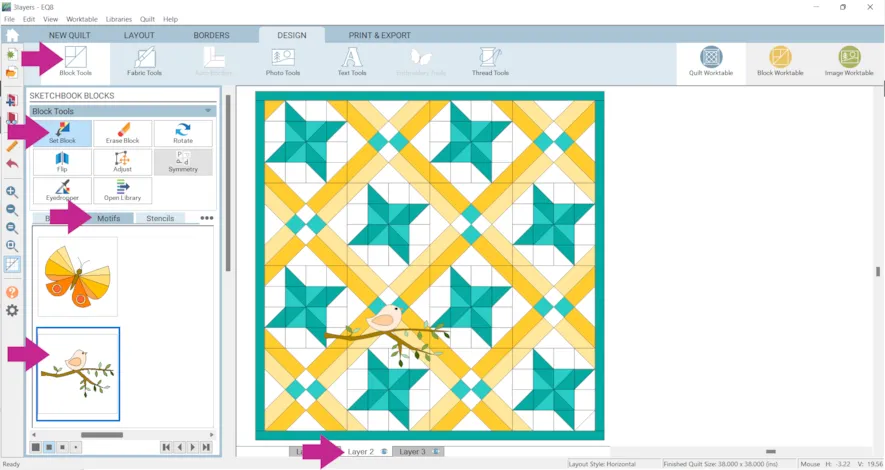
- Click the Adjust tool to change the size and location of the motif.
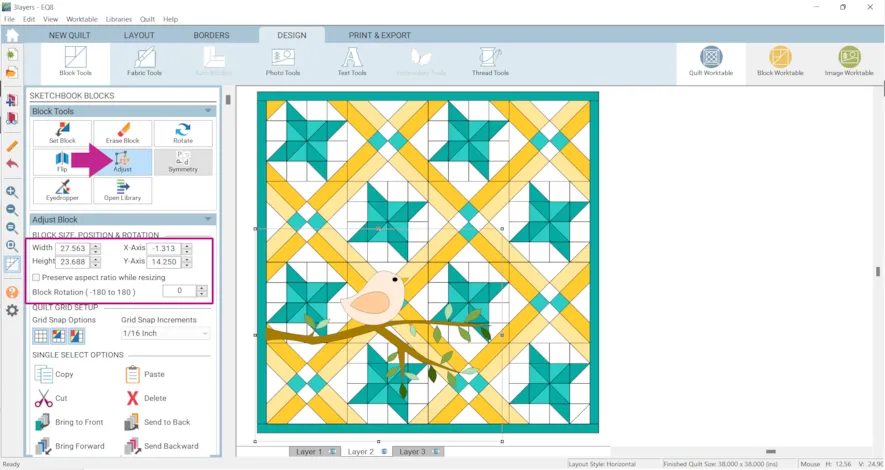
- Click Fabric Tools and recolor. Remember whichever layer you place something on is the layer it will need to be edited on. So, if you want to change something on Layer 1, you need to click the Layer 1 first.
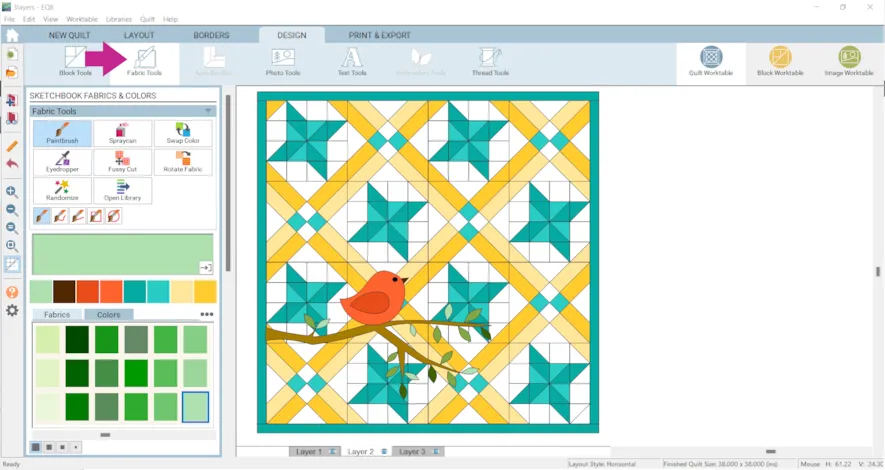
- Click Add to Project Sketchbook
 for any variations you would like to keep.
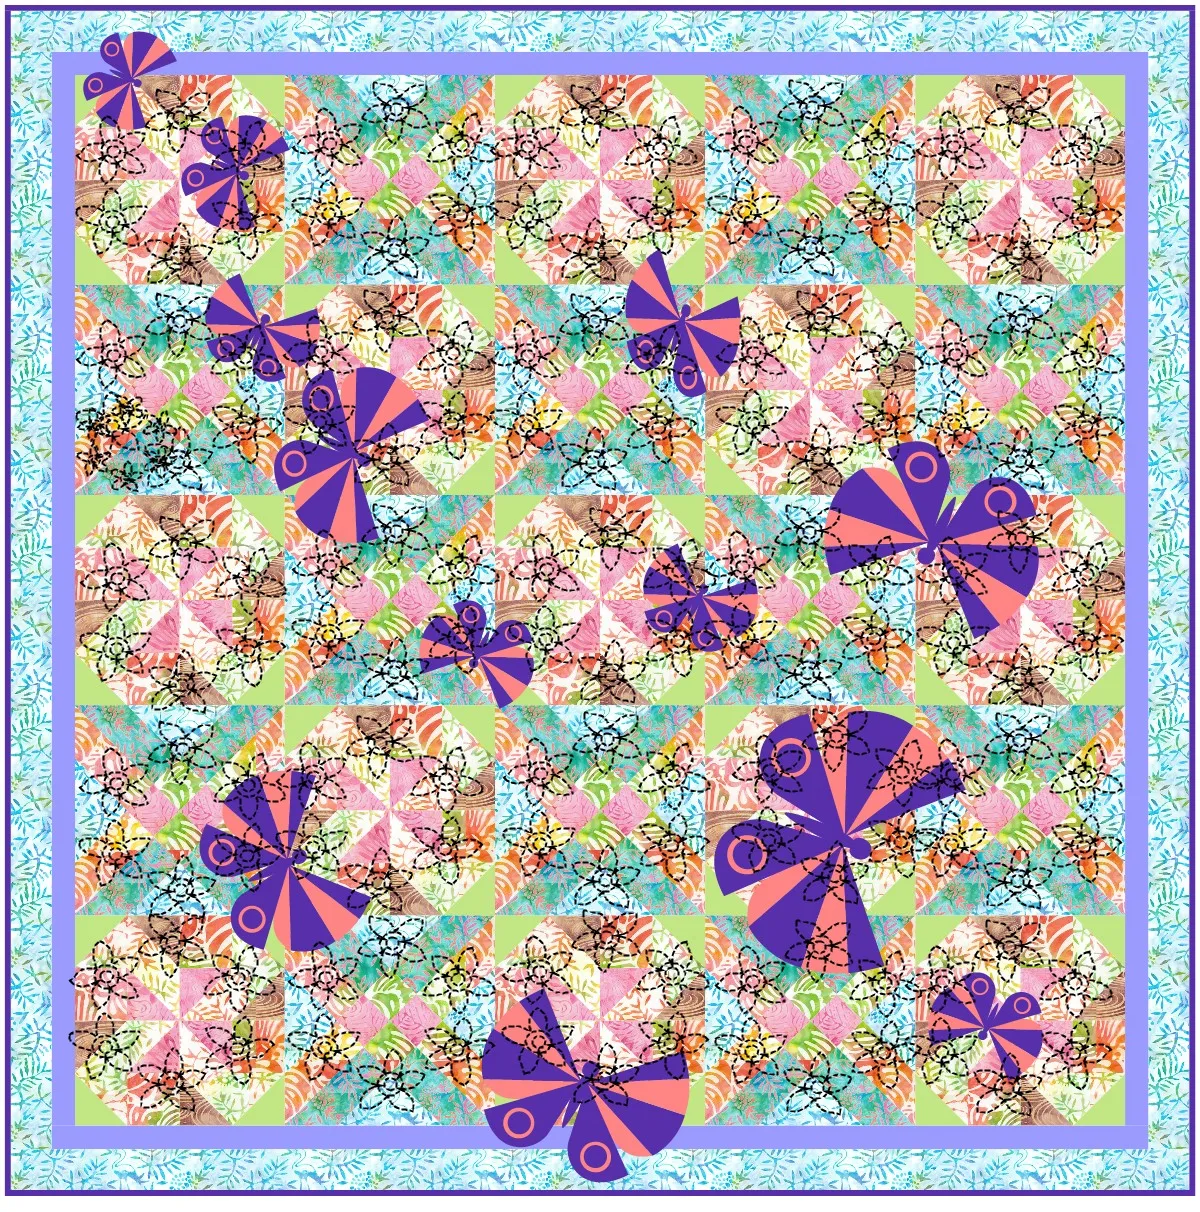
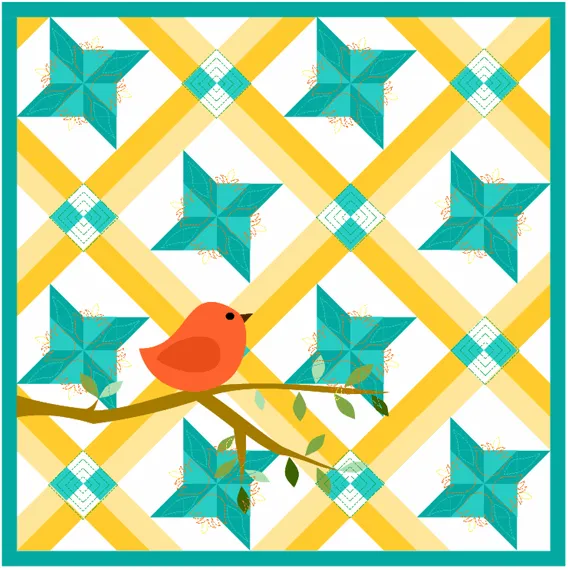
Now we’ll be working with the Layer 3. Anything placed on Layer 3 will display as a quilting stencil.
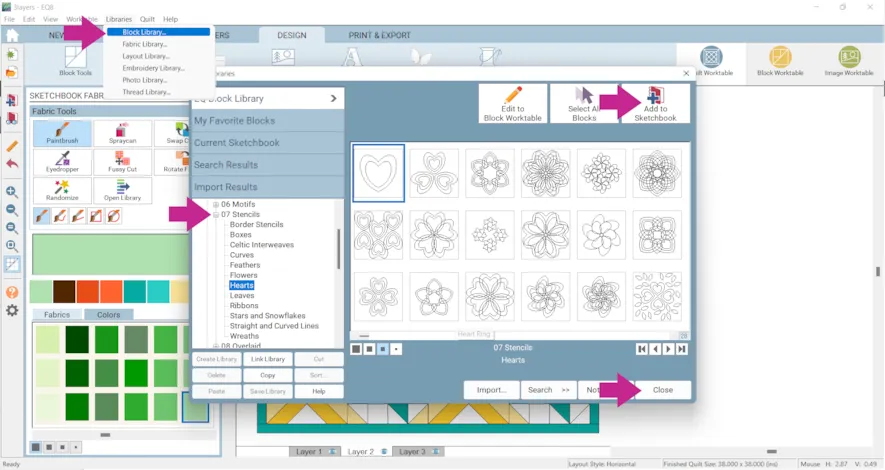
- Click Libraries > Block Library
- Click the plus sign + next to 07 Stencils to open it.
- Choose a few stencils and add them to your Sketchbook.
- Click Close.
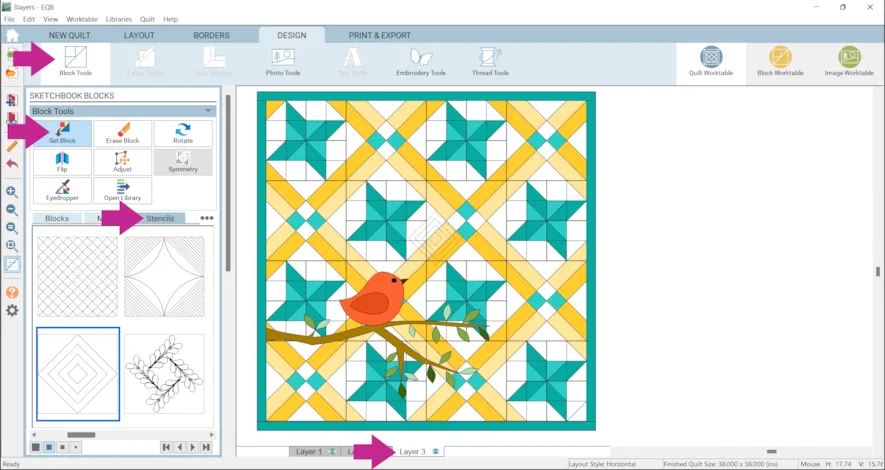
- Click Block Tools > Set Block > Stencils
- Click Layer 3 at the bottom of the screen
- Click on a stencil and drag it onto the quilt
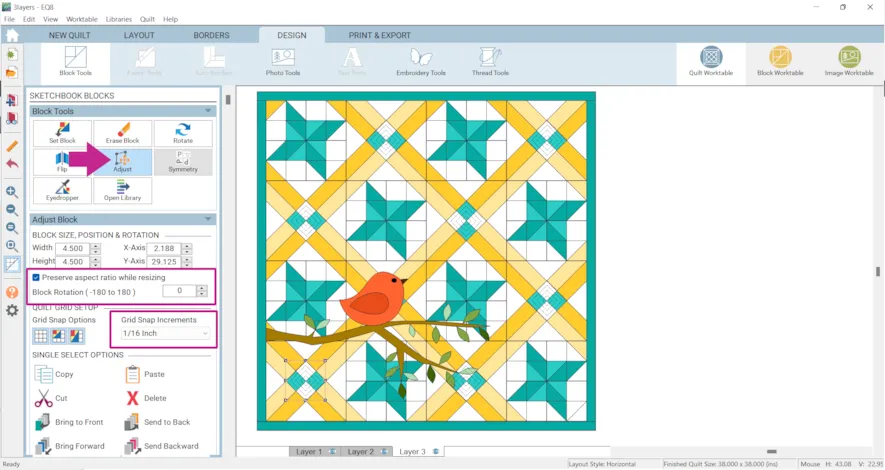
- Click the Adjust tool to move and resize the stencil.
You may want to check Preserve aspect ratio to keep the stencil at the same ratio.
You can also rotate your stencil using the Adjust tool.
If you are having trouble getting your stencil in the right spot, check your Grid Snap Increments.
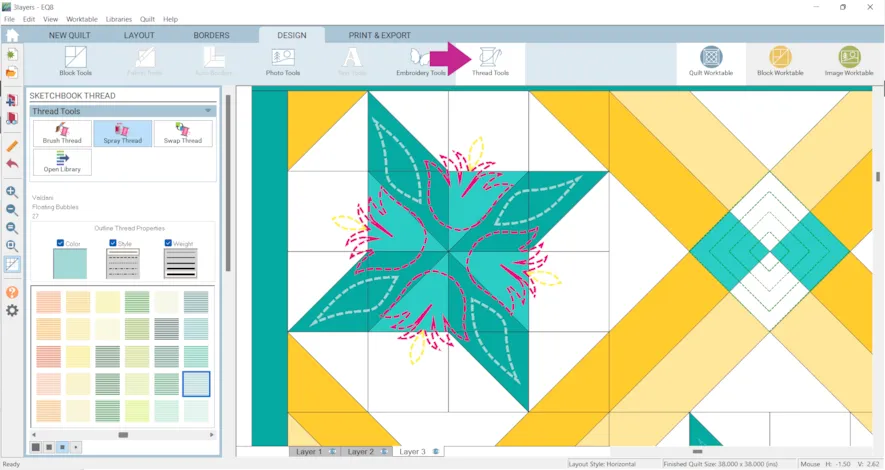
- Click the Thread Tools and recolor the thread as desired. You can also change the weight of the thread and the style.
- Click Add to Project Sketchbook
 when you are done.
- To print click the PRINT & EXPORT tab > Print
Select what you would like to print and make sure you are on the corresponding layer.
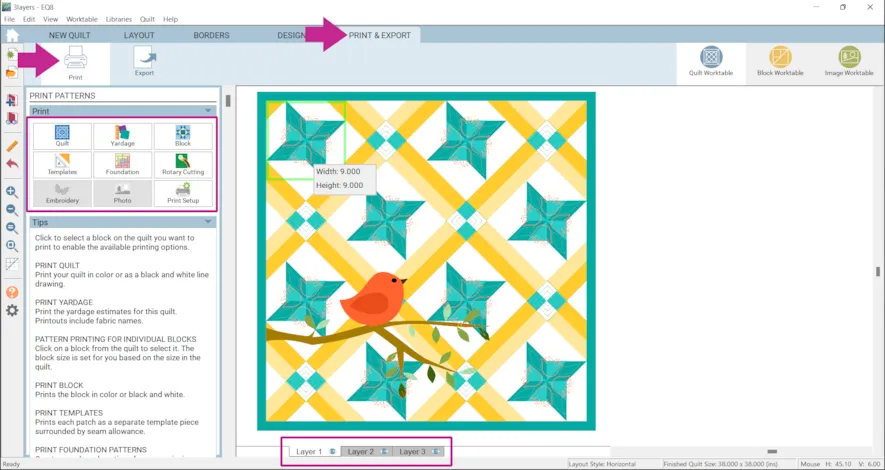
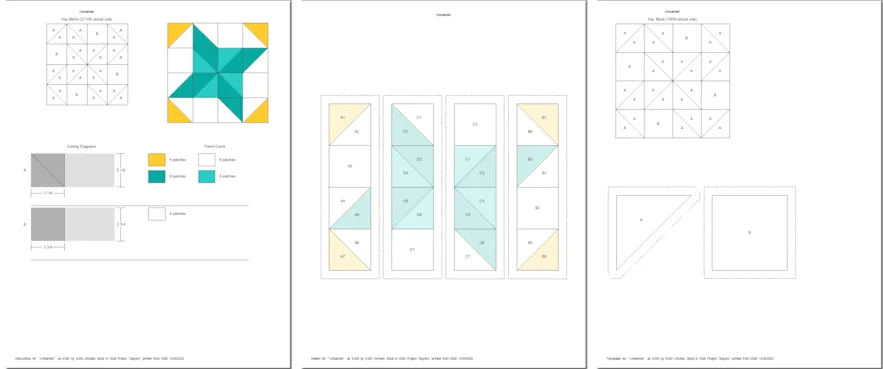
For example, to print the two pieced blocks click on Layer 1 then you can choose to print rotary cutting, foundations or templates.
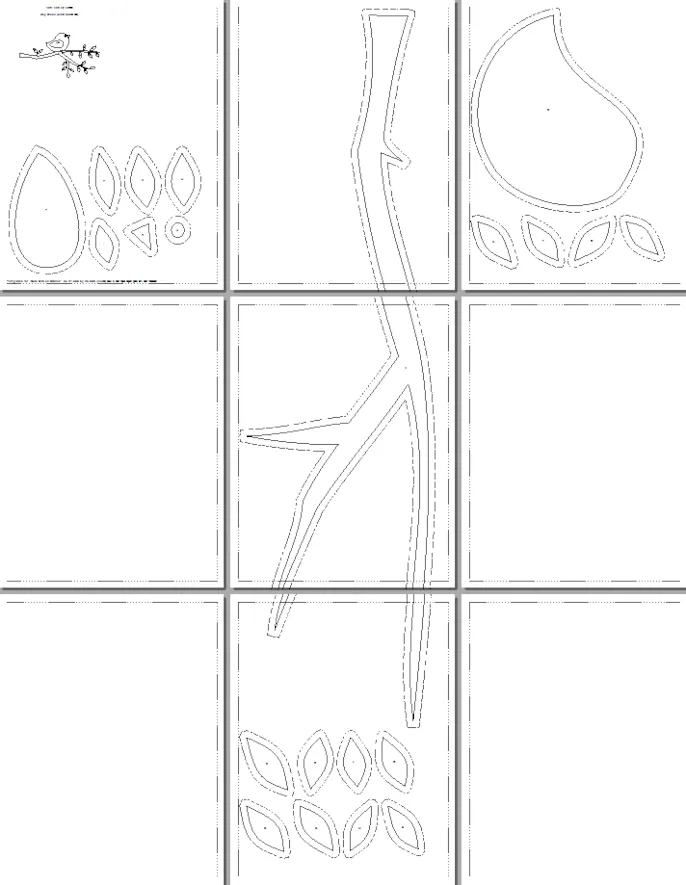
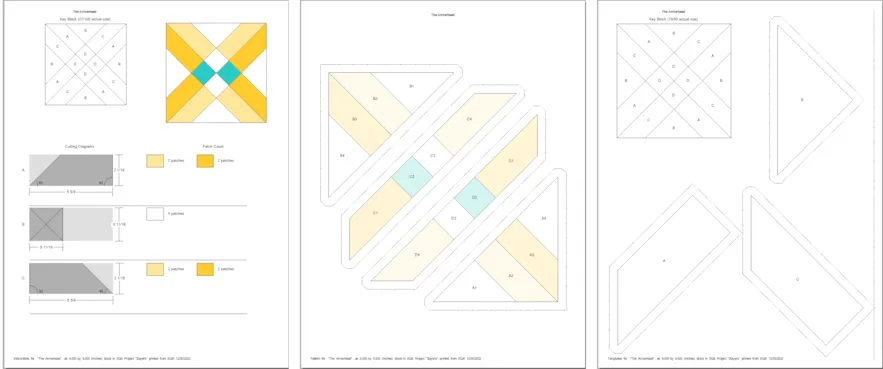 For the motif we placed on Layer 2, click on Layer 2 and then click on Templates. Like in the example below, the template may be very large. Here is how to handle printing large templates.
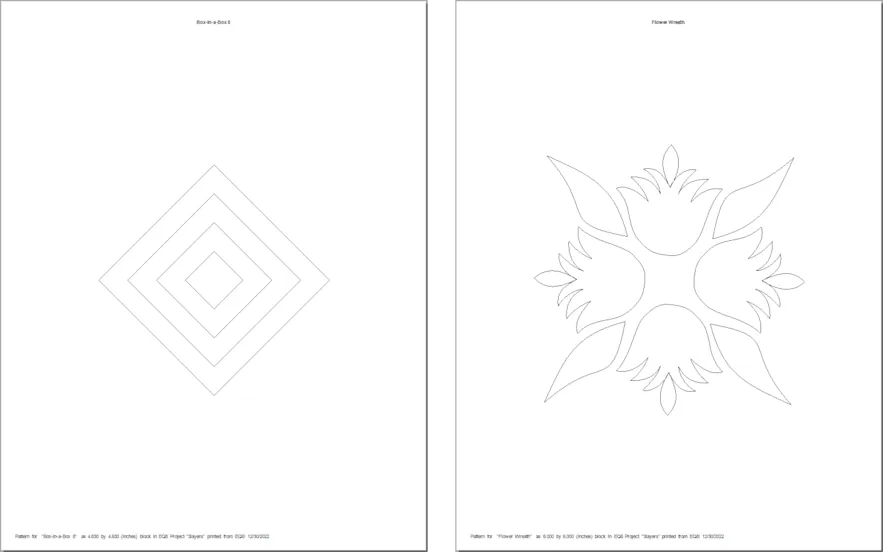
 For the stencils, click on Layer 3 click on a stencil then click Block.
From any layer you can print an image of the quilt by clicking Quilt or the Fabric Yardage Estimate by clicking Yardage.
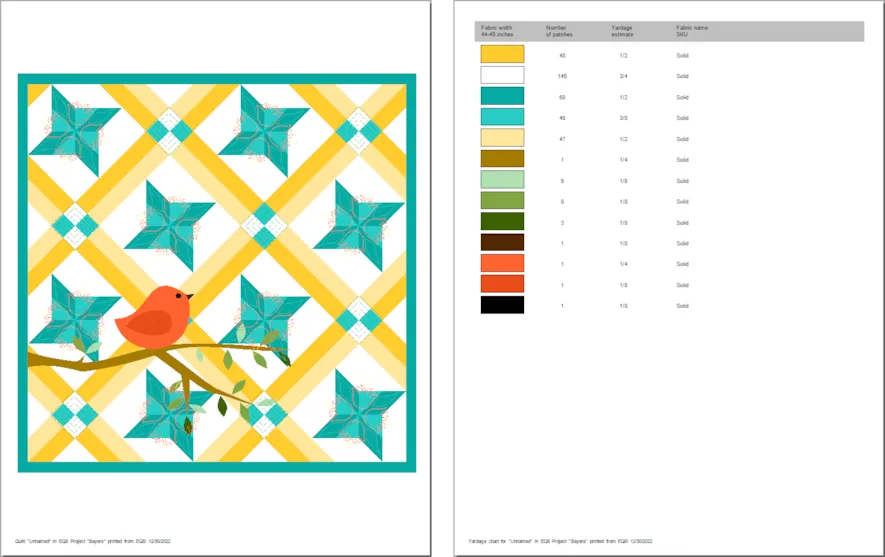
If you want to post images of your quilt, here is how to export the images.
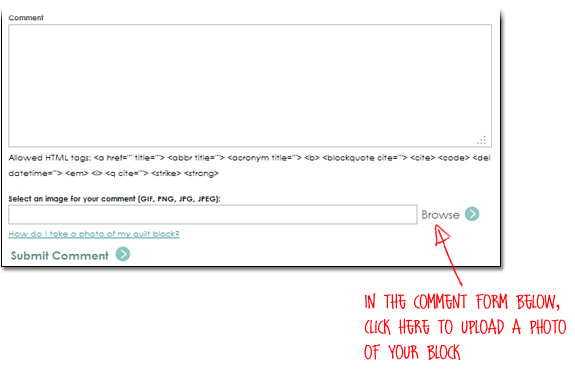
To post your image click to comment on this post. Fill in your info and then click Browse.
Go to: Documents\My EQ8\Images
I can’t wait to see what you’ve done! I hope you enjoyed the lesson!
If you have questions about the lesson feel free to post them below.
If you have questions about something else EQ related, please contact techsupport@electricquilt.com.
If you have suggestions for new Design & Discover lessons feel free to comment below or email Heidi@electricquilt.com.


