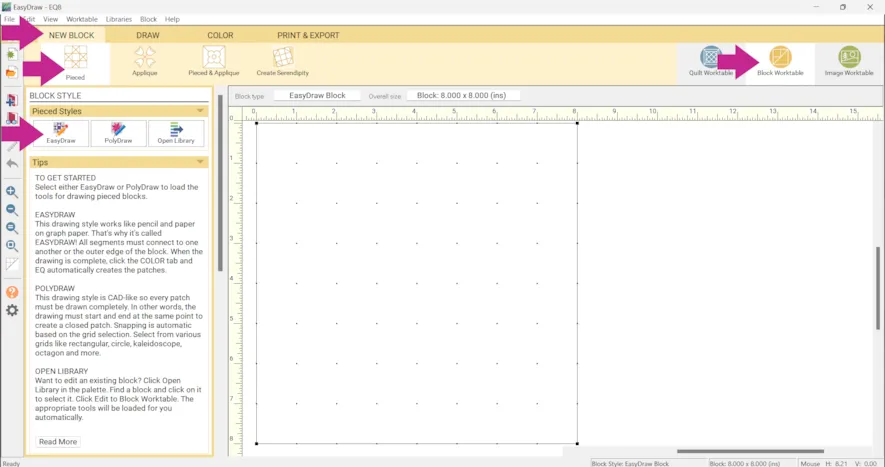
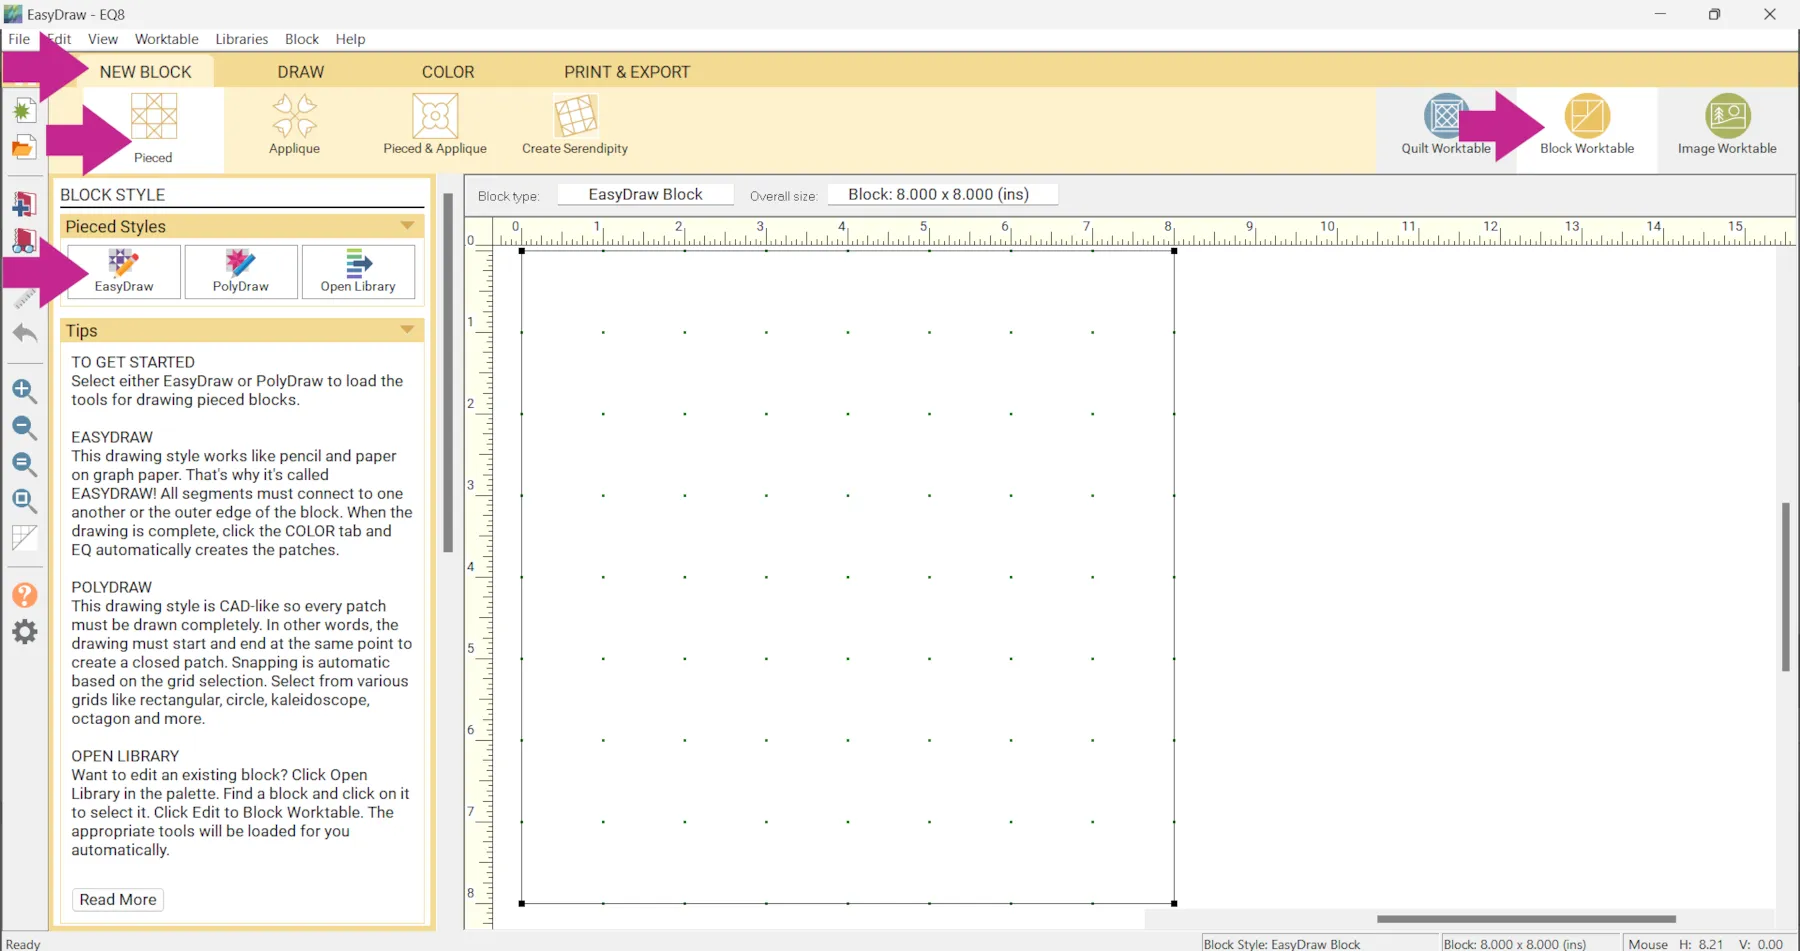
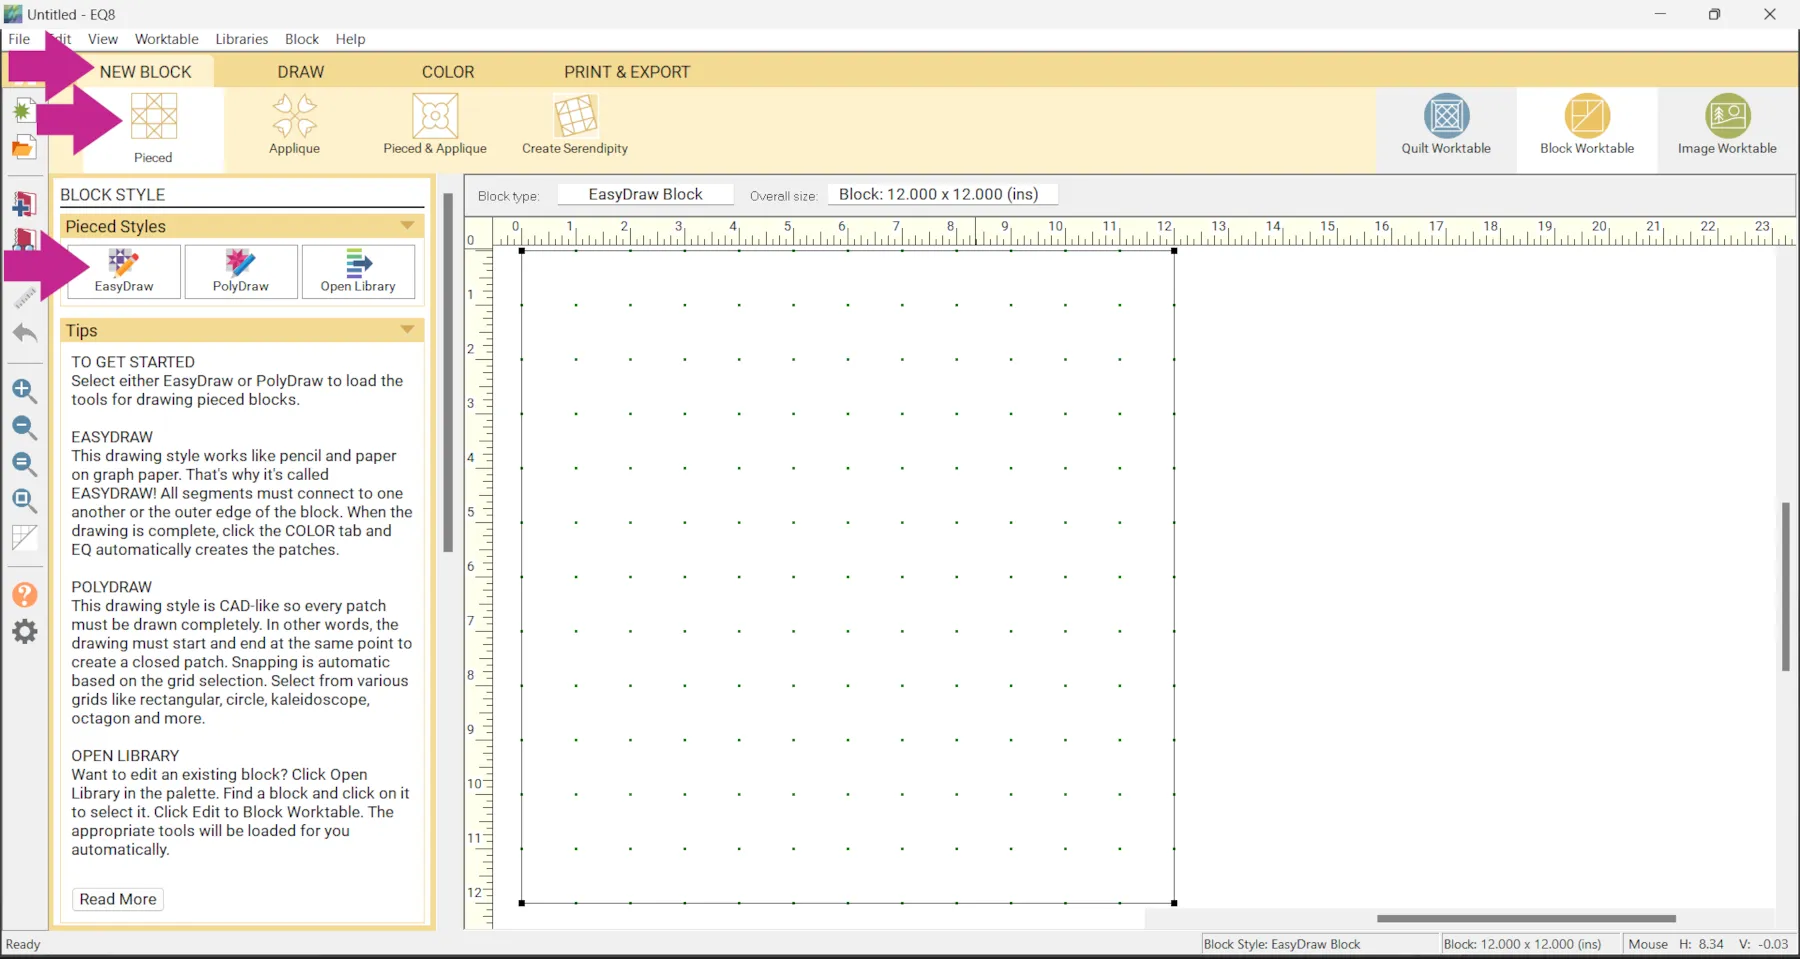
EasyDraw is for pieced blocks. You can also use PolyDraw, or Applique.
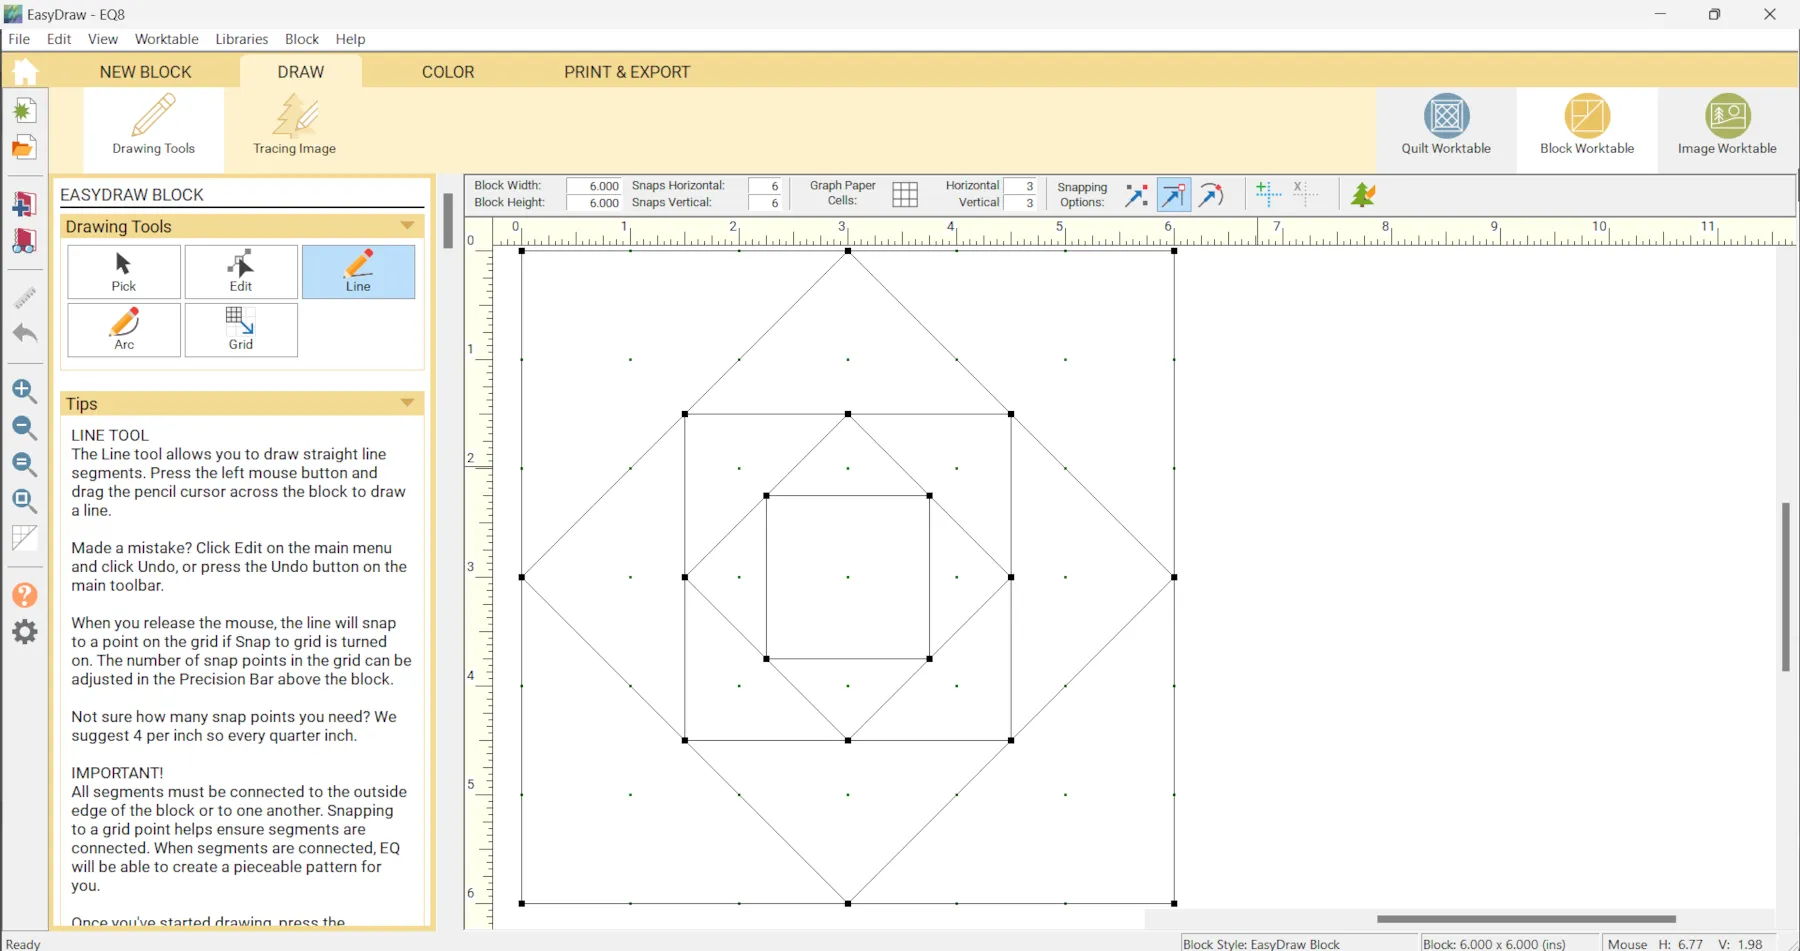
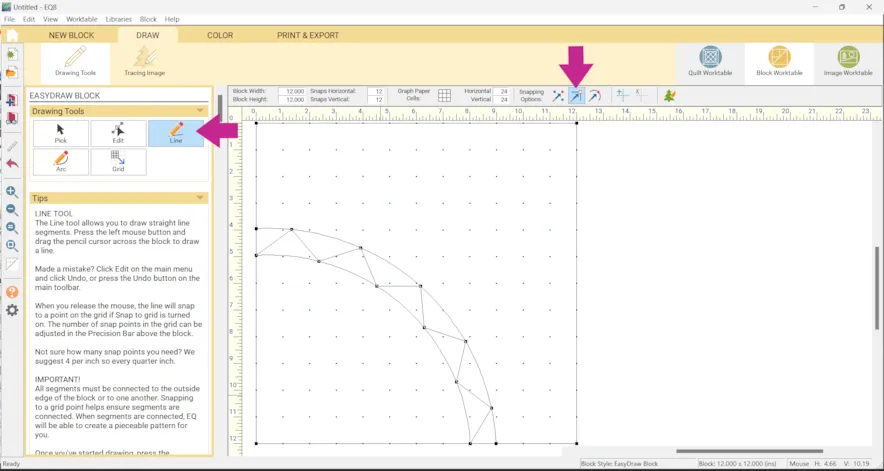
With EasyDraw all the lines must touch each other and/or the edges of the block. Think of your lines as seams.
For example, in the first block the lines do not touch the edges. The center pieces are “floating”. When you click the COLOR tab you won’t see the diamond.
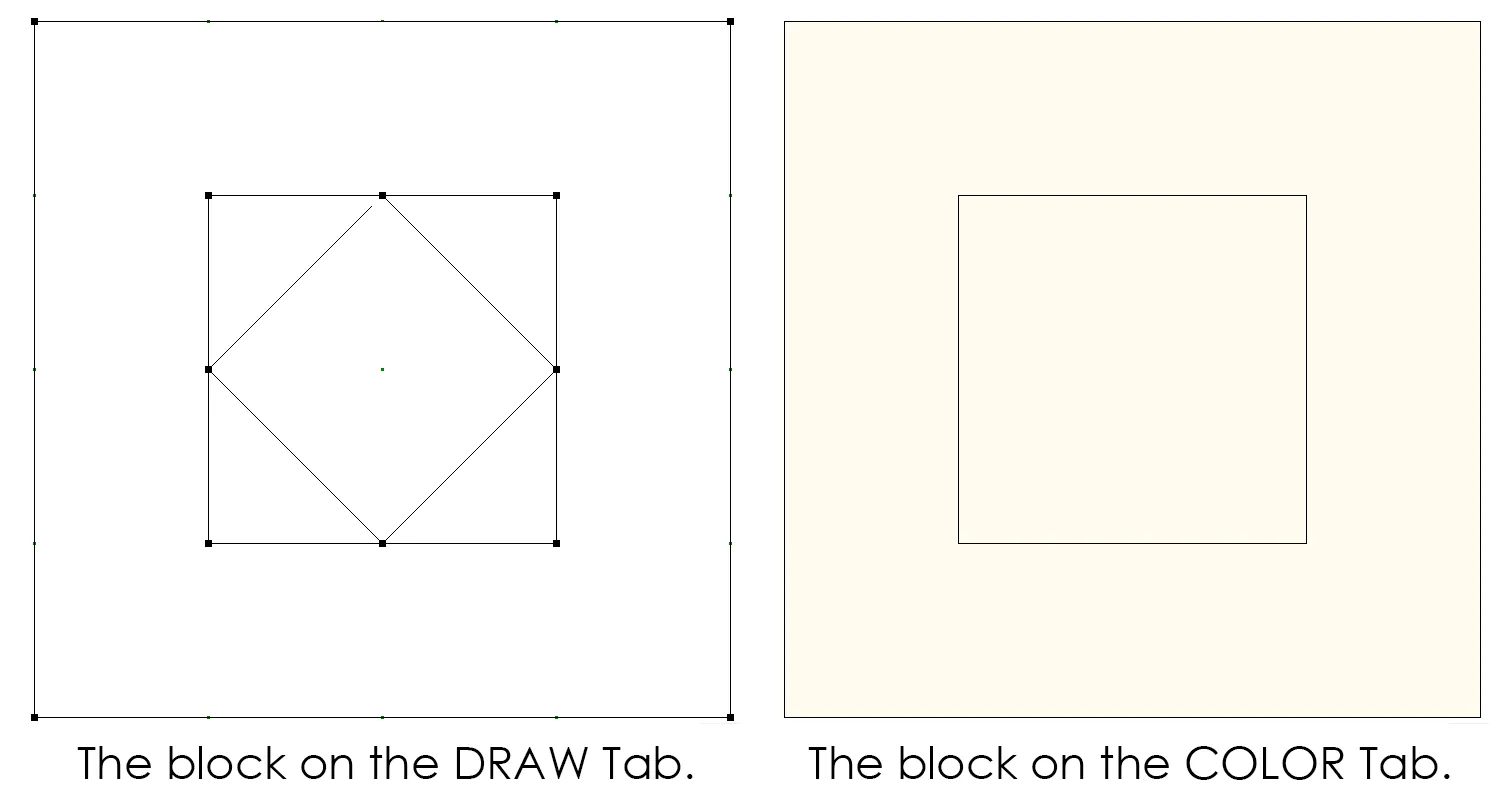
You couldn’t piece the first block, so you can’t draw it that way in EasyDraw either!
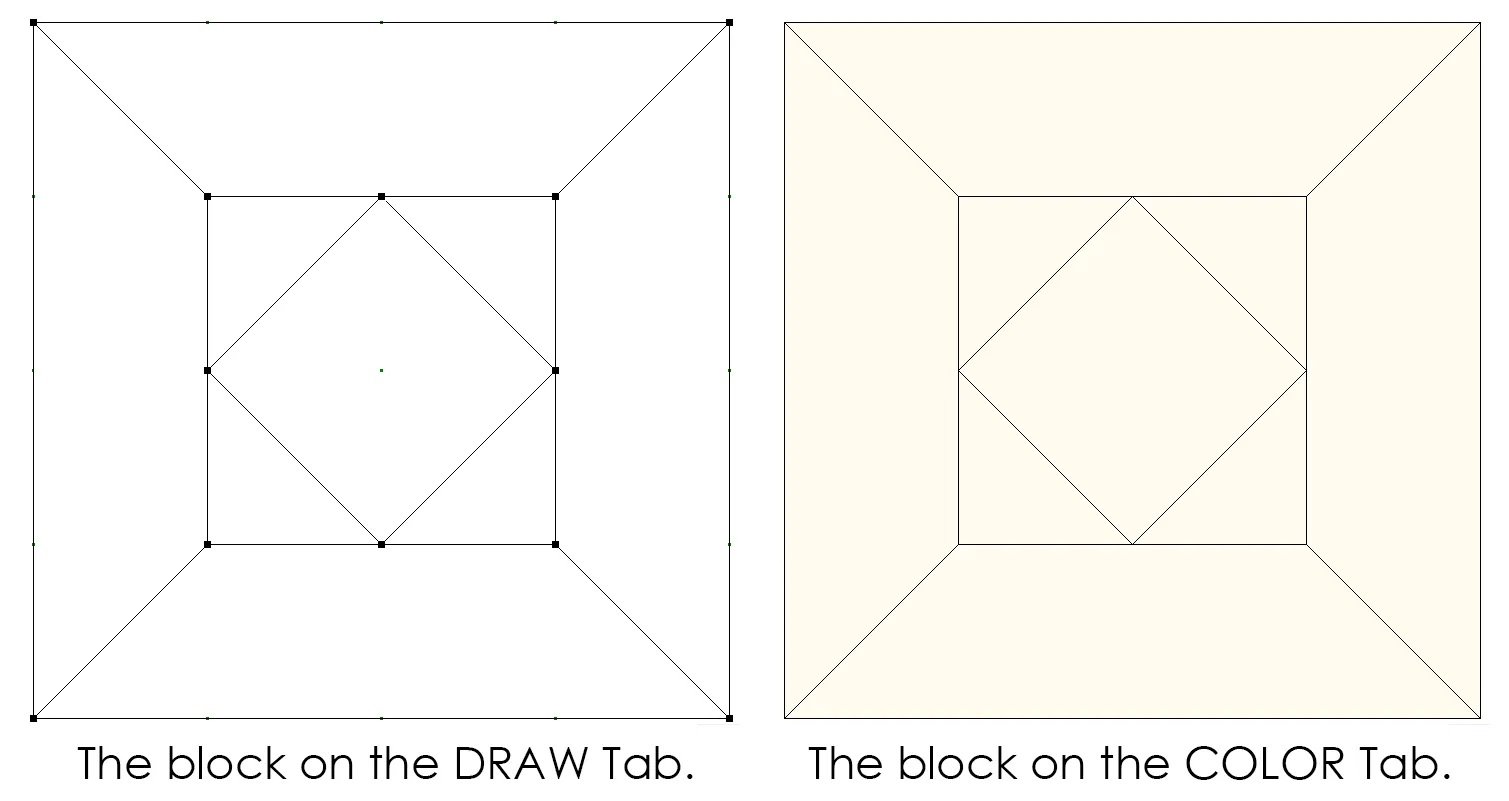
In the second block, lines are added. Now, you could sew it, and it appears correctly on the COLOR tab.
There are a few other things you want to consider BEFORE you start drawing your block: the block size and the precision bar settings.
Block Size
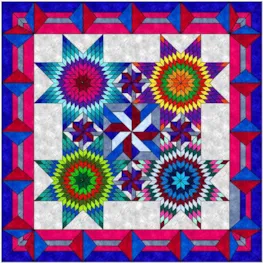
Let’s say you want to draw the log cabin block below and want the finished block to be 12 inches x 12 inches.
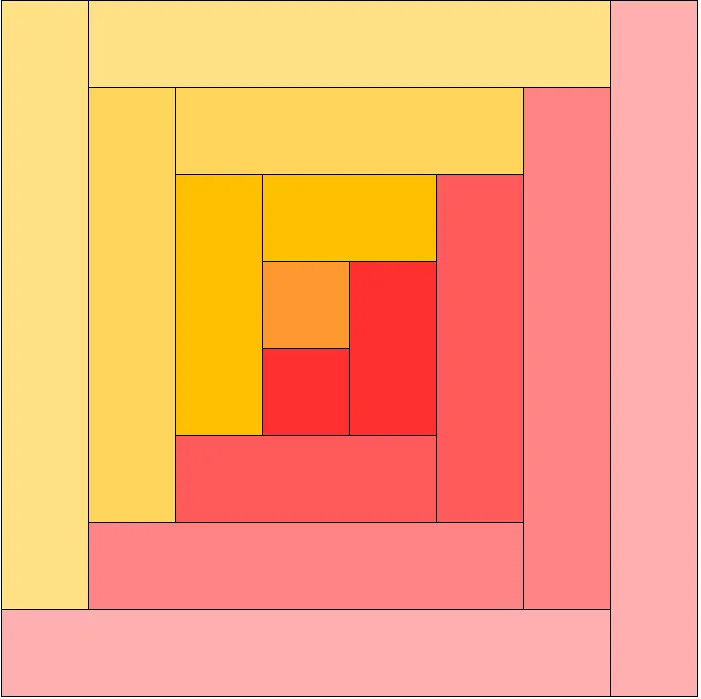
If you analyze the block a little you will see that it’s based on an 8 x 8 grid.
So, it will be easier to draw the block at 8 inches x 8 inches than at 12 x 12.
Even if you draw the block at 8 x 8, when you set the block in a quilt, it will automatically resize to the layout size of the quilt, meaning that’s where you could set your block size on the LAYOUT tab to 12 x 12 for this example.
Or, if you are planning on printing it from the Block Worktable you can change the size of the block when you print.
Another option is just to change the size of the block once you’re done drawing it.
But, the point is, draw the block at the size that works the best for that particular block, not the finished size you want!
Here are a few more examples…
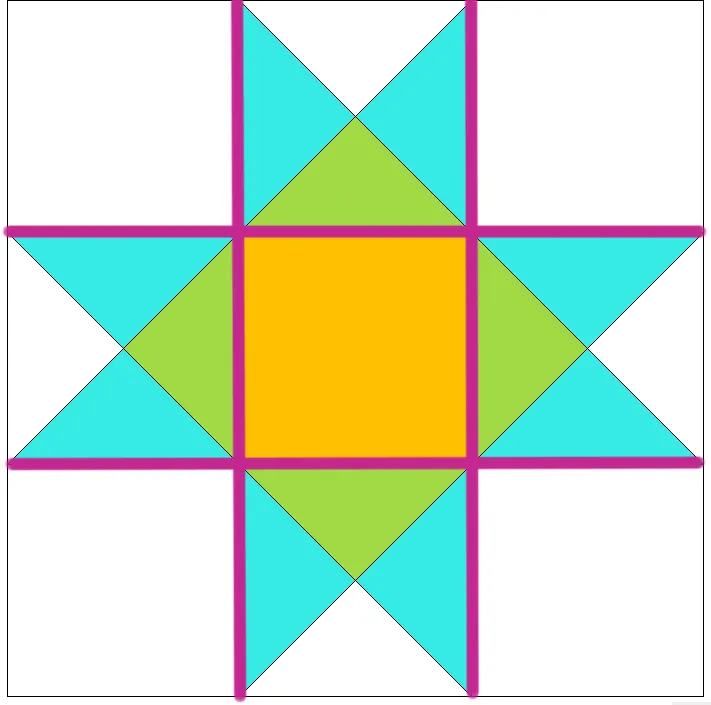
This blocks is based on a 3 x 3 grid. You would want to draw the block at 3 x 3 or at dimensions that are multiples of 3.
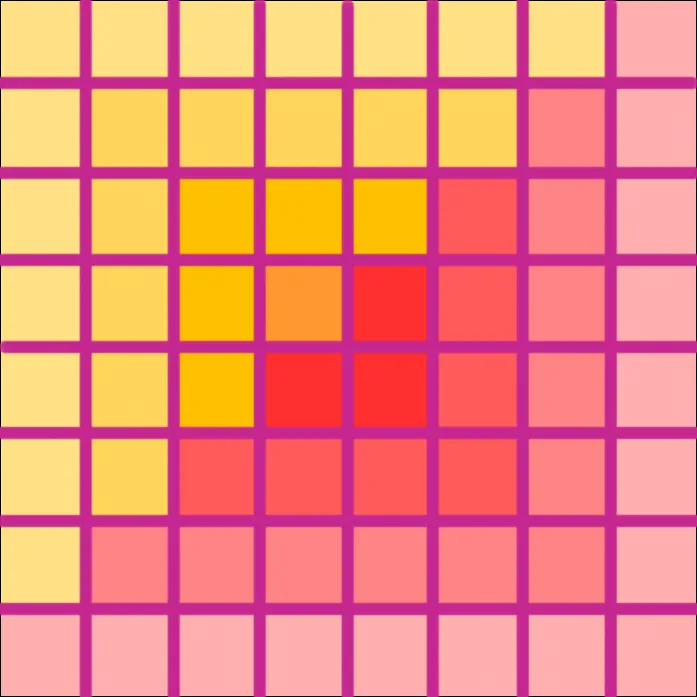
This blocks is based on a 6 x 6 grid. You would want to draw the block at 6 x 6 or at dimensions that are multiples of 6.
Let’s practice with the log cabin block.
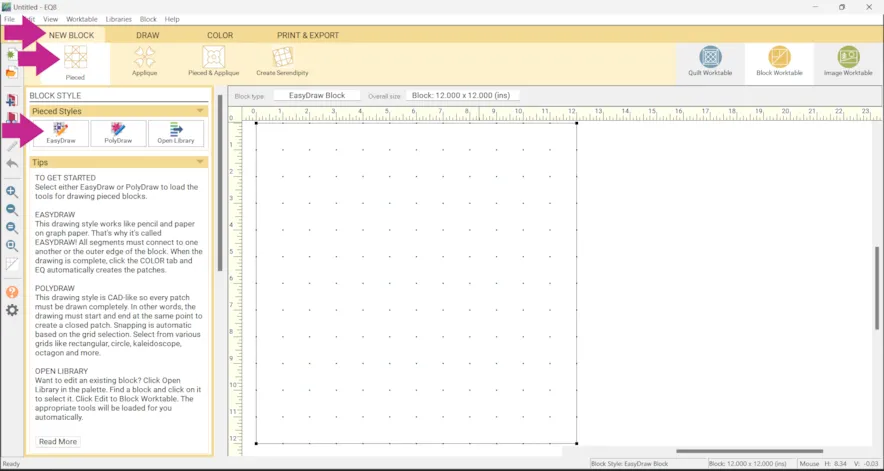
- Click Block Worktable > NEW BLOCK > Pieced > EasyDraw
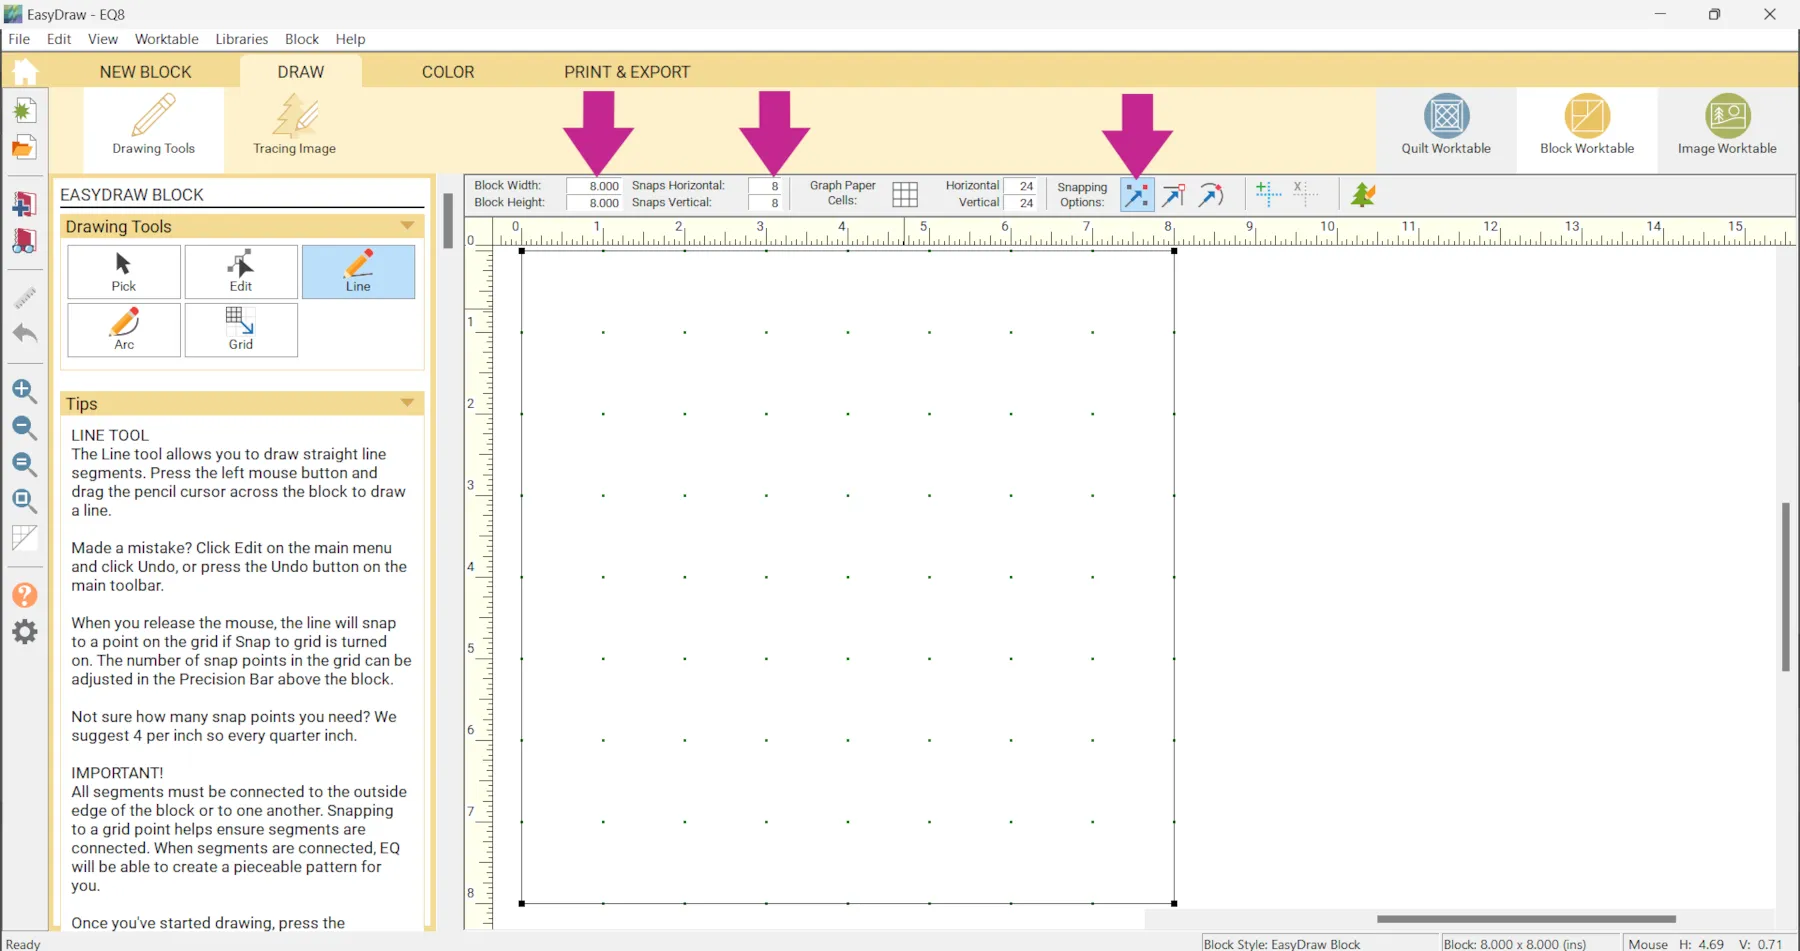
- Under Block Width and Block Height make the block 8 x 8
Precision Bar Settings - Under Snaps Horizontal and Snaps Vertical enter 8 x 8
- Turn Snap to grid points on worktable ON
With these settings the lines will snap to every inch.
Once you have the correct set up, the lines will literally just pop into place! (Then you can click on the COLOR tab to color it as well!)
Click Add to Project Sketchbook  for any variations you would like to keep. If the project is unnamed, EQ8 will prompt you to do so. (To be saved, your item needs to be in the Sketchbook AND your project needs to be named. Here is more information.)
What if you wanted other snapping options for an 8 x 8 block?
- If you wanted to draw lines at the half inch marks you could set your snaps to 16 x 16 (8 x 2)
- If you wanted to draw lines at the quarter inch marks you could set your snaps to 32 x 32 (8 x 4)
- If you wanted to draw lines at the two inch marks you could set your snaps to 4 x 4 (8 ÷ 2)
What if your block was 5 x 3, for example?
- If you wanted to draw lines at the inch marks you could set your snaps to 5 x 3 (5 x 1, 3 x 1)
- If you wanted to draw lines at the half inch marks you could set your snaps to 10 x 6 (5 x 2, 3 x 2)
- If you wanted to draw lines at the quarter inch marks you could set your snaps to 20 x 12 (5 x 4, 3 x 4)
- In this case you wouldn’t be able to set the lines to snap to the 2 inch mark because 5 ÷ 2 = 2.5 and 3 ÷ 2 is 1.5 and you can’t enter decimals or fractions as snap settings. The best option would be to set the snaps to 5 x 3 and start your lines close to the 2 inch increments.
Something else to check out is the Graph Paper Cells. You can turn them off and on and adjust the Horizontal and Vertical settings. But, this only controls the graph paper, or guide lines; it does not effect how the lines snap. In the example below my Graph Paper is set to 3 x 3 but my snaps are set to 8 x 8. If I try to draw a line at 2 2/3 inches (where the first grid line is) it will snap to the 3 inch mark. (Also, the graph paper is there to help you, but will not appear on printouts, nor is a part of the block drawing.)
EasyDraw Tools
Take a look at the EasyDraw tools…
Pick Tool
Edit Tool
Line Tool
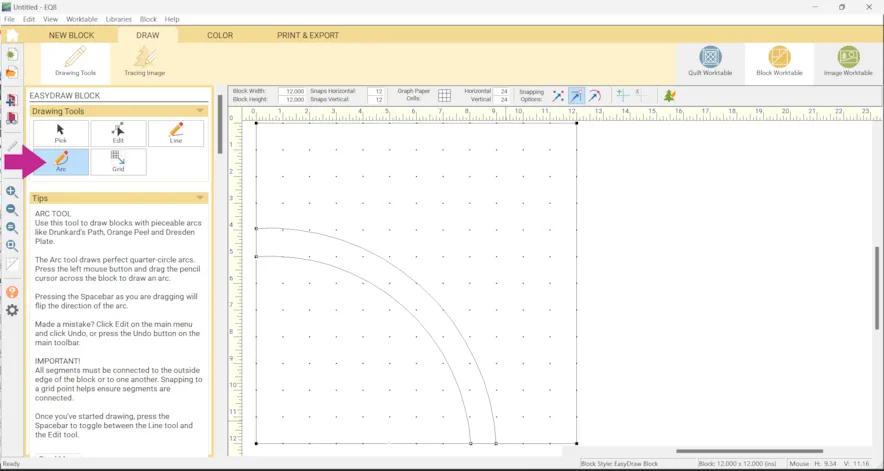
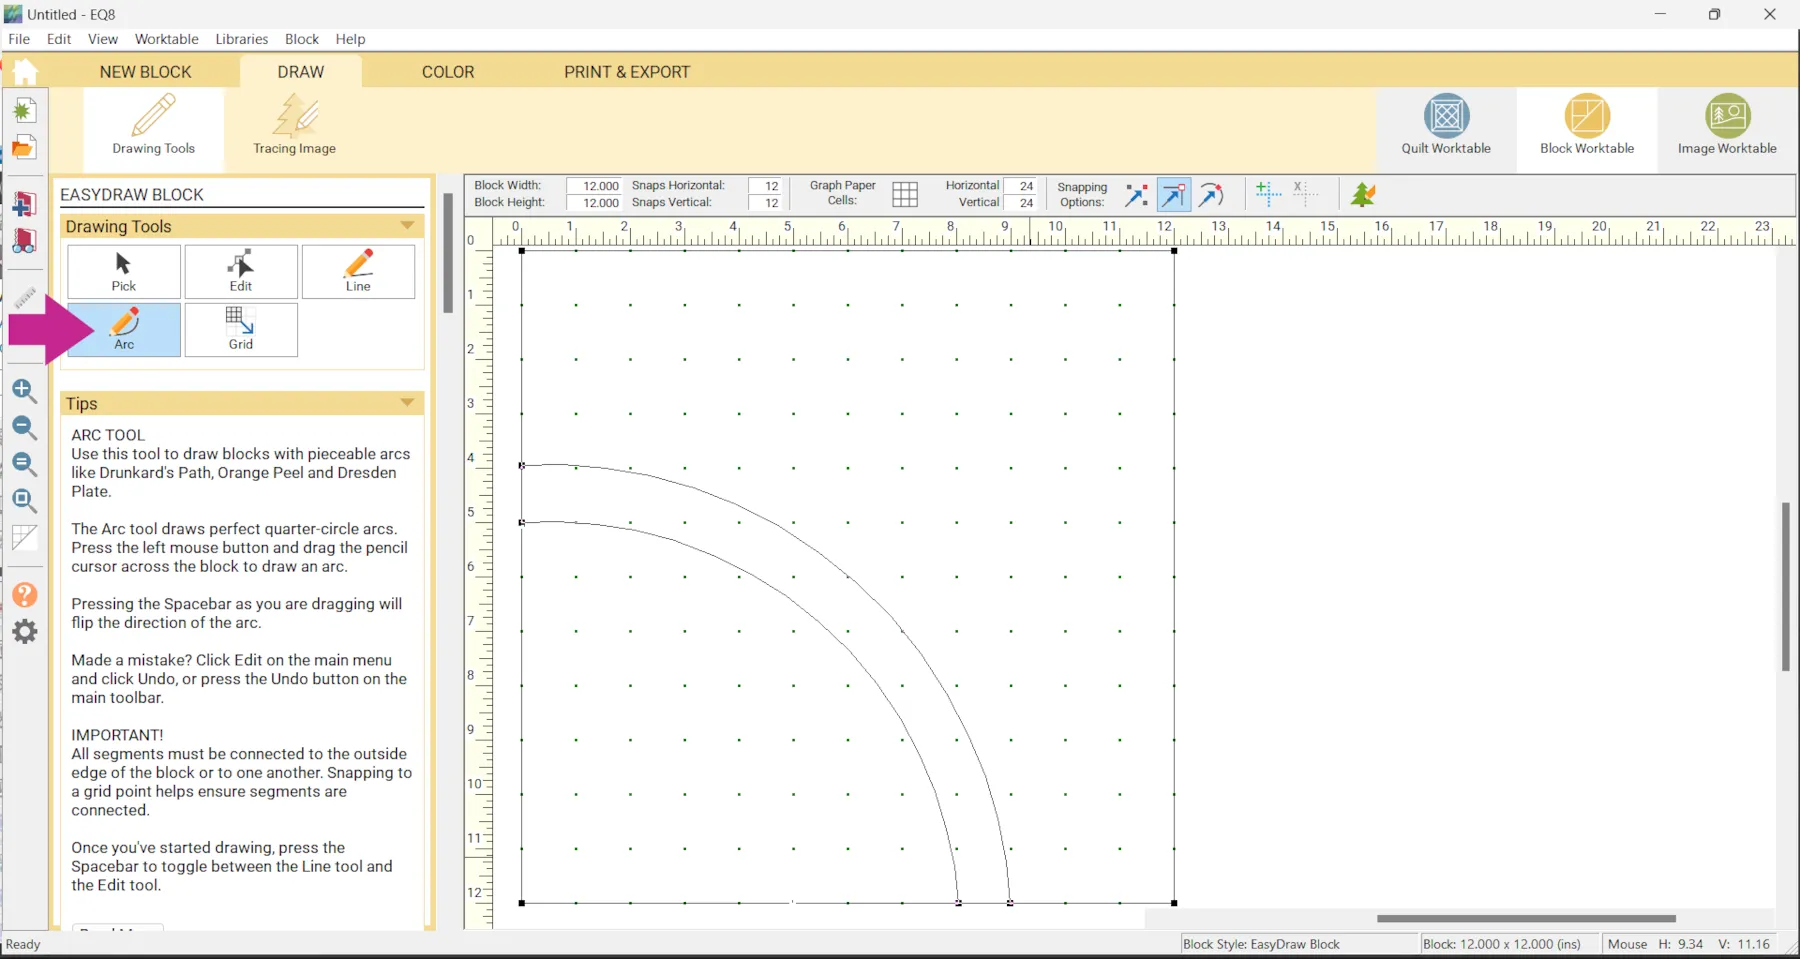
Arc Tool
Grid Tool
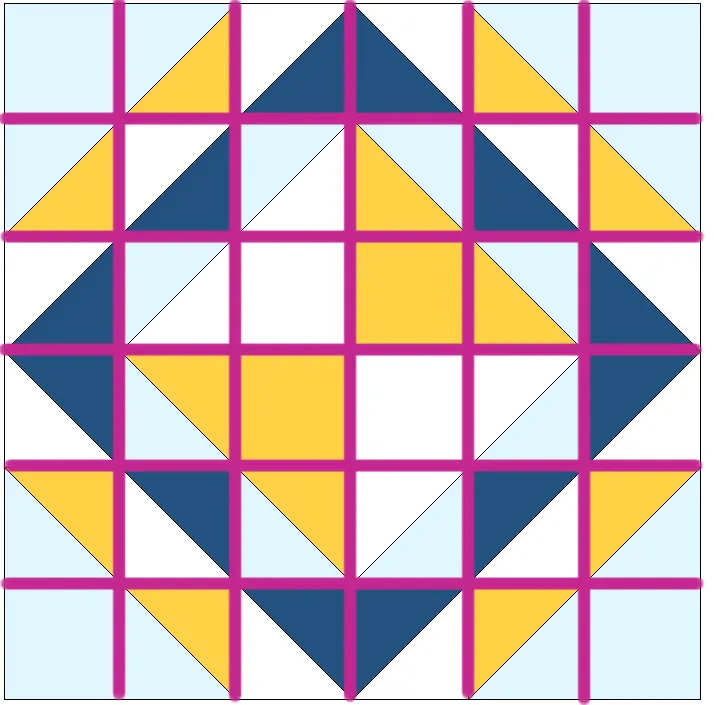
The Edit tool is sometimes overlooked and can be very helpful, especially for blocks you may not be able to see the grid for. Let’s use the Edit tool to draw the block below.

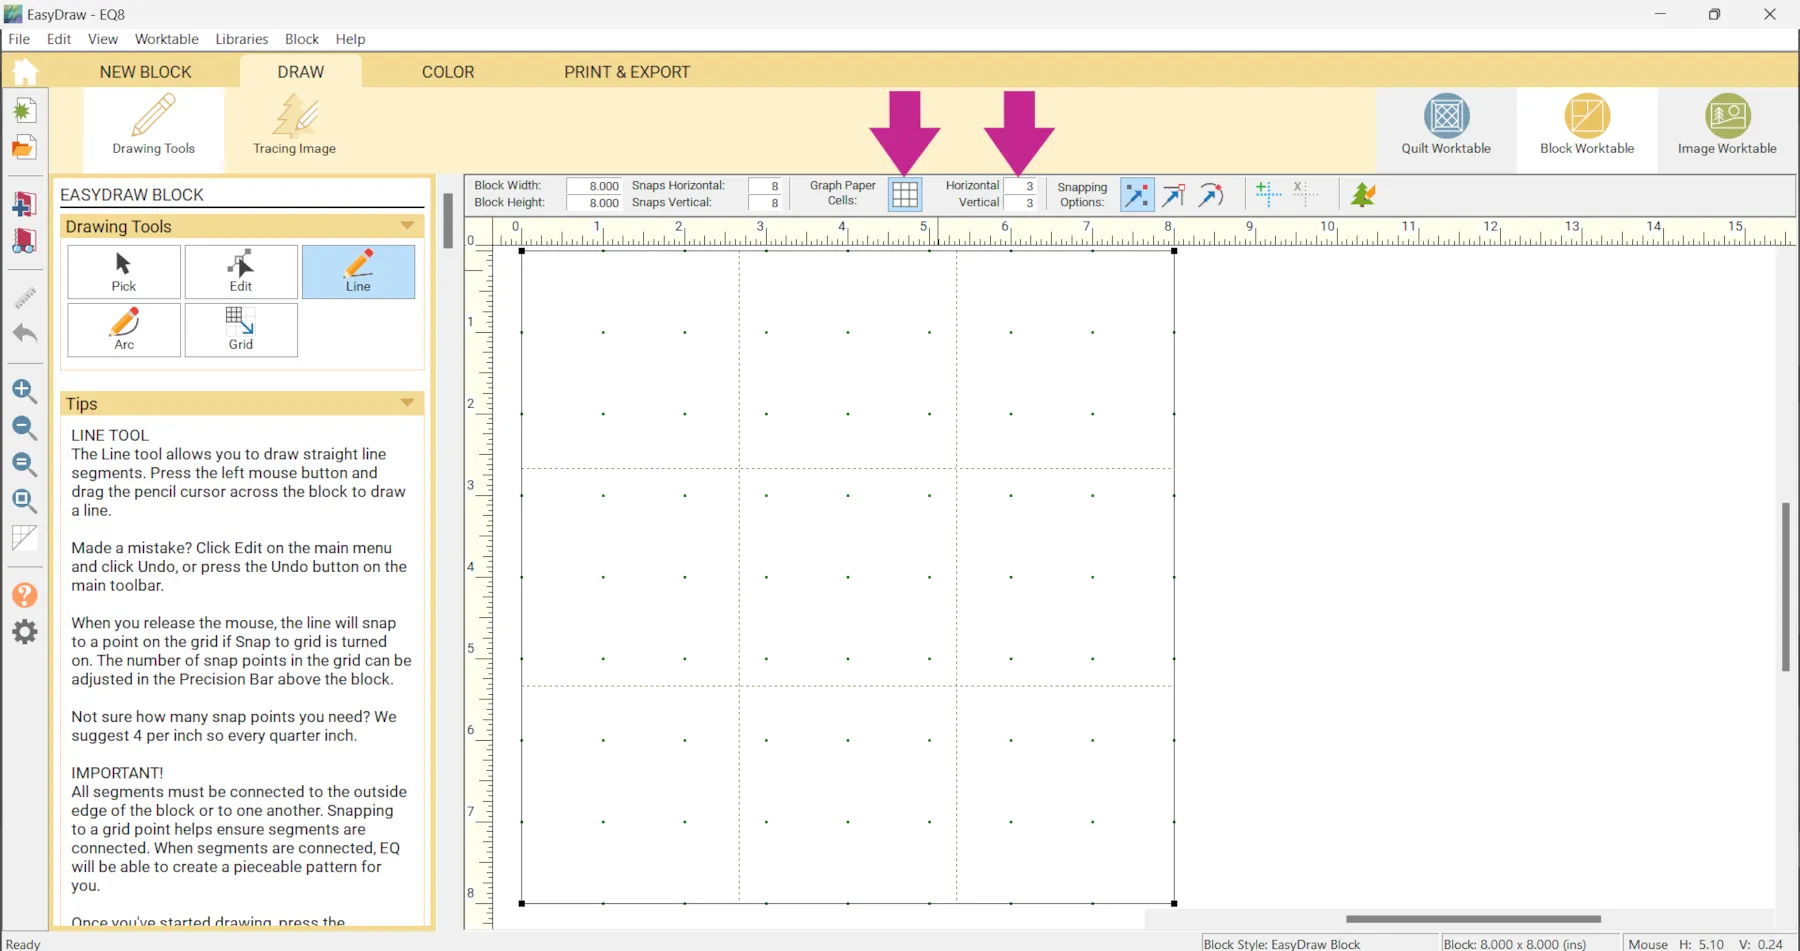
- Make the Block Width and Block Height 6 x 6 (although the size doesn’t matter too much for the method we’re going to use)
- Under Snaps Horizontal and Snaps Vertical enter 6 x 6
- Turn Snap to grid points on worktable ON
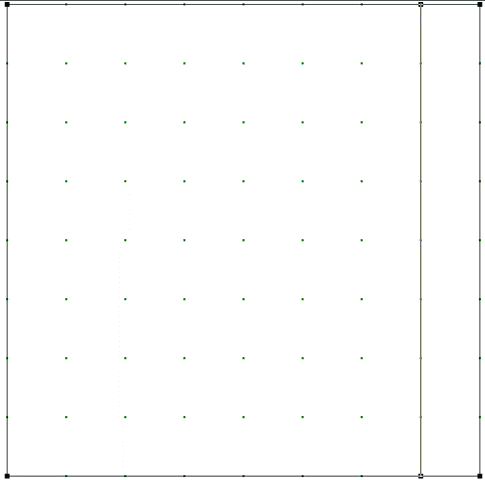
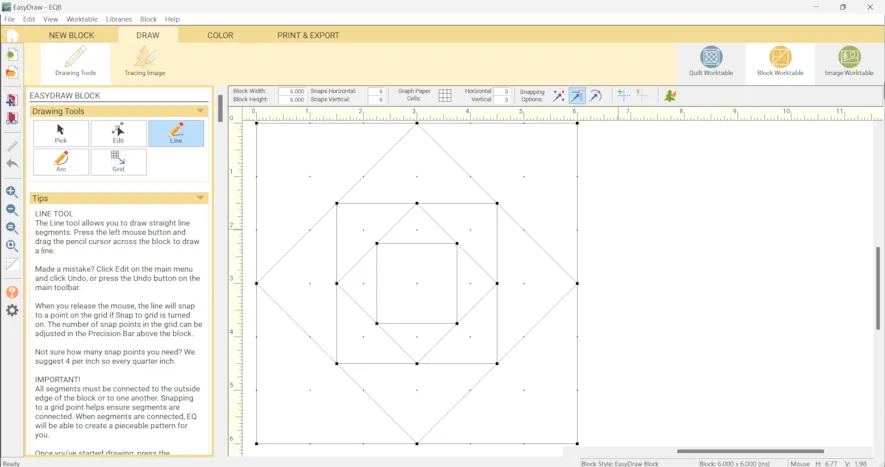
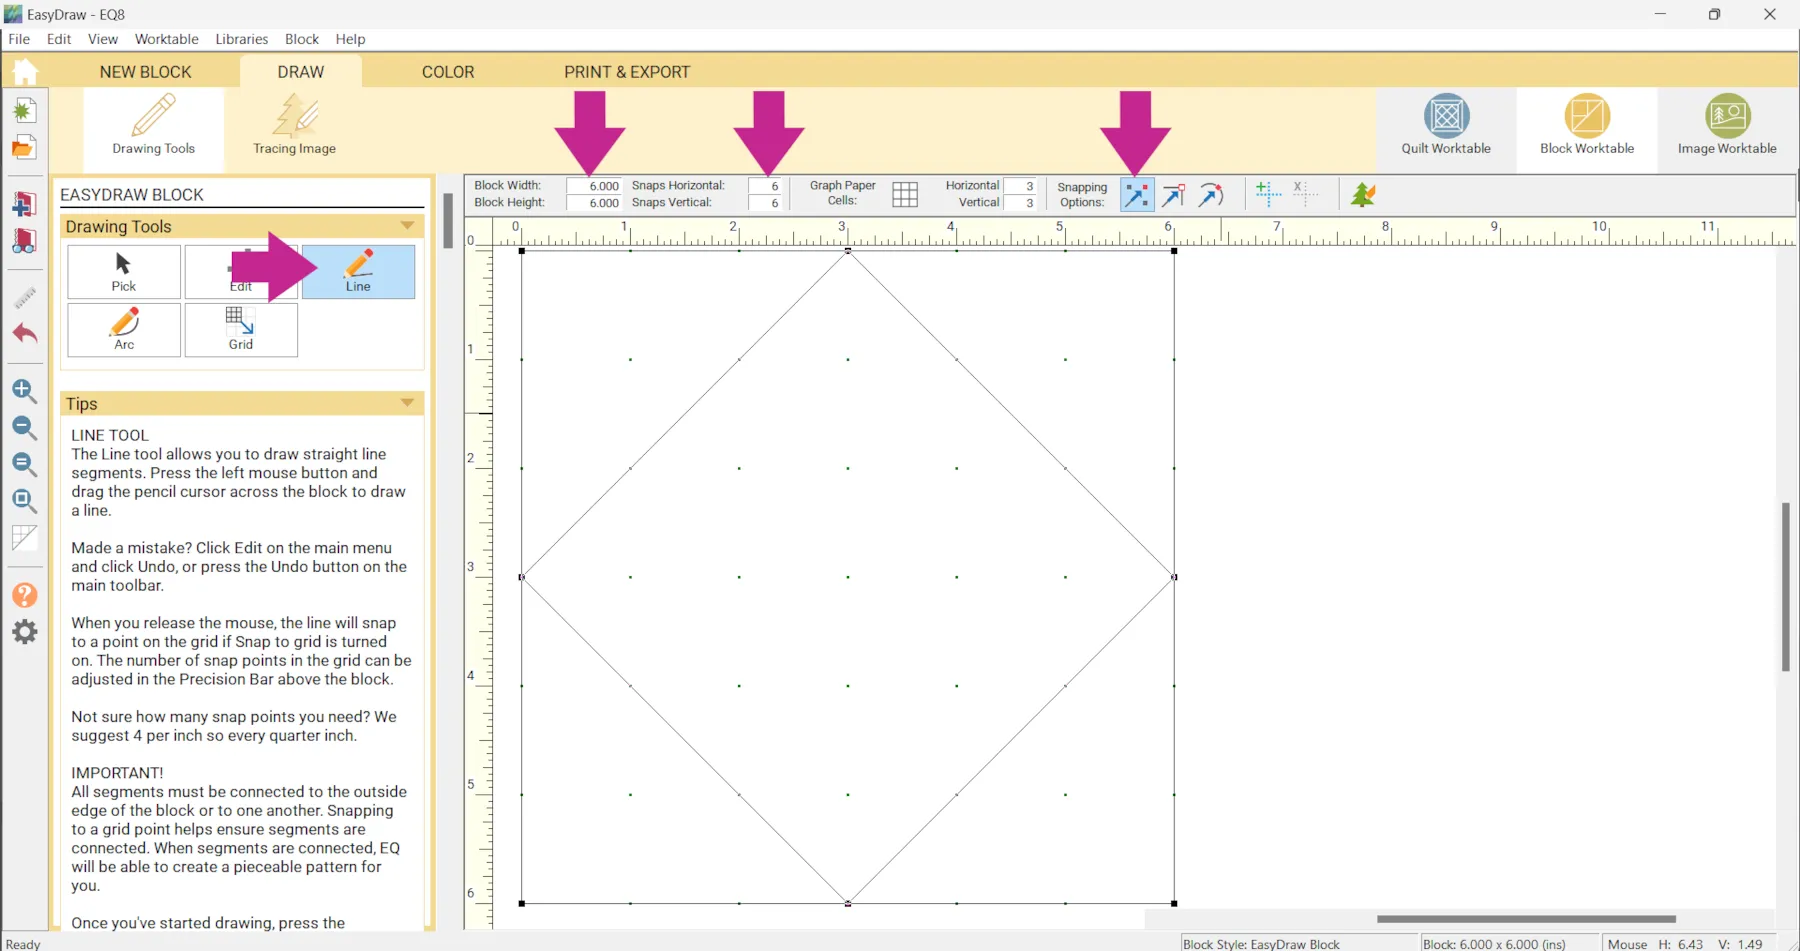
- Click the Line tool and draw a diamond like shown.
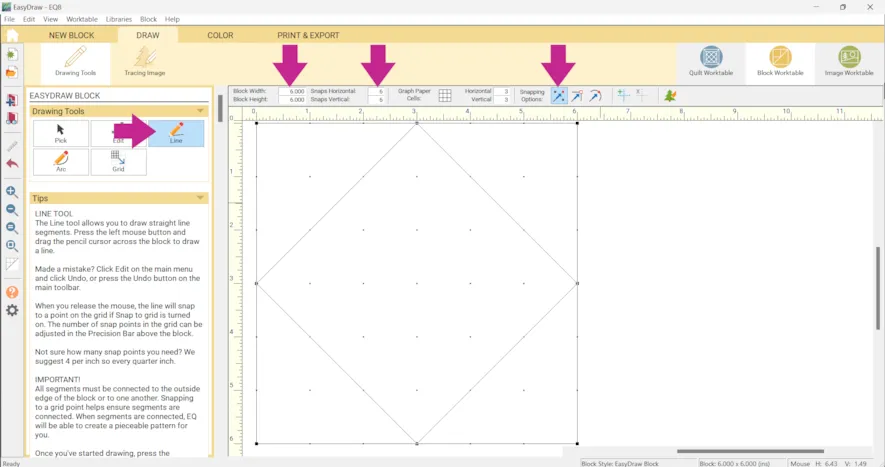
- Now, turn Snap to grid points on worktable OFF
With this off, your lines will not snap to any grid points. - Turn Snap to nodes of drawing ON
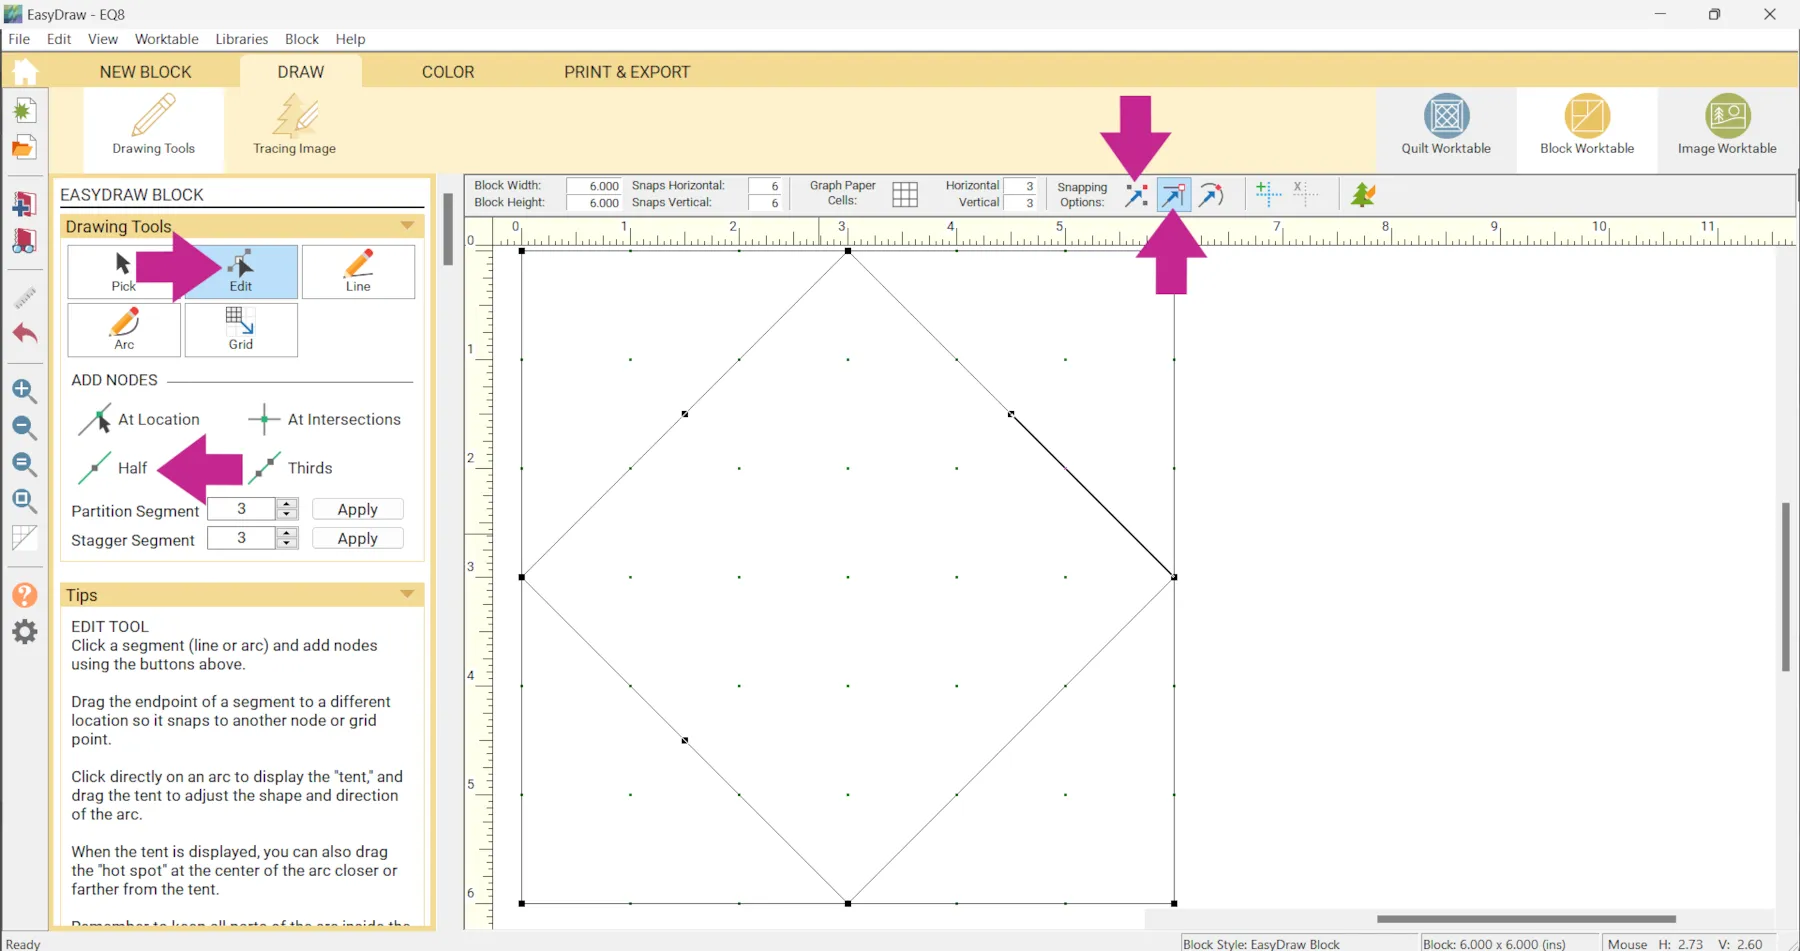
With this on, your lines will snap to the nodes of your drawing. - Click the Edit tool
- Click on each line of the diamond and click the Half button
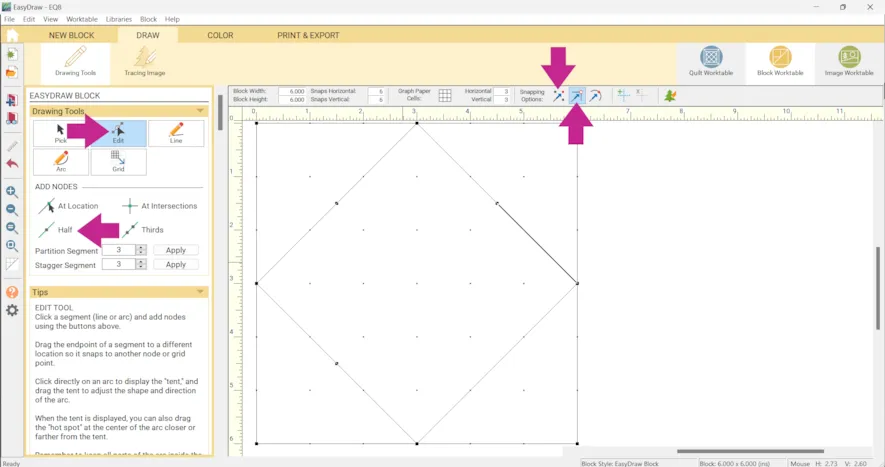
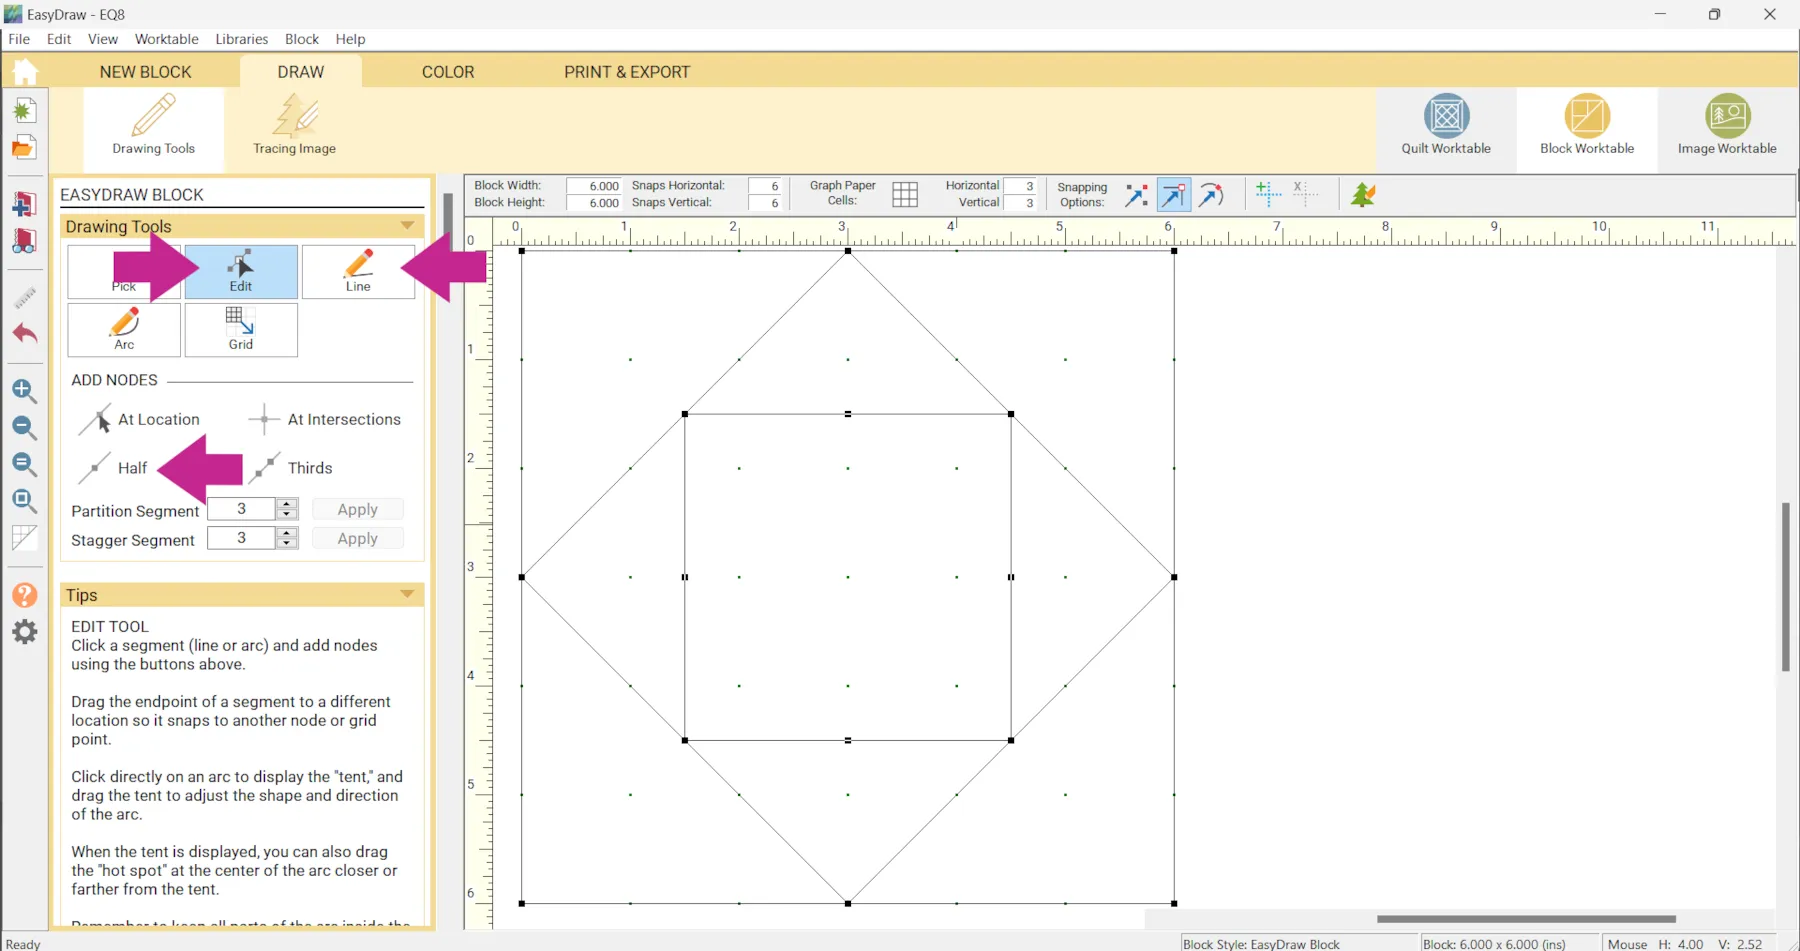
- Click the Line tool and connect the nodes to draw a square.
- Click on the Edit tool and click on each line in the square and click the Half button.
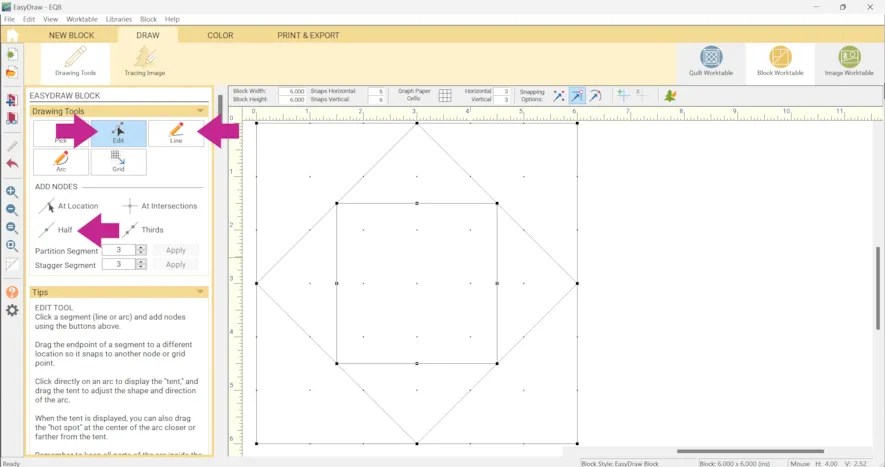
- Repeat that process until your block is complete.
- Color the block if you would like.
- Click Add to Project Sketchbook
- Click NEW BLOCK > Pieced > EasyDraw
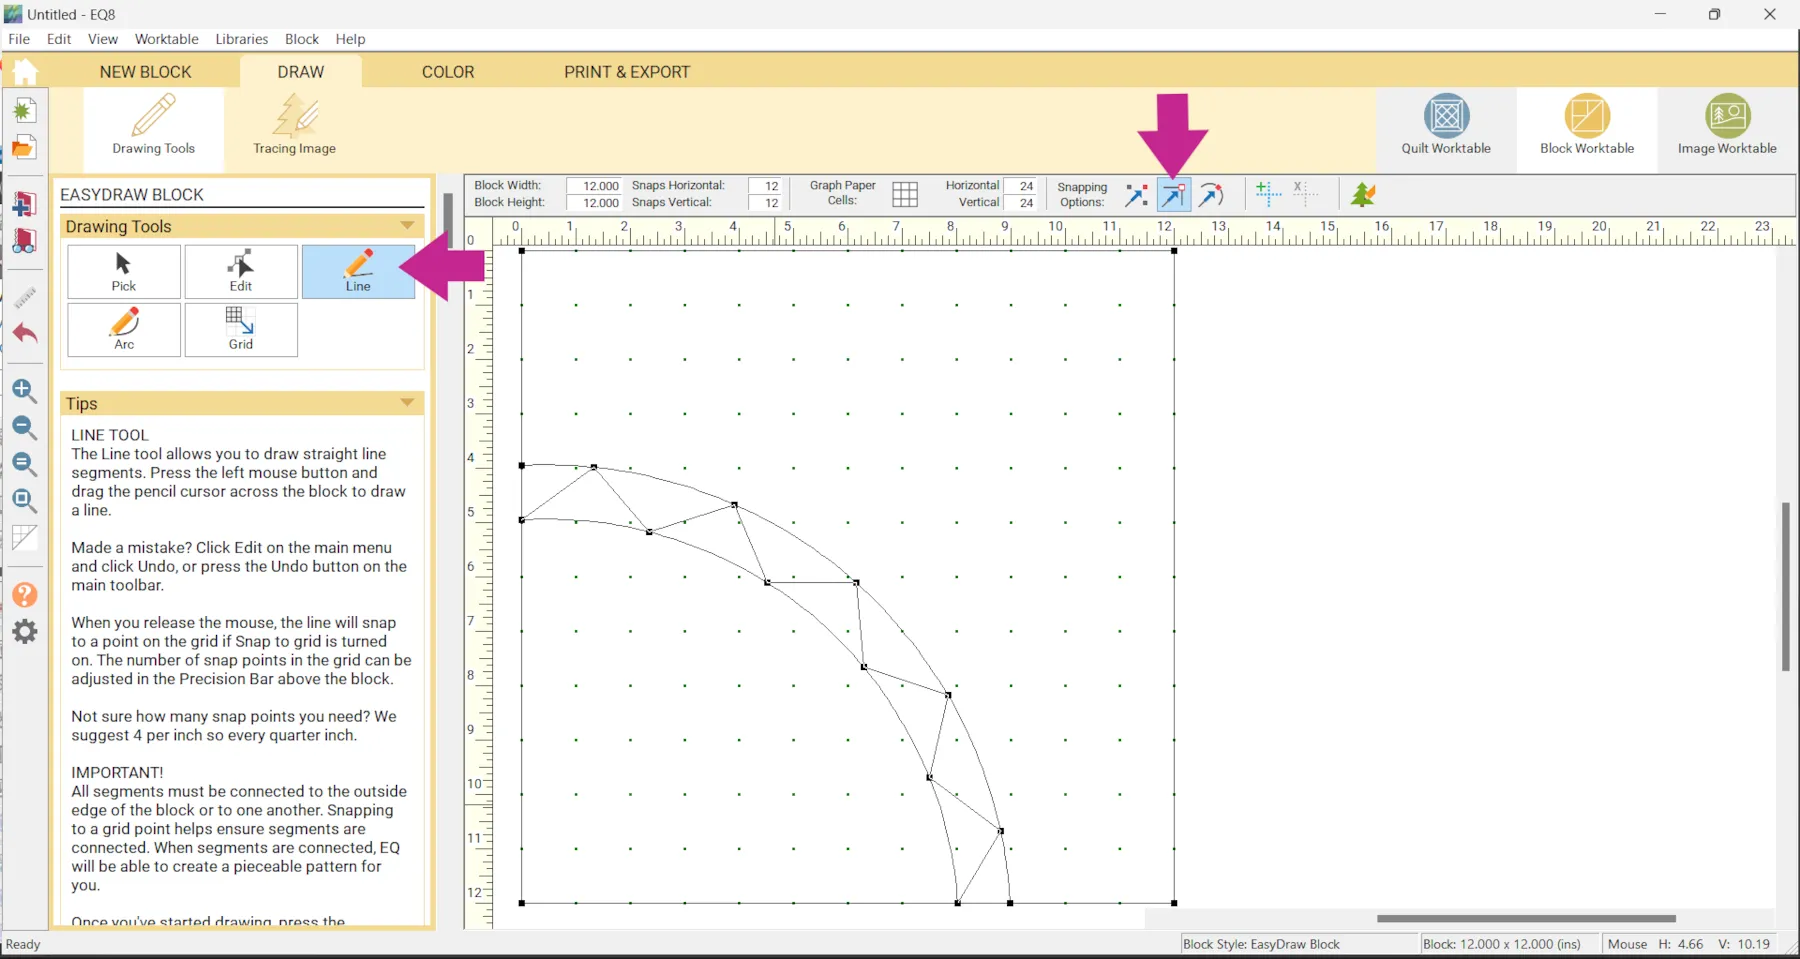
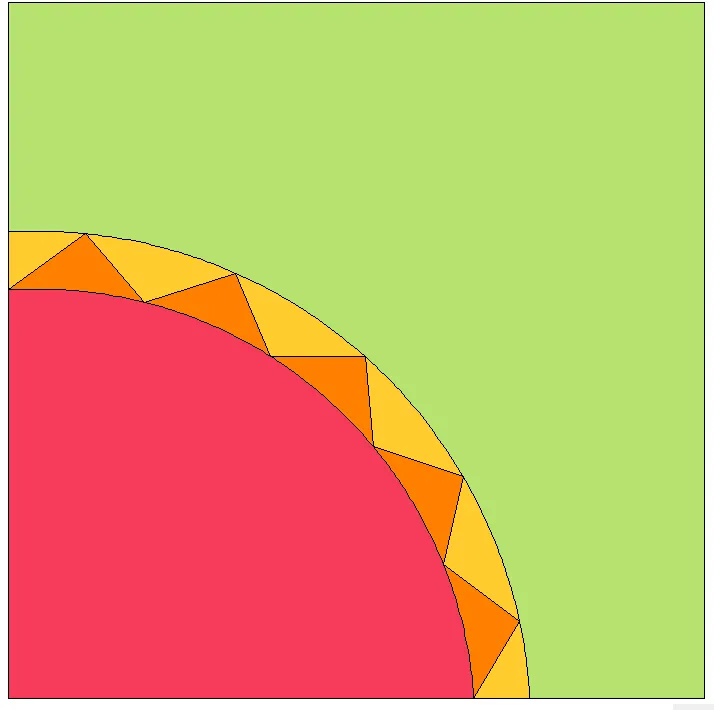
We aren’t using the Snaps Horizontal and Snaps Vertical so the block size doesn’t matter in this case. - Click the Arc tool and draw two arcs.
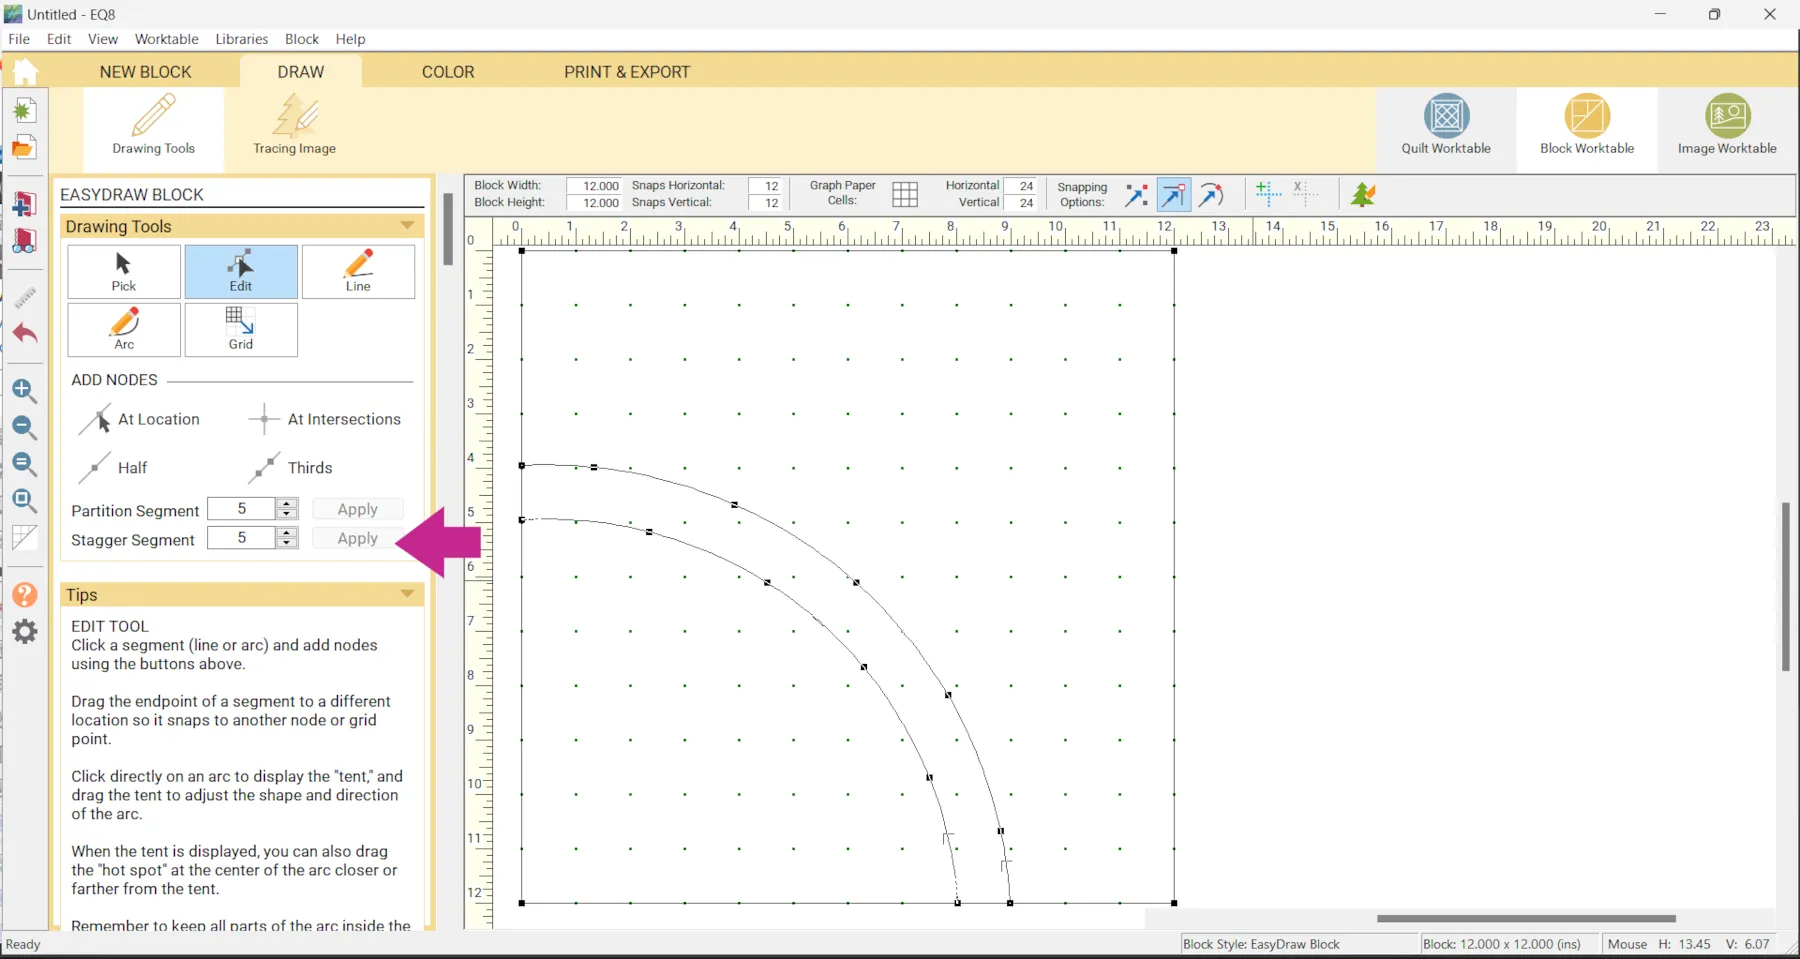
- Click on the the Edit tool and click on a arc to select it
- Enter a number under Partition Segment and click Apply.
Partition Segment divides the line or arc into equal segments.
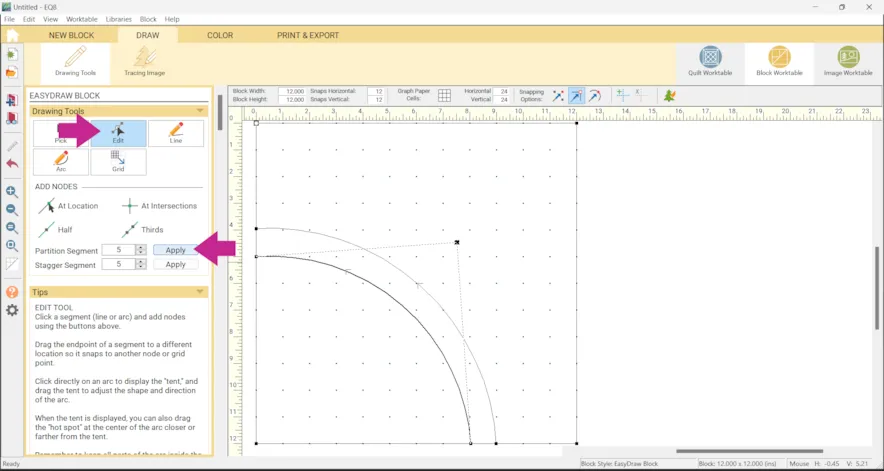
- Click on the other arc to select it.
- Enter the same number under Stagger Segment and click Apply.
Stagger Segment inserts a half segment before the first node and after the last node. The other nodes are evenly spaced.

- Turn ON Snap to Nodes of drawing (and the other snapping options off)
- Click the Line tool and connect the nodes
- Color the block if you would like.

- Click Add to Project Sketchbook

If you want to post images of your blocks, here is how to export the images.
To post your image click to comment on this post. Fill in your info and then click Browse.
Go to: Documents\My EQ8\Images
I can’t wait to see what you’ve done! I hope you enjoyed the lesson!
If you have questions about the lesson feel free to post them below.
If you have questions about something else EQ related, please contact techsupport@electricquilt.com.
If you have suggestions for new Design & Discover lessons feel free to comment below or email Heidi@electricquilt.com.