
In this lesson we’ll be learning about sashing without cornerstones but, also be sure to check out these other posts about designing with sashing.
Design & Discover – Sashing! – learn how to design these quilts and some basics (and beyond) about sashing.
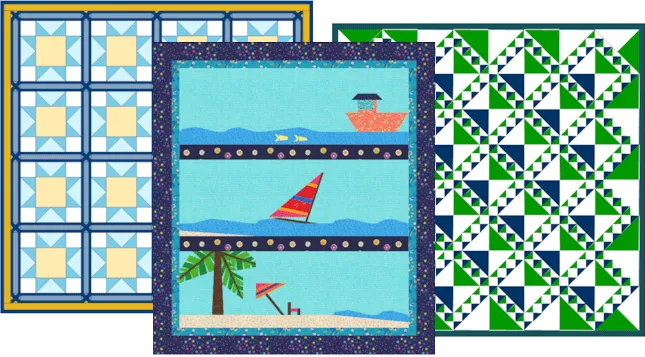
Design & Discover – Using Blocks in the Sashing! – this lesson explains how to use blocks in the sashing to create designs.
But let’s get started with designing quilts with sashing and no cornerstones. The easiest and quickest way is to use quilts from the Layout Library.
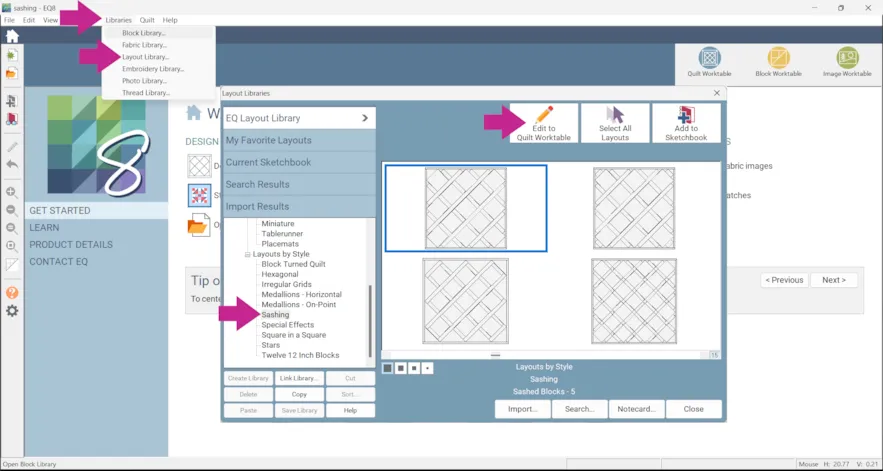
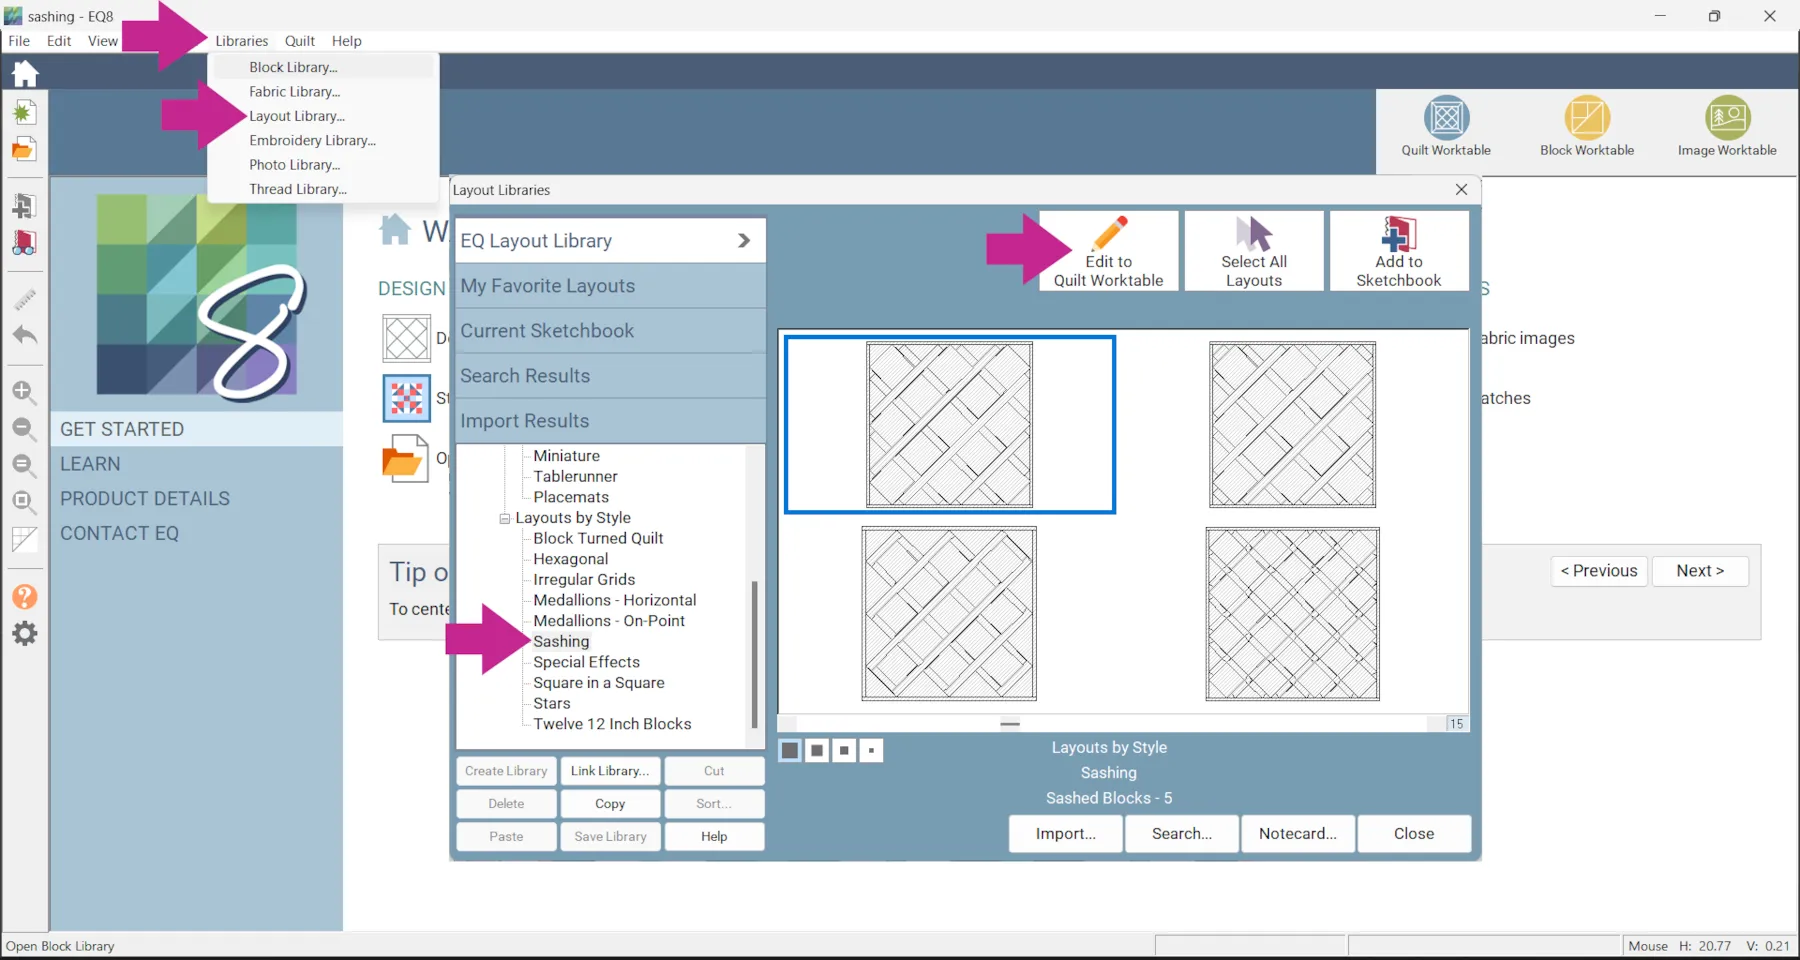
- Click Libraries > Layout Libraries
- Click Layouts by Style > Sashing
- Take a look at all the options and select one
- Click Edit to Quilt Worktable
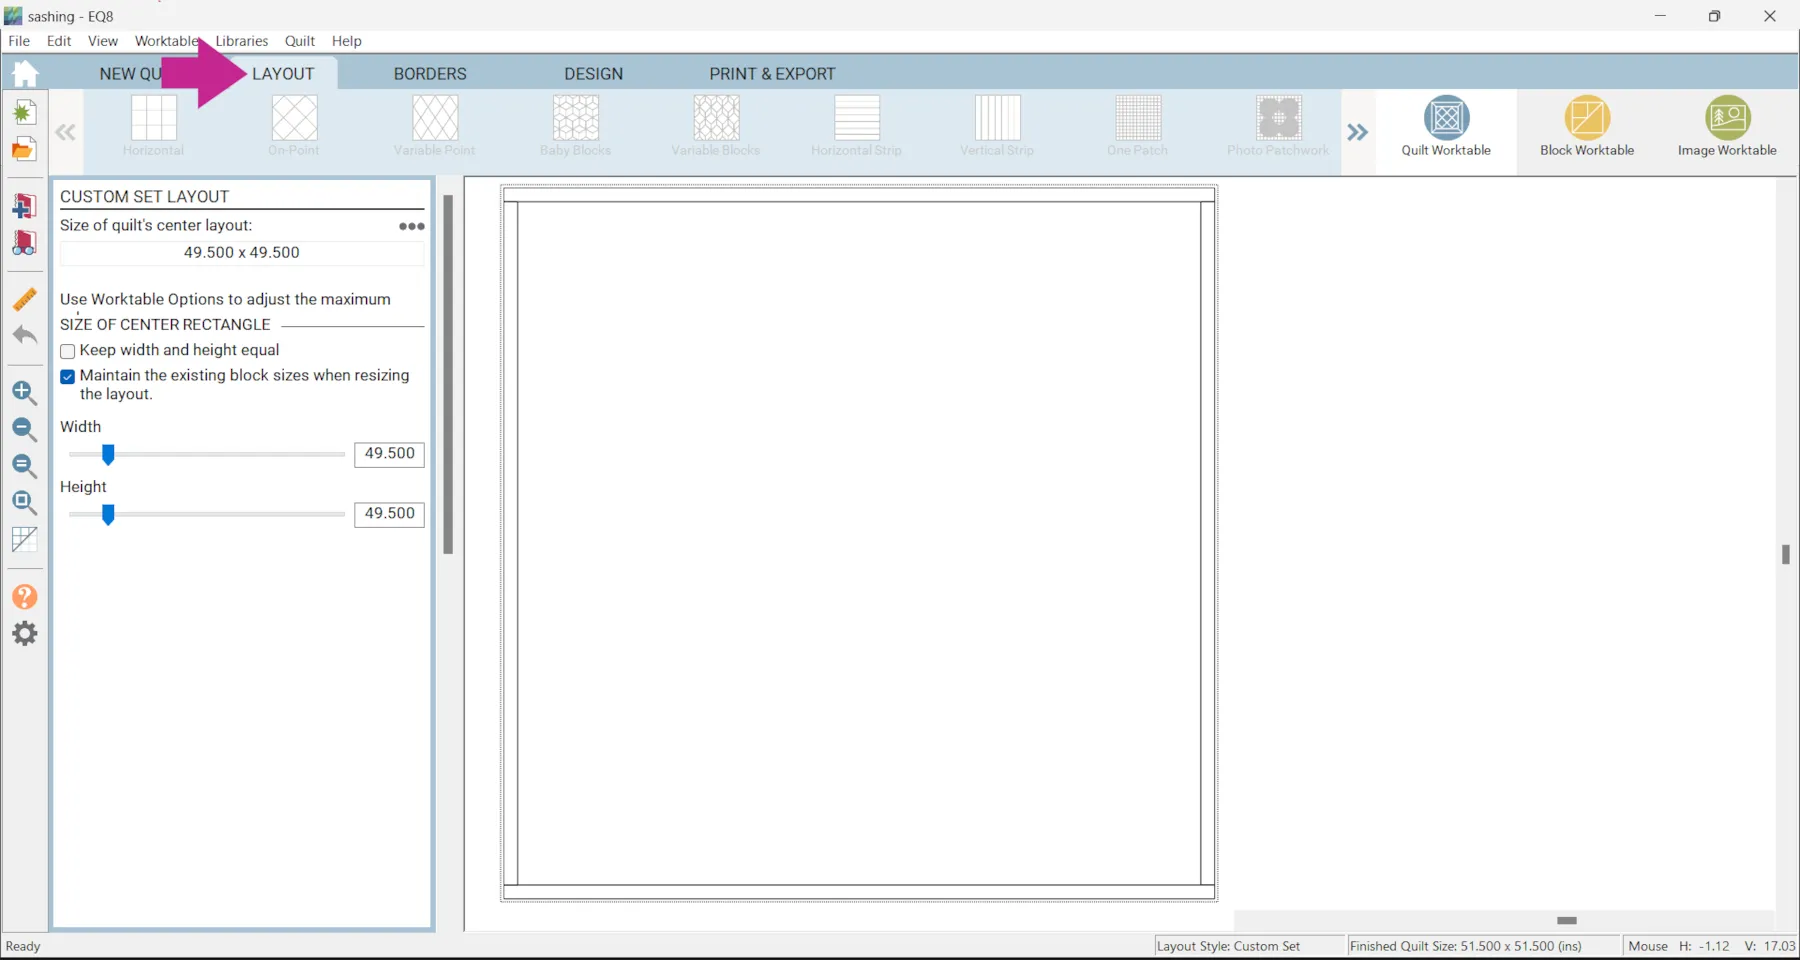
If you click the LAYOUT tab you’ll see a “blank” quilt. This is because technically this is a Custom Set quilt.

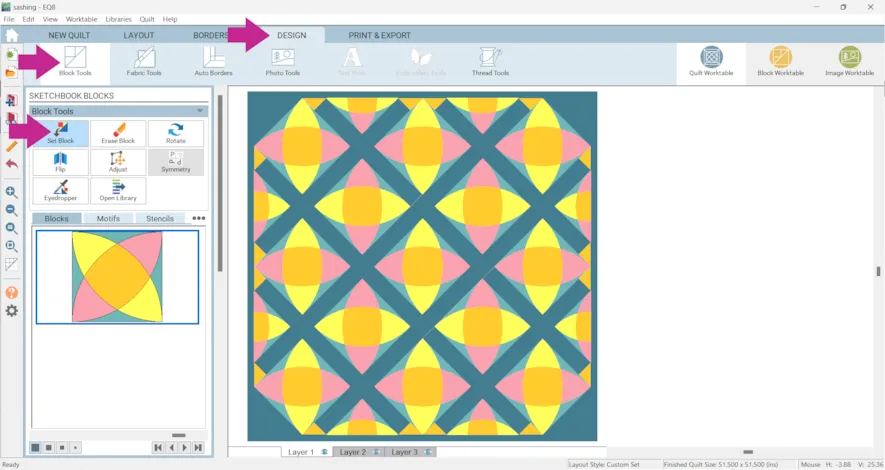
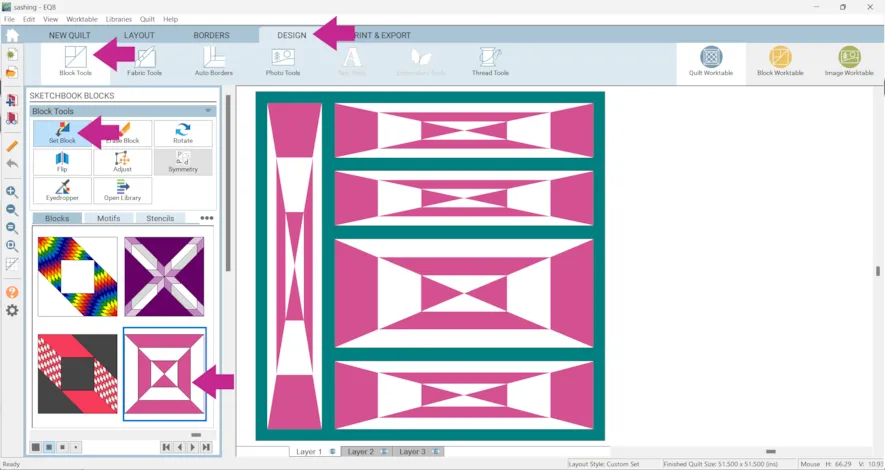
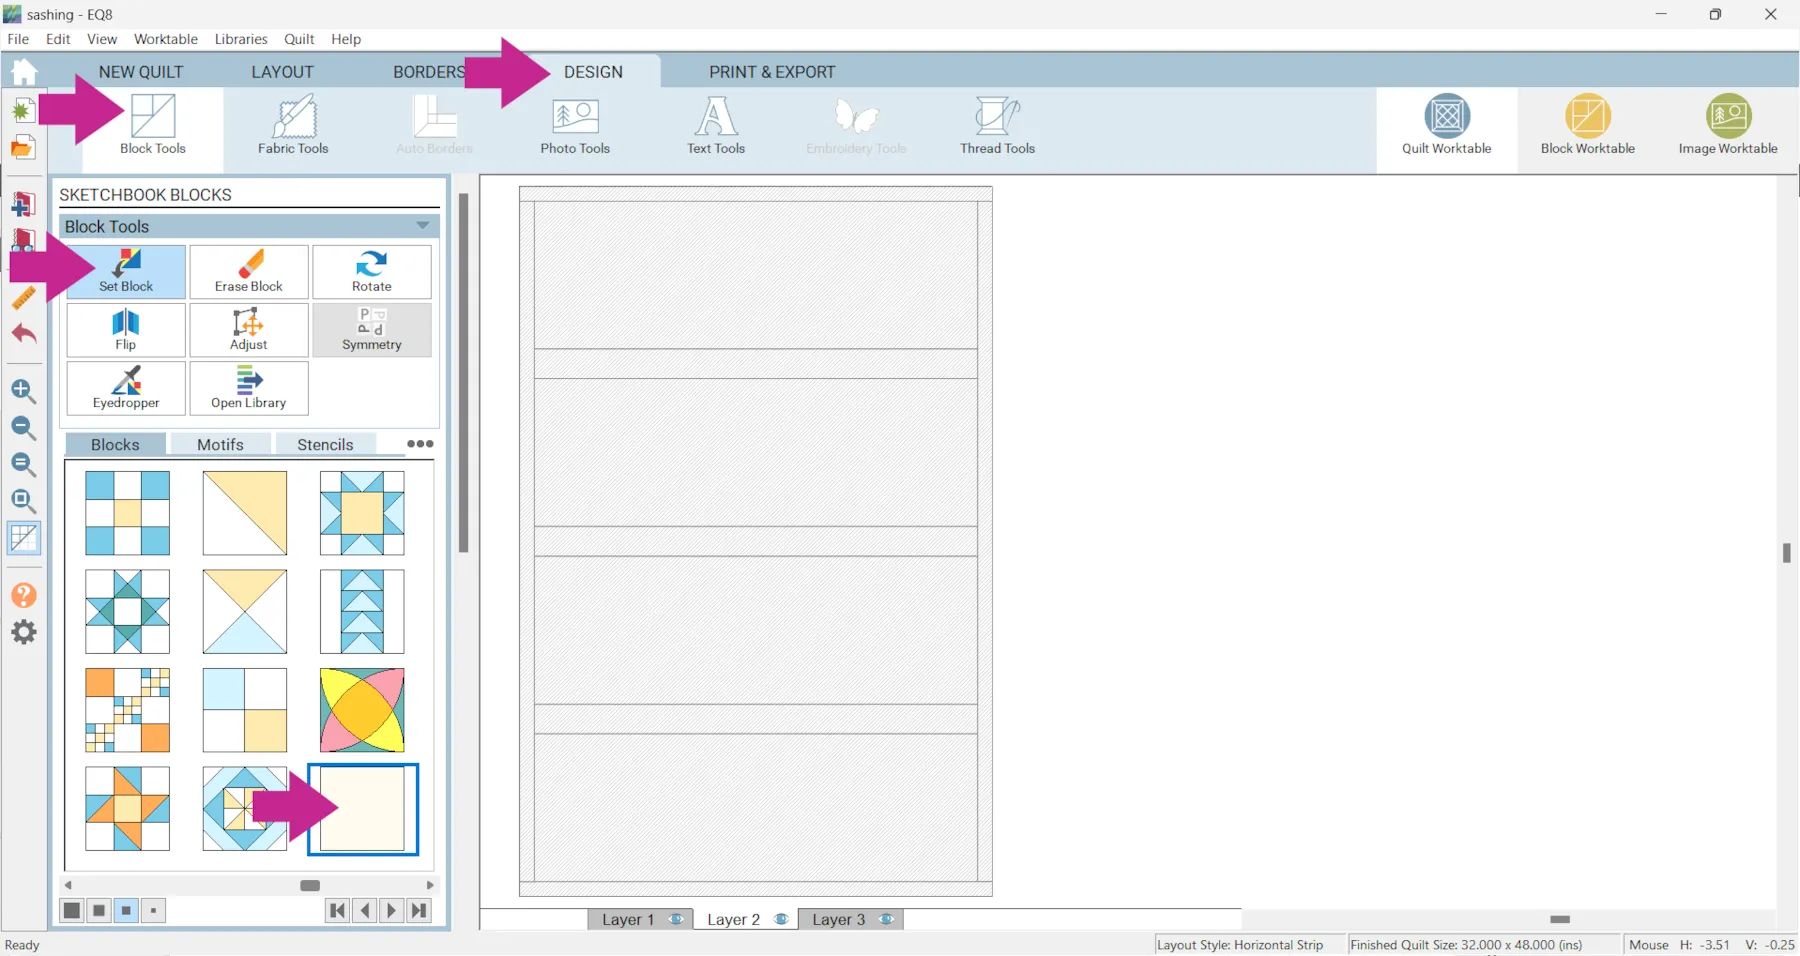
That means if you would like to resize the quilt you would do it under the Width and Height, with Maintaining the Block Size when Resizing Quilt checked, or with the Adjust tool. - To place blocks click the DESIGN tab > Block Tools > Set Block
- Then color as desired.
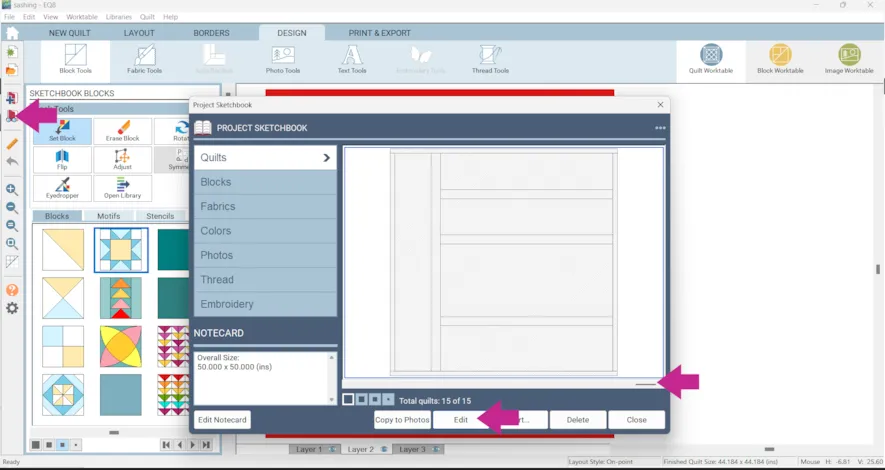
- Click Add to Project Sketchbook
 . If you haven’t named your project yet, EQ8 will prompt you to do so. (To be saved, your item needs to be in the Sketchbook AND your project needs to be named. Here is more information.)
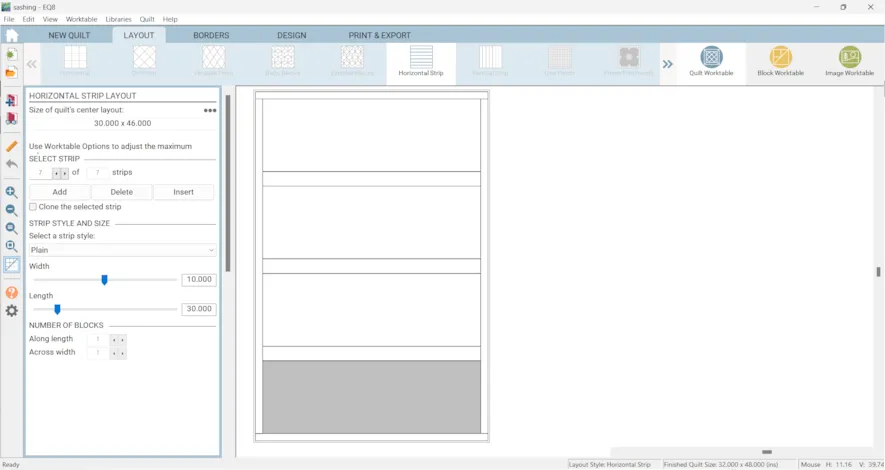
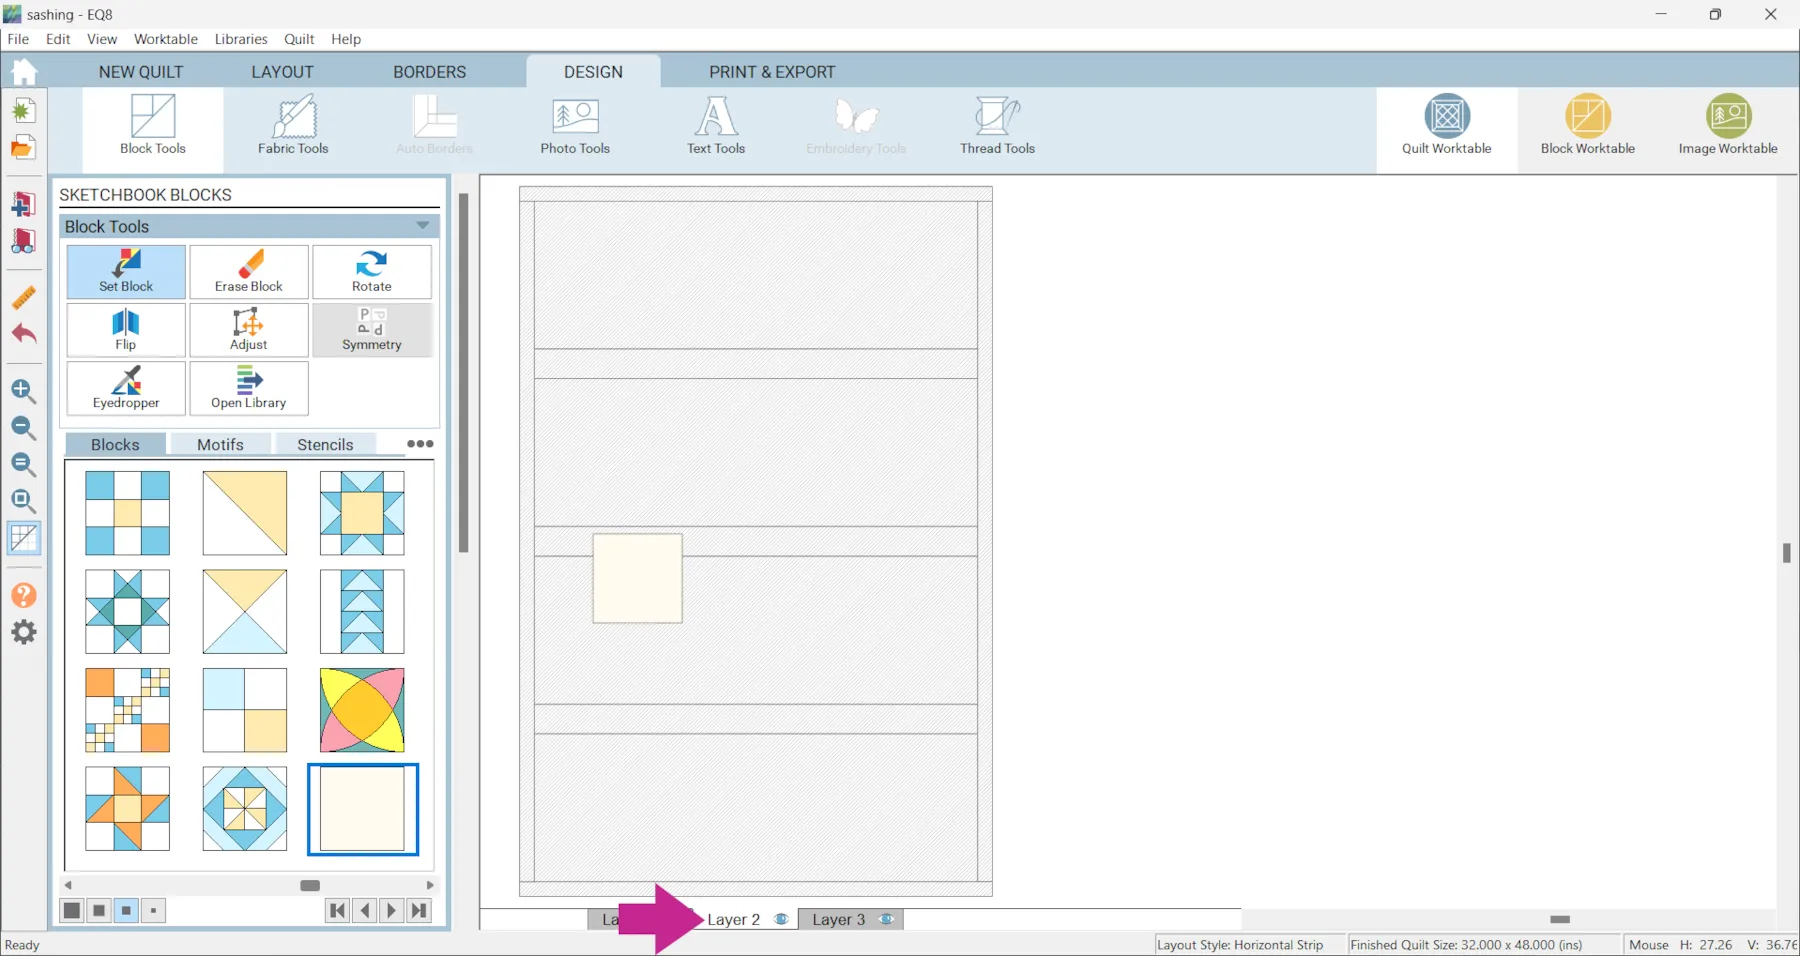
Another way to create a quilt with sashing and no cornerstones is to create a Strip Quilt and then place blocks on Layer 2. In this example on the LAYOUT tab the quilt has alternating strips of 2 inches and 10 inches.
- Once you have your layout click the DESIGN tab > Block Tools > Set Block > Plain Block
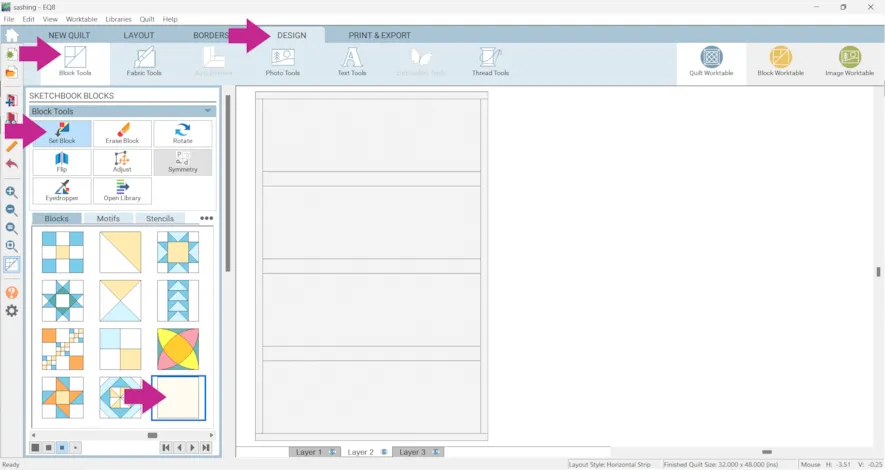
- Click Layer 2
- Drag the plain block onto the quilt.
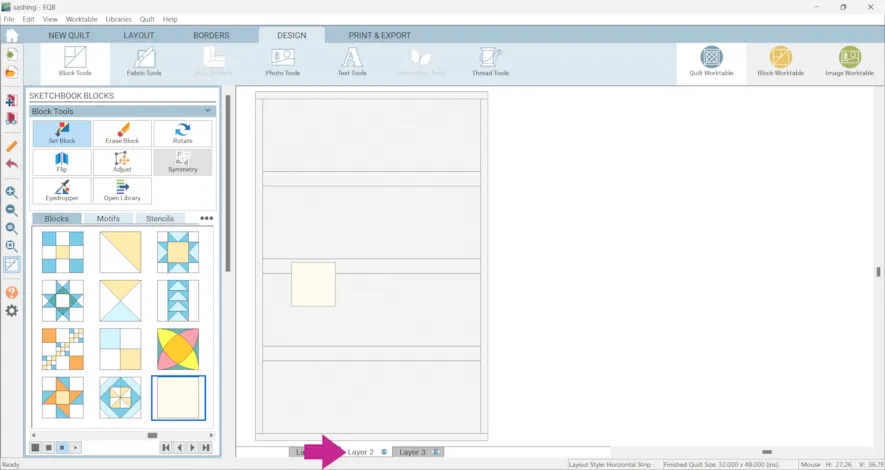
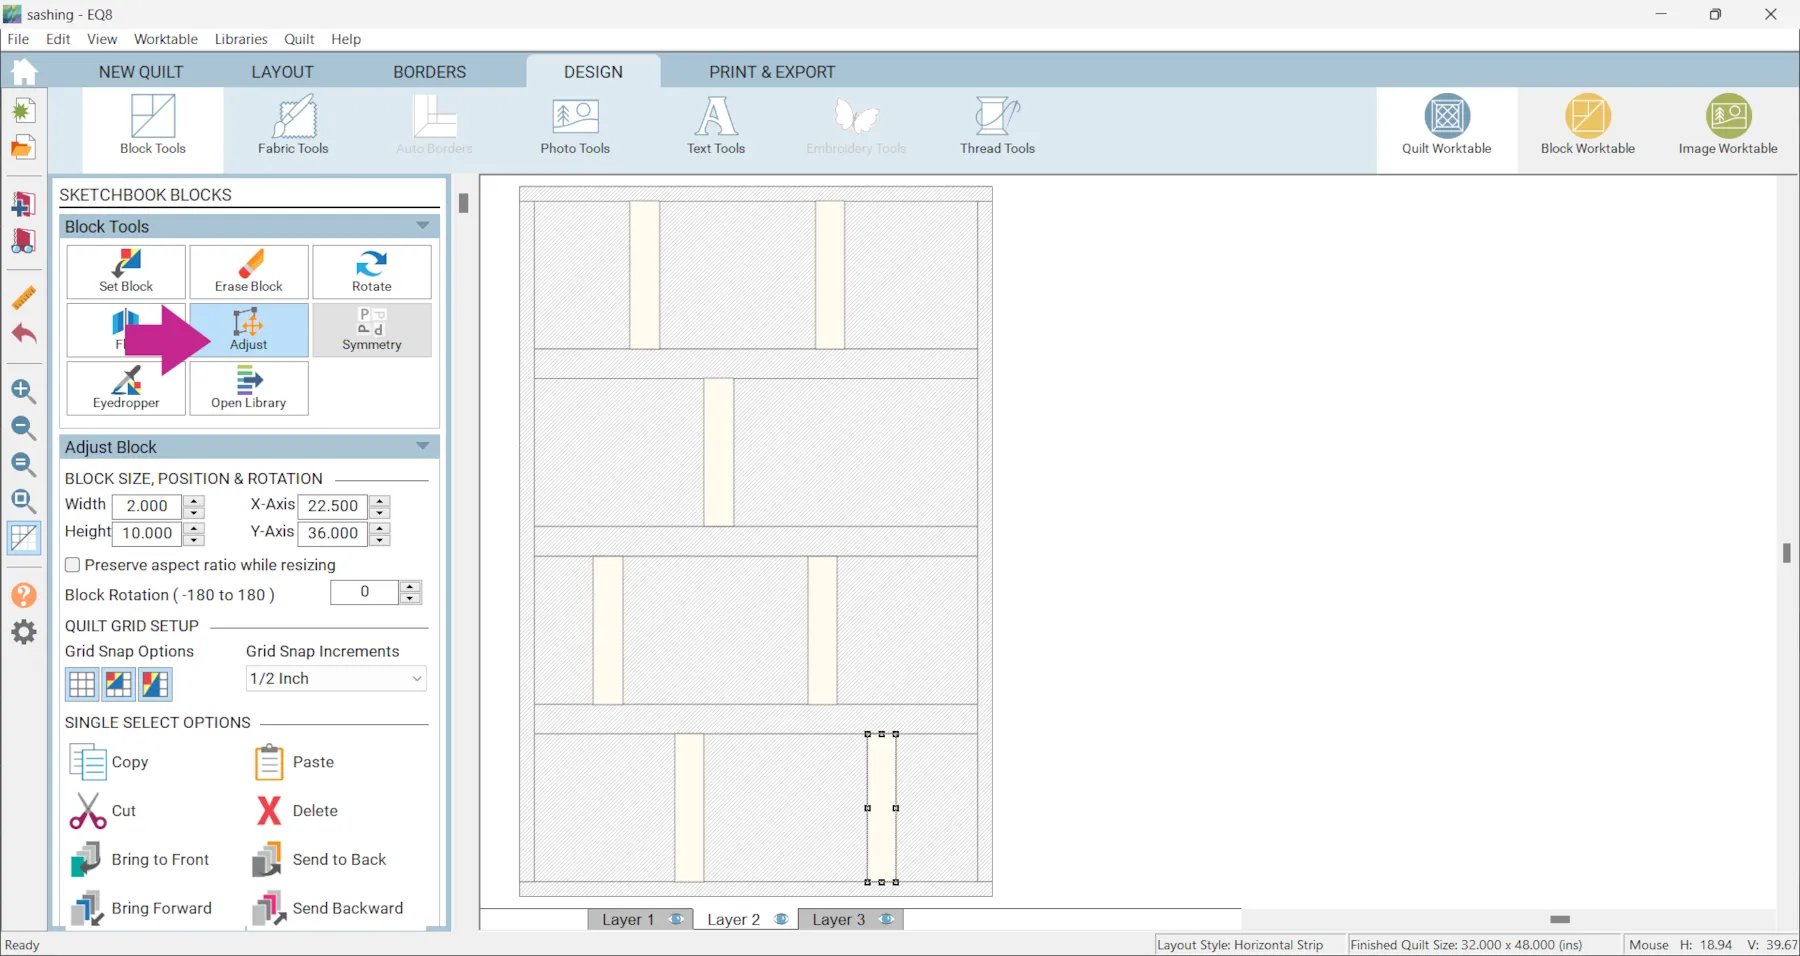
- Use the Adjust tool to resize and move the block. In the example the block is 2 inches x 10 inches.
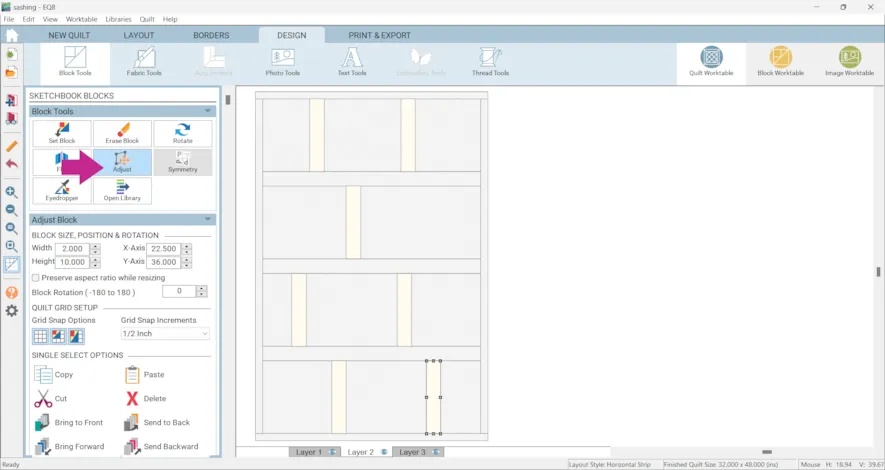
- Set other blocks on Layer 2 and recolor. Keep in mind that anything set on Layer 2 needs to be colored on Layer 2 while anything on Layer 1 needs to be colored on Layer 1.

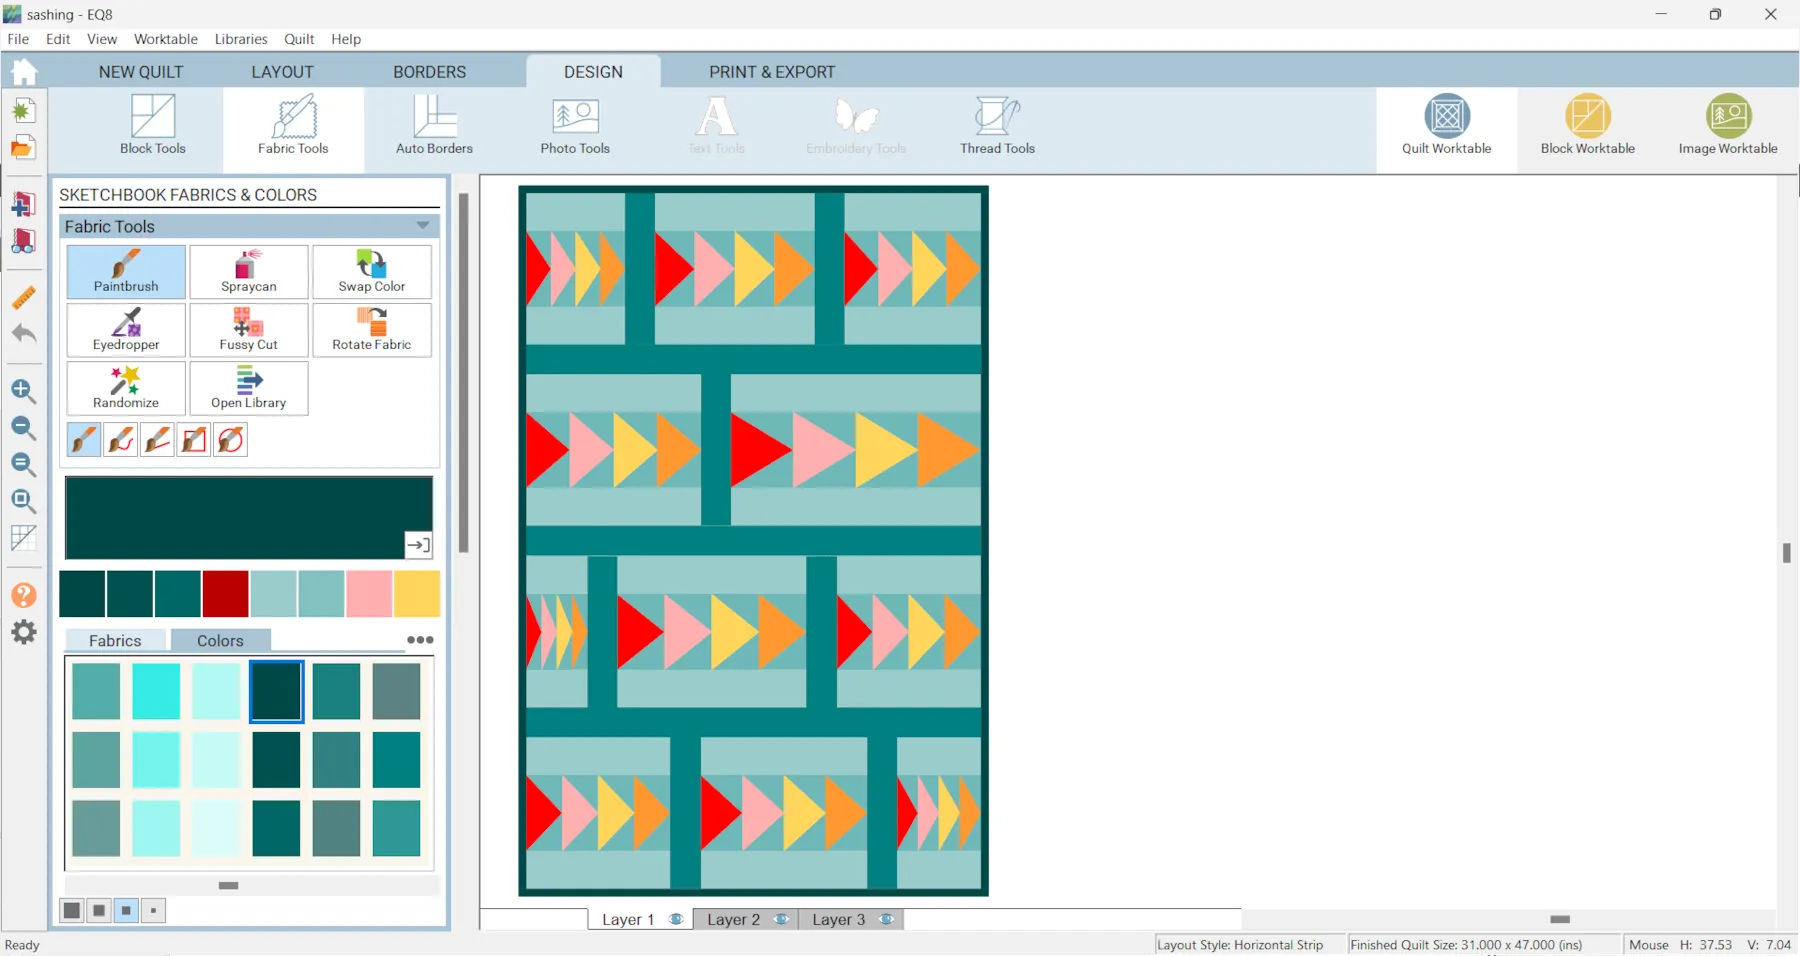
- Click Add to Project Sketchbook
for anything you want to save.
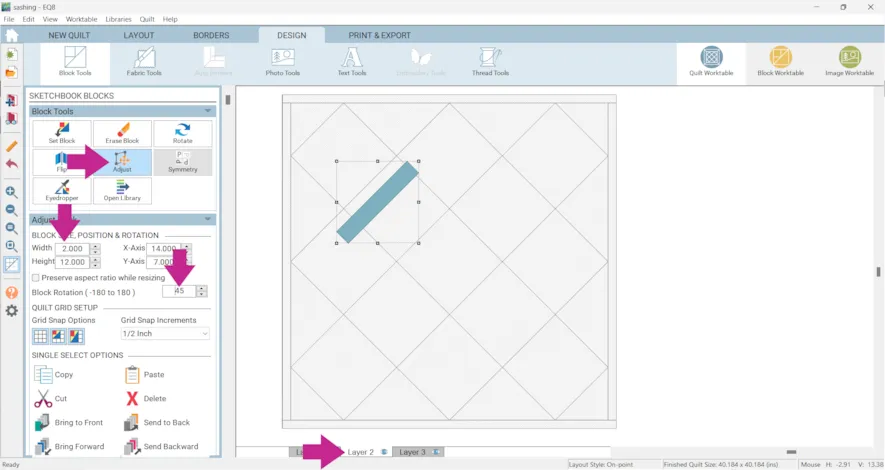
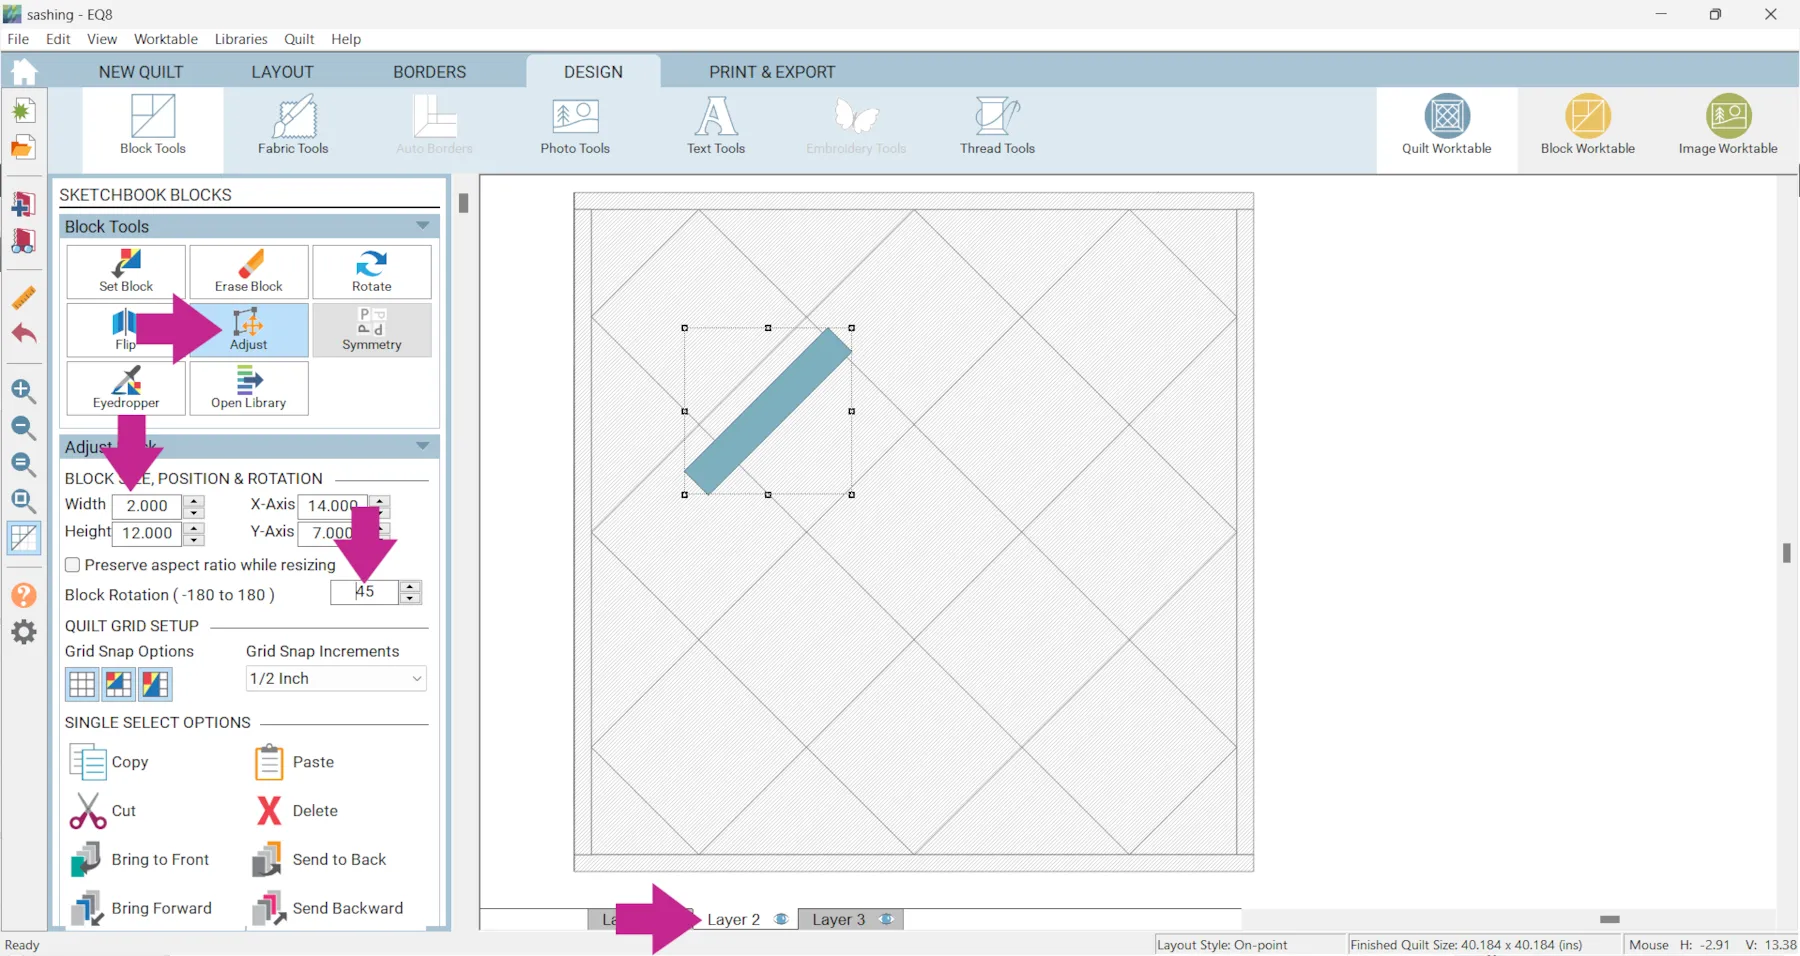
A similar option is to place a plain block on Layer 2 and rotate it to create diagonal sashing.
- Start with whatever quilt layout you would like.
- Click the DESIGN tab > Block Tools > Set Block > Plain Block
- Click Layer 2
- Drag the plain block onto the quilt.
- Click the Adjust tool and change the size. In the example it is 2 inches x 12 inches.
- Rotate 45 degrees.
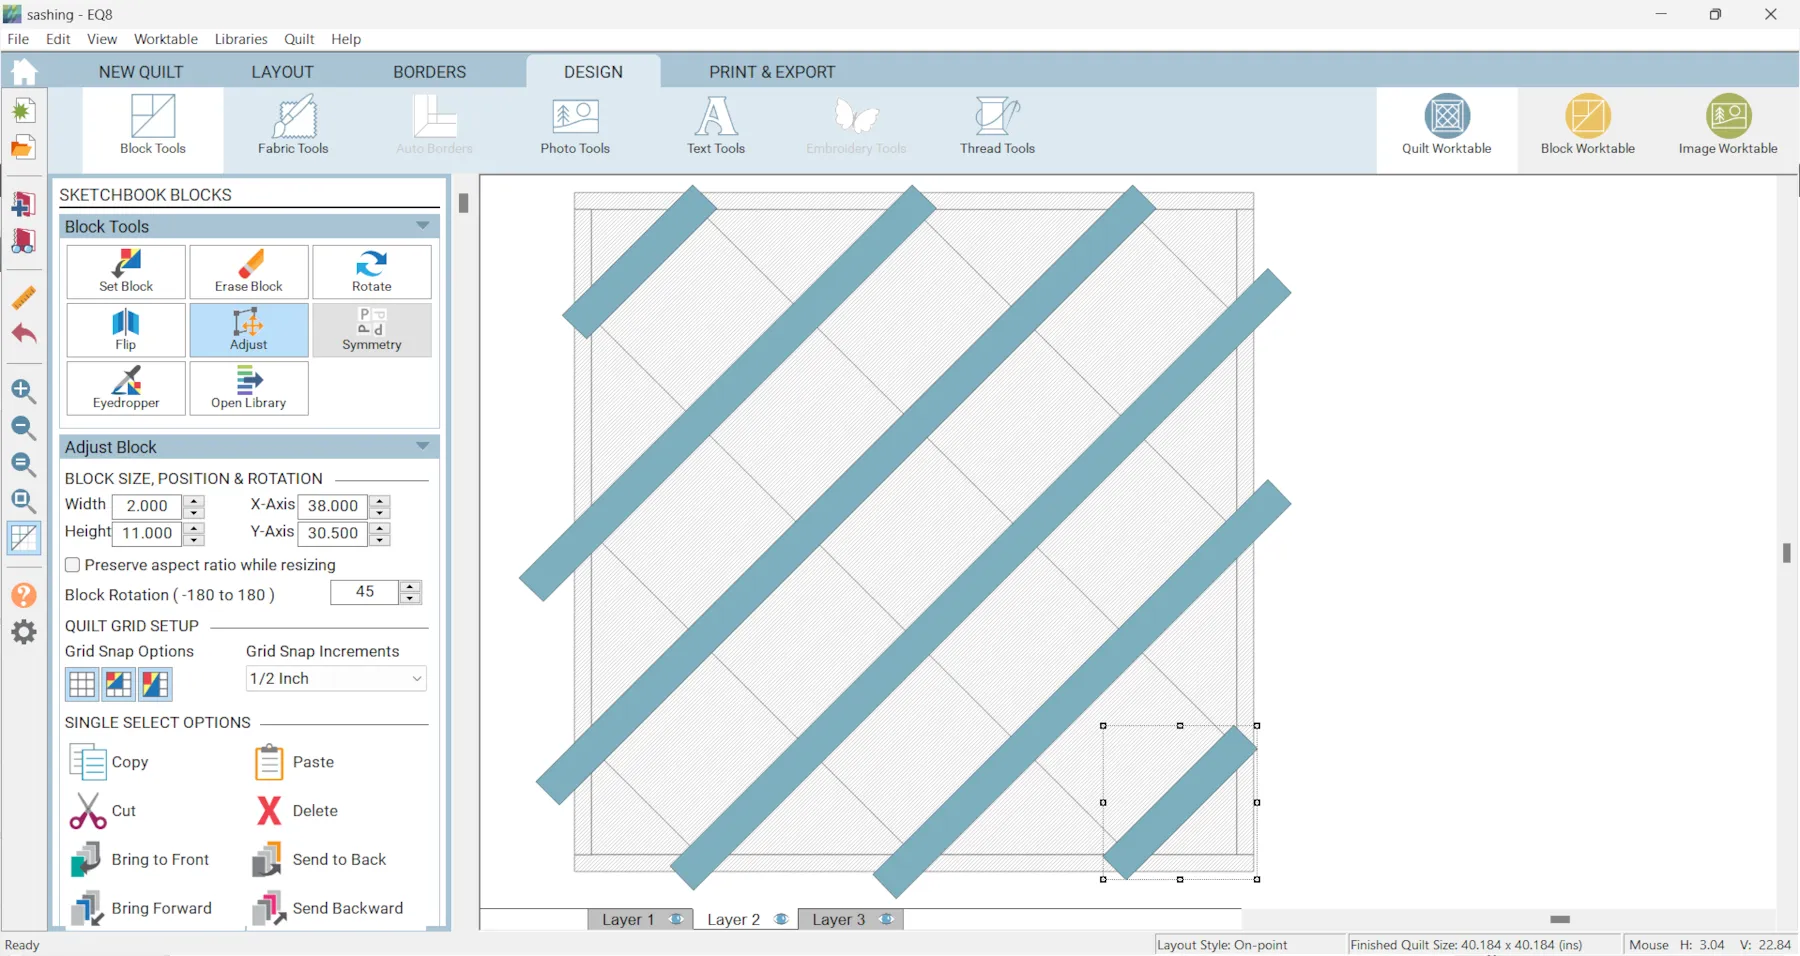
- Repeat steps 17-19 until you have all the sashing you want. (Or, you can also copy and paste the block.)
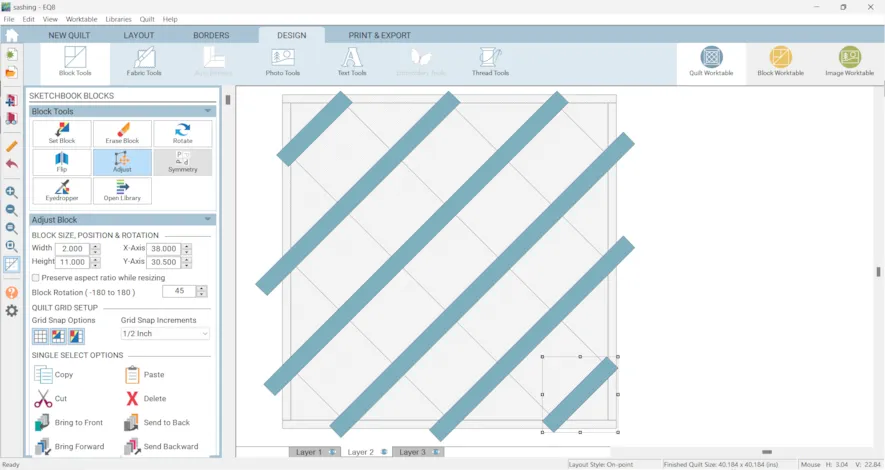
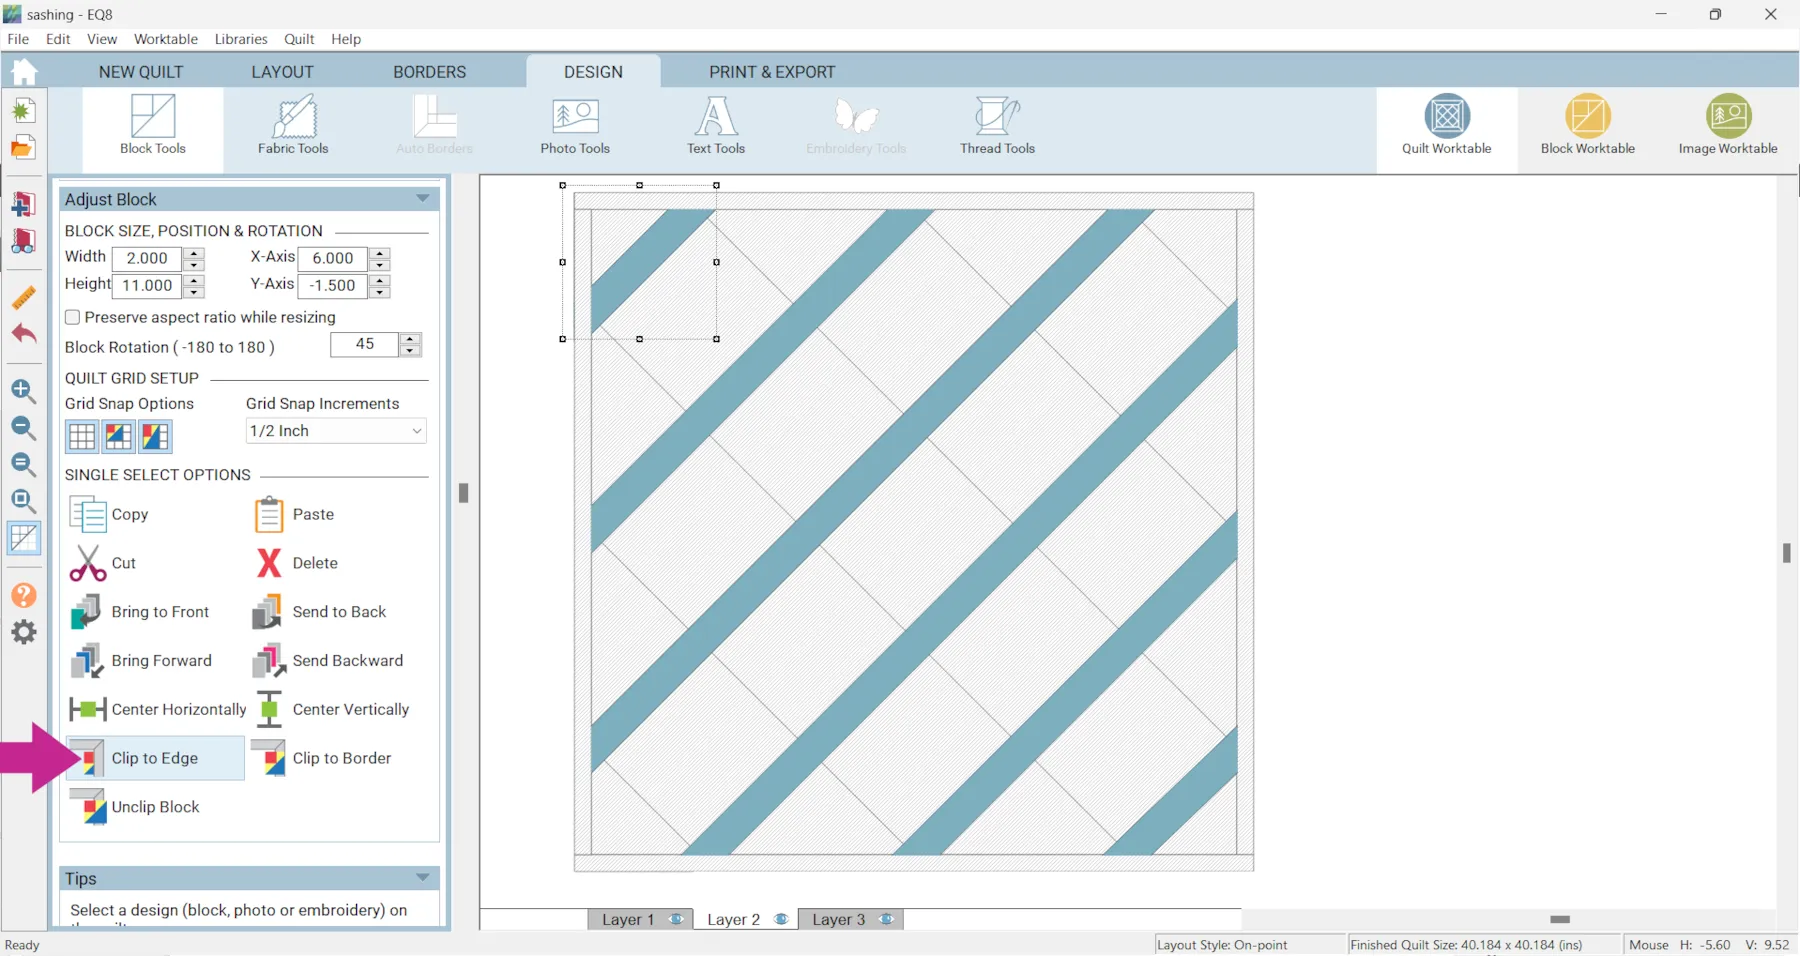
- Click on each block and click Clip to Edge.
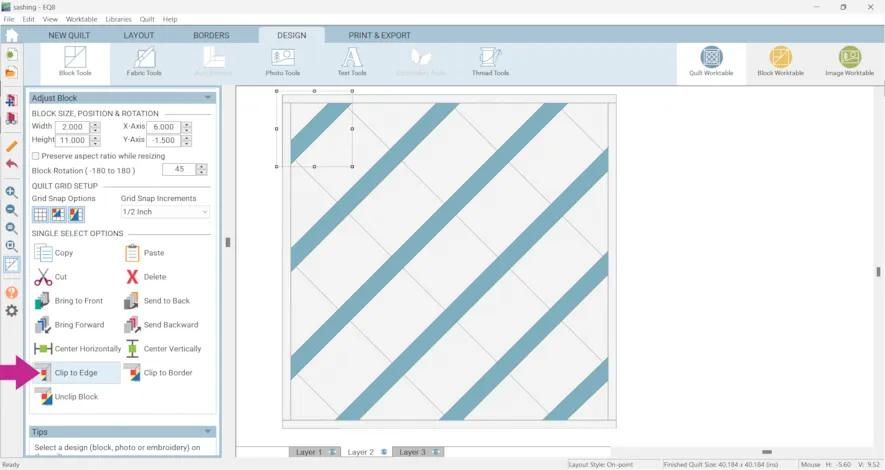
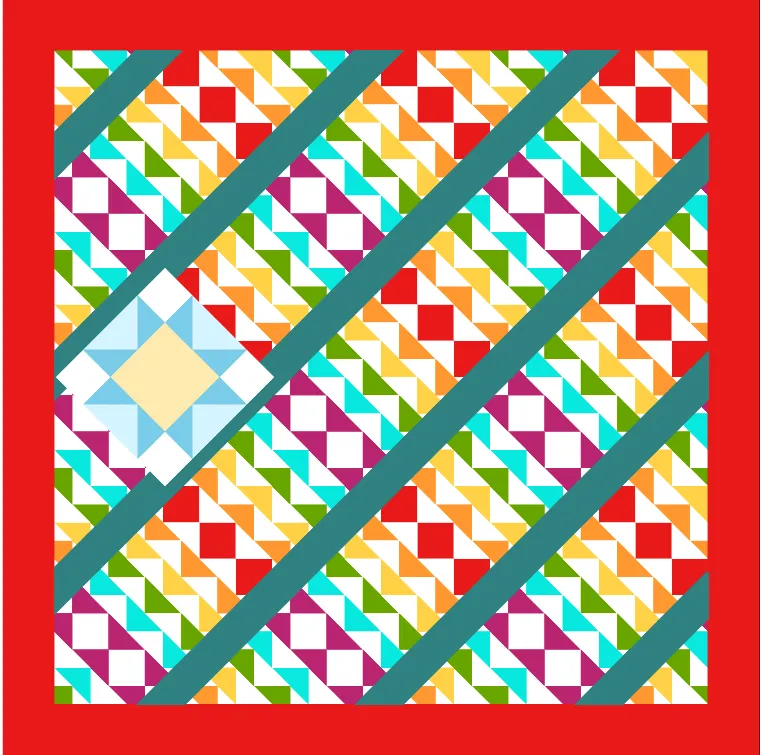
You can set blocks on Layer 1 or Layer 2.
On Layer 1 the blocks will show behind the sashing.
On Layer 2 the blocks may show above the sashing, depending on how you design the quilt.
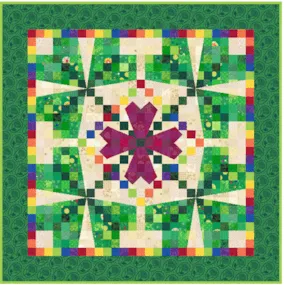
In the example below the rainbow triangle blocks are on Layer 1 and the star block is on Layer 2.
- Click Add to Project Sketchbook
for anything you want to save.
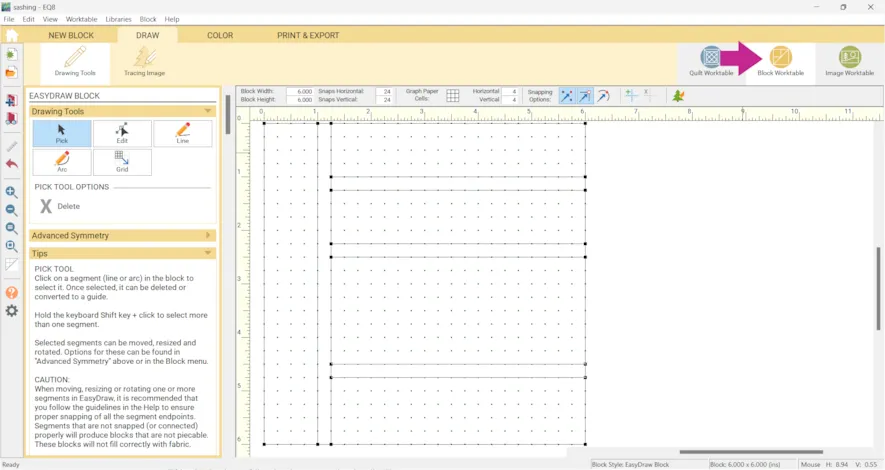
Another option! You can use Create a Quilt from Block to create your layout.
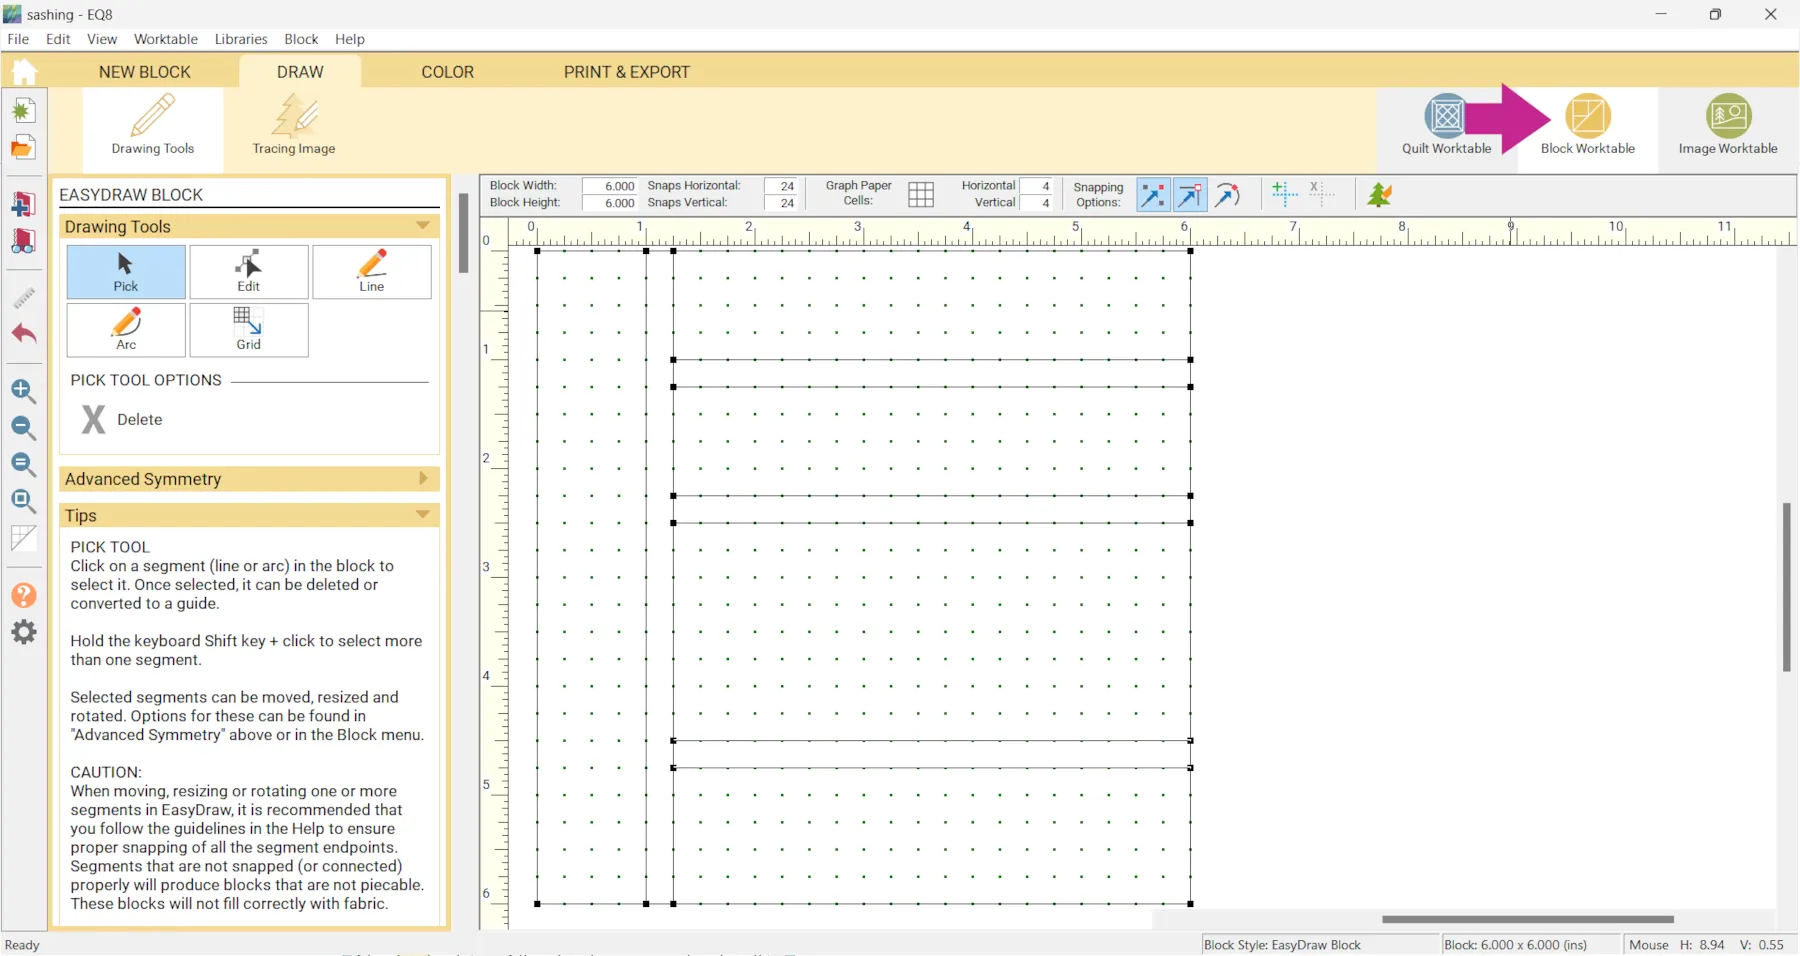
- Click the the Block Worktable button and draw the layout you would like your quilt to have. For a block to be eligible for Create a Quilt from Block, it must be drawn with the EasyDraw tools. The block must contain straight horizontal and vertical lines only.
- Click Add to Project Sketchbook
- Click Quilt Worktable
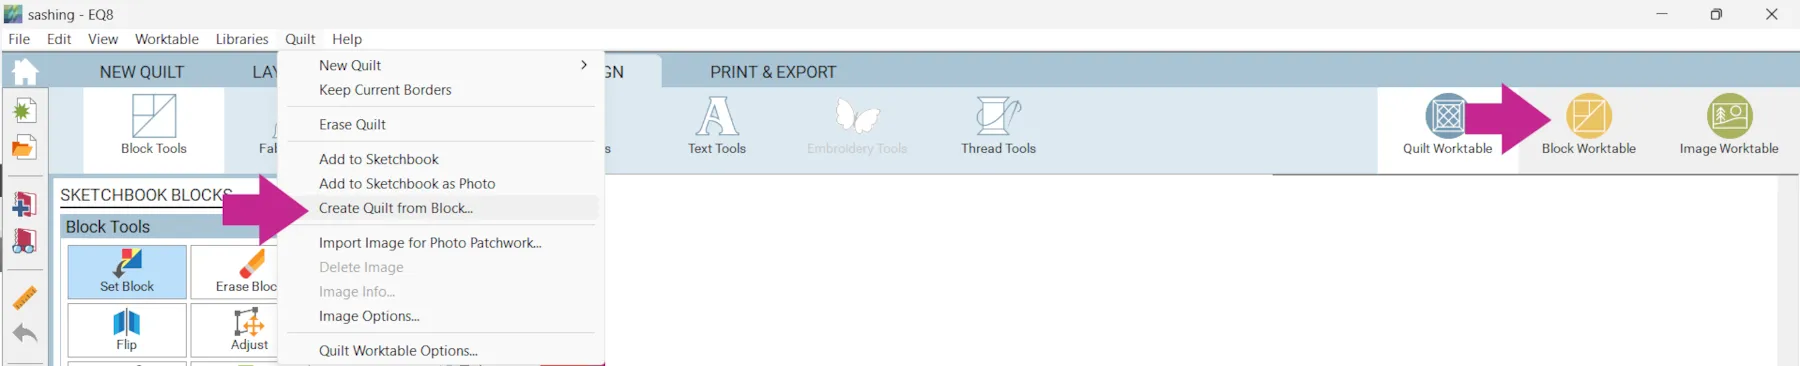
- Click Quilt > Create a Quilt from Block

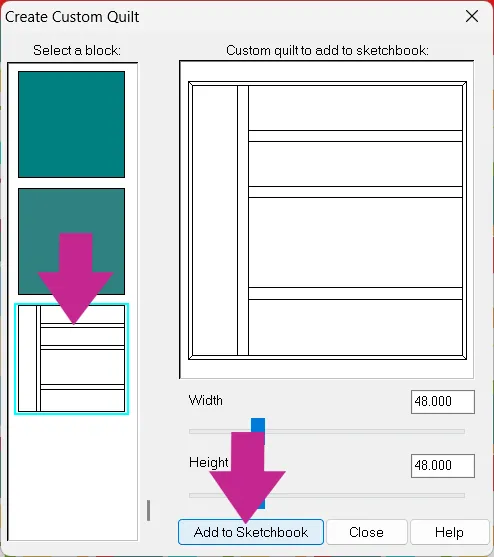
- Find your block on the left and click it. Then change the size if you’d like and click Add to Sketchbook.

- Click View Sketchbook
- Scroll to the end of all the quilts in the Quilts section
- Click Edit
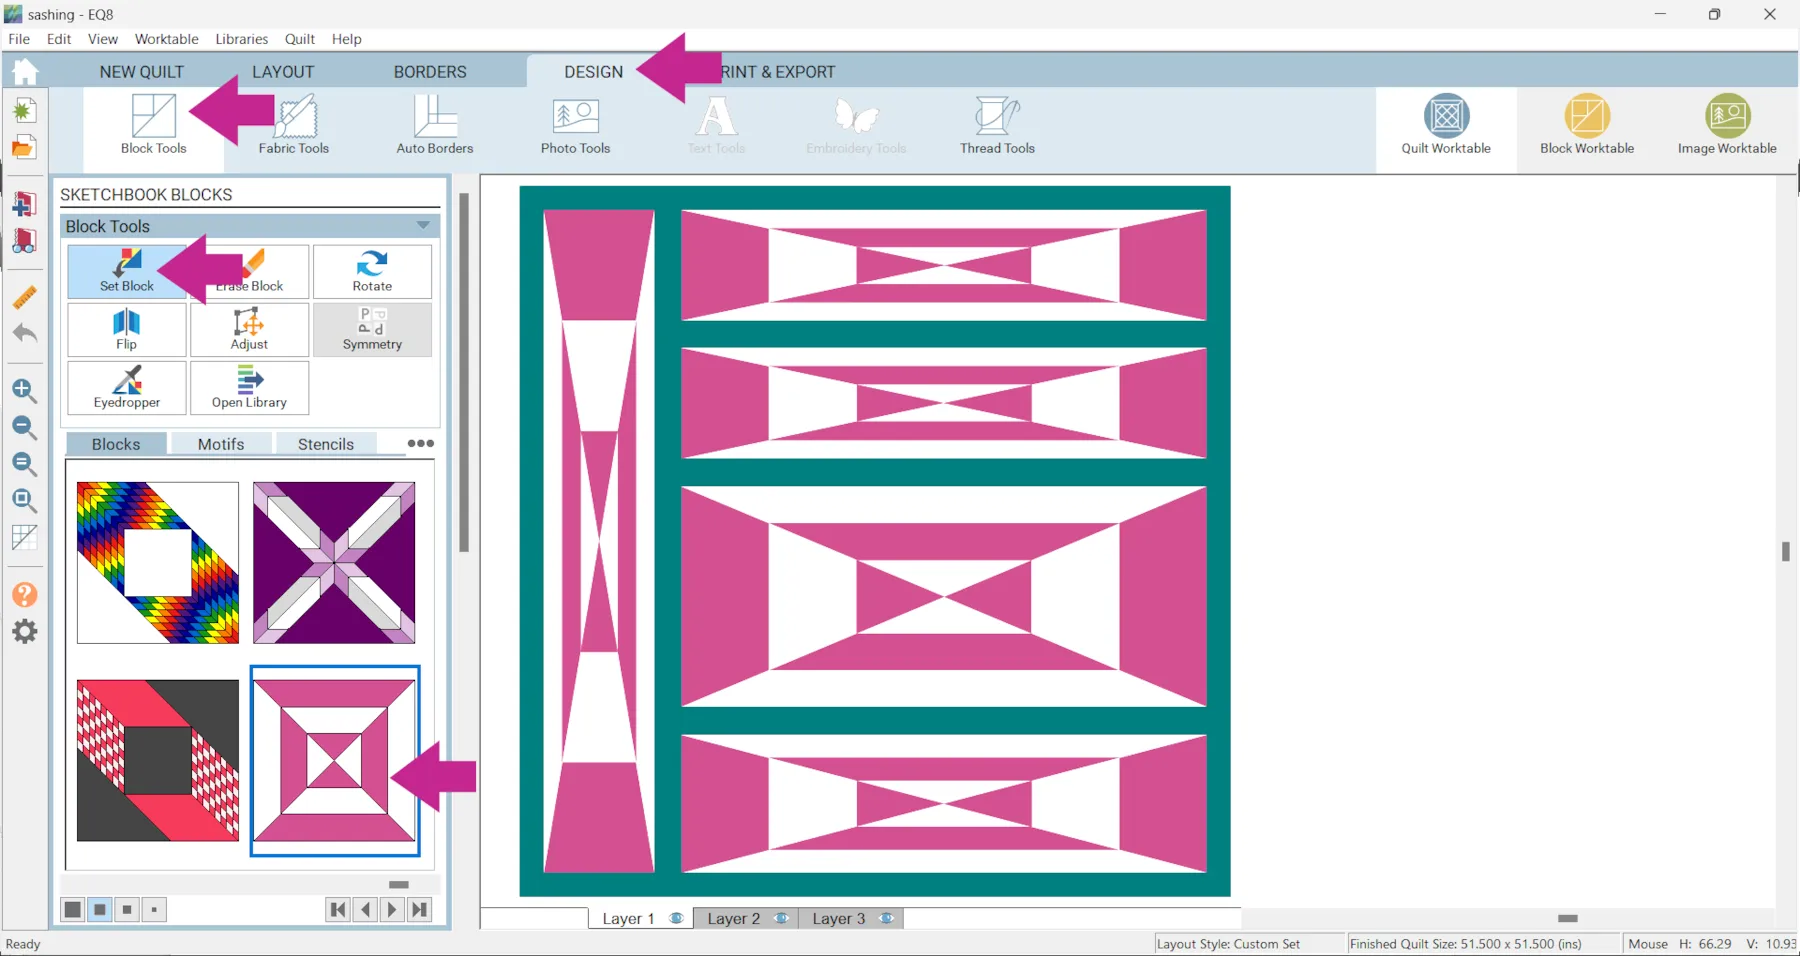
- Click the DESIGN tab > Block Tools > Set Block
- Recolor the quilt as desired.
- Click Add to Project Sketchbook
If those methods don’t work for what you have in mind you could also use a Custom Set layout.


If you want to post images of your quilts, here is how to export the images.
To post your image click to comment on this post. Fill in your info and then click Browse.
Go to: Documents\My EQ8\Images
I can’t wait to see what you’ve done! I hope you enjoyed the lesson!
If you have questions about the lesson feel free to post them below.
If you have questions about something else EQ related, please contact techsupport@electricquilt.com.
If you have suggestions for new Design & Discover lessons feel free to comment below or email Heidi@electricquilt.com.


