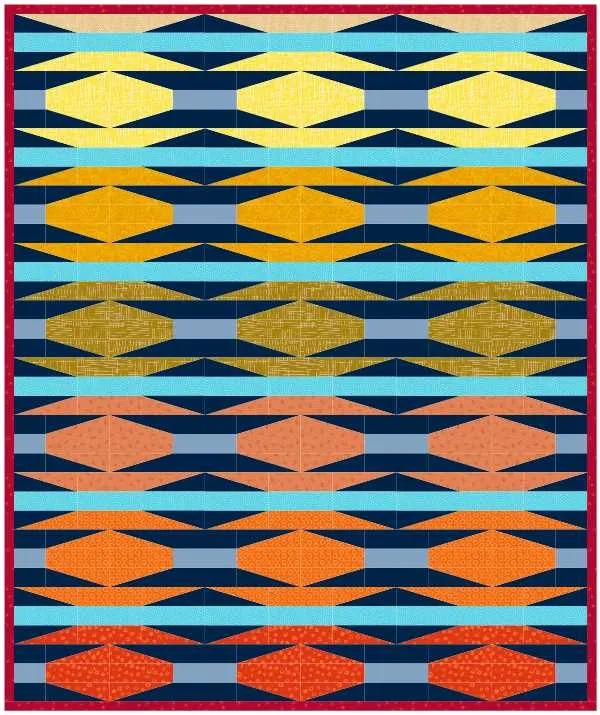
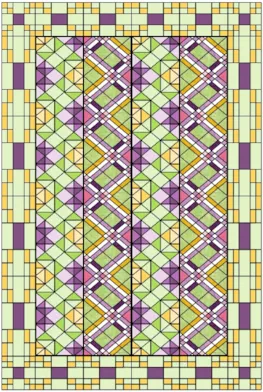
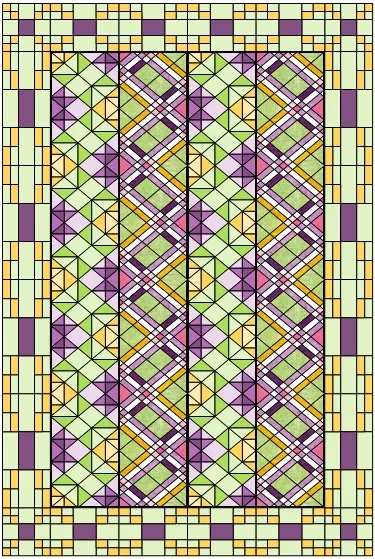
Strip quilts layouts are so versatile! You can use them for the typical strip quilt layouts, but so much more!
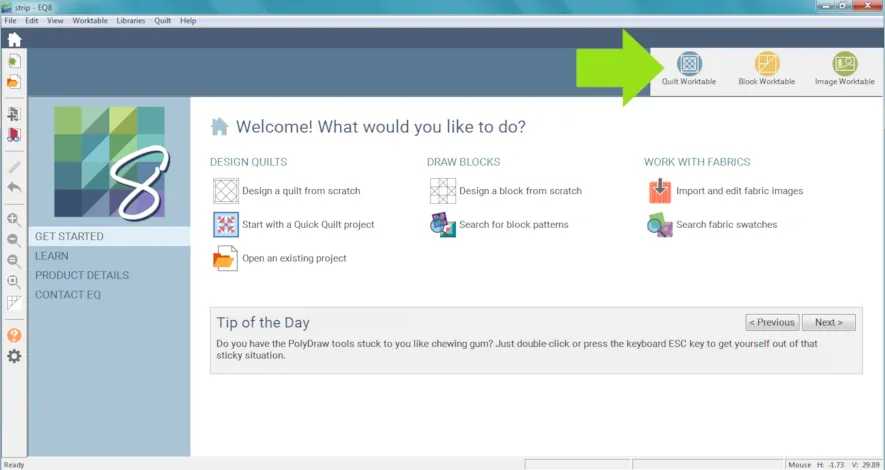
- Click Quilt Worktable
- Click NEW QUILT
- Click Horizontal Strip
- Click LAYOUT tab
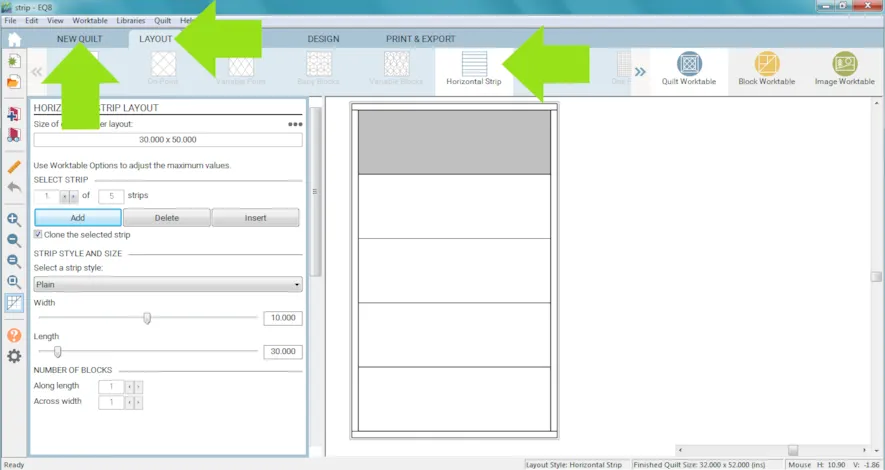
- Under Select a Strip Style choose: Pieced Blocks
- Set the Width to: 3
- Set the Length to : 30
- Under the NUMBER OF BLOCKS
- Set Along length to: 3
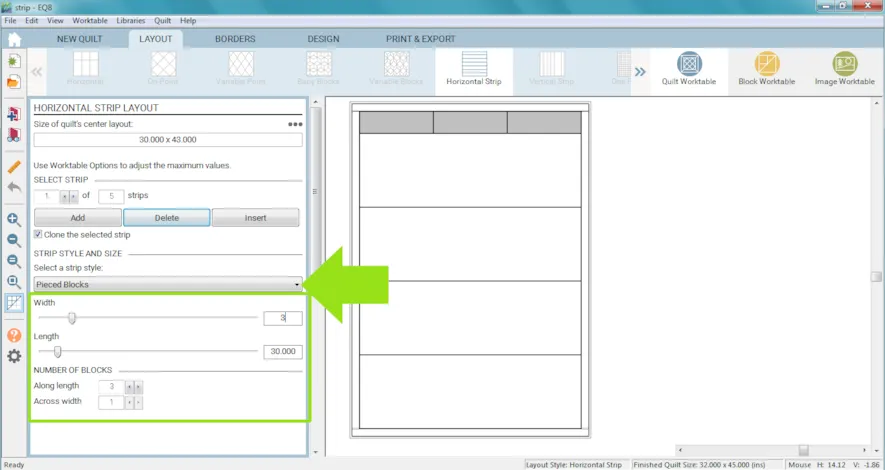
- Click on the second strip.
- Under Select a Strip Style choose Half Drop Blocks
- Set the Width to: 3
- Set the Length to : 30
- Under the NUMBER OF BLOCKS set Along length to: 3
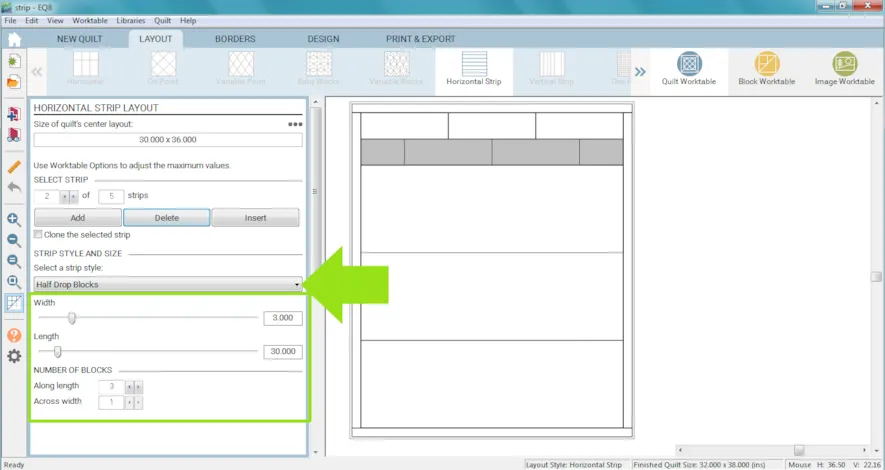
- Click on the third and click the Delete button. Also delete the 4th and 5th rows.
- Click on the first row.
- Check the Clone the selected strip box.
- Click Add.
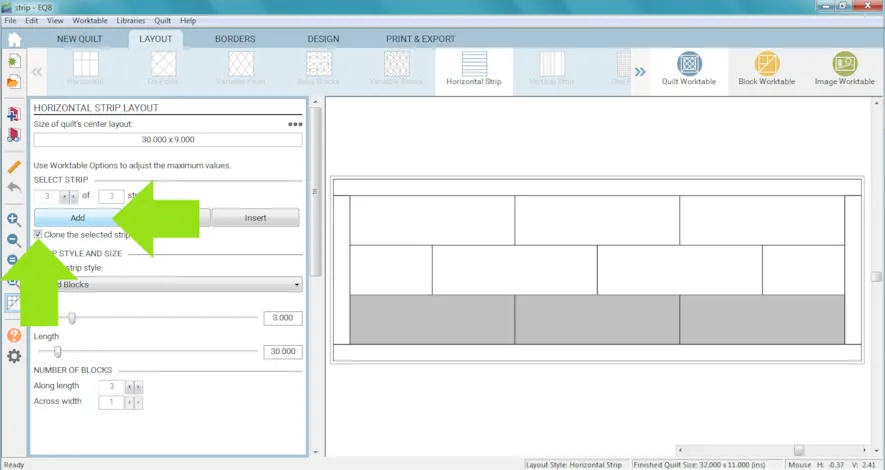
- Click on the second row.
- Check Clone the selected strip.
- Click Add.
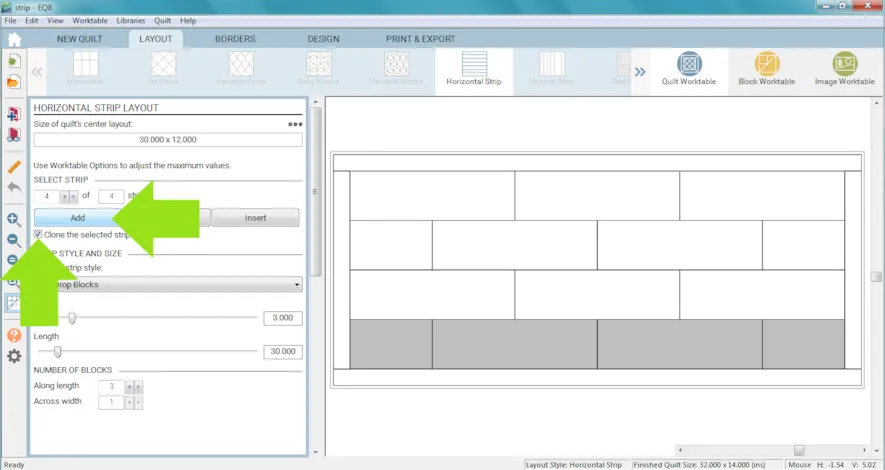
- Repeat alternating cloning every other row until you have 12 rows.
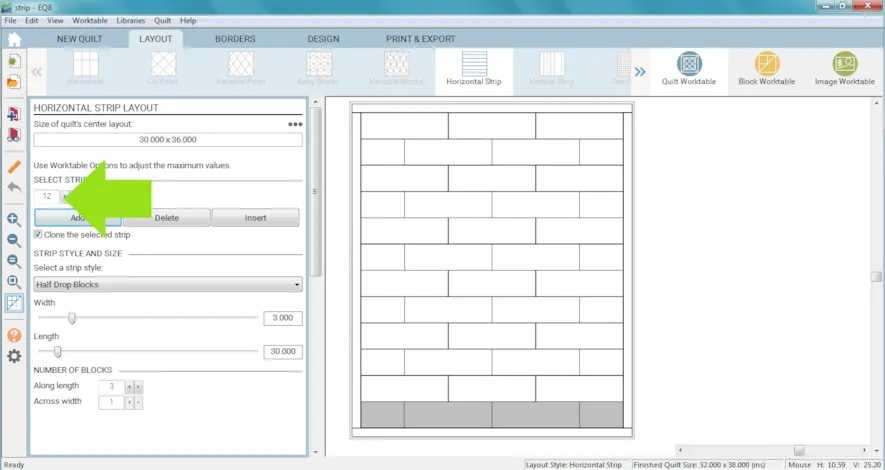
- Click the DESIGN tab
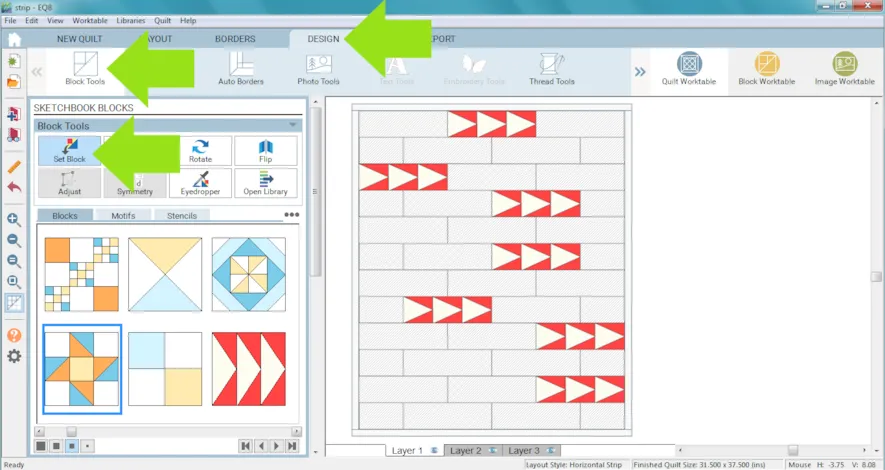
- Click Block Tools
- Click Set Block and place blocks as desired.
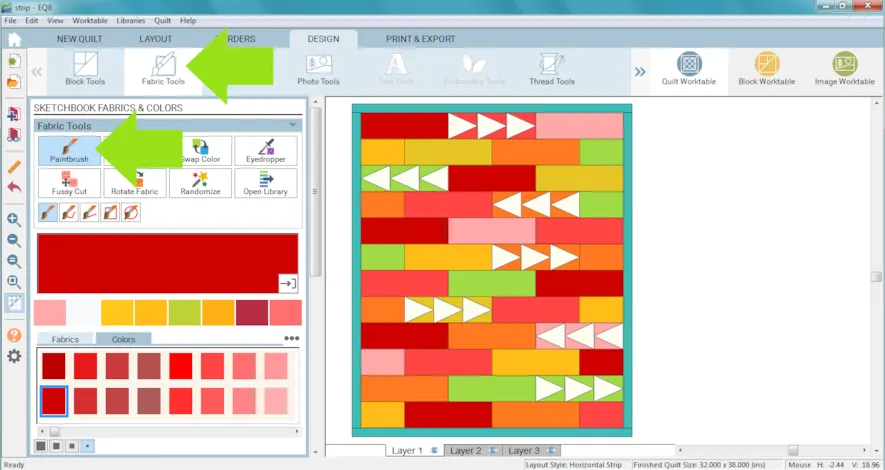
- Click Fabric Tools
- Click Paintbrush and color as desired.
- Click Add to Project Sketchbook
 . If you haven’t named your project yet, EQ8 will prompt you to do so. (To be saved, your item needs to be in the Sketchbook AND your project needs to be named. Here is more information.)Let’s start another example.
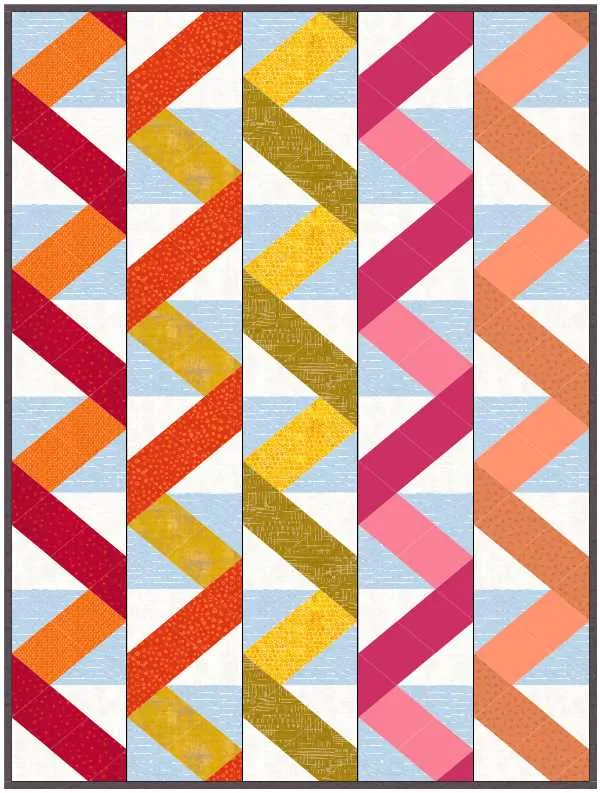
 - Click NEW QUILT
- Click Vertical Strip
- Click the LAYOUT tab.
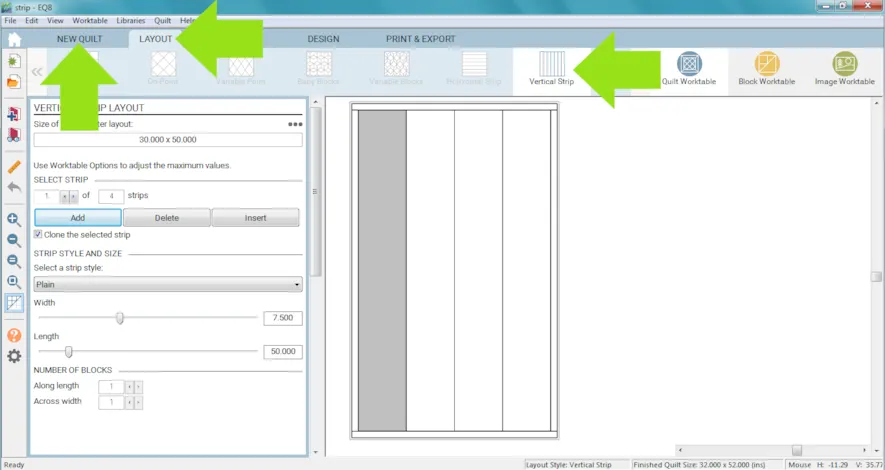
- Under Select a Strip Style choose Points A
- Set the Width to: 7.5
- Set the Length to : 50
- Under the NUMBER OF BLOCKS set Along length to: 4
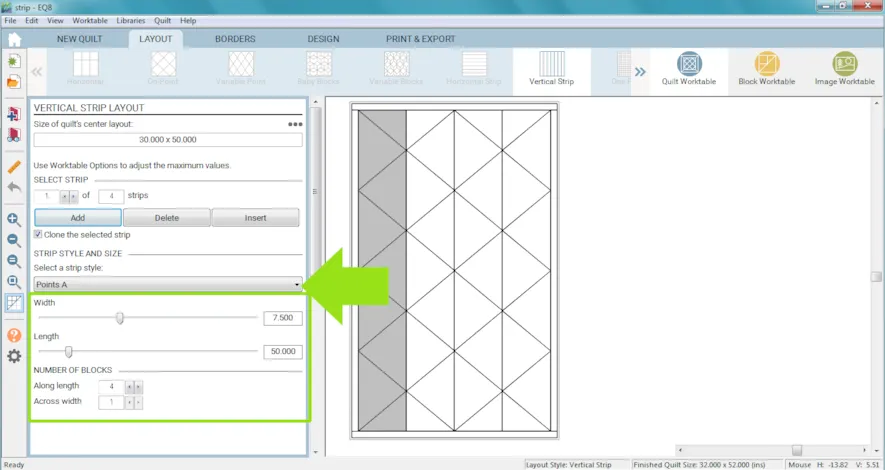
- Check Clone the selected strip.
- Click Insert three times.

- Click on the fifth strip and click the Delete button. Also delete the 6th and 7th rows.
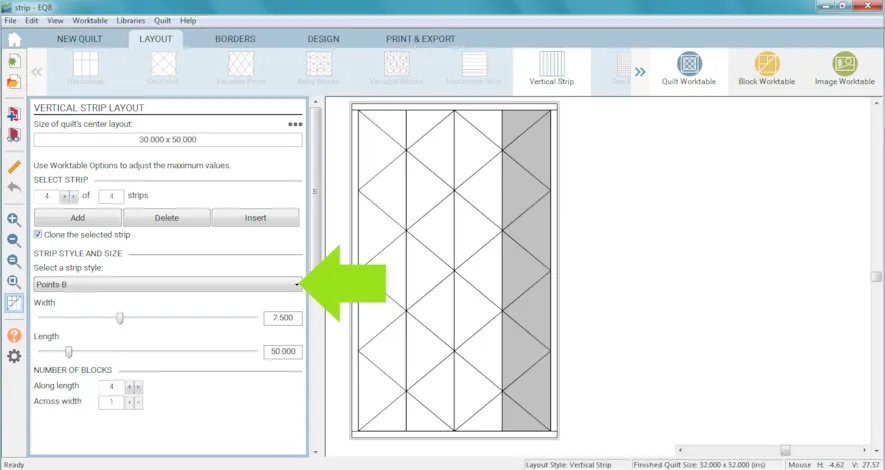
- Click on the second row and change the Strip Style to Points B.
- Click on the fourth row and change the Strip Style to Points B.
- Click the DESIGN tab
- Click Block Tools
- Click Set Block (in this example Log Cabin was used.)
- Click Fabric Tools
- Click Paintbrush and color as desired.
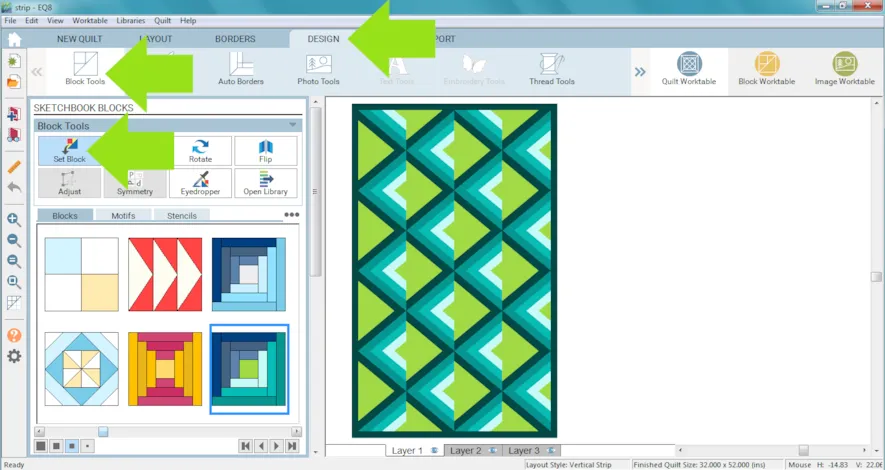
- Click Add to Project Sketchbook
 .
.
Strip Quilts can also be used to create more layouts that just have different sized blocks.
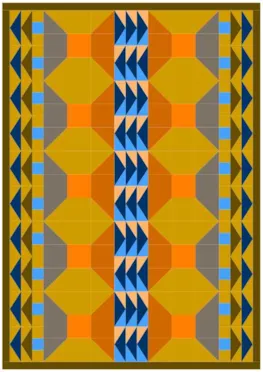
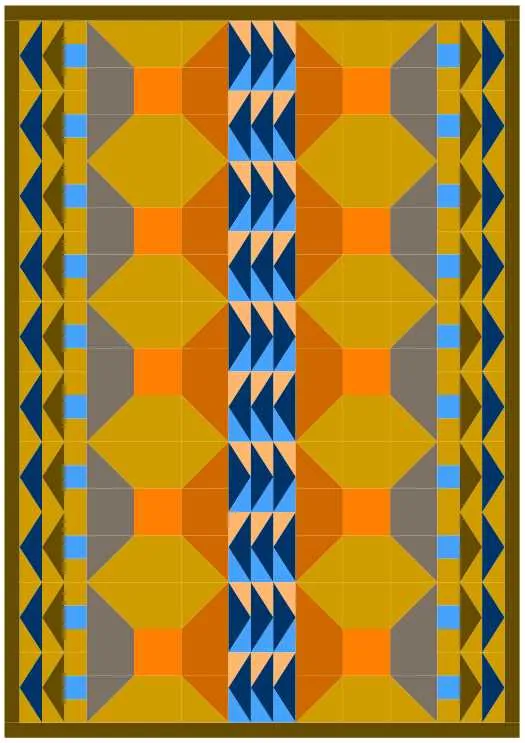
For example a Vertical Strip quilt with the following settings: - For strips 1, 3 and 5:
Under Select a Strip Style choose: Pieced Blocks
Set the Width to: 2.25
Set the Length to : 23.5
Under the NUMBER OF BLOCKS set Along length to: 10 - For strips 2 and 4:
Under Select a Strip Style choose: Pieced Blocks
Set the Width to: 4.75
Set the Length to : 23.5
Under the NUMBER OF BLOCKS set Along length to: 5 - Add some blocks. (In this example the EQ Default Ohio Star and EQ Default Flying Geese were used.)
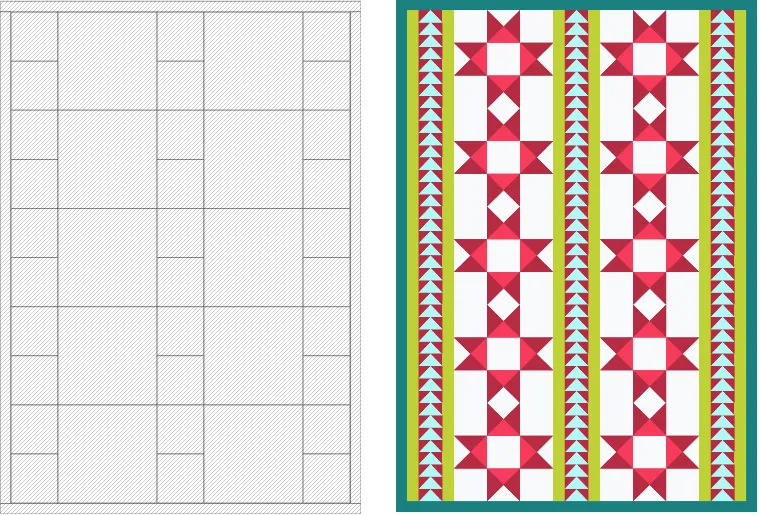
For another example a Vertical Strip quilt with the following settings: - Under Select a Strip Style choose: Pieced Blocks
Set the Width to: all different between 2 and 5 inches
Set the Length to : 23.5
Under the NUMBER OF BLOCKS set Along length to: 11 - Add some blocks. (In this example the EQ Default Half-Square Triangle was used in both examples, just rotated and colored differently.)

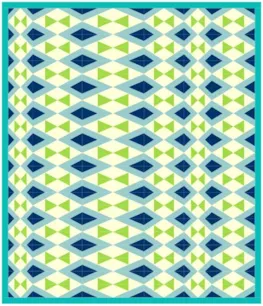
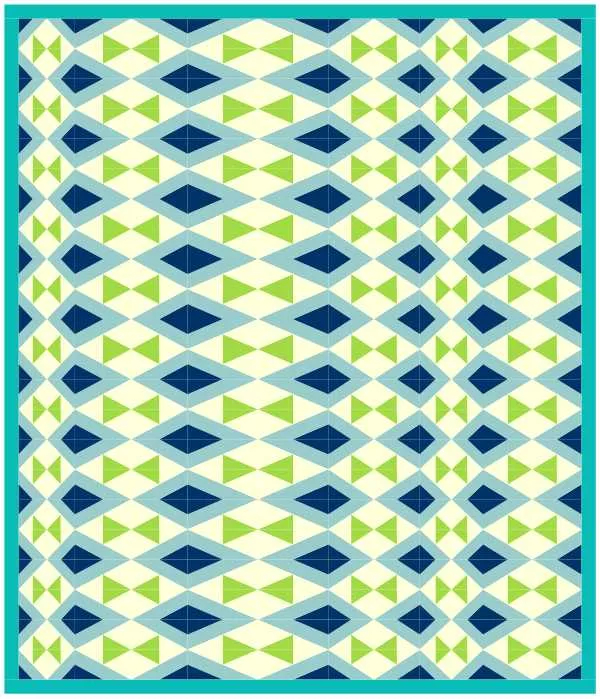
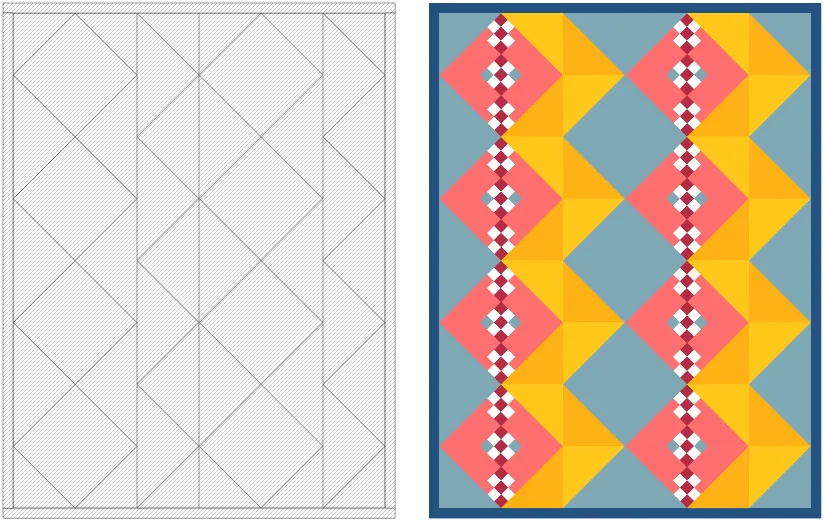
Here we go again… a Vertical Strip quilt with the following settings: - Rows 1 and 3:
Under Select a Strip Style choose: Diamonds
Set the Width to: 12.5
Set the Length to : 50
Under the NUMBER OF BLOCKS set Along length to: 4 - Rows 2 and 4:
Under Select a Strip Style choose Points A
Set the Width to: 6.25
Set the Length to : 50
Under the NUMBER OF BLOCKS set Along length to: 4 - Add some blocks. (In this example the EQ Default Nine Patch Chain and EQ Default Half-Square were used.)
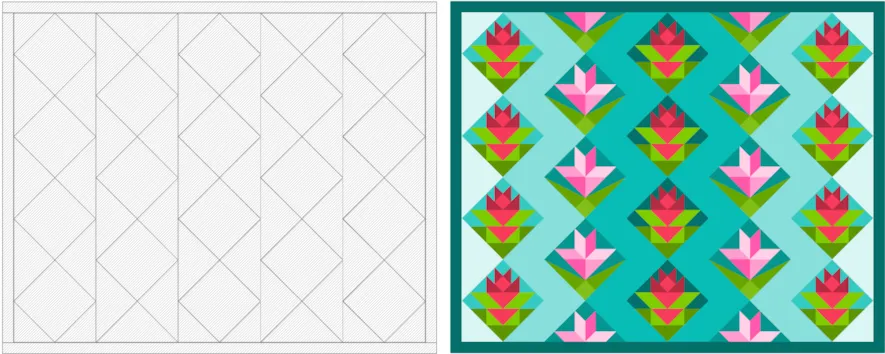
- Strips 1, 3 and 5:
Under Select a Strip Style choose: Diamonds
Set the Width to: 7.5
Set the Length to : 30
Under the NUMBER OF BLOCKS set Along length to: 4 - Strips 2 and 4:
Under Select a Strip Style choose Half Drop Diamonds
Set the Width to: 7.5
Set the Length to : 30
Under the NUMBER OF BLOCKS set Along length to: 4 - Add some blocks. (In this example the Amaryllis Bulb and Peony were used. Notice that the blocks are drawn diagonally but they’ll be upright in the layout.)
If you want to post images of your quilt, here is how to export the images.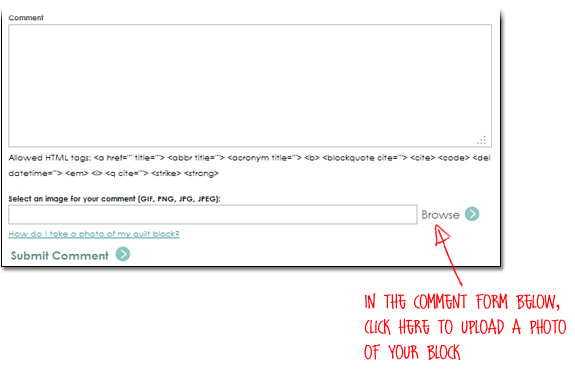
To post your image click to comment on this post.Fill in your info and then click Browse.
Go to: Documents\My EQ8\Images
I can’t wait to see what you’ve done! I hope you enjoyed the lesson!
If you have questions about the lesson feel free to post them below.
If you have questions about something else EQ related, please contact techsupport@electricquilt.com.
If you have suggestions for new Design & Discover lessons feel free to comment below or email Heidi@electricquilt.co


