Many optical illusion and 3D quilts can be designed with 60° triangles, which means you can use 60° triangle rulers!
Also, if you’re interested in triangle quilts you may also want to check out Design & Discover – Quilts with Triangles!
Let’s get started!
- Click Design a quilt from scratch

- Click either Horizontal Strip or Vertical Strip. (I’ll be using Vertical Strip.)

- Click the LAYOUT tab
- Under Select a strip style choose Points A
 If you don’t want your triangles to be 60° skip down to step 8.
 - If you want 60° (isometric) triangles for a Strip Quilt: Use this calculator to figure out the width and height you would need. For example, if your strip is 50 inches long, with 10 triangles they would be 5 inches on one side…because 50/10=5. According to the calculator if one side is 5 inches the width needs to be 4.33 inches.In other words…
A = 50 (because that’s how long you want your quilt to be)
B = 10 (because that’s the number of triangles you want in each strip)
C = 5 (because 50/10 = 5)
D = 4.33 (because that’s what the calculator says)
E = 4.344 (because EQ8 is rounding 4.33 to 4.344)(None of the other information from the calculator is relevant for this situation.)
- As you can see, sometimes EQ8 will round the Width of the strip (E). You can change the way EQ8 rounds (to some extent). If you would like to do this, click Worktable Options > Snap Settings > Nudge Settings. You can change the settings to whatever you would prefer and click OK.

- If you want to double-check, preview the rotary cutting directions and make sure the angles are 60°.

- Now we can add more strips. But first let’s delete the old ones. Click on the next strip and click the Delete button. Repeat until you only have the Points A strip left.

- If it is not already, put a check mark next to Clone the selected strip.
- Click Add a few times to add more strips.

- Click on every other strip and change the strip style from Points A to Points B

- Click the DESIGN tab > Fabric Tools > Paintbrush
- Check out the Paintbrush Subtools to make coloring much faster.

- Click Add to Project Sketchbook
 for anything you’d like to save. If you haven’t named your project yet, EQ8 will prompt you to do so. (To be saved, your item needs to be in the Sketchbook AND your project needs to be named. Here is more information.)


Here is an example of a quilt you can design with this type of layout…

With the patch lines showing…

Here are the details from the LAYOUT tab.
- 22 strips
- Alternating Points A and Points B strip styles.
- Width: 1.313
- Length: 60
- NUMBER OF BLOCKS – Along Length: 40

Here’s another…

With the patch lines showing…

Here are the details from the LAYOUT tab.
- 8 strips
- Alternating Points A and Points B Strip styles.
- Width: 1.5
- Length: 40
- NUMBER OF BLOCKS – Along Length: 24

One more example…

With the patch lines showing…

And the details from the LAYOUT tab.
- 14 strips
- Alternating Points A and Points B Strip styles.
- Width: 1.375
- Length: 36
- NUMBER OF BLOCKS – Along Length: 24

If you want to post images of your quilts, here is how to export the images.
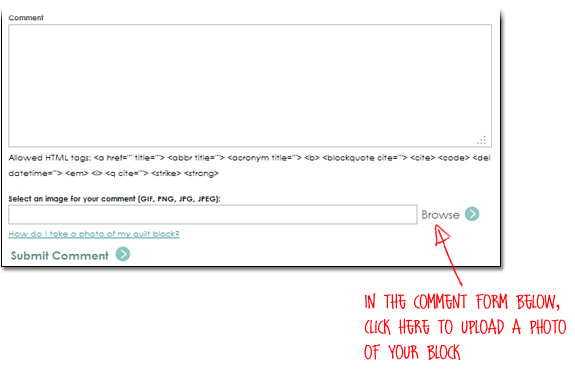
To post your image click to comment on this post. Fill in your info and then click Browse.
Go to: Documents\My EQ8\Images
I can’t wait to see what you’ve done! I hope you enjoyed the lesson!
If you have questions about the lesson feel free to post them below.
If you have questions about something else EQ related, please contact techsupport@electricquilt.com.
If you have suggestions for new Design & Discover lessons feel free to comment below or email Heidi@electricquilt.com


