There are a few different ways to make quilts with triangles in EQ8.
The simplest way is using a One Patch Quilt layout.
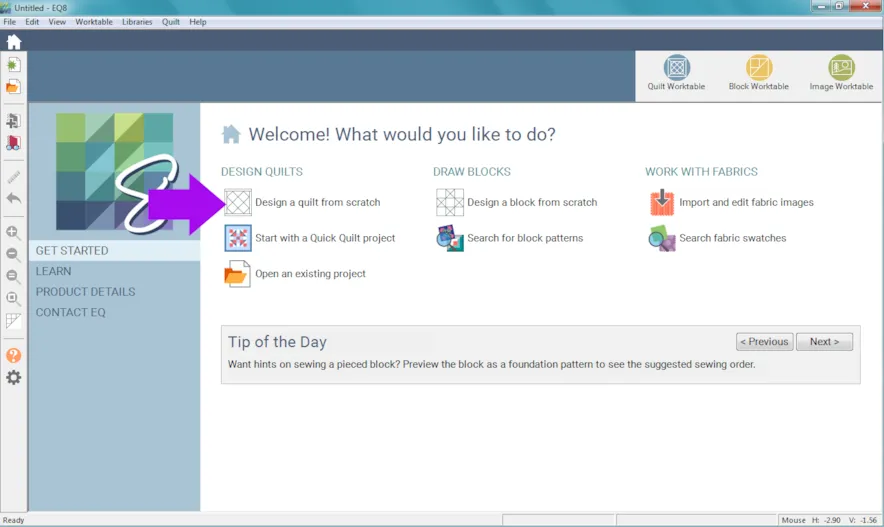
- Click Design a Quilt from Scratch.
- Click One Patch
- Click the LAYOUT tab
- Click the down arrow under Patch Style to select Lightning
- You can change the number of units and the finished size of the units.
Here is more information on One Patch quilts and how the patches are counted.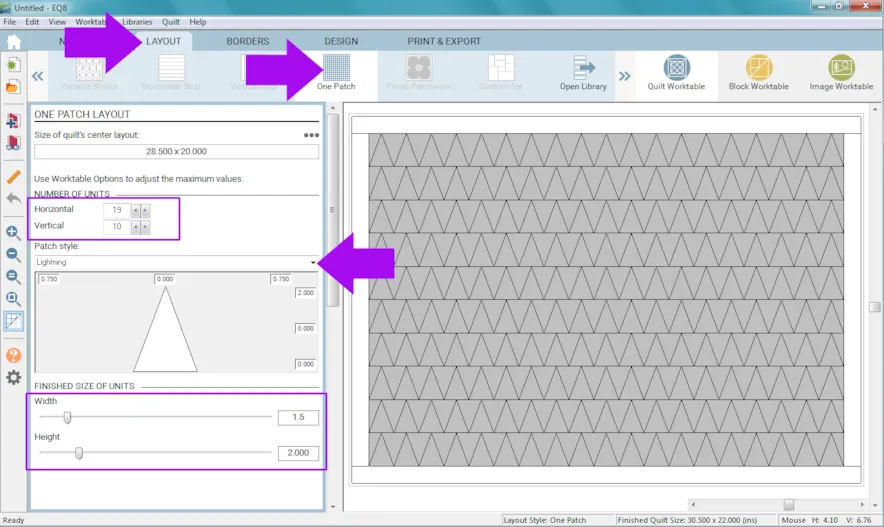
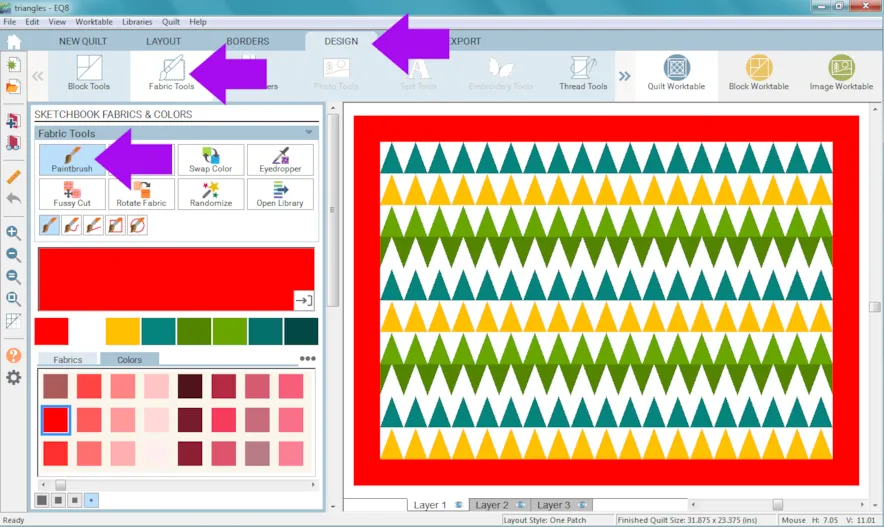
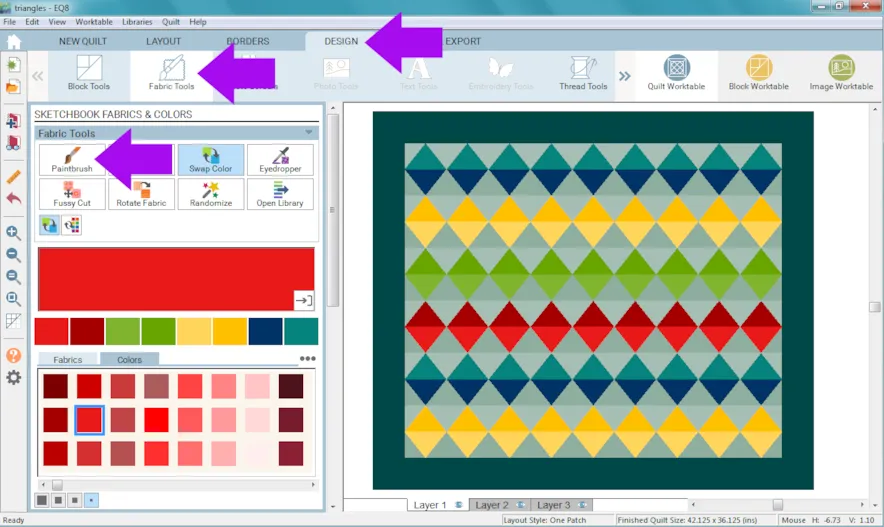
- Click the DESIGN tab.
- Click Fabric Tools.
Please Note: Blocks cannot be placed in One Patch Quilt layouts.
See Step 29 for how to add triangles to Layer 2 of any quilt layout. - Click Paintbrush. Add colors and fabrics as you wish.
-
Click Add to Project Sketchbook
 . If you haven’t named your project yet, EQ8 will prompt you to do so. (To be saved, your item needs to be in the Sketchbook AND your project needs to be named. Here is more information.)
Let’s start a new quilt.
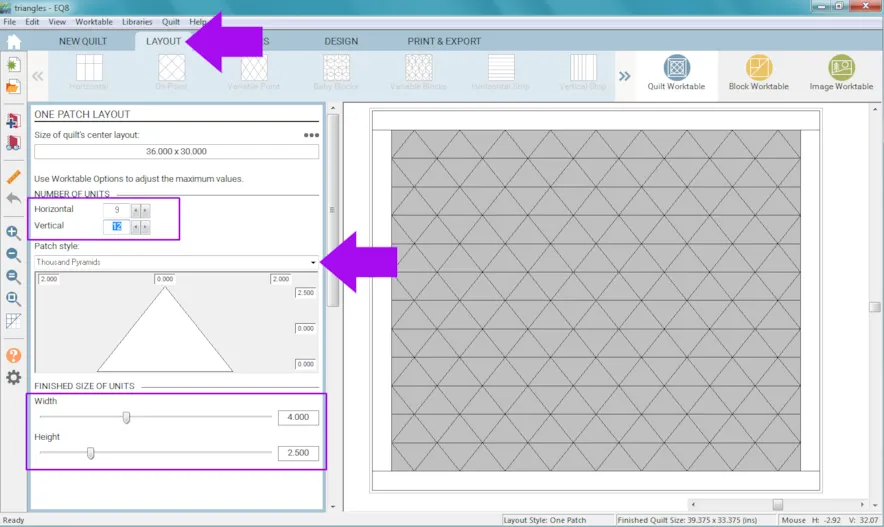
- Click the LAYOUT tab
- Click the down arrow under Patch Style to select Thousand Pyramids.
- You can change the number of units and the finished size of the units.
- Click the DESIGN tab.
- Click Fabric Tools.
- Click Paintbrush. Add colors and fabrics as you wish.
- Click Add to Project Sketchbook.
 Here is another Design & Discover about One Patch Quilts for more information.
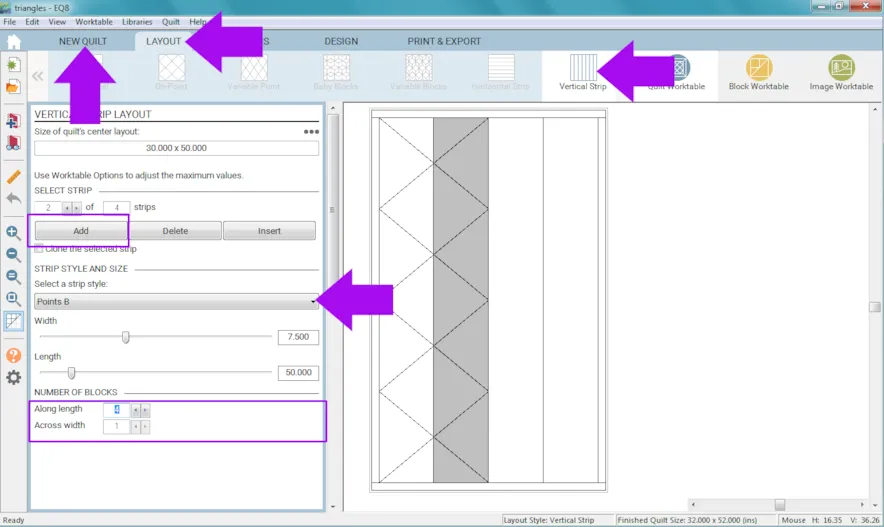
Next we’ll use Strip Quilts to create triangle quilts you can place blocks in. - Click NEW QUILT
- Click Vertical Strip
- Click LAYOUT
- Click the down arrow under Select a strip style to select Points A for the first strip.
- Click on the second strip and select Points B for the Select a strip style.
- You can continue alternating Points A and Points B until you have filled all the strips. (You can also add more strips.) Or, you can use whatever combination of Points A and Points B you want.
- You can also change the number of blocks.
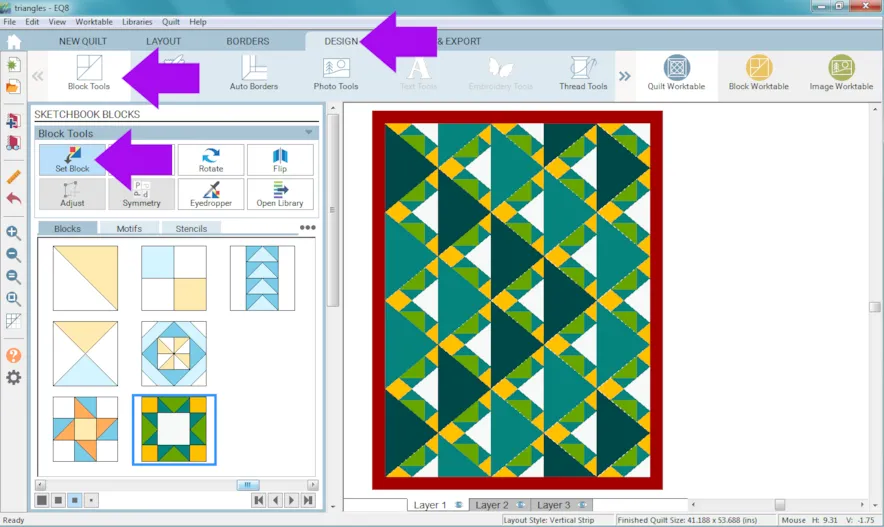
- Click the DESIGN tab
- Click Block Tools
- Click Set Block
- Place blocks in your quilt as you would like.
- Color the quilt and Add to Project Sketchbook when you’re done.
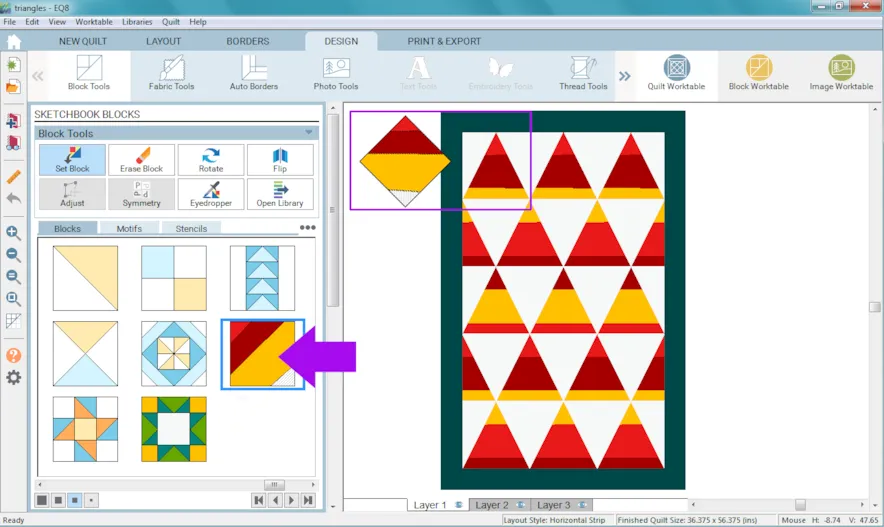
 Here is an example of a Horizontal Strip Quilt. When you place a block in a triangle, you can see it rotates 45°.
Here is another Design & Discover all about Strip Quilts for more information and options.Another way to use triangles is to draw a triangle block in PolyDraw.
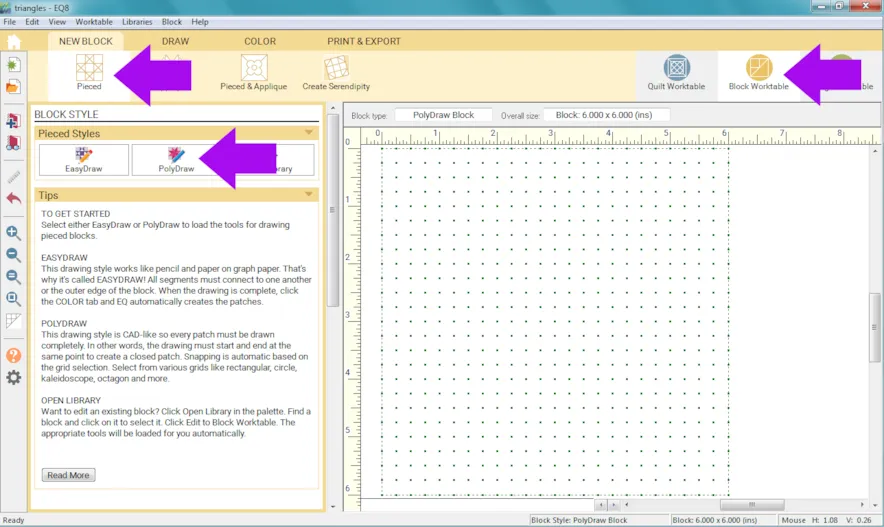
- Click Block Worktable
- Click Pieced
- Click PolyDraw
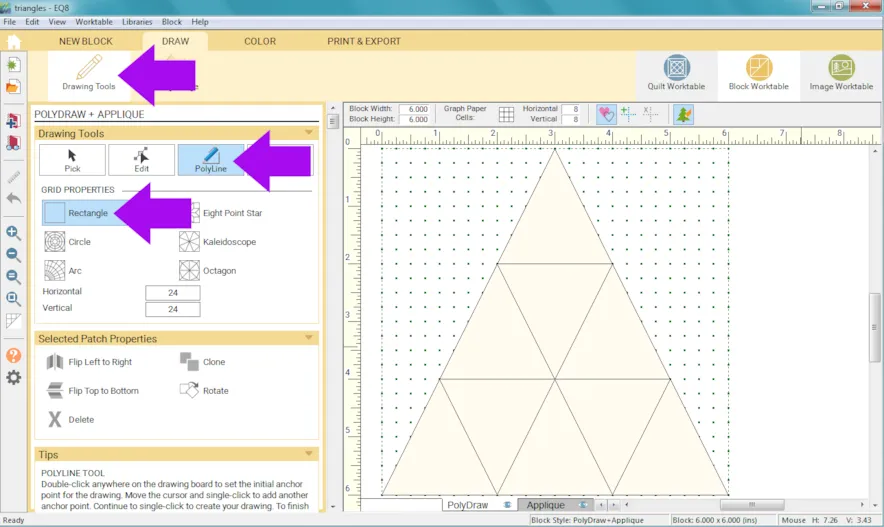
- Click Drawing Tools
- Click the Rectangular Grid
- Click the PolyLine tool and draw your triangular block.
Remember for PolyDraw:
• Double-click the left mouse button to start your shape and place the first node. Drag the mouse and a thick blue line will display the path of your mouse.
• Click the left mouse button to anchor the next node. Continue to click and drag until you reach the initial node.
• To complete the polygon, position the mouse over the initial node and double-click. This will complete, or close, the patch and release the mouse from the drawing mode.
Here is more information on using PolyDraw. - Click Add to Project Sketchbook when you are done drawing.
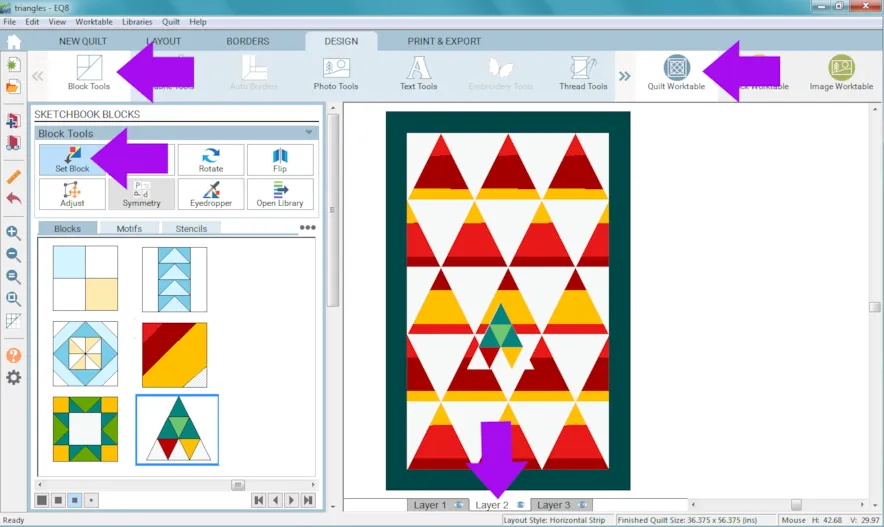
- Click Quilt Worktable.
- Click Block Tools.
- Click Set Block.
- Click Layer 2.
- Click on the block and drag onto your quilt.
You can design a quilt with blocks on both layers together, just remember that you need to edit the blocks on Layer 1 while on Layer 1 and the blocks that are on Layer 2 while on Layer 2. You can’t recolor a block placed on Layer 1 if you’re on Layer 2. - Keep adding more blocks to create your design.
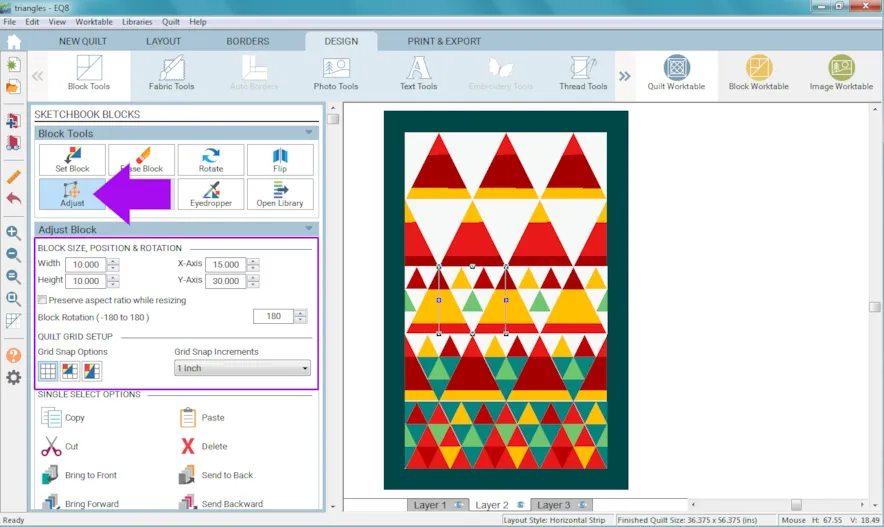
- Click the Adjust tool to move, resize, or rotate the blocks.
- You may also want to clip your blocks.
- When you are done click Add to Project Sketchbook.
Another option is designing a triangle shaped quilt. Here is a video about making a triangle shaped quilts.
What if you want 60° (isometric) triangles?
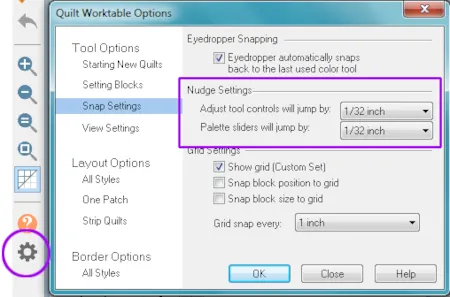
First, make sure your Nudge Settings are set to 1/32.
• Click Worktable Options > Snap Settings > Nudge Settings.
If you want 60° (isometric) triangles for a One Patch Quilt: Use this calculator to figure out the width and height you would need. For example, if you want your triangles to be 2 inches tall the calculator says all the sides (including the bottom/width) would be 2.31 (when you enter that size in EQ8, it gets changed to 2.313).
If you want 60° (isometric) triangles for a Strip Quilt: Again, use this calculator to figure out the width and height you would need. For example, if your strip is 50 inches long, with 10 triangles they would be 5 inches on one side…because 50/10=5. According to the calculator if one side is 5 inches the width needs to be 4.33 inches.
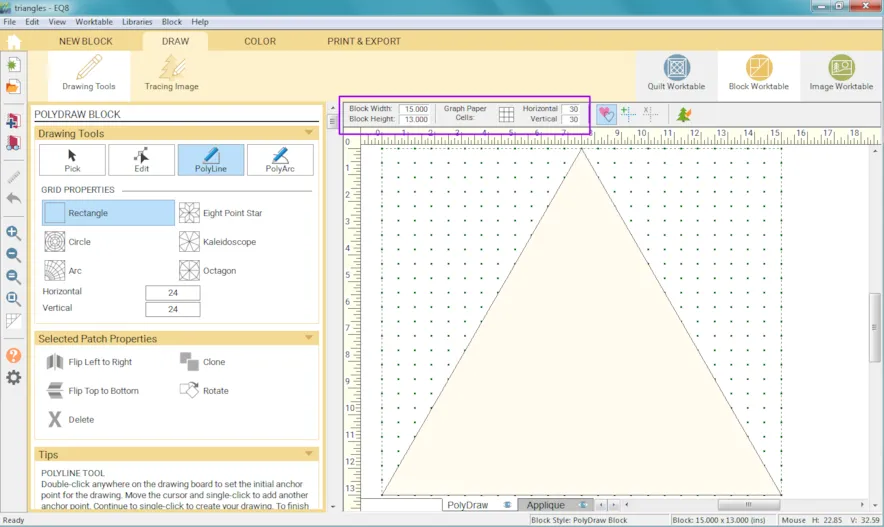
If you want to draw a 60° (isometric) triangle: Use this calculator to figure out the width and height you would need. One set of whole numbers you can use is 13 and 15. The calculator says if the height is 13 inches each side will be 15 inches.
• Set the block height to 15 and the width to 13 and the Horizontal and Vertical snaps to 30 x 30.
• Draw the triangle from 7.5 at the top to each lower corner.
• Click Add to Project Sketchbook.
• Click Quilt Worktable and drag the block onto Layer 2.
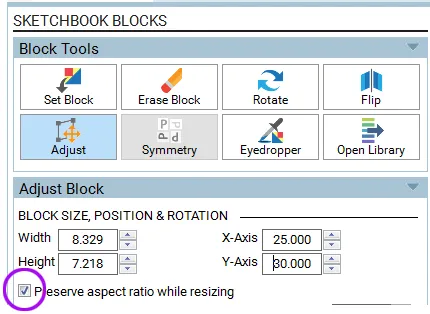
• Use the Adjust tool to resize the triangle.
• Make sure you have Preserve aspect ratio while resizing checked or it will no longer be 60°.
Please note: There is also a calculator available for 45° 45° 90° triangles as well as other triangles, too.
If you want to post images of your blocks or quilts, here is how to export the images.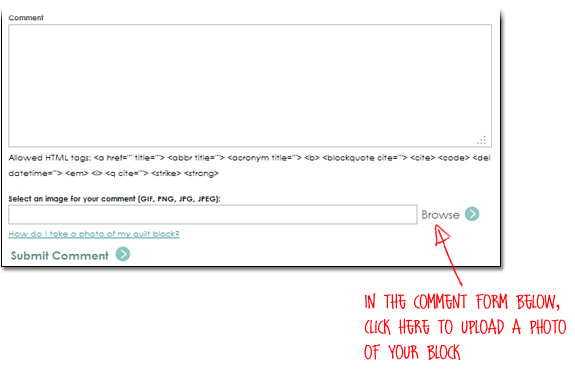
To post your image click to comment on this post. Fill in your info and then click Browse.
Go to: Documents\My EQ8\ImagesI can’t wait to see what you’ve done!
I hope you enjoyed the lesson!
If you have questions about the lesson feel free to post them below.
If you have questions about something else EQ related, please contact techsupport@electricquilt.com.
If you have suggestions for new Design & Discover lessons feel free to comment below or email Heidi@electricquilt.com


02-01-2021
11:29 am
Excellent article as always!
02-01-2021
1:06 pm
Thank you! I’m happy to hear you like it
02-01-2021
1:08 pm
Thank you! I’m glad this article is helpful!
02-01-2021
4:07 pm
answer to a prayer! Thanks
02-01-2021
4:08 pm
Answer to a prayer. Have not understood which numbers to insert where. Thanks
02-18-2021
5:14 pm
Thank you ever so much. Learned a lot about the strip layouts and how to manage those large and tricky 60 degree triangles.
08-01-2023
3:26 am
Thank you very much! This article is very helpful