This month we’ll be learning more about making borders to go with specific quilt designs. Although EQ8 has LOTS of border options it has even more quilt design options so sometimes you may need to get a little creative with how you design the border. You can use the concepts in this lesson to create unlimited types of borders. Also, make sure you check out this past lesson about borders, too!
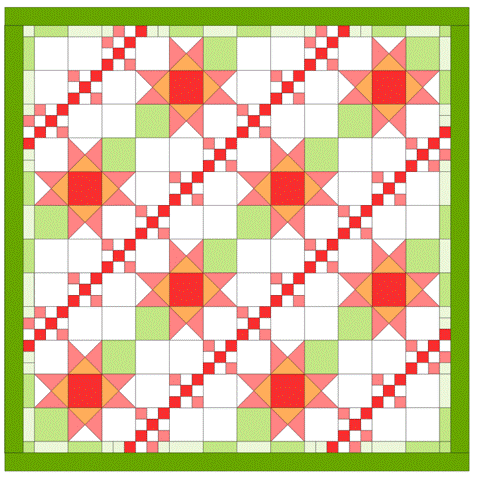
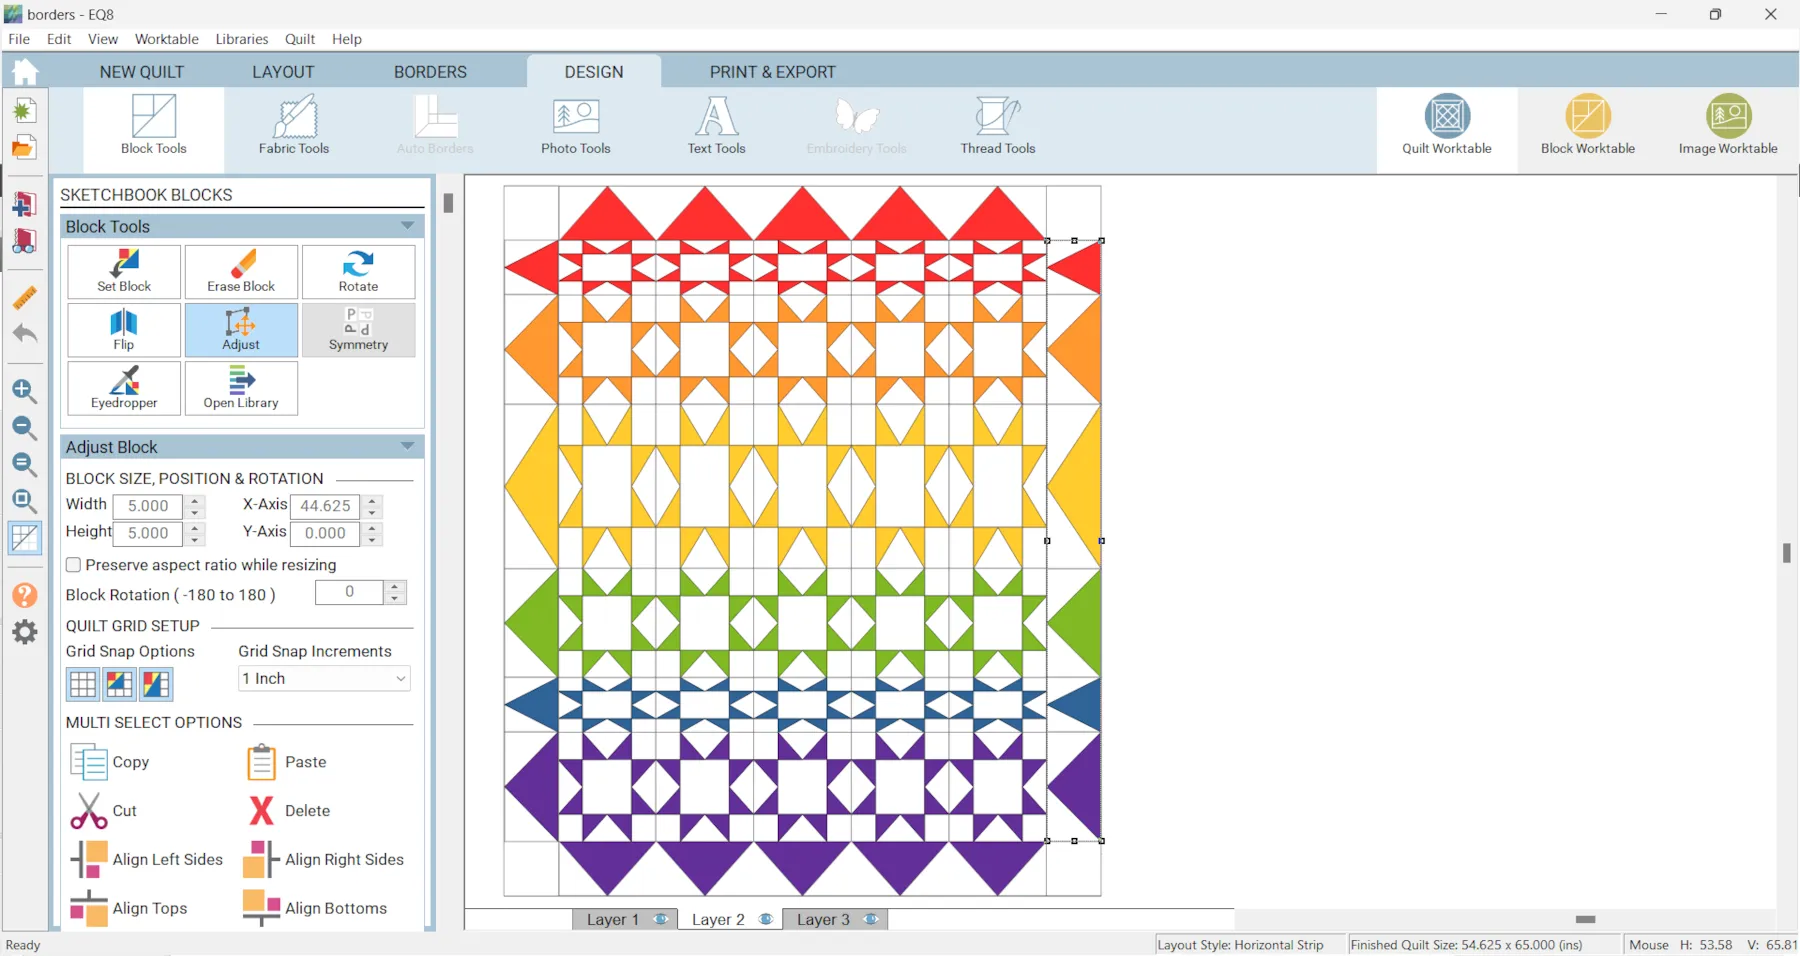
Let’s start with a basic quilt, and in this example we’re going to extend the Nine Patch design into the borders.
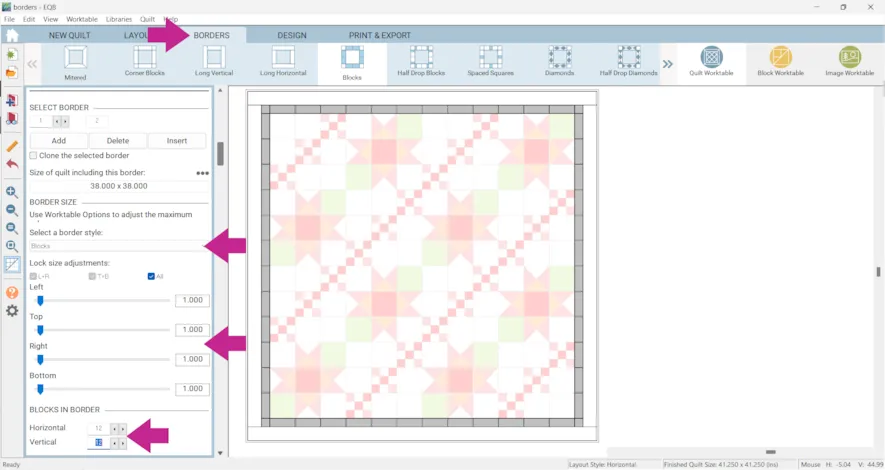
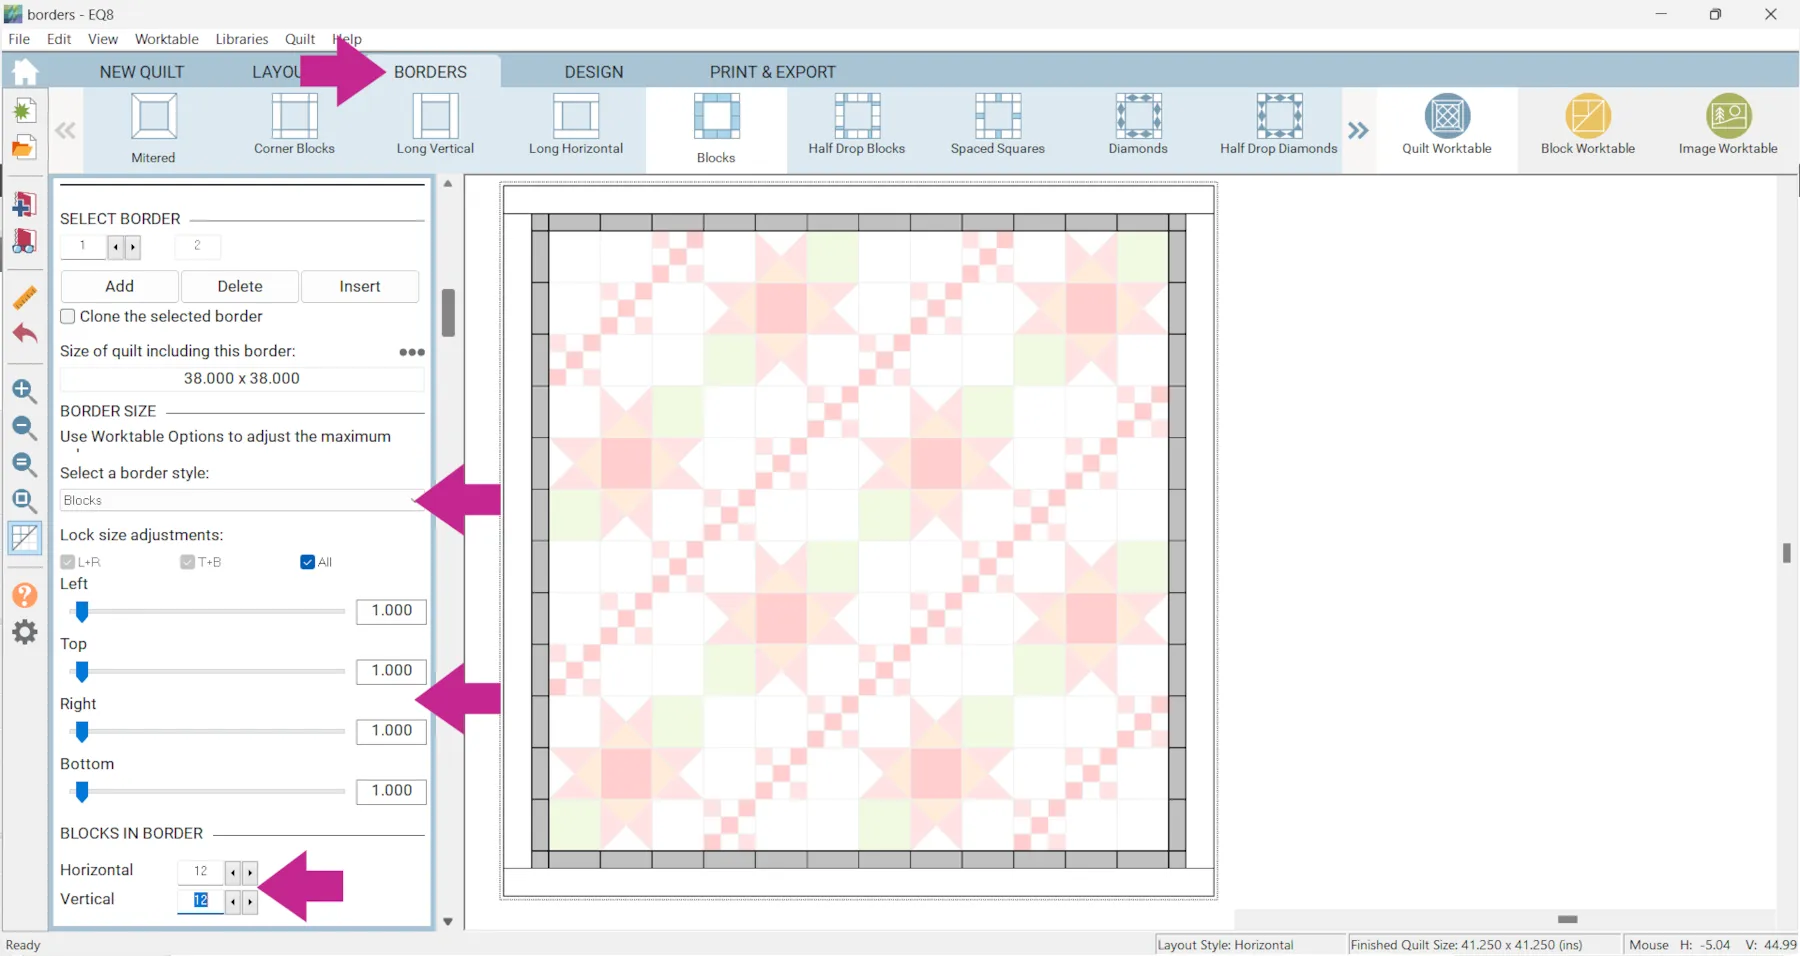
- Click the BORDERS tab
- Under Select a Border Style choose Blocks
- Change the size of the border, in the example the inner border is 1 inch.
- Change the number of blocks in the border, in the example there are 12 Horizontal and 12 Vertical.
If a Nine Patch is set in this border it will be skewed and not look right because the border is a third of the size of the Nine Patch. So, I really just want three squares in the space.
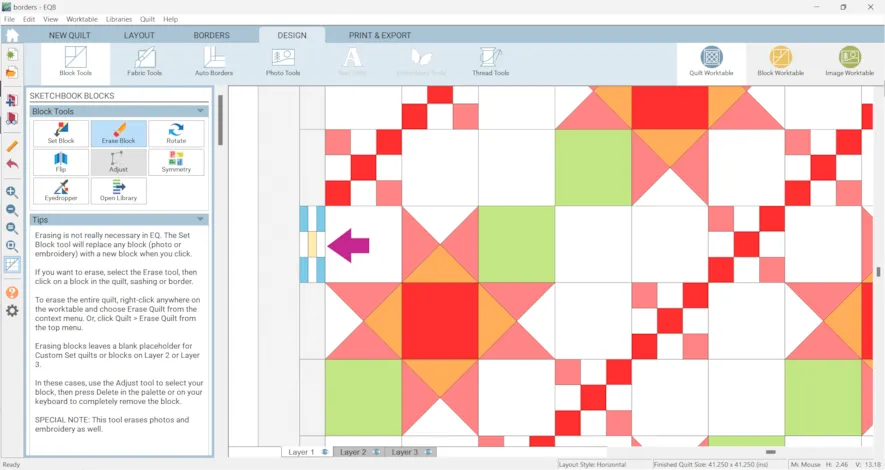
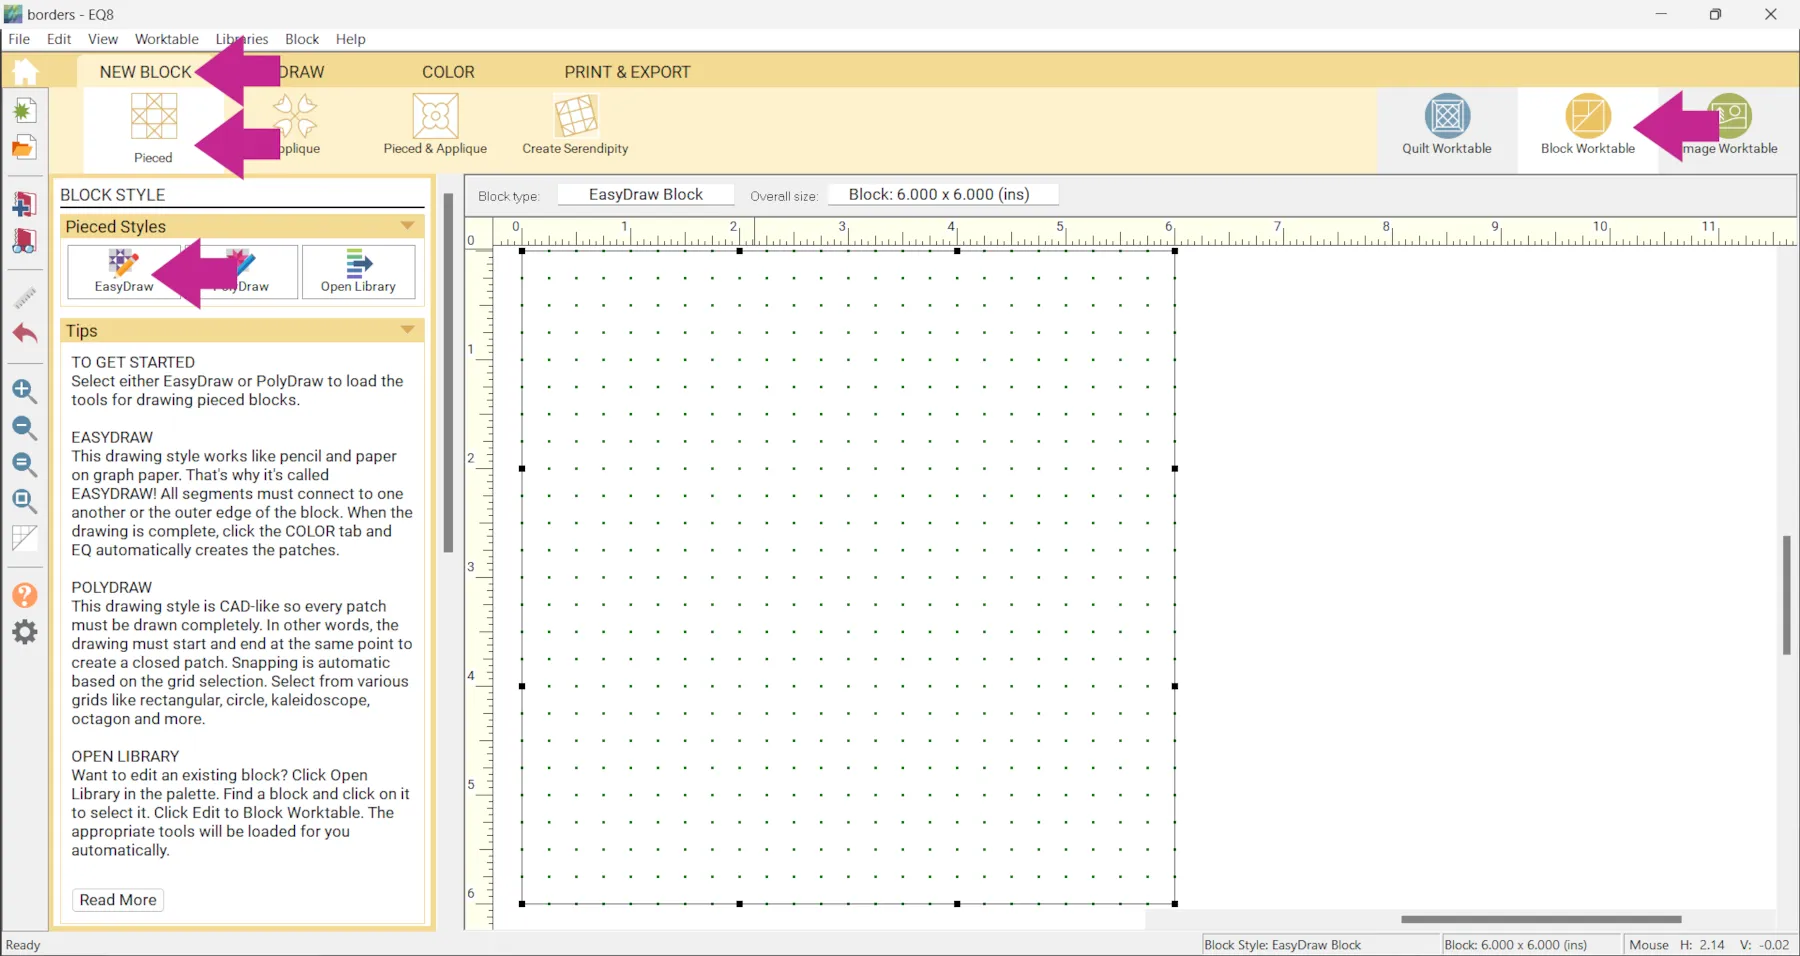
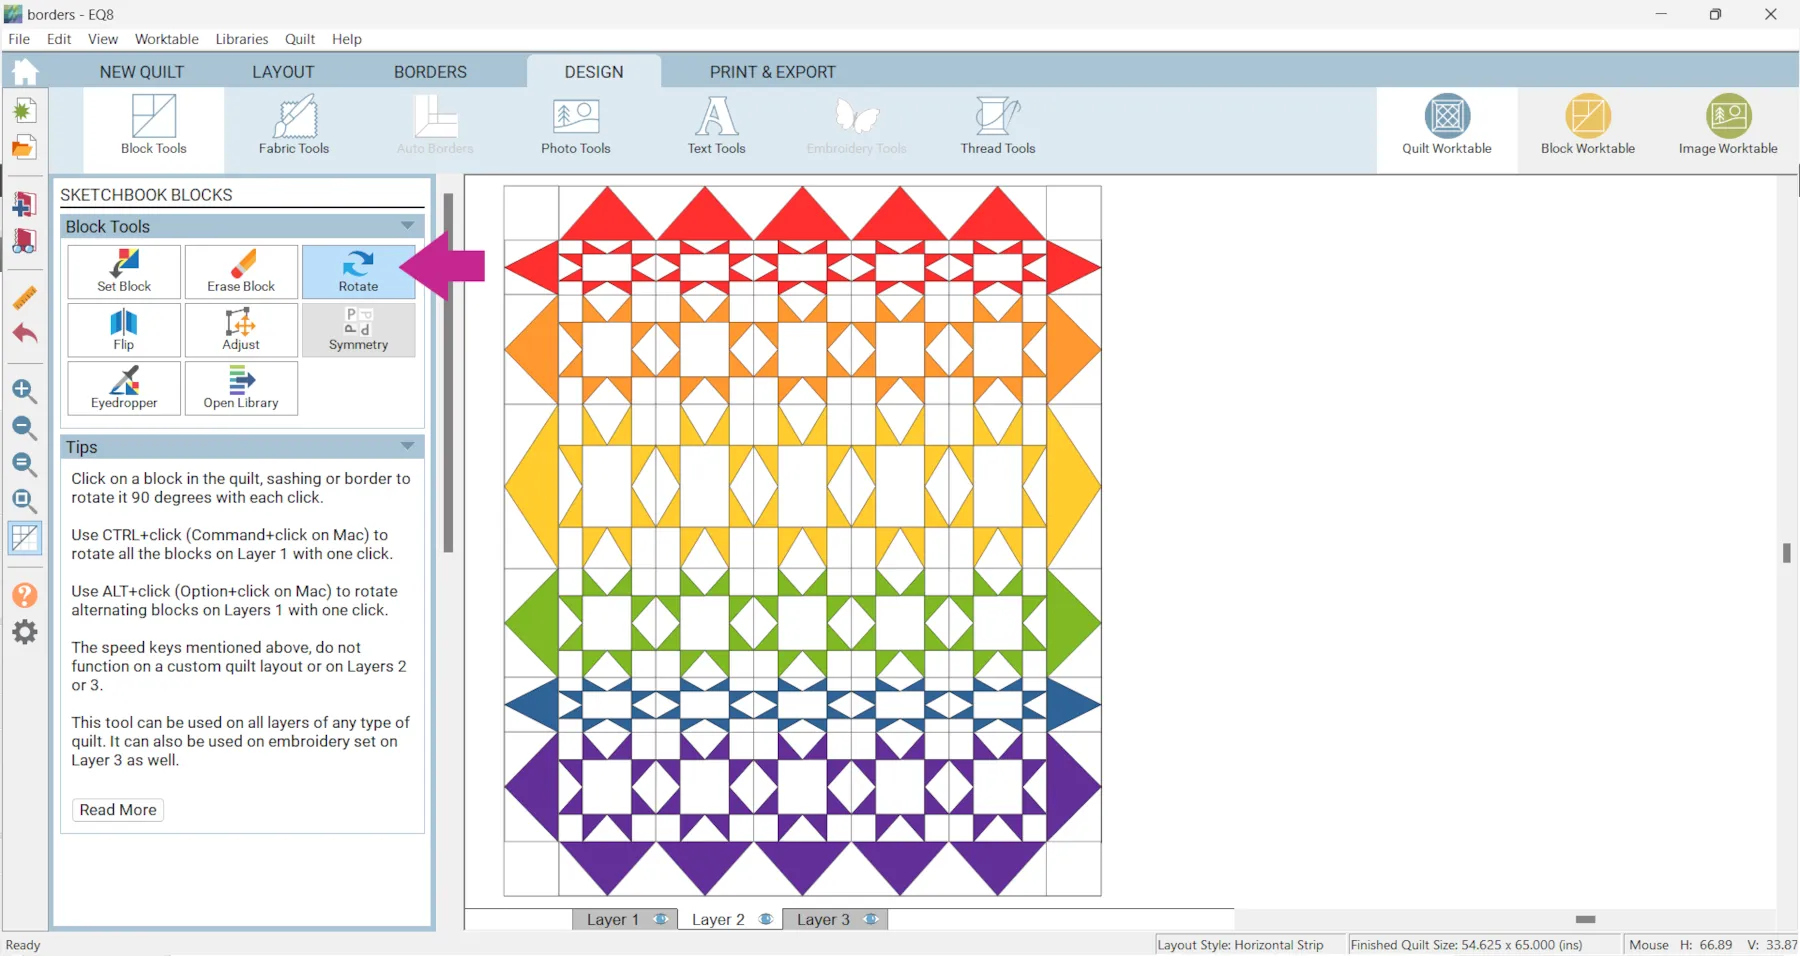
We’ll draw a block to complete the design. - Click Block Worktable > New Block > Pieced > EasyDraw

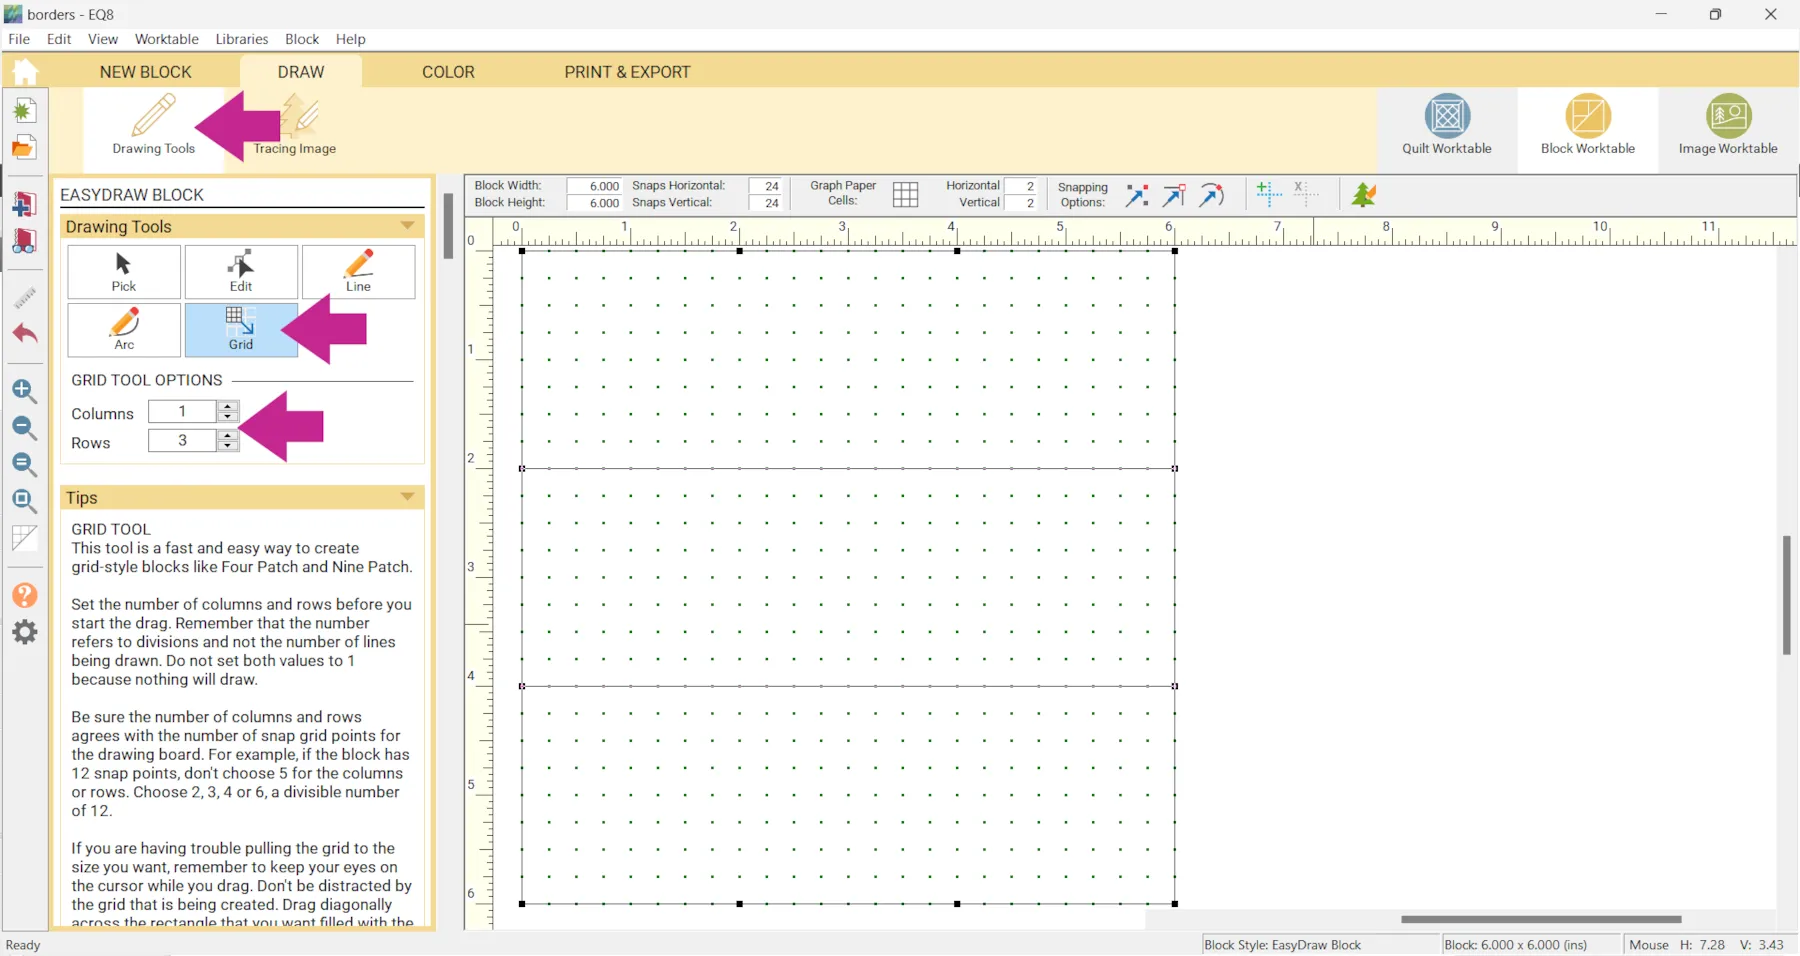
- Click Drawing Tools > Grid
- For the Grid Tool Options enter…
Columns: 1
Rows: 3
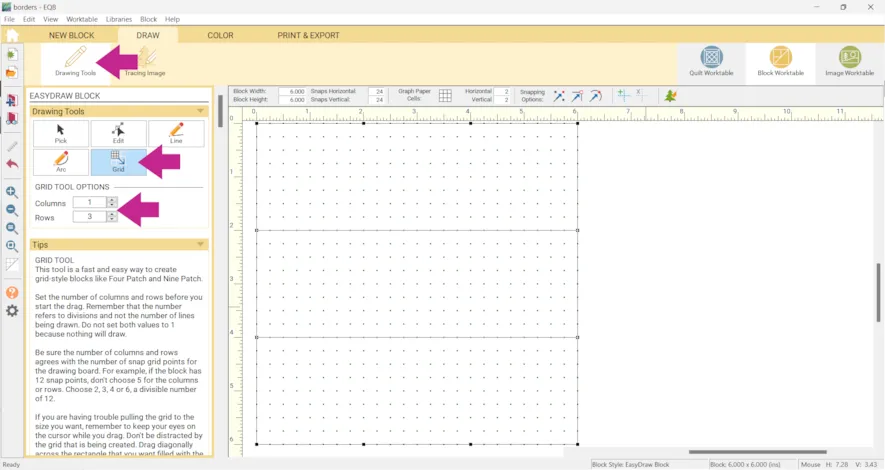
- Click Add to Project Sketchbook
 . If you haven’t named your project yet, EQ8 will prompt you to do so. (To be saved, your item needs to be in the Sketchbook AND your project needs to be named. Here is more information.)
 - Set the new block in the border. Notice that even though it was drawn as a square it resizes to fit the patch it is set in.
- Recolor as desired.

- Click Add to Project Sketchbook
for any variations you would like to save.
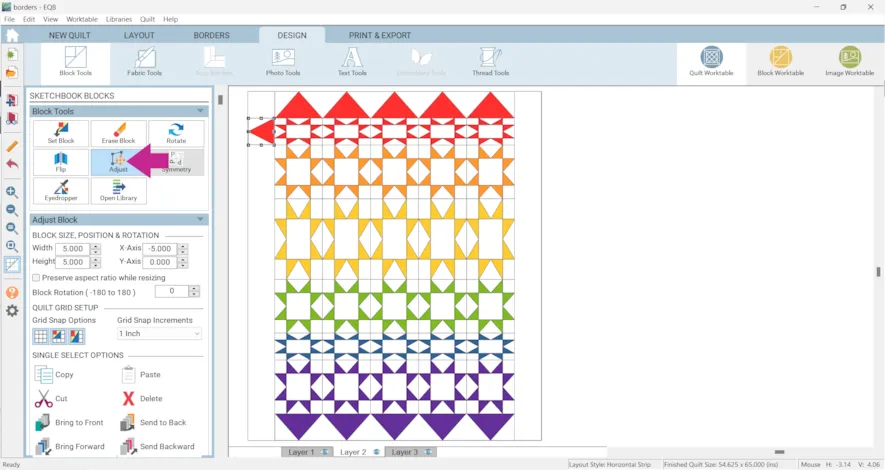
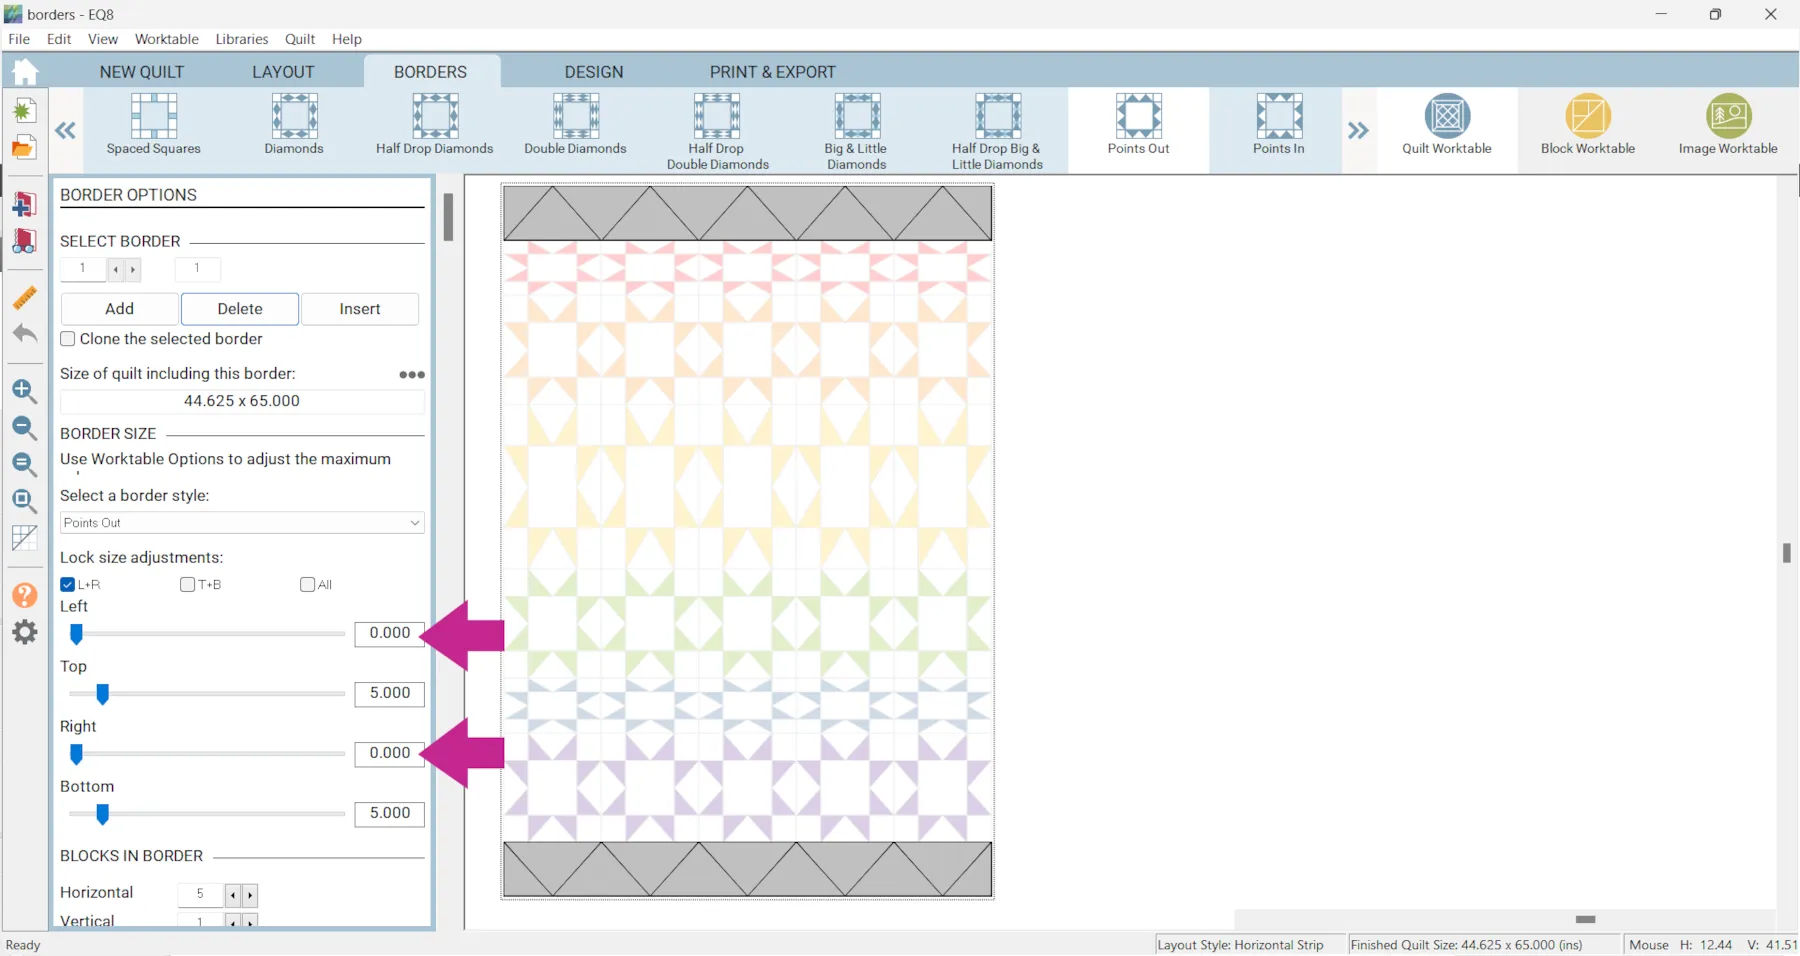
For the next example we’ll use a horizontal strip quilt with different strip widths. Again, while you may not design a quilt exactly like this, you can use this general idea for lots of different types of quilt designs. - Click the BORDERS tab and choose Points Out for the border style.
- Set the BLOCKS IN BORDER to 5 Horizontal
This matches up with the top and bottom blocks with the border points.
But, since all the widths of the rows are different this won’t work for the left and right sides.
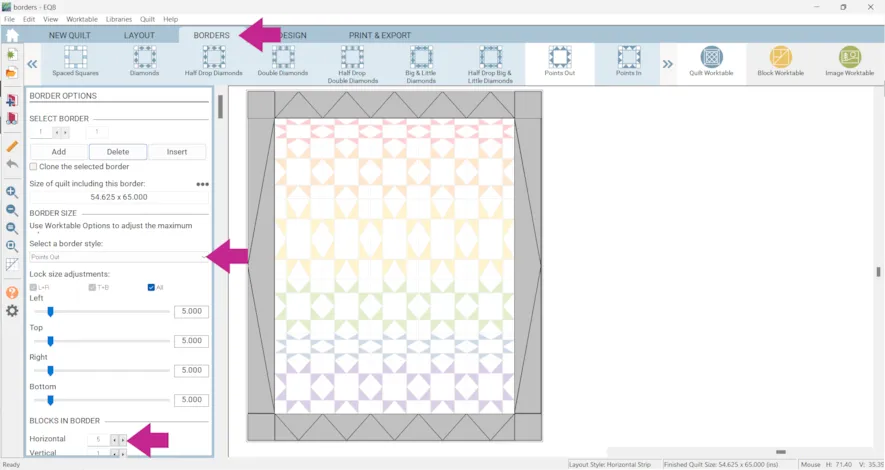
- Set the Left and Right borders to 0.

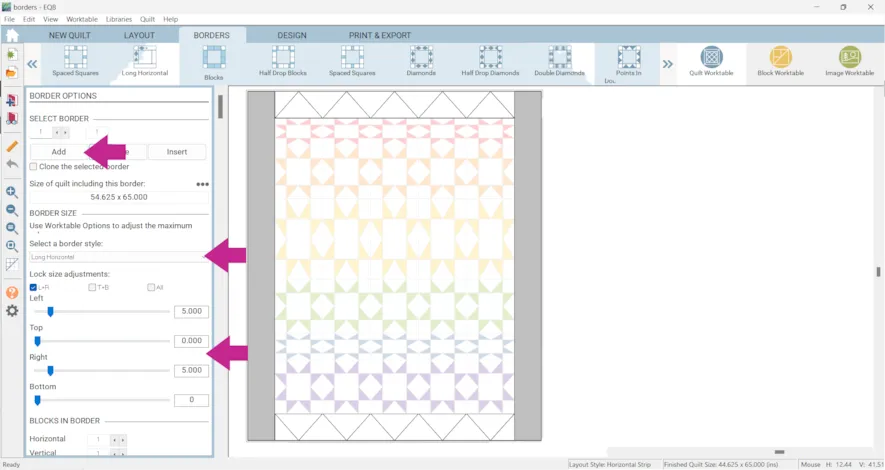
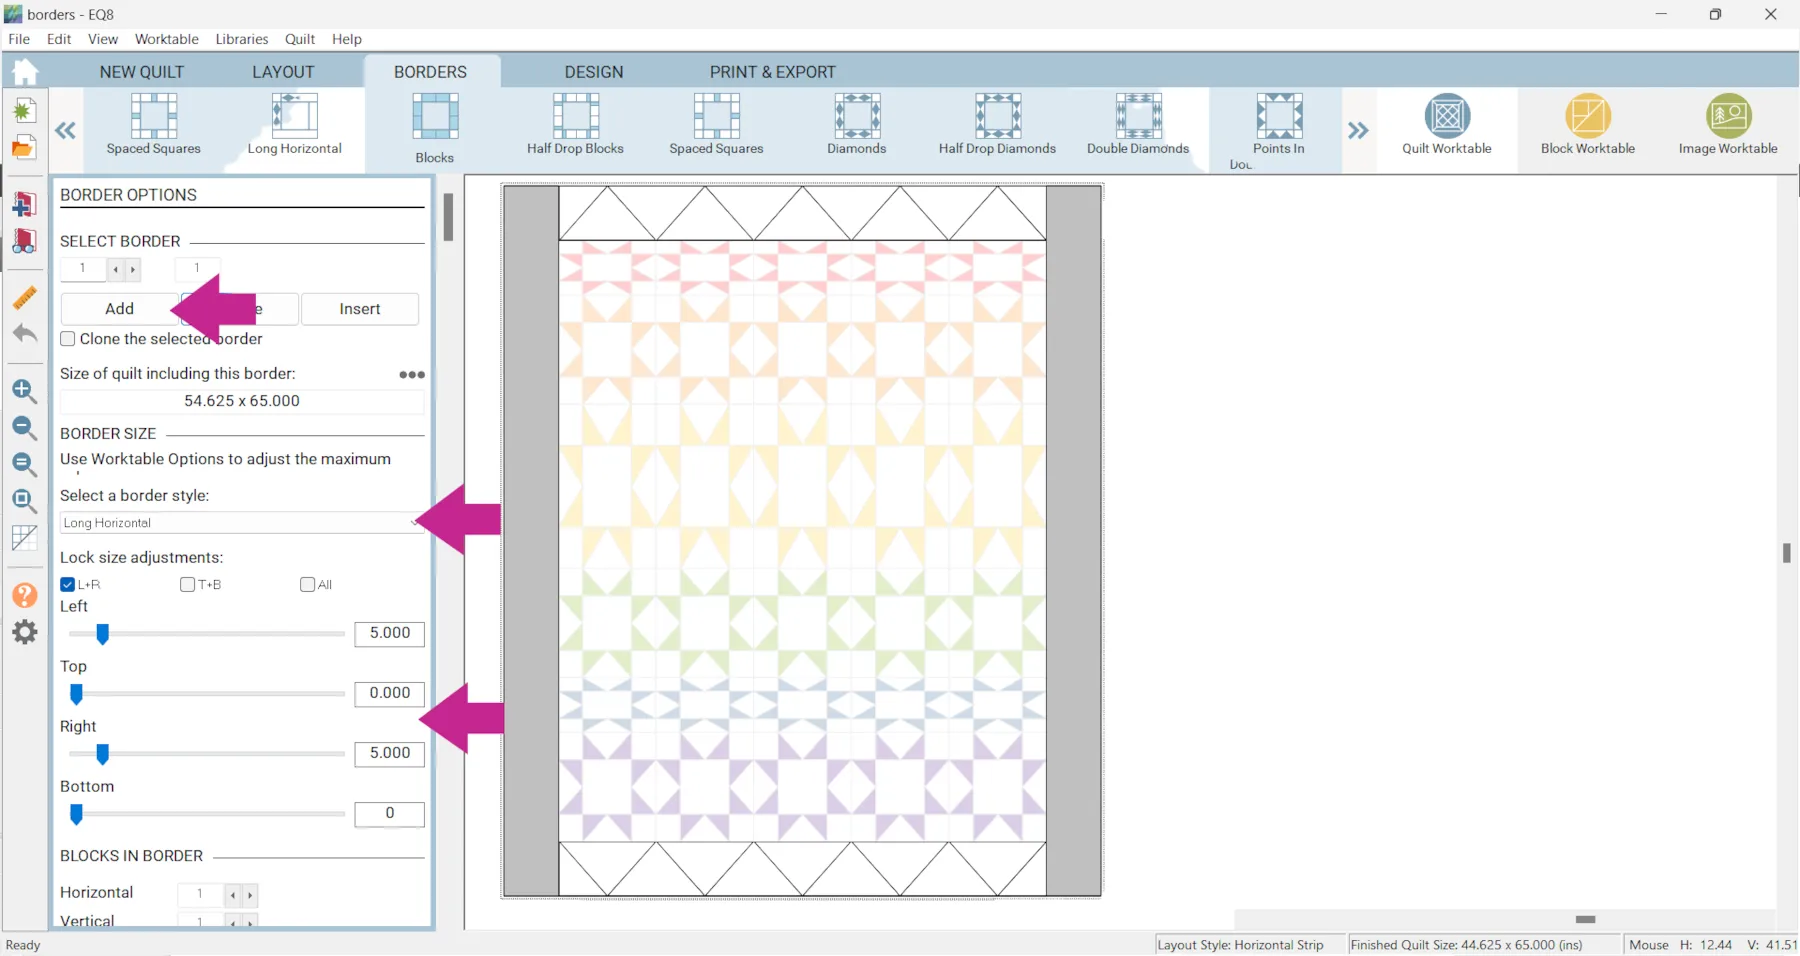
- Click Add > Long Horizontal
- Under BORDER SIZE enter…
Left: 5
Top: 0
Right: 5
Bottom: 0
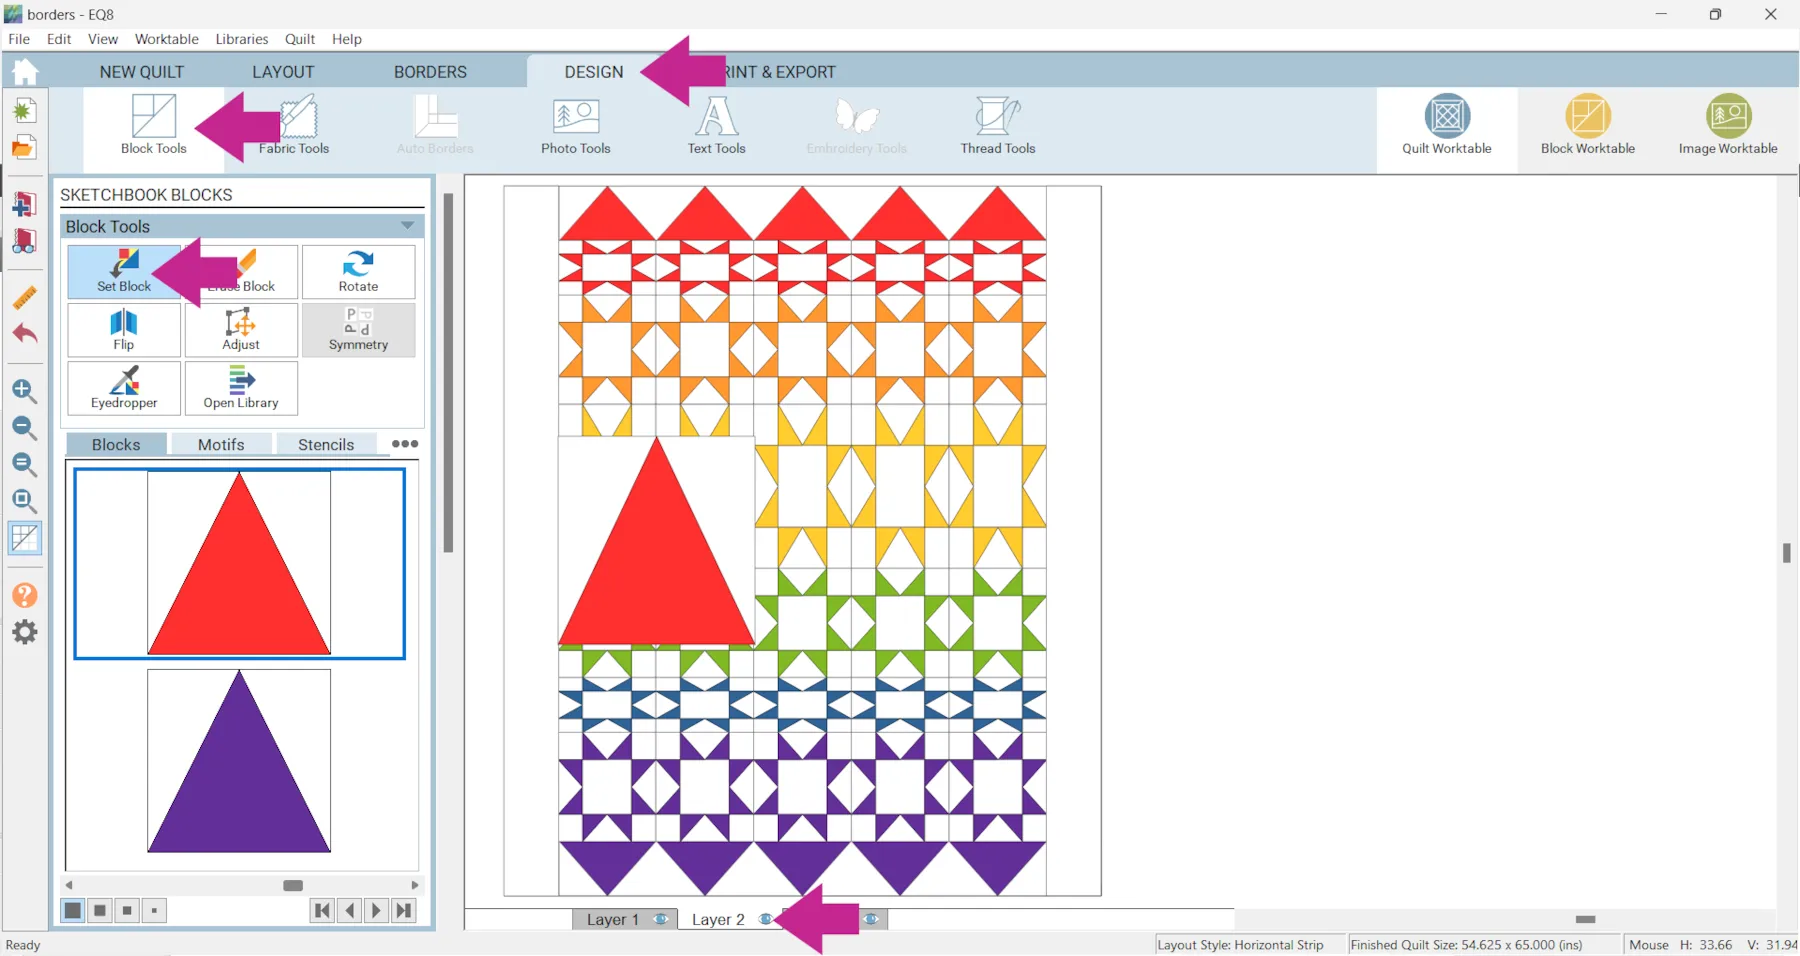
- Click the DESIGN tab > Block Tools > Set Block > Layer 2
- Drag a block onto the quilt.
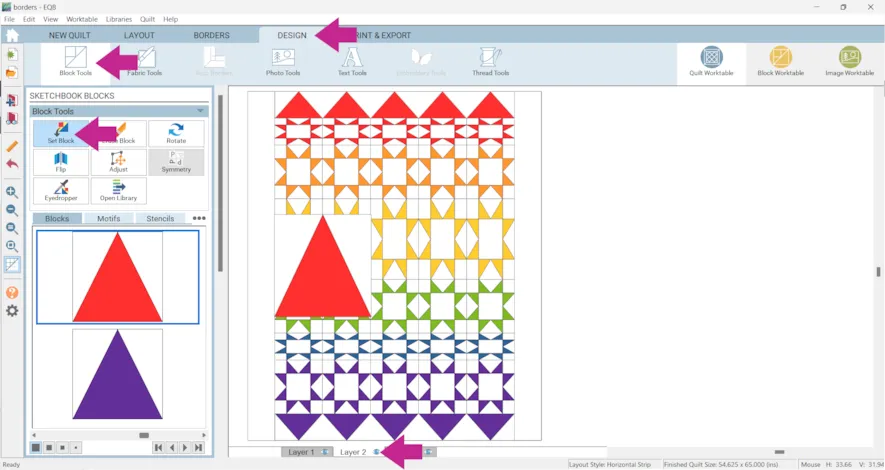
- Use the Adjust tool to move and resize the block. (I also rotated.)
- Continue to place blocks until you have one side completed.
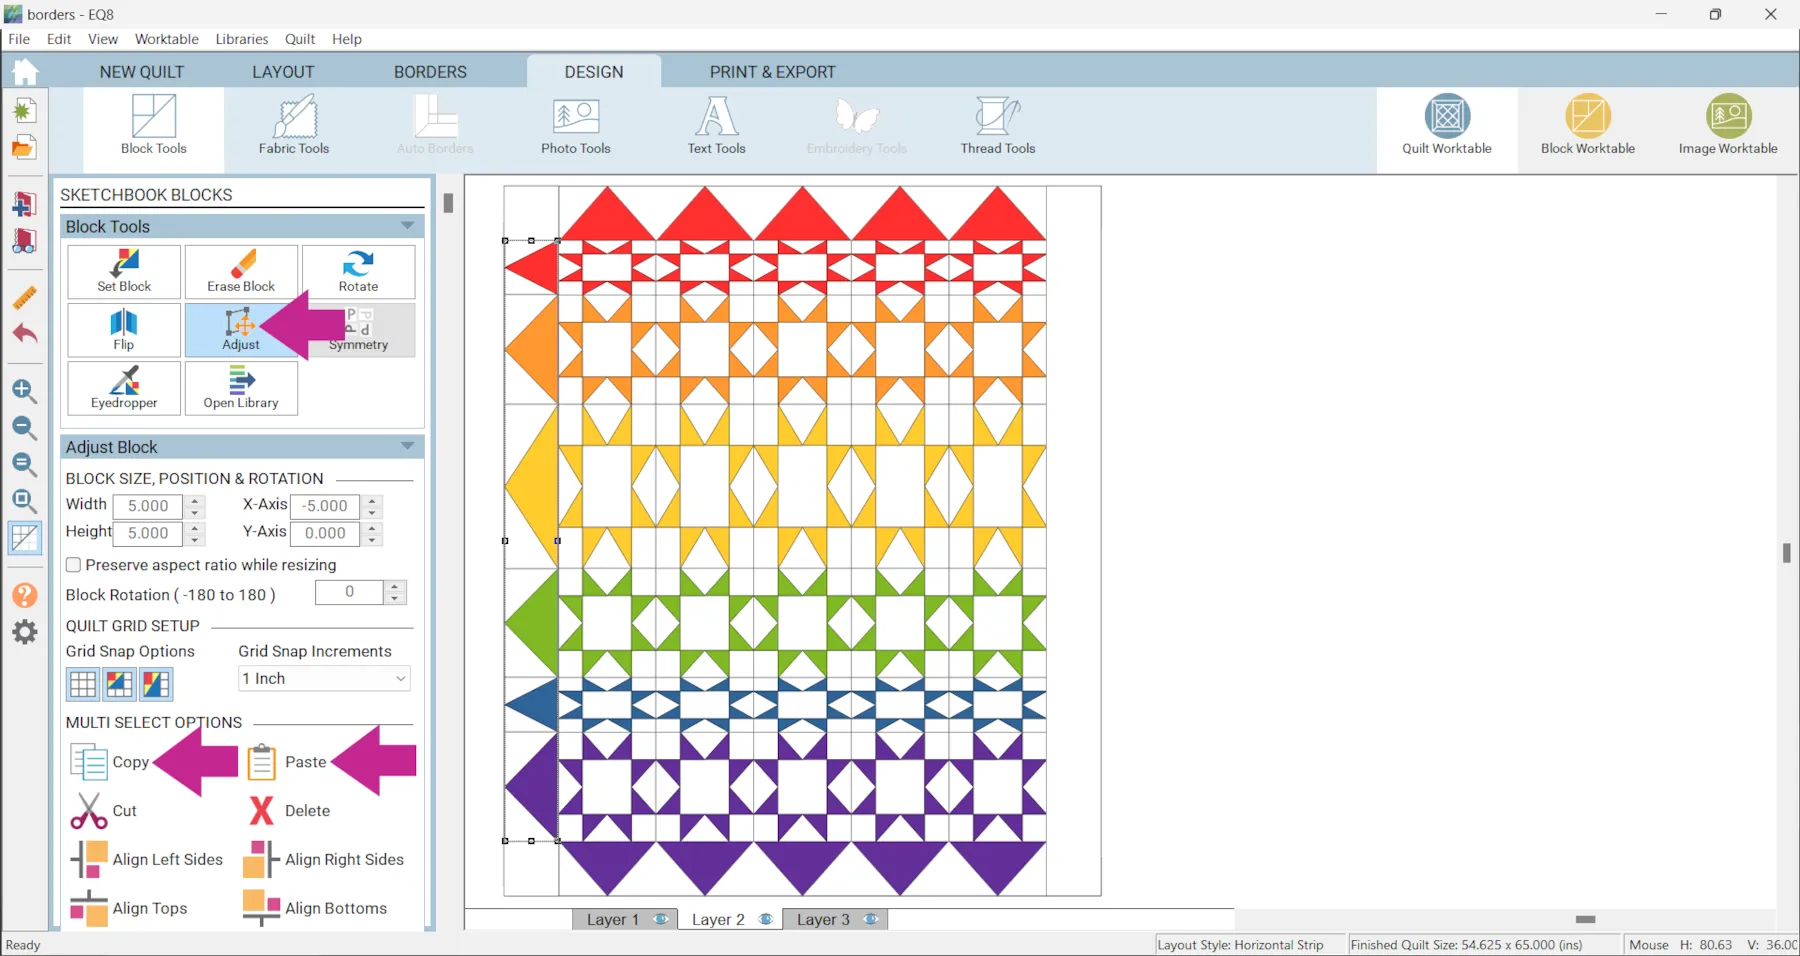
- Click the Adjust tool and click and drag out a section around all of the blocks you just placed.
- Click Copy
- Click Paste
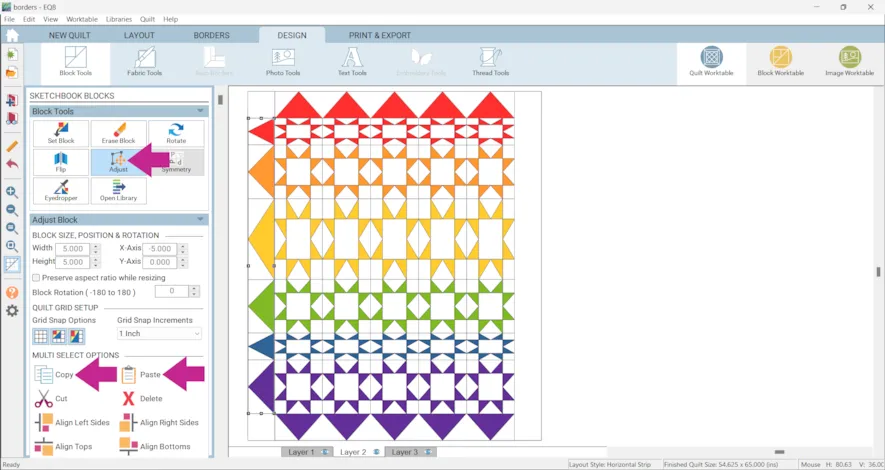
- Drag the blocks to the other border.

- Rotate if necessary.
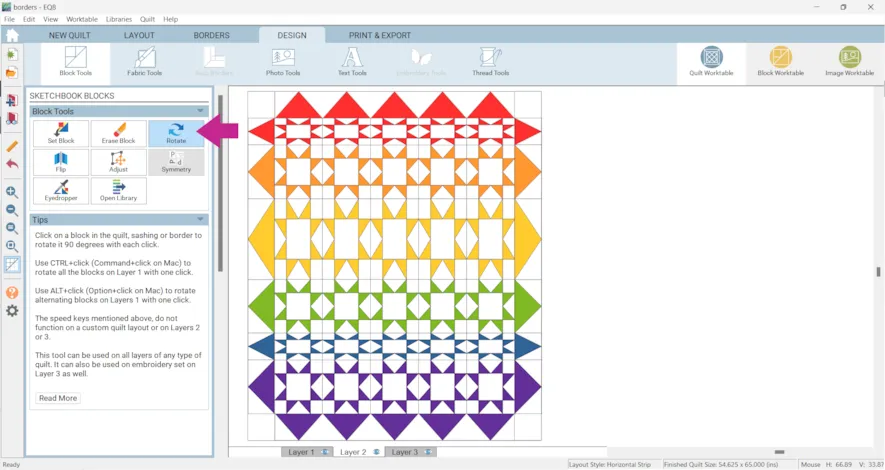
Once there are blocks set in place it’s easy to replace them for lots of different variations.

- Remember to click Add to Project Sketchbook
for any variations you would like to save.
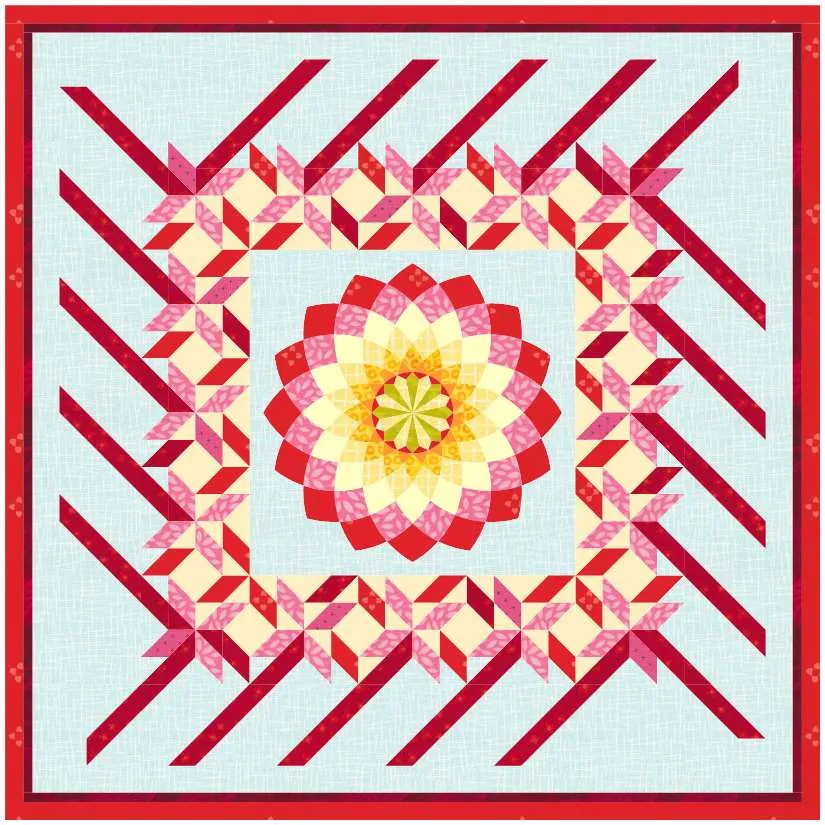
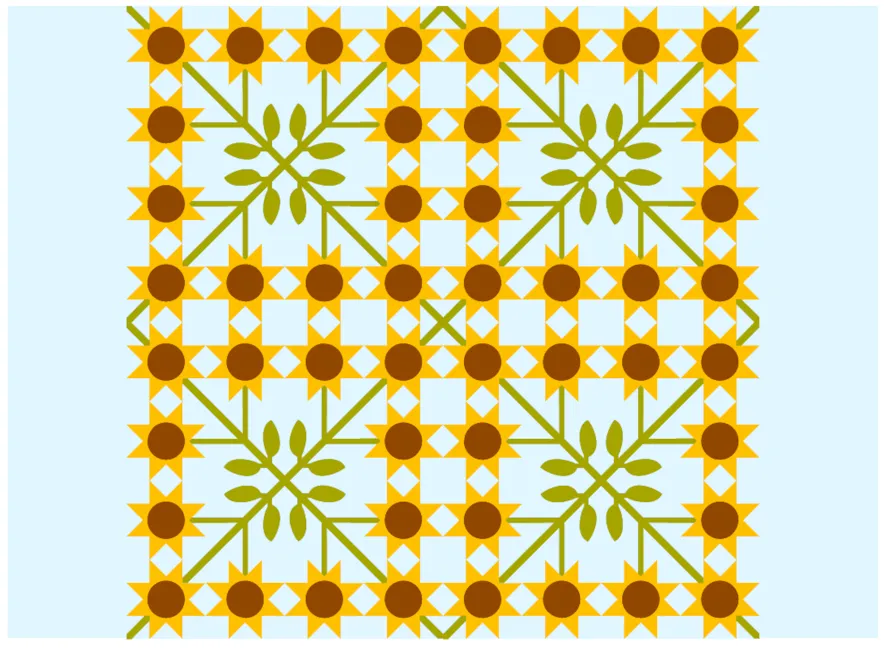
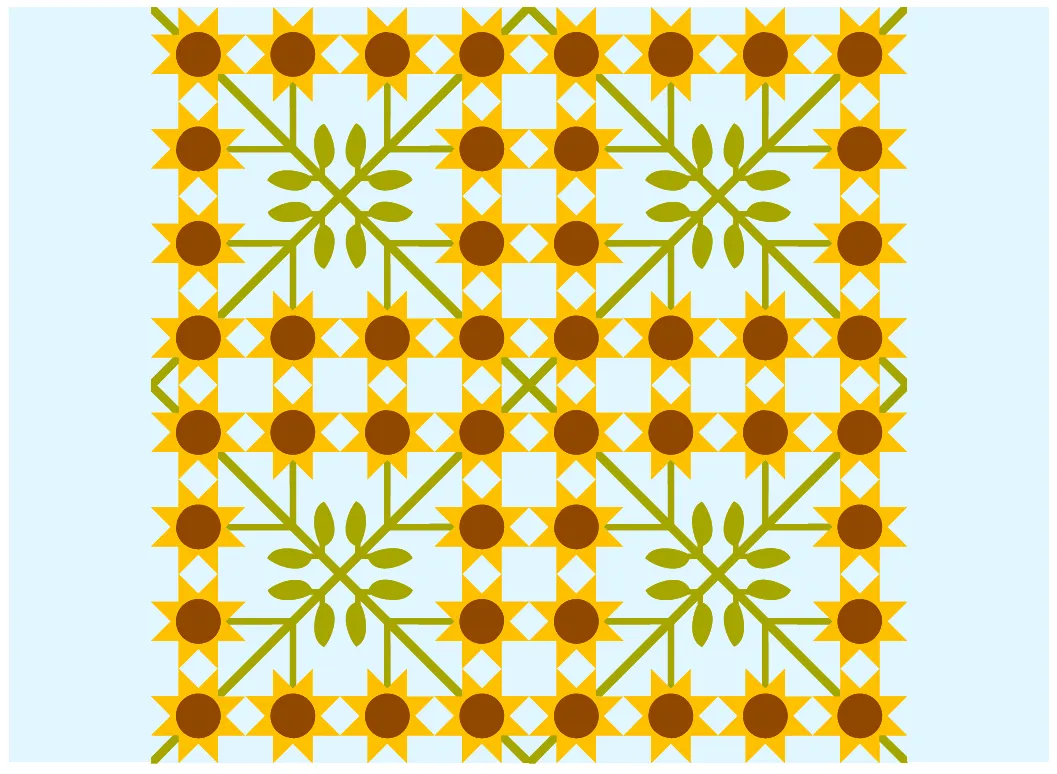
What if you have a quilt and want to extend the design into the borders? (Like the stems in this quilt.)
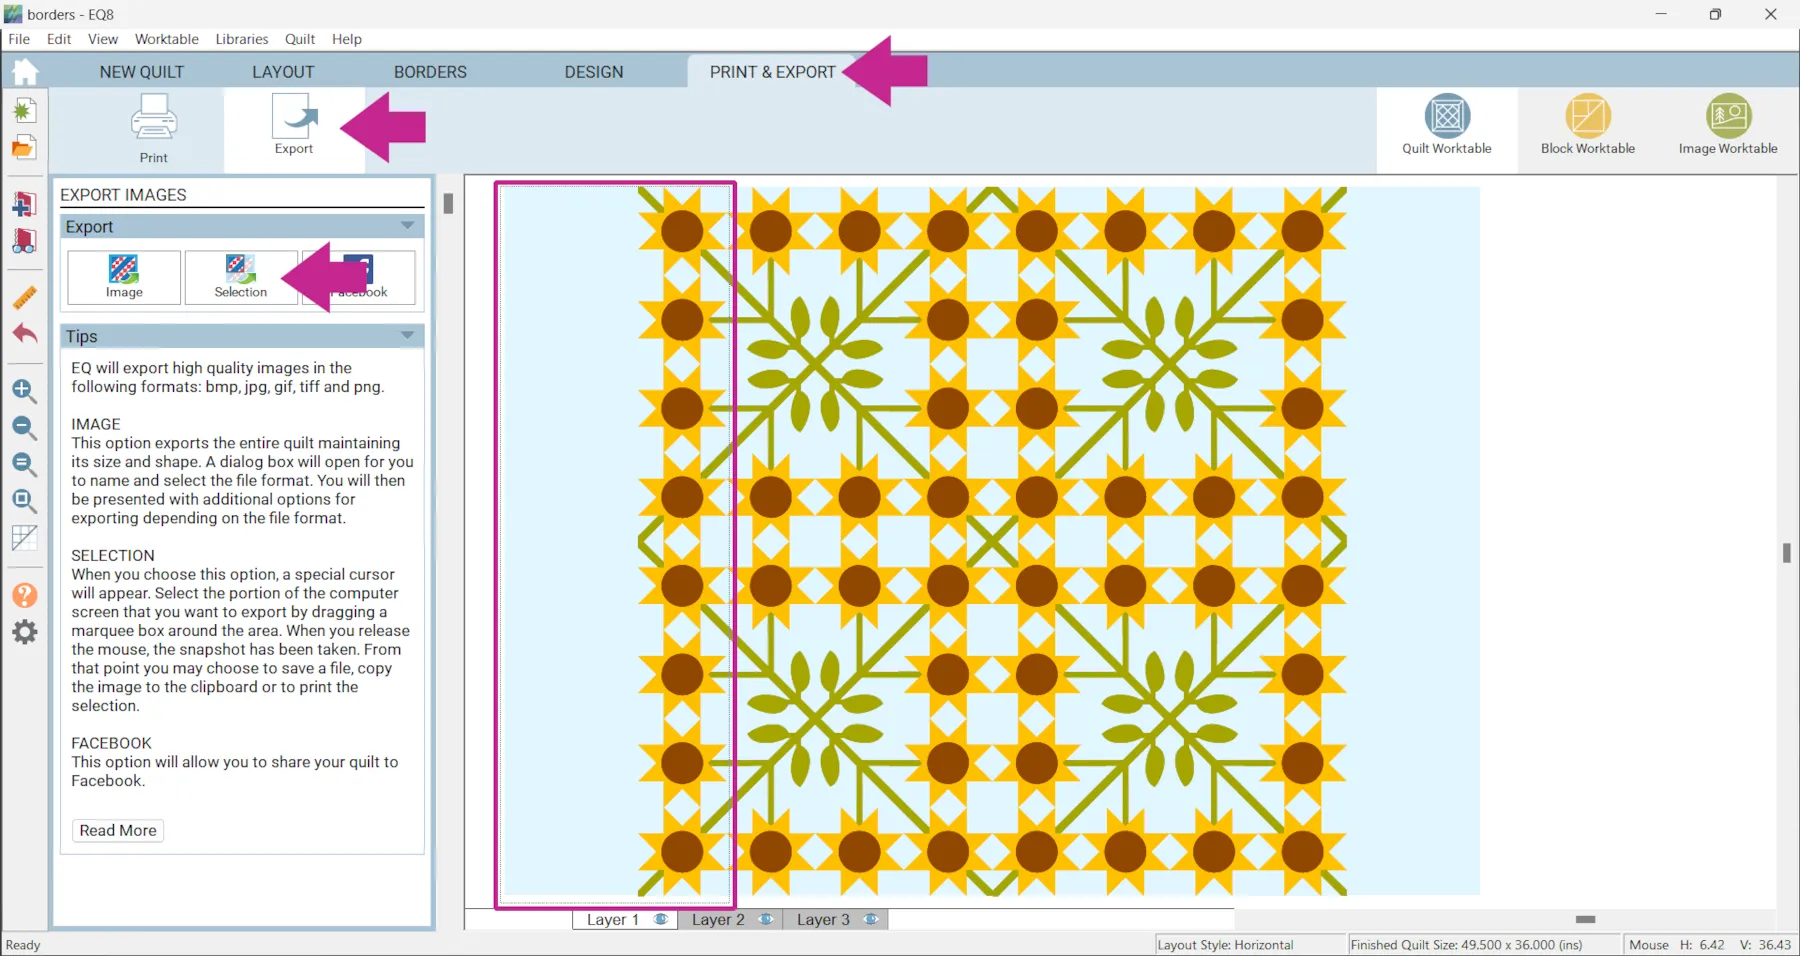
- Click the PRINT & EXPORT tab > Export > Selection and drag a selection box around the area you want the border to line up with. In this example, I selected the blue border and the last row of sunflowers so that I’ll be able to line up the stems when I draw the border block.

- Note the size you want your border block to be. For this example I want it to be 6.75 x 49.5.
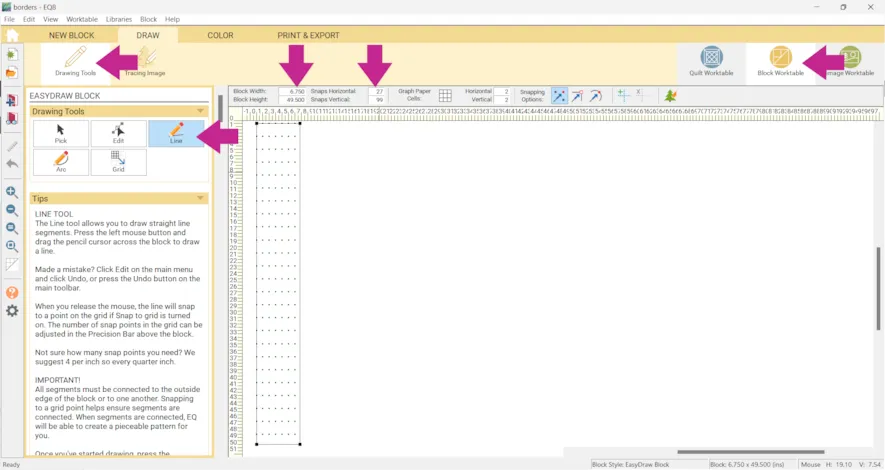
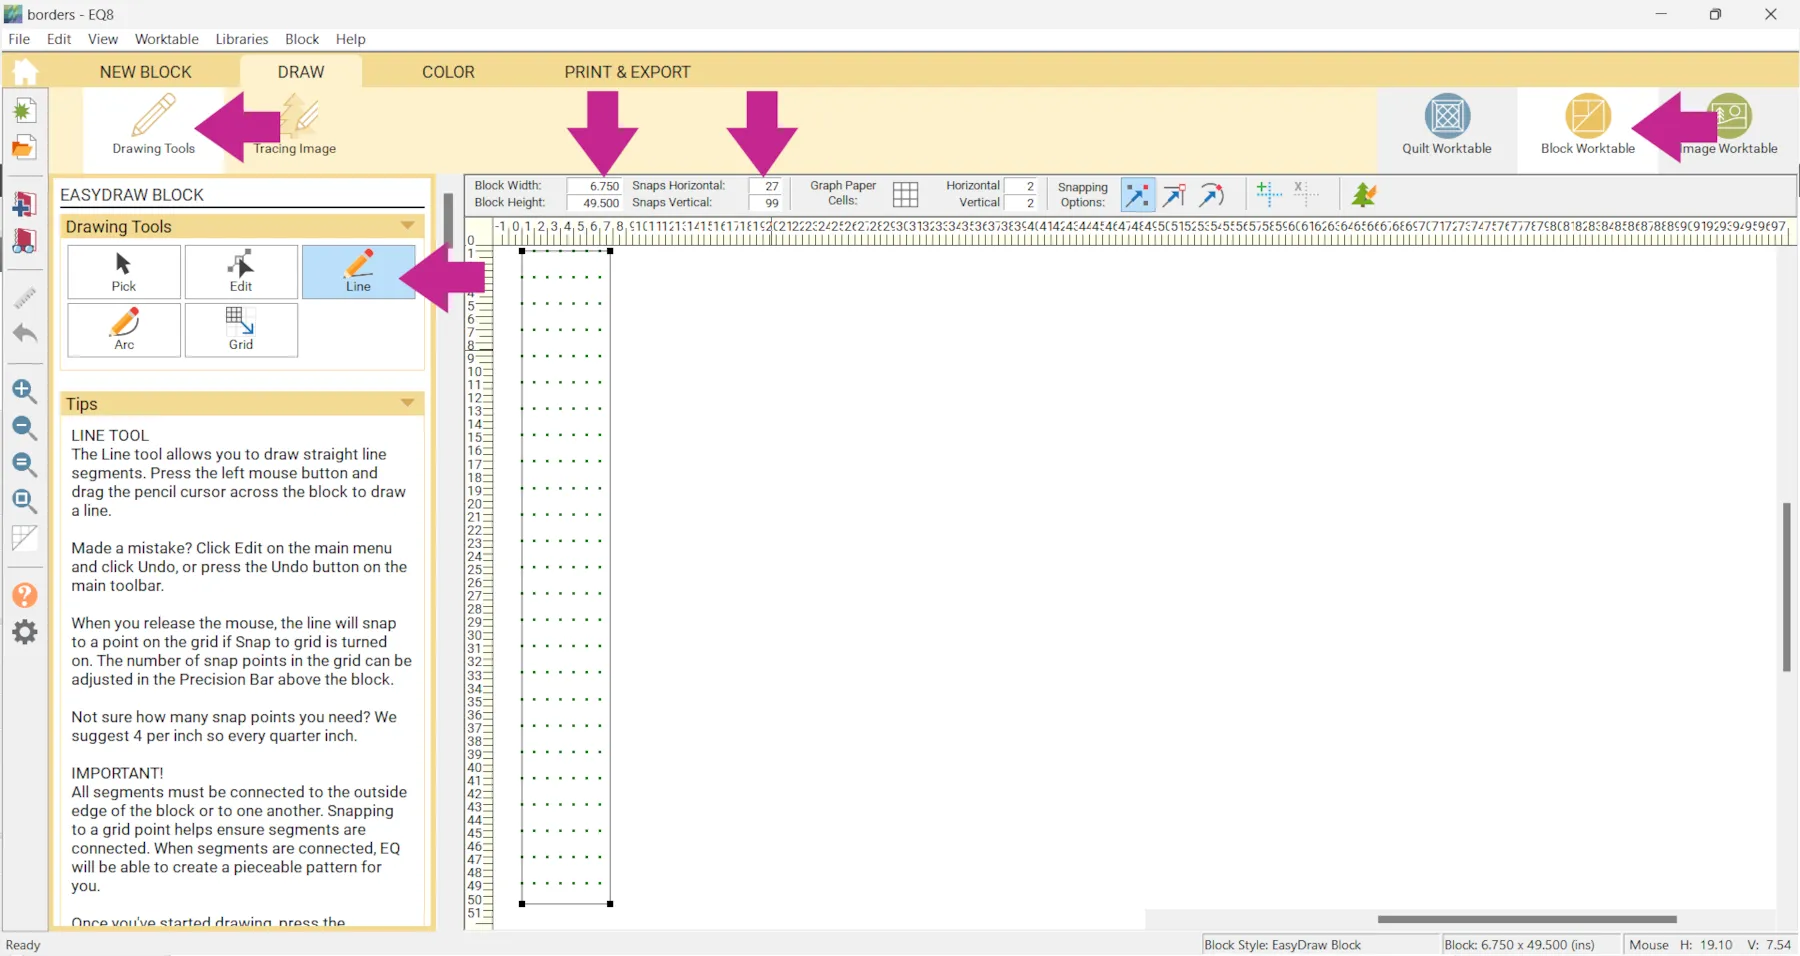
- Click Block Worktable > New Block > Pieced > EasyDraw
- Click Drawing Tools
- Make the block the size you noted, set the snaps as desired. Here is a EasyDraw lesson that may help if you’re not sure what to use for your project.
In the example the block is 6.75 x 49.5 with snaps set to 27 x 99 (because Snaps should always be a multiple of your block size).
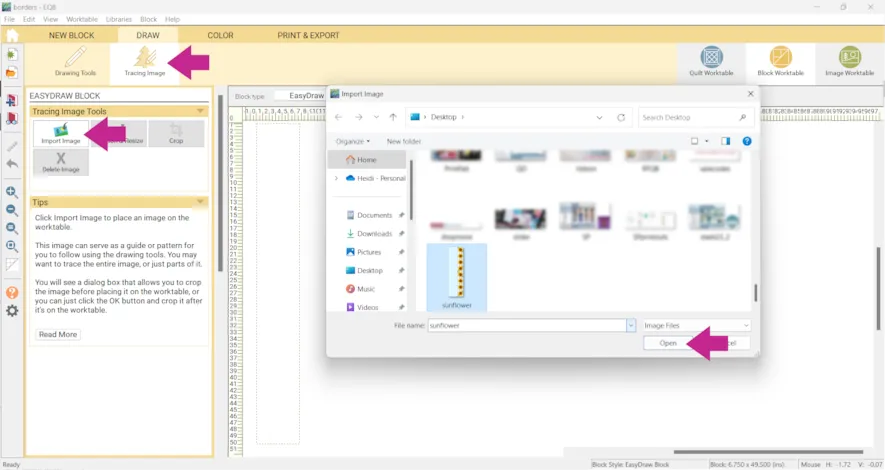
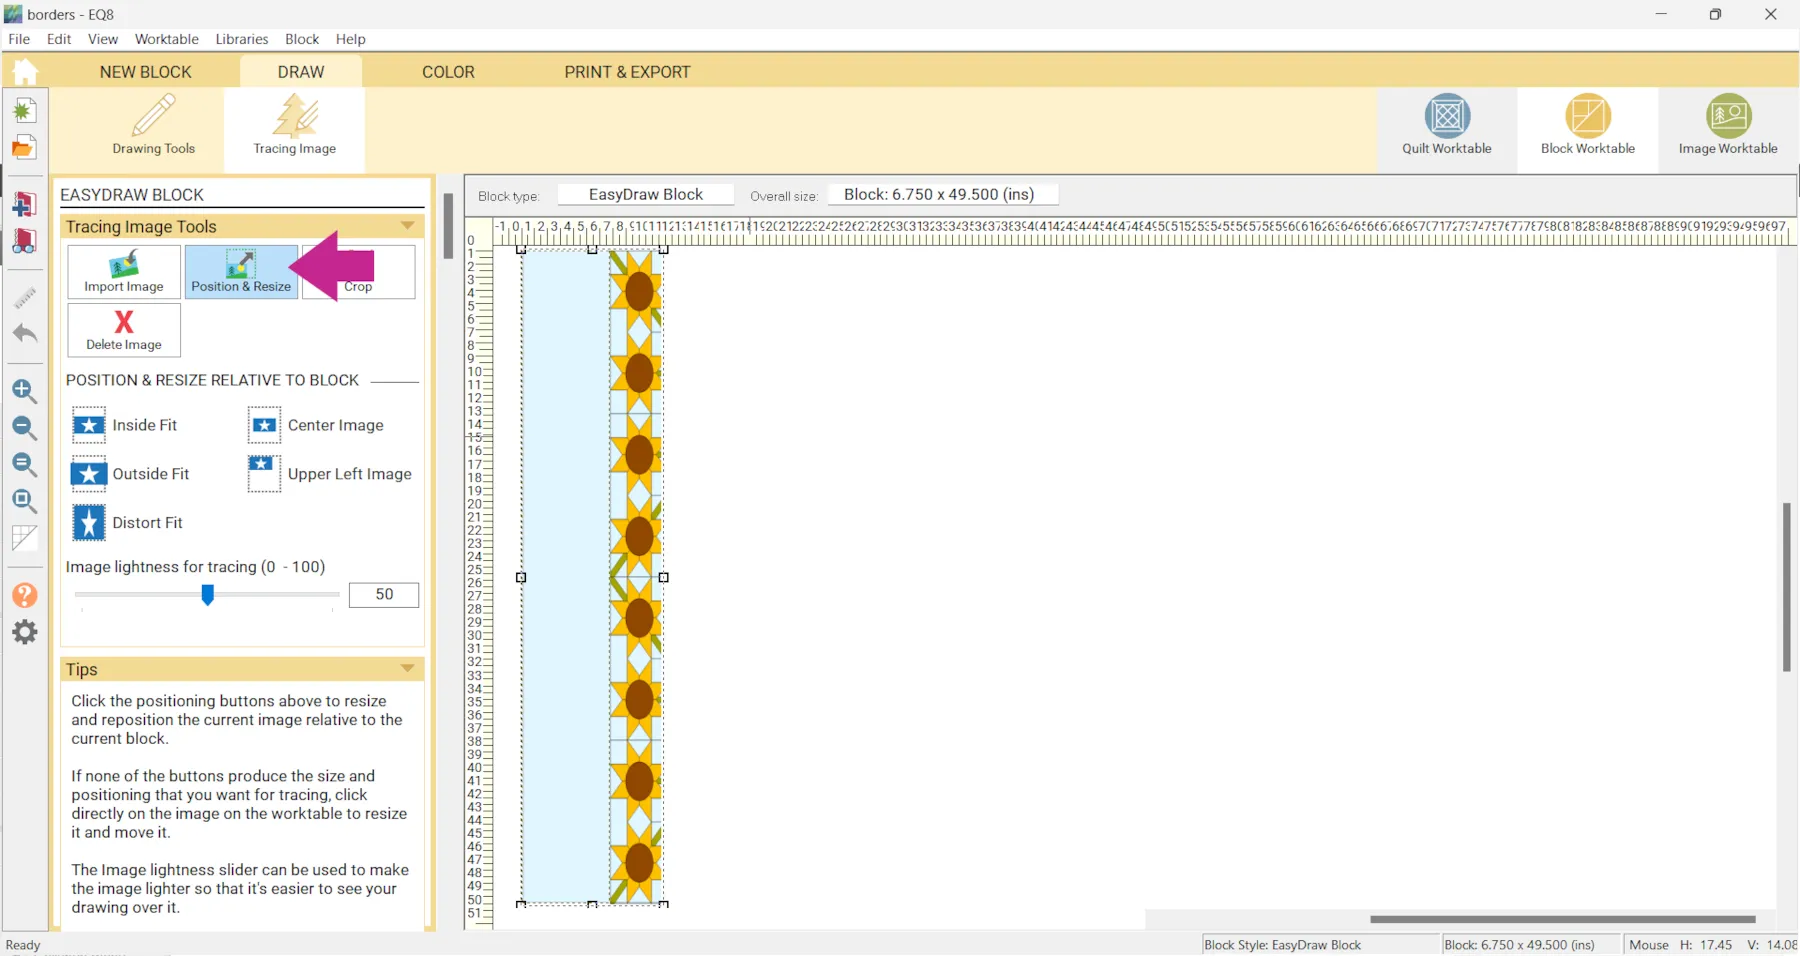
- Click Tracing Image > Import Image
- Navigate to your file and click Open.
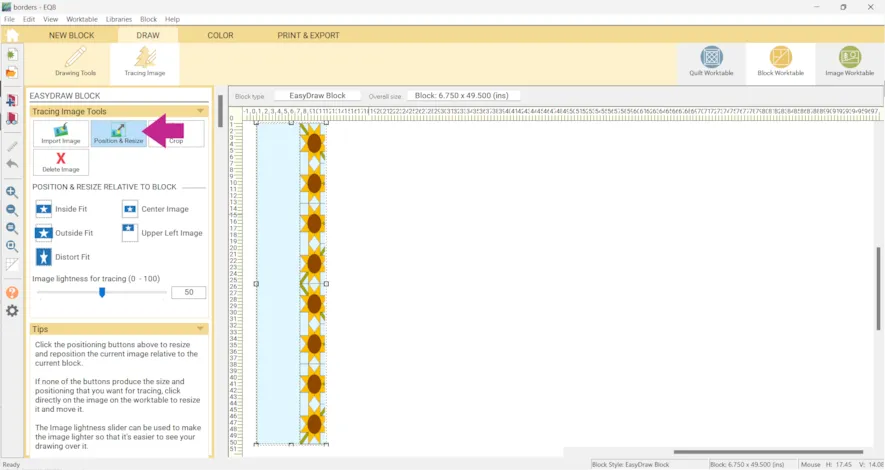
- Click Position & Resize and adjust the image.
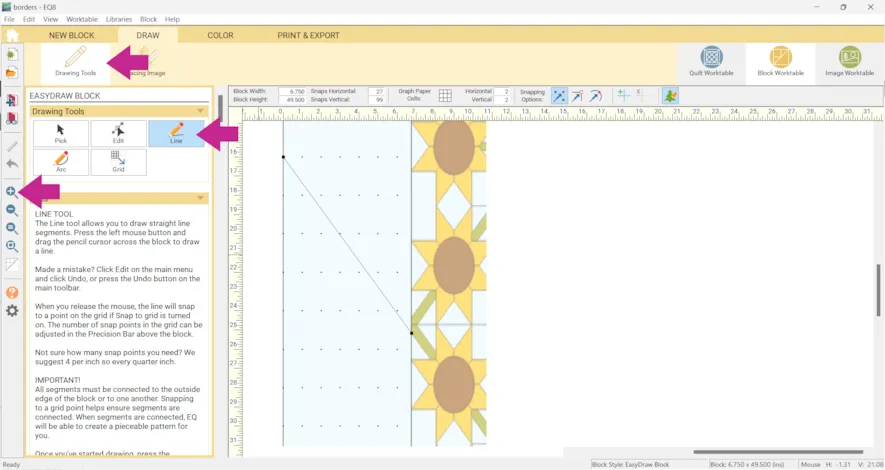
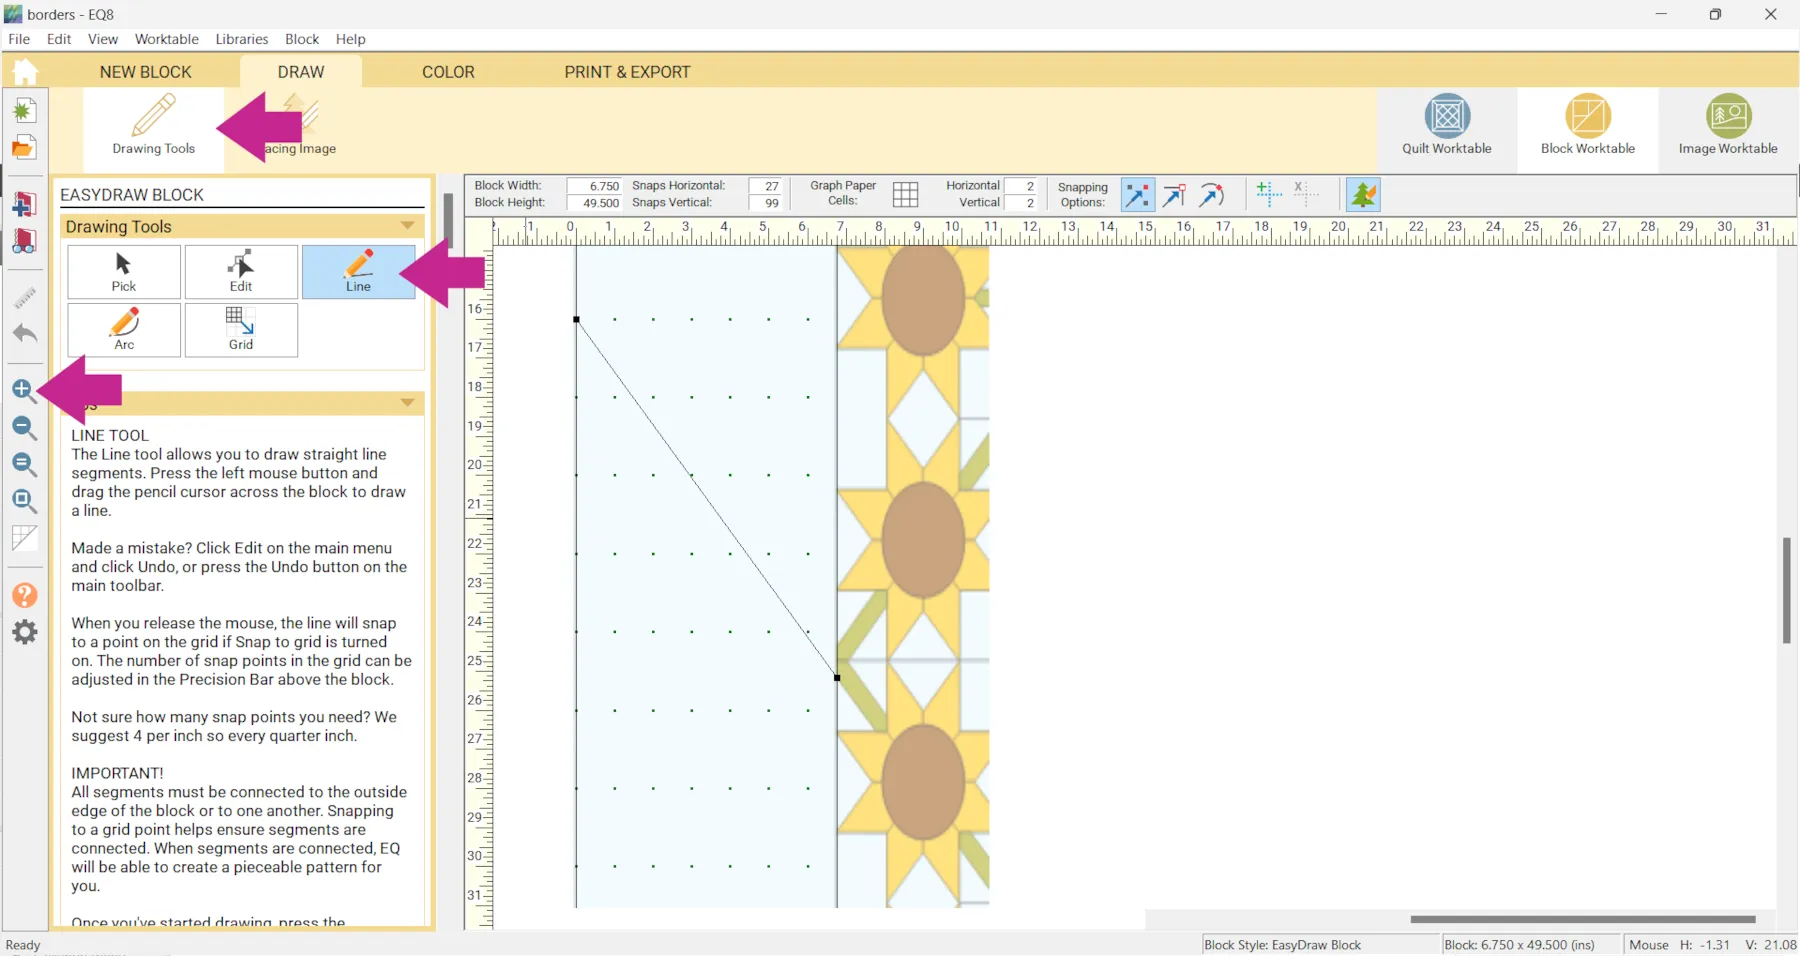
- Click Drawing Tools > Line
- You may also want to Zoom in
- Draw the block and click Add to Project Sketchbook
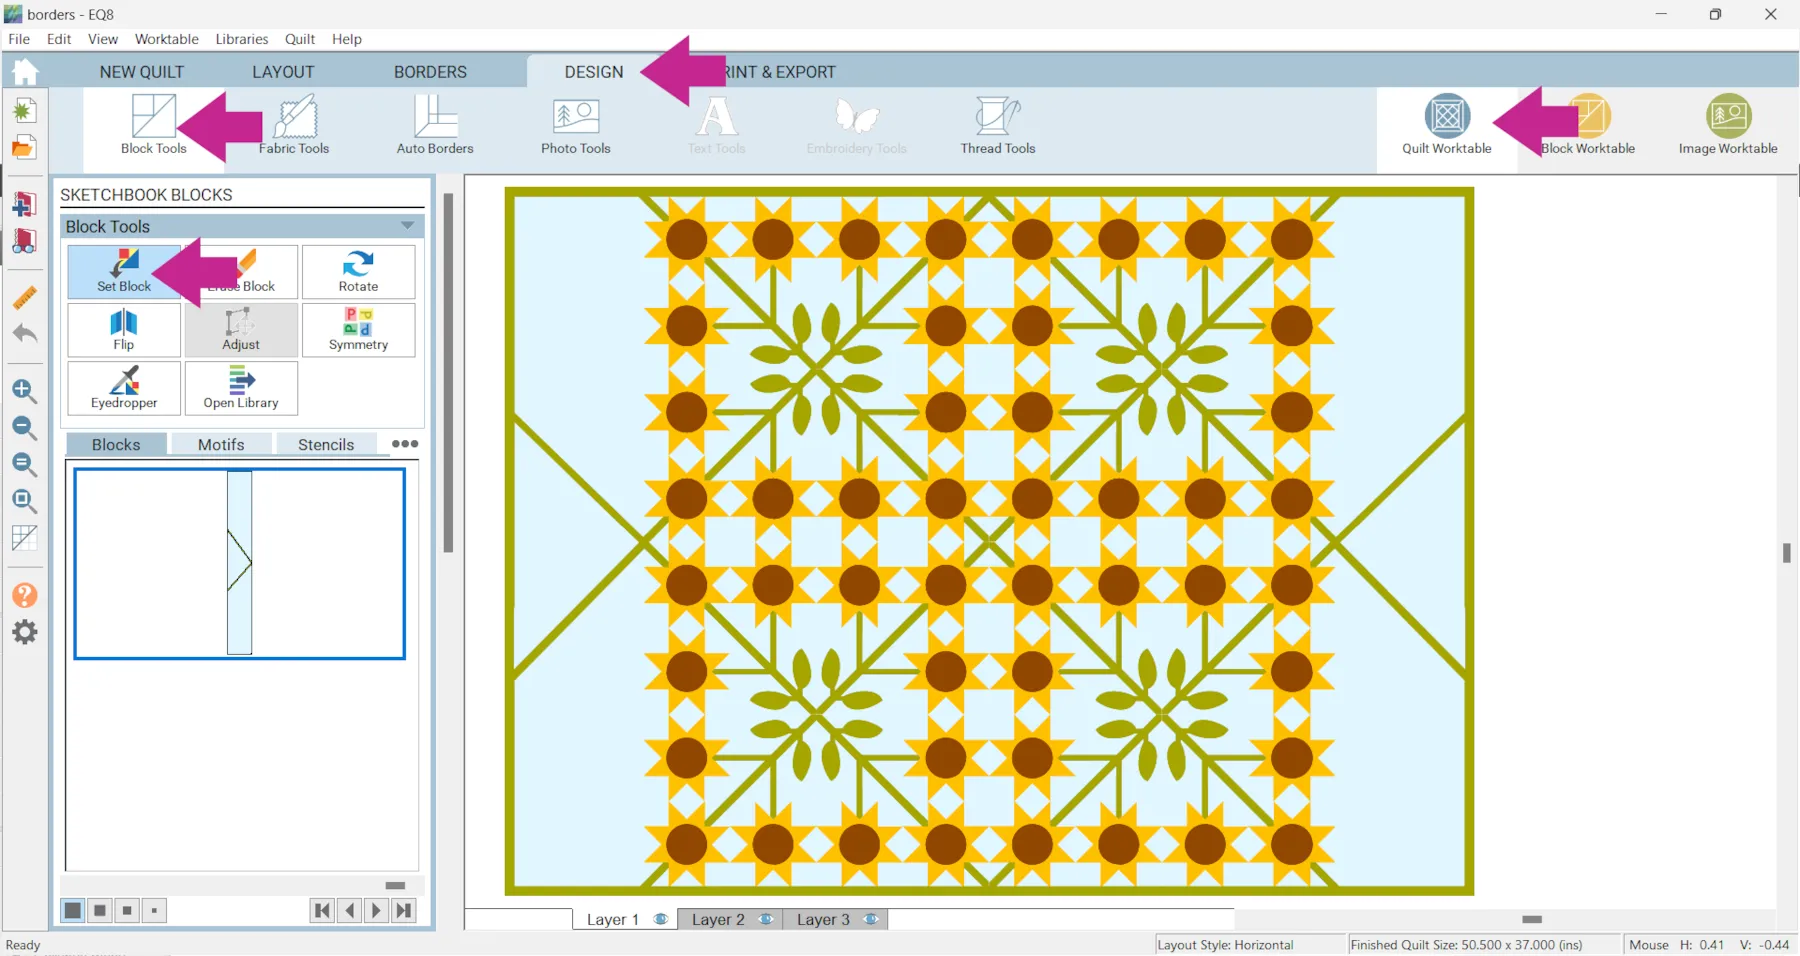
- Click Quilt Worktable > DESIGN tab > Block Tools > Set Block and set the border block on both sides.
- Flip one block, if needed.

- Recolor as desired and click Add to Project Sketchbook


If you want to post images of your quilts, here is how to export the images.
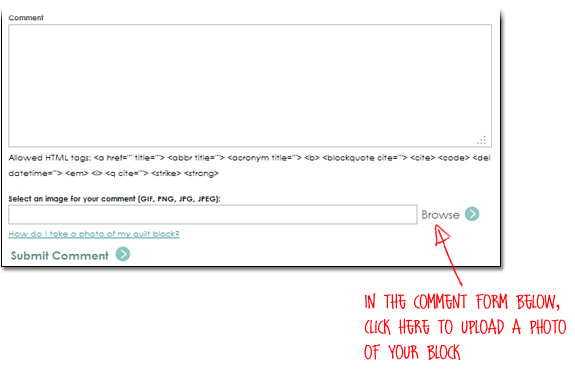
To post your image click to comment on this post. Fill in your info and then click Browse.
Go to: Documents\My EQ8\Images
I can’t wait to see what you’ve done! I hope you enjoyed the lesson!
If you have questions about the lesson feel free to post them below.
If you have questions about something else EQ related, please contact techsupport@electricquilt.com.
If you have suggestions for new Design & Discover lessons feel free to comment below or email Heidi@electricquilt.com