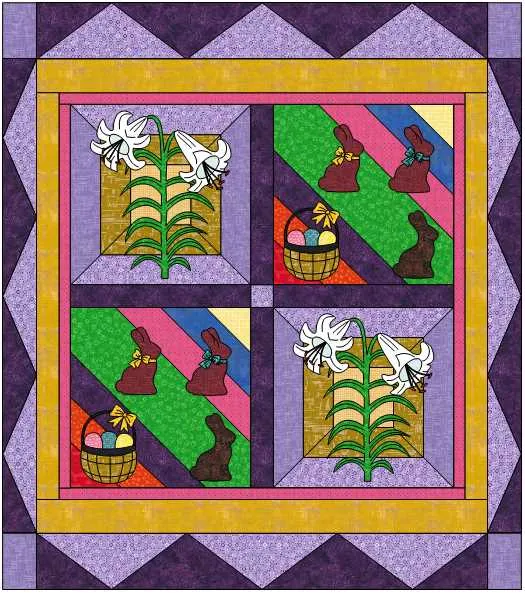
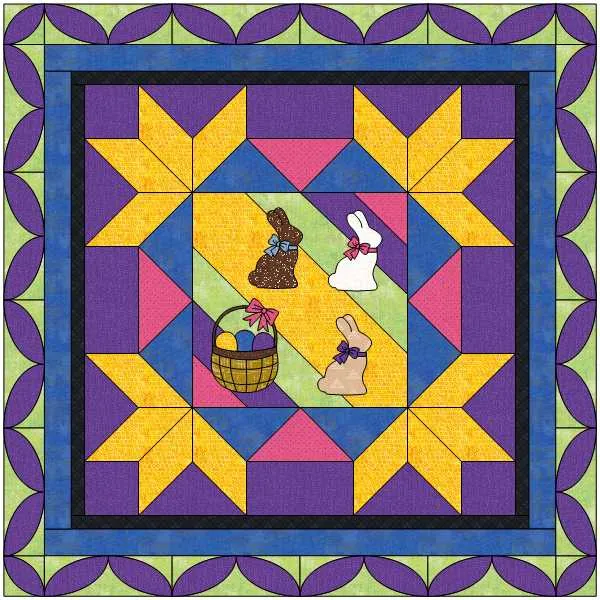
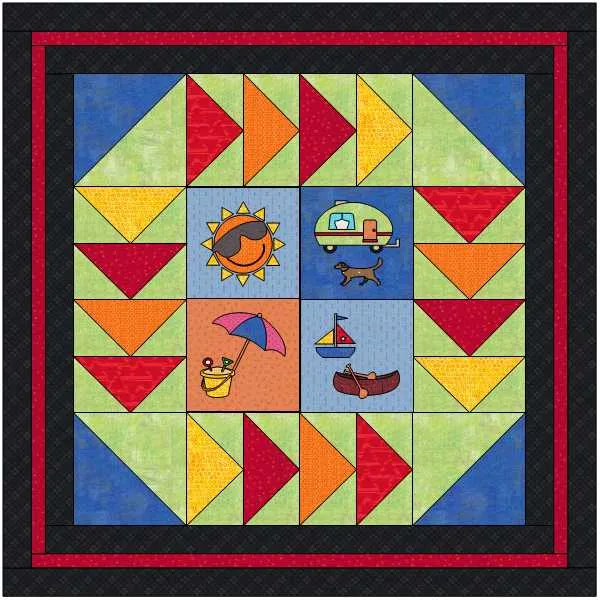
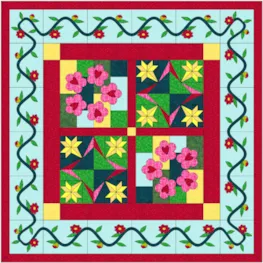
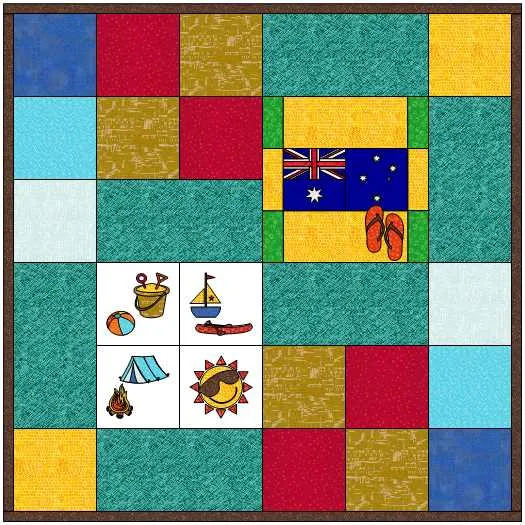
Welcome to DESIGN AND SEW ALONG 3- LESSON SIX Lessons with Yvonne. I hope you have enjoyed the first five lessons of this series. In this final lesson, we will work with the quilt layout worktable to bring our lesson block designs together to create quilt design options.
The name of this class is DESIGN AND SEW ALONG. I do hope you are stitching some of the designs we have created in our EQ8 program. I would love to see some of the designs that are sewn.
Remember to watch the video at the end of the blog to start with to familiarize yourself with the steps we will be taking during these class written lessons. A picture is worth a thousand words and visual learning is helpful for any of the classes.
Remember to save an image of your favorite quilt from this class to post to the EQ blog page in the comment section. Please make sure the image you post is indeed from this class. If you need to refresh your memory on how to post an image, refer back to lesson one of this series. Be sure to ask any questions you have in the comment section of the blog page.
Are you cleaning up your sketchbook as you go along? Refer back to lesson two on how to clean up the sketchbook. We will be doing a final clean up of the entire project file at the end of this lesson.
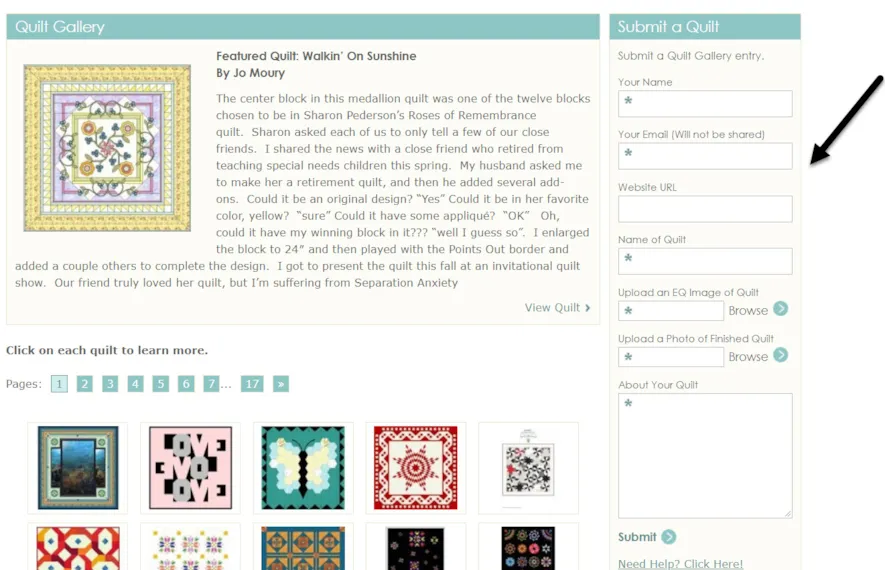
As you create and sew your project, we would love to see you post the completed item on the EQ Quilt Gallery page of the website. https://doyoueq.com/quilt-gallery/
PUTTING IT ALL TOGETHER
1. Click onto the EQ8 icon  on your desktop to launch the program.
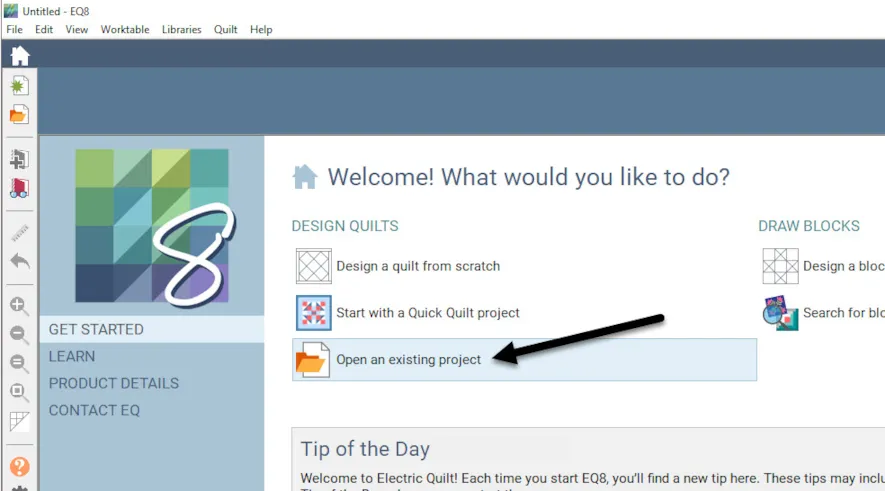
2. On the opening screen, click on the ‘open an existing project’ in the center of the screen.
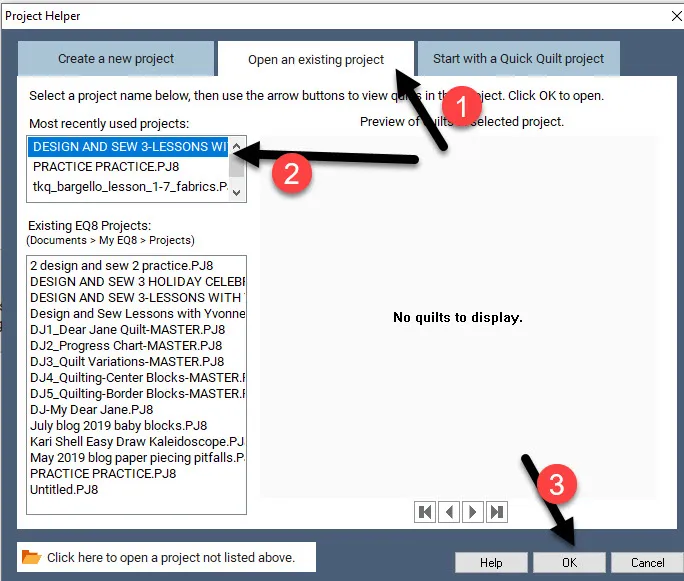
3. On the screen, click on the Design and Sew Along 3 Lessons With Yvonne project name to select it and then click on the OK at the bottom of the box.
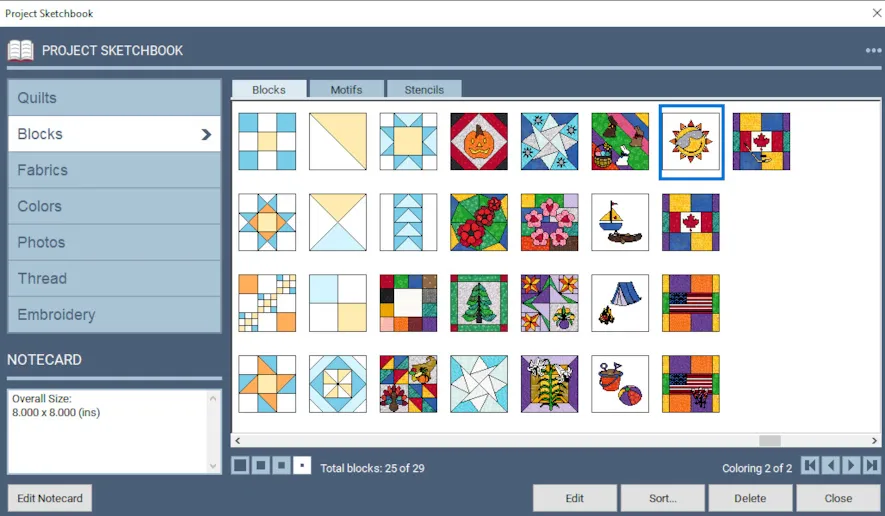
4. The project will open with the project sketchbook on the screen. The sketchbook will open to the blocks we designed in the previous lesson. If you have worked through the lessons you should have completed at least 16 different 16-inch blocks. You may have more if you created different versions of the lessons. Close the sketchbook for now by clicking on the word ‘close’ at the bottom of the sketchbook box.
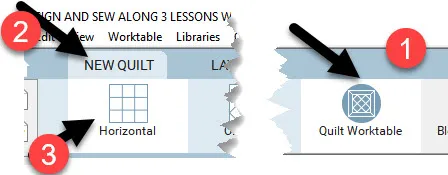
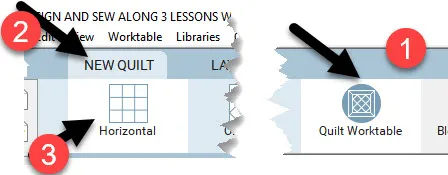
5. Click on the quilt worktable icon on the upper right side of the screen. Click on NEW QUILT> Horizontal. The horizontal layout is the default layout for EQ8.
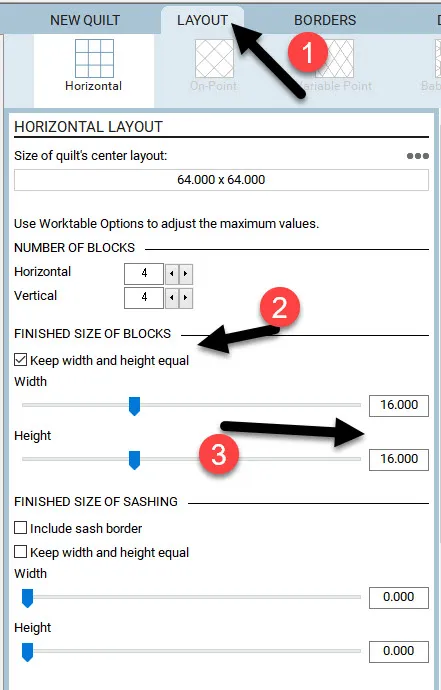
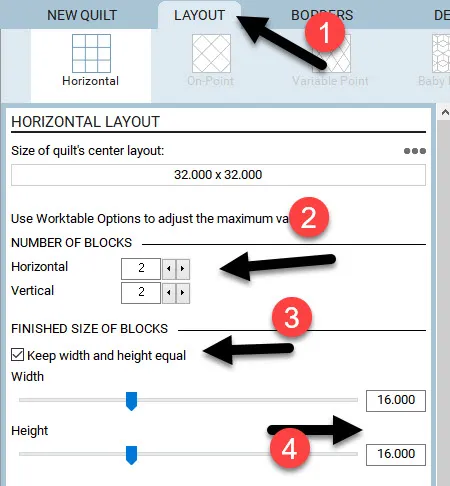
Click on the layout tab and set the size of the blocks to be 16 x 16.
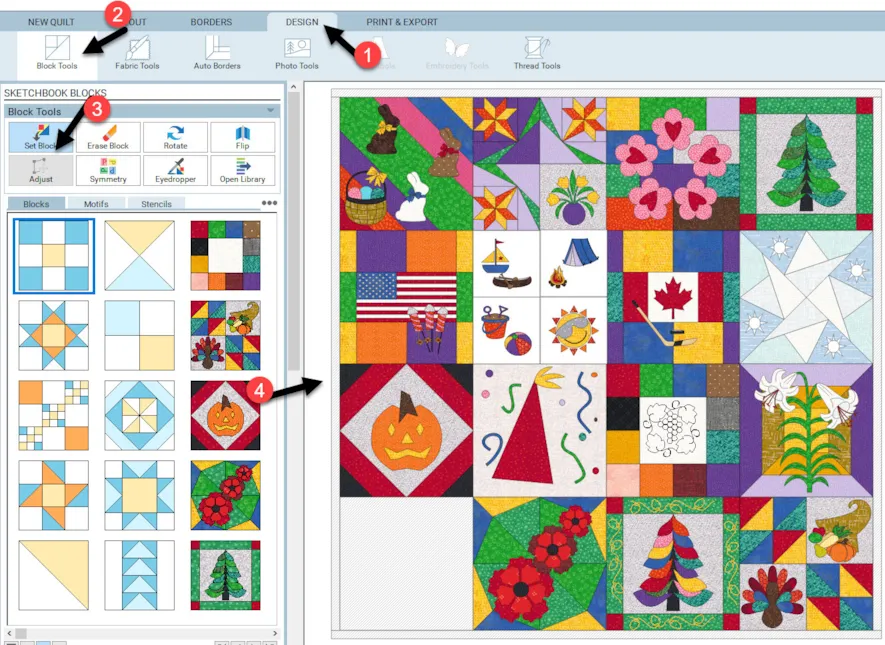
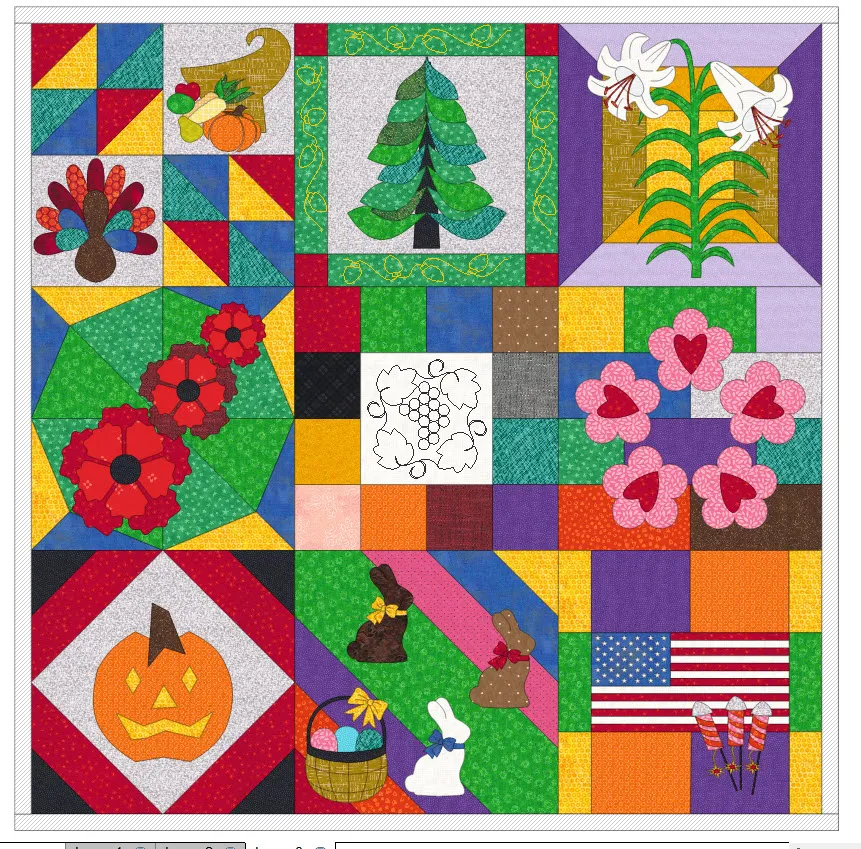
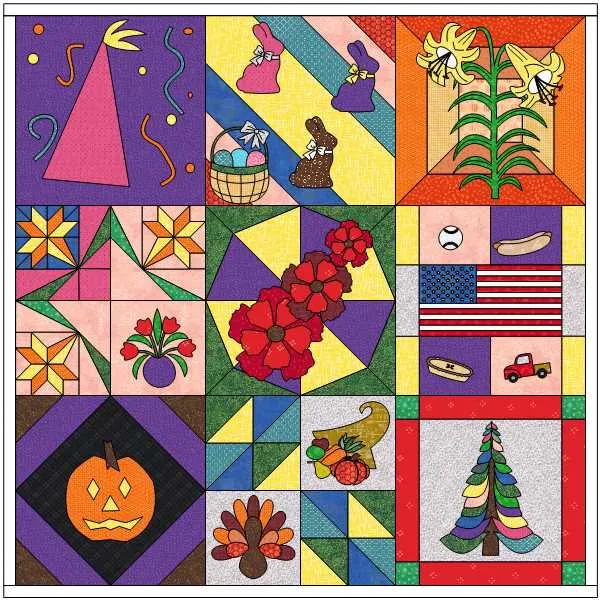
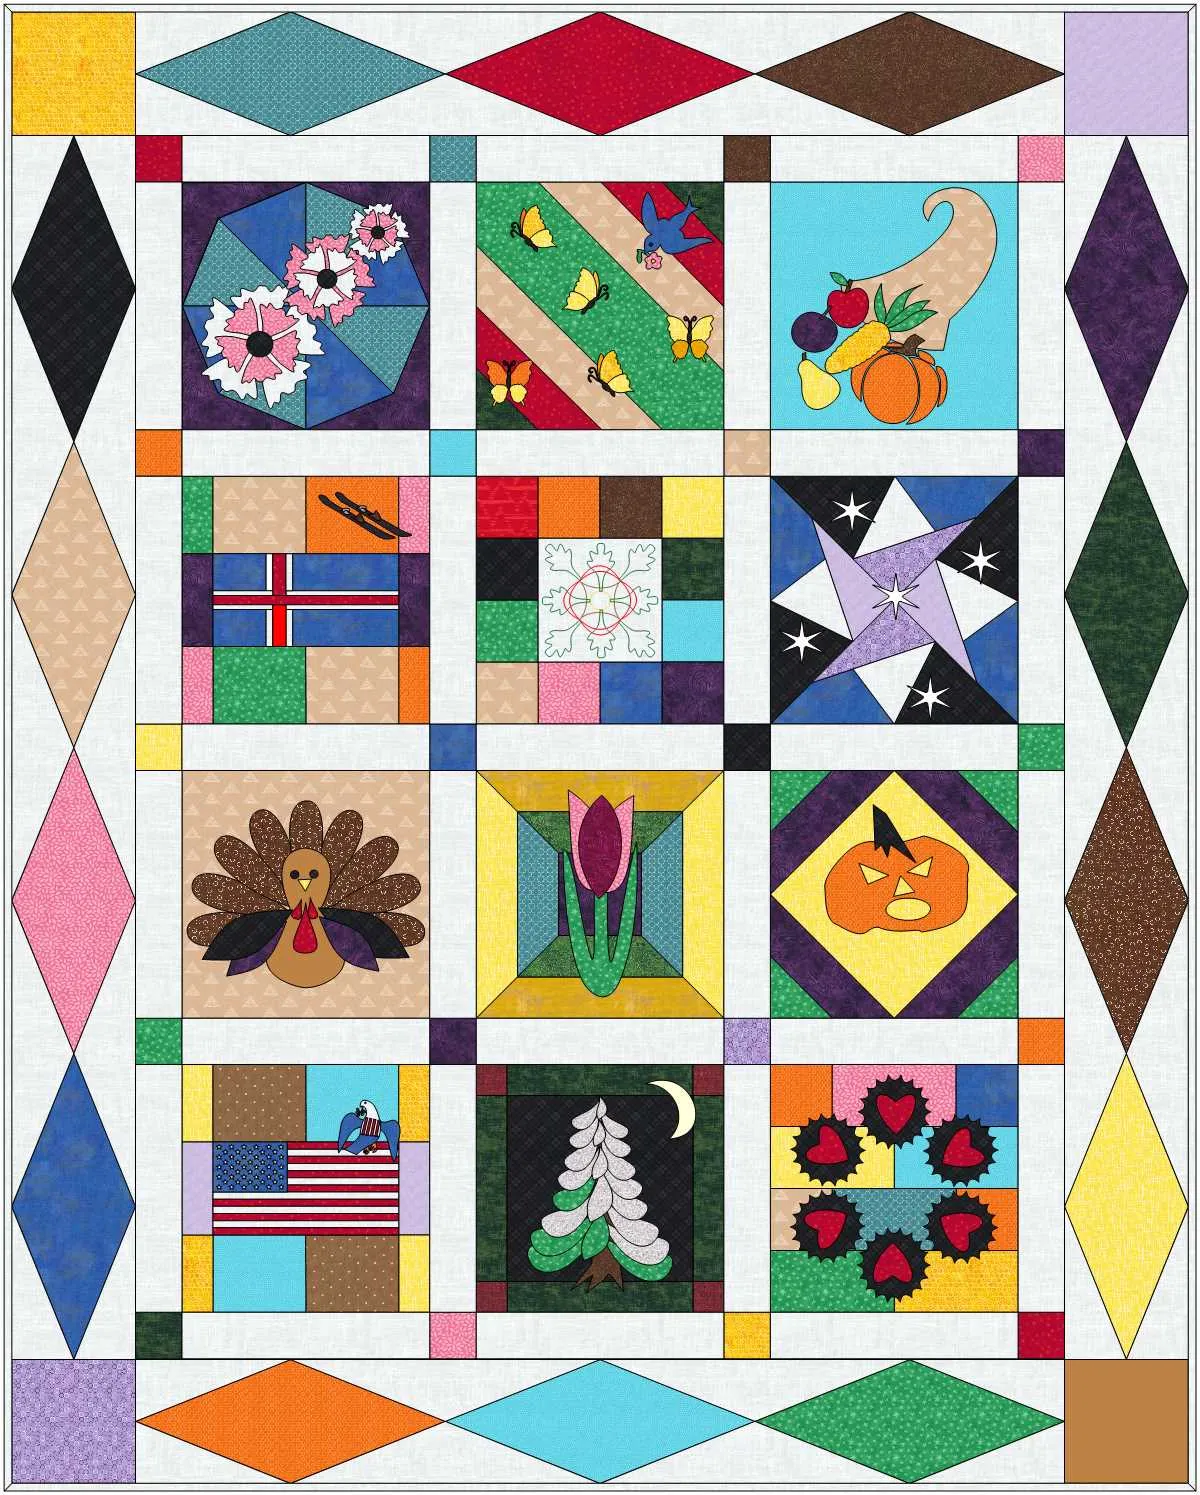
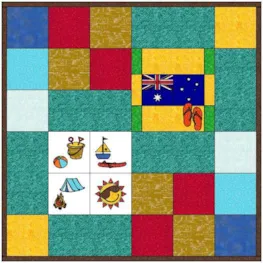
6. Click on the Design tab. Under the design tab, select the Block tools>Set Block> blocks tab, click on each block image to select it, and drag each of the designs created in the lesson onto the work table. The four summertime blocks combined will fill one 16-inch section on the worktable when placed on layer 2 of the quilt layout. Be sure to use layer 3 of the worktable to add the stencils to the blocks we created. At this time, you may not have enough blocks to fill the entire worktable.
For now, all I am doing is evaluating if my blocks will indeed work together. Some of my blocks stick out badly. If I have not sewn my blocks yet, I can simply change the colors to make them feel more like they will work well together.
NOTE: If you are printing your fabric colored designs onto fabric printer sheets, and you recolor the printer sheet color on the design worktable, you would need to adjust the fabric selection you use before printing. Your options would be to 1) use your own fabric as a printer sheet for the correct background color, 2) paint the background of the white fabric printer sheet to blend with the other blocks, or use dense quilting designs in a contrasting color to the background fabric to help add another color element to the fabric block pieces. The design process you choose is entirely up to you.
EQ8 makes it easy for us to view our completed quilt before we even begin. This helps to prevent us from making mistakes.
7. Go back to the Layout tab and redesign your quilt layout that will incorporate your favorite blocks into a quilt that will work with the colors you chose to start with. Leave out any blocks that don’t work well for your overall design.
Do you want an entire quilt with large blocks with holidays all over it for your bed quilt? If not, use the blocks to create pillows, seasonal wall hangings, table runners, shopping bags, table centerpieces, etc.
ADDING BORDERS AND SASHING TO ENHANCE THE QUILT LAYOUT DESIGN
Start with one block and make that single block design into a quilt.
1. Click on the quilt worktable icon  on the upper right side of the screen and choose NEW QUILT> Horizontal on the ribbon at the top of the screen.
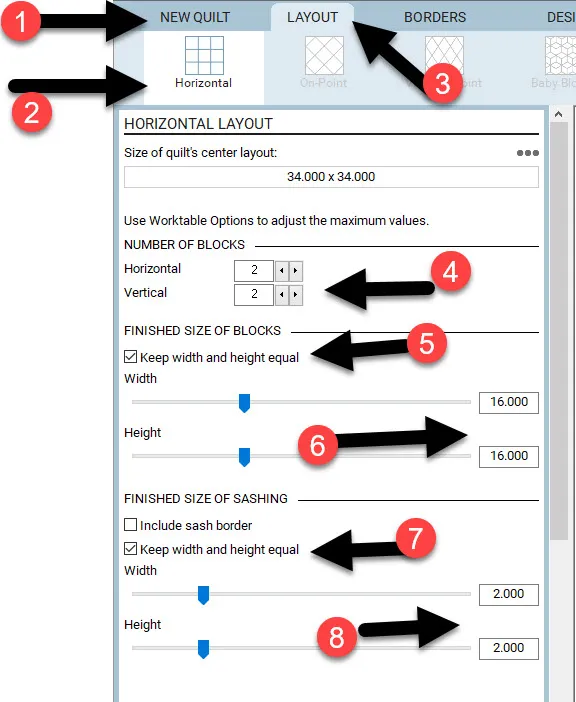
2. Click on the Layout tab at the top of the screen and set the layout to be 2 x 2 blocks with 16 inches for the size.
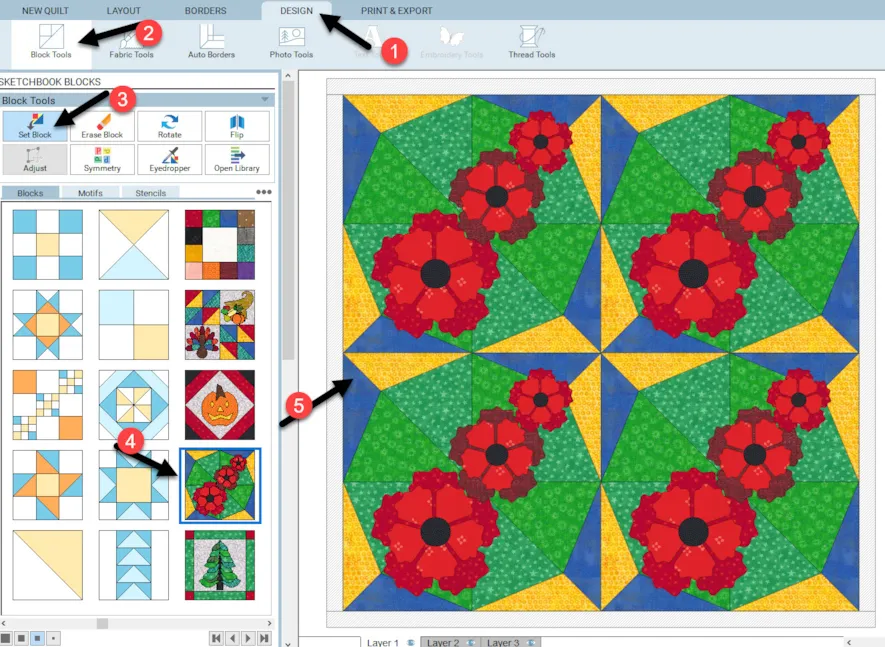
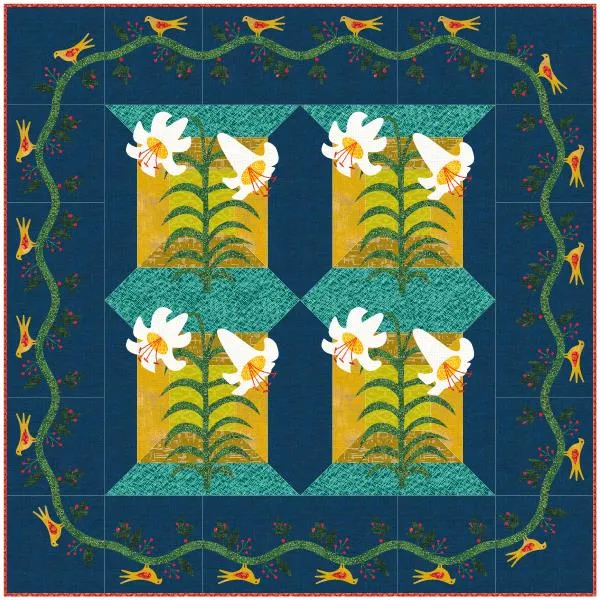
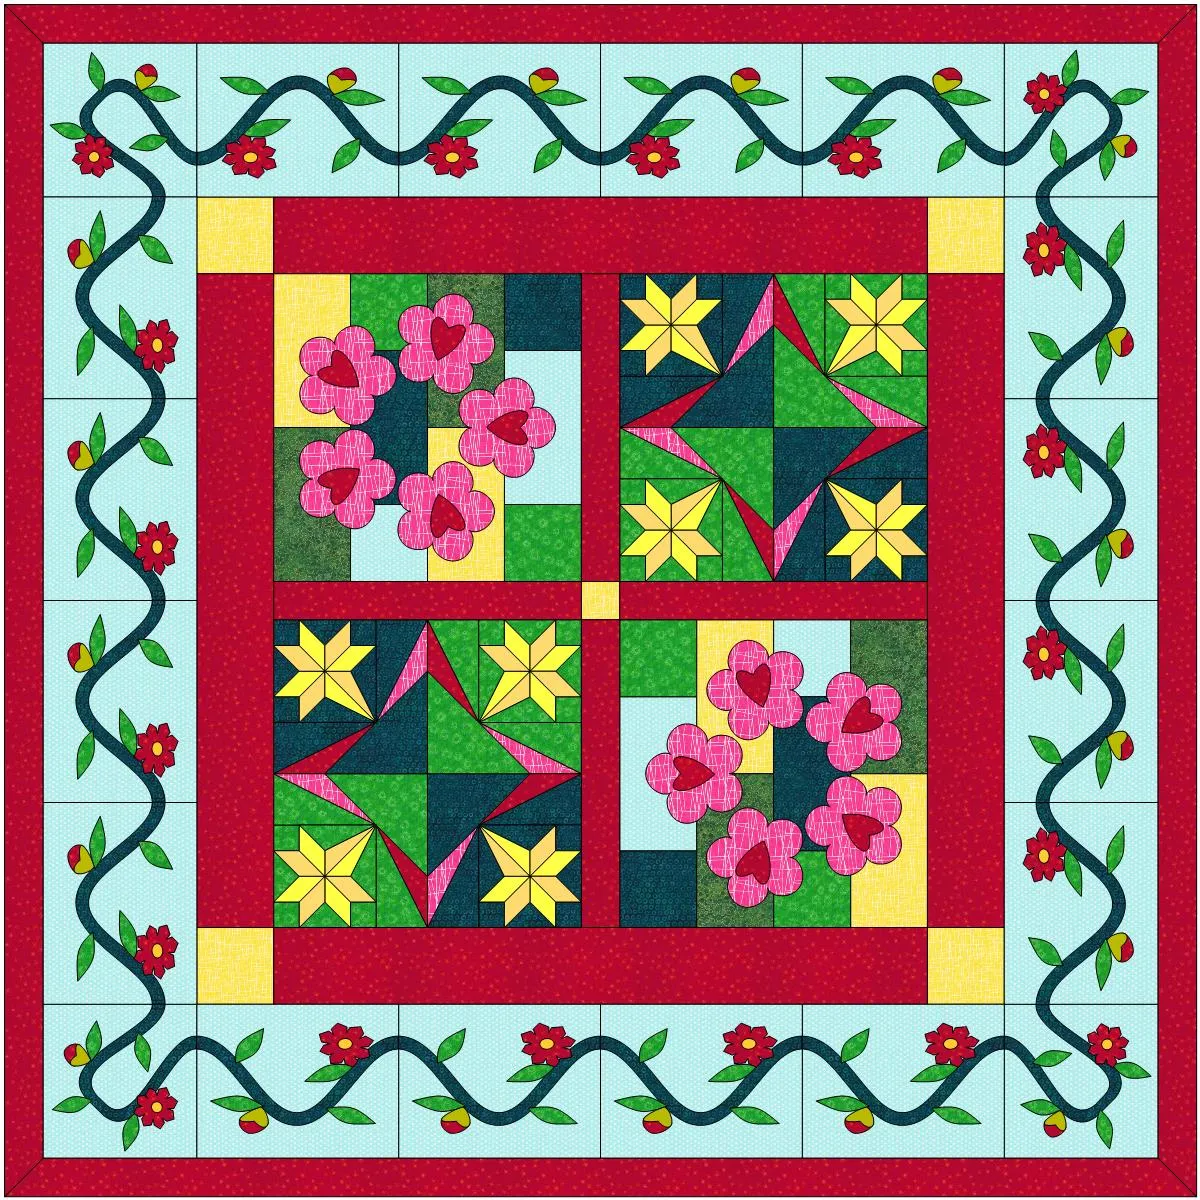
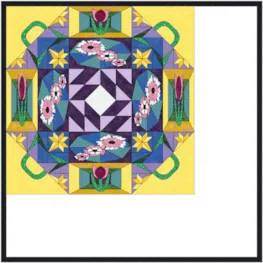
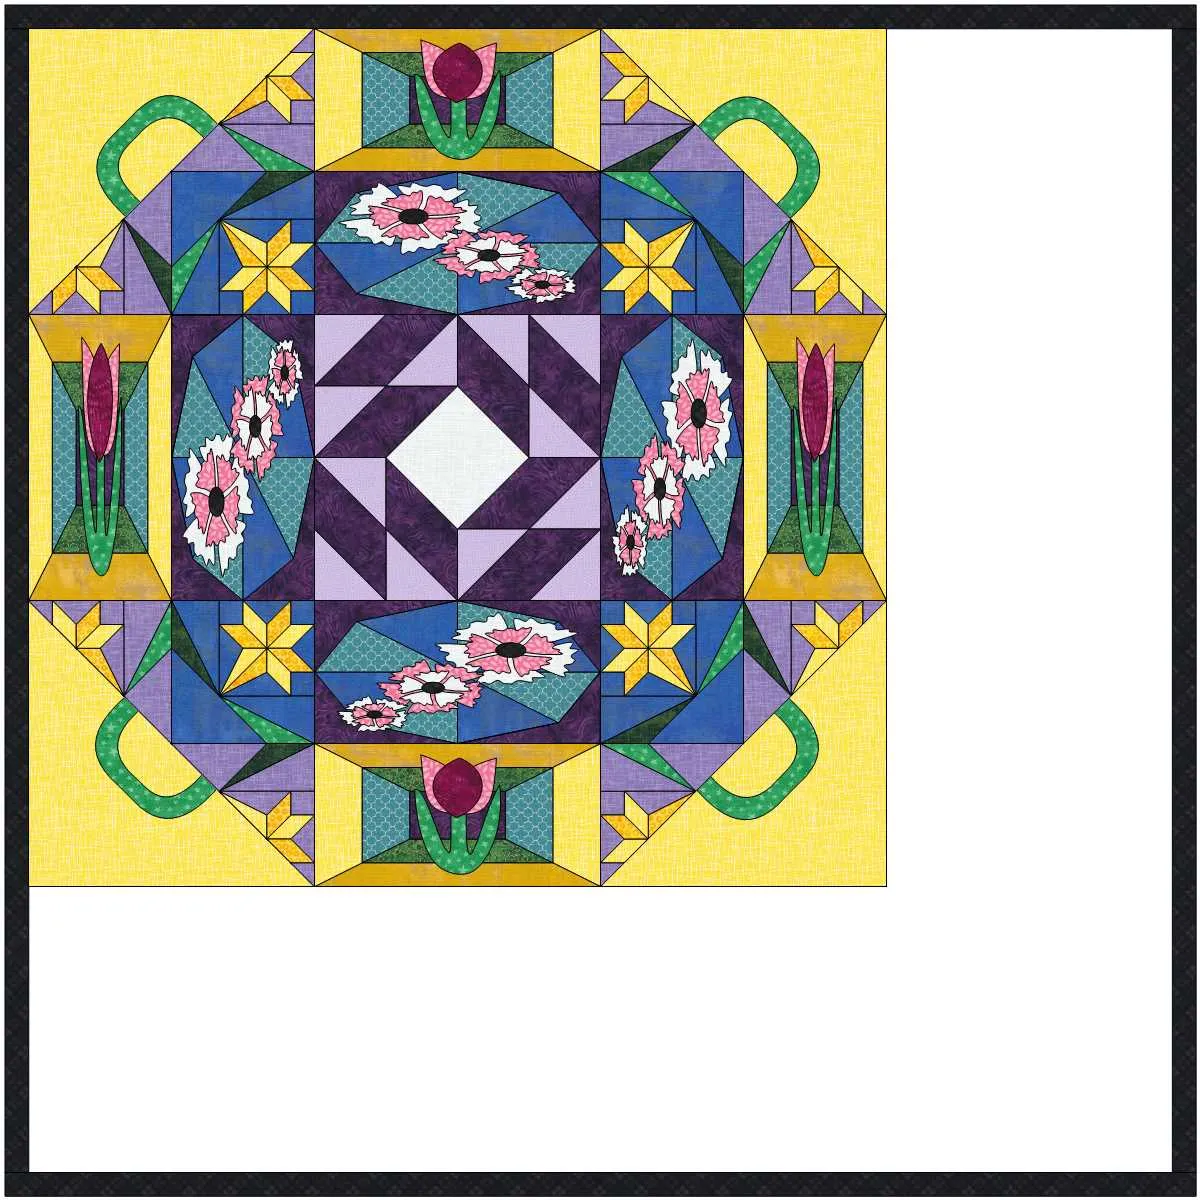
3. Borders can be added on the borders tab and under the design tab. Click on the Design tab at the top of the screen. Select the set block tool ![]() and scroll through your blocks to find the Remembrance Day block we designed.
and scroll through your blocks to find the Remembrance Day block we designed.
While holding down the control key on the keyboard, click on the block to select it and move the cursor over to the worktable and click once to set four blocks with one click.
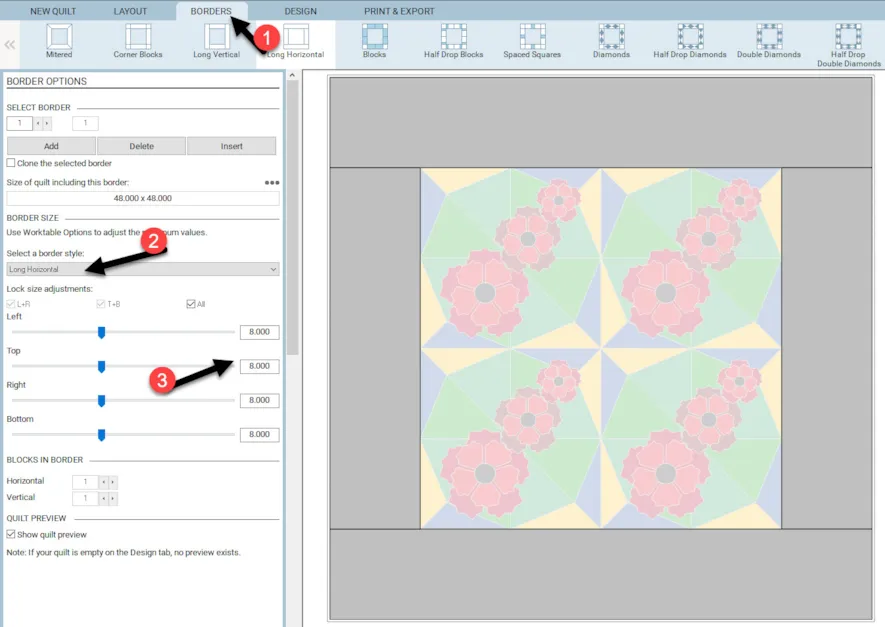
4. The default border width is too small for adding a design to the border area. Leave the default style as horizontal and then change the size. Click on the borders tab at the top of the screen and change the width to be 8 inches.
The wider width of the border area gives us room to add more applique to the border design. Too narrow of a border setting will distort any selection.
EQ8 has an automatic selection of borders that you can try out to see how they work with your inner block design.
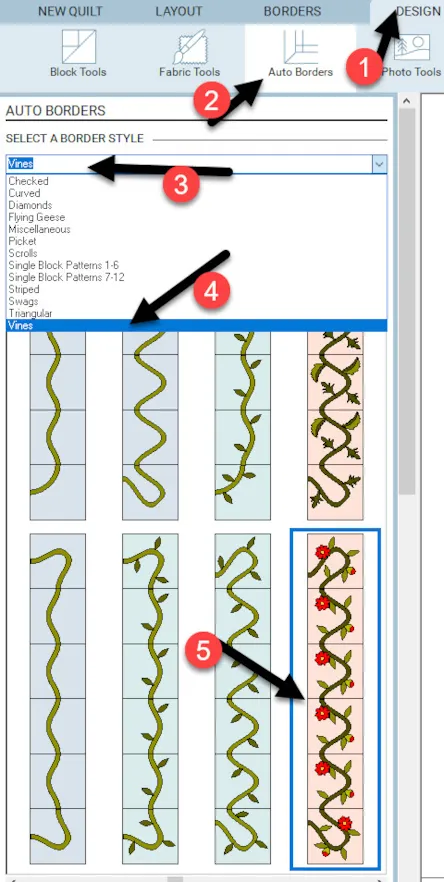
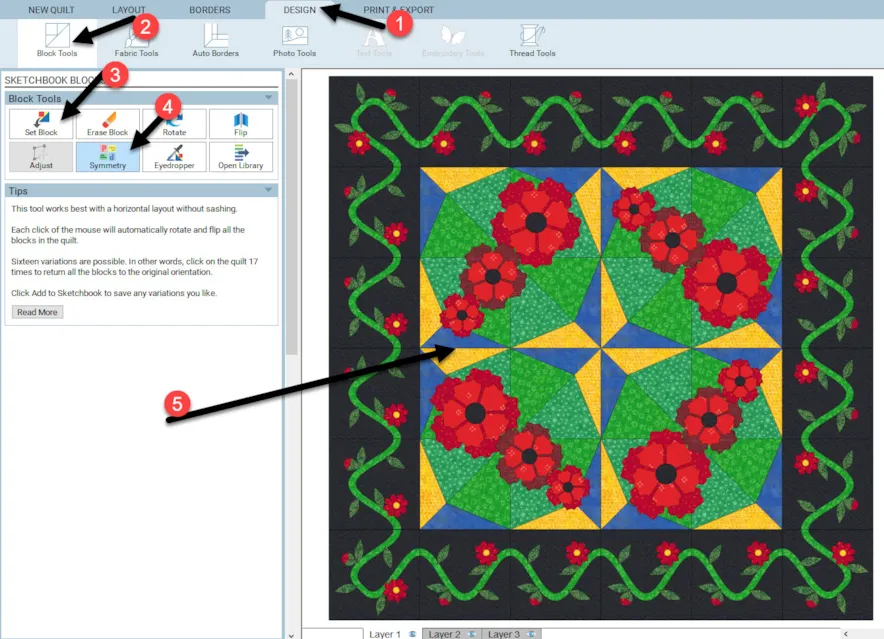
5. Click on the Design tab and select the Auto Borders from the ribbon at the top of the screen. In the drop-down menu, select the vines category, and then click on the image of the vines with the little red flowers.
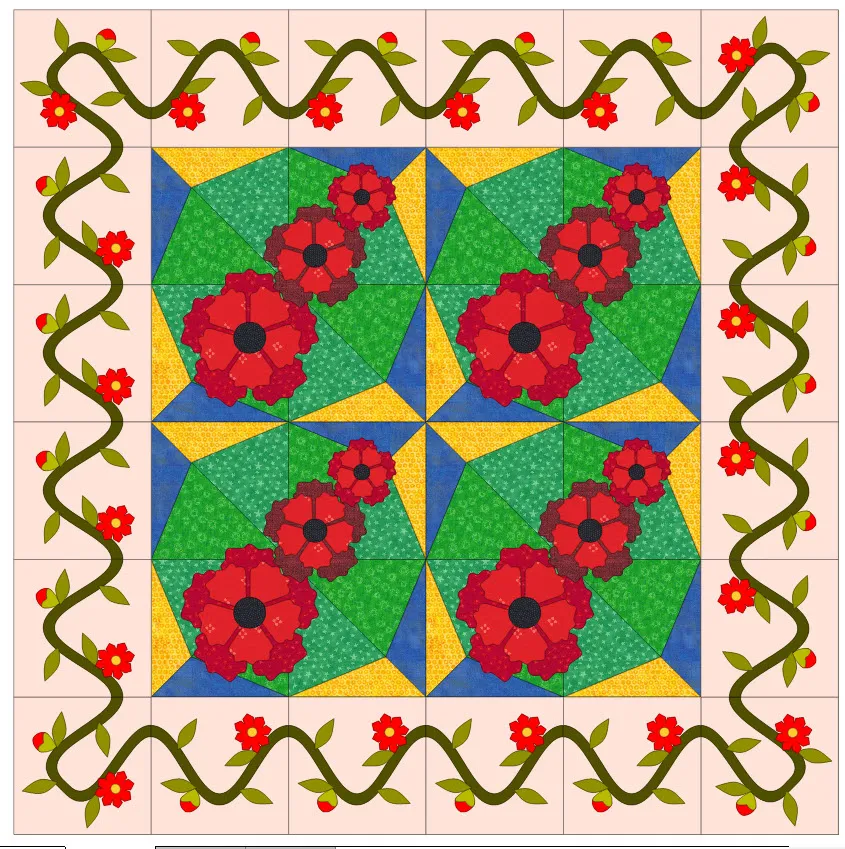
Move the cursor over to the worktable and click once on a border to set the design all around the blocks. The colors will need to be changed.
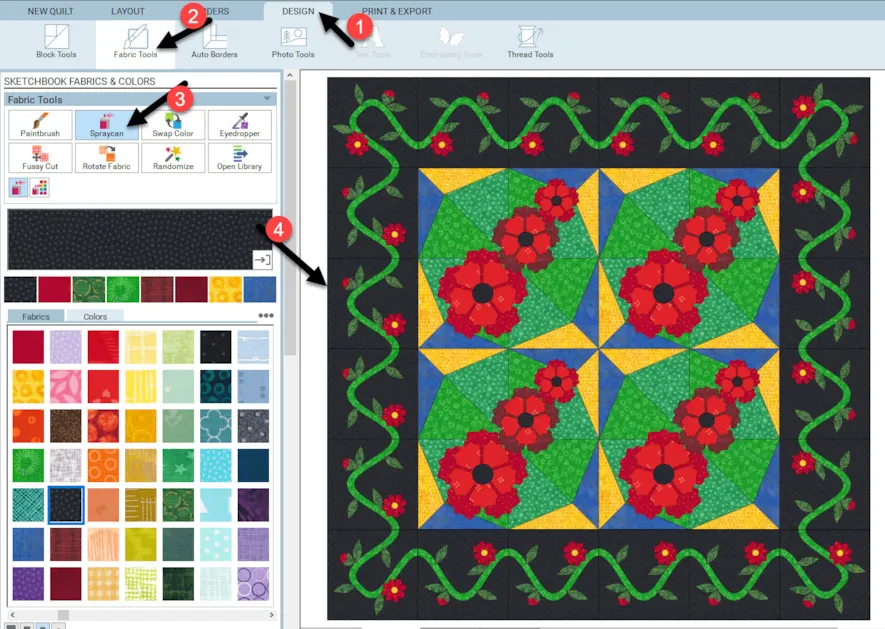
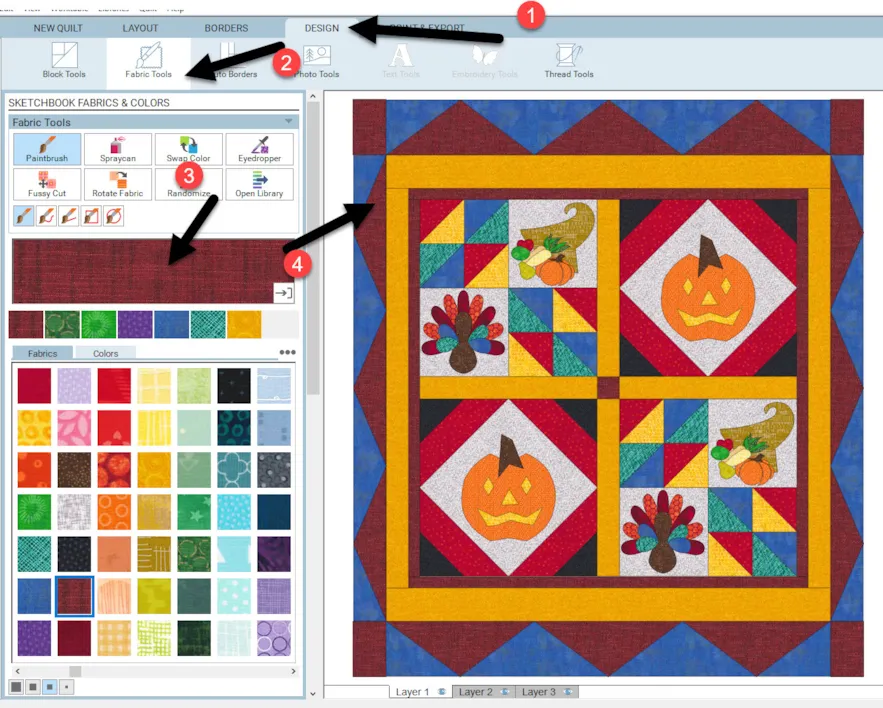
6. Click on the fabric tools icon ![]() and select the spray can
and select the spray can![]() and hold down the control key on your keyboard to color your border with one click on the side and one click on a corner using colors from inside you blocks. The spray can works by coloring all similar colored patches with the new color you select from the fabric palette. Try different colors to find one you are satisfied with.
and hold down the control key on your keyboard to color your border with one click on the side and one click on a corner using colors from inside you blocks. The spray can works by coloring all similar colored patches with the new color you select from the fabric palette. Try different colors to find one you are satisfied with.
7. Look at your design layout and determine if it would look better with a different rotation of the center blocks. Click on the block tools, set block icon, ![]() and click on the Symmetry tool
and click on the Symmetry tool![]() to select it. . Move the cursor over to the worktable and click on the layout in the center of the quilt up to 16 times to see different layout options. Save any you like to your sketchbook.
to select it. . Move the cursor over to the worktable and click on the layout in the center of the quilt up to 16 times to see different layout options. Save any you like to your sketchbook.
NOTE: The option to add auto borders is on the Design Tab only. You can not add the sashing or multiple borders with the auto borders selection. Multiple borders and sashing can only be added when you are on the Borders Tab.
ADD SASHING TO BLOCKS
Sashing helps to define one block from another in a quilt layout. It can also add depth to the design.
EQ does not tell us how to stitch our blocks together. It is up to the individual to plan how they will construct the blocks, sashes, and borders.
1. Click on the quilt worktable icon  on the upper right side of the screen. Select NEW QUILT > Horizontal. Click on the layout tab and set the layout to 2 x 2 with a 16-inch block. Add sashing at 2 x 2 inches.
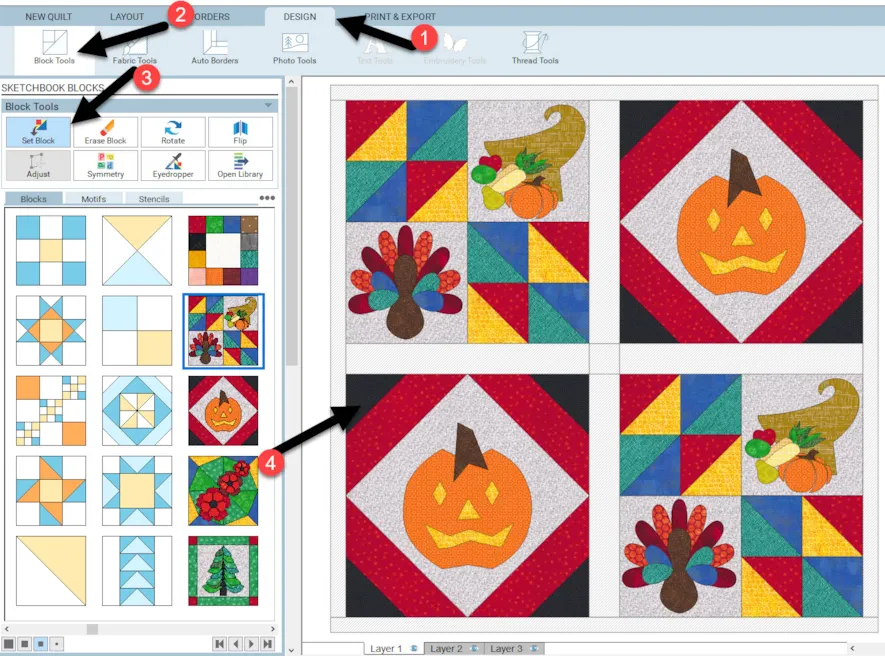
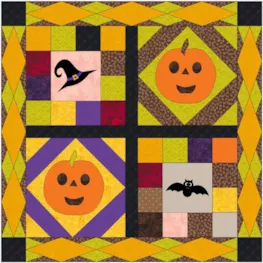
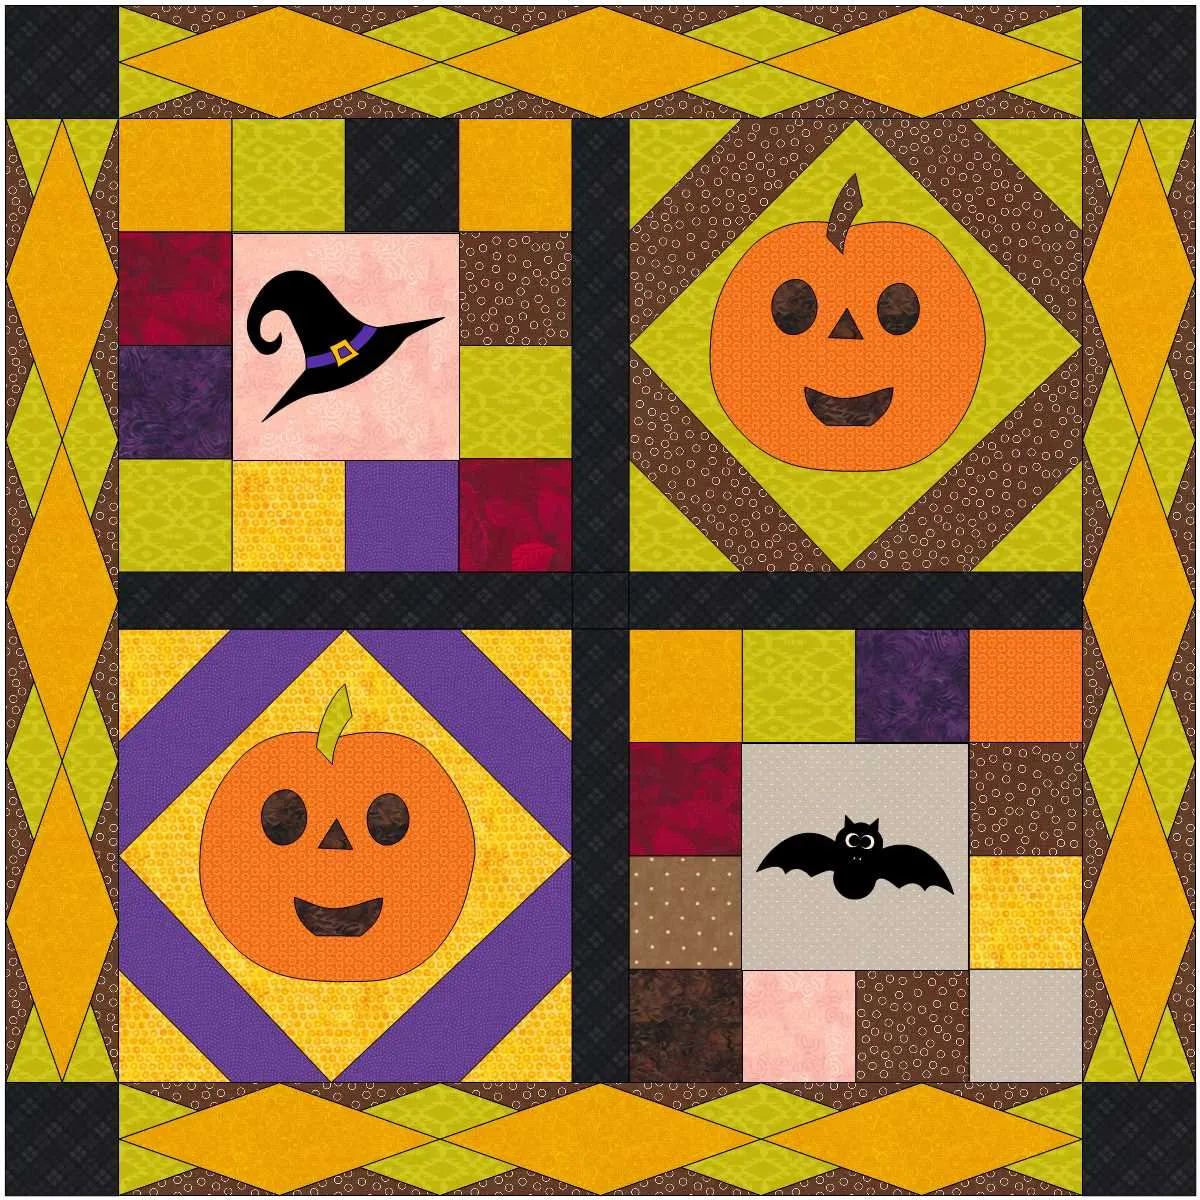
2. Click on the Design tab at the top of the screen. Click on block tools, set block, and click on the Thanksgiving block to select it. Click/hold/drag/release the block onto the worktable in two opposite corners. Repeat this same process with the Halloween block.
Note how EQ has added the sashing strips between the blocks but not along the outer edges of the quilt.
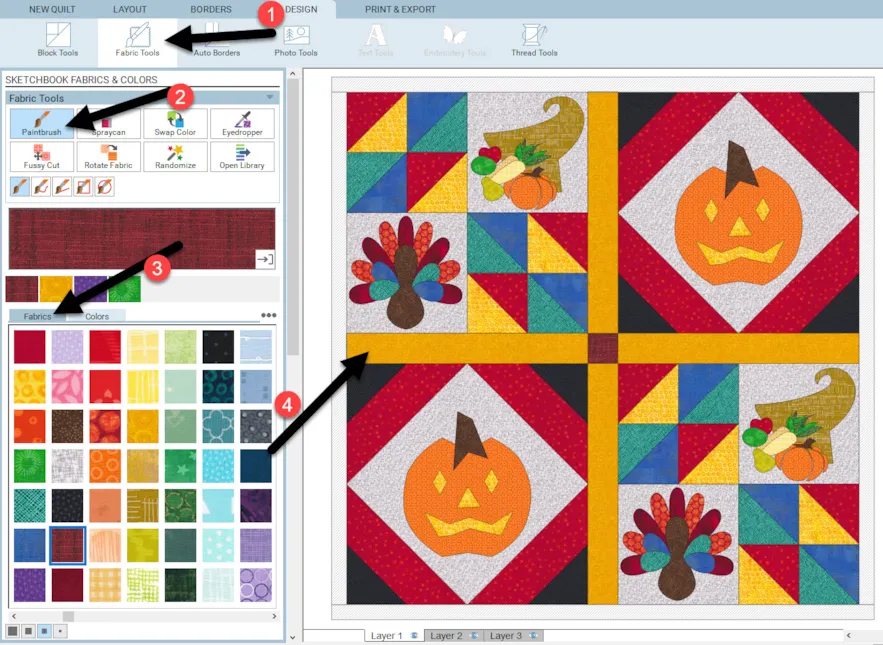
3. Click on the fabric tools![]() , paintbrush,
, paintbrush, and select fabric colors to color your sashing strips.
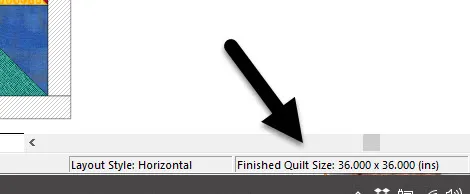
4. On the lower right side of the screen, the size of the layout is shown. This is 36 x 36 inches as it is now. You can decide how you will use this quilted project. It is too big for a table topper but could be used as a wall hanging at this size. You can change the dimensions of the layout and make it into a lap quilt simply by adding borders of varying sizes.
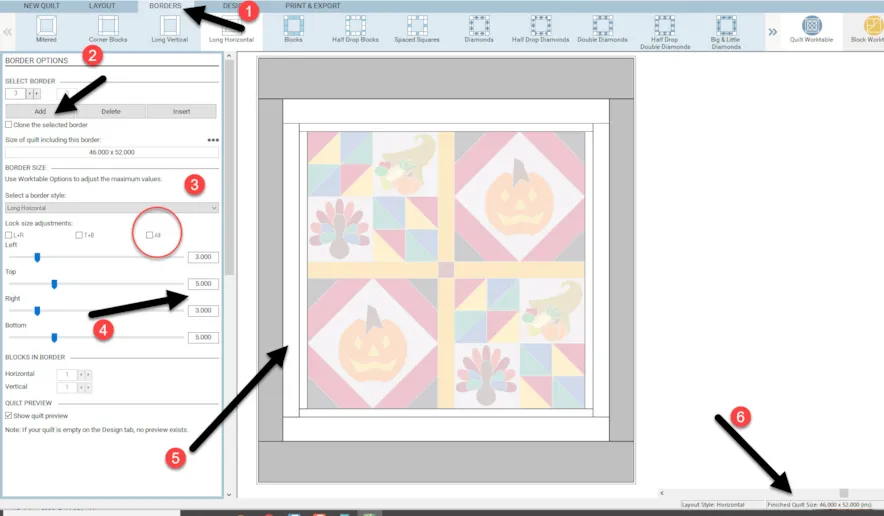
5. Click on the borders tab at the top of the screen. Leave the first border as it is. Add more borders by clicking on the word ‘add’ and change the sizes of the borders by typing in varying sizes for the sides and the top/bottom of the quilt to make it longer and wider. You need to uncheck the ‘all’ selection to be able to type in varying sizes for the borders. Add multiple borders. Note how the size of the quilt changes with each addition of borders at the bottom of the screen.
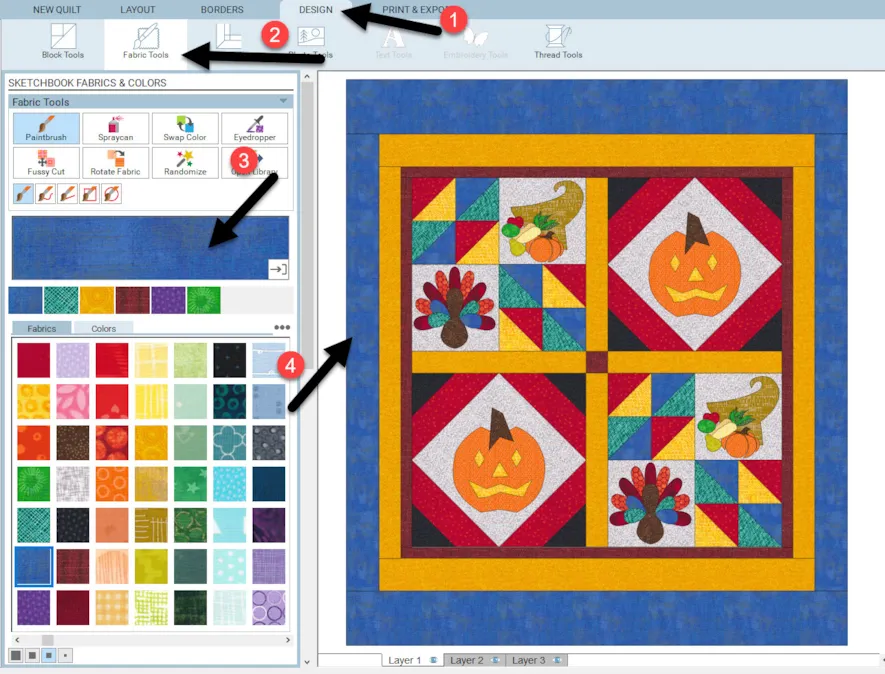
6. Click on the Design tab and select the fabric tools and color your borders to complement the blocks.
7. The possibilities of the quilt layout are endless. You can keep the center blocks as they are and continue to try out different border layouts to add more interest.
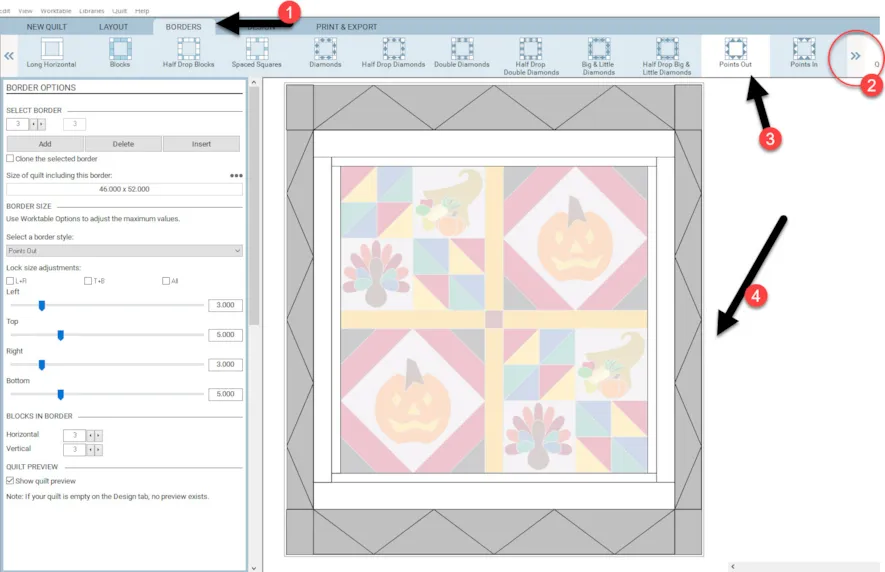
Click on the borders tab at the top of the screen. On the ribbon across the top, use the double arrow to view more options for your borders. Select one to add to the outermost, widest border.
There is no right or wrong way to create your quilt layout. You can change the styles of the borders and the dimensions of the borders to create what looks good to you.
8. Click on the Design tab and use the fabric tools to color your borders.
9. Spend some time working with your various blocks to create different layouts.
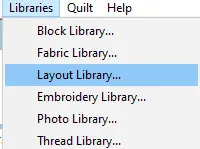
Click on LIBRARIES>Layout Library at the top of the screen.
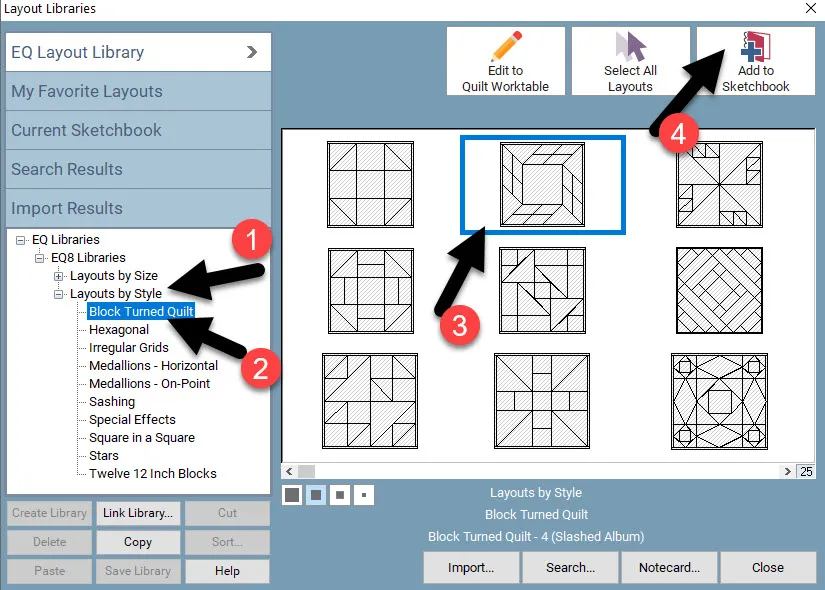
In the library box, scroll through the layouts by style and see if there is one that could accommodate your 16-inch blocks. You will have to adjust the layout to fit your block perfectly.
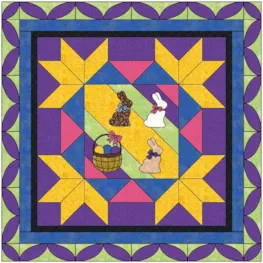
Click on the ‘layouts by style’ and select the block turned quilt category. Selected the turned quilt with the square block in the center and add it to your sketchbook.
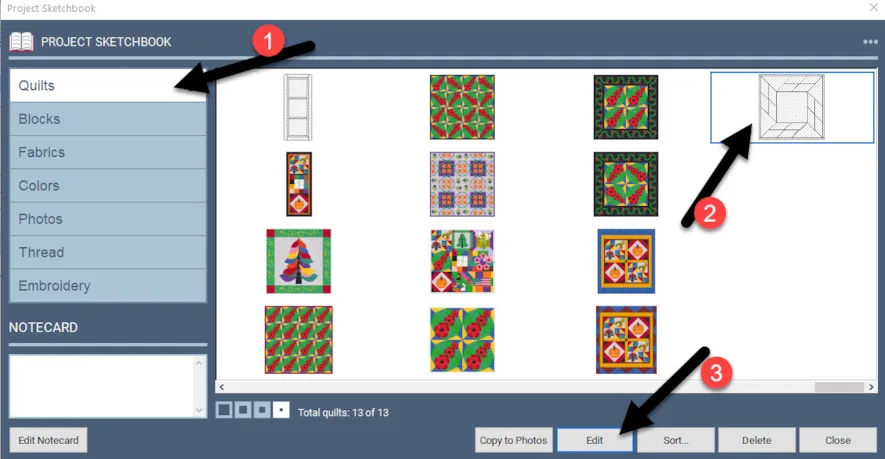
10. Click on the view sketchbook icon![]() and select the layout from the quilts category. Click on ‘edit’ at the bottom of the sketchbook to place it on the worktable.
and select the layout from the quilts category. Click on ‘edit’ at the bottom of the sketchbook to place it on the worktable.
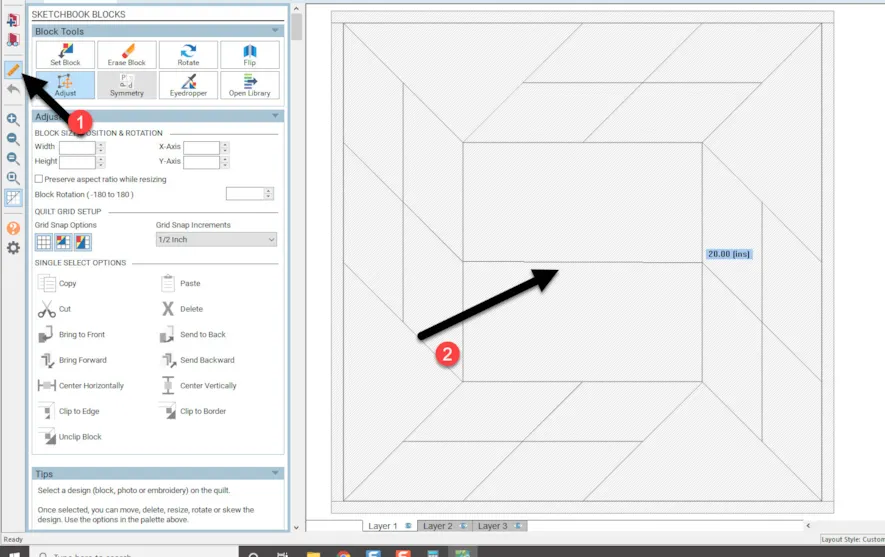
11. With the layout on the quilt worktable, click on the tape measure tool![]() to select it then move the cursor over to the center of the layout and click/hold/drag a line straight across the center block area. The center of this design is 20 inches.
to select it then move the cursor over to the center of the layout and click/hold/drag a line straight across the center block area. The center of this design is 20 inches.
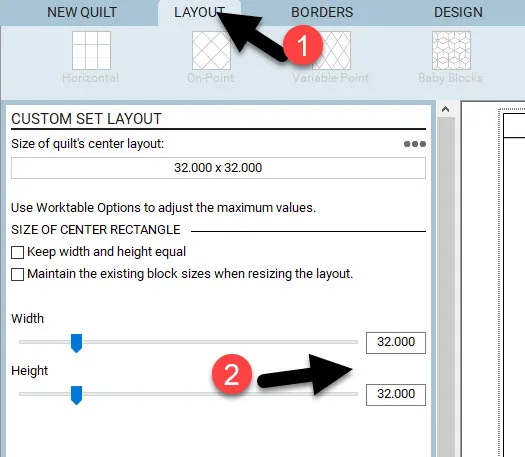
12. Click on the layout tab and change the size of the layout to 32 x 32 inches. Return to the design tab and use the tape measure tool ![]() to remeasure the center block. It should now be 16 inches.
to remeasure the center block. It should now be 16 inches.
NOTE: I had to try a few different sizes until I got my center block area to be the required 16 inches.
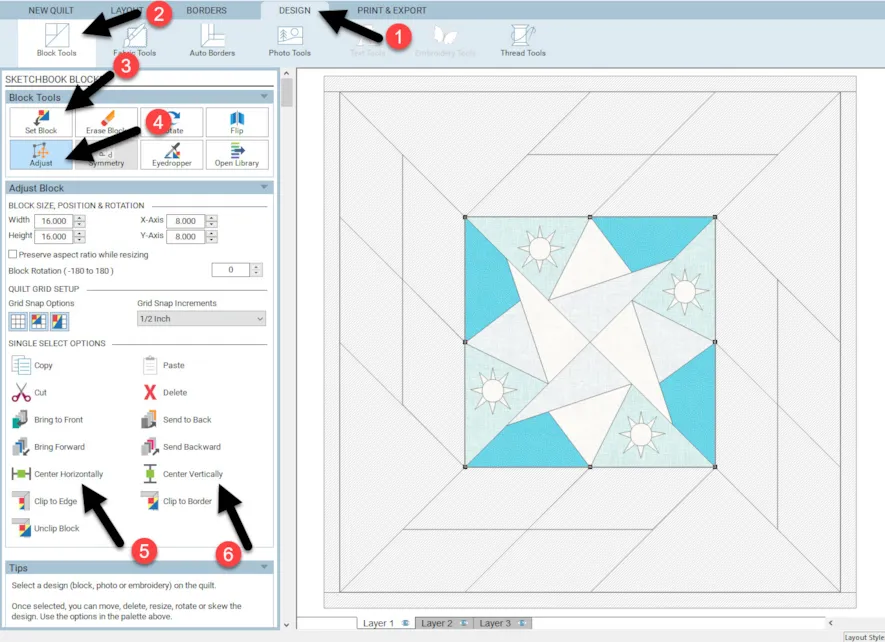
13. On the design tab, click on the set block and choose one of your blocks to place in the center of the quilt layout. Click/hold/drag/release the block onto the worktable. It will not be centered. Click on the adjust tool. ![]() Use the ‘center vertical’ and ‘center horizontal’ icons
Use the ‘center vertical’ and ‘center horizontal’ icons to get the block directly in the center.
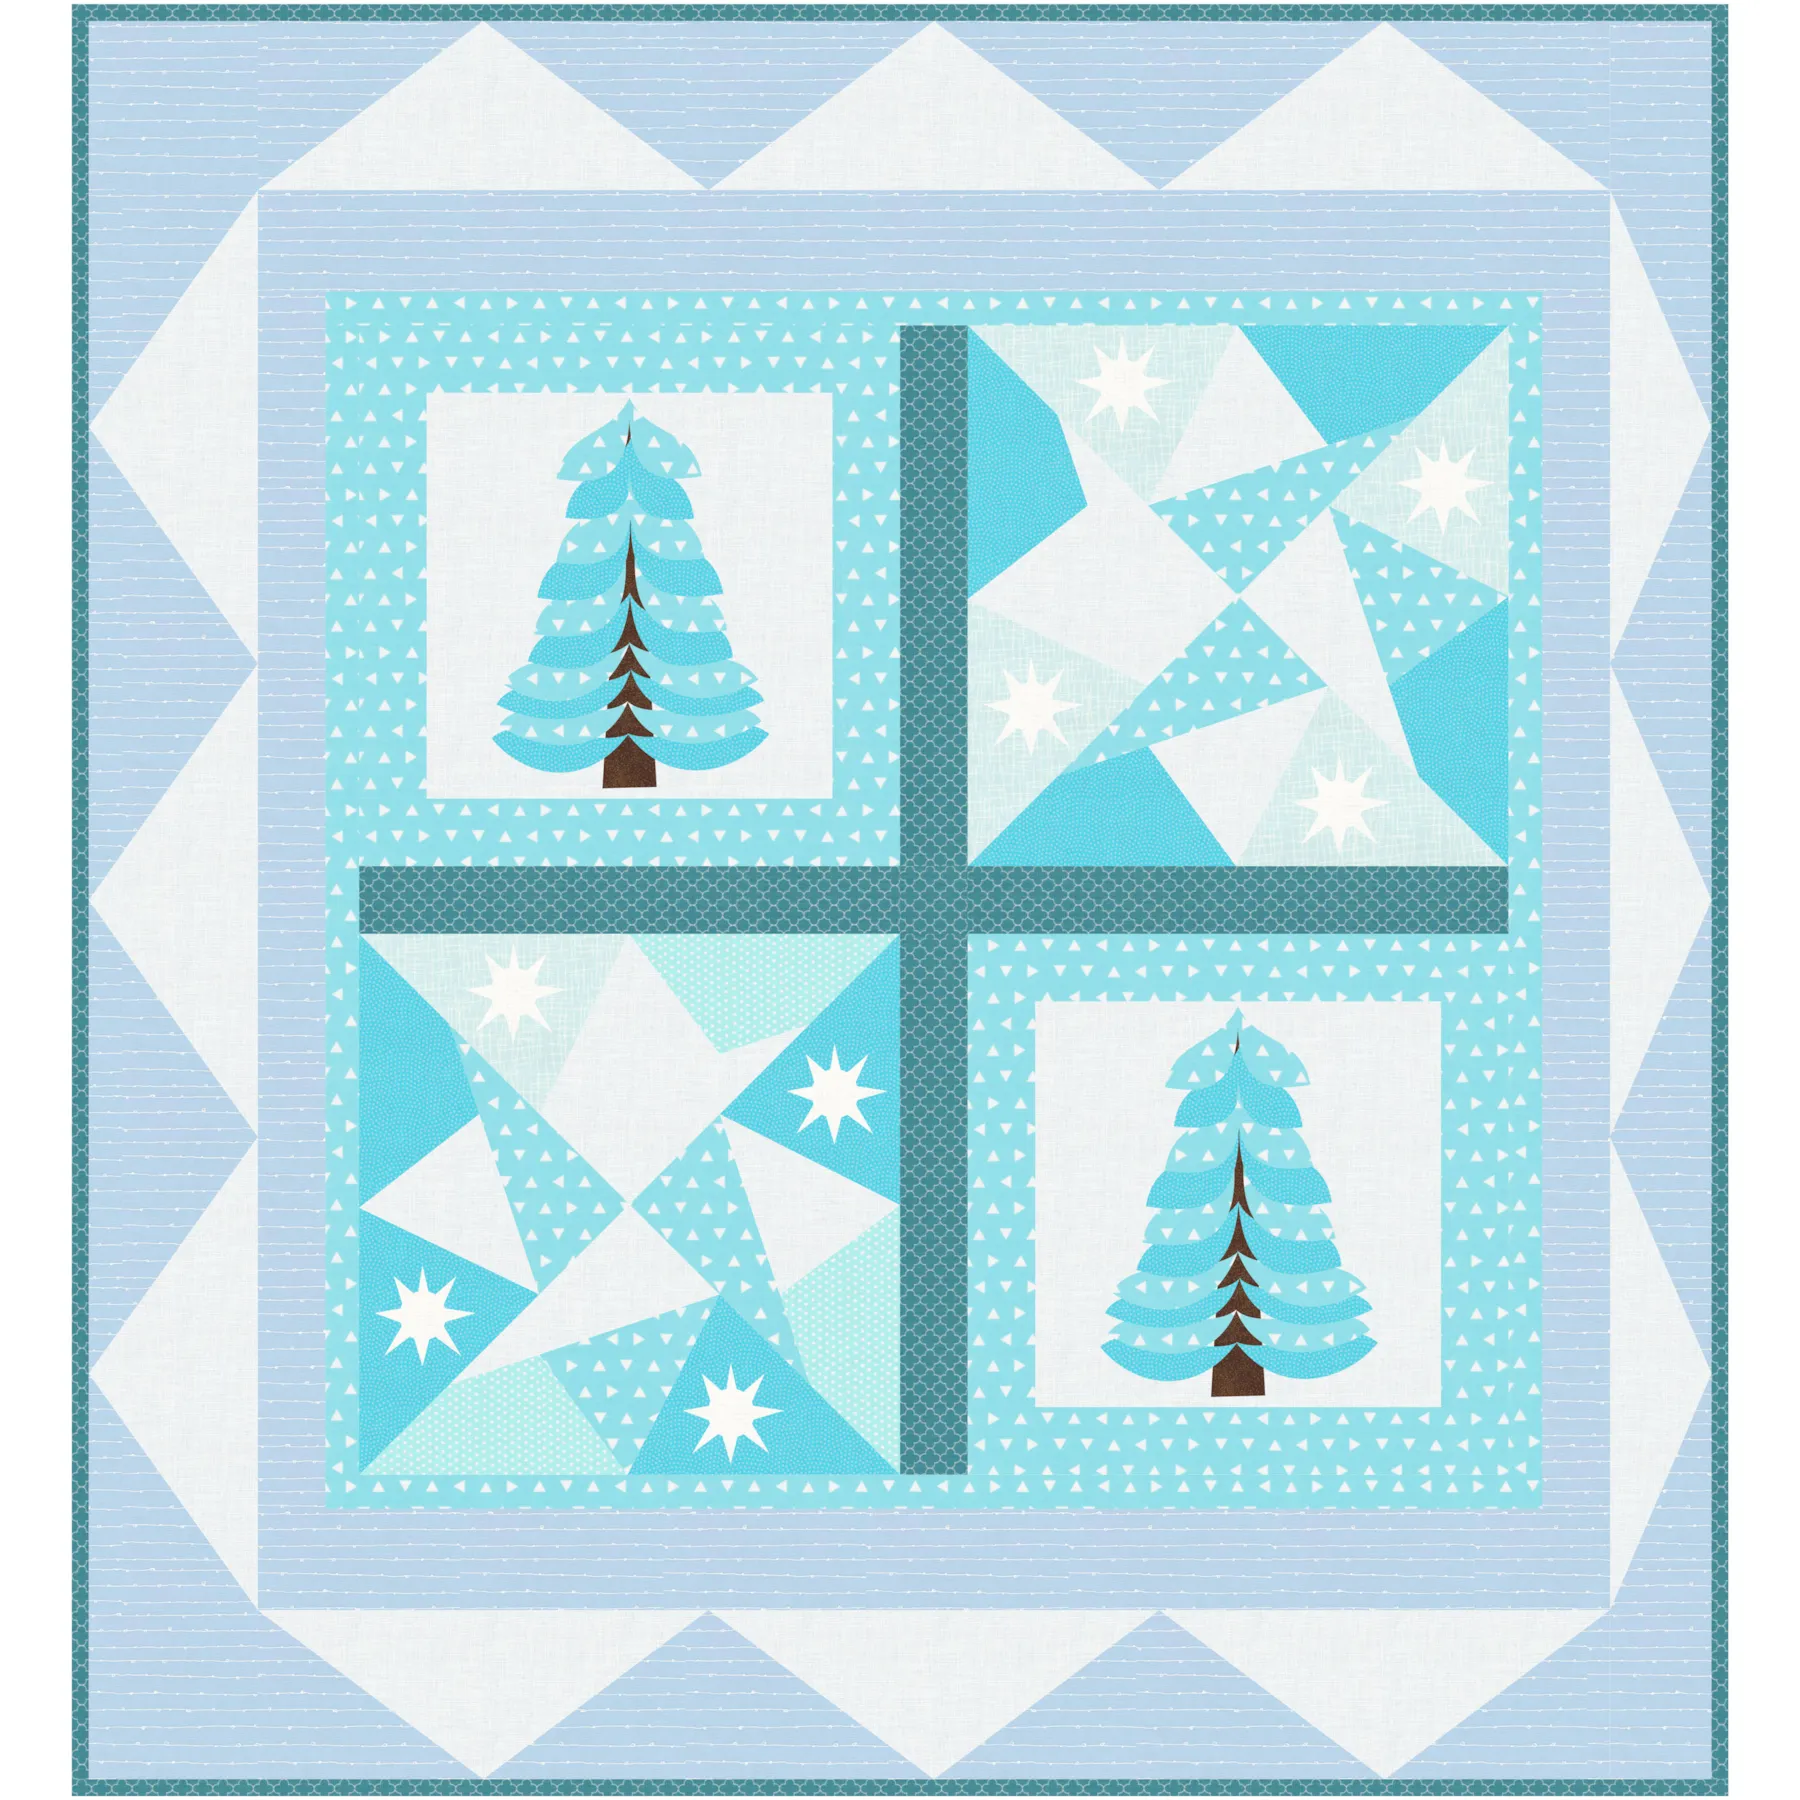
This design layout is 34 inches with a narrow border. This is a good size for a winter-inspired wall hanging.
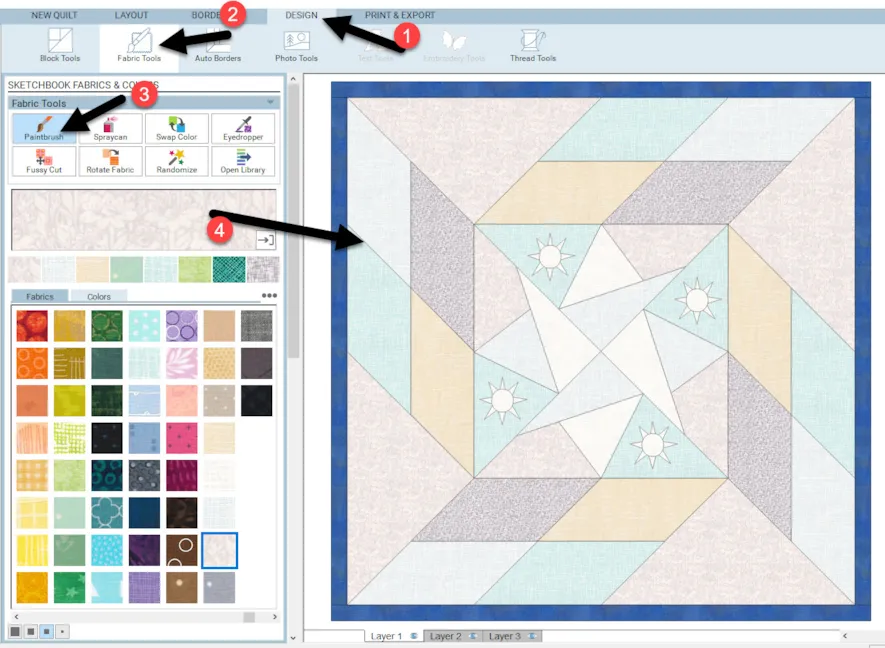
14. Click on the fabric tools ![]() in the ribbon at the top of the screen and color the remainder of the quilt layout.
in the ribbon at the top of the screen and color the remainder of the quilt layout.
CLEAN UP THE SKETCHBOOK
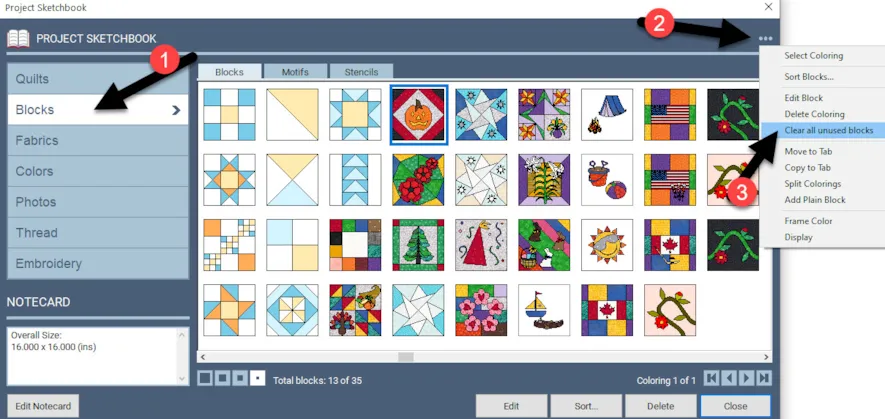
We have several blocks, quilts, and fabrics in our sketchbook. They take up a lot of space. The project file can be made smaller by cleaning up the sketchbook. With a smaller file, it will use less space on your computer and the file will be small enough to email to another person without all the details that are not needed.
1. Click on the view sketchbook icon. ![]() In the sketchbook, click on the blocks heading. Click on the three little dots in the upper right corner of the sketchbook. Select the ‘clear all unused blocks’ option.
In the sketchbook, click on the blocks heading. Click on the three little dots in the upper right corner of the sketchbook. Select the ‘clear all unused blocks’ option.
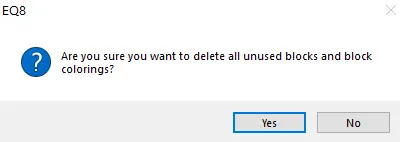
You will get a message asking if you really want to do this. Click on the ‘YES’.
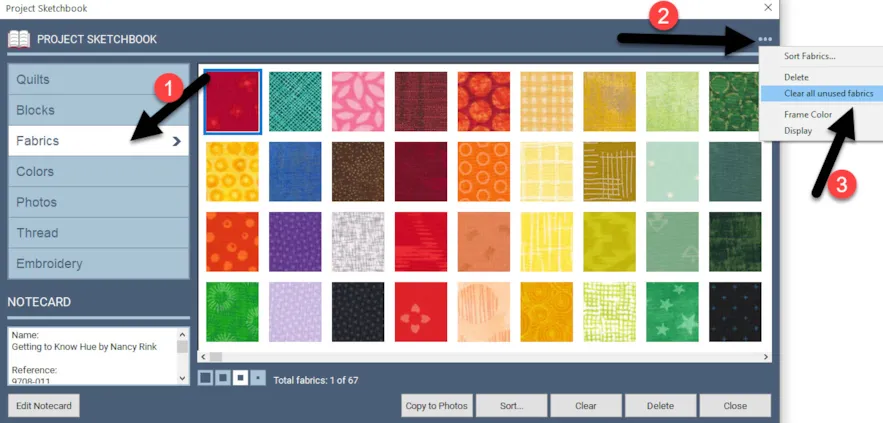
3. Still in the sketchbook, click on the fabrics heading and use the three dots to clear all the unused fabrics.
Answer ‘YES” in the box that asks if you want to do this.
4. Continue doing this same process for both the colors and the threads in the sketchbook.
5. Click on the quilts heading and make sure you select and delete any quilt layouts that you no longer need. Click on each one and then click on the delete key on your keyboard.
The entire project file now only contains items you actually used during the class lessons. This smaller file will take up less storage space on your computer and make it easier to send in an email.
Continue to design different layouts with your blocks created during the lessons. Remember, if you have not stitched your blocks yet, you can always change the color selections now before your sew.
Use the print/export tab to export an image of your favorite quilt layout from this session and add it to the comment section at the bottom of the blog page. Refer to lesson one if you have forgotten how to do this.
I hope this inspired you to play a little with your EQ8 program to discover new ways to produce blocks and layouts.
WATCH THE VIDEO BELOW
Want to download the video to watch later? Click an option below:


