Making a Lone Star quilt in EQ8 is easy! There are a few different options. A Lone Star Block First try checking in the Block Library. Click Libraries > Block Library > 01 Classic Pieced > Lone Stars. There are 29 block options. You can also edit any of these blocks. If you would like to use one of these blocks click on the block and click Add to Sketchbook. Click NEW QUILT > Layout > Horizontal Under NUMBER OF BLOCKS make the quilt 1 x 1 Under FINISHED SIZE OF BLOCKS make the block the size you want your finished quilt to be (minus any border). Click the DESIGN tab > Block Tools > Set Block Click on the block and click on the quilt to set it. Click the Fabric Tools an use the coloring tools to recolor the quilt. Click Add to Project Sketchbook for any
Favorite Posts
Design & Discover – Lone Star Quilts
Posted 04-01-2023 by Heidi | Posted in: Design & Discover Favorite Posts
Lessons with Yvonne–March 19, 2023 Easter Design
Posted 03-19-2023 by Yvonne | Posted in: EQ8 EQ8 Lessons with Yvonne Favorite Posts
I love having a quick and easy Easter design handy for the grandkids. I don’t always have time to make a quilt, but my EQ8 program will produce an easy outline to help the kids be creative with paints or crayons to color a design I create. Open your EQ8 program and name a new project ‘Easter’ on the opening page. At the top of the screen, click on LIBRARIES>Block Library In the bottom of the library box, click on the word ‘search’ > “by notecard”. When the notecard box opens, type in the word ‘bunny’ and then click on the word ‘search’ at the bottom of the box. The results box will list how many items you have in EQ8 that fit this word. Click on the OK at the bottom of the box to see the results. Scroll through the search results and click on any one of
Design & Discover – Using Blocks in the Sashing
Posted 03-01-2023 by Heidi | Posted in: Design & Discover
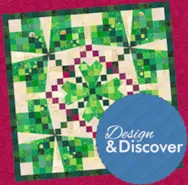
Let’s see how this month’s free project Lucky Leaves was designed. You can download the project here. Be sure to check out the other free projects available. There are over 320 to choose from! The project includes 51 new fabrics! And this cute block! Here is how to design this quilt: Click the NEW QUILT > Horizontal Click the LAYOUT tab Under NUMBER OF BLOCKS make the Horizontal and Vertical: 2 Under FINISHED SIZE OF BLOCKS make the Width and Height: 9 Under FINISHED SIZE OF SASHING make the Width and Height: .75 Click the BORDERS tab For the first border’s style choose Corner Blocks and make all sides: .75 For the second border’s style choose Long Horizontal and make all sides: 2.250 For the third border’s style choose Long Horizontal and make all sides: .250 Click the DESIGN tab > Block Tools > Set Block Click on the
Design & Discover – Easy Quilt Changes
Posted 02-01-2023 by Heidi | Posted in: Design & Discover
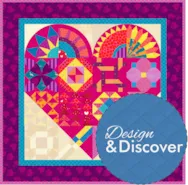
Let’s discover some easy and quick ways to change existing projects. For example, I’m going to use this month’s free project of the month, Scrappy Sweetheart. You can download the project here. It also includes 50 fabrics! This is just one of over 320 free project downloads for EQ8. Check them all out! Download the project and double-click on the project to open it in EQ8. If you’re having trouble finding the project, please read this. Click the Quilts section Click on the quilt Click Edit This quilt it a little quirky and pretty bright. Let’s try it with some lighter colors. Click DESIGN > Fabric Tools > Randomize > Map to Colors Choose Brightness and click on the quilt to see the brightness level change. Click Add to Project Sketchbook . If the project is unnamed EQ8 will prompt you to do so. (To be saved, your item needs
Lessons With Yvonne-January 2023-Inspired Thread Painting with EQ
Posted 01-15-2023 by Yvonne | Posted in: EQ8 EQ8 Lessons with Yvonne Favorite Posts
Thread is the glue for our stitching. Without thread, there would be no sewing of any kind. Art quilters use different mediums to create their amazing masterpieces. Thread plays a big role in the decorative/embellished look of artsy quilts. If you can’t draw, like me, I can use EQ8 to help me create my designs first and then use my threads or paints to finish my project. Launch your EQ8 from your desktop. Click on the ‘create a new project’ icon on the upper left side of the screen. The project helper screen will open. Name your project ‘Thread Painting Using EQ8′. Click on the OK at the bottom of the box. Confirm that the project’s name shows at the top of the screen. Once it is named, everything you add to your sketchbook while working on this project will be listed under this named project. To create a Thread
Design & Discover – An Easy Quilt Using All Three Layers!
Posted 01-01-2023 by Heidi | Posted in: Design & Discover
This lesson is great for anyone starting off with EQ8, or if you want a refresher on the basics! We have lots of other resources available for learning EQ8, as well. Let’s get started! Open EQ8 and click Design a Quilt from scratch For this lesson we are using the default layout and border, but you can learn more about Layouts here and more about Borders here. Please note that in EQ8 always works with finished sizes. When you are choosing sizes for blocks, or anything else, EQ8 adds the seam allowance for you. Click the DESIGN tab > Block Tools > Open Library Beside 01 Classic Pieced click the plus sign + to open that category, then click the Four Patch style Click on Clay’s Choice and click Add to Sketchbook Click Four X to open that style Click on The Arrowhead Click Add to Sketchbook Click Close Click Set Block
Design & Discover – Wreaths!
Posted 12-01-2022 by Heidi | Posted in: Design & Discover
This month we’re playing with different ways to make wreaths in EQ8! EQ8 comes with some wreath blocks already installed. Let’s check those out first. Open EQ8 and click Search for block patterns Click Search > By Notecard Type in wreath Check all 3 boxes. Make sure it reads Find at most 300 items. Click Search Click on a wreath you like and click Edit to Block Worktable This is a Polydraw + Applique block, with everything drawn on the Applique tab. If you want to edit here is a lesson about applique blocks. Otherwise, click the COLOR tab and recolor the block, if you’d like. (We’ll be changing the block and recoloring it again in a few steps, if you want to wait.) But, even a spring wreath can look more wintery with some new colors or fabric! One option is to use fabrics from the Fabric Library > Themes
