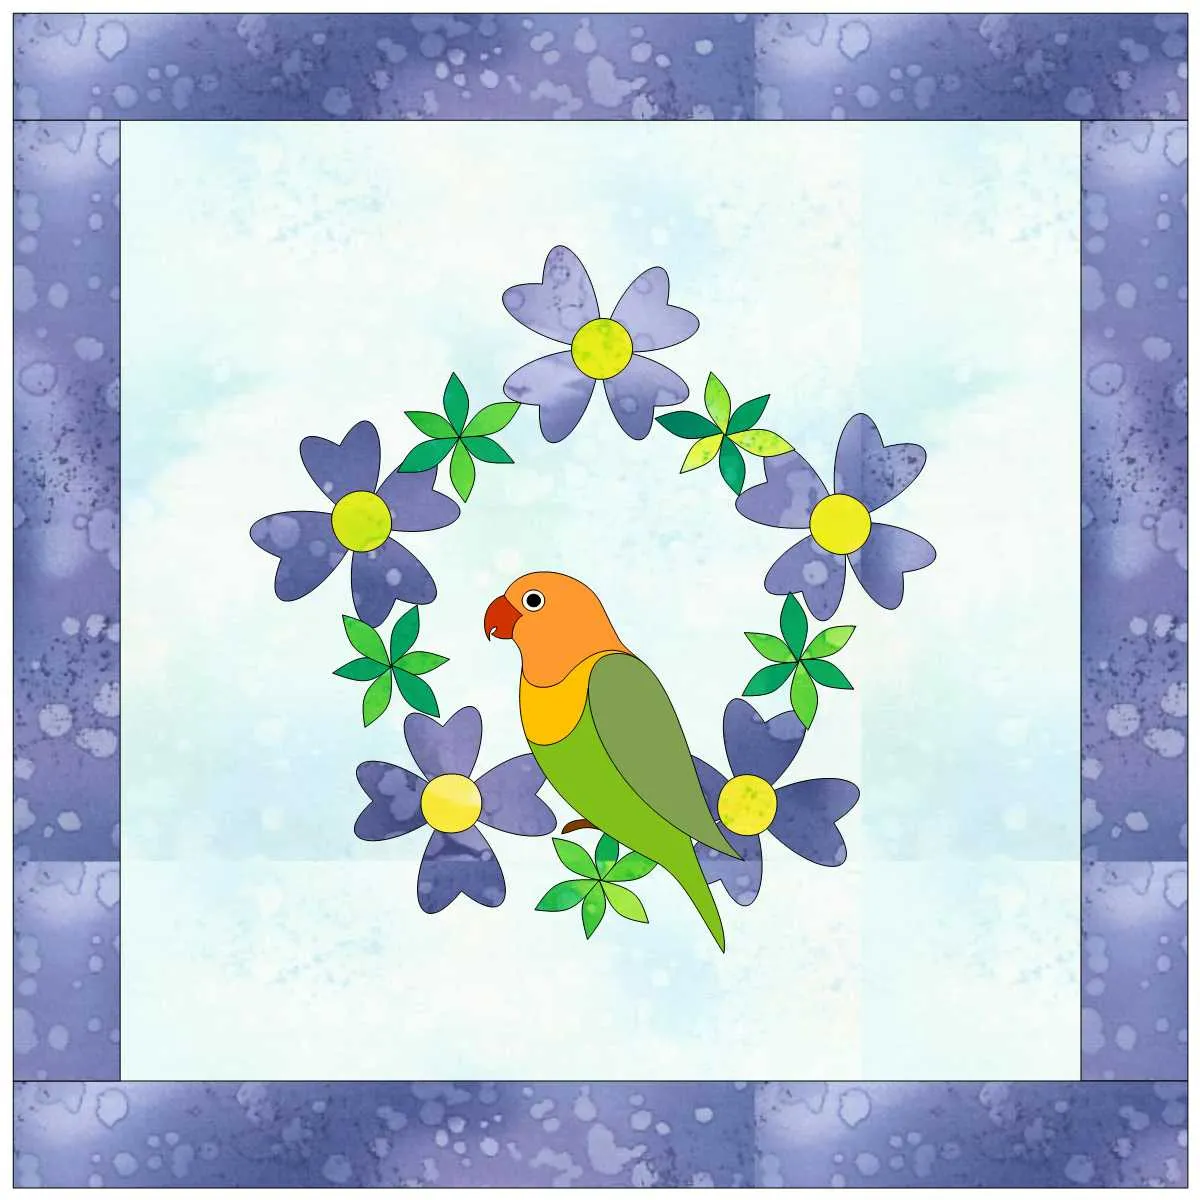
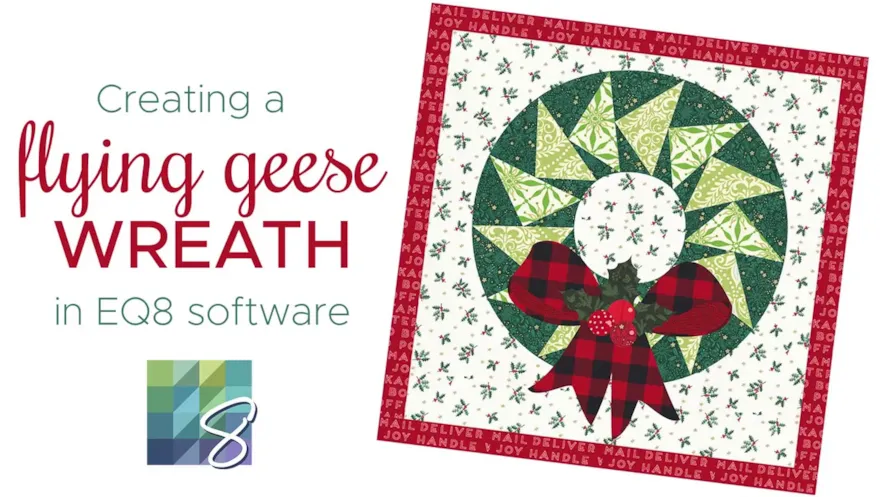
This month we’re playing with different ways to make wreaths in EQ8!
EQ8 comes with some wreath blocks already installed. Let’s check those out first.
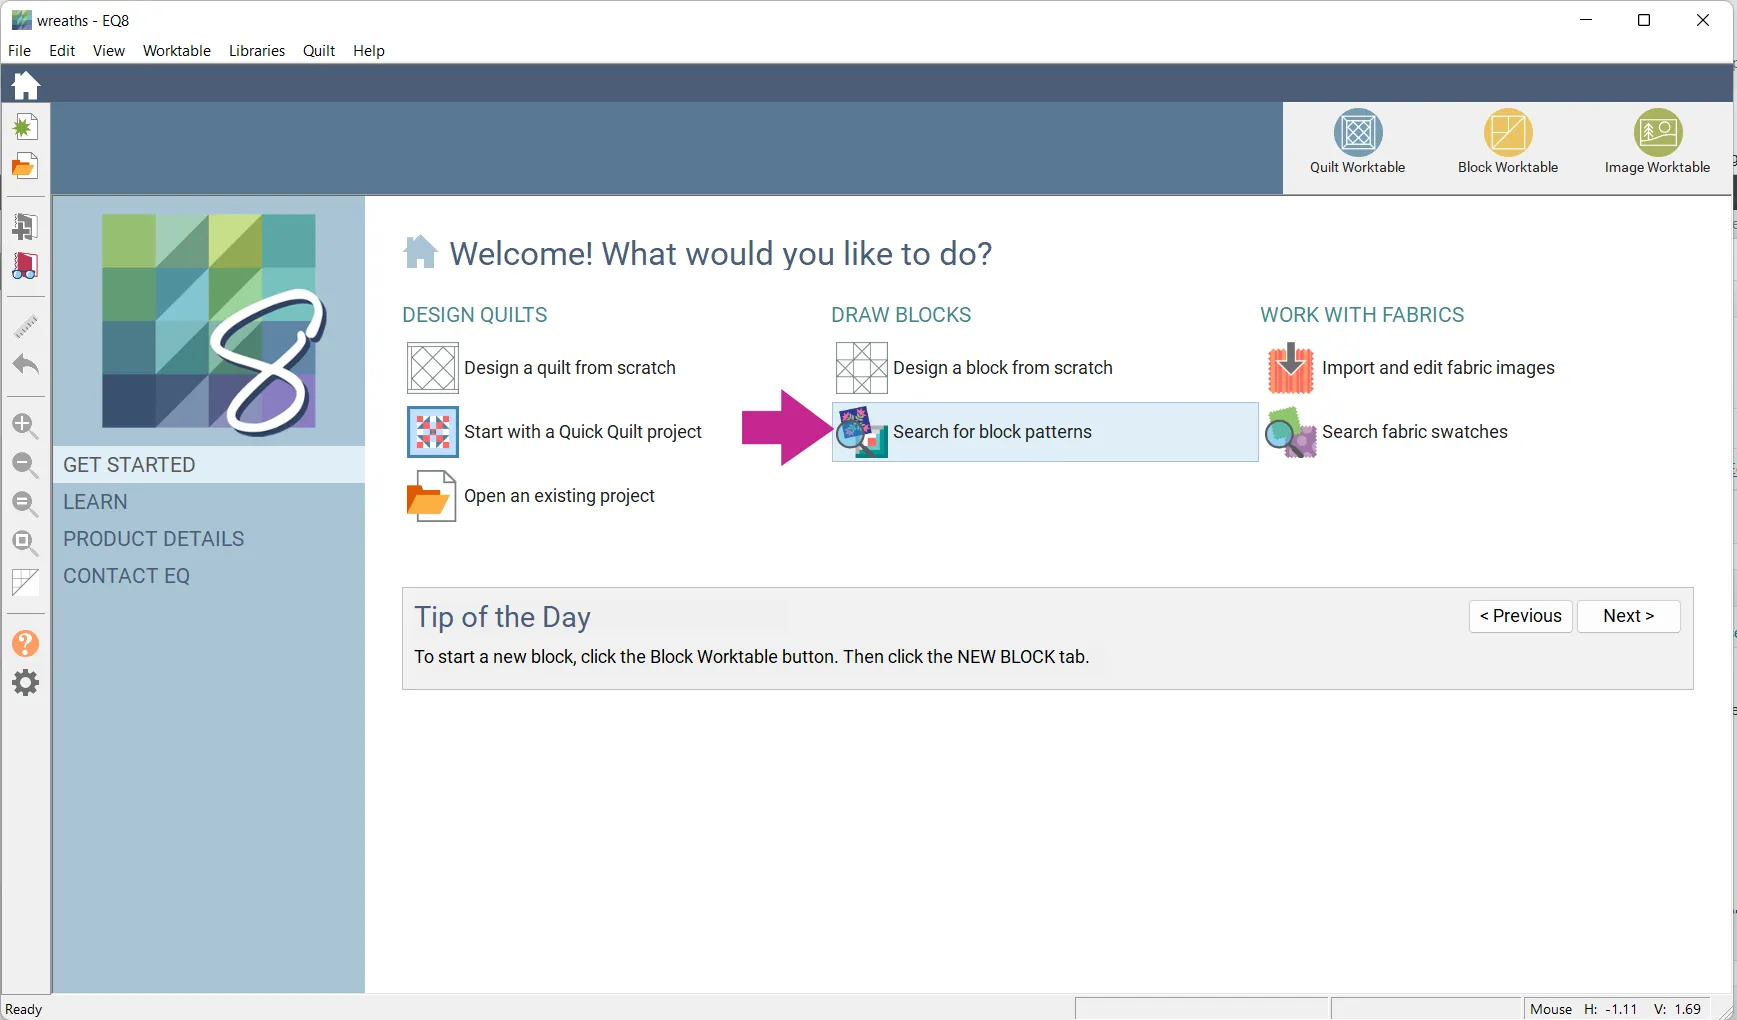
- Open EQ8 and click Search for block patterns
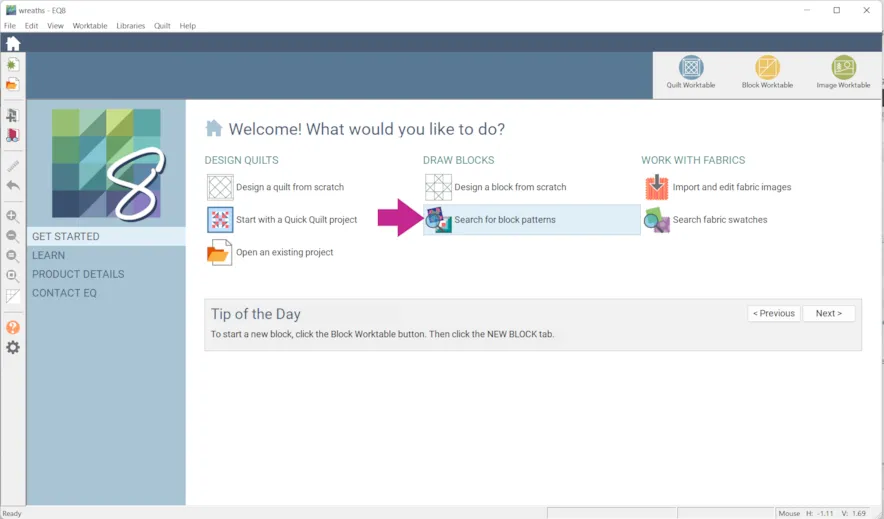
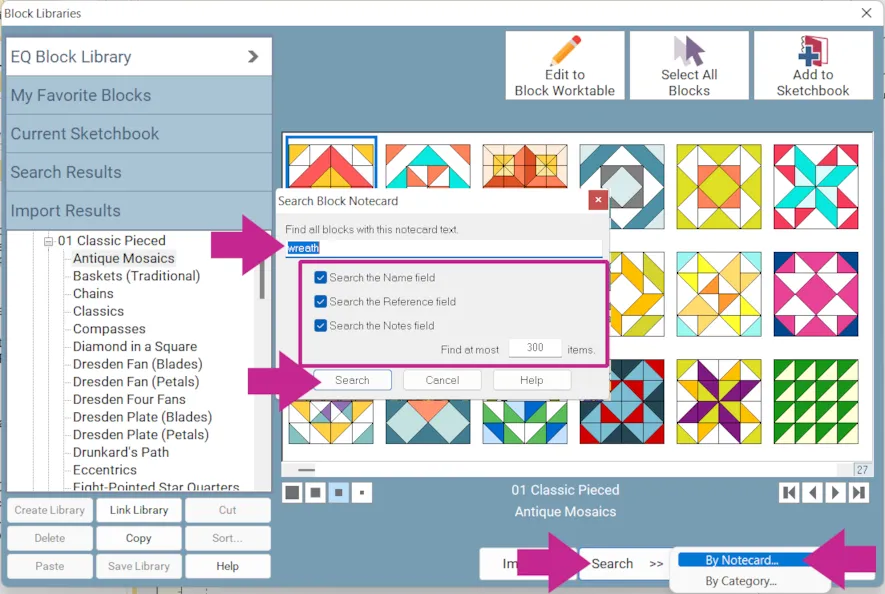
- Click Search > By Notecard
- Type in wreath
- Check all 3 boxes.
- Make sure it reads Find at most 300 items.
- Click Search
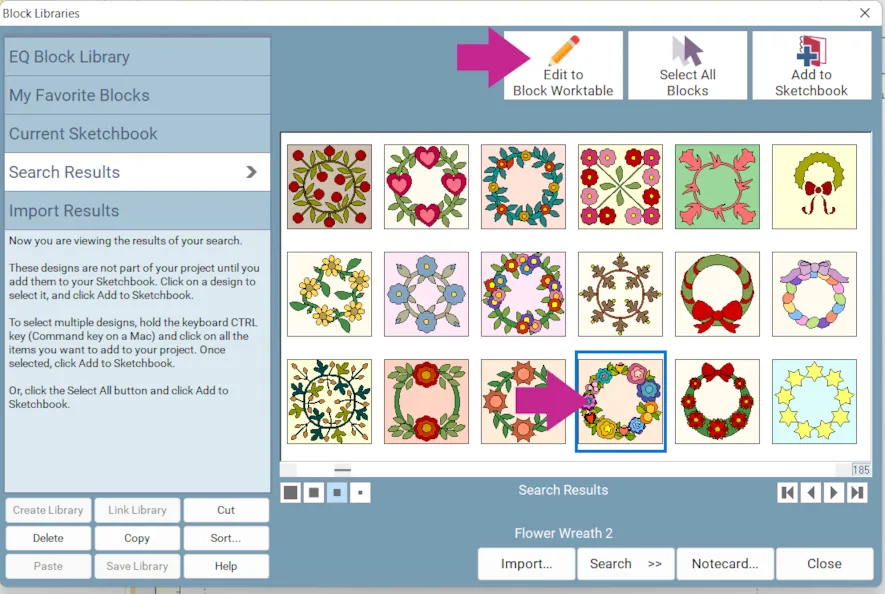
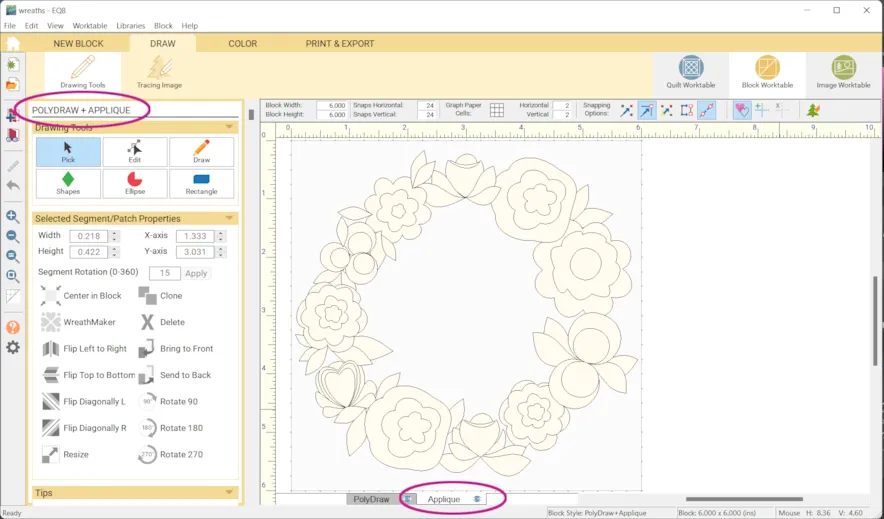
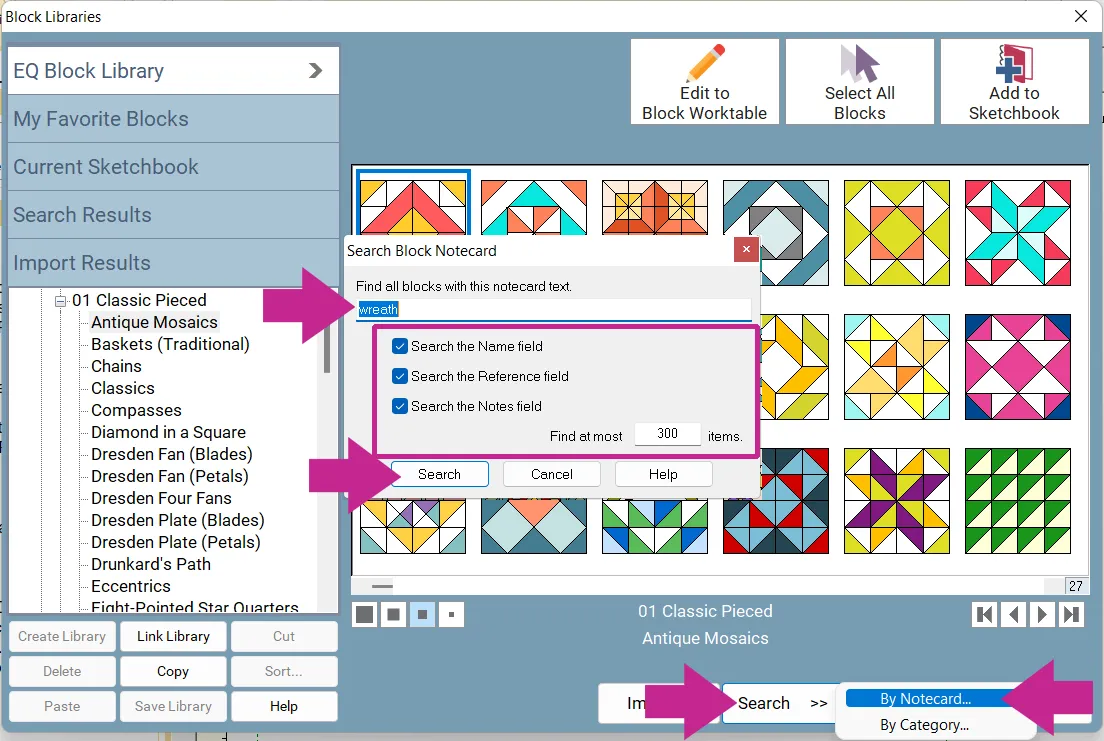
- Click on a wreath you like and click Edit to Block Worktable
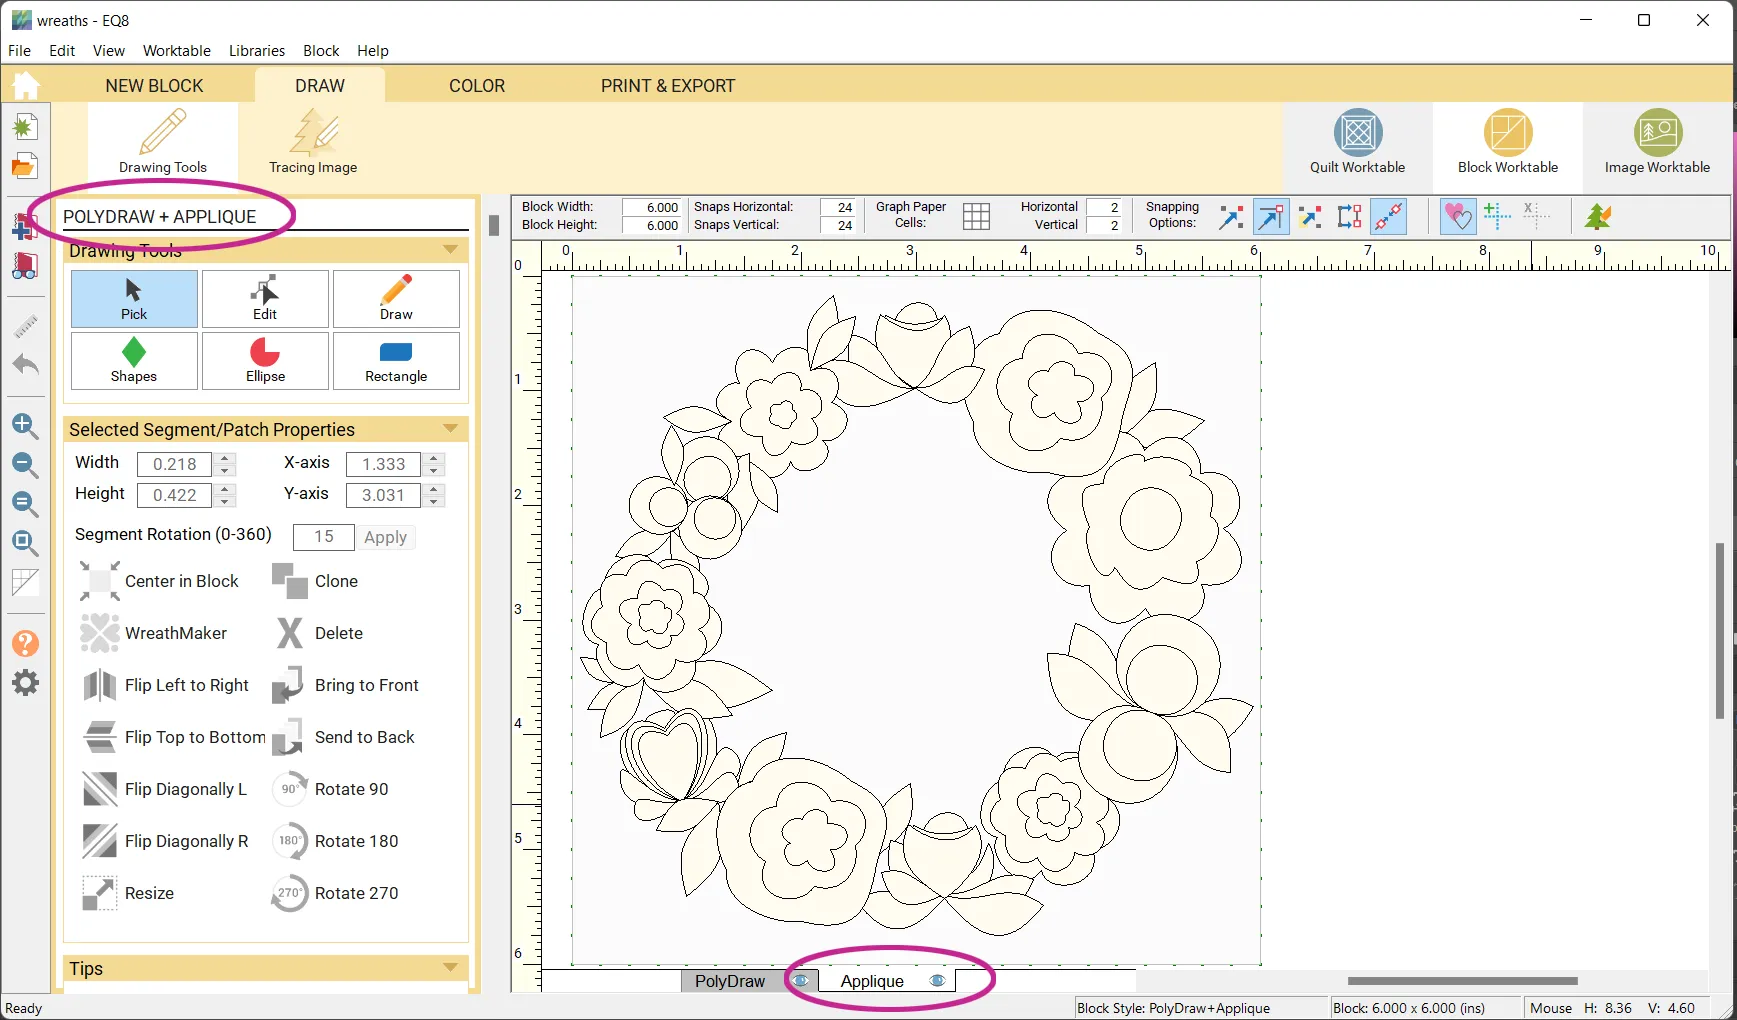
 This is a Polydraw + Applique block, with everything drawn on the Applique tab. If you want to edit here is a lesson about applique blocks.
- Otherwise, click the COLOR tab and recolor the block, if you’d like. (We’ll be changing the block and recoloring it again in a few steps, if you want to wait.)
But, even a spring wreath can look more wintery with some new colors or fabric! One option is to use fabrics from the Fabric Library > Themes > 18 Holidays-Winter.

- Click Add to Project Sketchbook
 . If the project is unnamed EQ8 will prompt you to do so. (To be saved, your item needs to be in the Sketchbook AND your project needs to be named. Here is more information.)
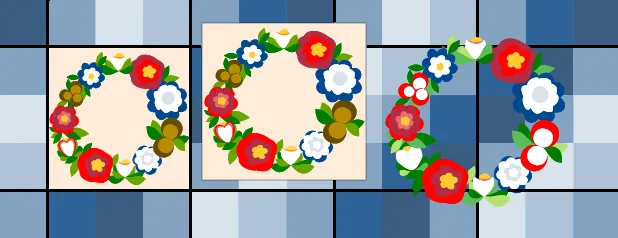
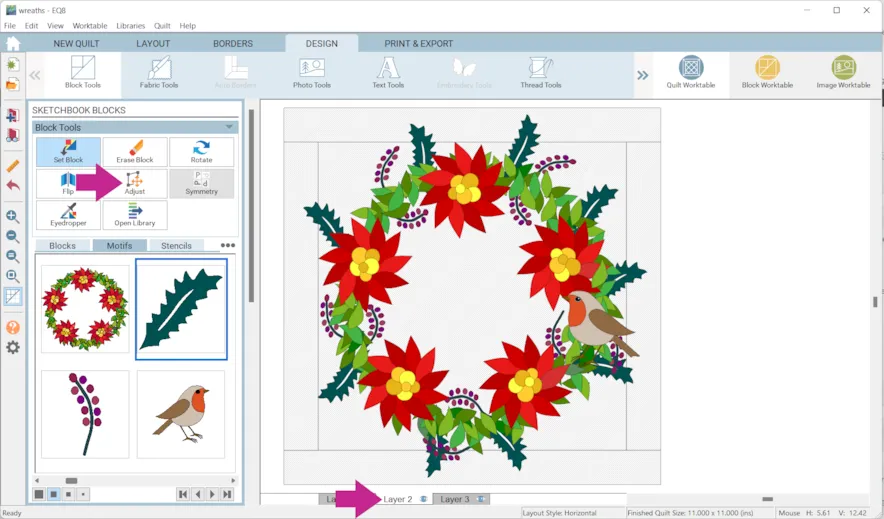
Again, this block is an applique block. Blocks appear differently in quilts depending a few different factors.
The first block is the original applique block on Layer 1, it sets in the quilt like a typical block.
The second block is the original applique block on Layer 2, it sets over all the Layer 1 blocks.
The third block is the block converted to an motif and placed on Layer 2. It does not have a background.
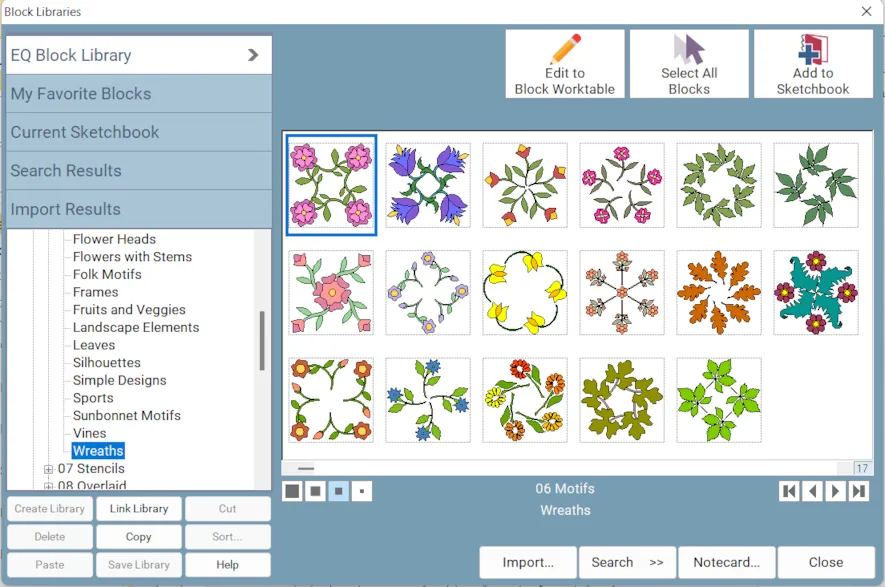
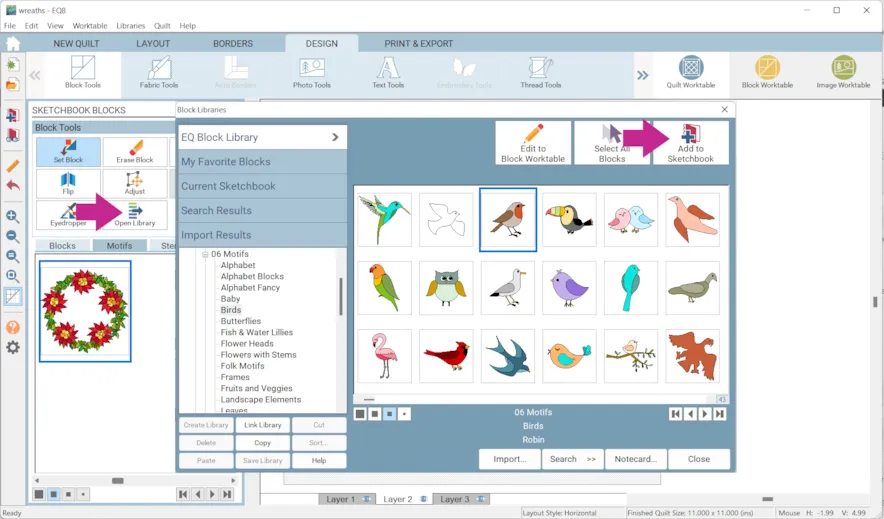
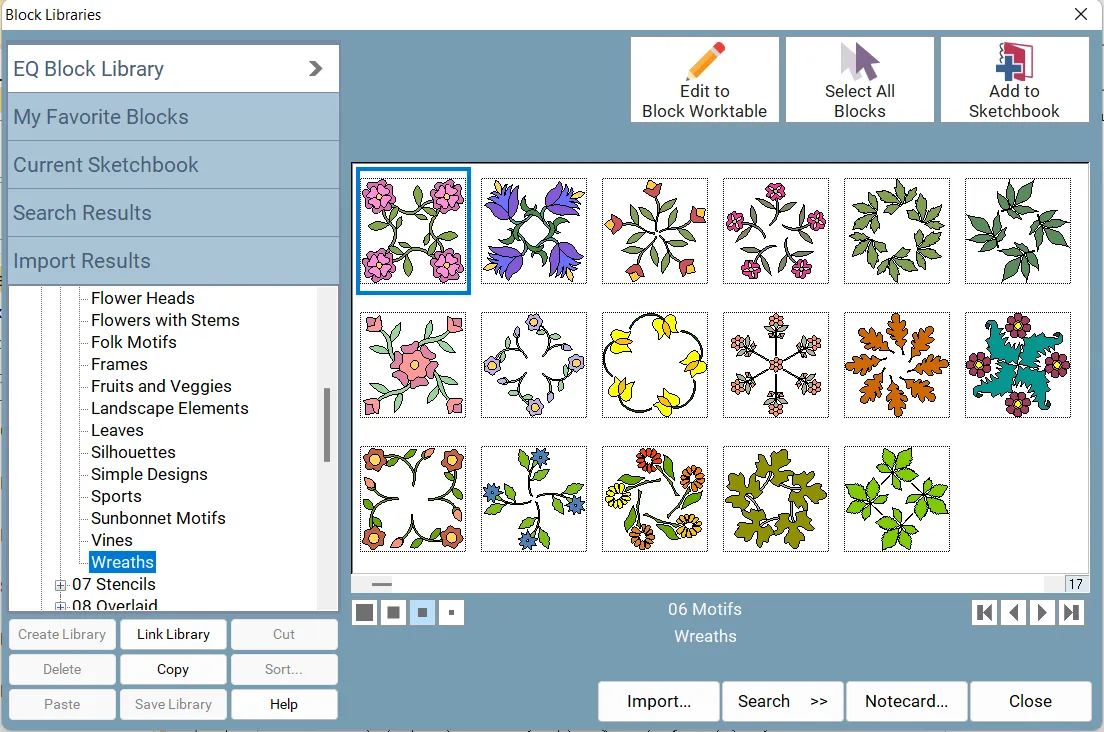
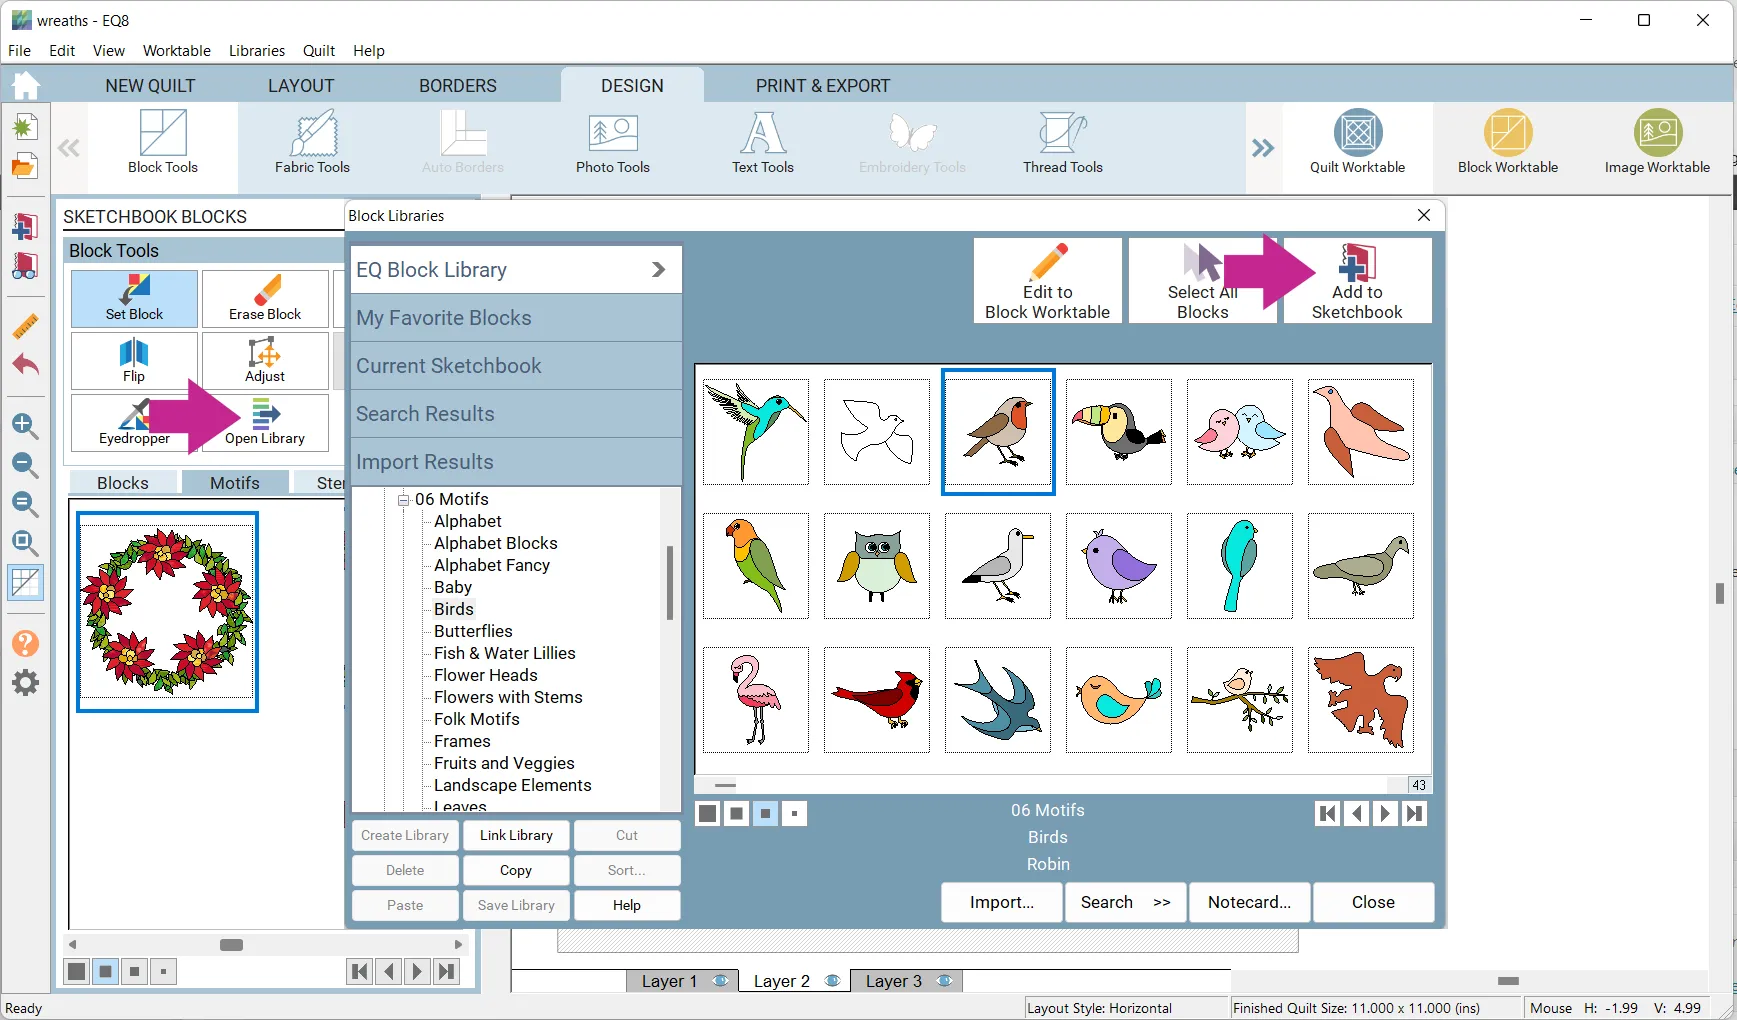
There are also motif wreaths in the Block Library under 06 Motifs > Wreaths.
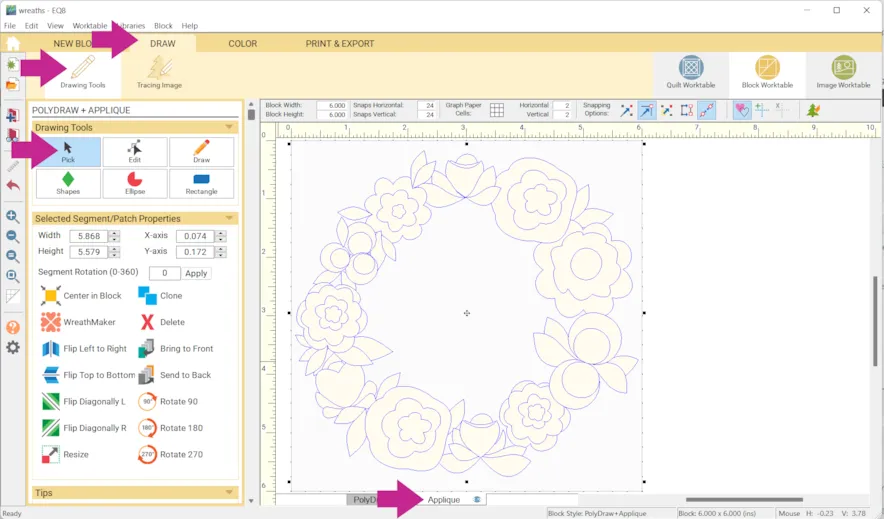
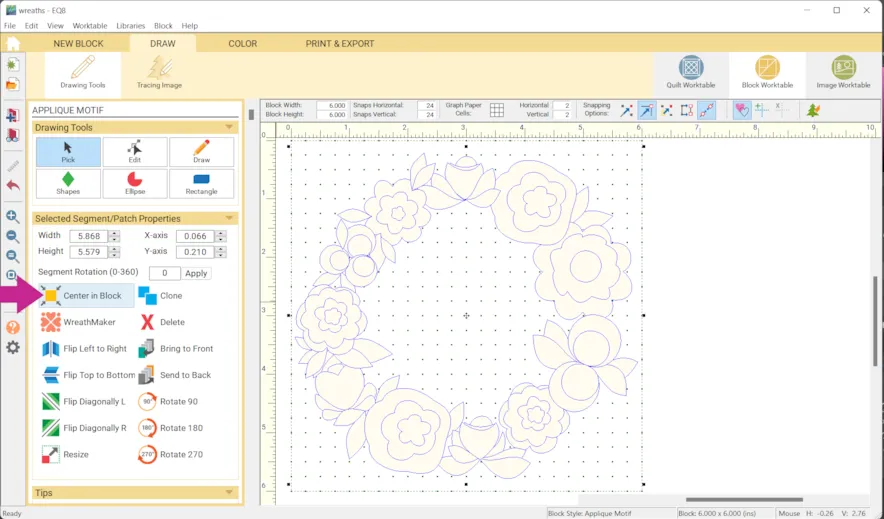
However, we are going to change the block from an applique block into a motif. - Click the DRAW tab > Drawing Tools > Pick
- Make sure you are on the Applique tab at the bottom of the screen.
- Press Ctrl + A/Cmd + A on your keyboard to select all. The pieces of the block should turn blue as shown below.
- Press Ctrl + C/Cmd + C on your keyboard to copy.
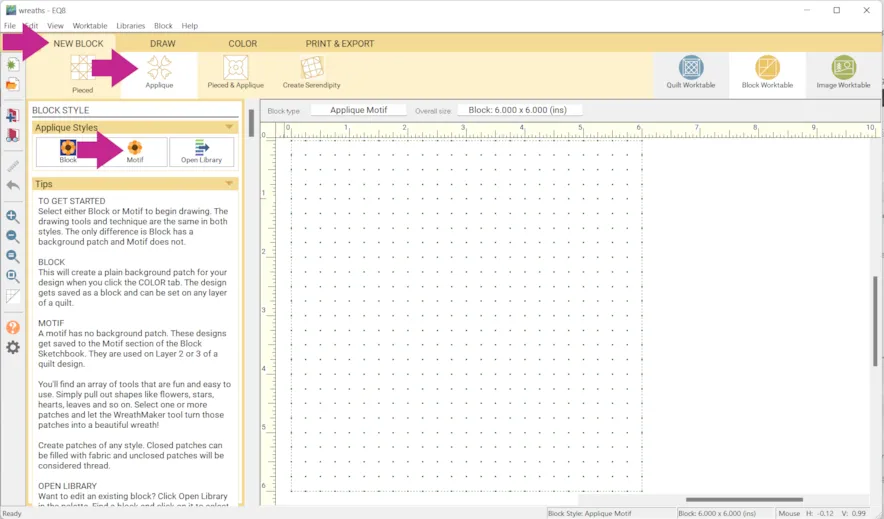
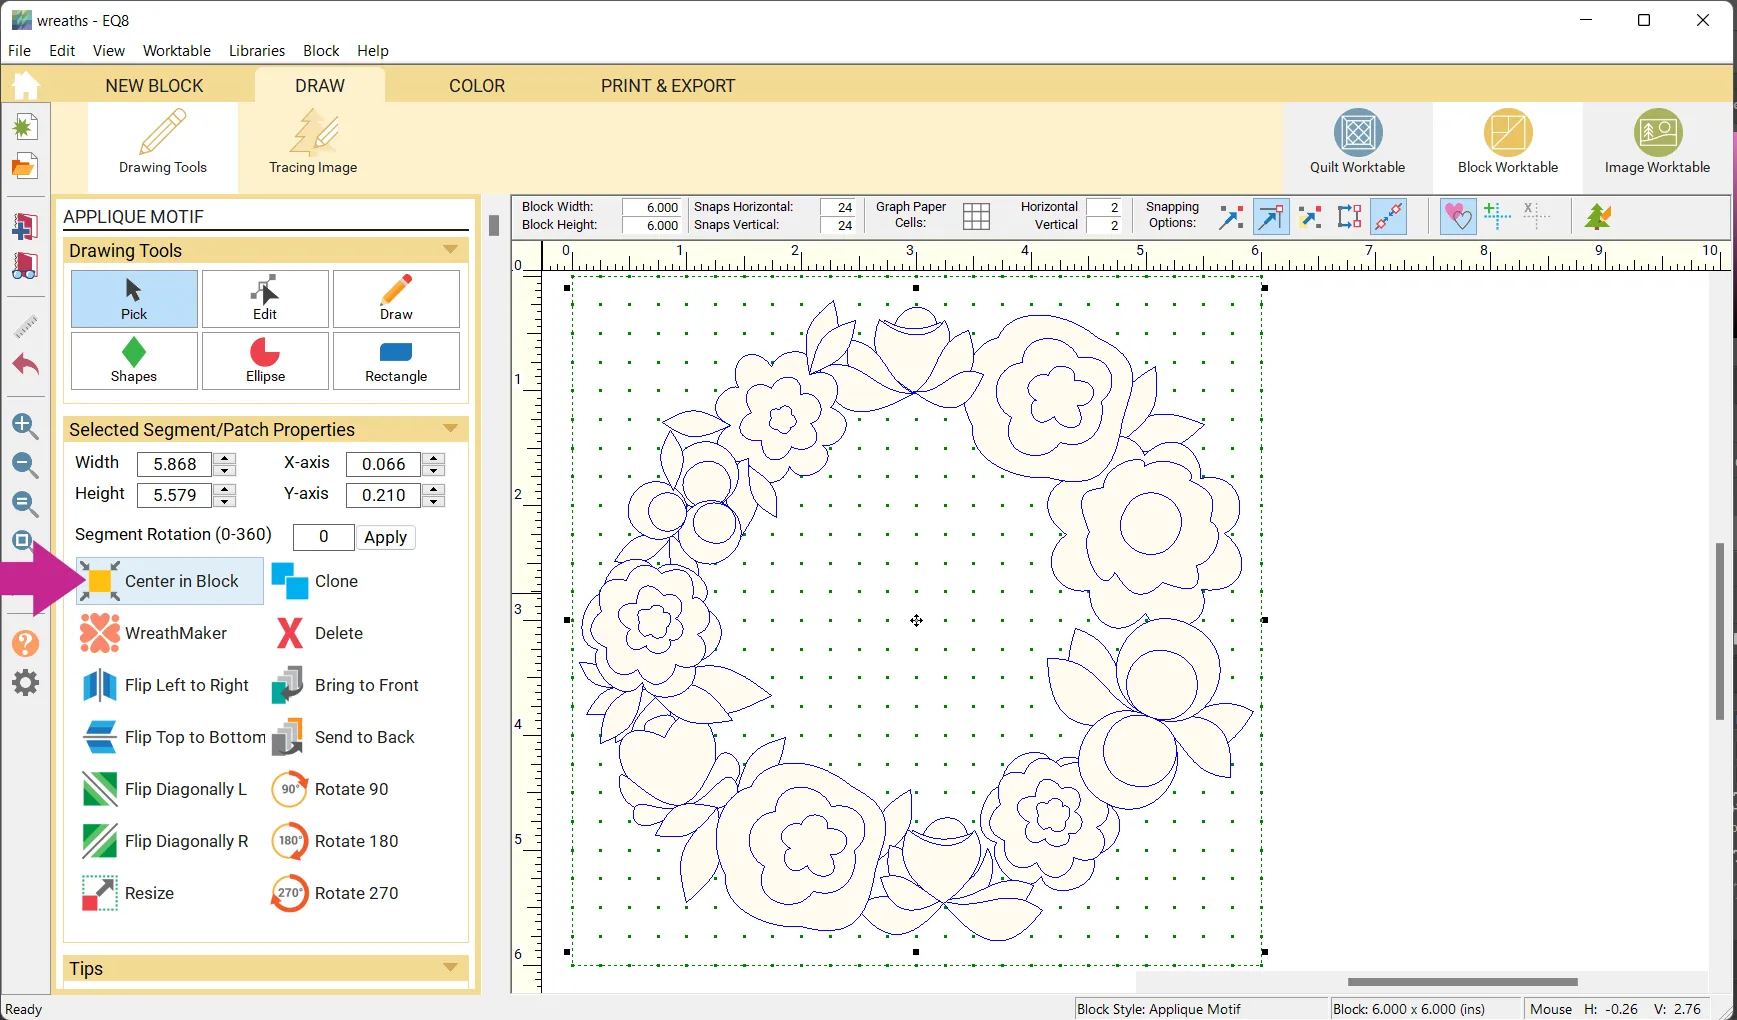
- Click NEW BLOCK > Applique > Motif
- Click in the block and press Ctrl + V/Cmd + V on your keyboard to paste or, click Edit > Paste.
- Click Center in Block
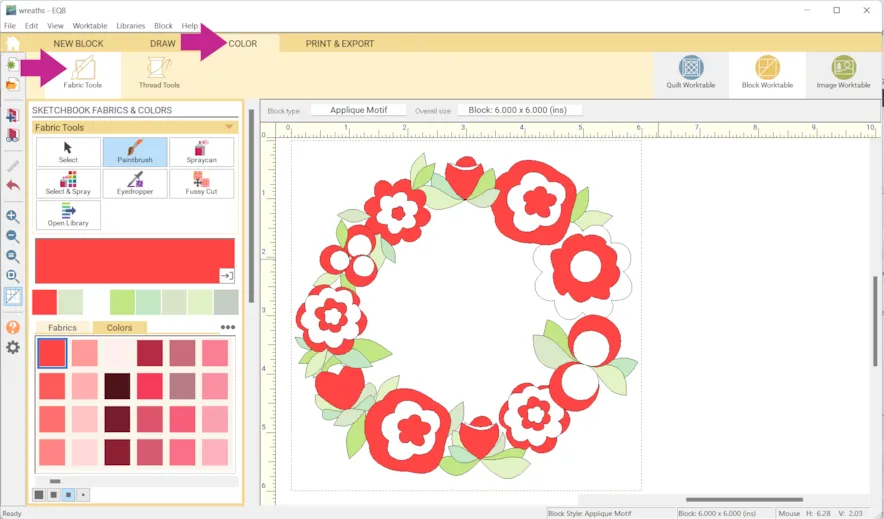
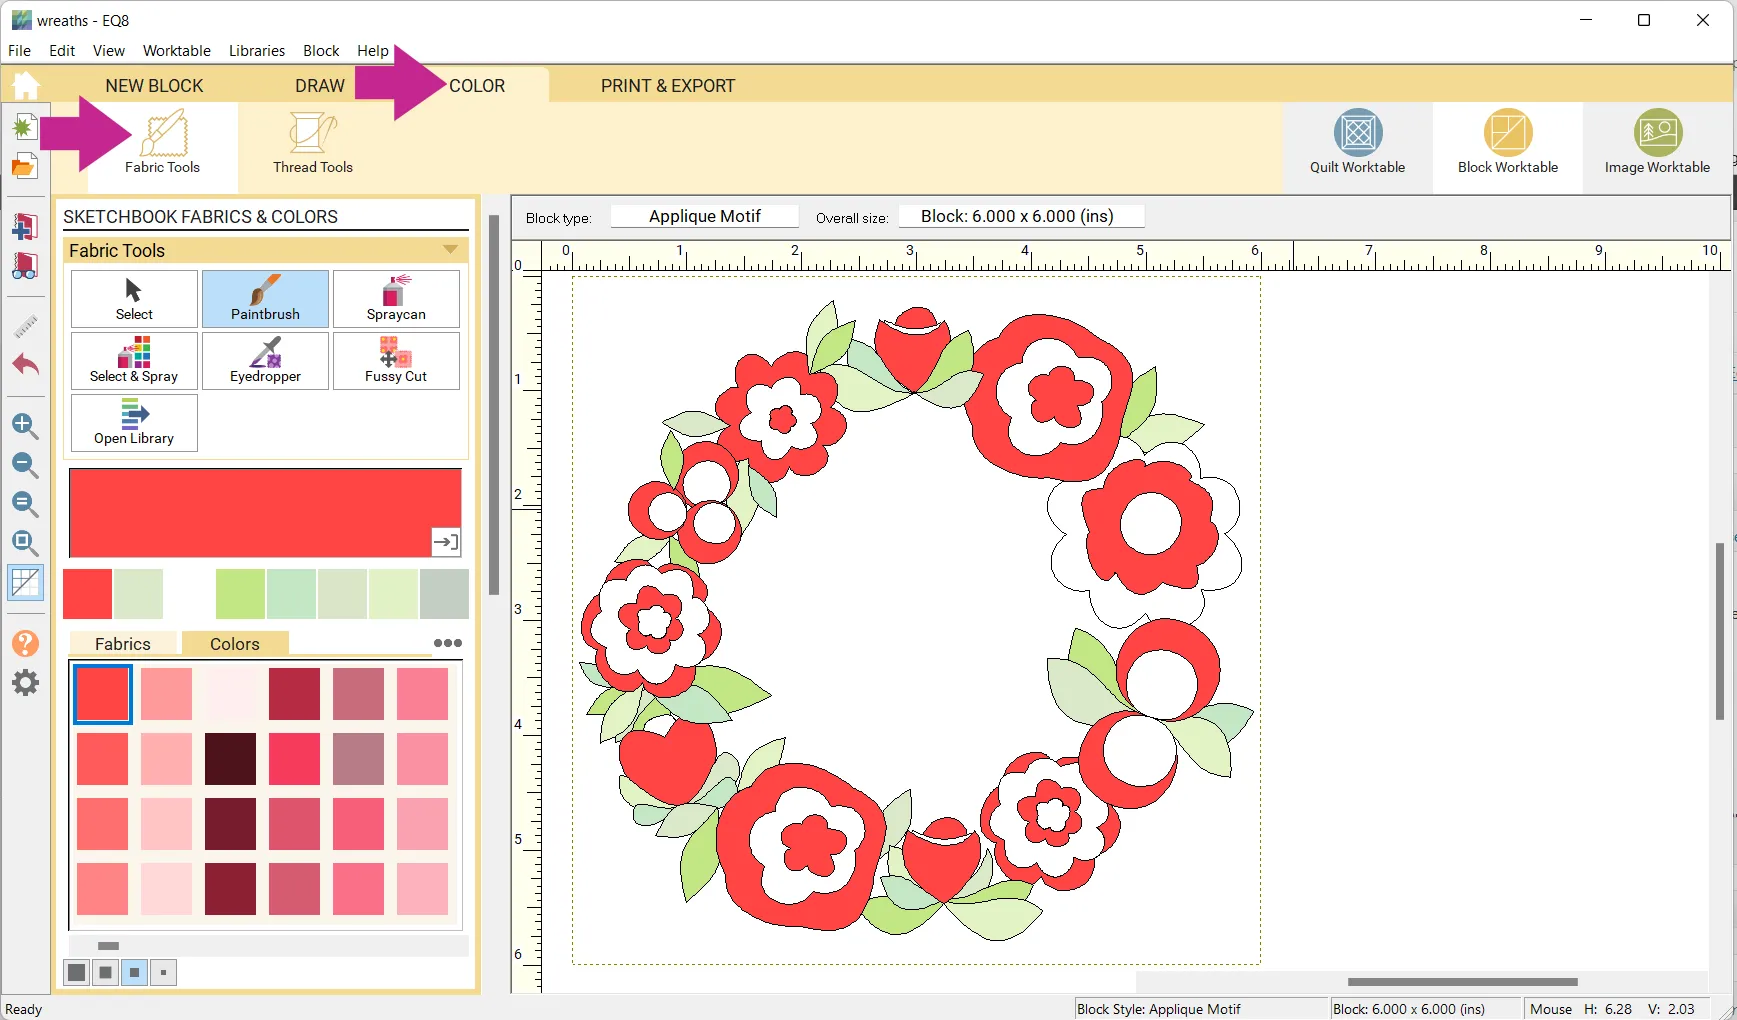
- Click the COLOR tab > Fabric Tools and recolor the block.
- Click Add to Project Sketchbook
Now you can use your motif (and/or the original block) in quilts. Here are some tips for using motifs.
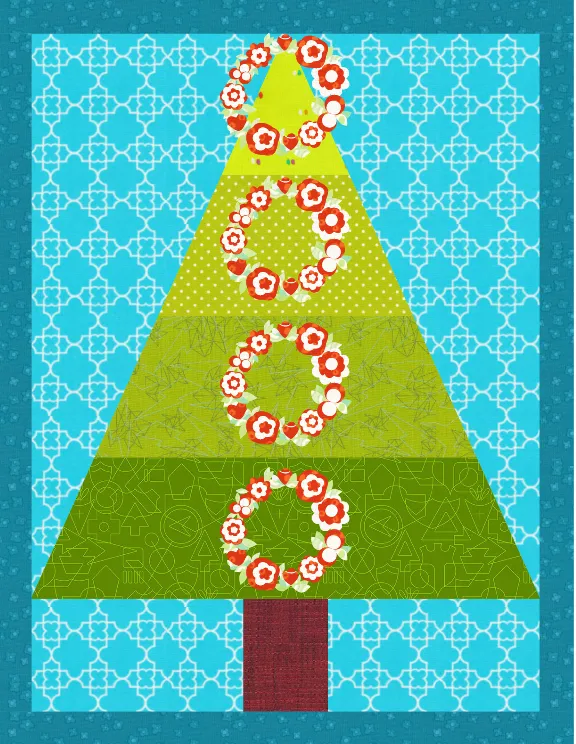
For example, I placed the motif on a tree and since they don’t have a background you can see the tree.
 Another way to make a wreath is with the Wreathmaker, of course!
 - Click the Block Worktable (if you aren’t already there).
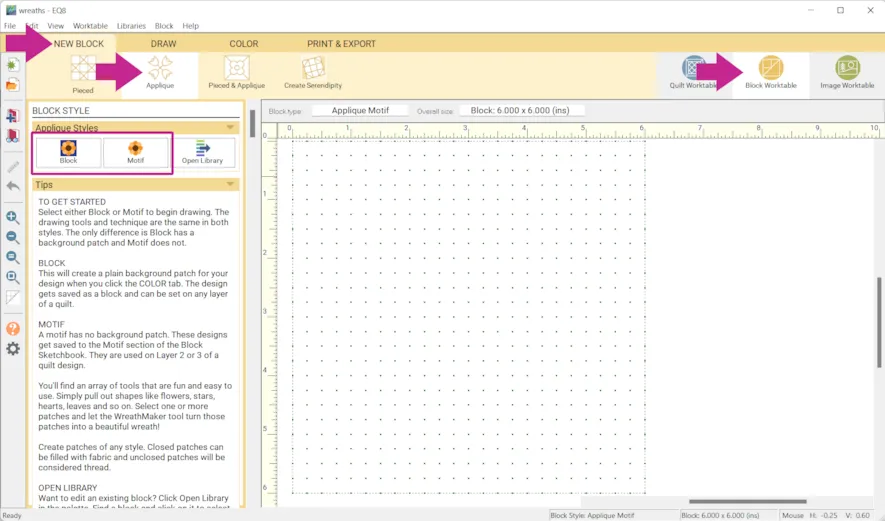
- Click NEW BLOCK > Applique
- Choose either Block (if you want it to have a background) or Motif (if you don’t want it to have a background).
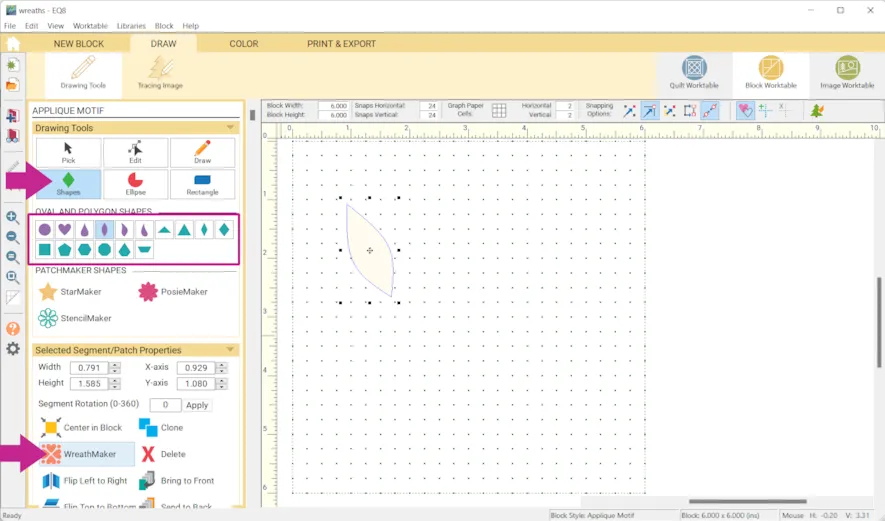
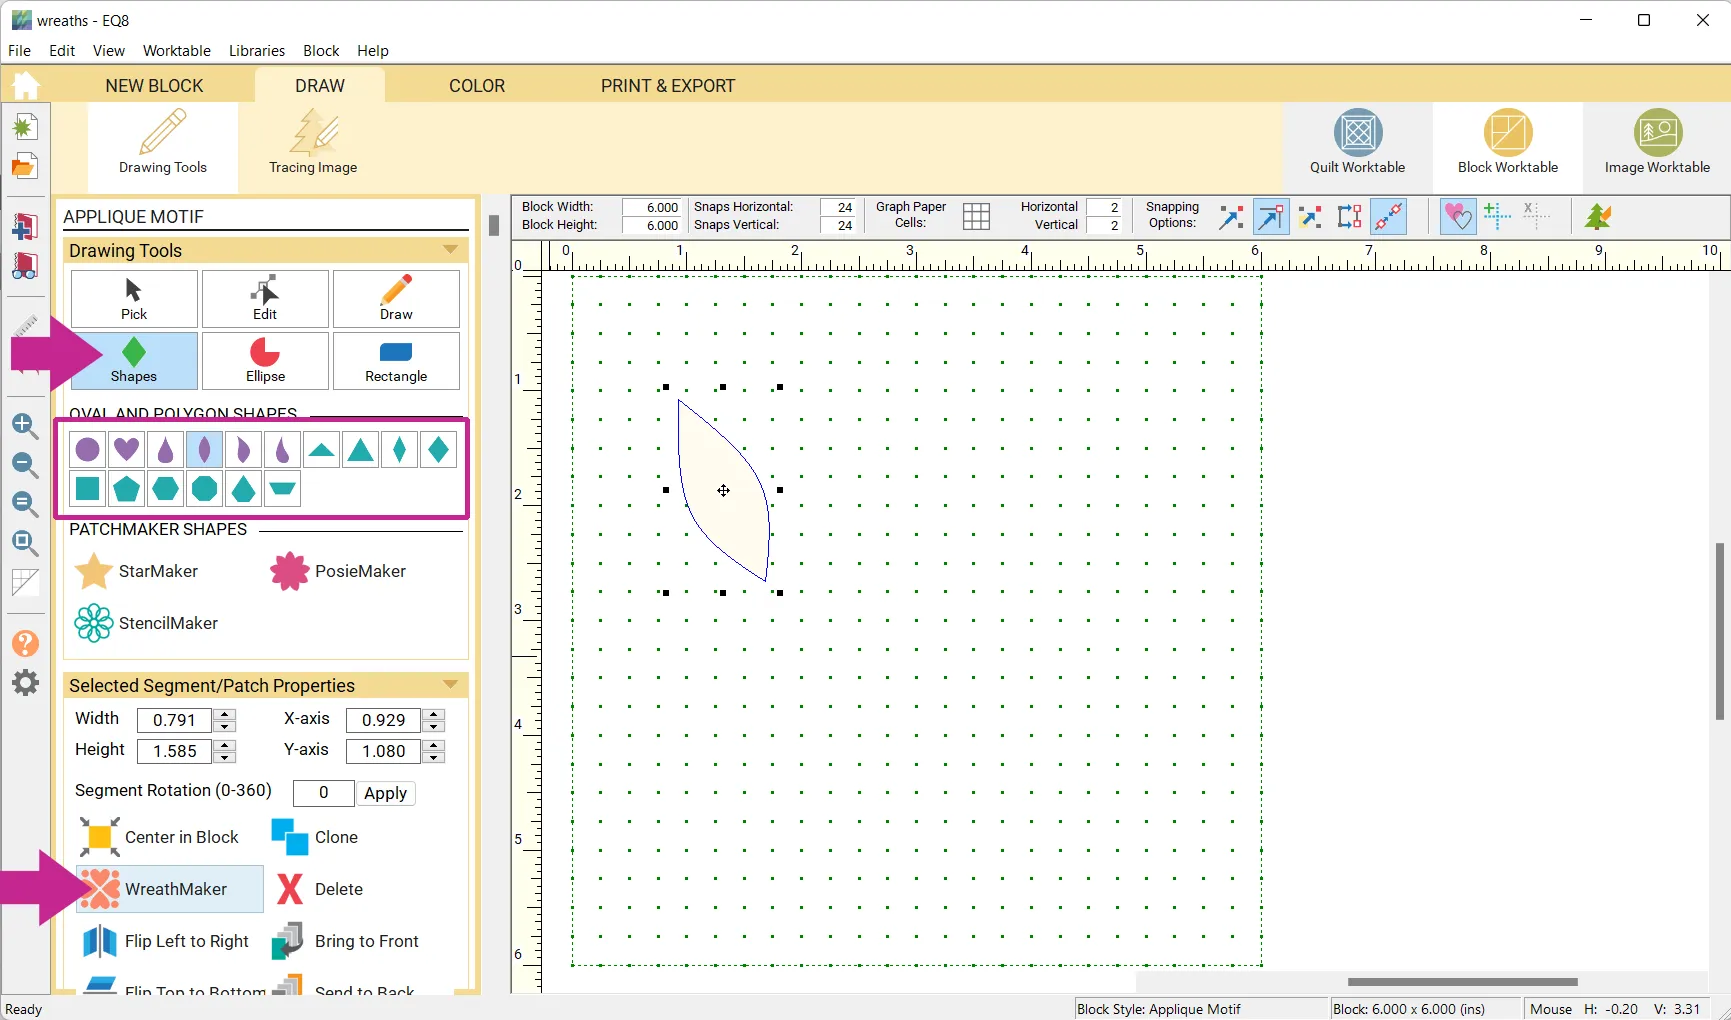
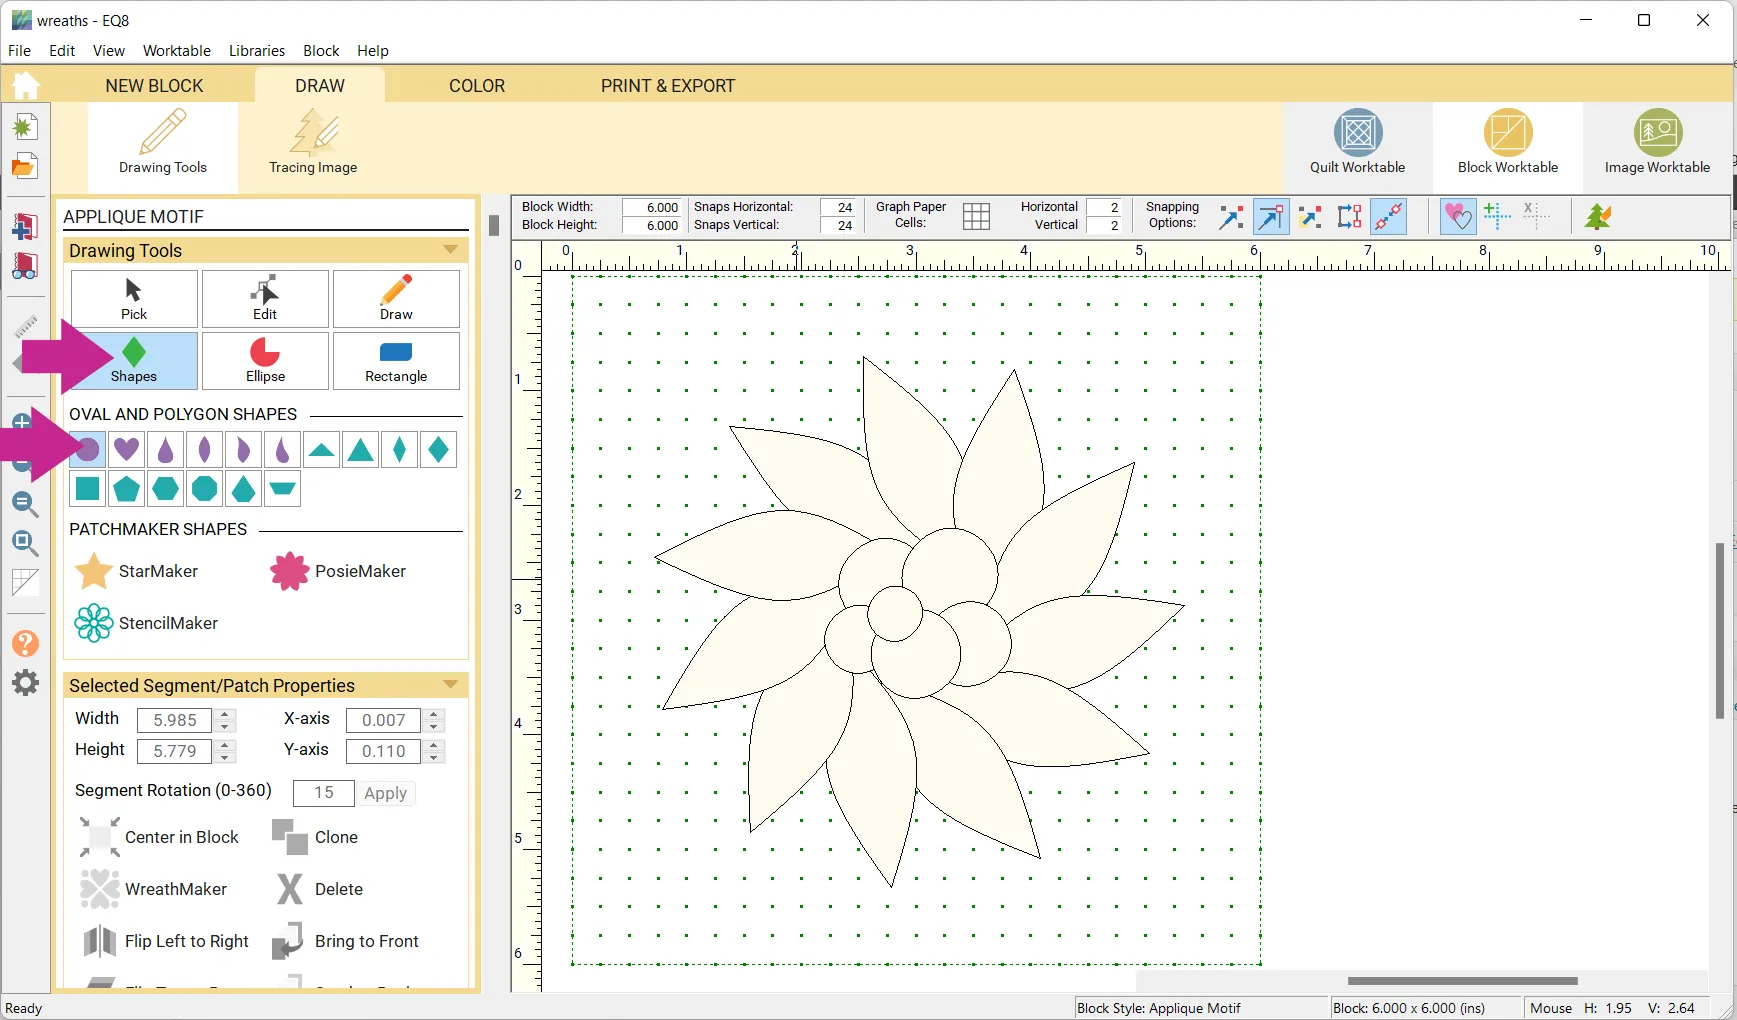
- Click the Shapes tool and choose a shape that looks like a petal.
- Click and drag to draw the shape.
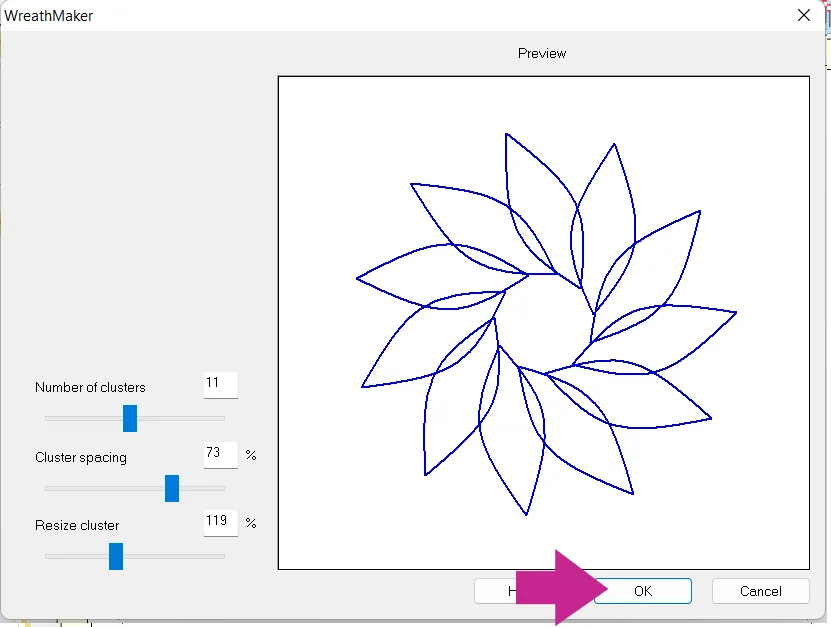
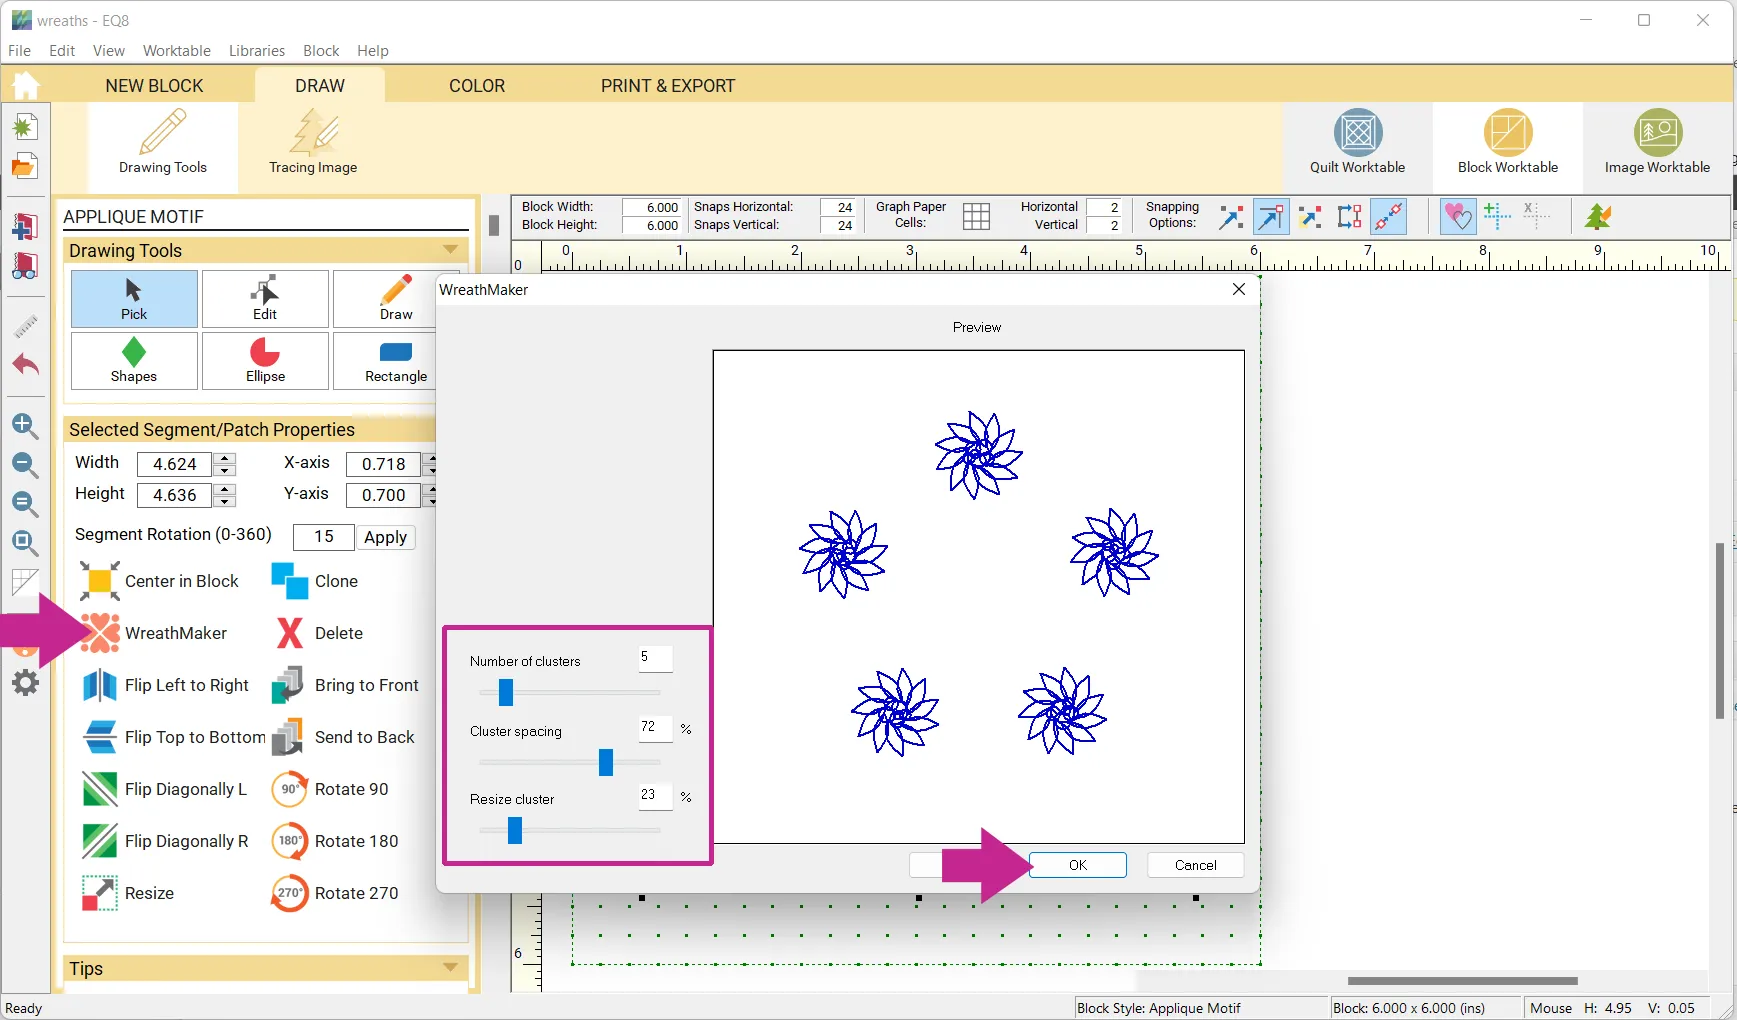
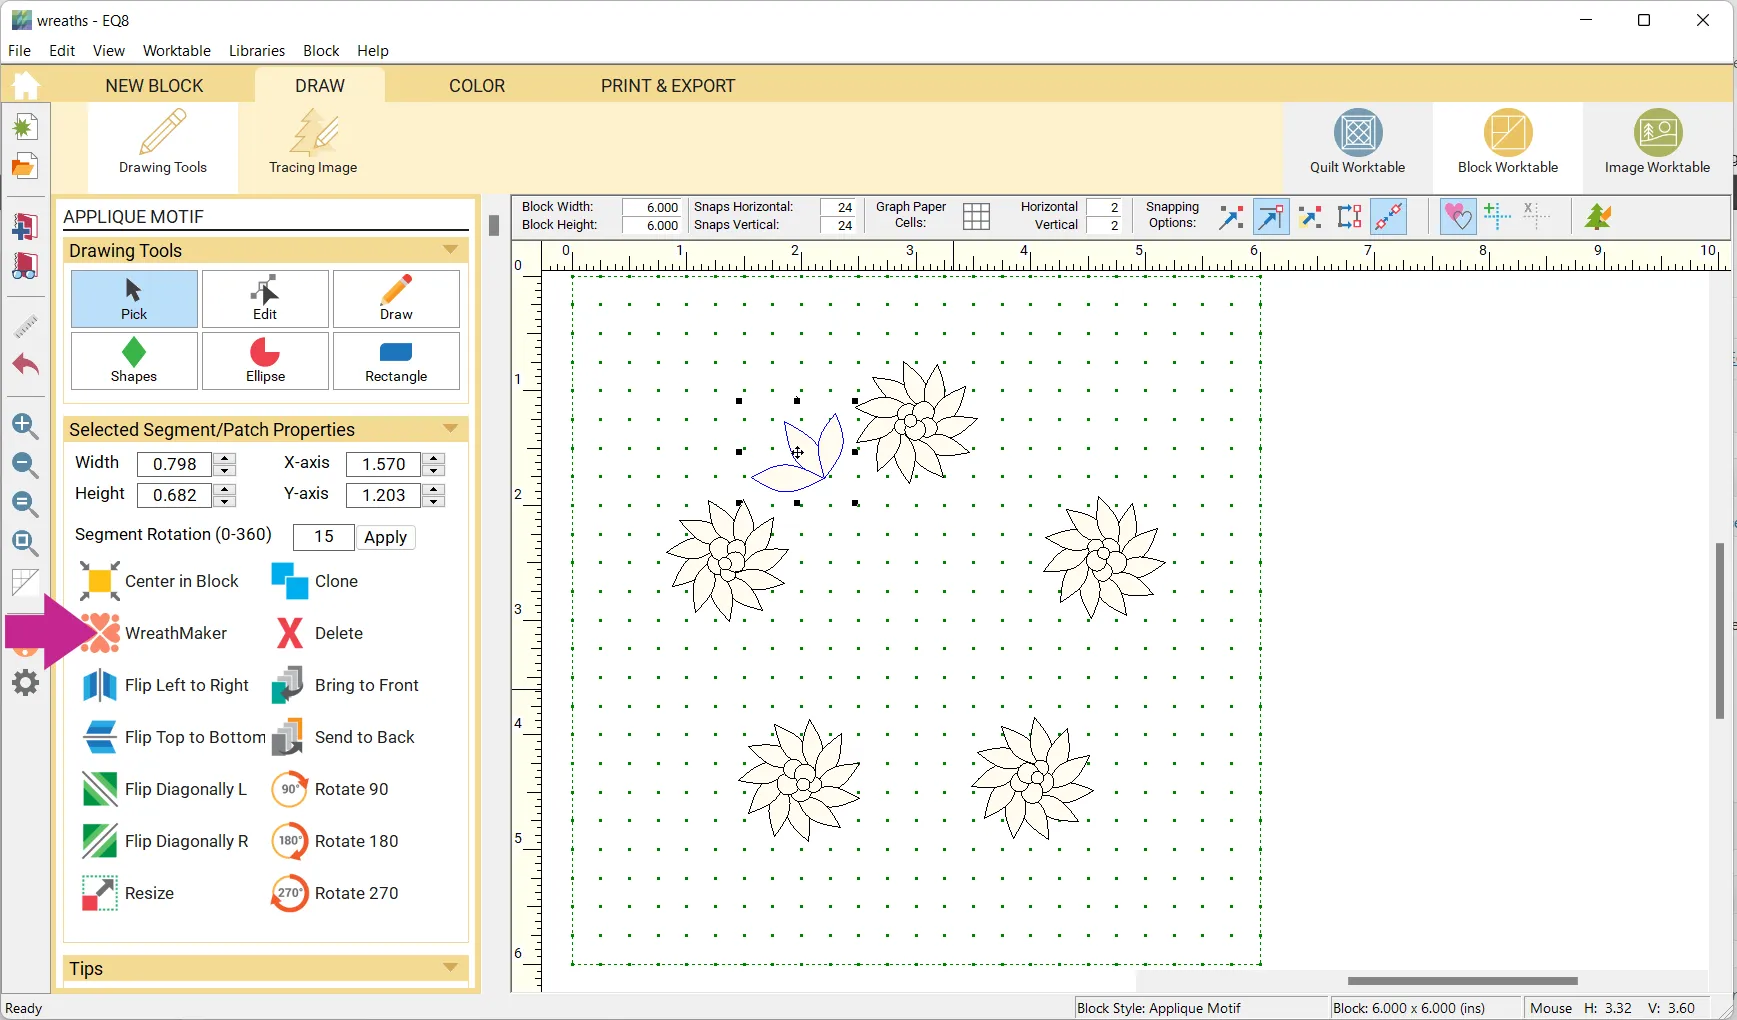
- Click Wreathmaker
- Experiment with the Number of clusters, Cluster spacing and Resize cluster until you get something you would like to use.
- Click OK
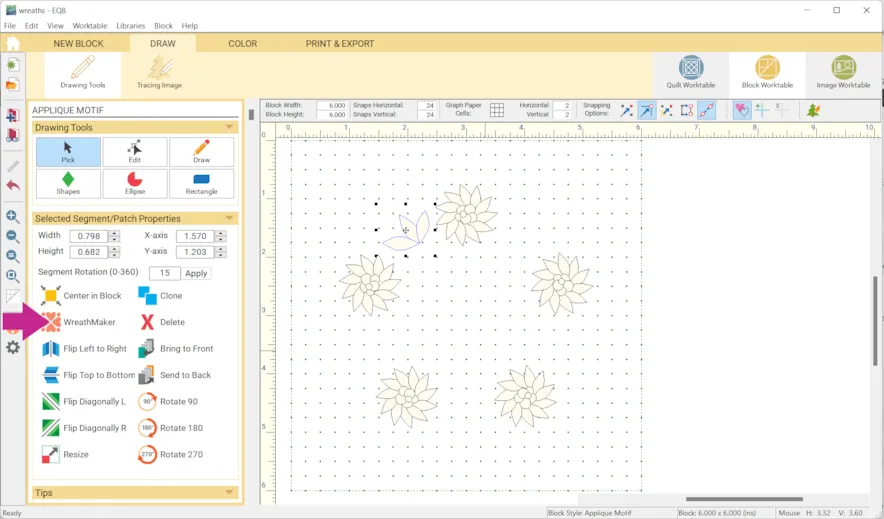
- Click Shapes > Circle tool to draw circles in the center of the flower.
- Press Ctrl + A/Cmd + A on your keyboard to select all.
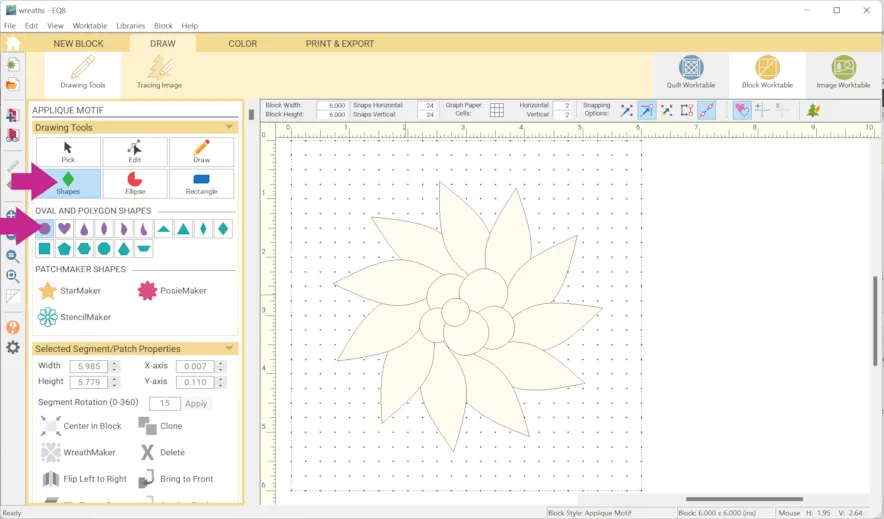
- Click Wreathmaker and adjust the Number of clusters, Cluster spacing and Resize clusters
- Click OK
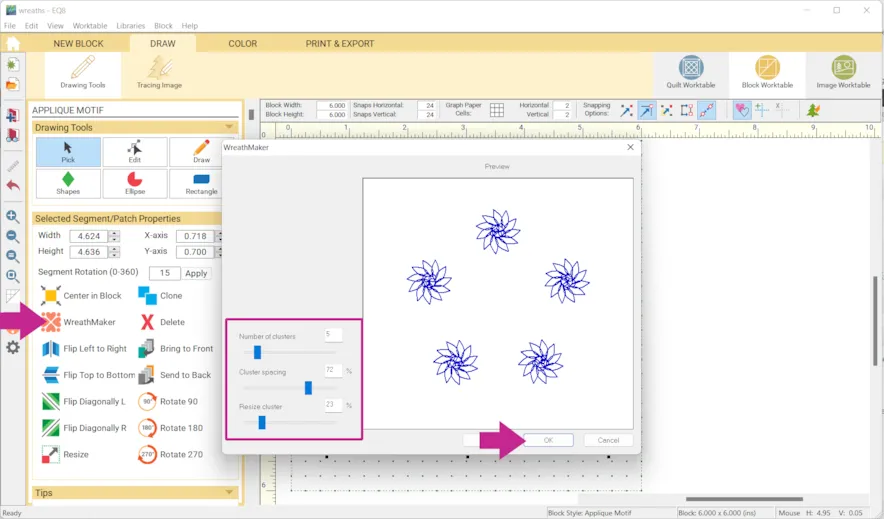
- Draw some leaves
- Click Wreathmaker again and adjust the Number of clusters, Cluster spacing and Resize clusters
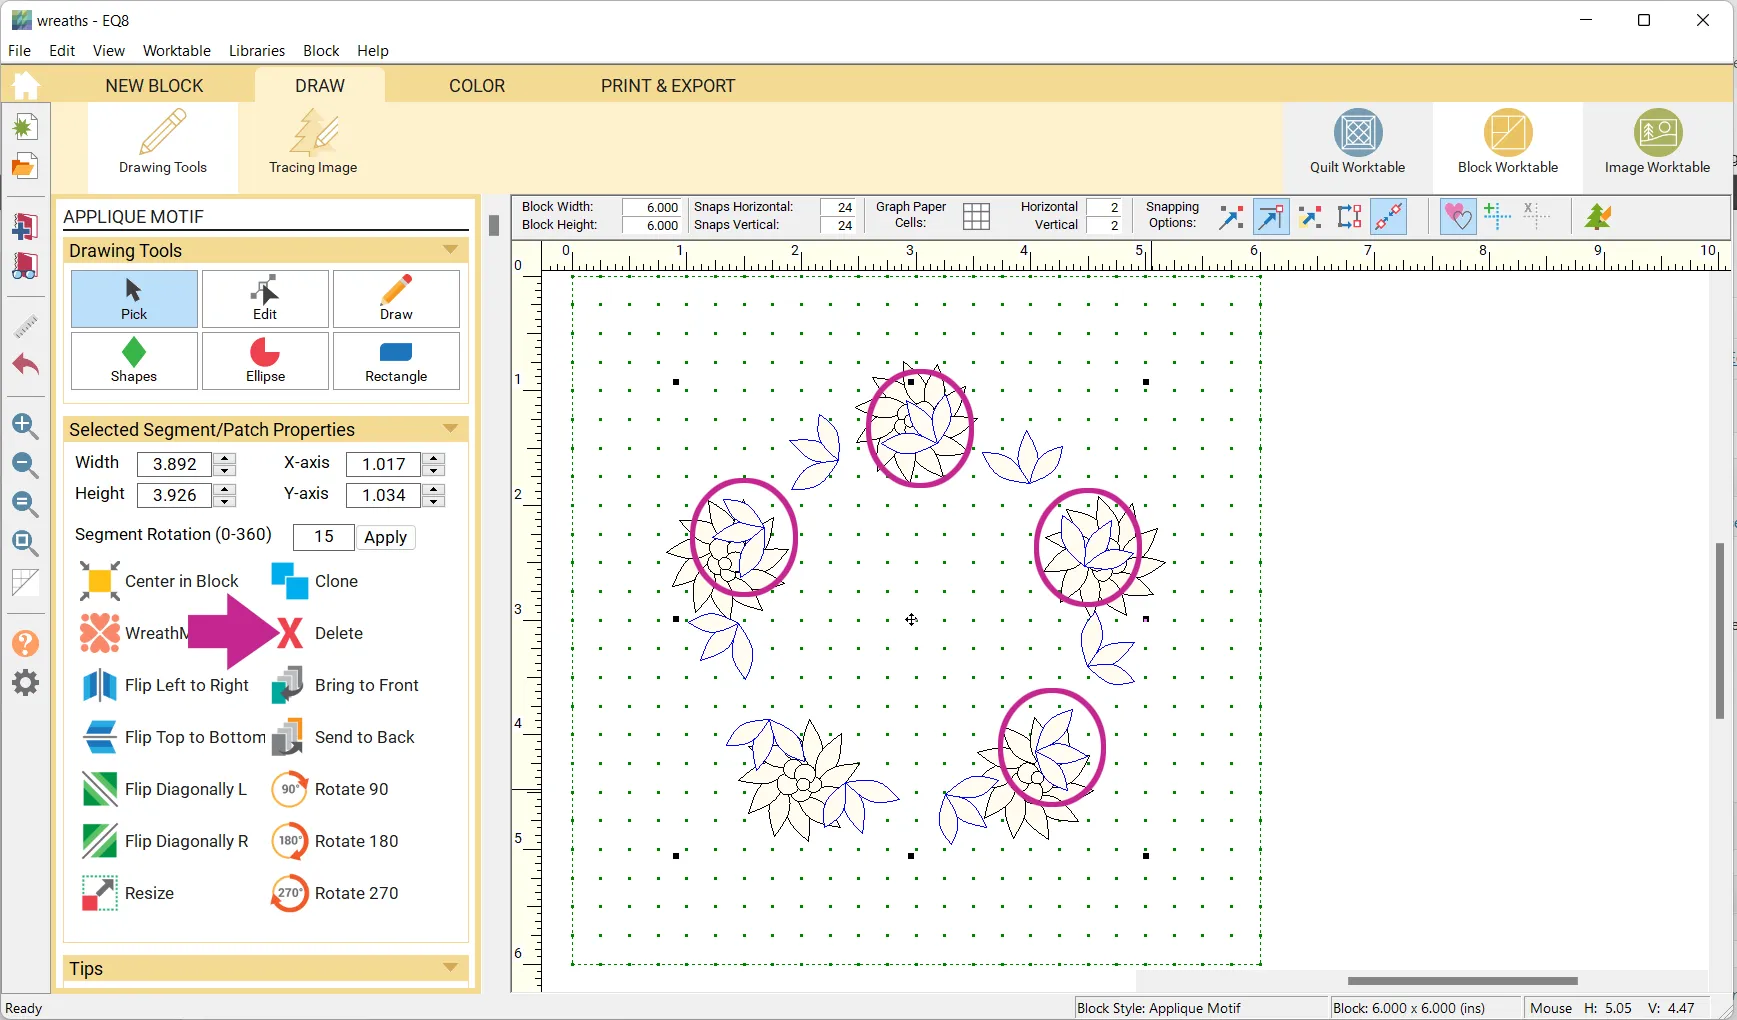
- You may want to delete some. You can do this by clicking on them then clicking the Delete button.
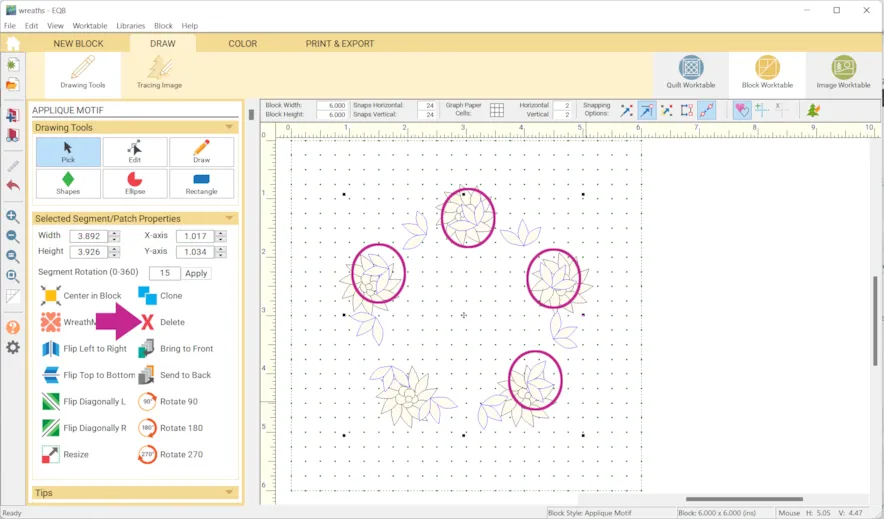
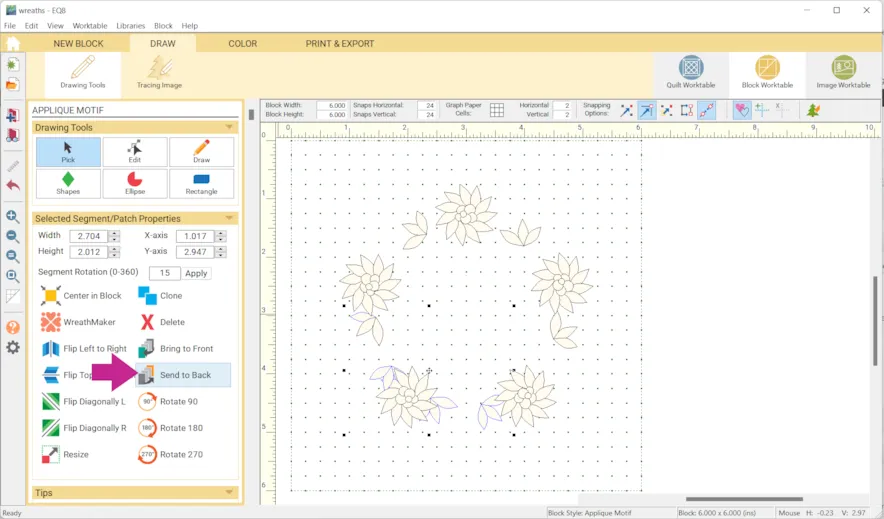
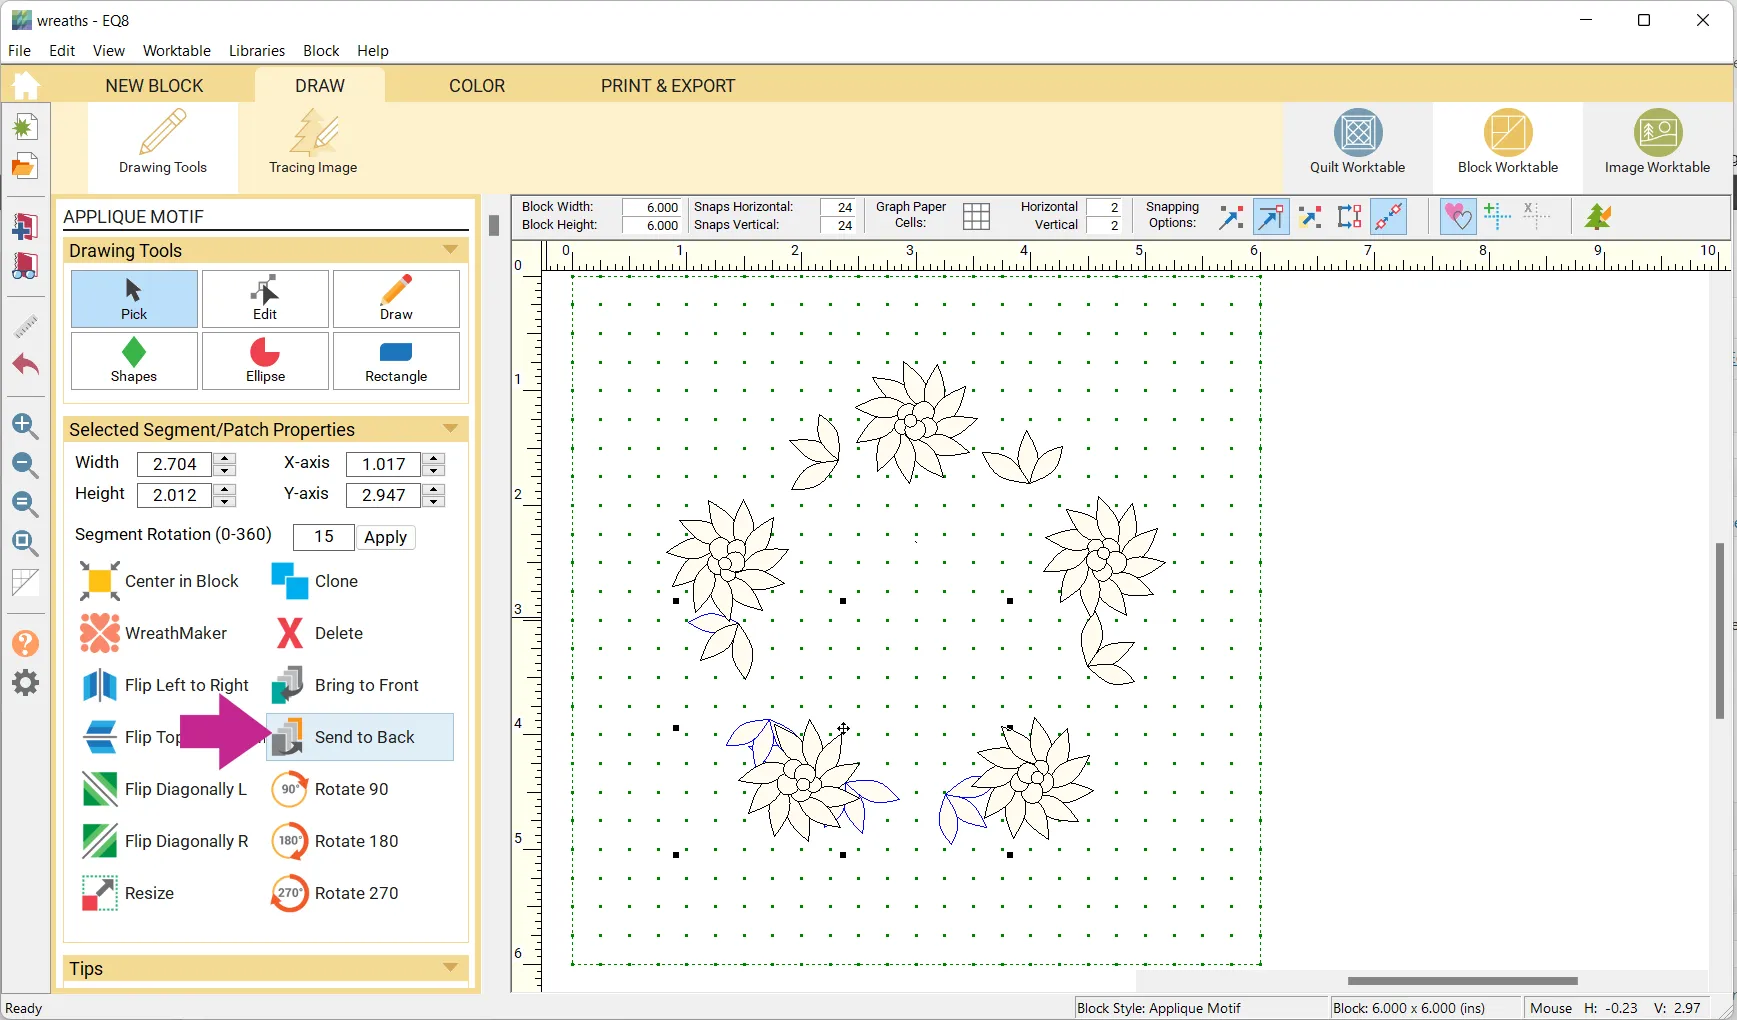
- You can also move the leaves behind the flowers by selecting the leaves and clicking Send to Back.
- Keep adding more leaves until you like how your wreath looks. Keep in mind we will be adding other elements so it doesn’t need to have a solid base of leaves necessarily.
You can also copy/paste leaves as well as flip and rotate. - Click Add to Project Sketchbook
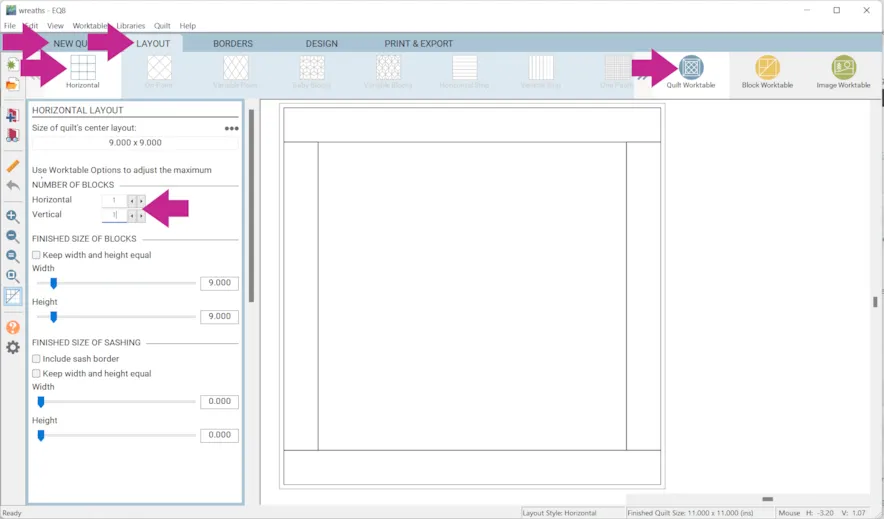
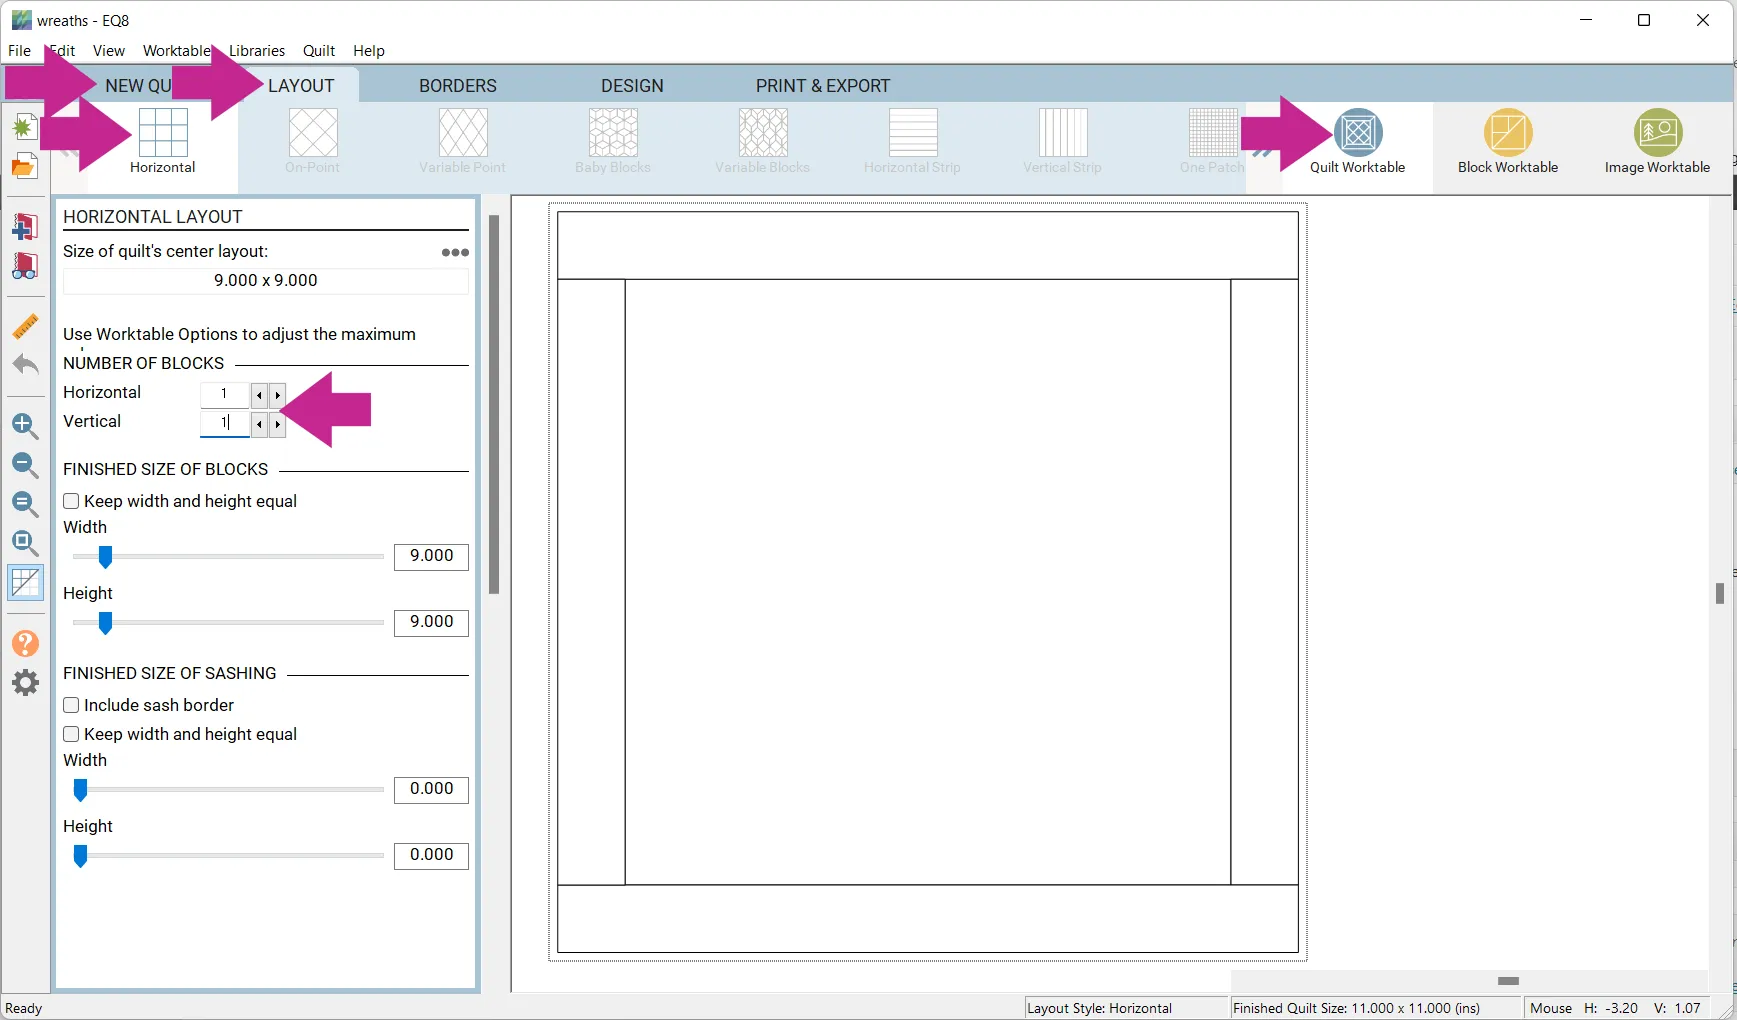
- Click Quilt Worktable > NEW QUILT > Horizontal > LAYOUT
- Make the layout…
Horizontal: 1
Vertical: 1
- Click DESIGN > Block Tools > Set Block
- In step #XX if you chose Block your block will be under the Block tab. If you chose Motif it will be under Motifs tab.
- If your block is a motif click on Layer 2 at the bottom of the screen to place your block.

- Click Open Library and open 06 Motifs.
- Click on a block and click Add to Sketchbook. Repeat if you would like more than one.
- Click Close.
- On Layer 2 drag the motifs to the quilt.
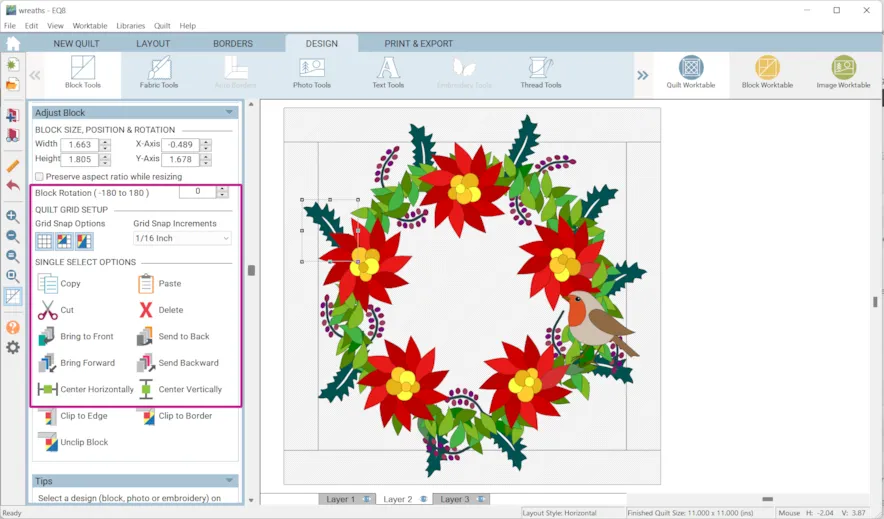
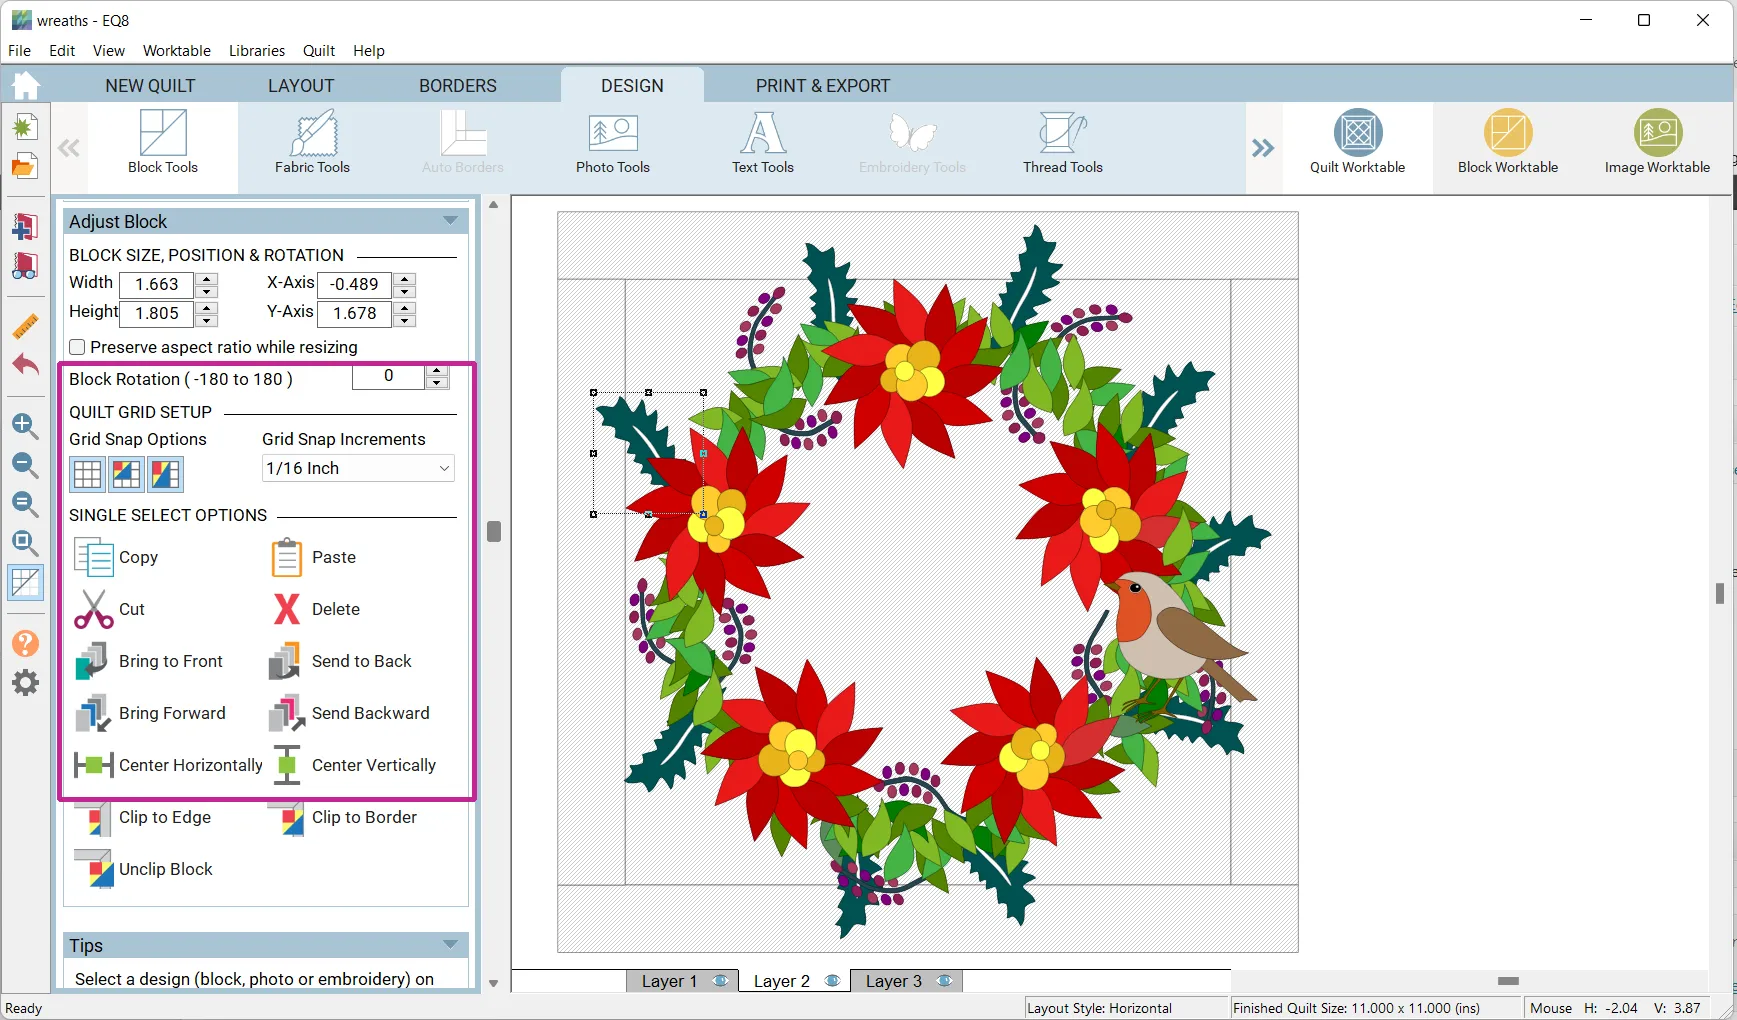
- Click the Adjust tool.
- Click on a motif and you will see the options to rotate, resize, send to back, etc.
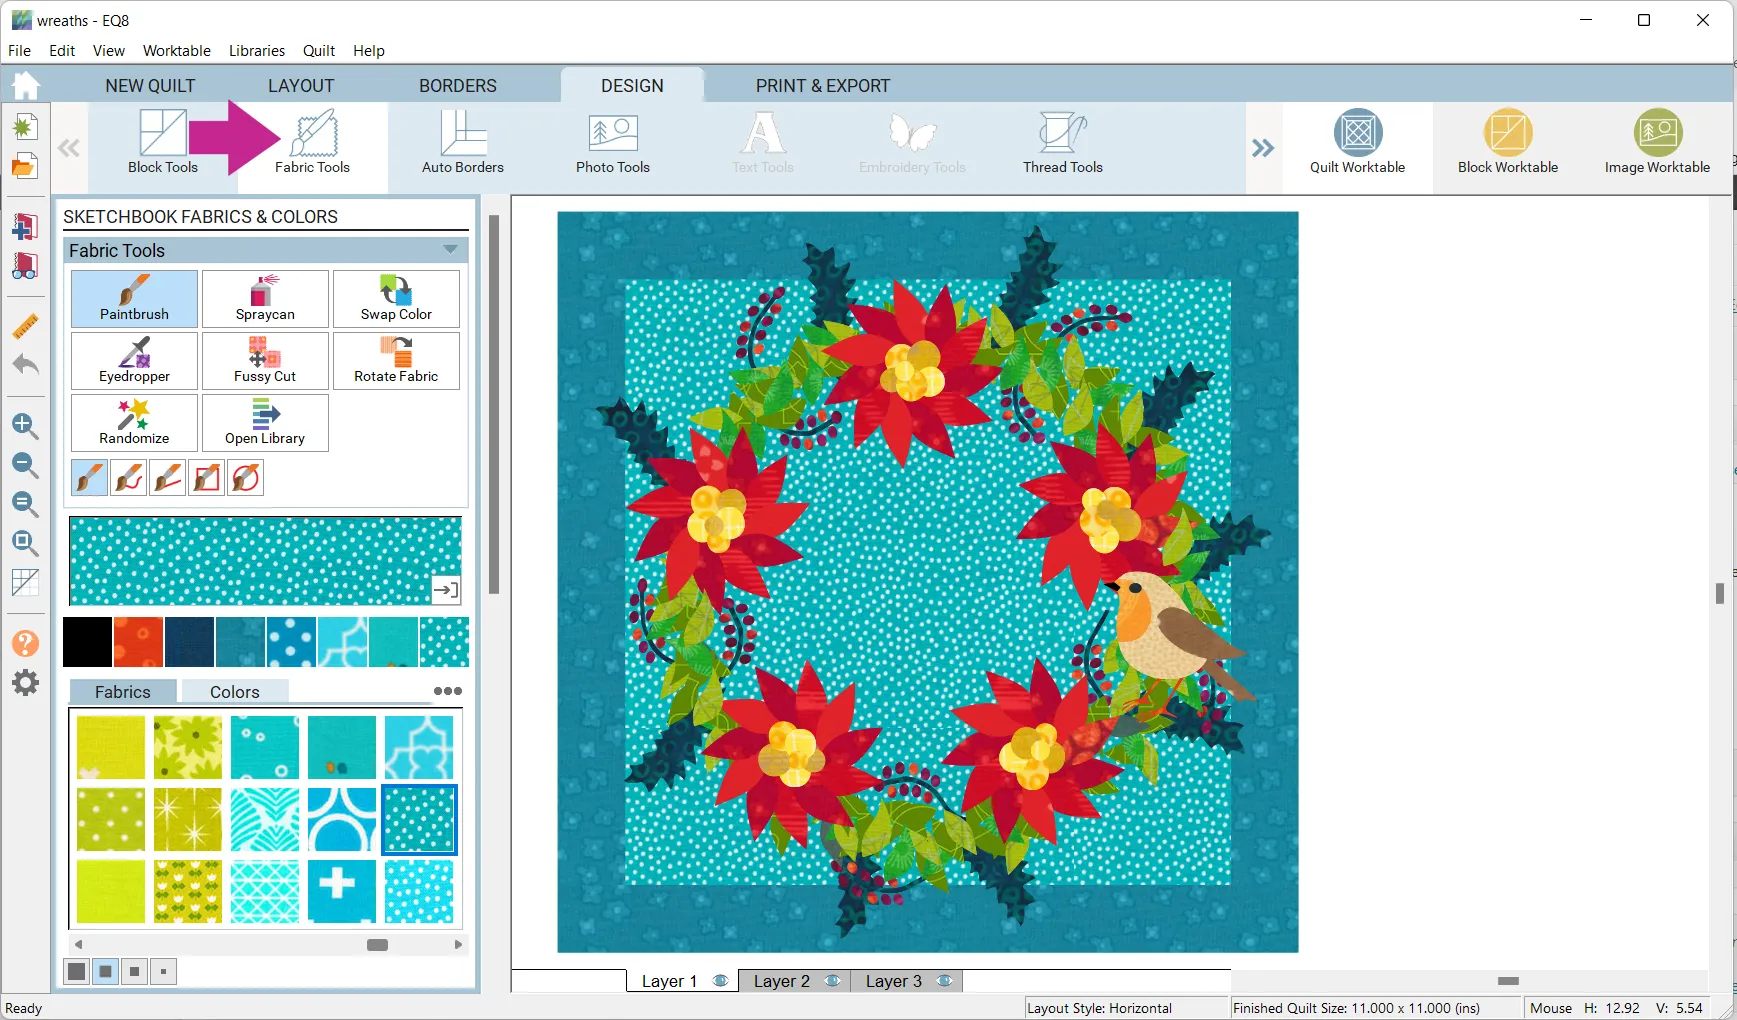
- Click the Fabric Tools and recolor as desired.
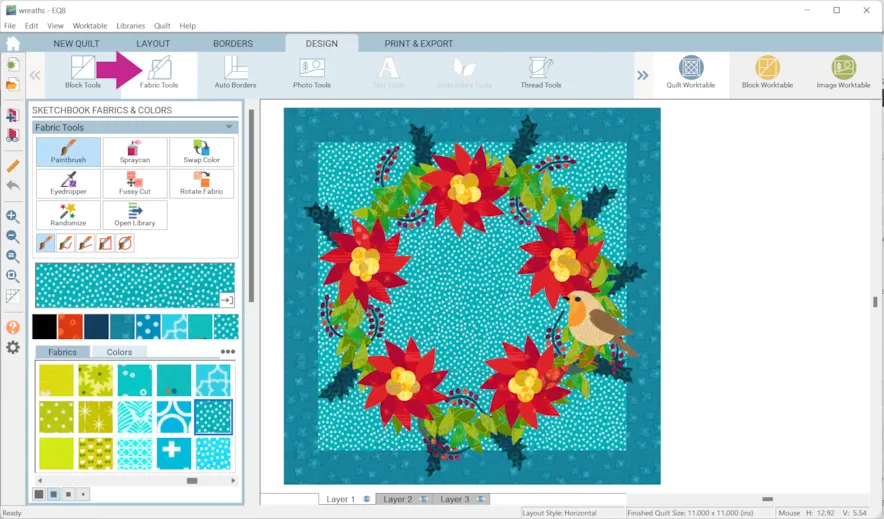
- Click Add to Project Sketchbook
when you’re done!Here’s a video about another fun way to create a wreath…
Or, check out a lesson on how to use the Wreathmaker to create snowflakes.


Have fun experimenting with these fun techniques! If you want to post images of your quilt, here is how to export the images.
To post your image click to comment on this post. Fill in your info and then click Browse.
Go to: Documents\My EQ8\Images
I can’t wait to see what you’ve done! I hope you enjoyed the lesson!
If you have questions about the lesson feel free to post them below.
If you have questions about something else EQ related, please contact techsupport@electricquilt.com.
If you have suggestions for new Design & Discover lessons feel free to comment below or email Heidi@electricquilt.com.