
I love having a quick and easy Easter design handy for the grandkids. I don’t always have time to make a quilt, but my EQ8 program will
produce an easy outline to help the kids be creative with paints or crayons to color a design I create.
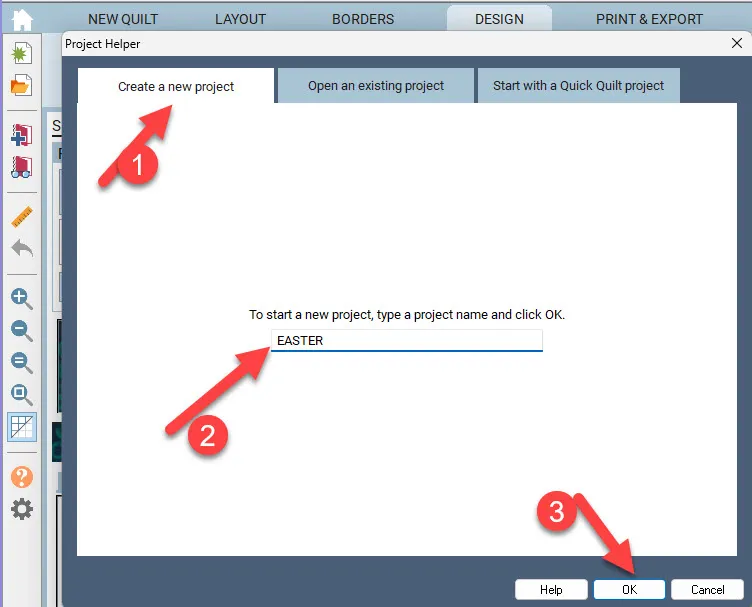
Open your EQ8 program and name a new project ‘Easter’ on the opening page.
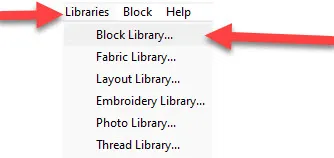
At the top of the screen, click on LIBRARIES>Block Library
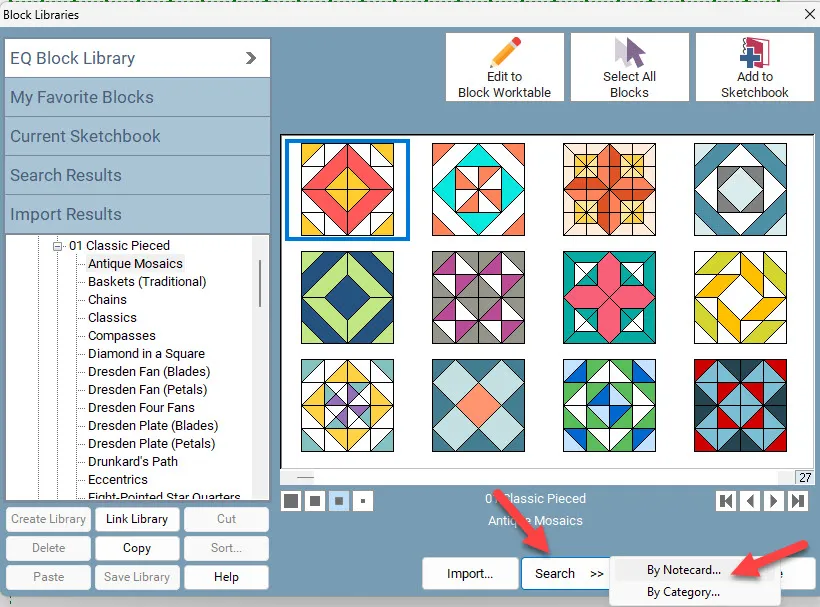
In the bottom of the library box, click on the word ‘search’ > “by notecard”.
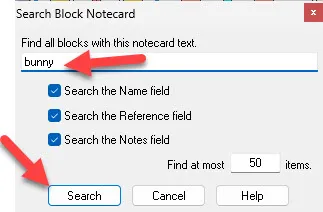
When the notecard box opens, type in the word ‘bunny’ and then click on the word ‘search’ at the bottom of the box.
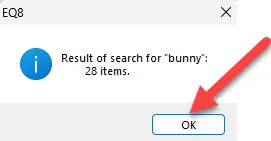
The results box will list how many items you have in EQ8 that fit this word. Click on the OK at the bottom of the box to see the results.
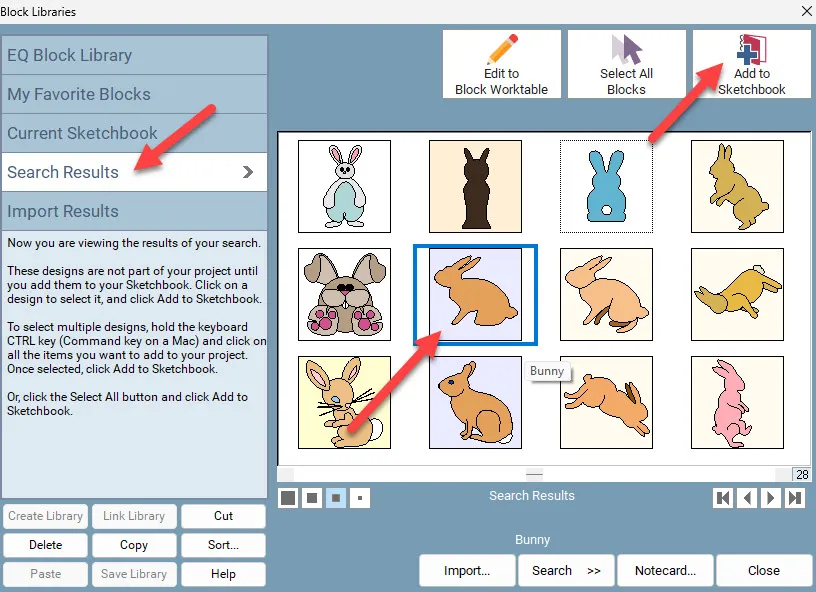
Scroll through the search results and click on any one of the silhouette bunnies that has a solid outline around the bunny to select it. Once it is selected, there will be a blue box around it. Click on ‘add to sketchbook’ at the top of the box. NOTE: Images with a solid line around it mean it is a block background with an applique added on top of the block. Images with a dashed outline around it mean it is a free-standing applique design with no background block.
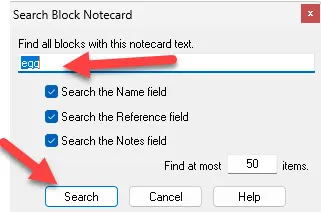
Click on the word ‘search’ >’ by notecard’ again and type in the word ‘egg.’ Click on the word ‘search’ at the bottom of the box.
The search results box will pop up with the number of items in your EQ8 that match the word ‘egg’. Click on the OK at the bottom of the box.

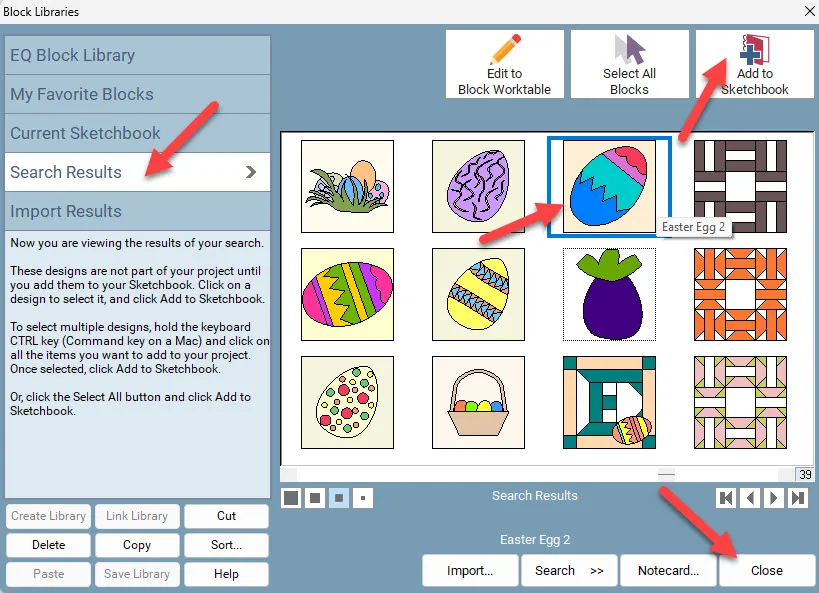
Scroll through the egg images and select a simple egg drawing. Once it is selected, there will be a blue box around it. Click on ‘add to sketchbook’ at the top of the box. Click on the word ‘close’ at the bottom of the box to close the block libraries.
You can edit these two blocks and merge them together. Remember, there is more than one way to use the program edit functions. Below is one way to work with the program.
Click on the ‘view sketchbook’ icon ![]() on the far left side of the screen.
on the far left side of the screen.
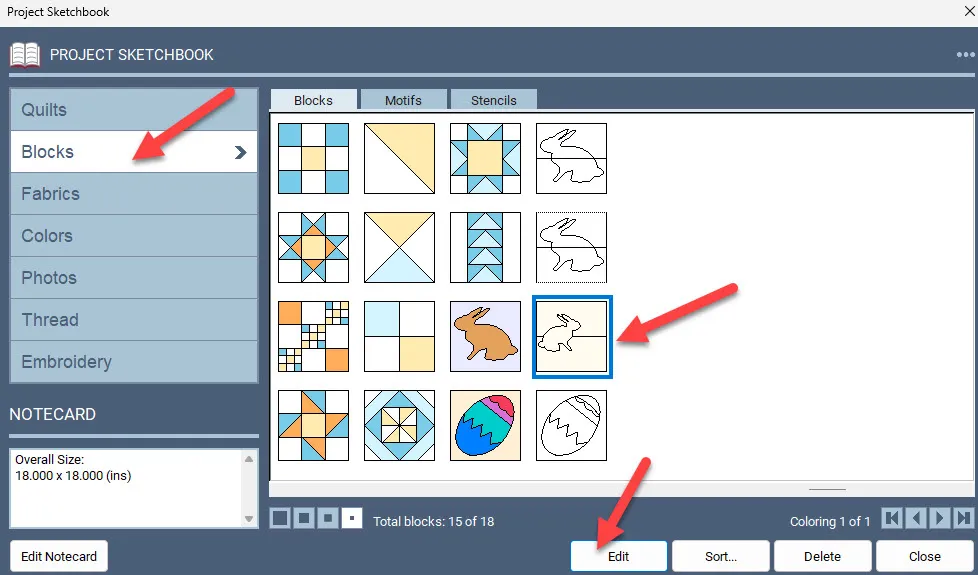
In the project sketchbook under the blocks heading, click on the bunny block to select it. Once it is selected, click on the word ‘edit’ at the bottom of the screen.
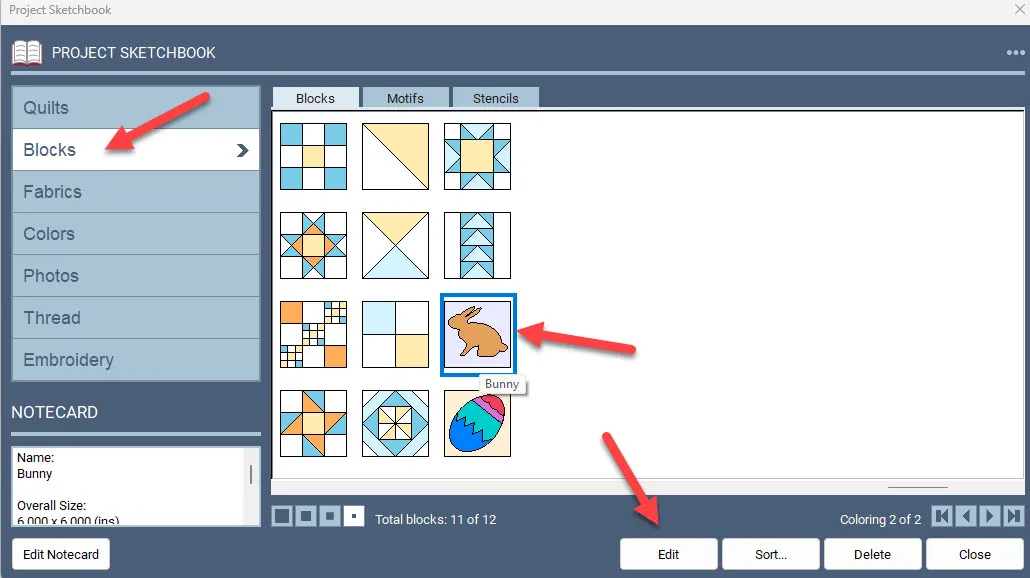
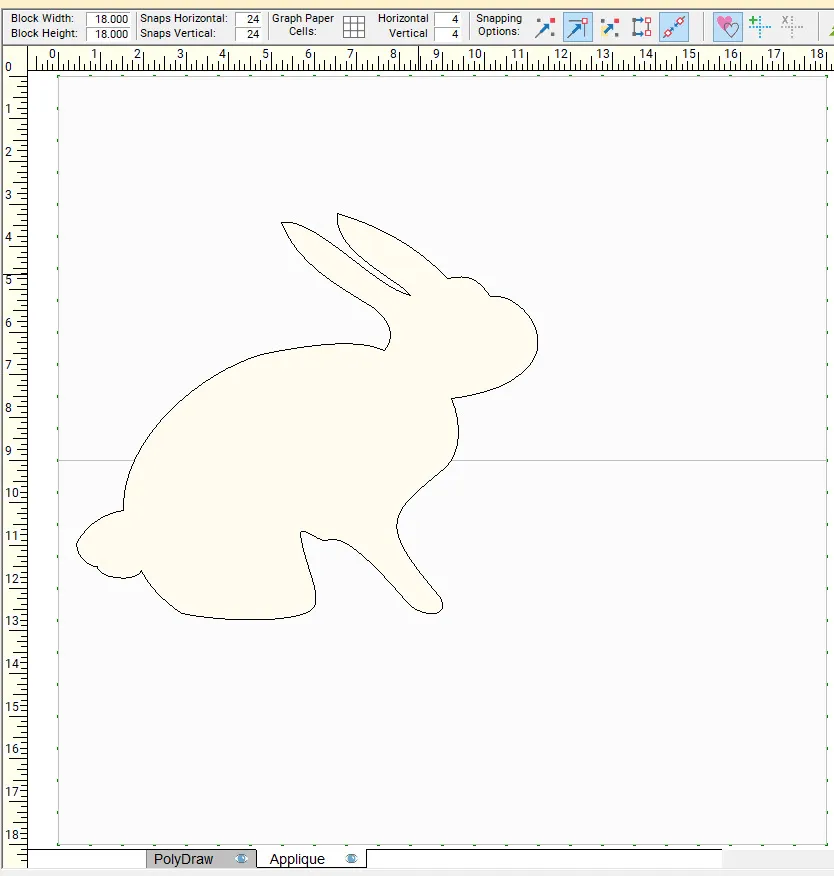
The bunny block will open on the block worktable under the type of block that it was designed as. This block was made on the poly draw block worktable with a setting of 6-inch block size. The bunny is an applique set onto a background block.
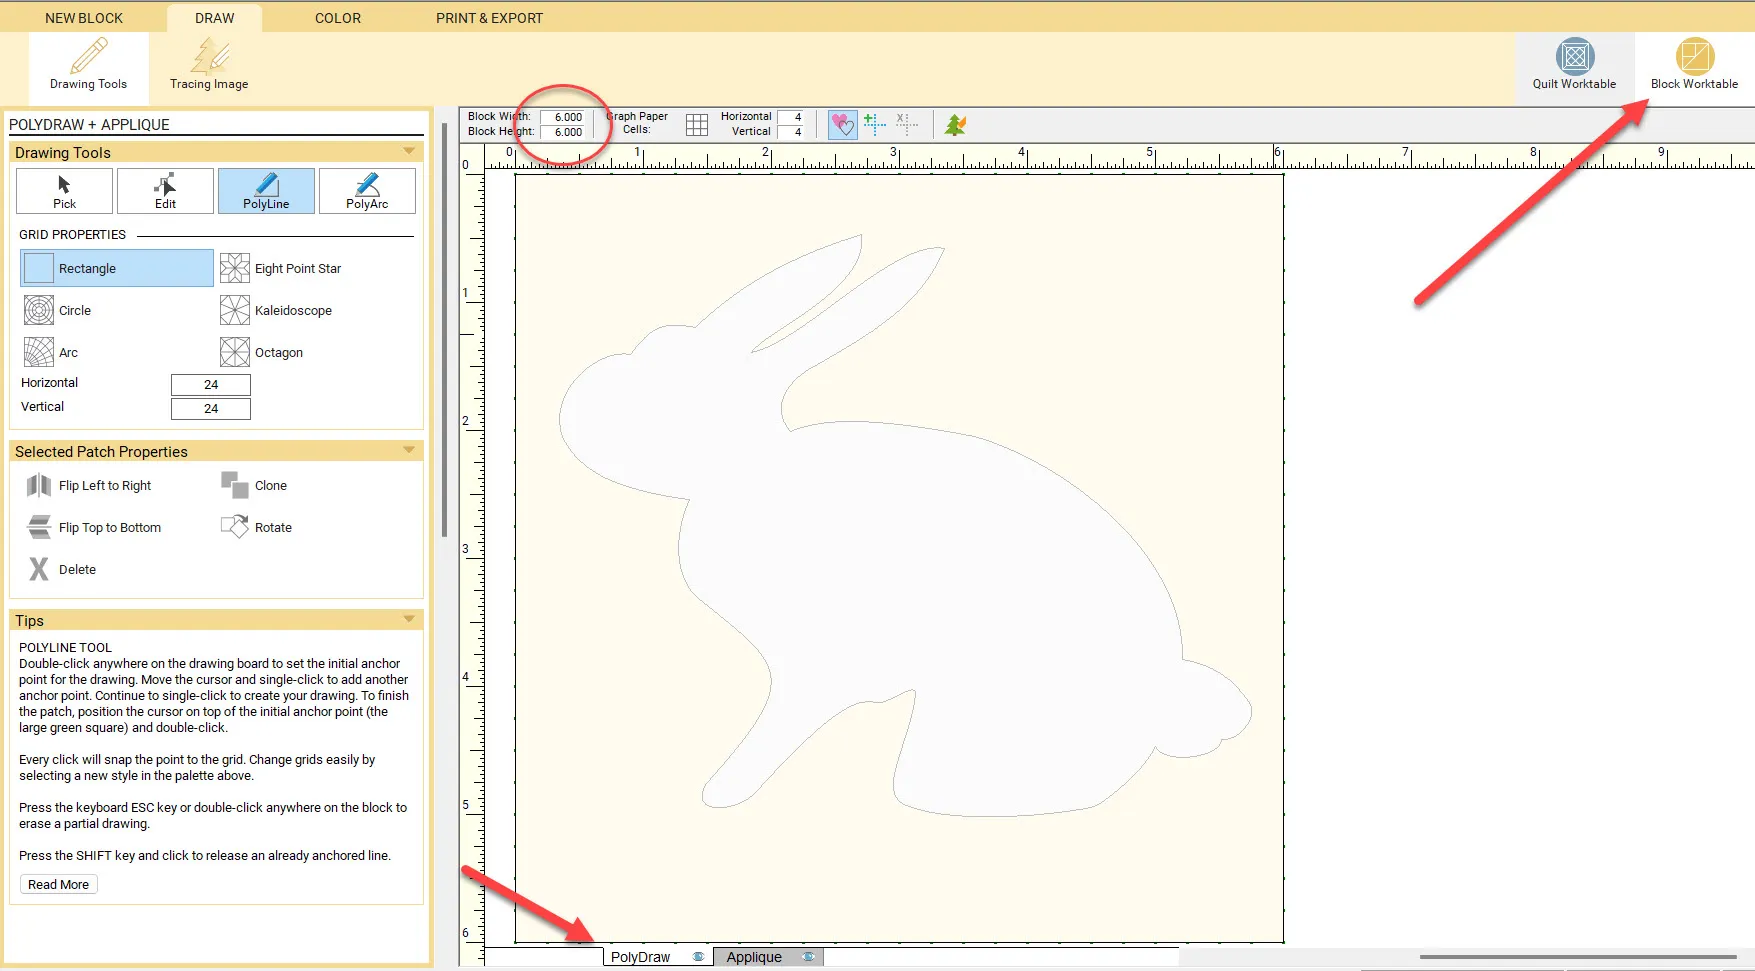
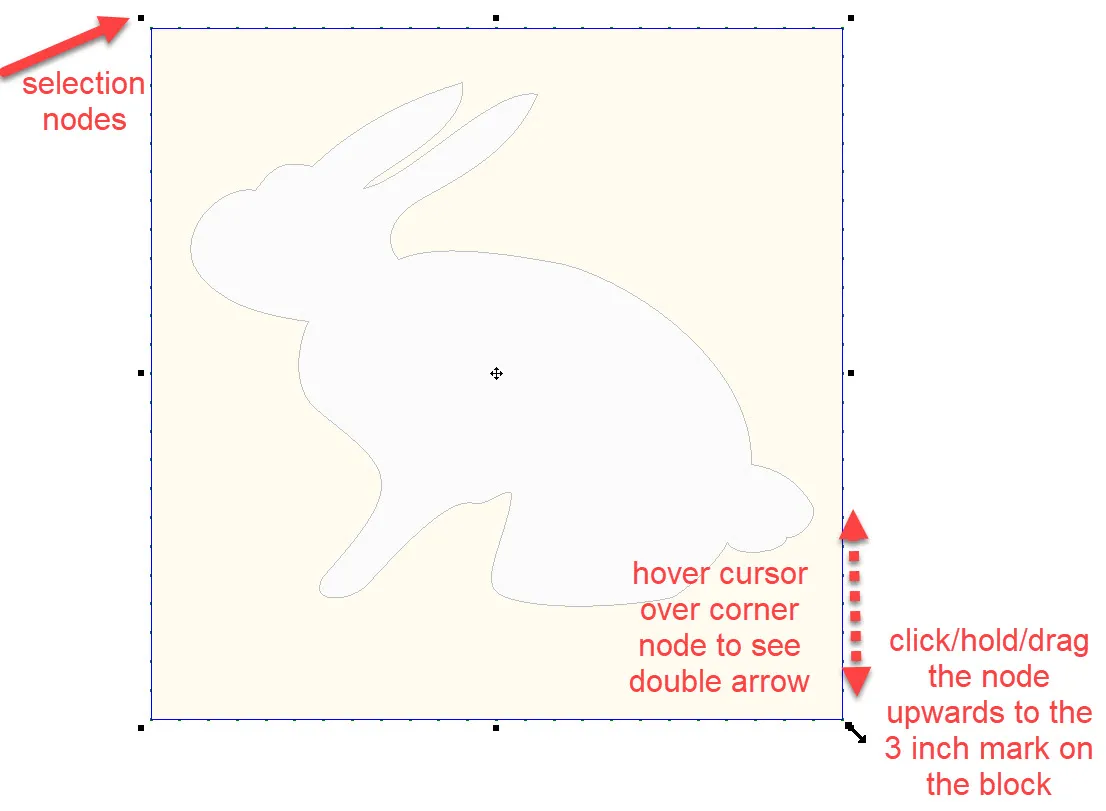
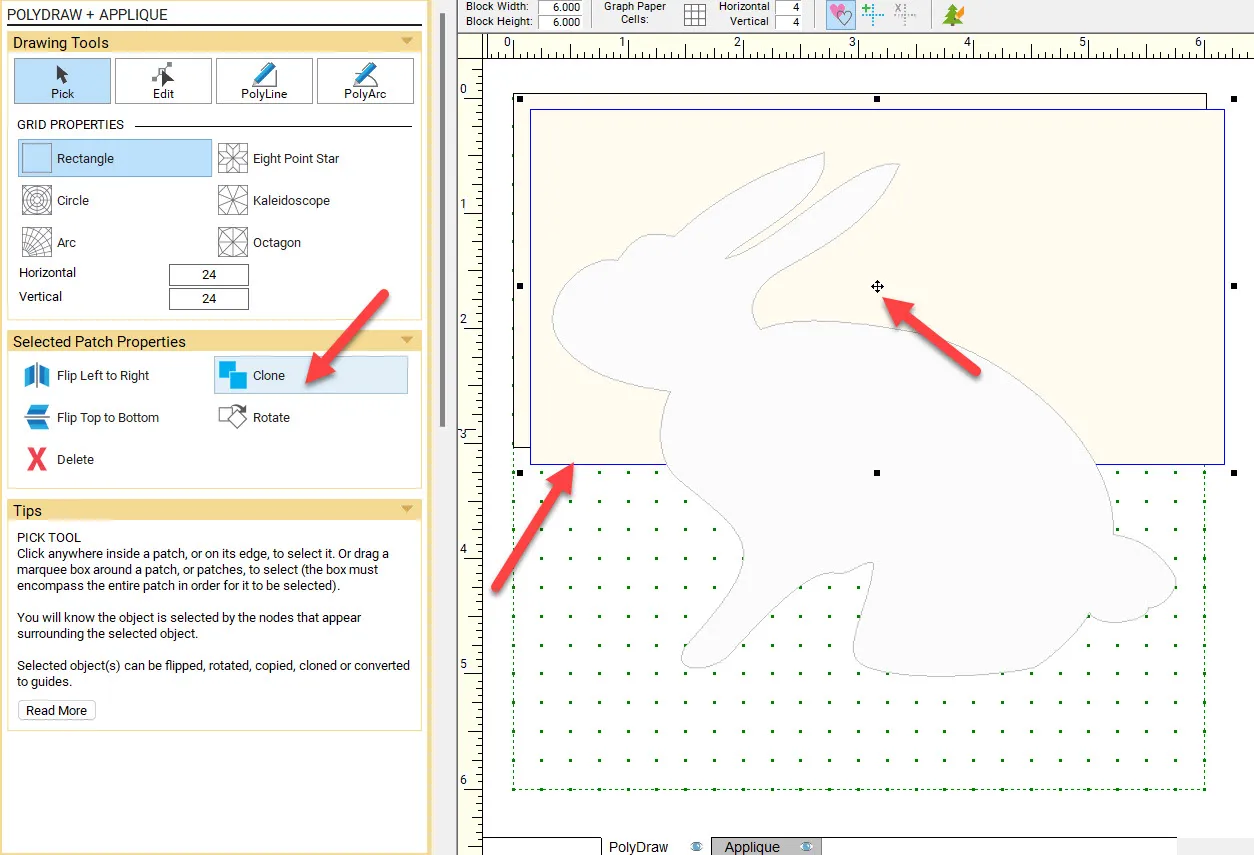
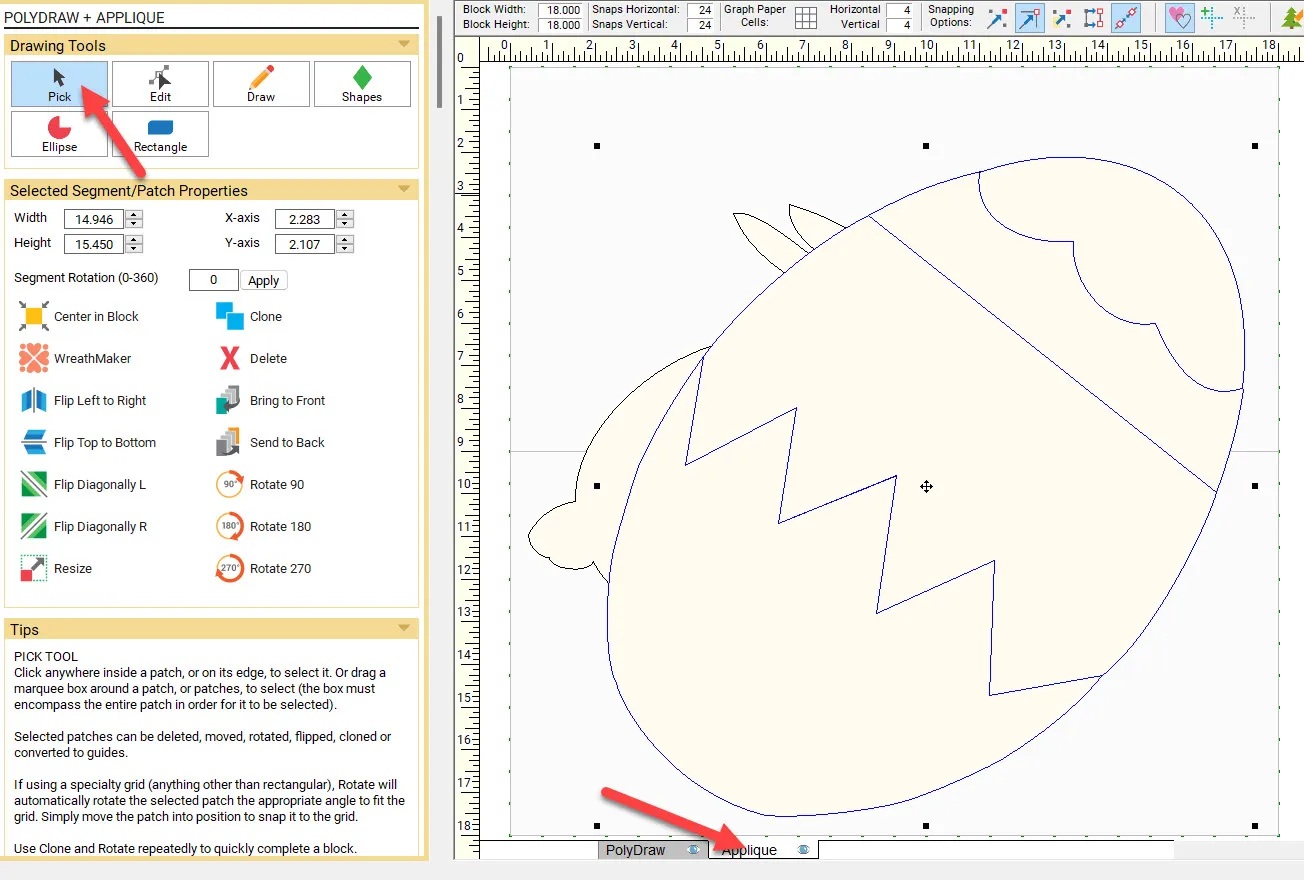
On the PolyDraw tab, we will edit the background block. Click on the pick tool ![]() to select it. Move the cursor over to the worktable and click once. You will see the selection nodes around the outside edge of the block background.
to select it. Move the cursor over to the worktable and click once. You will see the selection nodes around the outside edge of the block background.
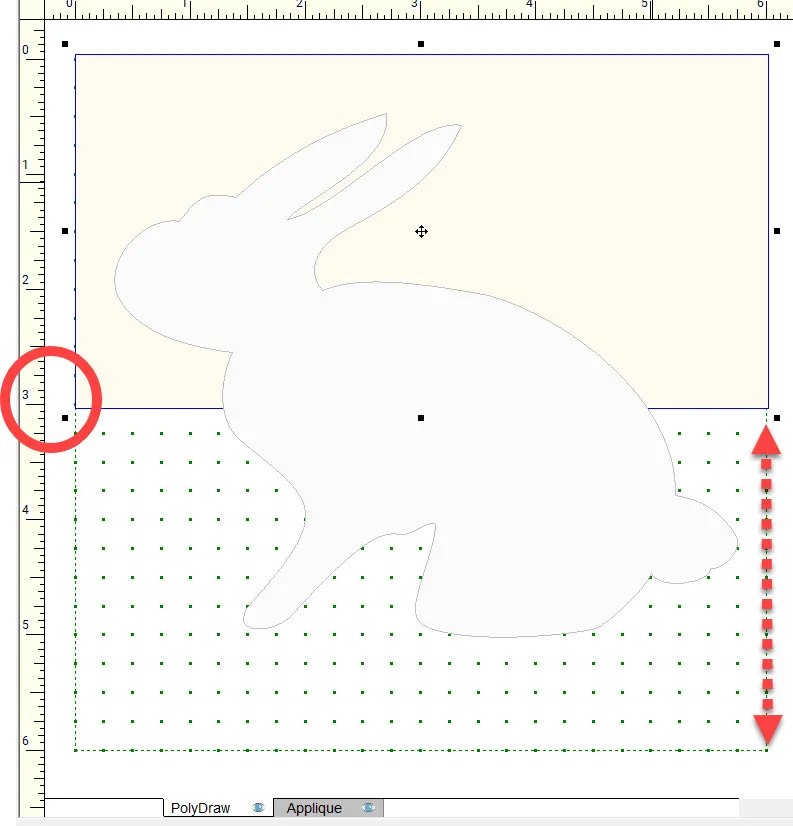
Click/hold/drag/release the bottom corner node and move it up to the 3-inch mark on the block.
You will now have only the upper half of the block as a background.
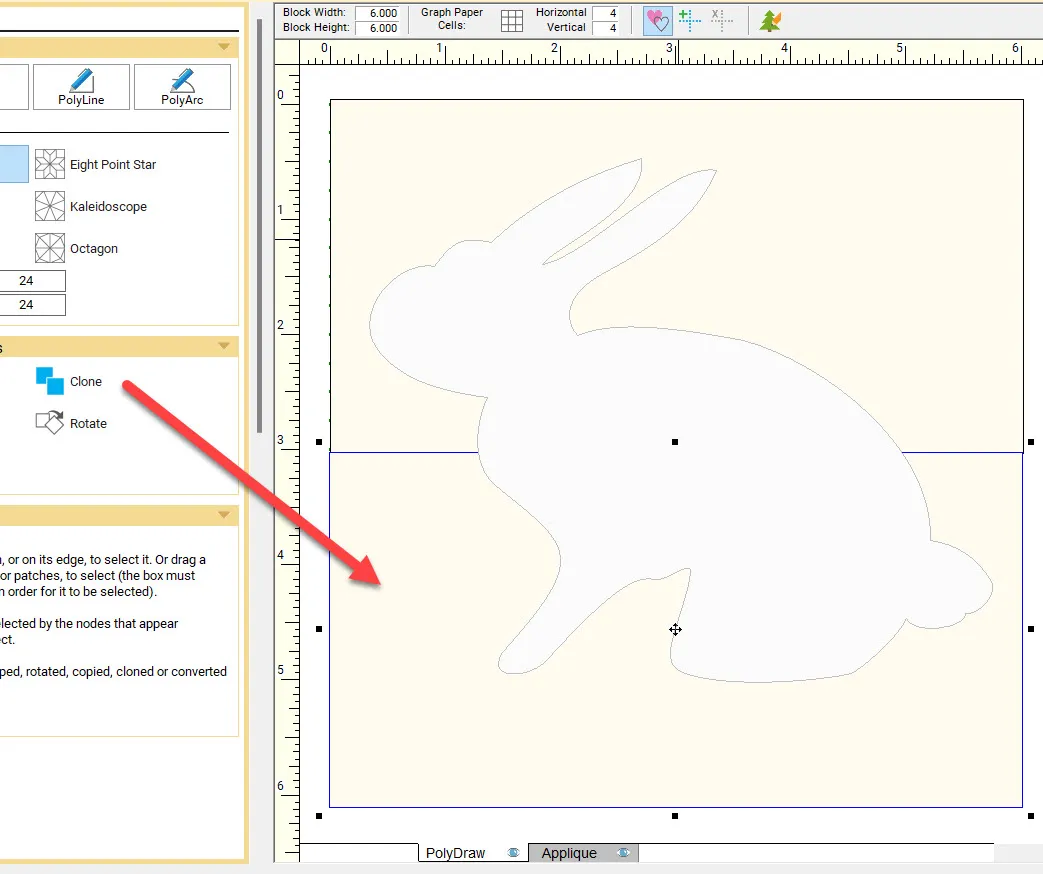
While the upper half of the block background is still selected, click on the ‘clone’ icon ![]() on the panel at the left side of the screen. A second copy of the block will be placed on the worktable. Click and hold on the center crosshairs of the cloned block and drag it to the bottom of the block worktable.
on the panel at the left side of the screen. A second copy of the block will be placed on the worktable. Click and hold on the center crosshairs of the cloned block and drag it to the bottom of the block worktable.
You will now have the background for the entire block which is a pieced block background.
Add this revision to the sketchbook by clicking on the ‘add to sketchbook’ icon ![]() at the far left side of the screen.
at the far left side of the screen.
Click on the ‘applique tab at the bottom of the block.
Click on the ‘pick tool’ icon ![]() to select it. Click on the bunny.
to select it. Click on the bunny.
Move the cursor over to a corner node of the selected bunny. You will see a double arrow. While holding down the CTRL key on the keyboard (Command key on a Mac), click/hold/drag/ release the node inwards to make the bunny smaller.
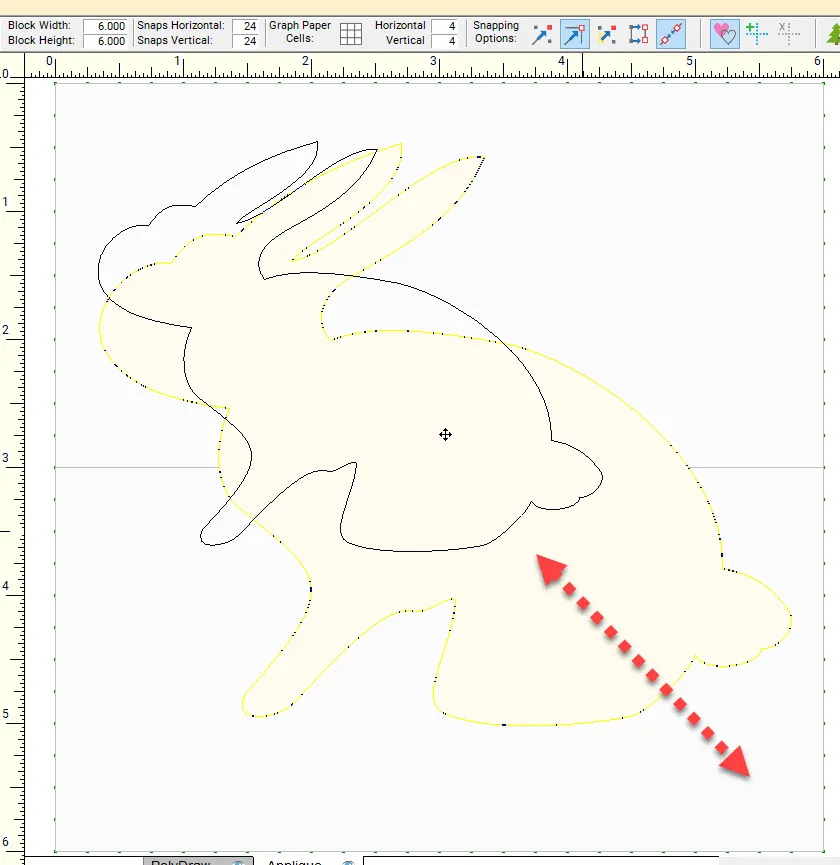
Click on the new smaller-size bunny to select it then click on the ‘flip left to right’ icon ![]() on the panel at the left side of the screen.
on the panel at the left side of the screen.

Resize the block to be 18 inches by 18 inches by typing in the new measurements on the property bar at the top of the block. The EQ8 program will rescale the block and all its images to the new size selected.
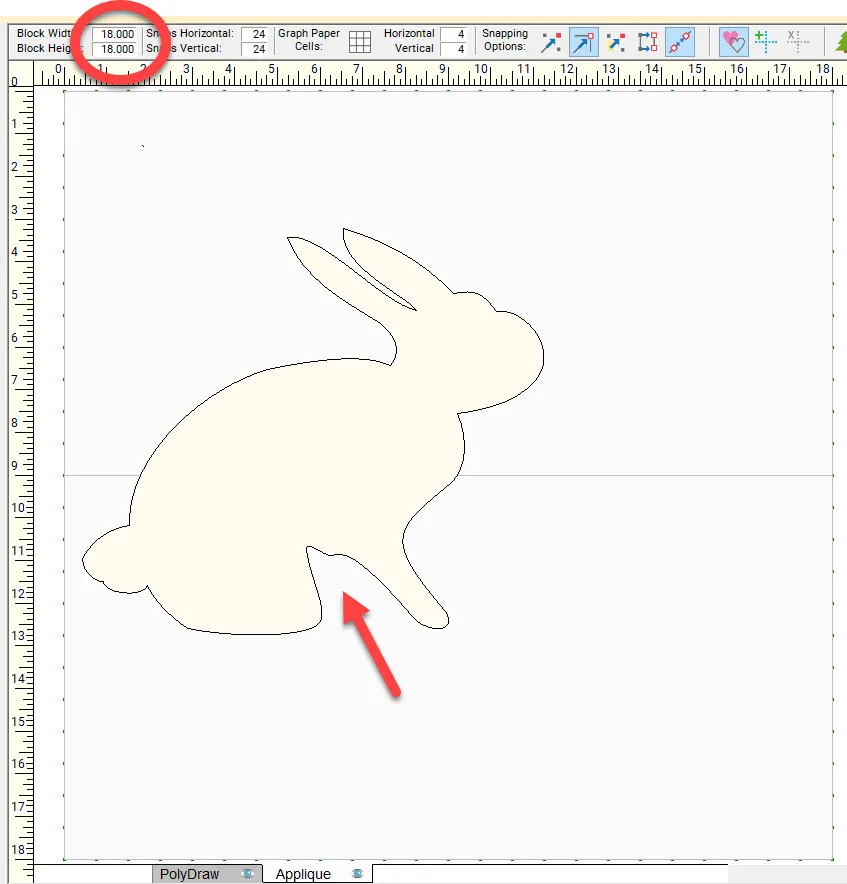
Add to sketchbook. ![]()
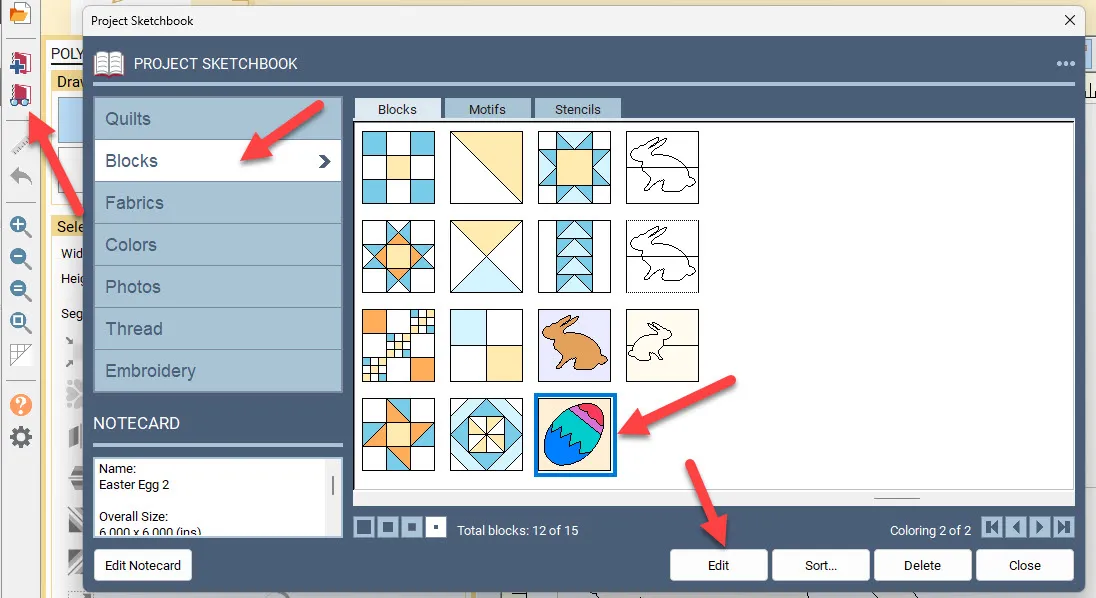
Click on the ”view sketchbook’ icon ![]() on the far left side of the screen. In the project sketchbook, under the blocks heading, click on the egg design to select it. You will see a blue box around it once it is selected. Click on the word ‘edit’ at the bottom of the box to send it to the worktable.
on the far left side of the screen. In the project sketchbook, under the blocks heading, click on the egg design to select it. You will see a blue box around it once it is selected. Click on the word ‘edit’ at the bottom of the box to send it to the worktable.
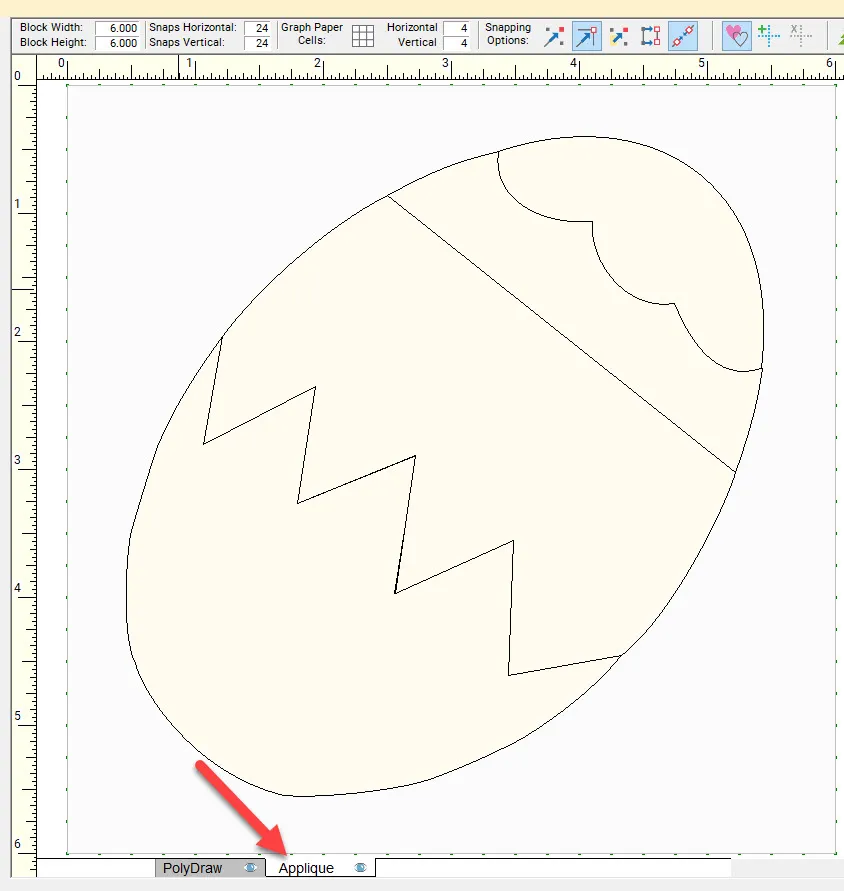
On the worktable, make sure you are on the applique tab at the bottom of the screen. We are only going to use the egg itself and not the background block.
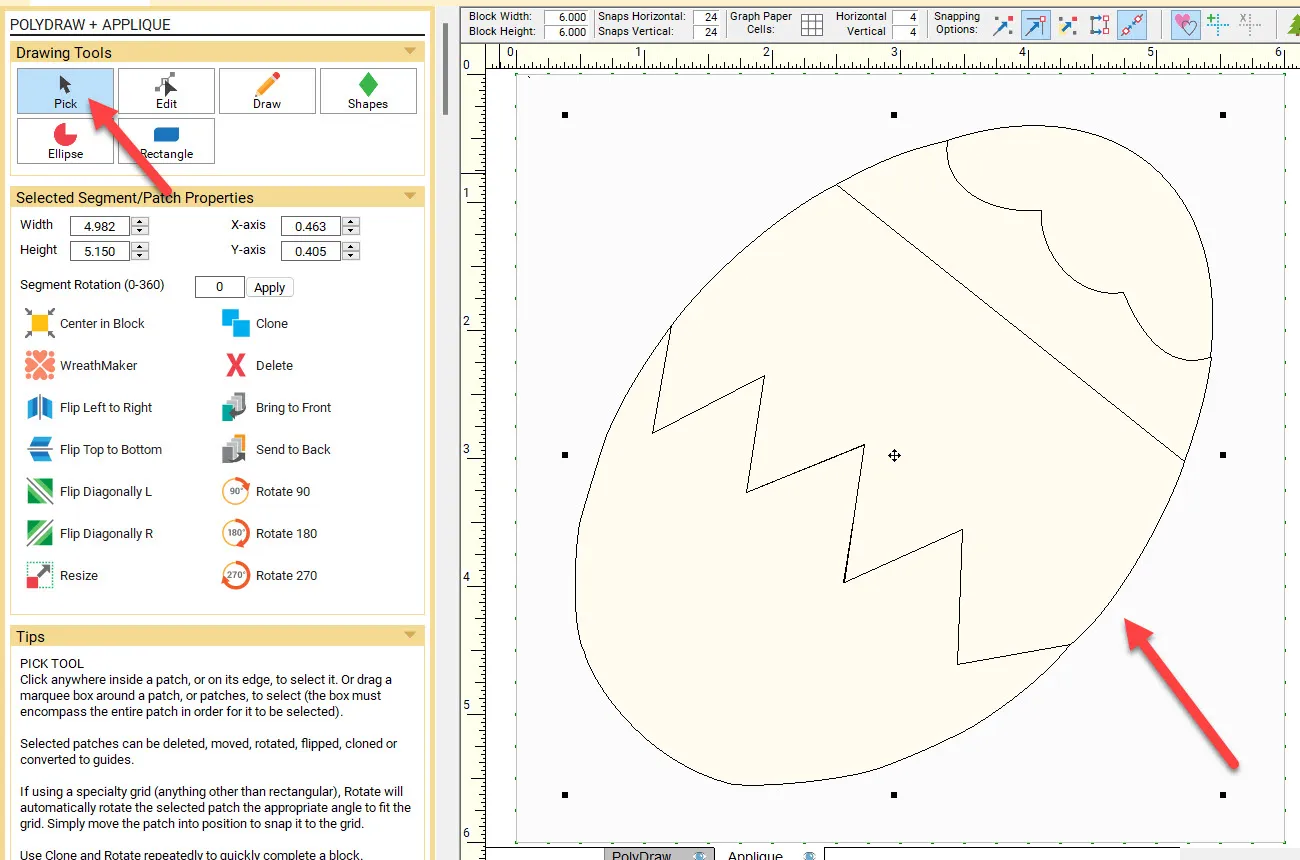
Click on the ‘pick tool’ icon ![]() to select it. Move the cursor over to the worktable and starting in the upper left side of the worktable, click/hold/drag/release downwards and across the block to select the entire egg. You will see selection nodes around the egg.
to select it. Move the cursor over to the worktable and starting in the upper left side of the worktable, click/hold/drag/release downwards and across the block to select the entire egg. You will see selection nodes around the egg.
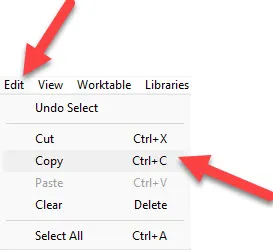
Once the design is selected, click on EDIT>copy at the top of the screen. NOTE: You can also use the shortcut keys Control +C (Command +C on a Mac) to place a copy of the design on the clipboard.
Now that you have a copy of the egg on the clipboard, click on the ‘view sketchbook’ icon ![]() on the far left side of the screen. In the sketchbook under the blocks heading, click on the resized bunny design block we created to select it. Click on the word ‘edit’ at the bottom of the box to place it back on the worktable.
on the far left side of the screen. In the sketchbook under the blocks heading, click on the resized bunny design block we created to select it. Click on the word ‘edit’ at the bottom of the box to place it back on the worktable.
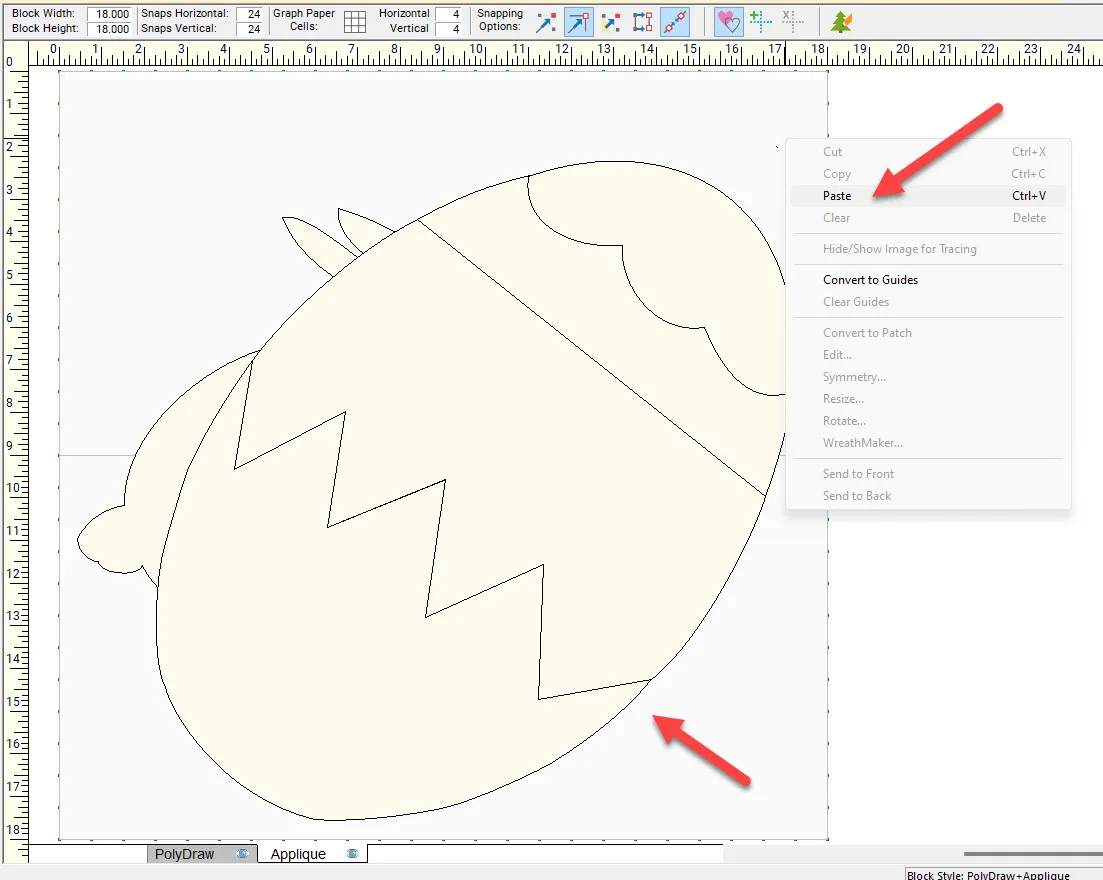
Make sure you are still on the applique tab at the bottom of the screen. Move the cursor over to the worktable and then right-click>paste to place the copied egg on the worktable with the bunny. The egg will be too large.
Using the pick tool,![]() while holding down the shift key on the keyboard, click on each of the segments of the egg. You will now have the entire egg selected and it will have all the outlines of the segments showing in blue.
while holding down the shift key on the keyboard, click on each of the segments of the egg. You will now have the entire egg selected and it will have all the outlines of the segments showing in blue.
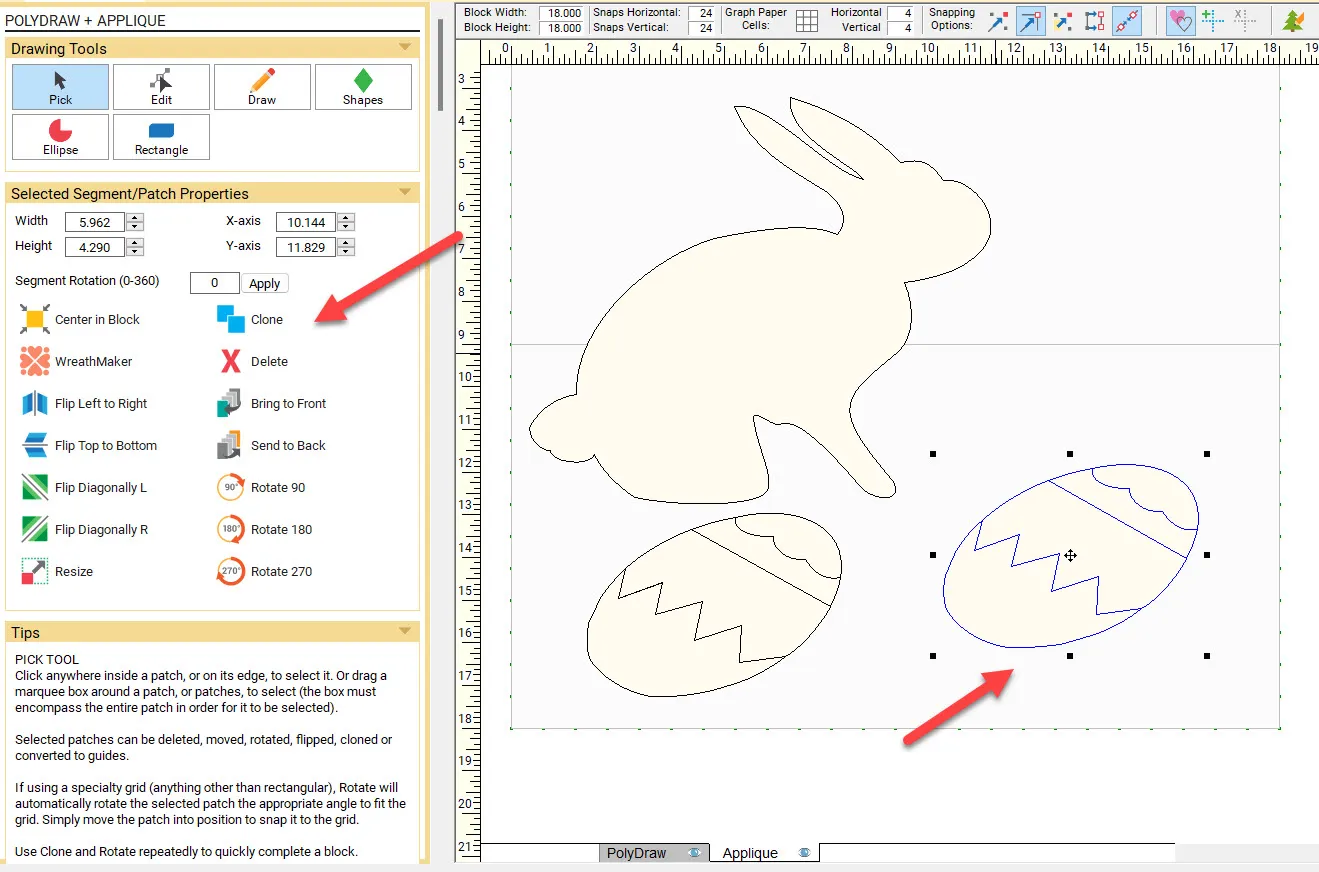
Move the cursor over to the worktable and click on a corner node and drag it inwards to create a smaller egg.

With the smaller egg is still selected, click on the word ‘clone’![]() to make another copy of the egg. Click and hold on the center crosshairs of the cloned egg and drag it over to a new position on the worktable.
to make another copy of the egg. Click and hold on the center crosshairs of the cloned egg and drag it over to a new position on the worktable.
Add the design to the sketchbook.![]()
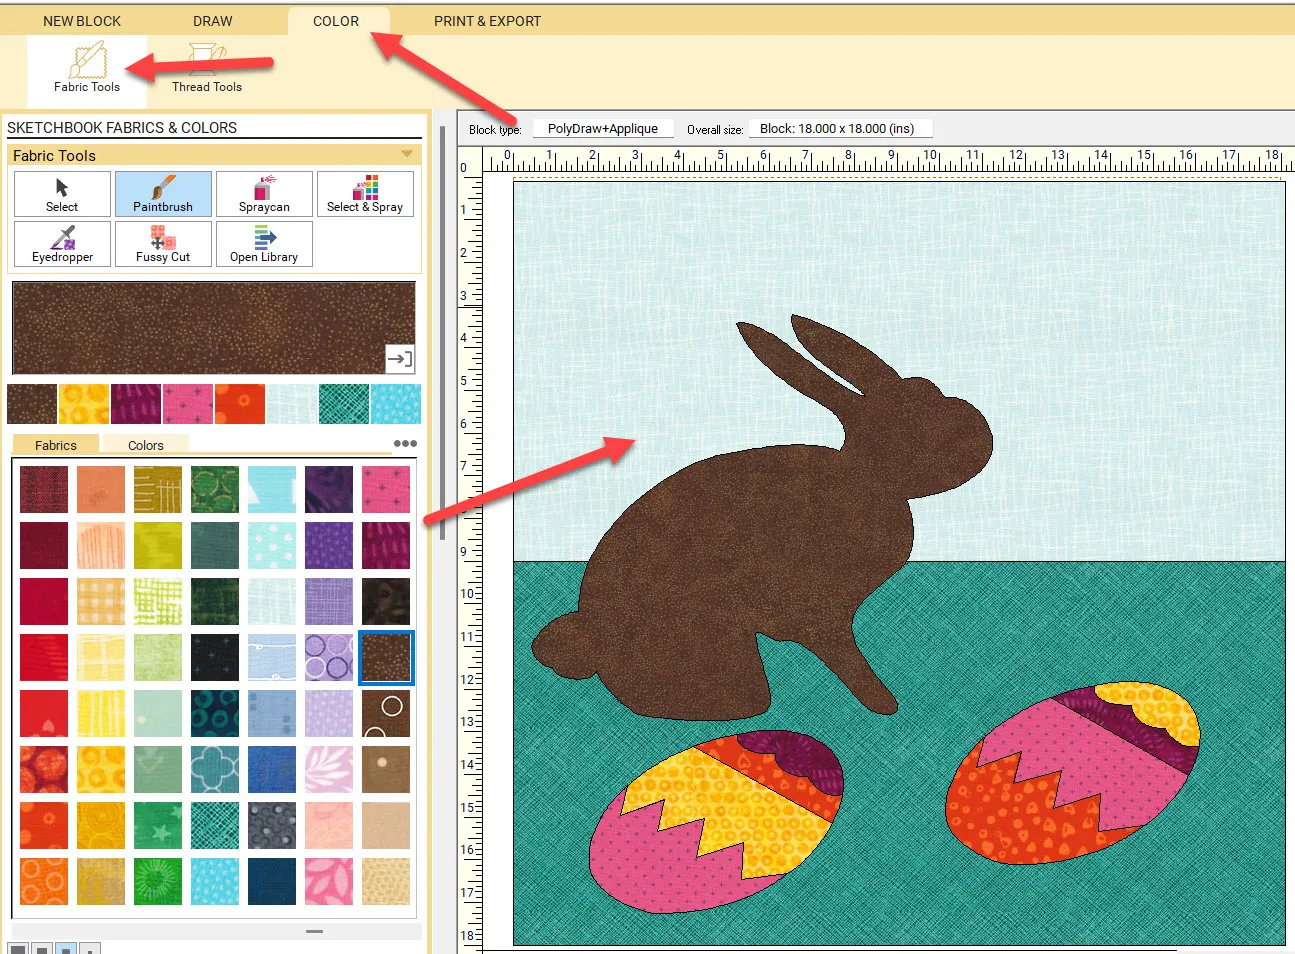
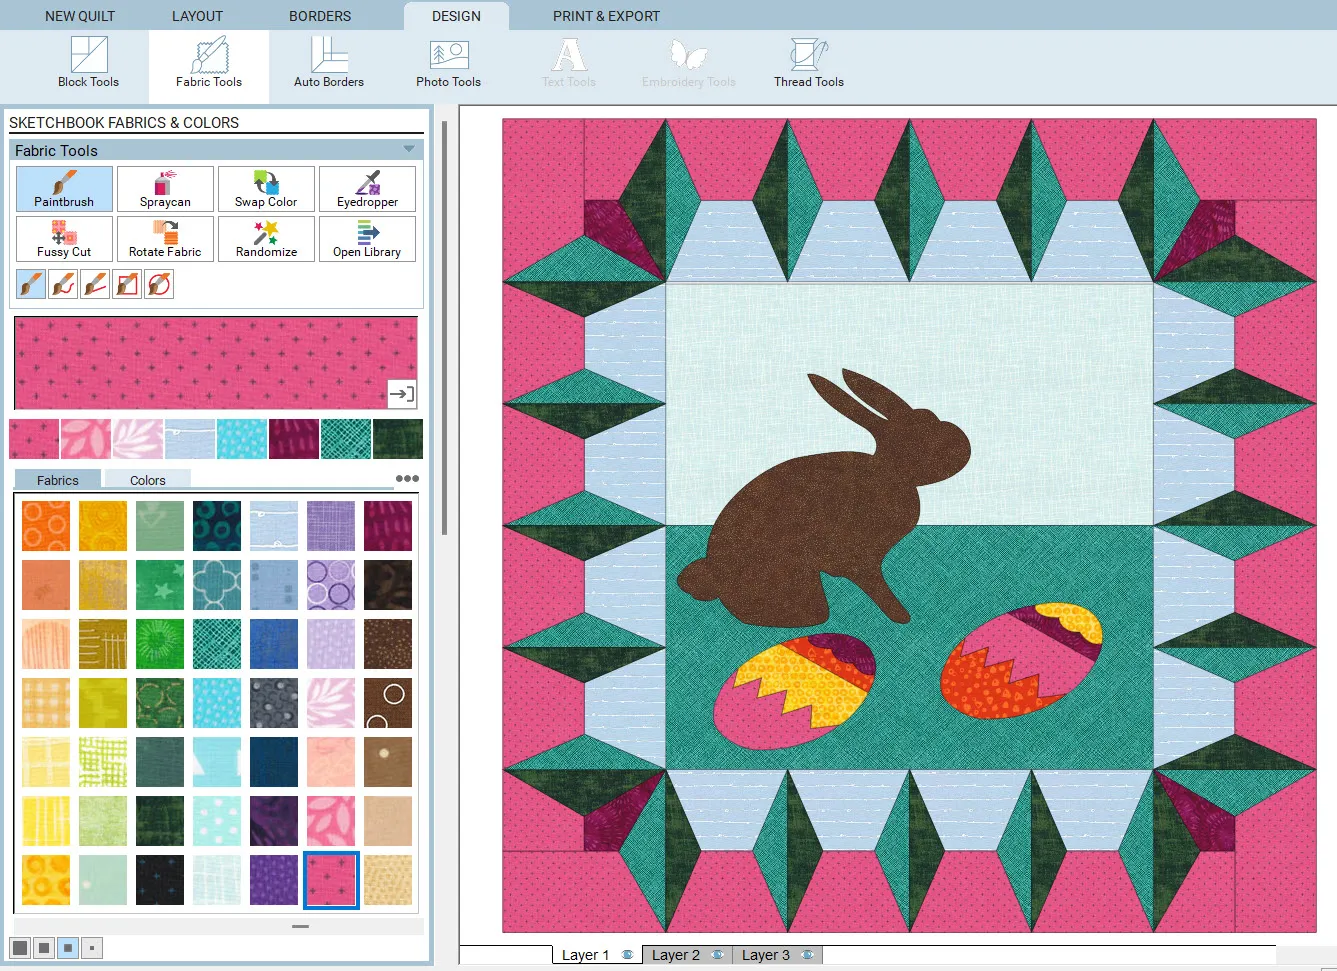
Click on the color tab a the top of the screen. Using the fabric tools, select the fabric colors of your choice and then click on the worktable to apply your colors to the design.
Add the design to the sketchbook. ![]()
Click on the quilt worktable icon on the upper right side of the screen. On the Selection bar, click on New Quilt>Horizontal.

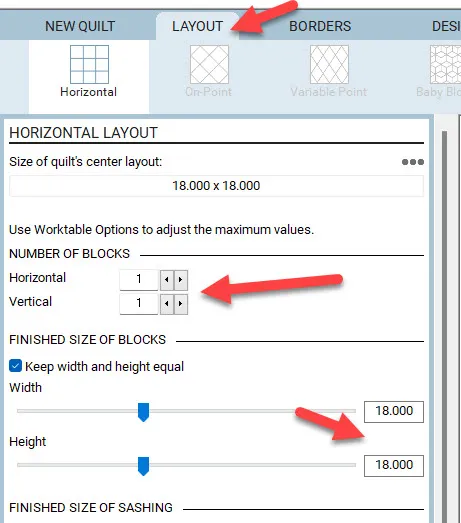
Click on the Layout tab at the top of the screen. Change the definition of the horizontal layout to be a 1 x 1 block and set the size to 18 x 18 inches.
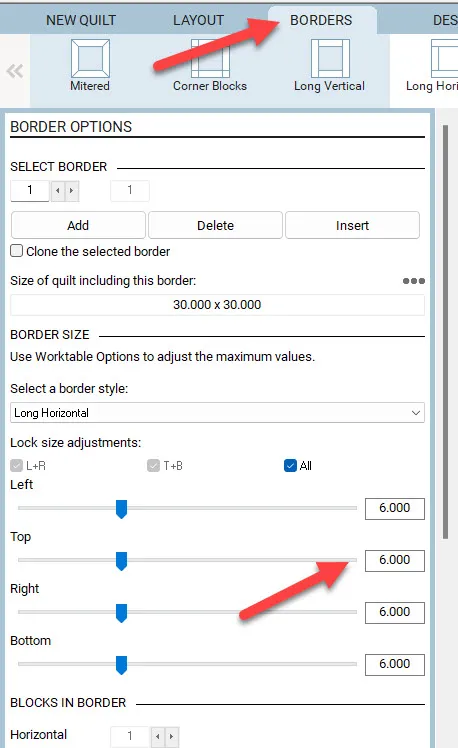
Click on the borders tab and set the definitions to be a 6 inch border on all sides.
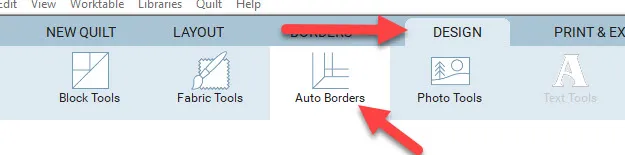
Click on the Design tab and select the ‘auto borders’ from the ribbon at the top of the screen.
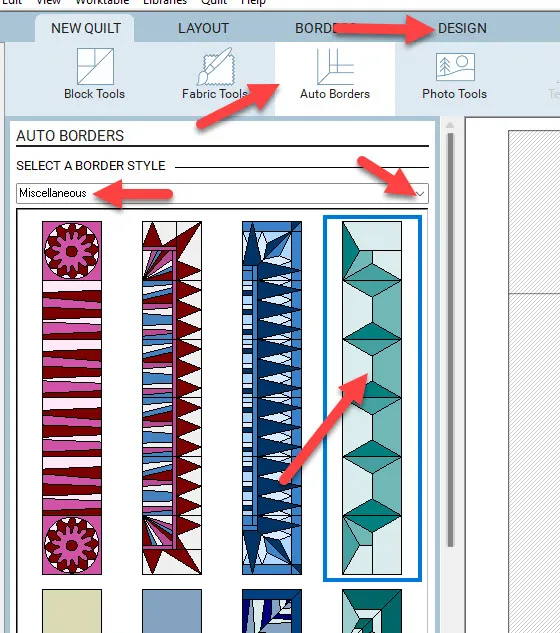
Click on the drop down arrow and choose any border option you wish to use. Click on the border option to select it and then move your cursor over to the drawing board and click once on the border area to set the new border design.

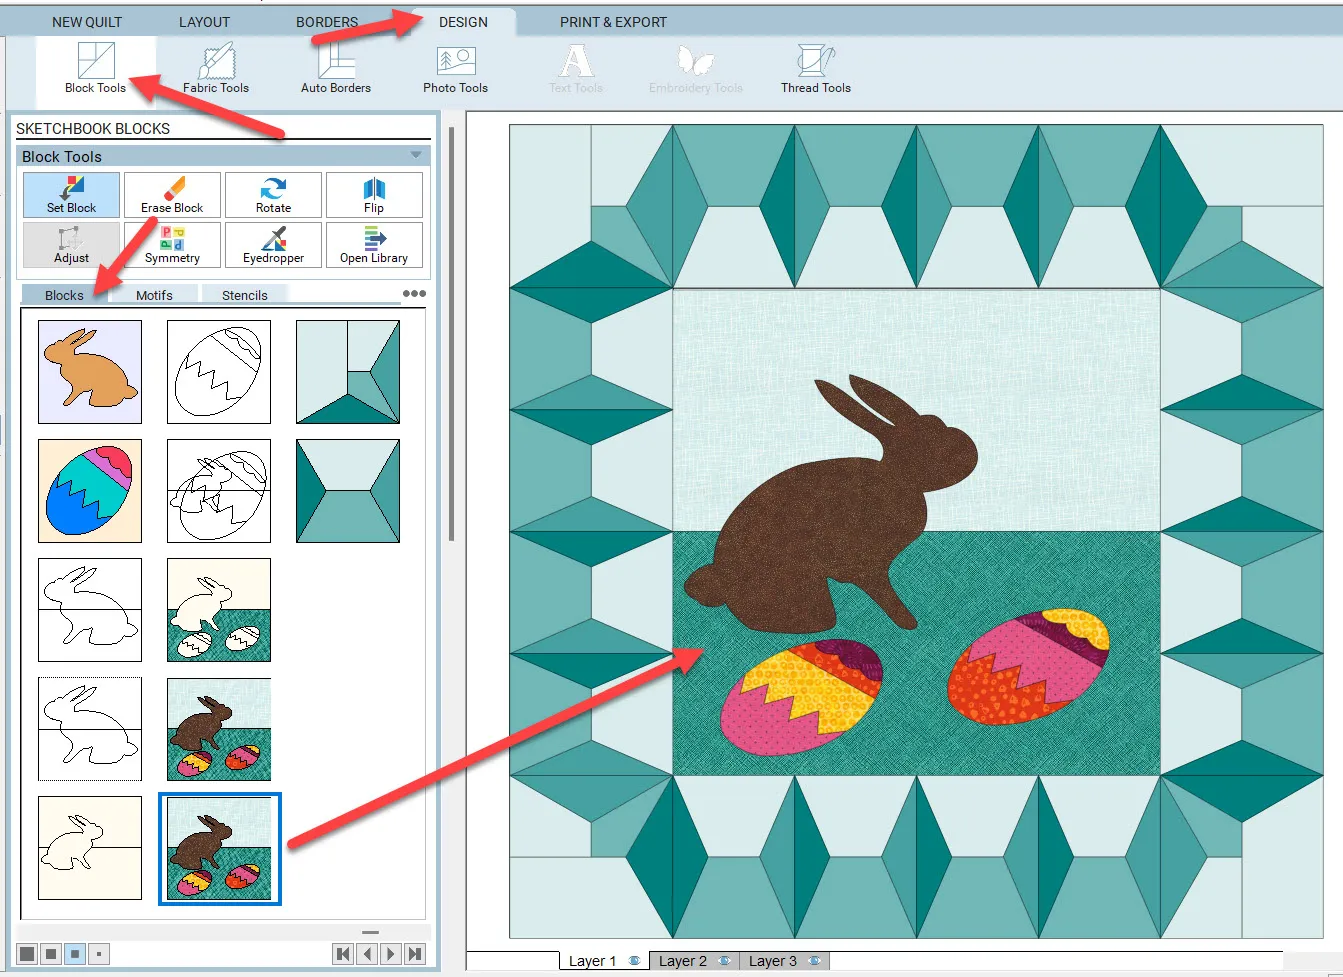
Under the Design tab, click on the Block Tool icon on the ribbon. Scroll through the block to find the bunny design. Click on it to select it and then move the cursor over to the worktable and click once in the center of the quilt to add the block design.
Click on the fabric tools icon on the ribbon at the top of the screen and recolor your border to work with the block fabric color choices.
Add to sketchbook ![]()
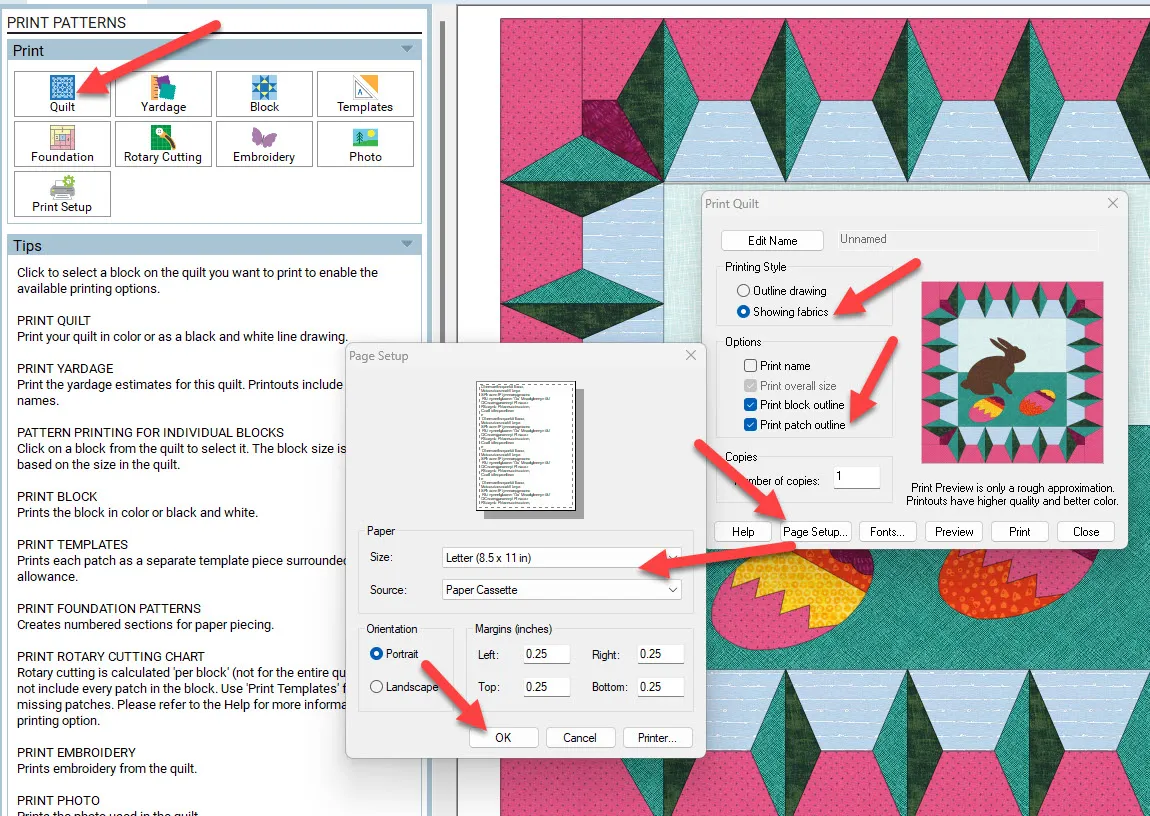
Click on the Print and Export tab at the top of the screen. Select the printer icon on the ribbon.

You can print a picture of your finished quilt design by clicking on the Quilt icon on the left side of the screen. In the print quilt box, click on ‘showing fabrics, print block outline, and print patch outline’. Click on the page setup and select the size of the paper you have in your home printer. Click OK when finished setting up the paper size.
Click on the ‘preview’ word at the bottom of the print quilt box. This will take you to the print page where you can print your colored design.
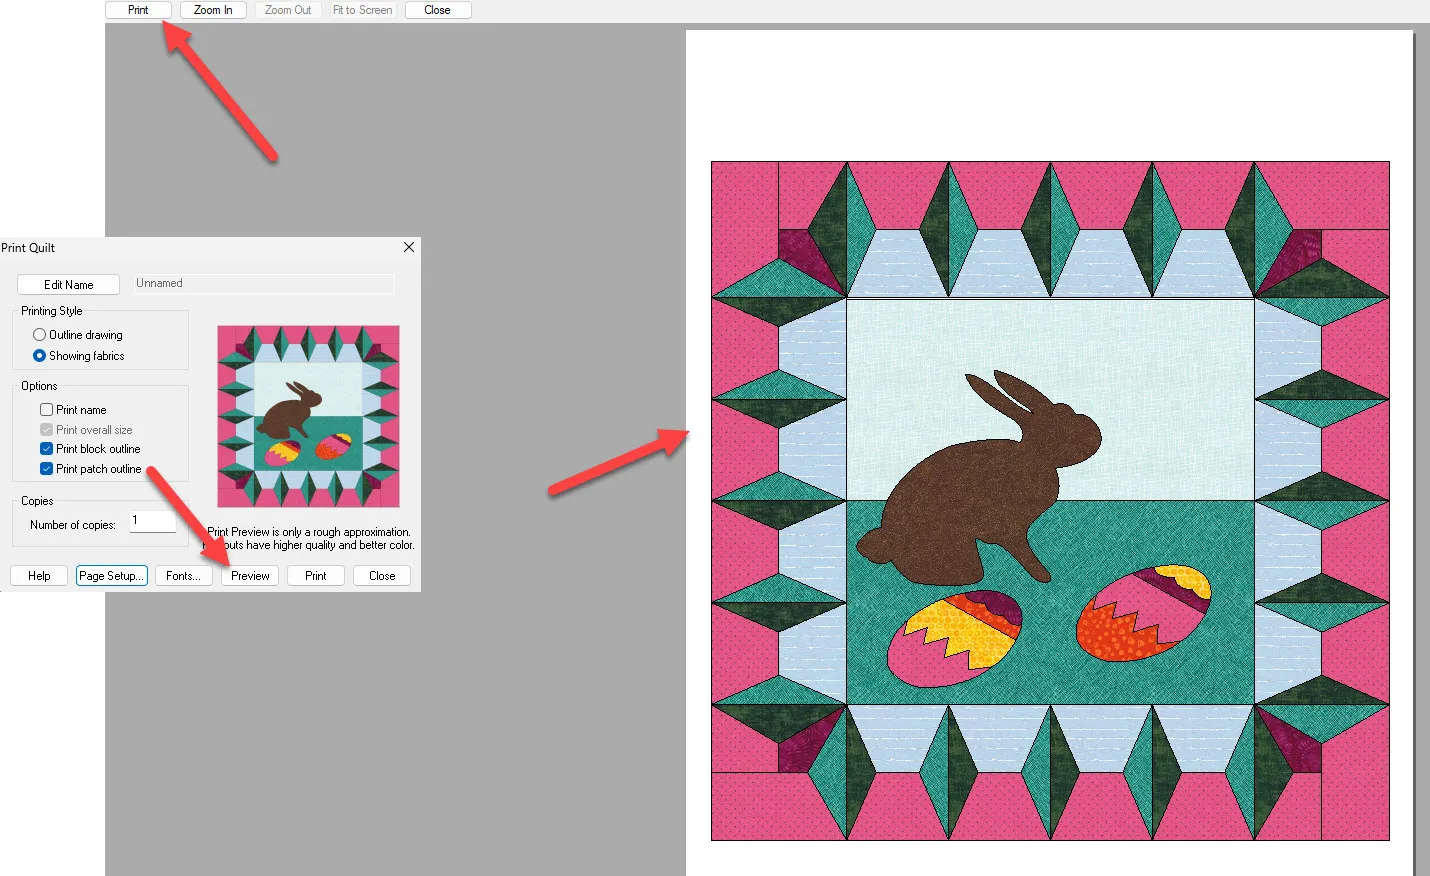
Close this box and return to the worktable.
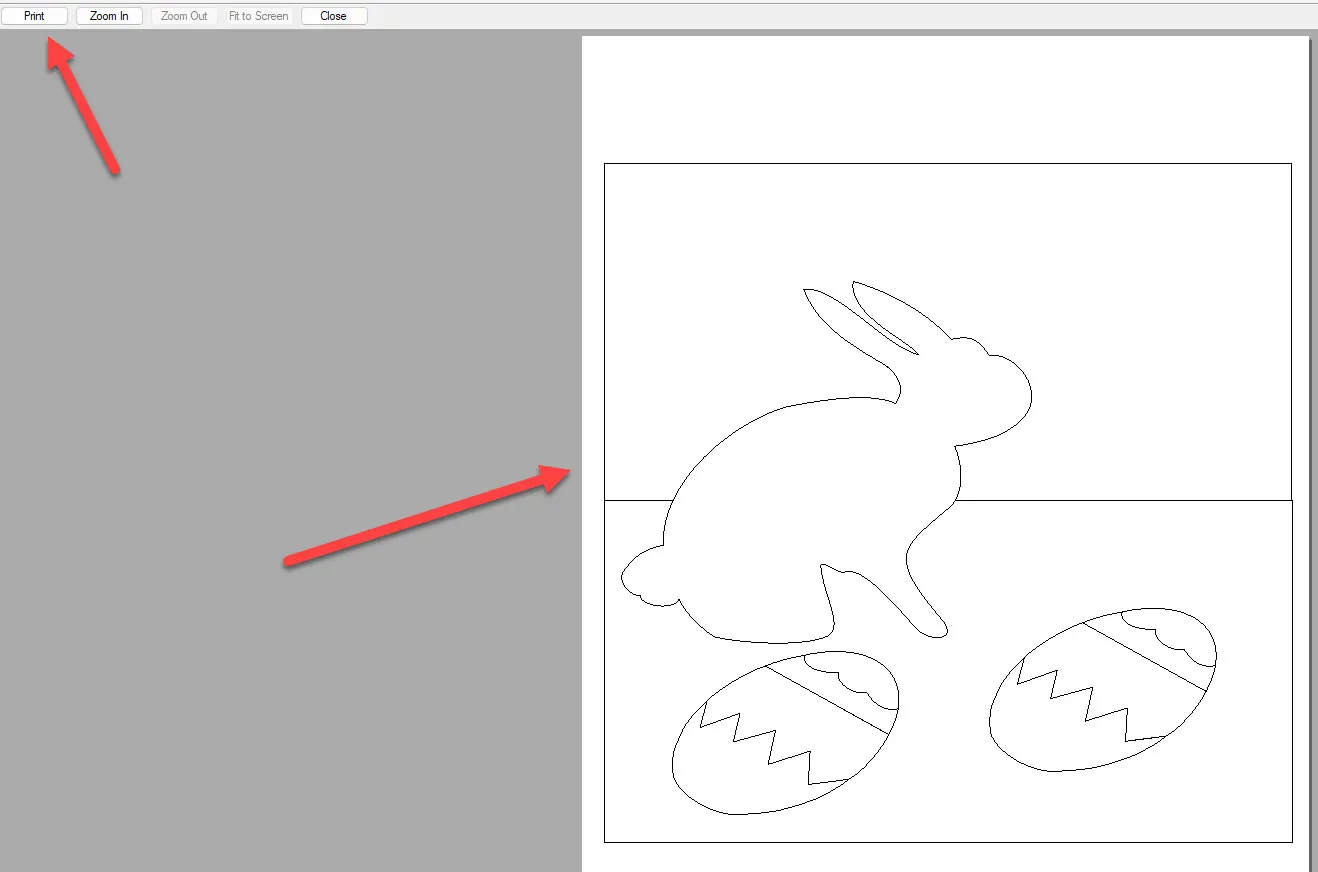
Click on the center block to select it. You will see a green selection box around the center block design. Click on the Block icon on the left side of the screen. In the print block box, change the size of the block to 8 x 8 inches as a custom block size. Select the ‘as an applique pattern’ for the printing style. Click on the preview box at the bottom of the screen.
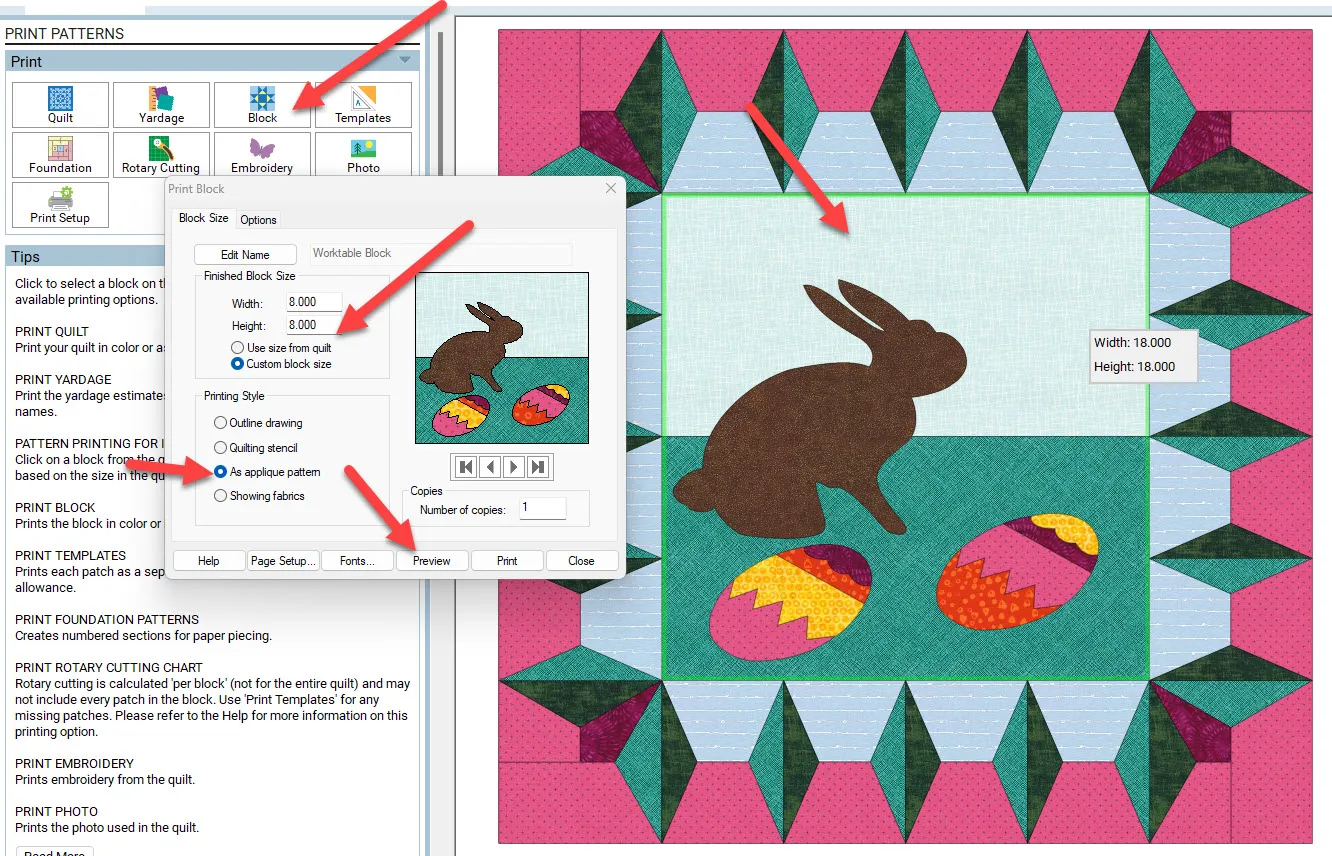
On the print screen, you will see an outline drawing of the center block of the quilt. This can be printed as a coloring page for young children. The colored design you printed previously can be used as an example of how to color the line drawing.
Use this quilt layout pattern as an Easter activity for your youngest children. Of course, you can always print the pattern to piece the design and make a small wall quilt to celebrate the Easter holiday also.


03-19-2023
12:01 pm
Wat grappig ik heb ook al ontdekt dat EQ8 heel handig is om iets met de kleinkinderen te doen. Mijn kleindochter vond het erg leuk om te zien hoe de quilt die ik 5 jaar geleden voor haar maakte er ook heel anders uit kan zien. Ze is nu net 9 geworden. Samen hebben we een quilt ‘gemaakt’ die we ook ingestuurd hebben. Ook heb ik bedacht dat een tekening met nummers er in ook een nummerkleurplaat voor ze kan zijn.
03-19-2023
12:27 pm
Gre-so glad to hear you enjoyed this post. I am glad to see you have used EQ8 in a similar way for your grandkids. The idea of printing numbers for them to color is a great learning tool for them. Thanks for posting your remarks!