Our quilts are often about color. Sometimes it is the design itself that is the focus, but the eye sees color before it sees patterns. I love designs that have a bit of a dimensional look and are quickly created with color. Launch your EQ8 project to start. On the opening screen, click on the little piece of paper with the green starburst on it on the upper left side of the screen. This is the new project icon. In the project sketchbook, name your project ‘Quick Coloring for Maximum Effect’. Click on the quilt worktable icon on the upper right side of the screen. Choose NEW QUILT>One Patch from the ribbon at the top of the screen. The default for the program is to open to the Hexagon one patch layout. Click on the Layout tab at the top of the screen. In the drop-down menu, select the rectangle
Favorite Posts
EQ8 Lessons with Yvonne-QUICK COLORING FOR MAXIMUM EFFECT
Posted 09-19-2021 by Yvonne | Posted in: EQ8 EQ8 Lessons with Yvonne Favorite Posts
Design & Discover – Using Layer 2 to Design Quilts
Posted 09-01-2021 by Heidi | Posted in: Design & Discover
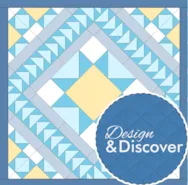
When you think of Layer 2 you may think of using it for applique and motifs, which is correct. However, you can use Layer 2 for elements of your quilt design as well. For example, to design a quilt with a block on-point in the center with blocks around the center. Click Design a quilt from scratch Click On Point Click the DESIGN tab Click Block Tools > Set Block Click on Layer 2 Click on a block and drag in onto the quilt. Click the Adjust tool. Place a check mark next to Preserve aspect ratio while resizing Type in the new size for your block (in the example it is 18 x 18) Enter the Block Rotation degree: 45 Click Center Vertically Click Center Horizontally Click on Layer 1 and place the rest of your blocks as desired. Click on the Fabric Tools and recolor any way you
Design & Discover – Sashing!
Posted 08-01-2021 by Heidi | Posted in: Design & Discover
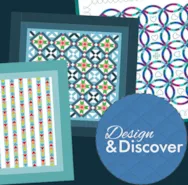
This month we’ll be learning a few different ways to design with sashing! Open EQ8 and click Design a quilt from scratch. Click Horizontal Click LAYOUT Use the sliders to choose the width and height of the sashing (for this example, mine are 1.5). You can also choose to check or uncheck Include sash border and Keep width and height equal. Click the DESIGN tab Click Open Library Any block can be placed in sashing but there are specific blocks designed to fit well. Click the plus sign + next to 10 Sashing to see some block options. Choose a few blocks and click Add to Sketchbook. Click Close. Click the Set Block tool to place the blocks. Click the Rotate tool to rotate the vertical sash blocks. Click Fabric Tools and recolor as desired. Click Add to Project Sketchbook . If you haven’t named your project yet, EQ8 will prompt you
EQ8 Lessons with Yvonne-Create Your Quilt Stencil to Match Your Block
Posted 07-18-2021 by Yvonne | Posted in: EQ8 EQ8 Lessons with Yvonne Favorite Posts
Once you create a block and quilt layout, the next step is to quilt the layout. Sometimes you have no idea what would look good for a quilting stitch. EQ8 can help us decide how to quilt a design by matching a block layout pattern with a quilt stencil. EQ has loads of stencils built into the library but they may not match exactly what you have designed for a quilt block. You can use your block drawing as a start for creating the stencil. Open your EQ8 by double-clicking onto the logo on the desktop. When the program opens name a new project file “PRACTICE STENCILS”. Click on the block worktable icon and select NEW BLOCK>Pieced>EasyDraw for the block worktable. On the properties bar for the block worktable, use the default size of 6 x 6 inches and snaps at 12 x 12. Click on the grid tool to
Design & Discover – Saving Fabrics in EQ8
Posted 07-01-2021 by Heidi | Posted in: Design & Discover
If you want to save certain groups of fabrics to use in multiple projects in EQ8, there are a few ways to do this. For the purposes of the lesson this month, the first step will be to gather all the fabrics you want and add them to your Project Sketchbook. You can also do this a few ways… You can search through the fabrics already in EQ8 and add them to your sketchbook. You can also import your fabric (this includes fabric that you have scanned, taken photos of, or downloaded from websites). If you are getting your fabric this way, be sure to check the scale if necessary. Another way is to import fabrics from other projects. Now that you have your fabrics collected, let’s cover the different ways of saving them. The first (and quickest) way is to change your default fabrics. When you start a new
Design & Discover – Bed-Sized Quilts Using the Layout Libraries
Posted 06-01-2021 by Heidi | Posted in: Design & Discover
This month we’ll be using the Layout Library to design quilts. In this lesson you’ll see how quick it can be to design a twin and queen sized quilt when you start with a pre-designed layout. We’ll also design a king sized quilt and get into a little more detail modifying the layout and adding stencils. Click Libraries > Layout Library Under Layouts by Size click Twin Click 7″ Pieced Vertical Strip Click Edit to Quilt Worktable It will open to the DESIGN tab Click Block Tools > Set Block Click on a block of your choice and click on a patch on the quilt. EQ Default Flying Geese is used in the example. If you’d like a block in every patch, since this is a Vertical Strip layout, hold down the Ctrl/Command key on your keyboard and click in each strip. Click Layer 2 at the bottom of the
EQ8 Lessons with Yvonne-Fabric Choices Make A Difference
Posted 05-16-2021 by Yvonne | Posted in: EQ8 EQ8 Lessons with Yvonne Favorite Posts
The month of May makes me think of Spring flowers and Mother’s Day. There are some wonderful applique designs built into EQ8 that host a variety of flower shapes in one applique block. This one block can look so totally different depending on the fabric choices used. You can try out different fabrics in your designs to see what gives the best overall feel for the quilt block before you even begin shopping for the fabrics or before you begin cutting the fabrics already in your stash. Launch your EQ8 program and name the project May Flowers. Click on the OK at the bottom of the project helper box. At the top of the screen, click on LIBRARIES>Block Library. In the block libraries box, click on the word ‘search>by notecard’. In the search block notecard box, type in the word ‘mother’ and then click on the ‘search at the bottom of


