2020 was a challenging year. Start 2021 by treating yourself. I turn to my sewing room for inspiration and it provides me with a calming retreat area in my own home. It starts with my favorite inspiration tool–EQ8. Browsing the huge built-in libraries for blocks and layouts gives me just the right space to start experimenting with new design ideas I had not tried before. I like to start my process by looking through the block library in EQ8. I also have many add-on libraries that the EQ company has provided us with to add to the already massive library of blocks in the program. I simply scroll through the library and look at the blocks and choose one that I have not tried before. Open your EQ8 program and start a new project called ‘Treat Yourself in 2021′. I can look at the blocks by category or by construction method.
EQ8 Lessons with Yvonne
EQ8 Lessons with Yvonne-Treat Yourself
Posted 01-17-2021 by Yvonne | Posted in: EQ8 EQ8 Lessons with Yvonne Favorite Posts
Lessons with Yvonne – Use Your Birthstone Color to Create a Quilt
Posted 11-15-2020 by Yvonne | Posted in: EQ8 EQ8 Lessons with Yvonne Favorite Posts
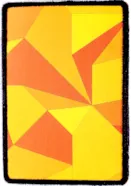
My birthday is in November. The birthstone for that month is Topaz. This is a yellow/orange color. I don’t like that color at all. But, as a challenge to myself, I will make a monochromatic block using that color. I find it is good to challenge myself in all kinds of ways as this is when I grow the most and learn all kinds of discoveries. I once made a quilt in browns and oranges that I don’t care for either, but it is now one of my favorite quilts. Surprise! Open your EQ8 and name your project ‘birthstone designs’. Click on the block worktable icon on the upper right side of the screen. Click on NEW BLOCK>Pieced>Easy Draw. Set the block size to be an 8 x 8-inch block with 24 snaps horizontal and vertical. I don’t care for the colors I am using so I will create areas
Design and Sew Along 3 – Lesson Six
Posted 10-11-2020 by Yvonne | Posted in: Design and Sew Along EQ8 Lessons with Yvonne Favorite Posts Lesson 6
Welcome to DESIGN AND SEW ALONG 3- LESSON SIX Lessons with Yvonne. I hope you have enjoyed the first five lessons of this series. In this final lesson, we will work with the quilt layout worktable to bring our lesson block designs together to create quilt design options. The name of this class is DESIGN AND SEW ALONG. I do hope you are stitching some of the designs we have created in our EQ8 program. I would love to see some of the designs that are sewn. Remember to watch the video at the end of the blog to start with to familiarize yourself with the steps we will be taking during these class written lessons. A picture is worth a thousand words and visual learning is helpful for any of the classes. Remember to save an image of your favorite quilt from this class to post to the EQ blog page in the comment
Design and Sew Along 3 – Lesson Five
Posted 10-04-2020 by Yvonne | Posted in: Design and Sew Along EQ8 Lessons with Yvonne Favorite Posts Lesson 5
Welcome to DESIGN AND SEW ALONG 3- LESSON Five Lessons with Yvonne. I hope you have enjoyed the first four lessons of this series. In this lesson, we will explore the Summer months and the holidays of July 4 (USA) July 1 (Canada). Each set of lessons explores some different tools to use to create the 16-inch blocks we determined to be the size of all the blocks in our continuing lessons. The name of this class is DESIGN AND SEW ALONG. I do hope you are sewing some of the designs we have created in our EQ8 program. I would love to see some of the designs that are sewn. Remember to watch the video at the end of the blog to start with to familiarize yourself with the steps we will be taking during these class written lessons. A picture is worth a thousand words and visual learning is helpful for
Design and Sew Along 3 – Lesson Four
Posted 09-27-2020 by Yvonne | Posted in: Design and Sew Along EQ8 Lessons with Yvonne Favorite Posts Lesson 4
Welcome to DESIGN AND SEW ALONG 3- LESSON FOUR Lessons with Yvonne. I hope you have enjoyed the first three lessons of this series. In this lesson, we will be looking ahead to Springtime. During Spring we have the holiday of Easter. You may choose to not celebrate the holiday, celebrate as a religious holiday, or celebrate in the secular retail promotion of the holiday. The choice will be yours. Remember to watch the video at the end of the blog to start with to familiarize yourself with the steps we will be taking during these classes written lessons. A picture is worth a thousand words and visual learning is helpful for any of the classes. Remember to save an image of your favorite block from this class to post to the EQ blog page in the comment section. Please make sure your image you post is indeed from this class. If you need
Design and Sew Along 3 – Lesson Three
Posted 09-20-2020 by Yvonne | Posted in: Design and Sew Along EQ8 Lessons with Yvonne Favorite Posts Lesson 3
Welcome to DESIGN AND SEW ALONG 3- LESSON THREE Lessons with Yvonne. I hope you have enjoyed the first two lessons of this series. In this lesson, we will explore the winter months and the holidays of New Year, and Valentine’s Day. Each set of lessons explores some different tools to use to create the 16-inch blocks we determined to be the size of all the blocks in our continuing lessons. Parts of this lesson three will be challenging. So, if you found the first two lessons a little simple for you, hold on tight as this gets more challenging! Remember to watch the video at the end of the blog to start with to familiarize yourself with the steps we will be taking during these classes written lessons. A picture is worth a thousand words and visual learning is helpful for any of the classes. Remember to save an
Lessons with Yvonne – Back to School
Posted 09-20-2020 by Yvonne | Posted in: EQ8 EQ8 Lessons with Yvonne Favorite Posts
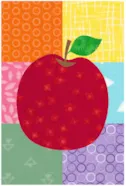
Let’s celebrate going back to school! A great way to start a new school year is to make a little gift for the teacher. EQ8 can help us design a very simple little ‘mug rug/coaster’ for the teacher. Open your EQ8 and name a new project called ‘back to school’. Click on the block worktable icon on the upper right side of the screen. Click on New Block>Pieced and Applique>Easy Draw. At the top of the block worktable, set the dimensions to be 4 x 6 inches with 24 snaps horizontal and vertical. On the left side of the screen, click on the grid tool to select it. Set the properties to be 2 columns by 3 rows. Move the cursor over to the drawing table and click/hold/drag/release the cursor from the upper left side of the block area to the lower right side of the block area. Add to


