Let’s celebrate going back to school! A great way to start a new school year is to make a little gift for the teacher. EQ8 can help us design a very simple little ‘mug rug/coaster’ for the teacher.
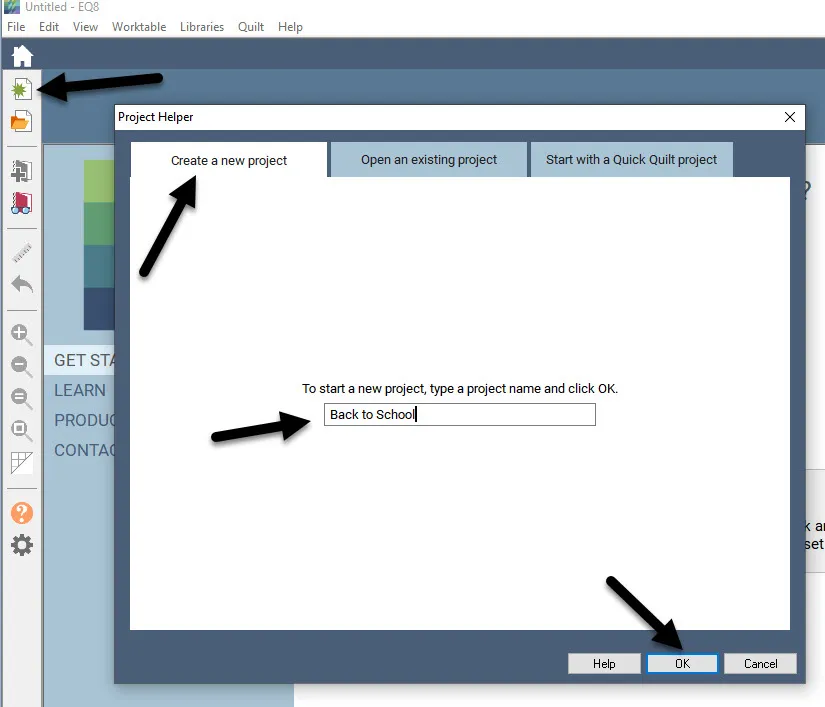
Open your EQ8  and name a new project called ‘back to school’.
Click on the block worktable icon on the upper right side of the screen.
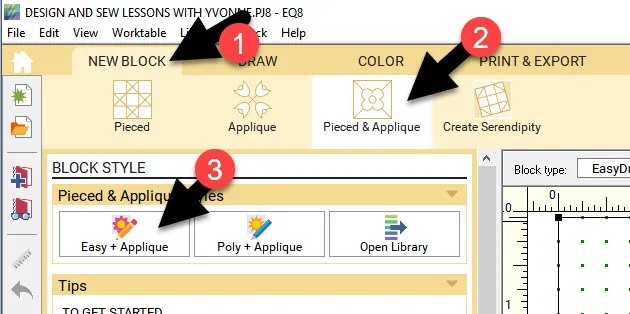
Click on New Block>Pieced and Applique>Easy Draw.
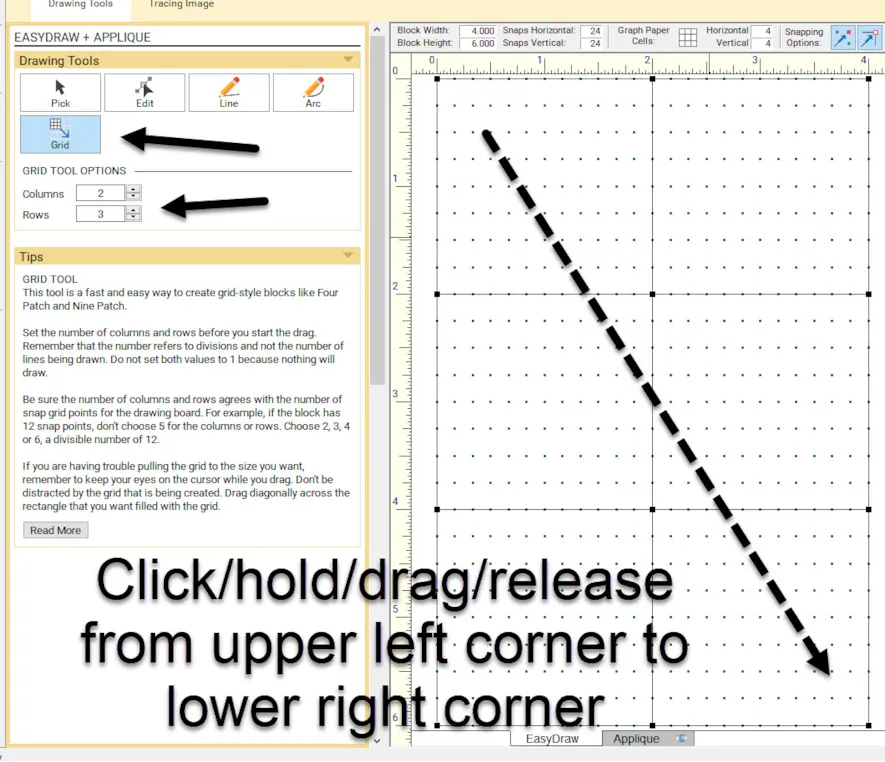
At the top of the block worktable, set the dimensions to be 4 x 6 inches with 24 snaps horizontal and vertical.
On the left side of the screen, click on the grid tool ![]() to select it. Set the properties to be 2 columns by 3 rows. Move the cursor over to the drawing table and click/hold/drag/release the cursor from the upper left side of the block area to the lower right side of the block area.
to select it. Set the properties to be 2 columns by 3 rows. Move the cursor over to the drawing table and click/hold/drag/release the cursor from the upper left side of the block area to the lower right side of the block area.
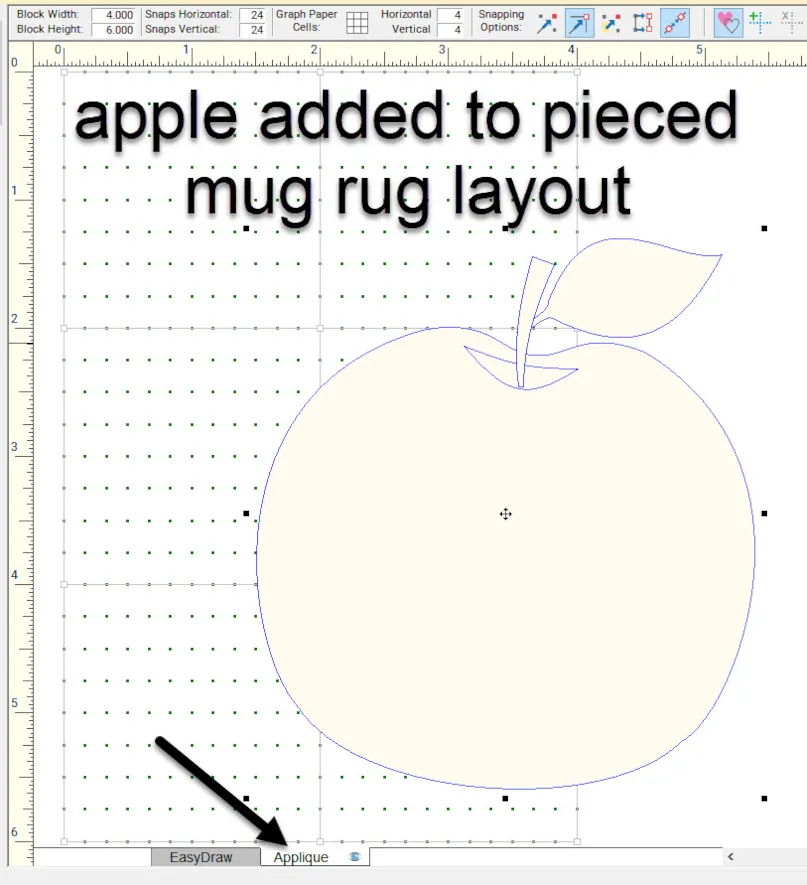
Click on the applique tab at the bottom of the screen.
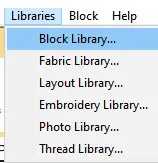
At the top of the screen, click on LIBRARIES> Block Library.
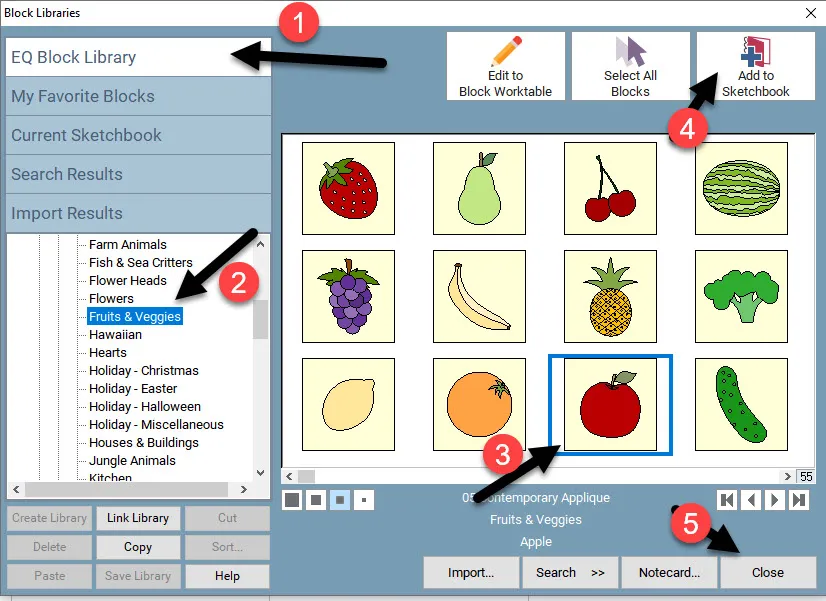
In the library box navigate to 05 Contemporary applique>fruits and veggies> and select the apple.
Once the apple is selected, click on ‘add to sketchbook’. Click on the close at the bottom of the box.
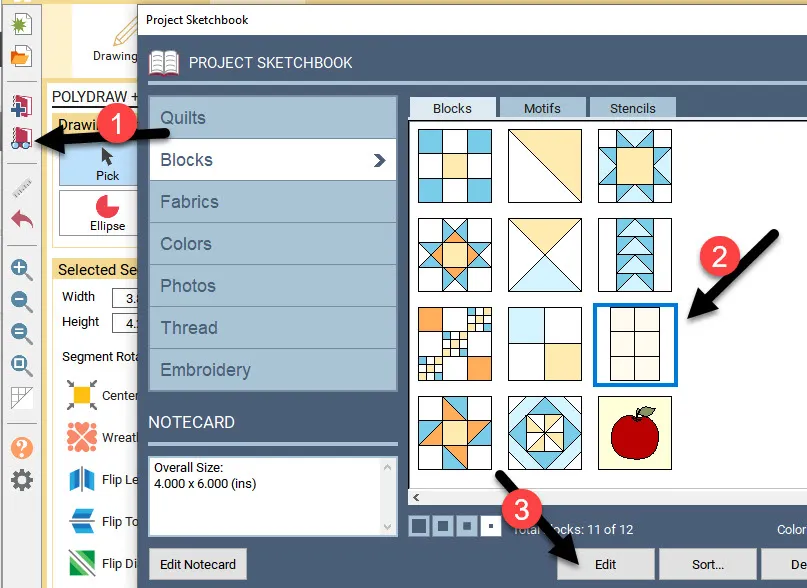
Click on the view sketchbook icon![]() on the left side of the screen.
on the left side of the screen.
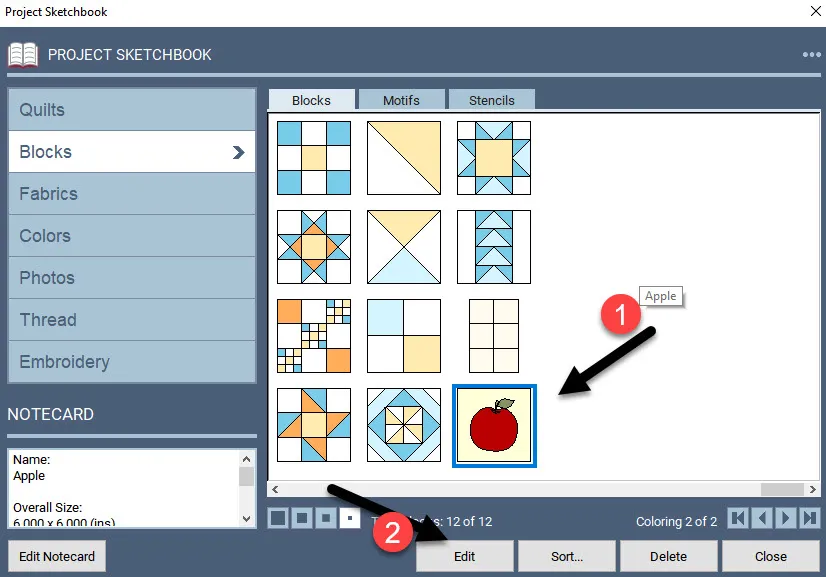
When the sketchbook opens, click on the apple to select it and then click on the word ‘edit’ at the bottom of the box.
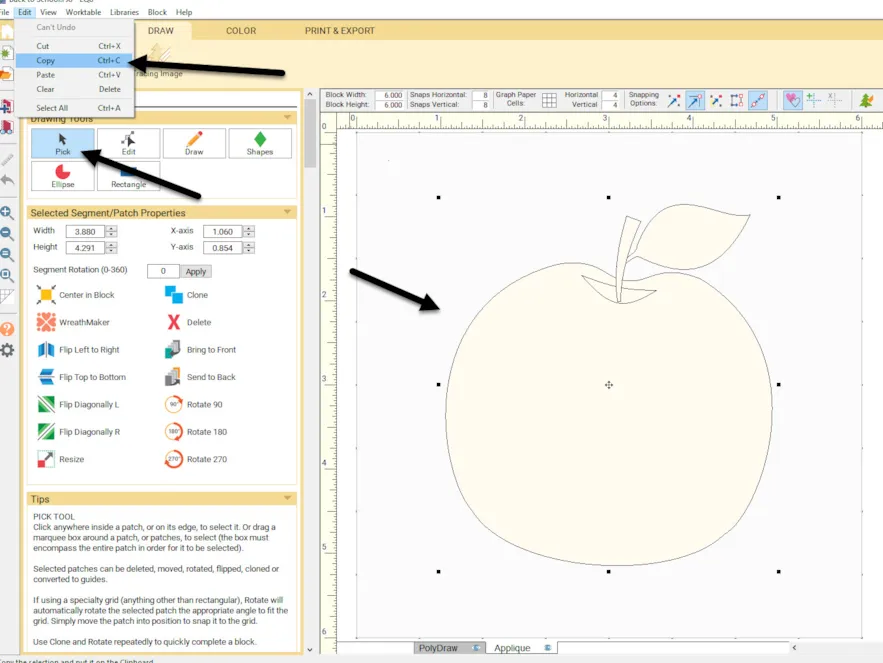
The apple opens on the worktable it was created on. We need to copy this applique apple and then edit it to the worktable where we created our block design.
Select the apple image by using the pick tool ![]() to click/hold/drag/release a selection box around the design. Once the selection box is shown, click on EDIT>copy (or CTRL +C) to place it on the windows clipboard.
to click/hold/drag/release a selection box around the design. Once the selection box is shown, click on EDIT>copy (or CTRL +C) to place it on the windows clipboard.
Click on the view sketchbook icon ![]() and select the mug rug piecing design and edit it to the worktable.
and select the mug rug piecing design and edit it to the worktable.
On the worktable, make sure you are still on the applique tab and then right click>paste (or CTRL +V) to have the apple design appear.
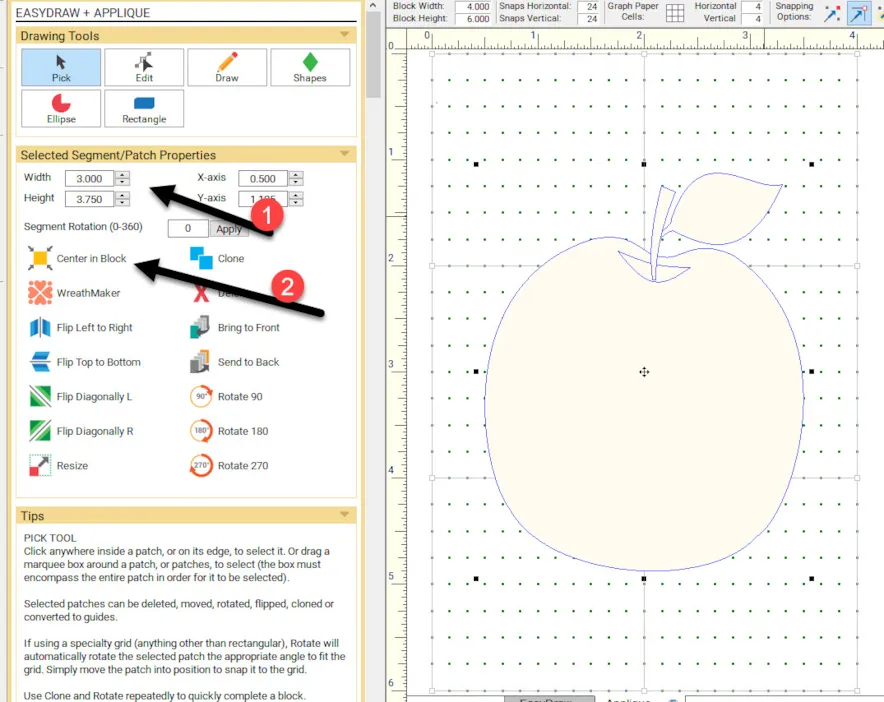
While the design is still selected, resize it to fit better and then click on the ‘center in block’ icon.![]()
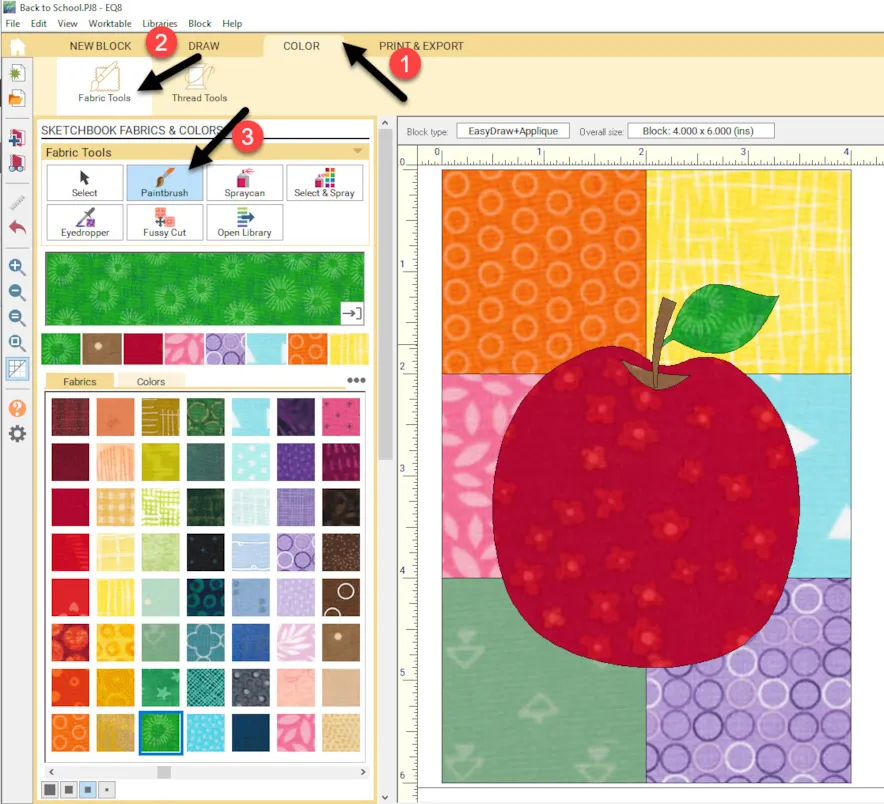
Click on the color tab at the top of the screen and use the fabric tools to select and place the colored fabric choices onto the design area.
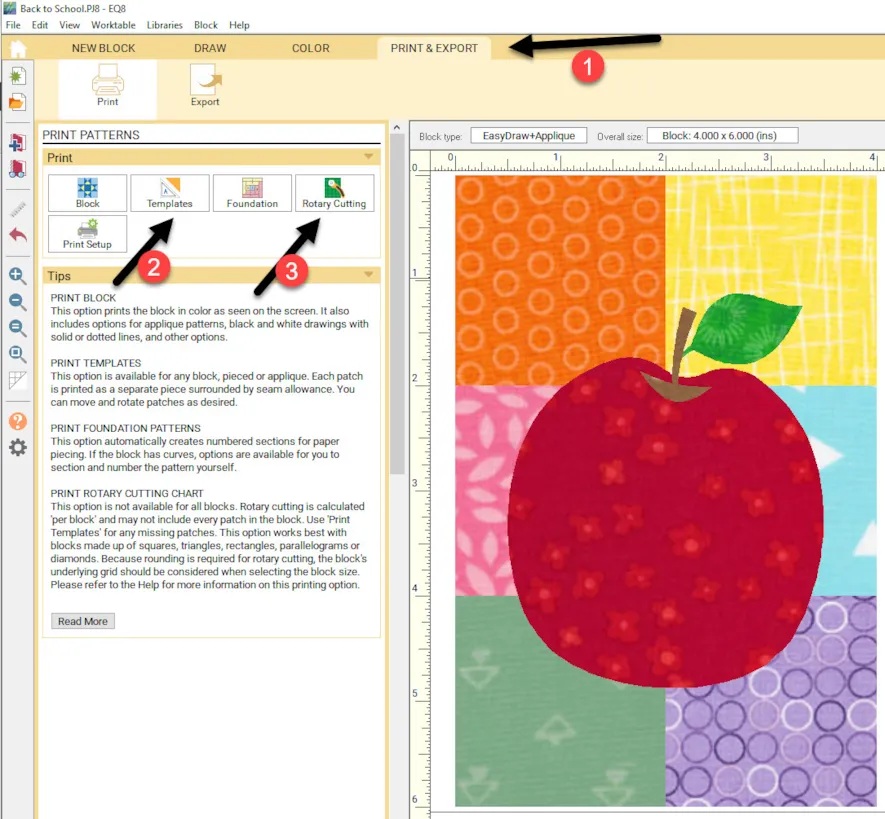
Click on the Print and Export tab at the top of the screen and print your cutting and applique directions.
EQ8 makes it easy for us to get creative with our small gift projects. See what you can create as a back to school gift for your little ones, the teacher, the school principal, or more!






09-20-2020
2:11 pm
hehehehe, after/following this lesson, I went a different direction!
but there’s no way to attach an image …
09-20-2020
2:35 pm
Elizabeth-I love that you take the lesson in a different direction. You can click on the print and export tab and save you design as an image and upload it to the class. I would love to see what you gave done.
10-18-2020
1:39 pm
Like Elizabeth, I tend to tweak a lesson now that I have been following along for awhile. I had just finished the third session of the Design and Sew series, when I opened this lesson. The techniques used are very similar. So rather than follow the mug mat verbatim I did my own thing. I used the block created in the prior lesson that was made up of squares and rectangles. I resized it for this one going from a 16″ square to 4″ x 6″. Since I had been focusing on holidays, I chose the candle instead of an apple. Used the skills learned to select the all the appliqué at once, copy, paste and center it. I’d share what I did but the lesson doesn’t include a way to select and import an image.
10-18-2020
2:38 pm
Gwyned–That is great! Learning techniques and combining them to create items that are one of a kind for you is wonderful. The opportunity to create new designs is limitless in EQ8.
01-03-2021
11:53 pm
Yvonne, again simple yet refreshing ty
01-04-2021
3:37 pm
Helen- yes it is simple but a challenge for me as it is colors I really don’t like. I challenge myself often to see if my opinion changes about my likes and dislikes!
04-19-2021
3:58 pm
will make this for next year.