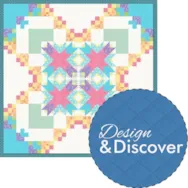
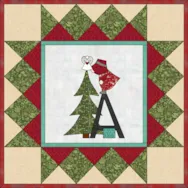
We’ve updated Club EQ! It’s now called Design & Discover! Now you can follow along with a lesson and submit your version of the design right on the blog with a link up. If you have a blog, make sure to add your site too. Let’s visit each others’ blogs and all get to know each other! This month we are making this quilt: Let’s get started! 1. Click Quilt Worktable 2. Click the Design tab 3. Click the Set Block tool 4. Click the block EQ Default Nine Patch Chain 5. Hold down the Ctrl key on your keyboard (for PC) or the Command key (for Mac) and click on a square in the quilt layout. It will fill all the spaces with this block. 6. Click the Block Worktable 7. Click Block > Serendipity > Kaleidoscope Block 8. Click the EQ Default Nine Patch Chain on the left
Using Serendipity and the Randomize tool in Quilt Design!
Posted 03-01-2018 by Heidi | Posted in: Design & Discover
EQ8 Lessons with Lori – Scrappy Toddler Tumbler Quilt
Posted 02-15-2018 by Lori | Posted in: EQ8 Lessons with Lori
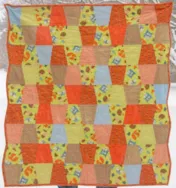
This adorable scrappy toddler tumbler quilt is made with a Tumbler block. In this lesson, we will discover how to create a One Patch quilt and how to make a Custom Patch. We will use the custom patch to create the same size 5 inch tumbler die that goes with my Sizzix Fabi fabric cutter, If you don’t have a die cut machine, you can print the template instead. Lets create! Scrappy Toddler Tumbler Quilt Size: 40″ x 40″ Skill Builders: Working with one patch designs Creating a custom patch On to the design! Open EQ8. Let’s name the Project. The project name appears at the top left of the EQ8 Window. Right now the project says Untitled – EQ8. On the left side toolbar, click the New project button. On the Create a new project tab, type in the project name field Scrappy Tumbler. Click OK. The box will close. Notice
Design and Discover – includes Strip Quilt Lesson!
Posted 02-01-2018 by Heidi | Posted in: Club EQ Design & Discover
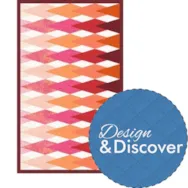
We’ve updated Club EQ! It’s now called Design & Discover! Now you can follow along with a lesson and submit your version of the design right on the blog with a link up. If you have a blog, make sure to add your site too. Let’s visit each others’ blogs and all get to know each other! Now on to the lesson… This month we are making two strip quilts. 1. Click Quilt Worktable 2. Click New Quilt and Vertical Strip 3. Click on the Layout tab 4. For the first strip choose Pieced Blocks for a Strip Style and 5 for the Number of Blocks. For the second strip choose Half Drop Blocks for a Strip Style and 5 for the Number of Blocks. For the third strip choose Pieced Blocks for a Strip Style and 5 for the Number of Blocks. For the fourth strip choose Half Drop Blocks
Club EQ is now Design and Discover! Plus Lesson and Challenge!
Posted 01-01-2018 by Heidi | Posted in: Club EQ Design & Discover
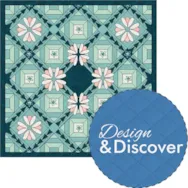
We’ve updated Club EQ (again!)! Now you can follow along with a lesson and submit your version of the design right on the blog with a link up! To Link Up Your Photo Scroll down to the comment form at the end of this post. Fill in your info and make sure you select an image for your comment (this will be the photo of your quilt). If you have a blog, make sure to add your site too. Let’s visit each others’ blogs and all get to know each other! Now on to the lesson… We are going to be making this quilt (or your own variation! If you don’t want to use the specific blocks I’ve used, that’s OK!). It has things on different layers, sashing, stencils…lots of fun stuff! Click on Quilt Worktable Click On-Point Layout Enter these settings: Click the Design tab Click Block Tools Click
EQStitch Sunday Stitch December 2017
Posted 12-17-2017 by Yvonne | Posted in: EQStitch Favorite Posts Sunday Stitch
Are you using your EQStitch to design Christmas gifts? Adding that special touch to a design with a monogram, custom design, or unique message makes the gifts we give mean more. It shows we thought about the receiver of the gift while designing and stitching their gift. Using the features of EQStitch, you can double check your digitizing work before you go to the machine. This is especially important when time is limited. Catch your errors and correct them before spending precious time stitching away only to find you are less than happy with the results. You can rely on EQStitch to help you immensely in the digitizing process. Open your EQStitch program. Click on the stitch worktable icon and then select embroidery as the new design type from the drop down menu. Click on the oval tool from the toolbar and select the heart shape. Move the cursor over
The Story of our Holiday Sunbonnet Sue
Posted 12-01-2017 by Jenny | Posted in: Downloads EQ News and Press EQ8
If you’ve been with us for a while, you’ll notice that each year around this time, we have a cute little visitor to our site: It’s our friend, Sunbonnet Sue, and she has the very important job of decorating the tree each year! She holds a special place in our hearts here at EQ and I thought I’d share a little bit about her story today. Penny McMorris & Dean Neumann, EQ founders The Sunbonnet Sue animation was created by Dean Neumann, EQ co-founder and programmer. She made her first appearance on our site back in 1996, shortly after our first website was launched. EQ3 was our current version of the software at that time. EQ3 could only export PCX files (PiCture eXchange) for images. Dean made the animation by drawing individual blocks on the Block Worktable for each of the movements. He exported a PCX for each block and
Design & Discover – Using Panels!
Posted 12-01-2017 by Heidi | Posted in: Club EQ Design & Discover EQ8
Using Panels! A question that we get a lot is how to use panels in quilts. So, that is what we are doing this month! Here is the quilt I created. Download the EQ8 project here. I used Petit Fleurs Alphabet Blocks Fabric Panel by Carolyn Gavin for Windham Fabrics. (There is a whole line of fabrics that go along with it and I think they are adorable.) First I searched the internet to get a full image of the panel. (If you are using a panel you already have and can’t find the image on the internet you can take a picture of it on your phone and email it to yourself.) I saved the image to my desktop. Now, open EQ8. Click Libraries > Photo Library (Here is more information on when to import something as a fabric and when to import it as a photo.) Click the


