

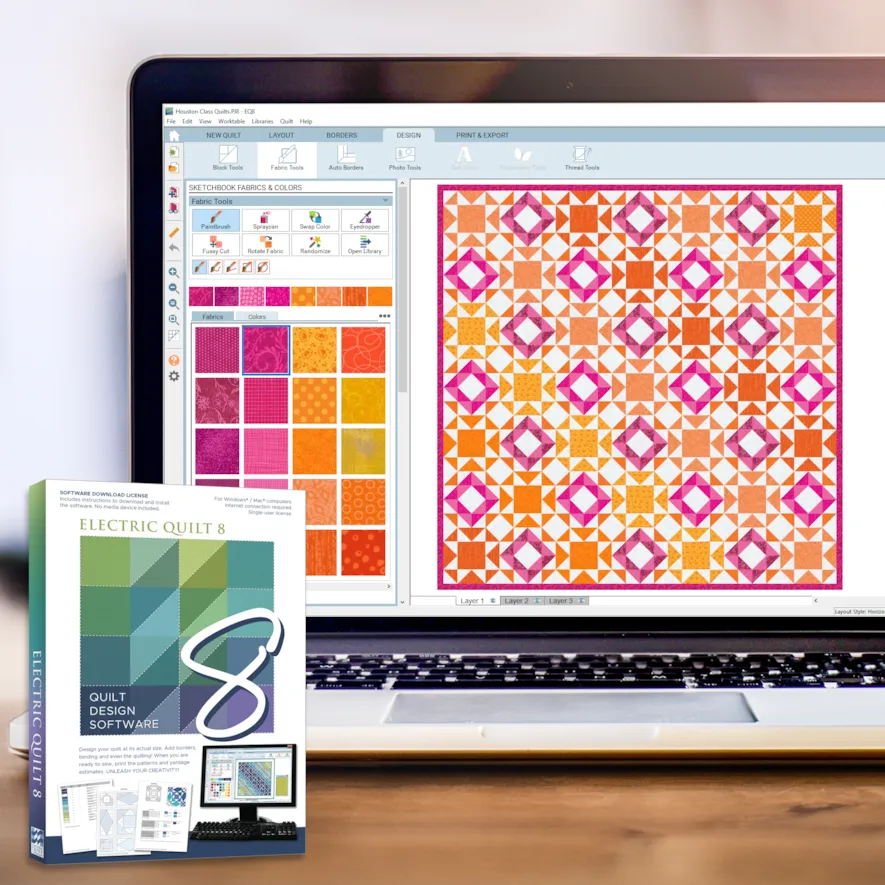
This post focuses on Beginner Basics for new EQ8 Users. If you are new to EQ8, learning to save your design work is a big deal. There is nothing more frustrating than designing a quilt block or quilt and then not being able to find it or thinking it has disappeared. As I teach Beginner EQ8 classes across the country, I find Saving your Projects and Designs to be one of most important beginner basics to learn. In this lesson, I am going to try to demystify projects and sketchbooks and how to save those precious designs.
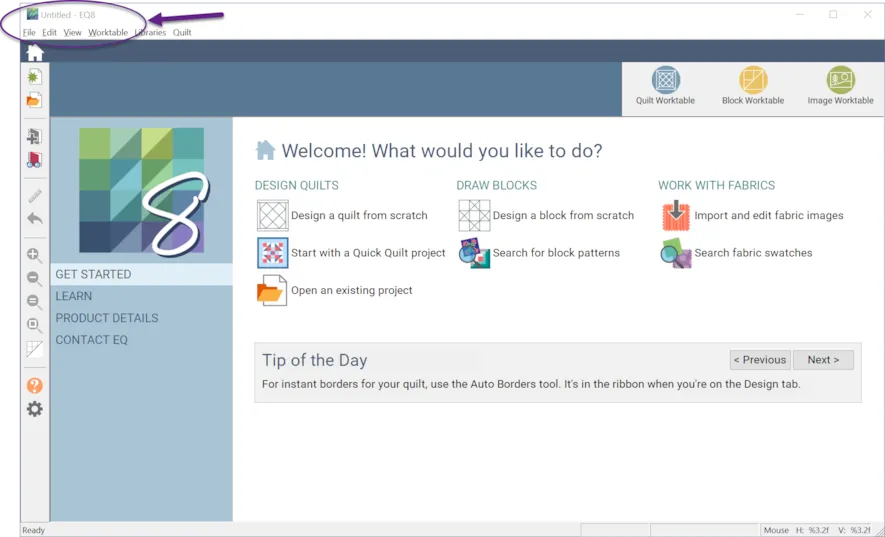
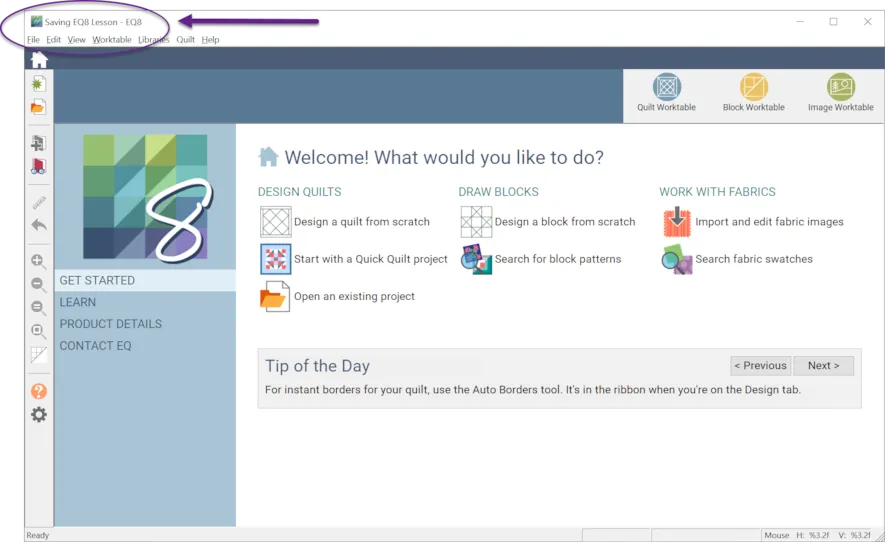
When you first open EQ8, it opens an UNNAMED project. You can always tell the name of the project by looking in the top left for Windows and hovering on the top center for Mac. It will say Untitled-EQ8.
This is a fresh new Project with only default information in it, so it is ready to use. But it has no name and only projects with a name can be saved properly.
Now this next part is going to be hard. You need to forget how any other software program saves information, EQ8 is unique, it does not save like Microsoft Word or other software you are used to using. Just hitting FILE SAVE or FILE SAVE AS will NOT necessarily save the things you want. You will need to have a better understanding of the file structures and how things are organized to be able to save. Trust me, when the light bulb comes on and you get the EQ8 structure, saving your work will be super easy.
There are some best practices that can really help with this process.
Best Practice #1: Name your project right away.
When you first open EQ8 with a fresh new project, it is Untitled. We want to give it a name right away. This can be anything you want to describe your project. Graduation Quilt, Sunflower quilt, whatever you will remember.
![]()
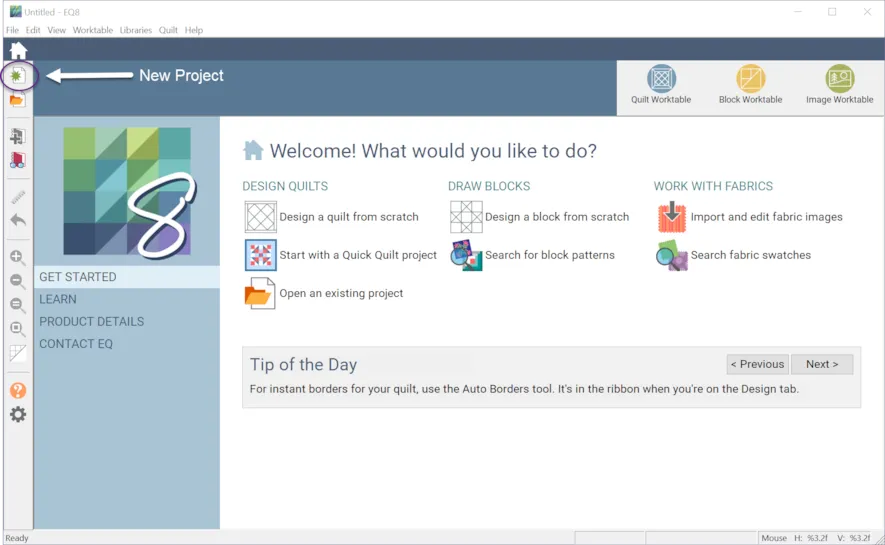
NEW PROJECT
- In order to name the project, in the left main toolbar, select the white paper with the green star. If you hover over the icon it will say NEW PROJECT. Click on that.
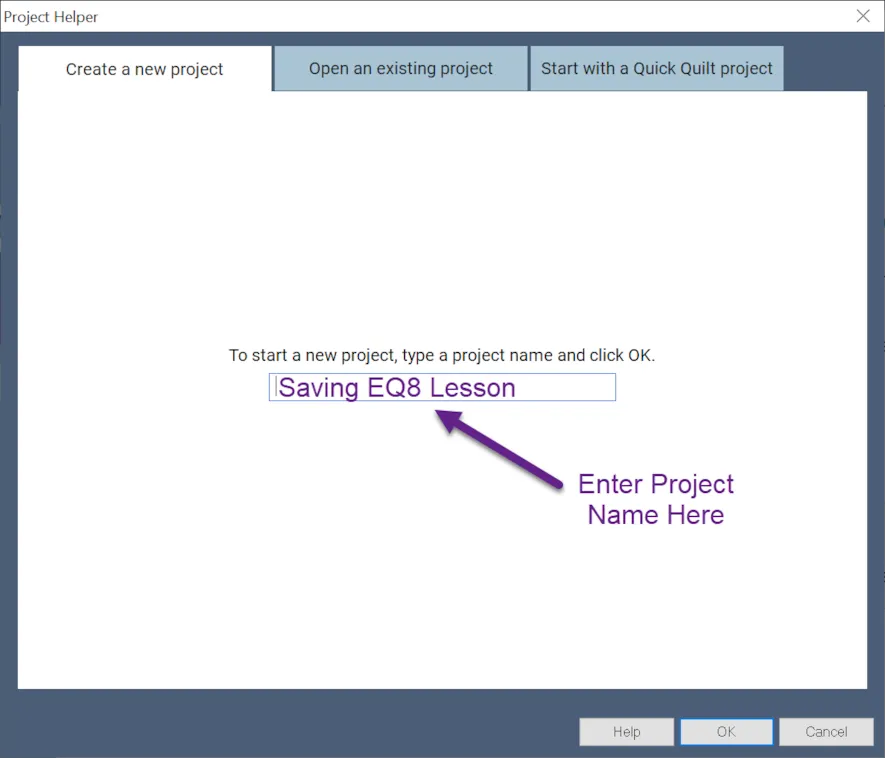
- A dialogue box will open to enter the name of the project. Let’s type in Saving EQ8 Lesson. Click OK.
- You will see that the name at the top of your screen should now say EQ8 Saving lesson.
This is a PROJECT name, not an individual block name or quilt name. You can have multiple blocks and quilt designs within a project, so keep that in mind. That being said, I usually limit a project to a single quilt I am designing. I may have multiple versions of the quilt inside the project and multiple versions of blocks but it contains all the work for that quilt idea in the one project.
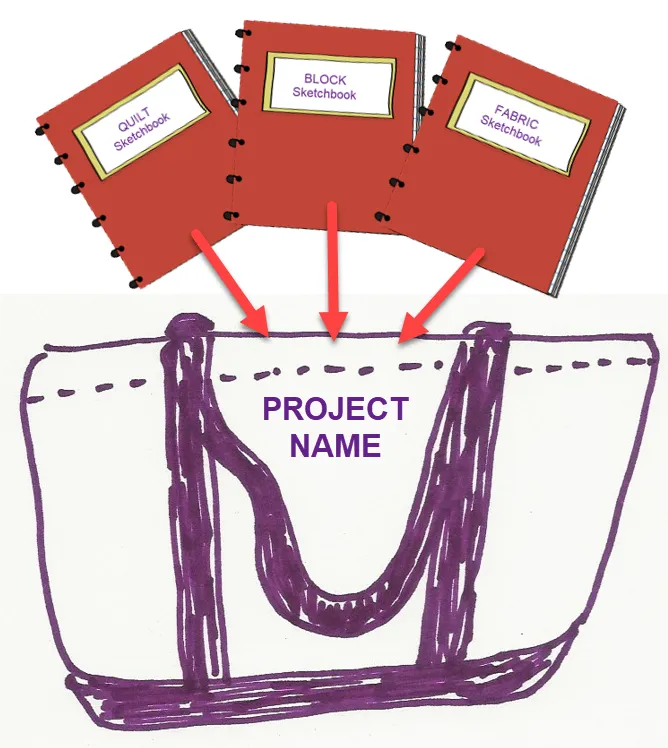
Now that we have the project named, we need to talk about Sketchbooks. Inside of every project, there are sketchbooks. Think of them as actual physical sketchbooks inside of a project bag. These sketchbooks contain quilt designs, block designs, fabrics and more.
IMPORTANT NOTE: These sketchbooks are only inside of this ONE project. If you open a new project, it will have its own set of sketchbooks that are only in that new project.
Let’s take a look at what are in the sketchbooks that come with every single new project.
![]()
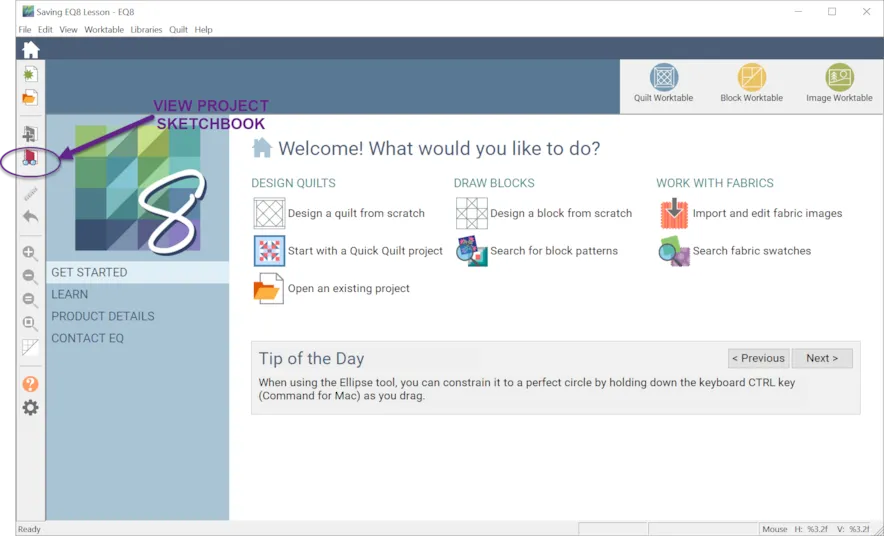
VIEW PROJECT SKETCHBOOK
- Open the Sketchbooks by finding the red book with eyeglasses in the left main toolbar. Select it.
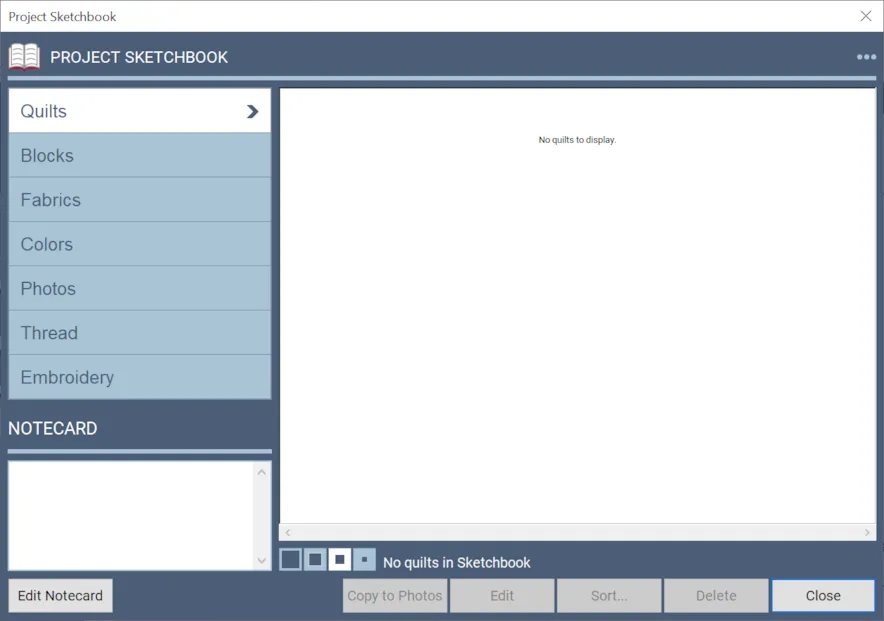
- A dialogue box will open and you can see the different sketchbooks stacked down the left hand side of the box. Let’s click on each sketchbook one at a time.
- QUILTS This sketchbook is empty until you design a quilt and add it to the Quilt sketchbook.
BEST PRACTICE #2: When in doubt, SAVE or ADD TO PROJECT SKETCHBOOK your quilt design if the system asks you.

If you try to close a project and have not saved your quilt design, EQ8 will prompt you and say: Worktable quilt is not in the Sketchbook! Add to Sketchbook before closing project? SAY YES! When in doubt, always say YES TO ADD TO SKETCHBOOK. The worst case is you saved too much. The key is to actually read and think about the message and not ignore it or you may be very sad. You can design as many versions of quilts as you want, but if you do not add them to the quilt sketchbook, they will not be saved in the project.
![]()
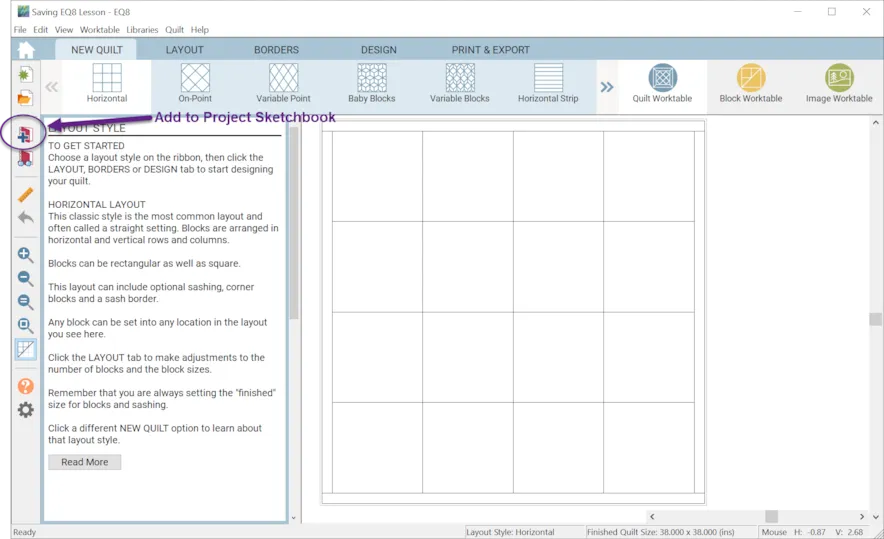
ADD to PROJECT SKETCHBOOK
- You add to the project sketchbook by Clicking on the Add to Project Sketchbook button in the main toolbar on the left.
BEST PRACTICE #3: After you add something to your Project Sketchbook, always View the Project Sketchbook to make sure it is there.
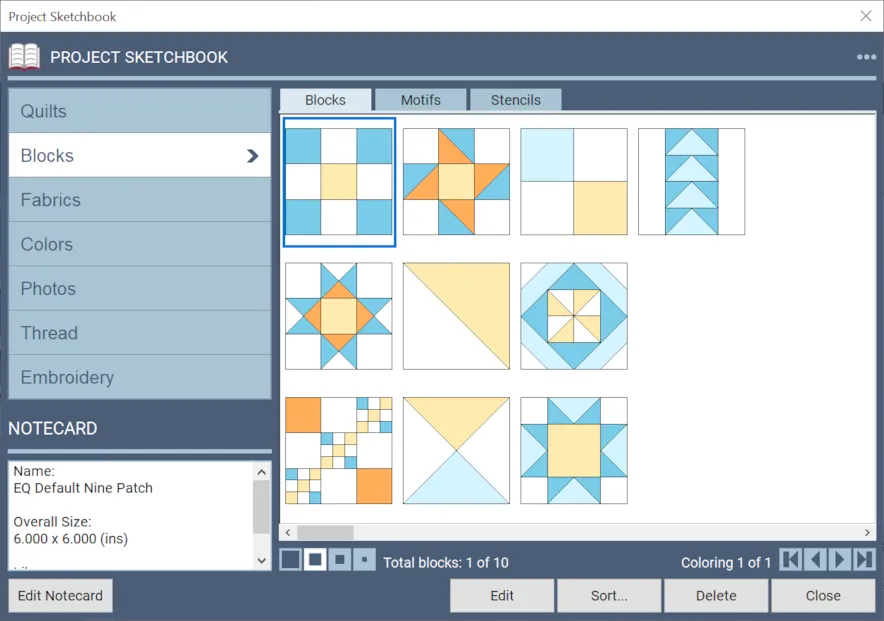
- BLOCKS This sketchbook currently contains 10 default blocks. You can use these blocks as something to start with when you begin designing. You can also add more blocks from the EQ8 libraries or design your own blocks. In either case, you will need to add the blocks to this sketchbook for them to appear here. The blocks cannot be saved into the project unless you add them to the block sketchbook first.
BEST PRACTICE #4: When in doubt, SAVE or ADD TO PROJECT SKETCHBOOK your block design if the system asks you.
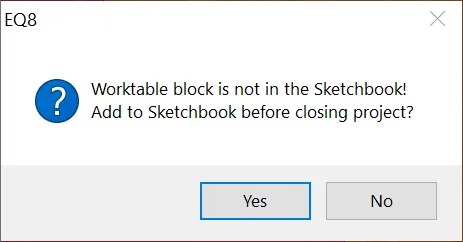
If you try to close a project and have not saved your block design, EQ8 will prompt you and say: Worktable block is not in the Sketchbook! Add to Sketchbook before closing project? SAY YES! When in doubt, always say YES TO ADD TO SKETCHBOOK. The worst case is you saved too much. Again, the trick is to actually read and think about the message and not ignore it. You can design as many blocks as you want, but if you do not add them to the block sketchbook, they will not be saved in the project.
- Fabrics This currently contains 67 default fabrics. You can add additional fabrics from the EQ8 libraries or import fabrics from other sources. The fabrics you use in your designs must be in the sketchbook to be used and saved in the project.
- Colors This contains 459 default solid colors to be used with your designs. You can create new colors using tones and tints, but the colors must be added to the sketchbook to be used and saved in the project.
- Photos This is always empty until you bring in photos from the EQ8 Photo library or from other sources. Again, to use Photos, they must be added to the sketchbook to be used and saved in the project.
- Thread This contains 87 default threads. You can add more threads from the EQ8 Thread library by manufacturer or color. They must be in the sketchbook to be used and saved in the project.
- Embroidery This contains only pictures of embroidery that you can use to mimic designs that you might like to add to your quilt.
REMEMBER! One more time, if you save your Project, but have not saved or added anything to the sketchbooks sitting inside your project, you will not save your designs.
Best Practice #5: Always add your blocks and quilts and fabrics to the Project Sketchbook before closing the current project or starting a new project.
Next, what if you worked on a project and now want to go back and update it some more or add some additional blocks or another version of the quilt. Once you have closed the project or have closed the EQ8 software, when you go to open EQ8 again, what project are you in? What is the name at the top of your screen? If it says Untitled – EQ8, it is a brand new project.
IMPORTANT NOTE: Whenever you open the EQ8 design software, it opens a brand new project.
If you want to open an existing project that you have already worked on, you will need to open that original project. Let’s try that.
- Close EQ8.
- Now , reopen the EQ8 Software. You should note that the name of the project is now Untitled – EQ8. That is because EQ8 always opens with a new project that is untitled. We want to find the last project we had named which is the Saving EQ8 Project.
![]()
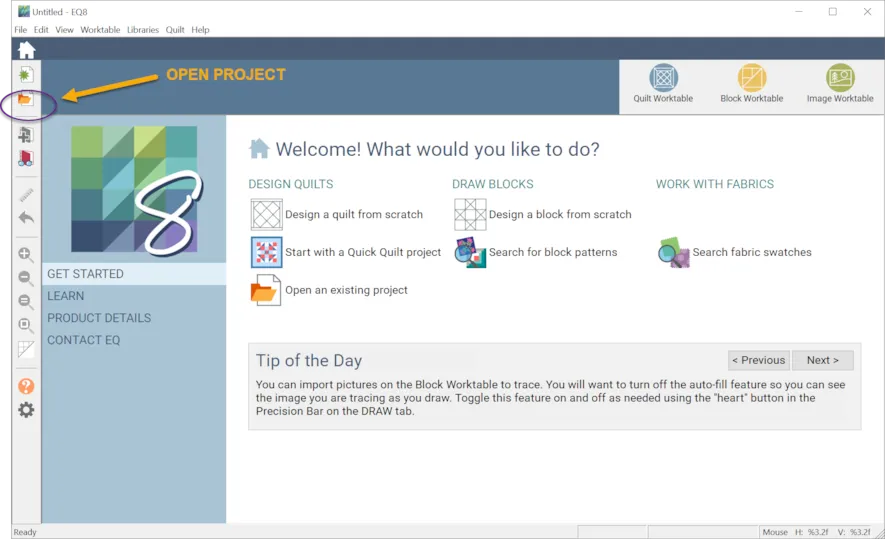
OPEN PROJECT
- To open an existing project you have worked on, use the White paper with a folder on it in the left main toolbar. If you hover, it says OPEN PROJECT. Click on it.
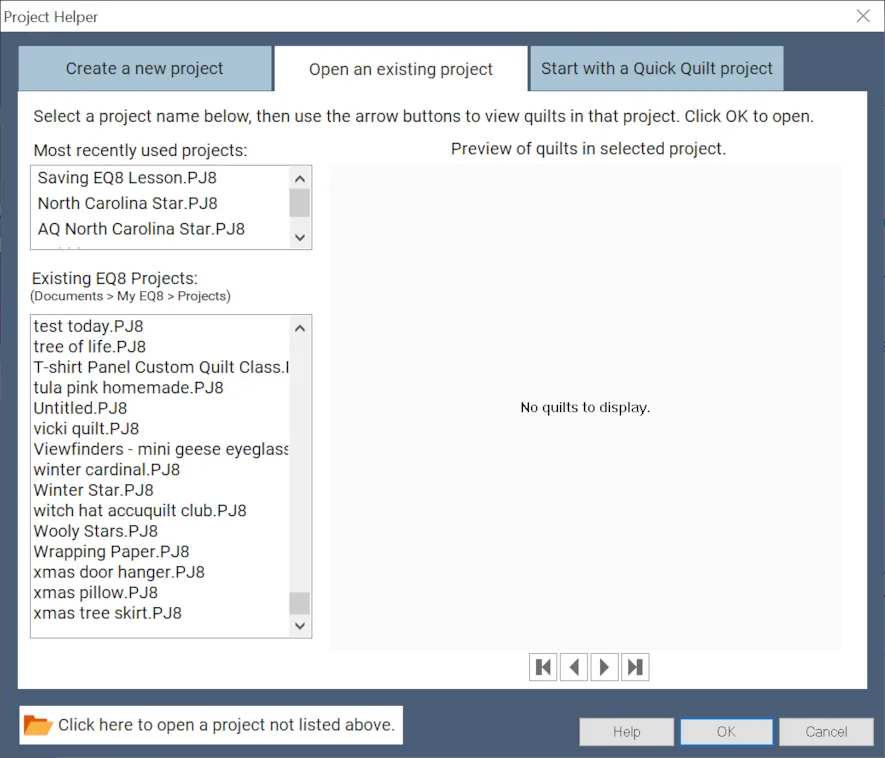
- When it opens, you should see your existing projects. In this example, you see a lot of my projects in the listing. You may not have very many projects yet and this list might be pretty sparse for you, but you get the idea. You most recently used projects are listed at the top left.
TIP: Make a note of where the Existing EQ8 projects reside. They are stored in your computers files under Documents / My EQ8 / Projects. You will see the name that you gave the project with the PJ8 extension that tells you it is an EQ8 project file. - You should see the project we had named Saving EQ8 lesson. Select it and then Click OK. It will open up that project for your use.
IMPORTANT NOTE: You can only have ONE project open at a time.
Whenever you have a project open and try to open another project, new or existing, EQ8 is going to try to save the currently open project before it opens something new. You can only have ONE project open at a time. Before it closes the current project, it will save it. If you have forgotten to add something to a sketchbook in the current project, it will prompt you to save it first. Say YES. Then EQ8 will close the current project and open the new one.
BONUS TIP: One place to look if you are missing Quilts or Blocks in your Sketchbook
One thing that can happen is related to how you view your designs in the sketchbook.
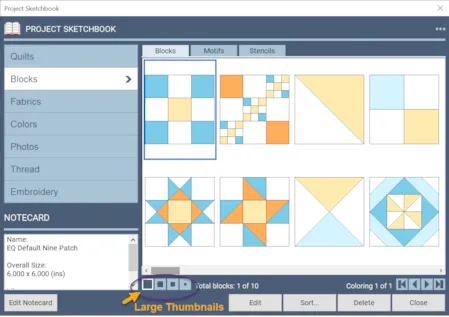
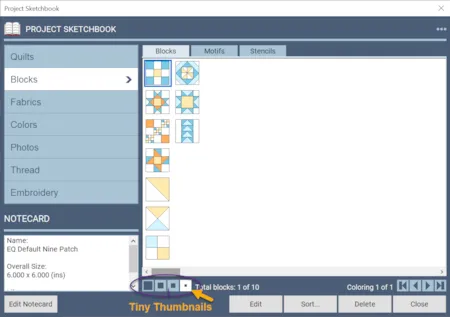
There are four buttons that determine the size of the thumbnail pictures of your designs. If you have the largest thumbnail chosen, you may only see one design or just a few designs on the screen of the sketchbook. Remember, when quilts or blocks are added, they add to the end of the designs. You may need to scroll to the right or choose smaller thumbnails to see all of your designs.
IMPORTANT NOTE: If you forget to name your project, and you create a quilt. When you go to close that project, EQ8 is going to try to help you. First it will say, Worktable quilt is not in the sketchbook. Do you want to save it. SAY YES. THEN it is going to ask you if you want to ‘Save Changes to Untitled”? SAY YES or the project and all the sketchbooks inside will not be saved. When you say YES, a dialogue box will open and you will be prompted to save the Untitled project. Make a note of where it wants to save it, we want it to be in My EQ8/Projects folder because that is where EQ8 will look for it. RIGHT NOW, make a conscious decision to rename Untitled to the project name that you want to save. Click ok.
I packed a lot of information into this lesson about how the software works and how to save your precious designs. I hope you now have a better understanding of how EQ8 is structured and how to make sure that you have what you want in your design project files.
Do you want more information, there are more resources here:
Helpful Videos
https://support.electricquilt.com/articles_categories/videos/electric-quilt-8
There are four great videos to reinforce this lesson under the heading PROJECTS
Helpful Articles
https://support.electricquilt.com/articles/saving-projects-2
Please share your ideas, questions and feedback in the comments. I would love to hear from you. Thanks!
Lori J. Miller lives in Oxford, Michigan, where she designs, stitches and sews quilts and quilty things. She loves experimenting with fun colors and designs to make playful and clever products for the modern sewist. Lori continues to share her knowledge with others teaching quilting and EQ8 classes around the country. A self professed EQ8 superfan, you can follow her quilting adventures on her blog at lorimillerdesigns.com or on instagram @lorimillerdesigns


