Welcome back to the Hexagon quilt design adventure! In this final lesson we are going to explore using the Custom Quilt layout to design a Hexagon quilt. This blank canvas will allow us to essentially build a Hexagon quilt that can be assembled with English paper piecing or EPP. This can open up a myriad of possibilities and let you step out of the box in your design. Hexagon Quilt Layouts Part 3 is the last post in the Hexagon series. If you need to catch up, check out my previous posts here:

Hexagon Quilt Layouts Part 3
Skillset: Intermediate/Advanced User
Skill Builders:
- Build applique blocks using EPP shapes
- Create a hexagon quilt layout using Custom Set
- Open EQ8.
- Let’s name the Project. The project name appears at the top left of the EQ8 Window. Right now the project says Untitled – EQ8.
- On the left side toolbar, click the New Project button.

- On the Create a new project tab, type in the project name field Hexagon Layouts 3.
- Click OK. The box will close. Notice the project name Untitled has been replaced with Hexagon Layouts 3.
- Select Design a Block from Scratch.
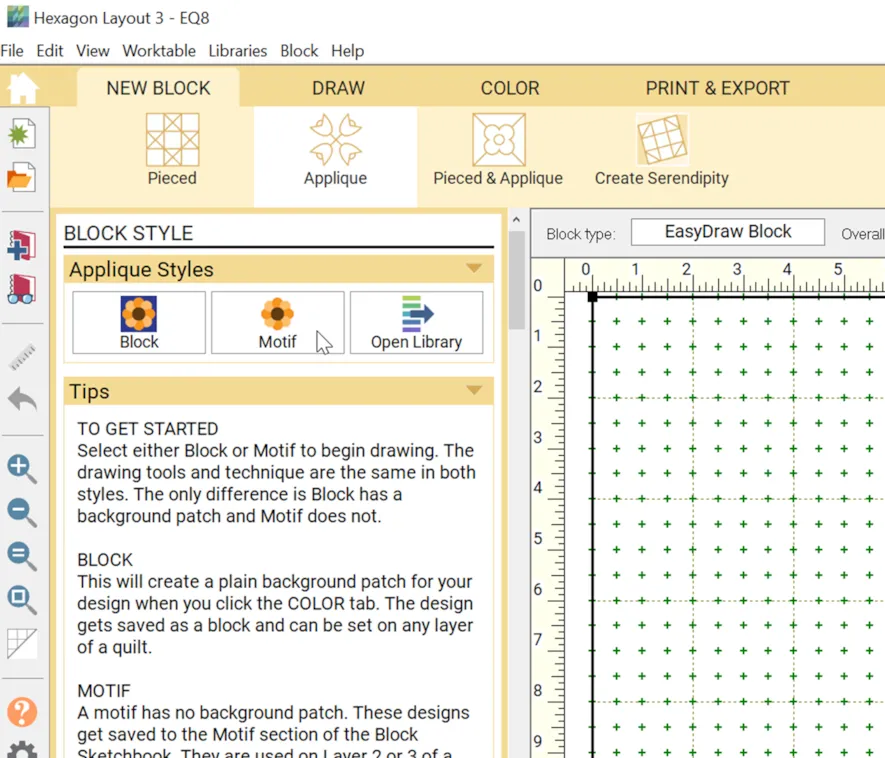
- NEW BLOCK > Applique > Motif
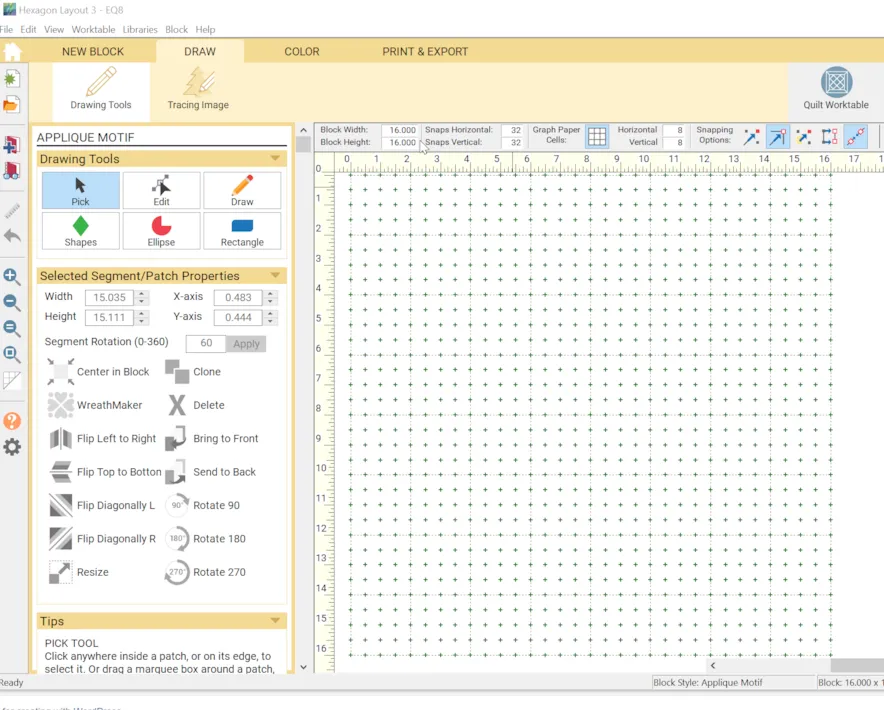
- Under Motif, in the Precision bar, change the block width and height to 16, Snaps horizontal and vertical to 32 and graph paper cells to 8 horizontal and vertical.
- Update the Worktable options by going to the Small Gear shape in the main left main toolbar. Click on it.
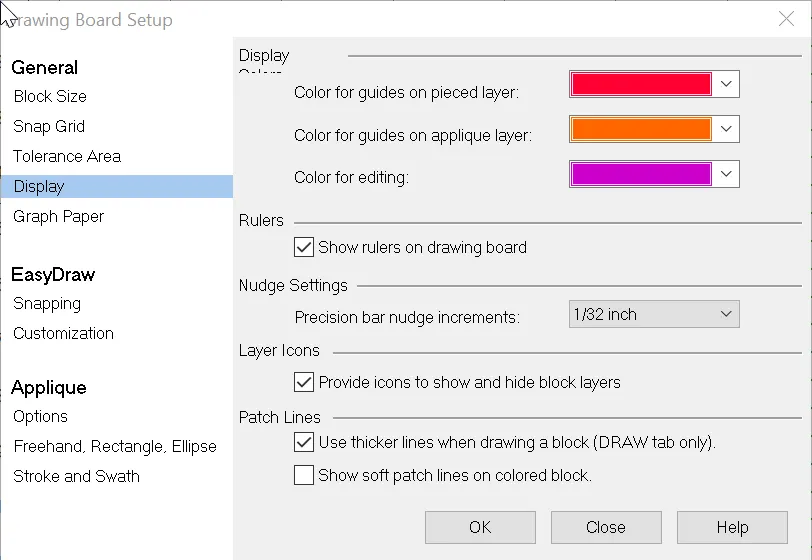
- Drawing Board Setup > General > Display
- Under Nudge Settings, change precision bar nudge increments to 1/32 inch.
- Under Patch Lines, check to use thicker lines when drawing a block. Close.
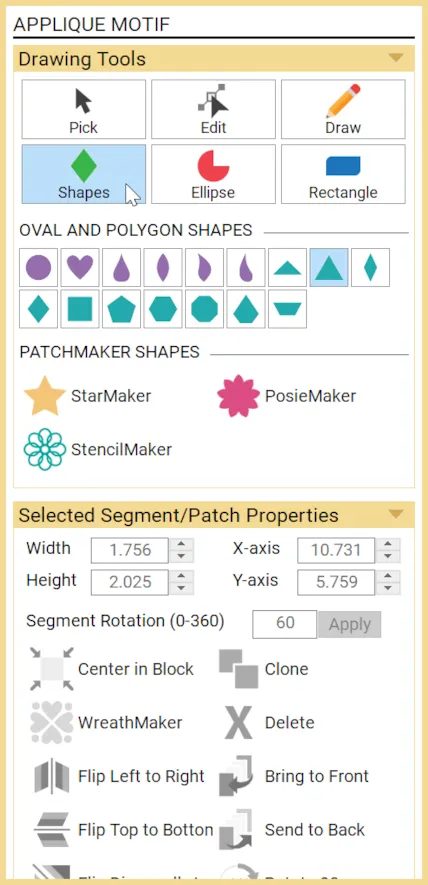
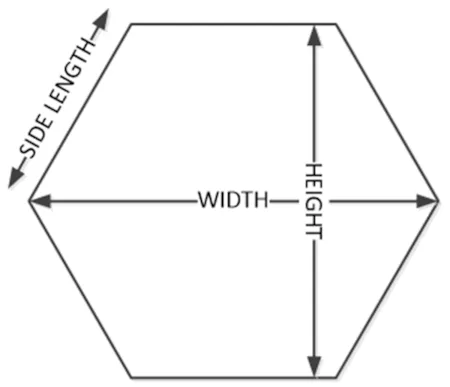
- Click on Shapes. Select the Hexagon shape. If you hover over the shape, the name of the shape will appear to guide you.

- Go over to the drawing grid and click and drag to draw a hexagon that is 8″ wide. This may take a little practice.
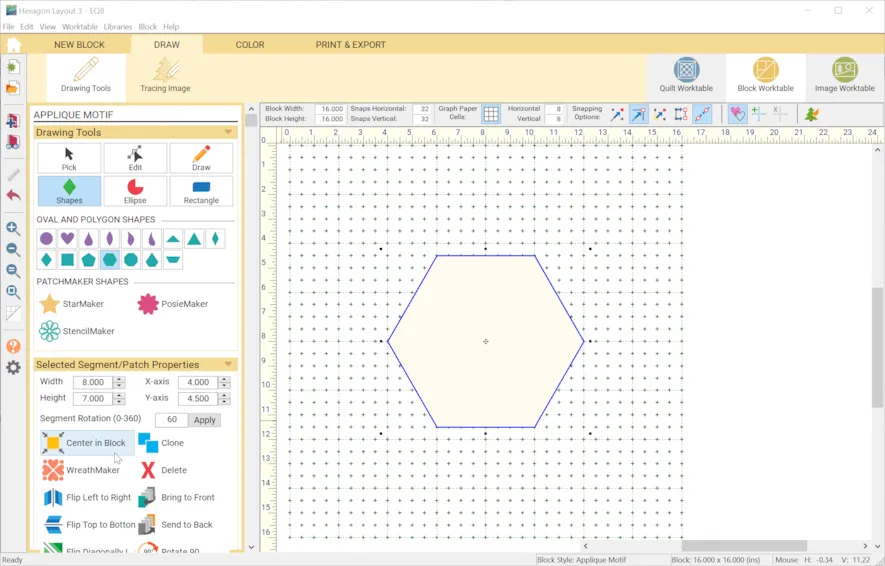
- You can go to the Selected Segment/Patch properties and make sure the hexagon measures a width of 8 and a height of 7. Click the Yellow tool to Center in Block.
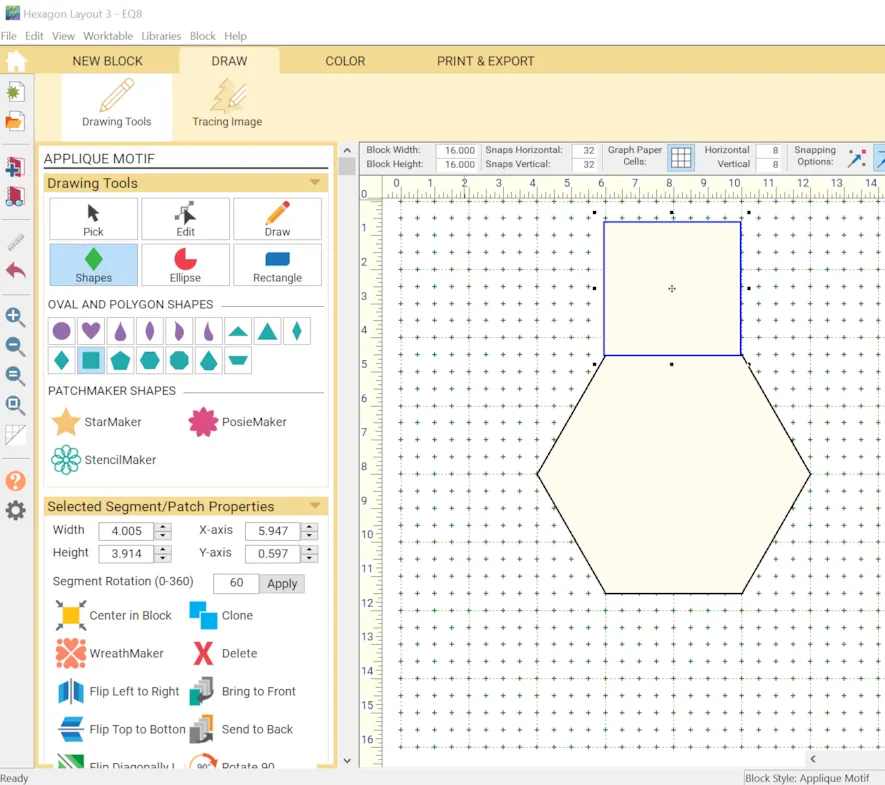
- Select the square shape. Draw a four inch square on the graph. Use the Selected Segment/Patch properties to make sure it measures 4″ on each side. Pick the square and move it over to one side of the hexagon.
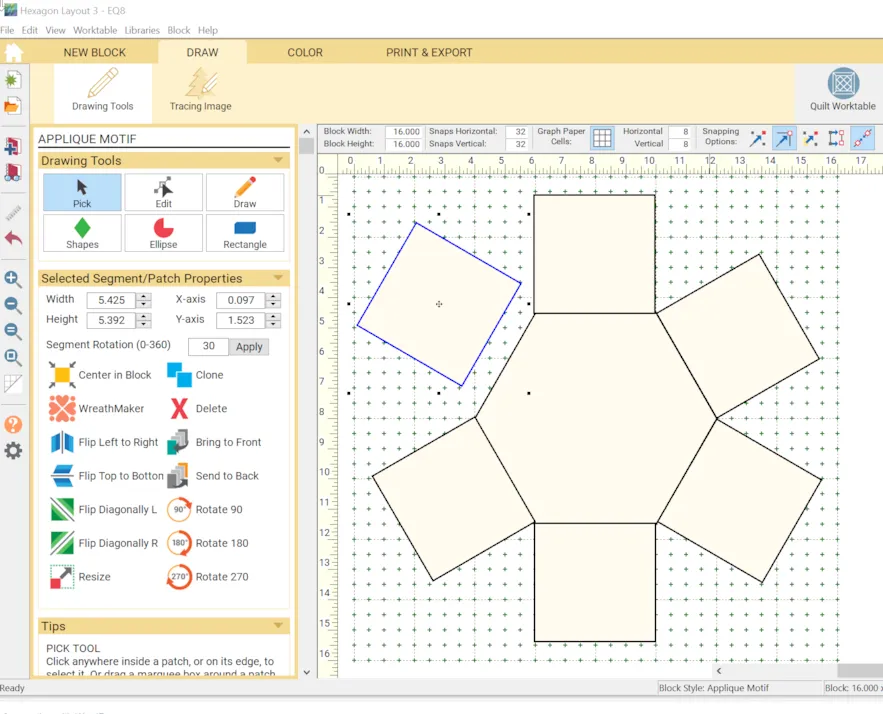
- Clone the square five times. Place the squares around the hexagon sides. You will need to rotate the squares using increments of 30 degrees and 60 degrees.
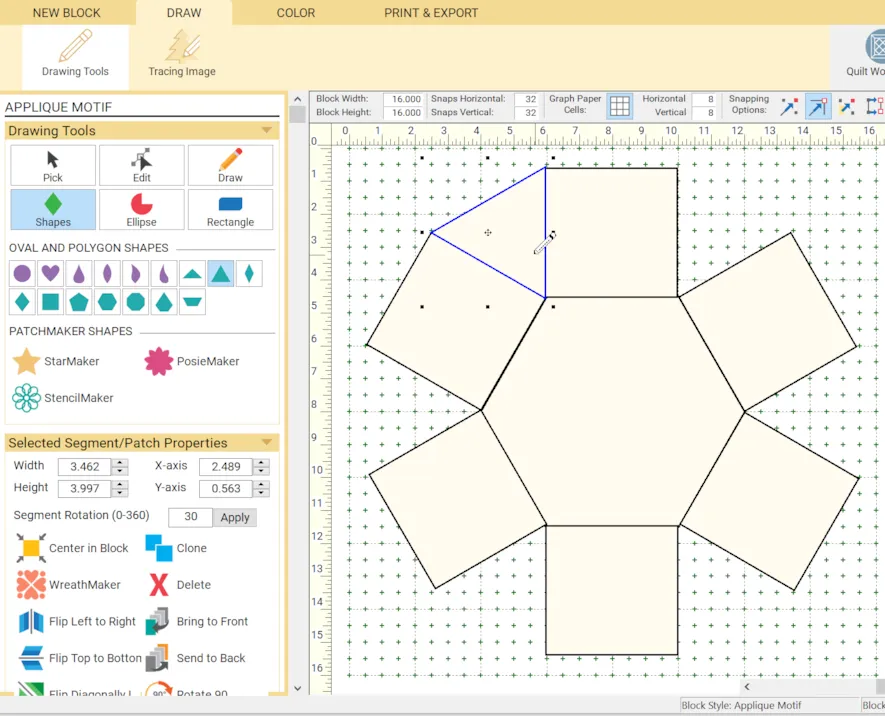
- Now, get the Equilateral Triangle shape. Draw it in the space between the squares. The drawing point starts at the top of the triangle. You may have to practice a few times to get it in place.
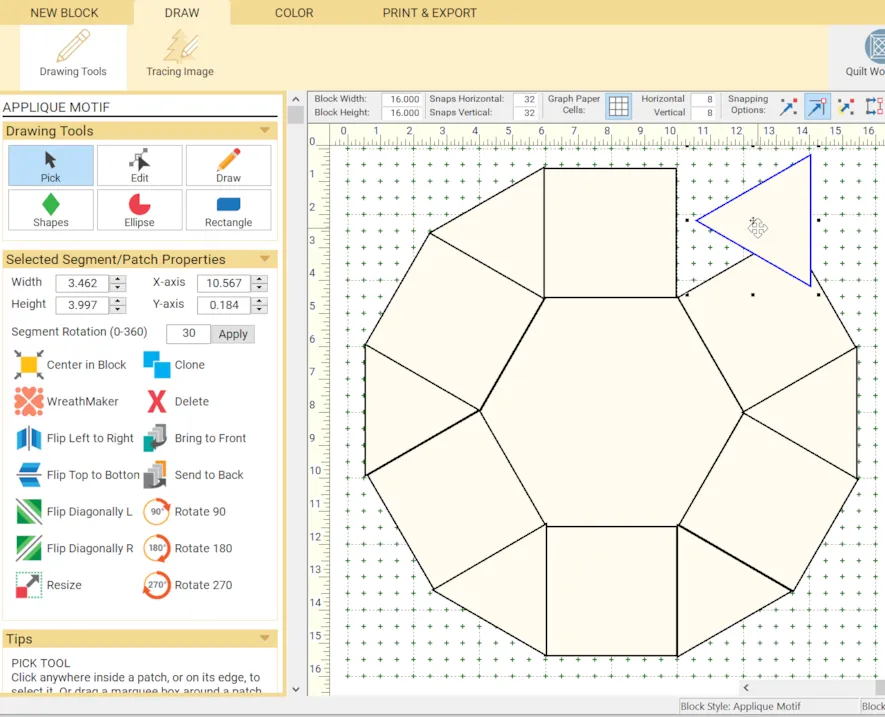
- Clone the triangle five times and arrange in the spaces between the squares. You can use the Rotate 180 degree tool for the triangles that need it.
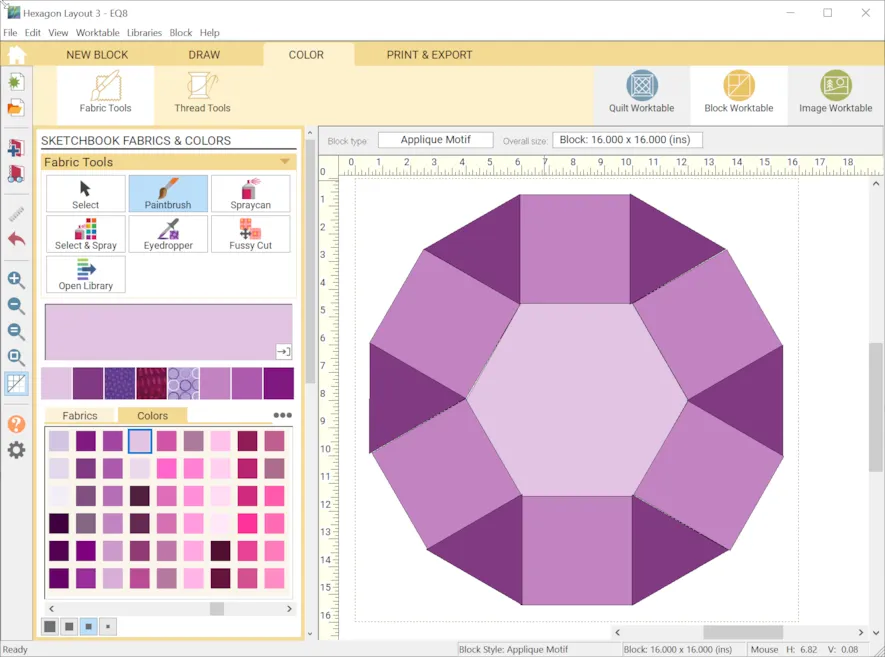
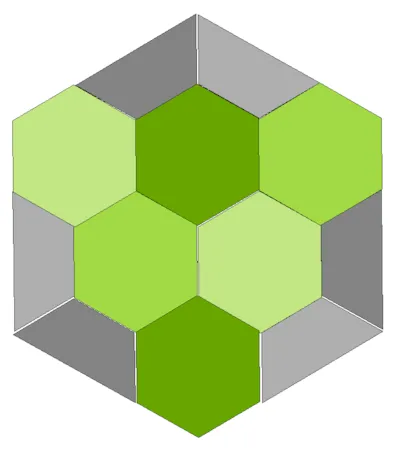
- Color Tab, Color the shapes. Add to Sketchbook.
- We are going to edit this block so we can join the blocks together without having any overlap.
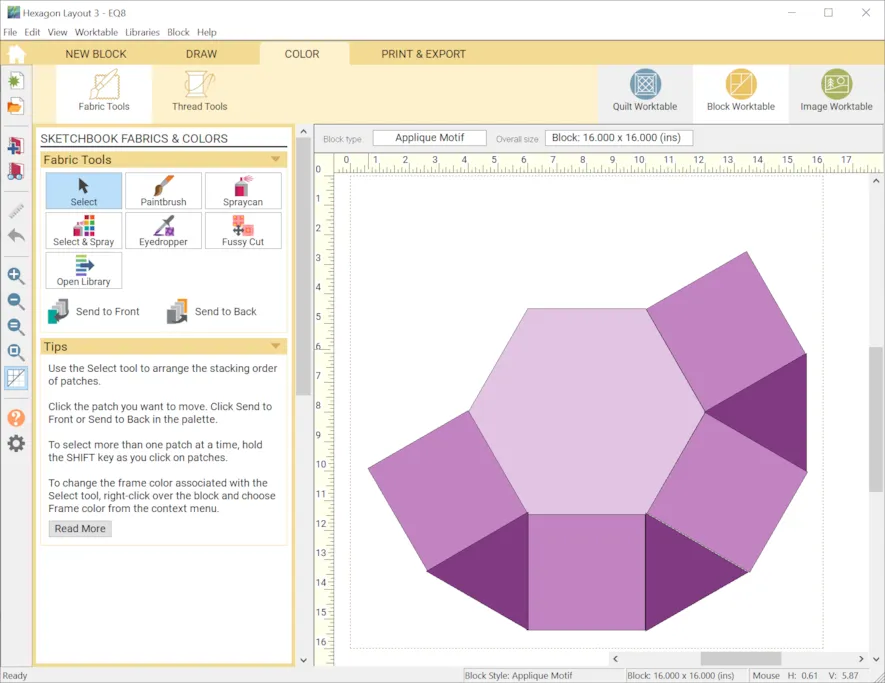
- Go back to the DRAW tab and remove the five pieces as shown, three triangles and two squares. Add to Sketchbook.
- Next we are going to build our quilt layout.
- Choose the Quilt Worktable.
- New Quilt > Custom Set
- First we will update the Quilt Worktable settings to help us better arrange and position the blocks in the quilt. Choose the Gear button at the bottom of the left main toolbar.
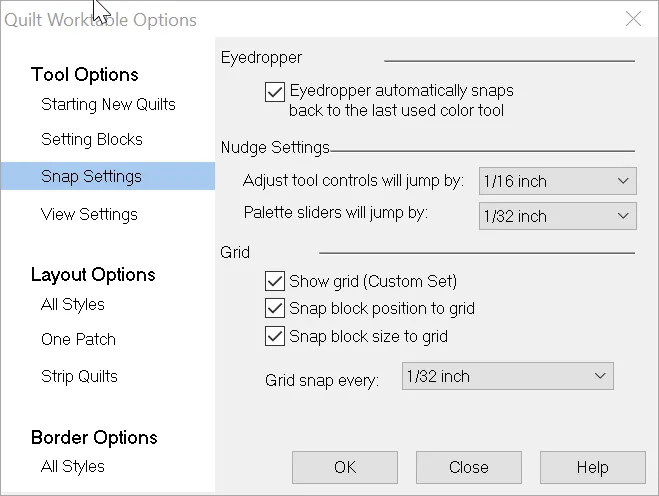
- Go to Tool Options, Snap settings.
- Under Nudge setting, Adjust tool controls will jump by 1/32 inch and Palette sliders will jump by 1/32 inch.
- Under Grid Settings, change grid snap to every 1/32 inch. Click Close.
- Layout Tab > Change the Quilt Width and Height to 0.50 inches.

- Borders Tab > Border Style: Mitered, Change width of border to 30″.
- If you cant get a border larger than 20″, change it by going to the Quilt Worktable Options. Use the Gear tool in the Main Toolbar on the left hand side.
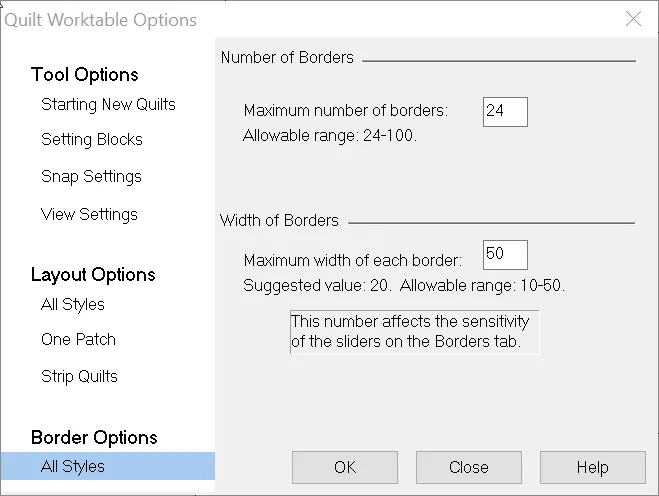
- Quilt Worktable Options > Border Options > All Styles, Change Maximum width of each border to 50″ which allows you a great range to choose from. Note: If you need a larger quilt, just add another border.
- Select the Layer 2 Tab
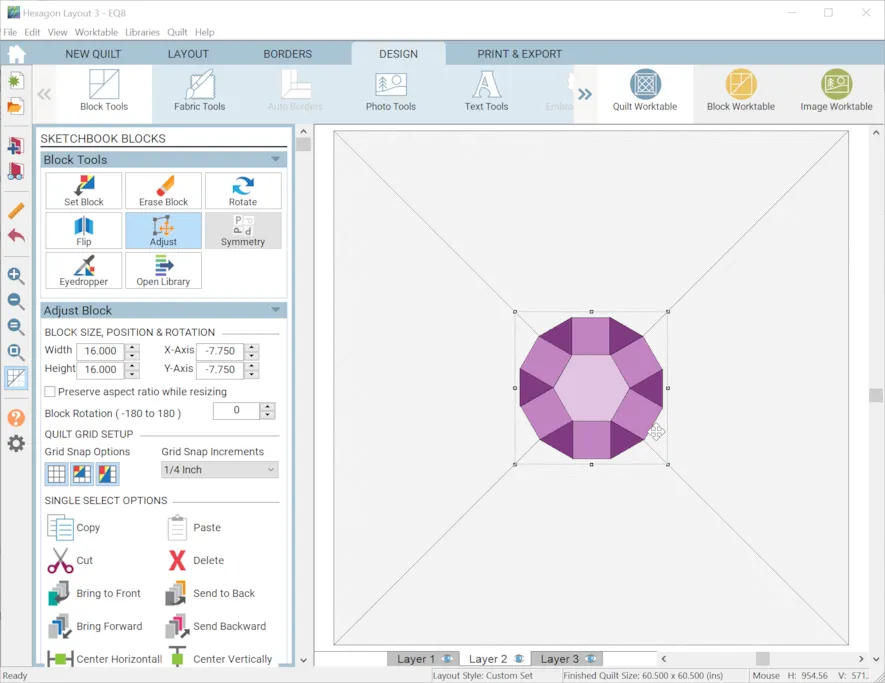
- Design Tab > Block Tools > Set Block > Motifs, Select the full block and drag it over onto the custom quilt.
- Use the Adjust button to select the block, then use the green tools to Center Horizontal and Center Vertically in the quilt.
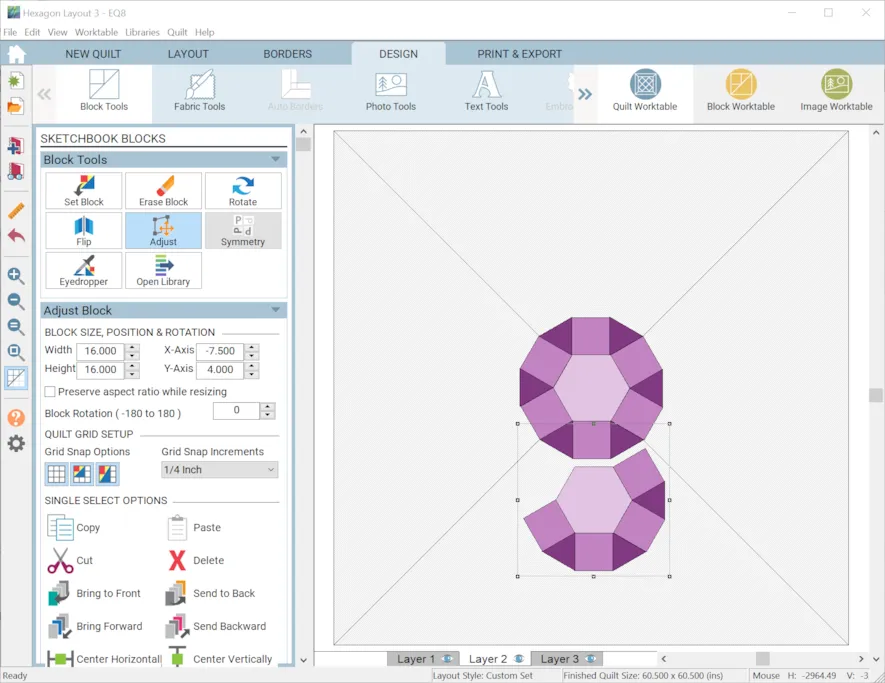
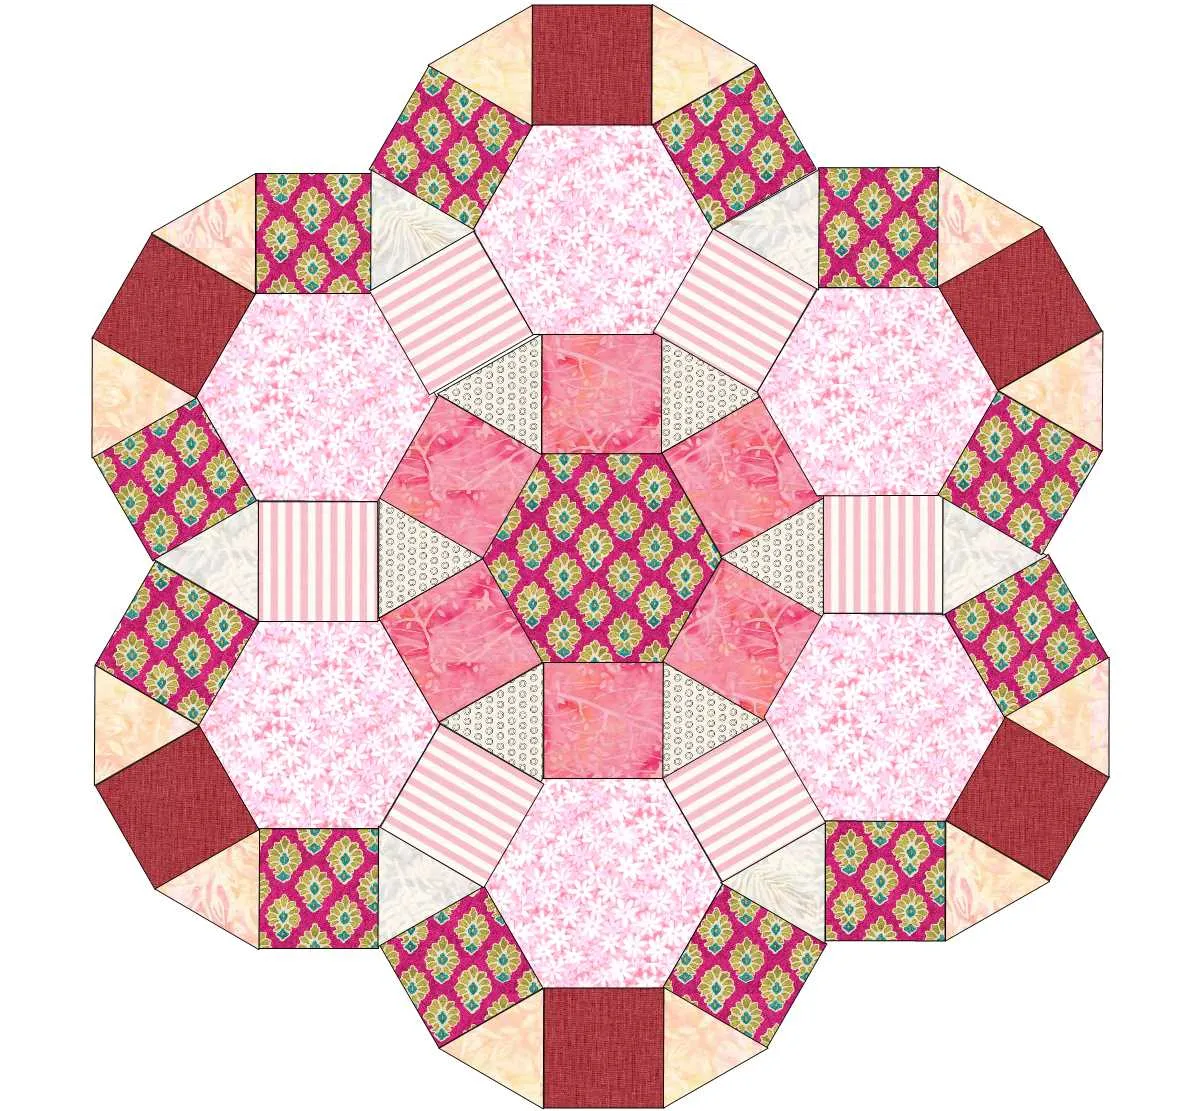
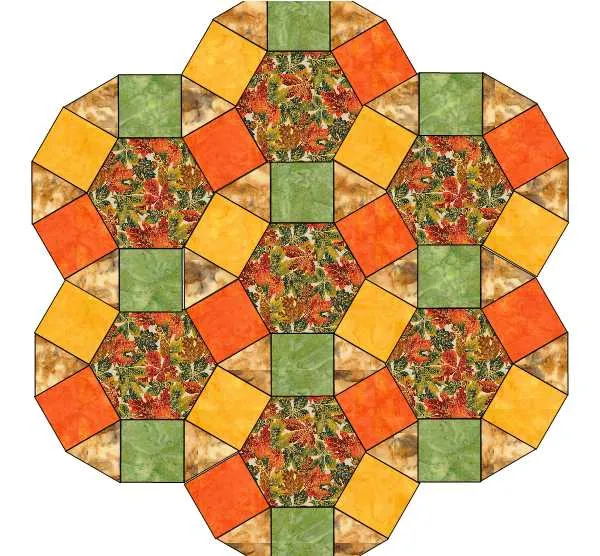
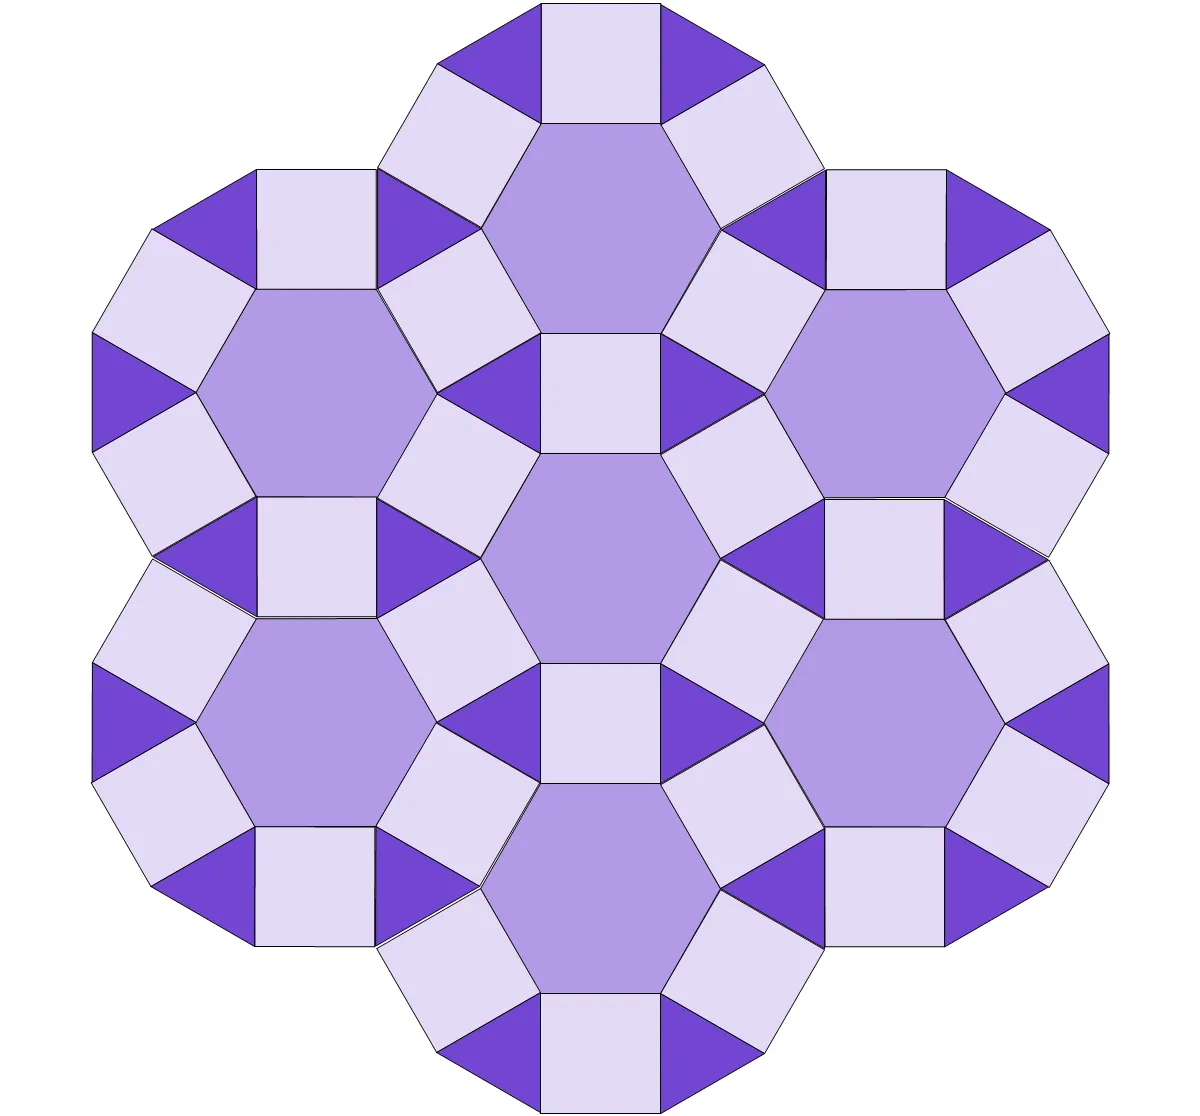
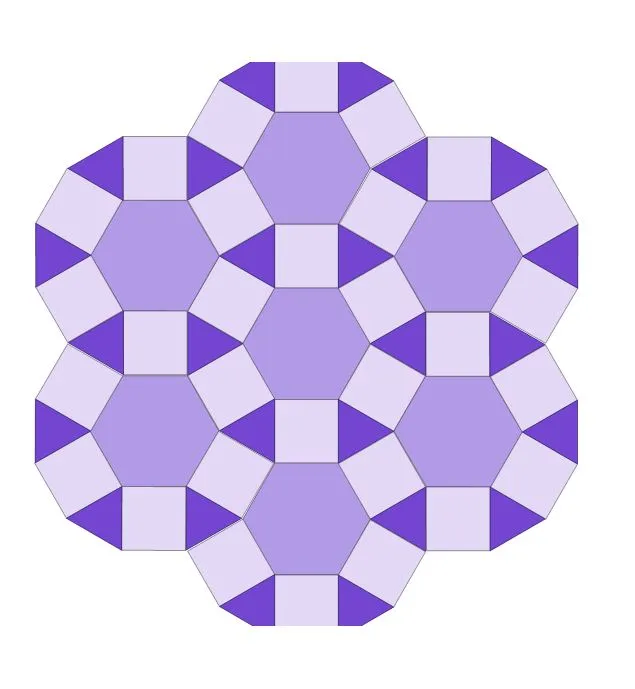
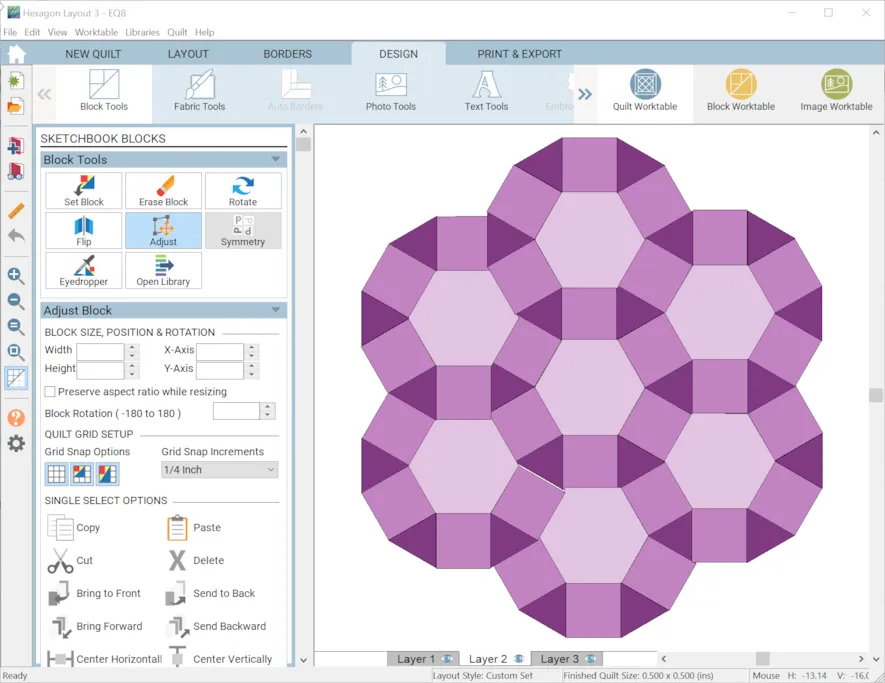
- Set Block > Motifs, Select the partial block and drag it to the quilt. Arrange it around the center block.

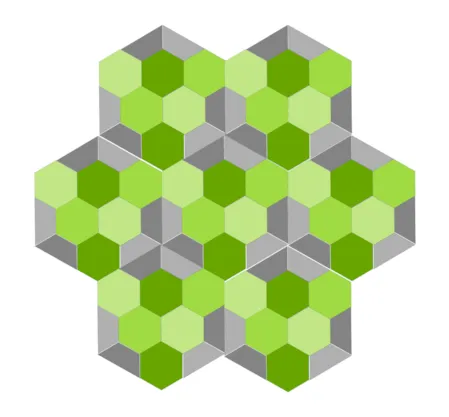
- Continue to add the partial blocks and fit them around the center block. You will need to rotate the blocks in increments of 60 degrees, 120 degrees, 180 degrees, -120 degrees, -60 degrees. This is under the block Rotation under the Adjust Tool. The blocks can be rotated 180 degrees in both directions. Add to Sketchbook.
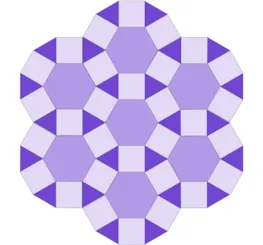
- Now that our quilt is designed, lets remove the outer border so we just have the blocks that remain.
- BORDERS tab > Border 1, Delete. Add to Sketchbook.
Questions or Feedback
Please share your ideas, questions and feedback in the comments. I would love to hear from you. Thanks!
Lori J. Miller lives in Oxford, Michigan, where she designs, stitches and sews quilts and quilty things. She loves experimenting with fun colors and designs to make playful and clever products for the modern sewist. Lori continues to share her knowledge with others teaching quilting and EQ8 classes around the country. A self professed EQ8 superfan, you can follow her quilting adventures on her blog at lorimillerdesigns.com or on instagram @lorimillerdesigns