Hello EQ8 Friends! In this post I am sharing a great idea to use a variety of themed blocks and organize them using a Horizontal Strip Quilt. Horizontal strip layouts are made up of long horizontal pieced or unpieced “strips.” Strip Quilts can be very versatile adapting to different sized blocks easily. I often use this layout for a Row by Row Quilt. If you use the Magic of Layer 2, you can even break the rules for block placement. Let’s explore Horizontal Strip Quilts.
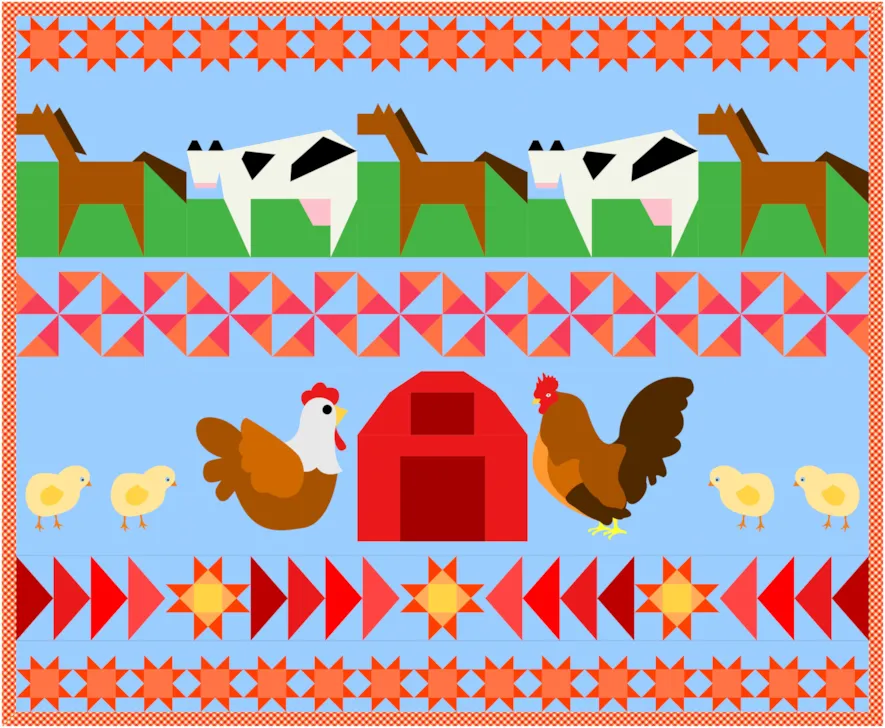
Barnyard Day Quilt
Skillset: Beginner/ Advanced Beginner
Size: 62″ x 51″
Skill Builders:
- Learn how to setup a Horizontal Quilt
- Explore plain, pieced and spaced squares strip styles
- Use the Magic of Layer 2 to creatively place blocks
Let’s design the Quilt.
- Open EQ8.
- Let’s name the Project. The project name appears at the top left of the EQ8 Window. Right now the project says Untitled – EQ8.
- On the left side toolbar, click the New Project button.

- On the Create a new project tab, type in the project name field Barnyard Day.
- Click OK. The box will close. Notice the project name Untitled has been replaced with Barnyard Day.
- From the HOME screen under DESIGN QUILTS, select Design a Quilt from Scratch.
- New Quilt> Horizontal Strip
- LAYOUT
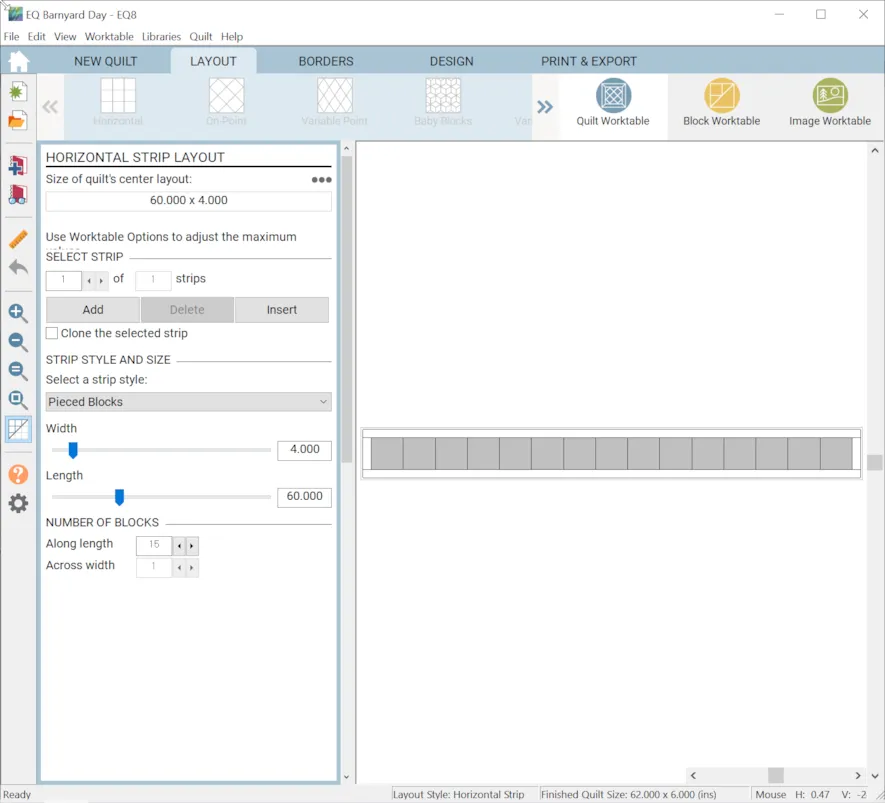
Under the layout tab, the horizontal strip quilt usually defaults to 5 strips. The highlighted or selected strip appears in gray. You can click directly on the strip you want to adjust or use the arrows to select a strip.
– Clicking Add will add a new strip to the bottom of your quilt.
– Insert will place the new strip above the highlighted/selected strip.
– When Clone the selected strip is checked, the next strip you add or insert will be exactly like the highlighted/selected strip.
– Clicking Delete will delete the focused strip.
The width of each strip can be adjusted individually, but all strips must be the same length. - Strip Styles – There are several styles of strips that you can use. For this quilt, we will be using 3 styles.
Plain
Strip is one long piece for placing a print or solid.

Pieced Block
Divides the strip into rectangular blocks. Use the arrows to set the number of blocks.

Spaced Squares
Divides the strip with equally spaced squares. Use the arrows to set the number of squares. The distance between the squares will vary as the number of squares is adjusted. As the number of squares increases, the squares will eventually become rectangles.
Let’s design the strips.
-
Strip 1: Strip Style-Pieced Blocks, Width 4 (This is how high the strip is), Length 60 (This is the length from left to right of the quilt); Number of blocks Along length 15. Hint: I am using a length that is divisible by many numbers to help me try out different size blocks. There are a lot of numbers that are divisible by 60 – 3,4,5,6,10,12,15,20. You are not limited to these sizes, they are just a good place to start.
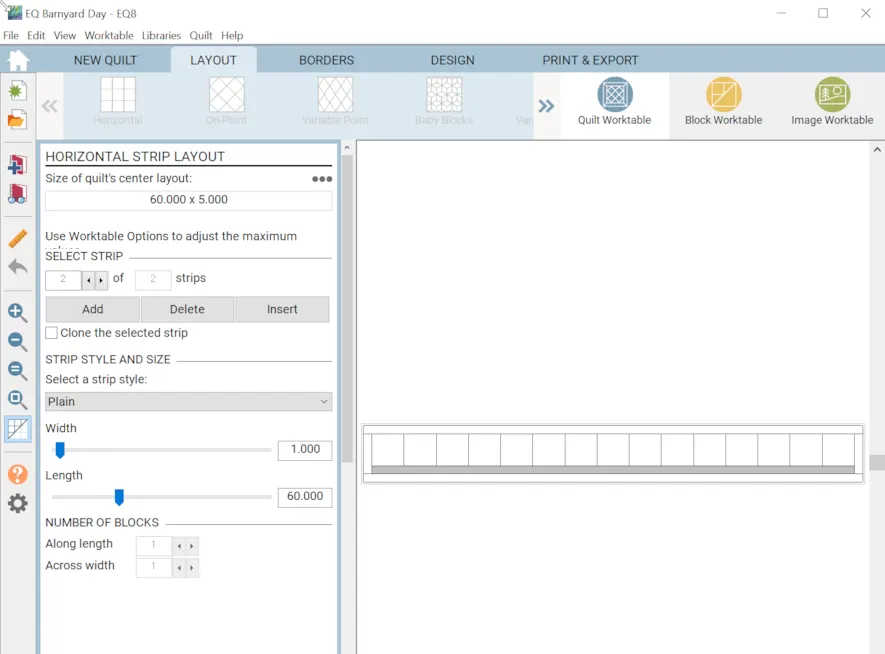
- ADD Strip 2: Strip Style- Plain, W1, L 60 (I am using this strip like a sashing between the rows.)
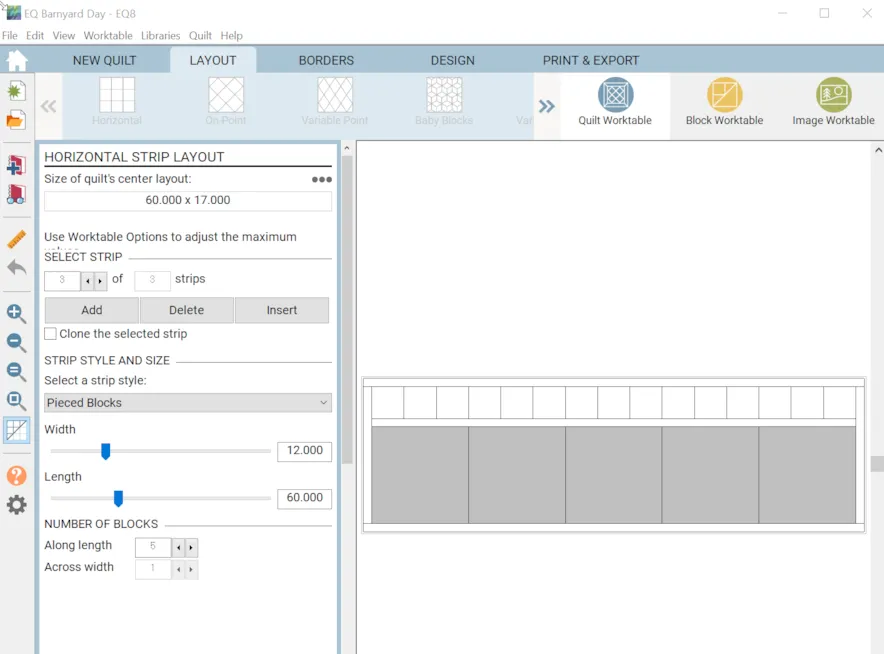
- Strip 3: Strip Style-Pieced Blocks, Width 12 Length 60, Number of Blocks Along length 5 (Pieced blocks creates spaces to place pieced blocks and the number of blocks along the length helps to determine the length of each block which will vary by how many blocks that are placed along the length.)
- Strip 4: Strip Style- Plain, W1, L 60
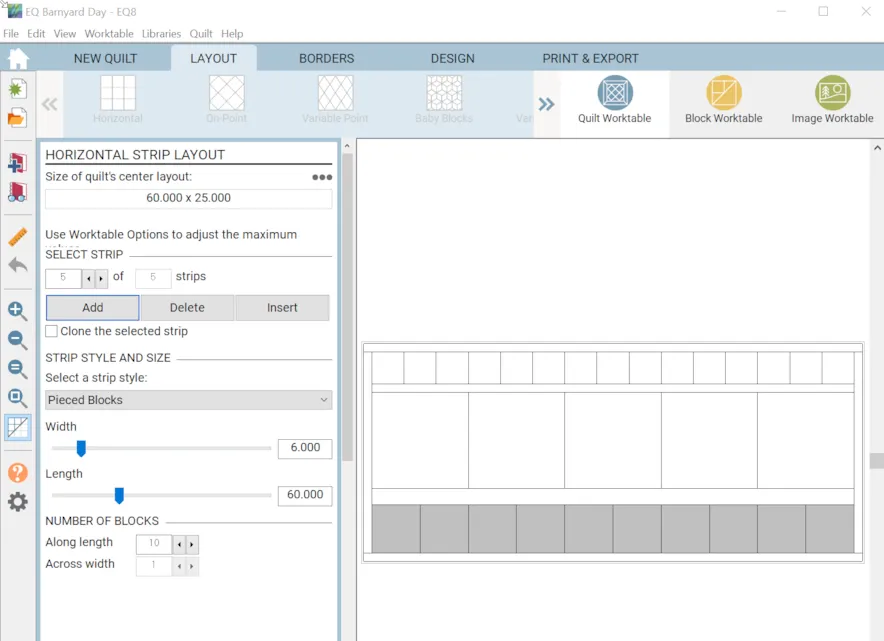
- Strip 5: Strip Style-Pieced Blocks, Width 6 Length 60, Number of Blocks Along length 10
- Strip 6: Strip Style- Plain, W1, L 60
- Strip 7: Strip Style-Pieced Blocks, Width 6 Length 60, Number of Blocks Along length 5
- Strip 8: Strip Style-Pieced Blocks, W 6 L 60, Number of Blocks Along length 10
- Strip 9:Strip Style- Plain, W1, L 60
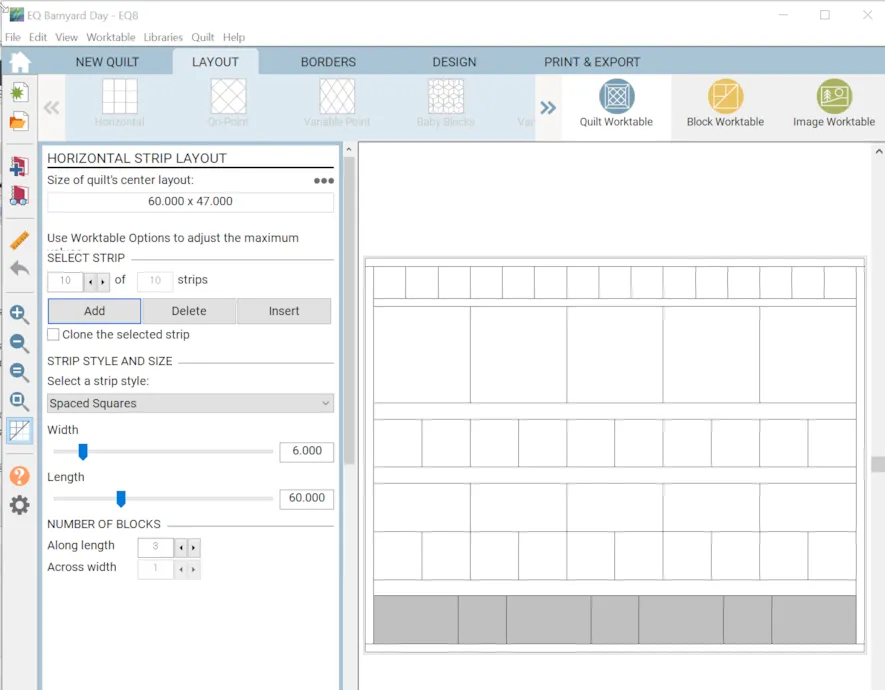
- Strip 10: Strip Style-Spaced Squares, Width 6 Length 60, Number of Blocks Along length 3 (This style works with my square blocks and will add rectangular spaces between whatever number of squares are chosen. I have added 3 squares and plan to fill the rectangle space with a similarly sized block when we get there.
- Strip 11:Strip Style- Plain, W1, L 60
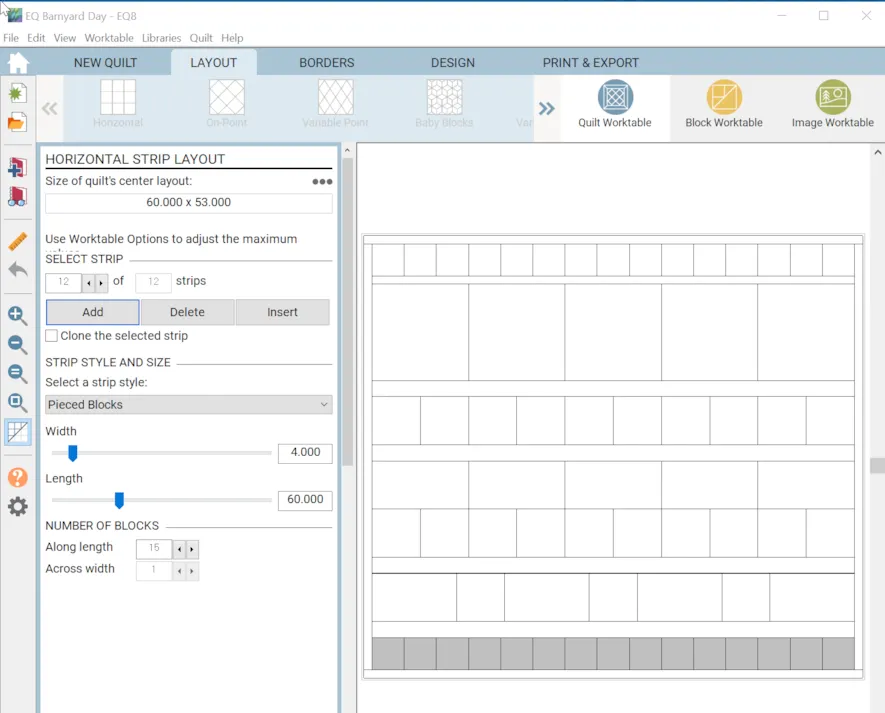
- Strip 12: Strip Style-Pieced Blocks, W 4 L 60, Number of Blocks Along length 15
- BORDERS > Mitered, Lock all 1″
- DESIGN > We will grab some barnyard themed blocks from the EQ8 Library
- Block Tools > Open Library Search for the following blocks and Add to Sketchbook.
Barn, Chick, Chicken, Cow, EQ8 Default Variable Star, EQ8 Default Ohio Star, Flying Geese 5, Horse, Rooster, Windmill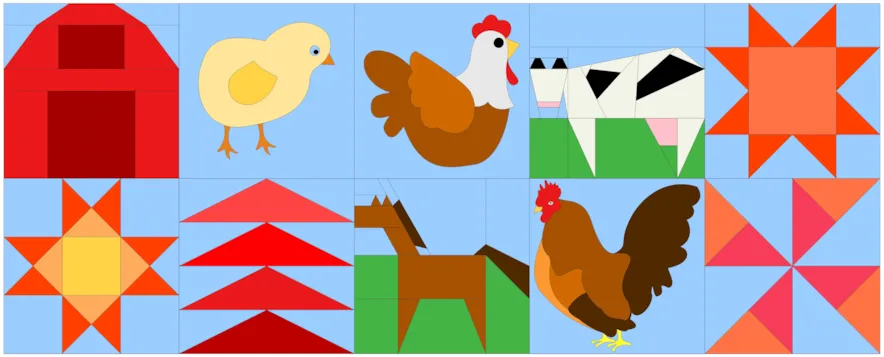
-
Block Tools > Set Block
-
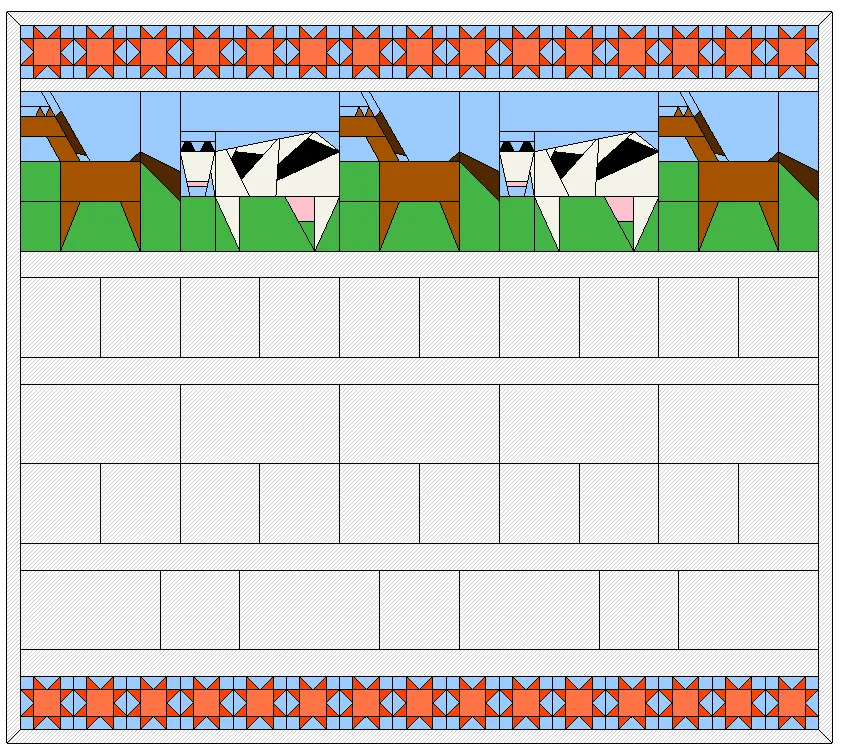
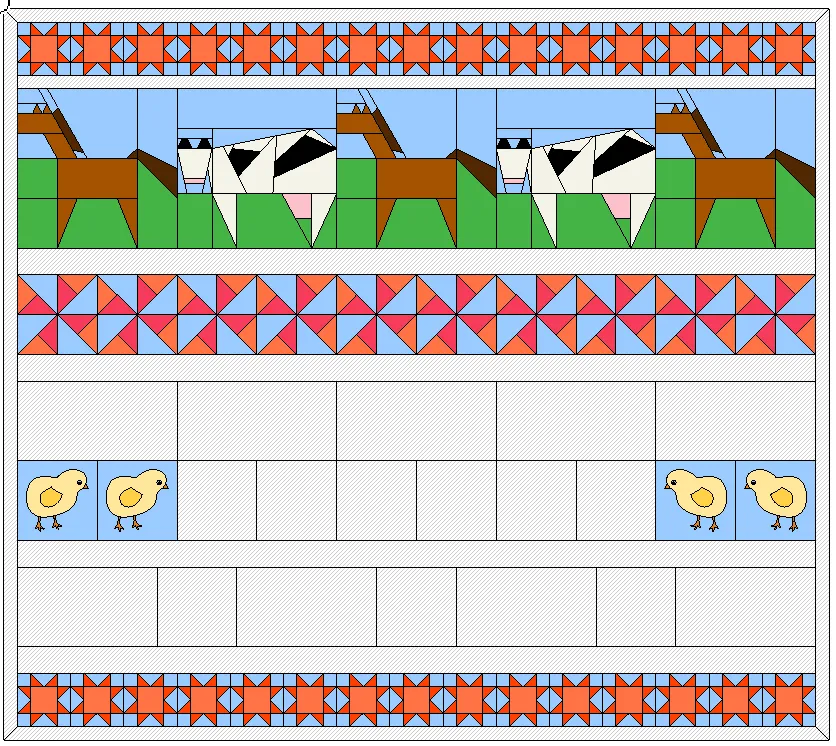
Strip 3: Alternating, add the Horse and Cow across this strip.
-
Strip 8: Drop two little chicks on the left side and two little chicks on the right side. Use the Flip to to arrange the chicks. Leave the rest of the blocks empty for now.
-
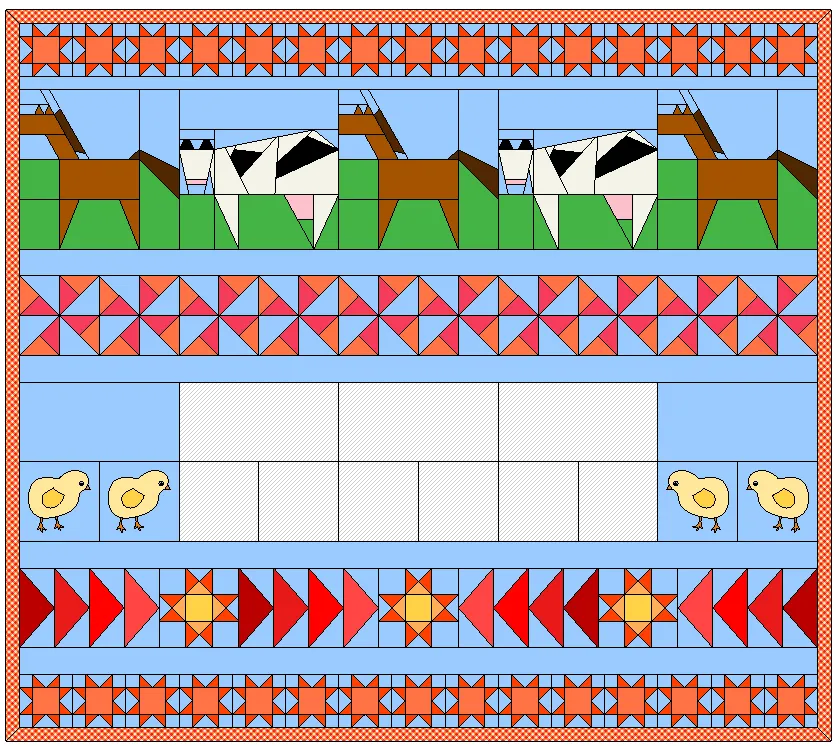
Fabric Tools > Color the plain strips, the plain blocks above the chicks and the binding. Be careful to leave the center blocks in Strips 7 and 8 UNCOLORED and empty.
-
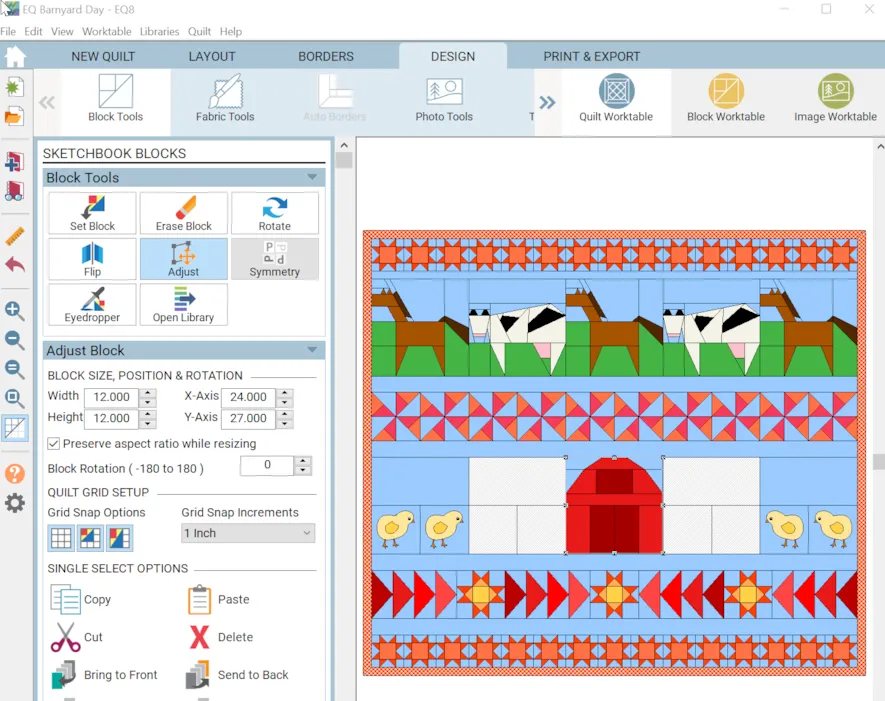
Select the Barn Block. We are going to drag and drop it in the center of strips 7 and 8 spanning both rows. Use the Adjust Block tool to make sure the Barn is a 12″ x 12″ block to cover the two 6′ strips beneath it. I set the Grid Snap increments to 1 inch to make it easier for placement.
-
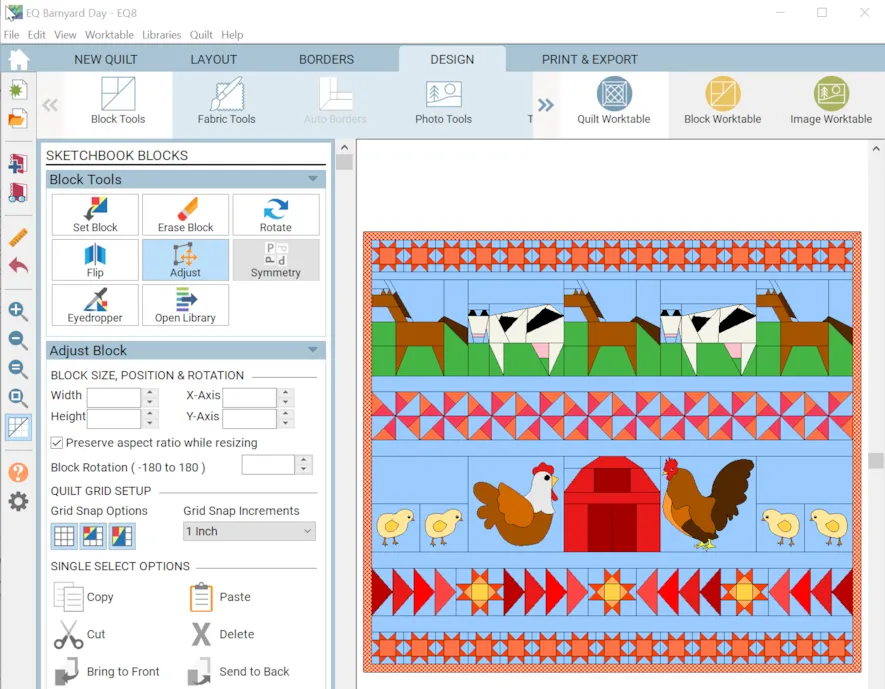
Select the Rooster Block and drag and drop it to the right side of the barn. Use the Adjust tool to make sure it is a 12″ x 12″ block.
-
Now you can recolor the quilt in fabric or the colors you like.
-
Make sure you do not add fabrics under your chicken, barn or rooster block or you will be counting fabric twice. One way to check is to click on the little Eyeballs next to the layer names. Try turning layer 2 off and making sure that the 3 blocks are totally empty on Layer 1. If they are not, just use erase block in Block Tools to remove the colored blocks. Don’t forget to turn it back on.
I hope this lesson inspired you to try some creative strip quilts of your own. Maybe you have orphan blocks that would be great designed together in a scrappy look.
Please upload and share your creations!
Want to learn more about Strip Quilts? Check out these great resources.

|
EQ Support has great information, just search for Horizontal Strip layout or Strip Layout Styles.
There is also a free support lesson HERE. Design a strip quilt with square blocks lesson HERE |
|
Design & Discover
Check out this great lesson from Heidi |

|
On Point Quilter’s Kari Schell shares how to make a braid quilt using horizontal and vertical strip quilts. |
Please share your ideas, questions and feedback in the comments. I would love to hear from you. Thanks!
Lori J. Miller lives in Oxford, Michigan, where she designs, stitches and sews quilts and quilty things. She loves experimenting with fun colors and designs to make playful and clever products for the modern sewist. Lori continues to share her knowledge with others teaching quilting and EQ8 classes around the country. A self professed EQ8 superfan, you can follow her quilting adventures on her blog at lorimillerdesigns.com or on instagram @lorimillerdesigns
