Do you plan to gift some quilts to family and friends this holiday season? Don’t forget to put a label on the quilt before you wrap it up! It’s important to document your quilts for future generations. And you worked hard on that quilt! You should “sign” your work, just like any other artist.
Did you know you can design your own personalized labels in EQ8? Print the labels on EQ Printables Inkjet Fabric Sheets and you’ll have the perfect label for quilt.
Create Your Own Quilt Label in EQ8
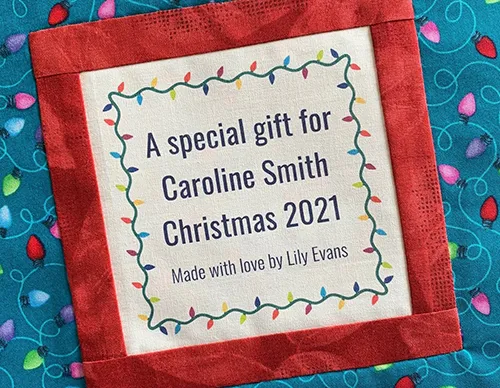
Below is a simple option that won’t use much ink, but still has a holiday flair!
- Download the free Lightbulb Border project from DoYouEQ.com. If you are given the option to open or save, choose to save the project. Most browsers will save the project file to the Downloads folder.
- Open the project file (Lightbulbs.PJ8) in EQ8.
- View the Project Sketchbook, select the Quilts section and Edit the Lightbulb Border quilt to the Quilt Worktable.
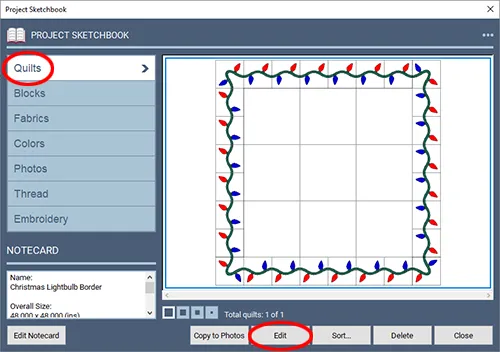
- (Optional) I wanted to add a bit more variety to the lights, so I selected Fabric Tools on the ribbon and then used the Paintbrush tool to color the lights with some different solid colors.
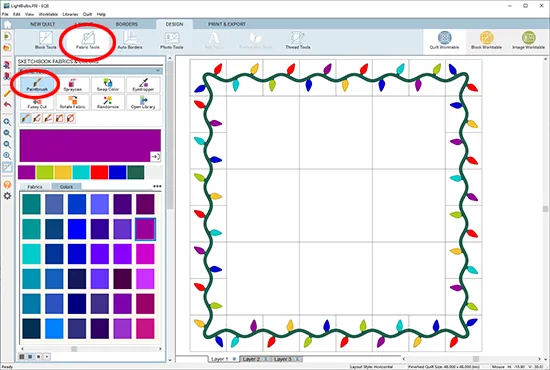
- Now we can add the text for the label. Below the quilt, click the Layer 2 tab.

- Click Fabric Tools on the ribbon (if you’re not already there from coloring the lights) and select a solid color in the palette you’d like to use for the text of the label.
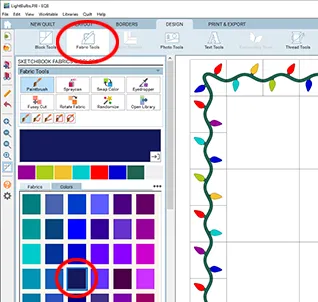
- On the main toolbar, click the Hide/Show Quilt Patch Lines button to turn off the lines showing in the center of the quilt.

- Click Text Tools on the ribbon and choose a Typeface you’d like to use in the palette.
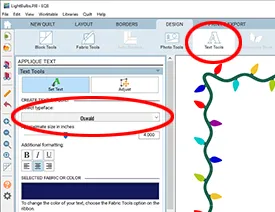
- Move your mouse over to the quilt. SHIFT+click and drag diagonally across the quilt to create a text box. When you release your mouse button and the Shift key, you’ll see a flashing cursor in the box. (Don’t worry about the location of the text on the quilt. We’ll adjust the size and placement of the text in a few steps.)
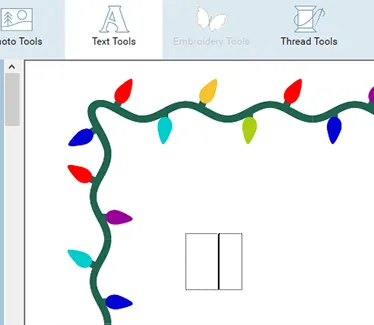
- Type the text for your label. The text box will expand as you type. So, when you want the text to break to a new line, press the Enter or Return key on your keyboard to move the cursor to the next line.
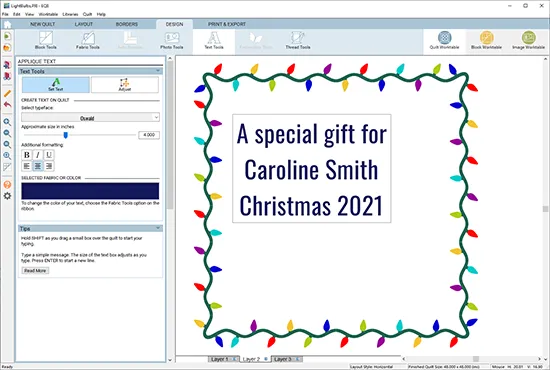
- While the text box is still selected, you can adjust the size and formatting of the text using the options in the palette.
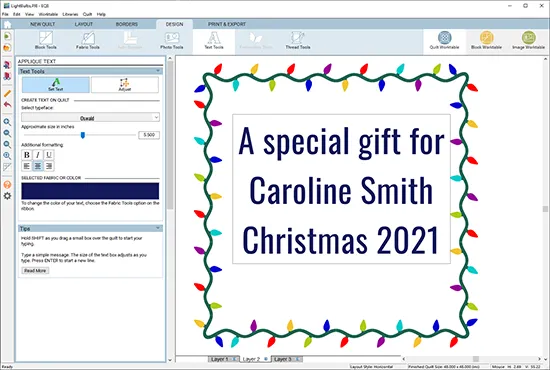
- The settings apply to all text within a text box. If you’d like the text to be different sizes or styles, create a different text box for each style.
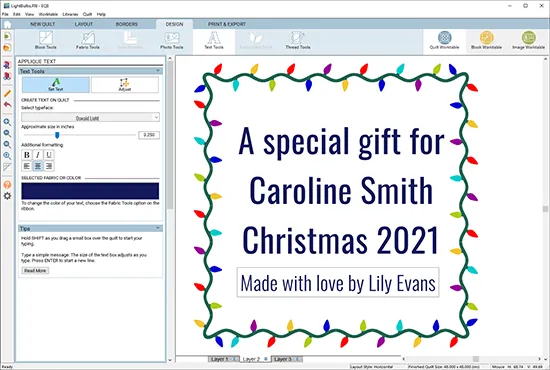
- You can use the Adjust tool in the palette if you need to move the text boxes on the quilt.
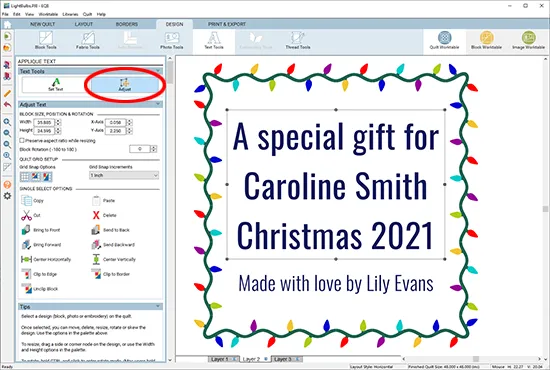
- When you are happy with the label, click the Add to Project Sketchbook button to save it.
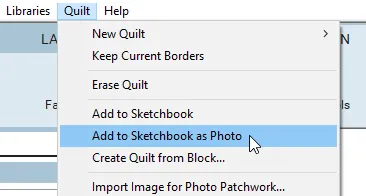
- We also need to save a version of this quilt design as a “photo” so we can easily print it on inkjet fabric sheets. On the top menu bar, click QUILT > Add to Sketchbook as Photo.
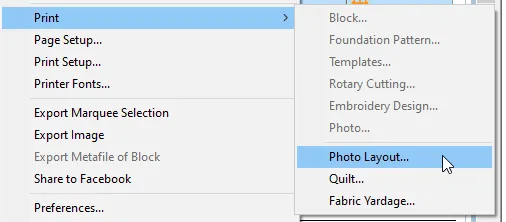
- On the top menu bar, click FILE > Print > Photo Layout.
- You’ll see a print preview page. All the photos in the Sketchbook are displayed in the panel on the right. You can drag the label photo from the panel onto the page. You’ll get a message warning you that the image is too big. Click Yes to scale it to fit on the page.
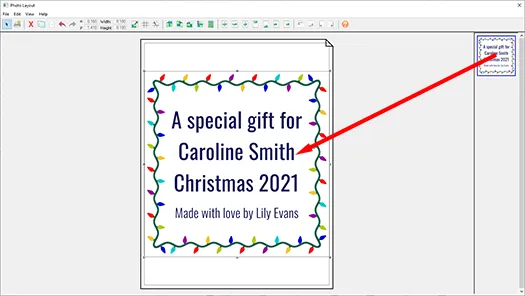
- Once the label is on the preview page, you can adjust the size of the label. Click the Resize button on the top menu bar, then type a new size in the dialog box and click OK.

- You can move the label around on the preview page. If you have several labels you’d like to print, you can combine them all on one page using this Photo Layout print option.
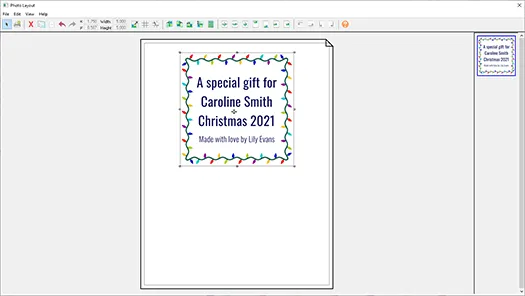
- I suggest printing a test label on regular paper first. Once you confirm that your label is all ready for fabric (Double-check for typos! Ask me how I know
 ), load your printer with a fabric sheet and hit Print.
 - Follow the after-printing directions for the fabric sheets you are using. If you are using EQ Printables, you can view the care sheet here.
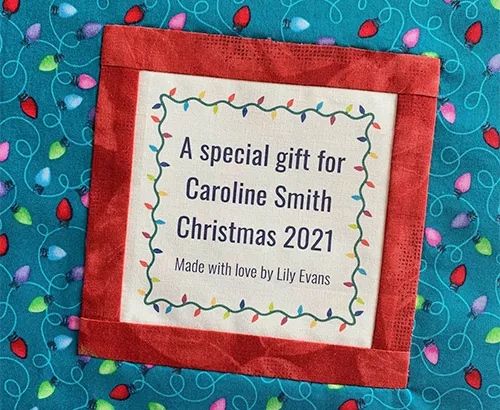
- Stitch that label to the back of your quilt and be proud that you are being a responsible quilt-labeler!
Tips:
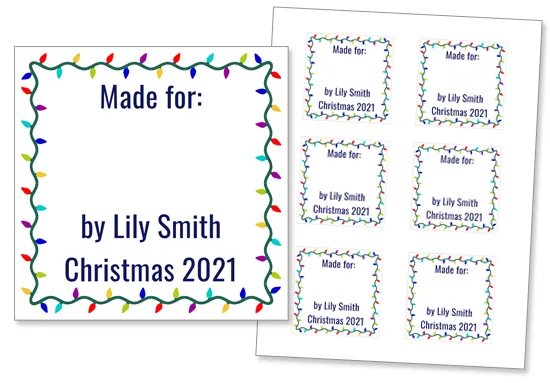
- If you have lots of gifts that need labels, design something more generic and print a full sheet of the labels. Leave a space where you can write the recipient’s name with a fabric pen.
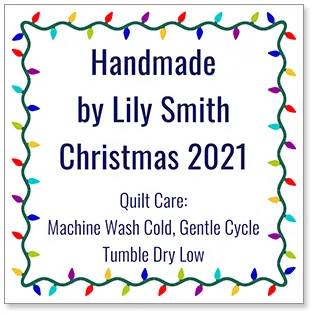
- Consider printing washing instructions on the label so the recipient knows how to properly care for their new quilt.
- Looking for more quilt label inspiration? Here are two more lessons on designing quilt labels in EQ8:
Design & Discover – Quilt Labels Lesson
Editing the Quilt Labels Quick Quilt Project
How many quilts are you gifting this year? Tell us what you’re working on in the comments!




11-20-2021
1:00 pm
Would love to see some more border designs on EQ.
11-22-2021
1:47 pm
Have you tried using any of the Auto Borders available in EQ8? Here’s a video to get you started: https://support.electricquilt.com/articles/using-auto-borders-in-eq8/
11-20-2021
6:10 pm
I use this process to print gift labels. Make up the label as desired then print on card stock or just typing paper. Print out, trim, add a ribbon hole or just tape to the gift.
For my younger kids, I put a photo of the recipient (them) and a photo of the gifter (me). The pictures let them know who its for (them) and who its from (usually me).
11-21-2021
12:53 pm
Barb you have such a wonderful idea about the gift labels; I might try that!
11-22-2021
1:52 pm
Great idea!
11-12-2022
7:14 am
Wow such a great idea Barb! My grandkids will love that