
Spring is coming up fast. It makes me think of new beginnings with new fresh flowers and the leaves budding on the trees. This inspires me to start a new quilt celebrating the flowers sprouting up from the cold winter ground.
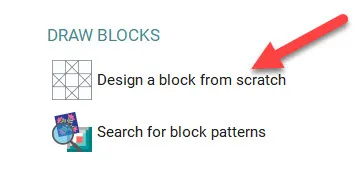
Open your EQ8 program ![]() and click on the ‘design a block from scratch’ heading on the opening page.
and click on the ‘design a block from scratch’ heading on the opening page.
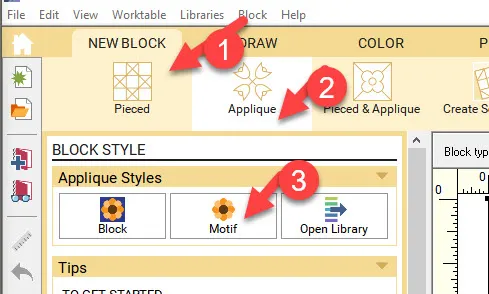
On the block worktable, click on the new block tab>applique>motif.
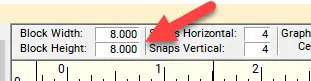
On the block properties bar at the top of the worktable, set the block size to 8 x 8 inches.
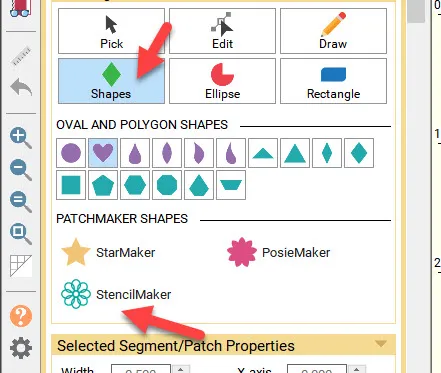
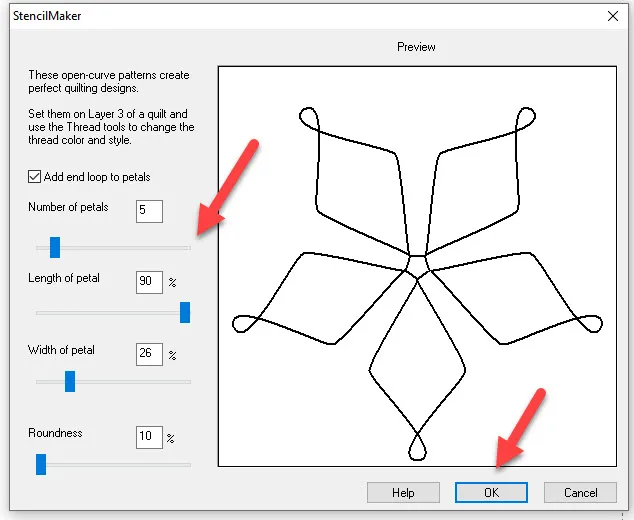
In the drawing tools box at the left click on the shapes icon and then click on the stencil maker icon.
In the dialogue box, use the slider bars to change the shape of the elements to create a flower like design then click OK to place it onto the worktable.
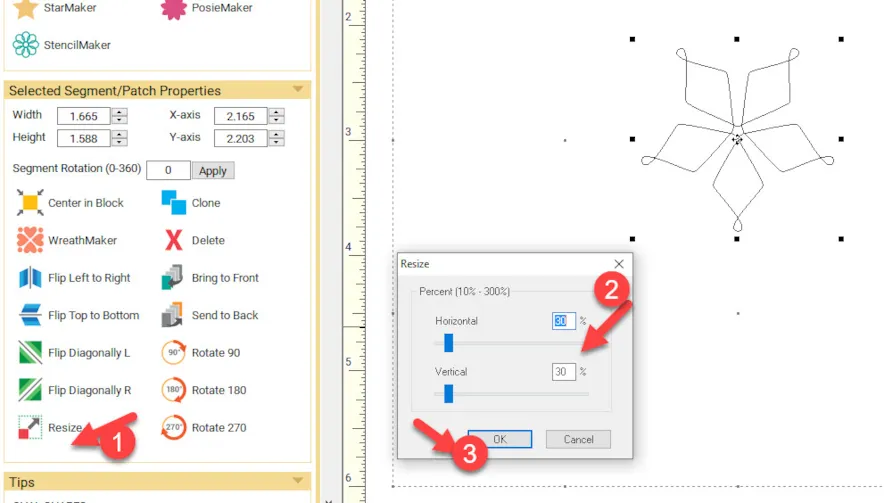
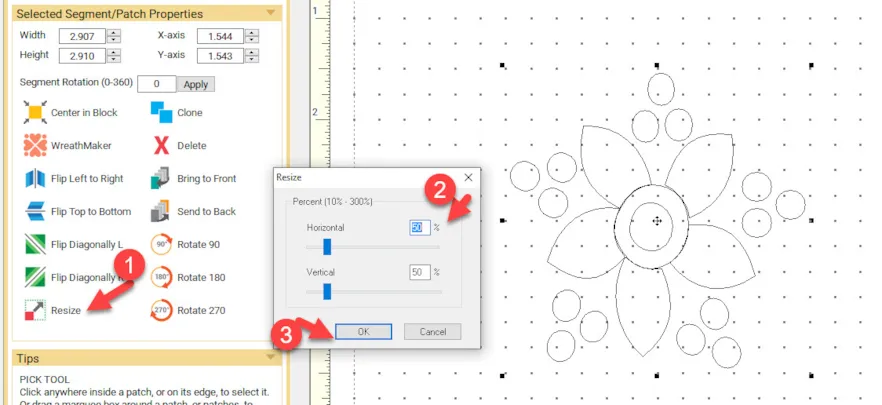
Once the design is on the worktable and still selected, click on the resize icon![]() in the properties menu at the left and resize the element to about 30% of the original size.
in the properties menu at the left and resize the element to about 30% of the original size.
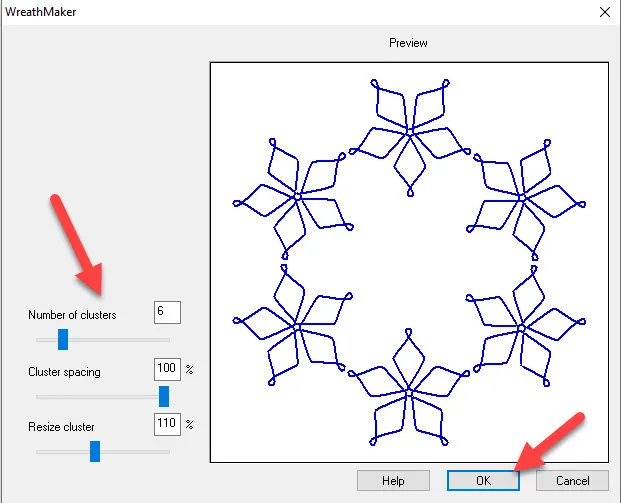
While the smaller design is still selected, click on the wreath maker tool![]() on the properties box at the left and create a ring of flowers.
on the properties box at the left and create a ring of flowers.
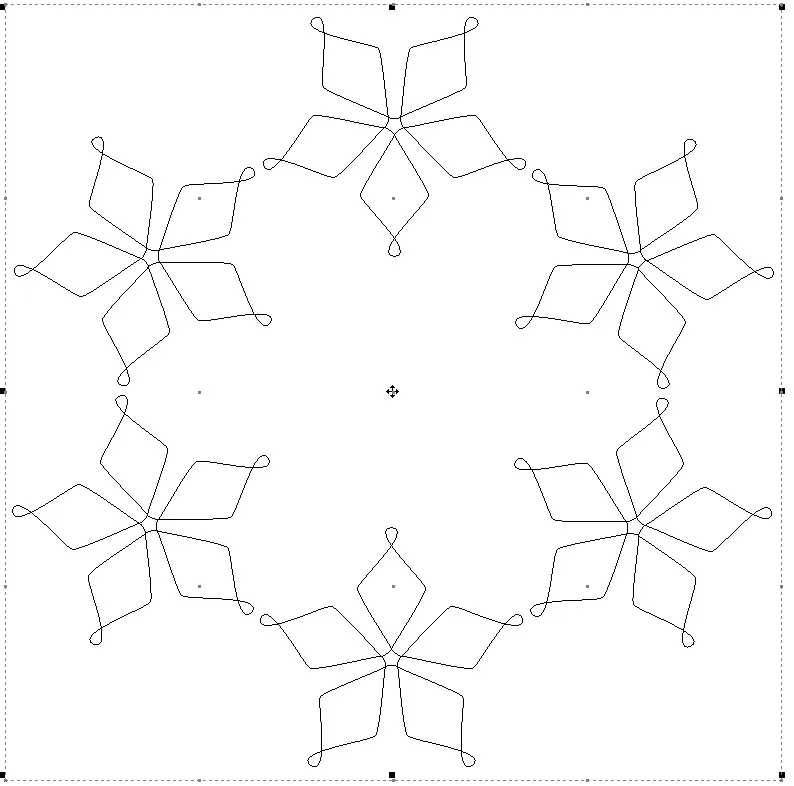
Once the wreath design is on the worktable and still selected, use the resize tool![]() to make the design fill the block worktable and the center block tool
to make the design fill the block worktable and the center block tool ![]() to center it in the worktable space.
to center it in the worktable space.
Add the design to the sketchbook.![]()
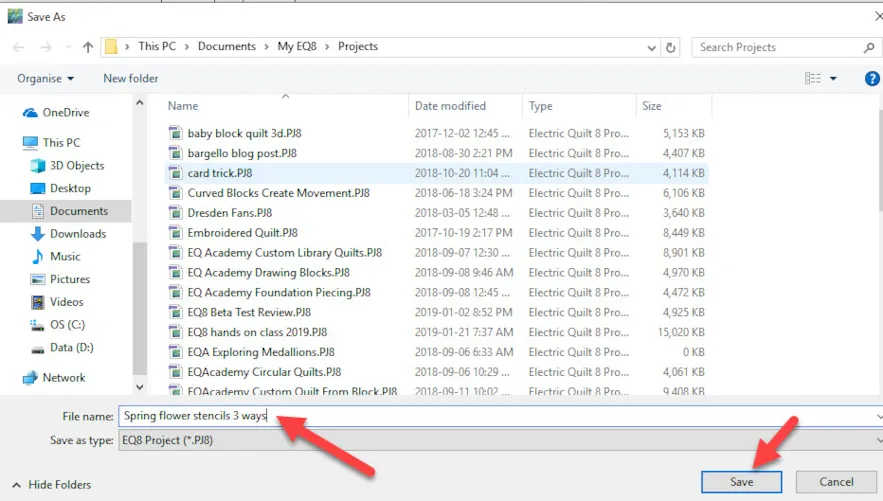
The program will ask you to name the file so I called mine “Spring Flower Stencils 3 Ways”.
There is a center area of the block where I can add more flowers to the design.
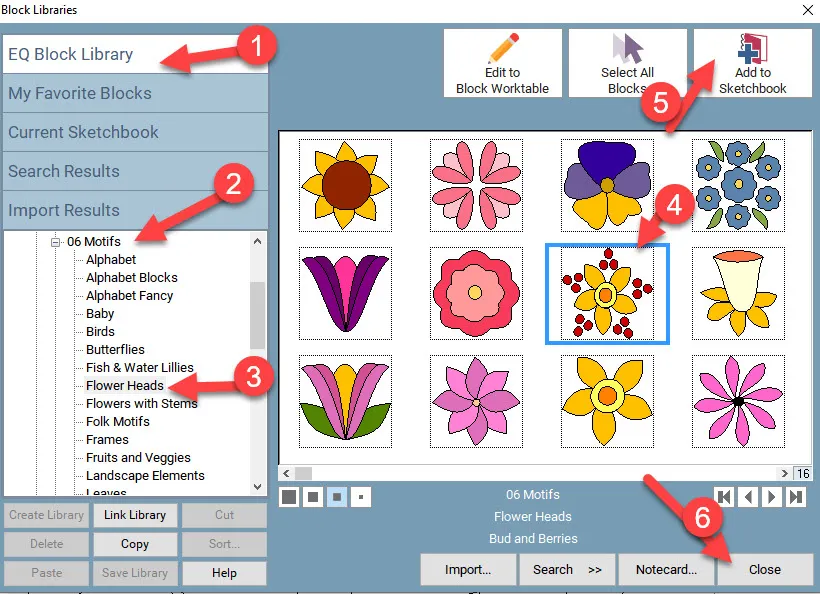
Click on LIBRARIES>Block Library at the top of the screen and then select the 06 Motifs heading. Select the sub category of Flower Heads. I am choosing the Bud and Berries design from the library. Add it to the sketchbook and close the block library screen.
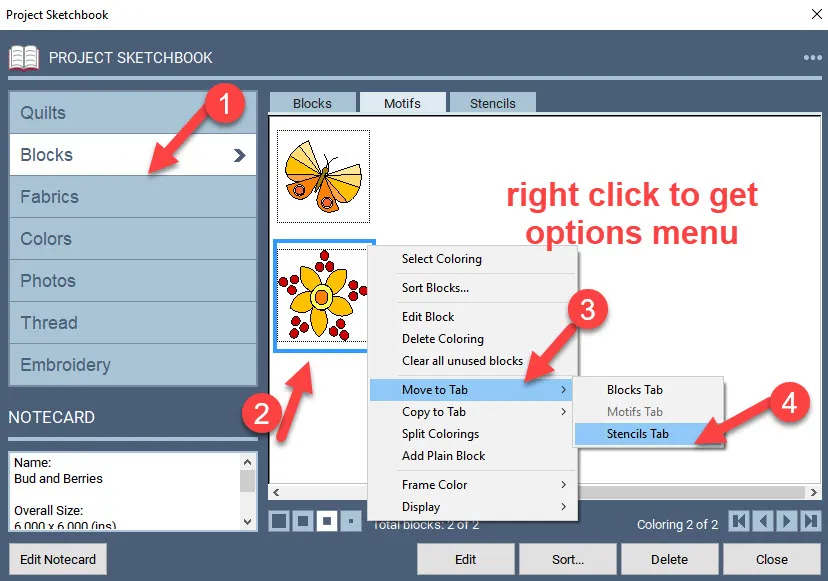
Click on the view sketchbook icon![]() on the left side of the screen and then click on the blocks heading under the motifs tab. We are not creating an applique motif for our design so we can select the flower design and right click to move the design to the stencils tab. Now you only have an outline of the applique motif as a new stencil design under the stencils tab.
on the left side of the screen and then click on the blocks heading under the motifs tab. We are not creating an applique motif for our design so we can select the flower design and right click to move the design to the stencils tab. Now you only have an outline of the applique motif as a new stencil design under the stencils tab.
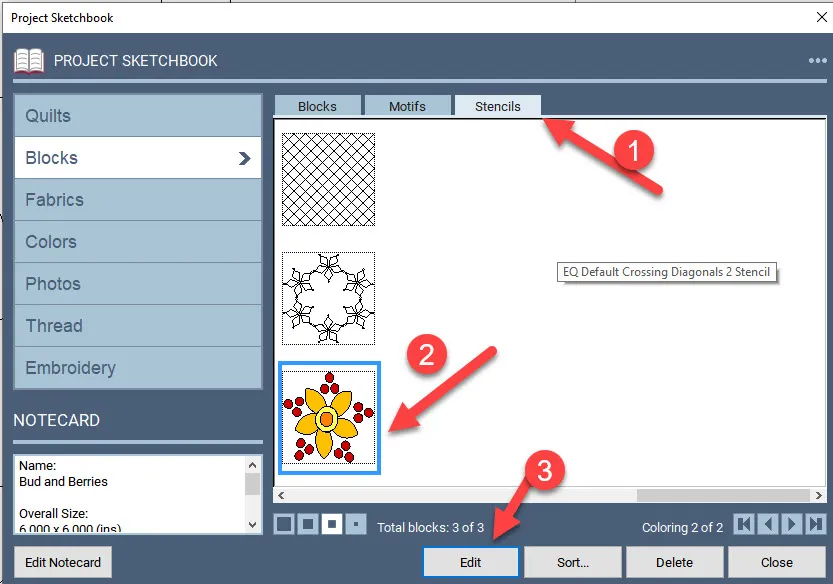
Click on the stencils tab to see the design in the sketchbook. Click on the design to select it and then click on edit at the bottom of the box to place the outline drawing on the worktable.
The stencil line drawing will appear on the block worktable. Click on EDIT>Select all at the top of the screen to select the entire design on the block worktable. Now resize the block to about 50 % using the resize tool ![]() on the properties box at the left.
on the properties box at the left.
Add this new resized flower and berries to the sketchbook.![]() Click on COPY>Paste at the top of the screen to add a copy of the design to the windows clipboard.
Click on COPY>Paste at the top of the screen to add a copy of the design to the windows clipboard.
Click on View Sketchbook and locate the wreath of flowers we created under the blocks heading under the stencils tab. Click on the design to select it and then click on edit at the bottom of the box to open it onto the worktable.
Once the wreath design is open on the worktable, click on EDIT>Paste at the top of the screen to add the flower with berries to the design. You may need to resize![]() it slightly to fit well into the wreath. You may also need to center
it slightly to fit well into the wreath. You may also need to center ![]() the design in the middle of the block.
the design in the middle of the block.
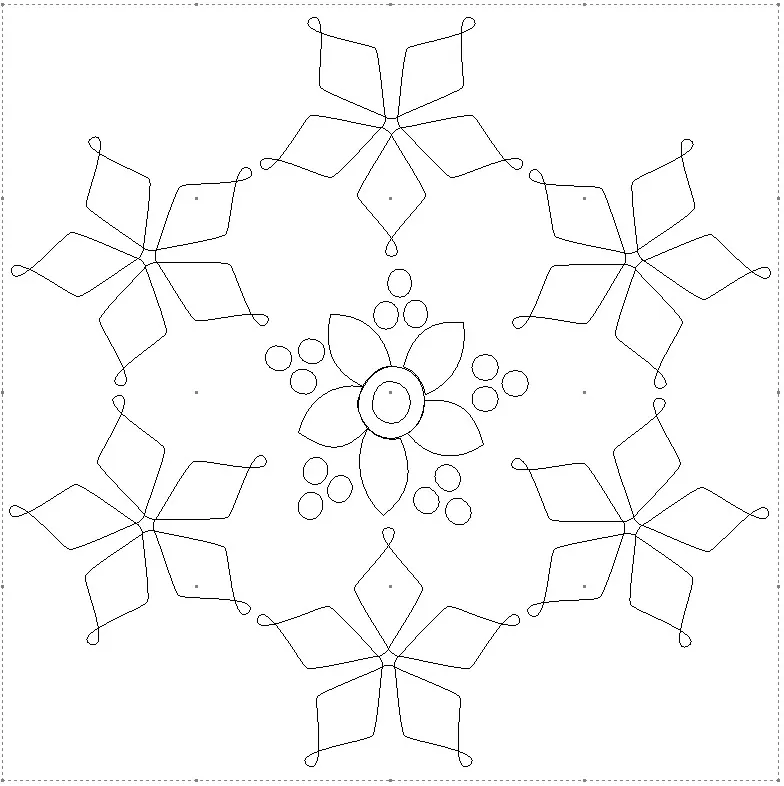
Add the design to the sketchbook.![]()
The new spring flower design stencil can be used three different ways.
1. Print the design onto paper and use it to trace or stitch through onto your quilt top for an intricate quilting design onto a block.
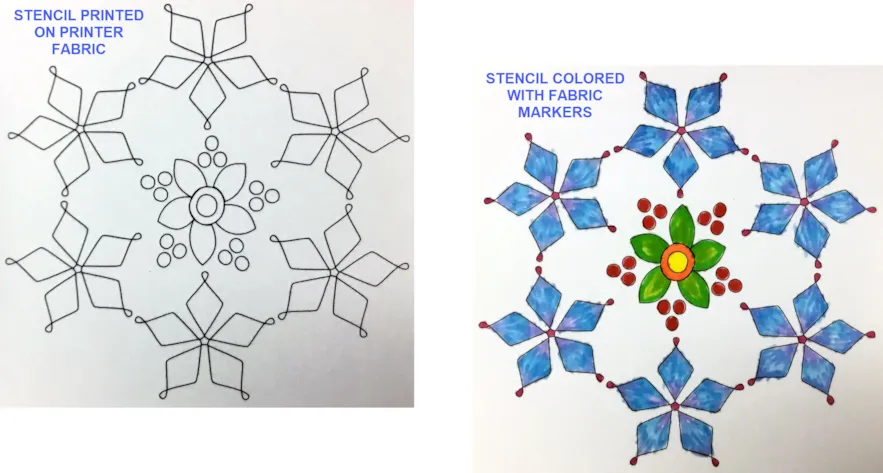
2. Print the design on printer fabric and then use the outline to place raw-edge applique elements onto the printed fabric sheet.
3. Print the design on printer fabric and color the elements with fabric felt pens or watercolor pencils to create a painted fabric block.
Use your imagination as to how you would use this detailed spring flower stencil design in your quilting project.


03-17-2019
11:17 am
Could this technique motif be exported to art n stitch software and converted to a long arm stitching design?
03-17-2019
1:07 pm
Asolutely. Go to FILE>Export Image and save it to a folder as an image (I use .jpg) to open in your Art and Stitch program.
03-17-2019
11:19 am
That is neat! Thanks . Love your ideas.
03-17-2019
1:08 pm
Thanks Barbara. I sure have fun discovering different ways to use my EQ8.
03-17-2019
1:44 pm
Thank you for the information. I am going to try it and then color from there.
03-17-2019
6:53 pm
Thank you! I can’t wait to explore this tool some more. This is a fun design. Happy spring(hope it gets here soon)!
03-17-2019
8:35 pm
I was very excited about this lesson, but I can’t seem to figure it out. First, does it matter what shape I choose? I was trying to get a stencil just like yours but It never seems to work. I try one shape, don’t like it so I cancel and try a new one, but I get the same thing no matter which shape I use. I see where you used the heart, but your preview looks nothing like a heart.
Thanks,
Susan
03-17-2019
8:44 pm
OK, I guess I guess I understand (sort of) I missed the a”Add end loops to petals”, now I do get what you drew, but is that all I can do? I was thinking I could use the different shapes to get different designs. I know, picky, picky, LOL!
Susan
03-17-2019
8:58 pm
Susan thanks for your questions. Of course you can use any shape to create a stencil. A stencil is simply a line drawing. Any shape can be edited by clicking on the edit nodes and changing them to curves or points. From there you could use the edit handles to ‘twist’ the shape to create loops or points. You can add or delete as many points as you need to create the shape you want. Once you have a shape you are satisfied with you can then copy/paste, clone, or use the Wreathmaker tool to create multiple copies of the selected shape. There is no end to the creativity of the EQ8 program. Keep experimenting with different shapes using edit points to see what you can create. Enjoy!!
03-18-2019
5:02 pm
But… I can’t use the heart shape vs the hexagon shape to get a different wreath effect from them, is that correct? Like hearts in a circle or squares in a circle etc?
Susan
03-18-2019
5:08 pm
Hi Susan. Yes you can use any shape you want and place it into a circular wreath design. You can edit your shapes with the edit tool. This is just using the shapes tools and not the stencil maker tool. Just simply shapes.
04-01-2019
1:31 pm
Could you please expand on this tutorial using the Janome Artistic digital cutter? We could conceivably made plastic quilting stencils. Thanks
04-01-2019
3:37 pm
Carol–In order to use any cutting machine, you would need to export the image in the file format needed by your specific machine. You need to contact your dealer as to what format you need and how to use it in your own cutting machine. This blog is dedicated to Electric Quilt products only. Thanks for your question.
04-01-2019
4:30 pm
Thanks for the speedy reply
04-03-2019
3:22 pm
Thanks