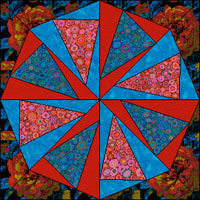
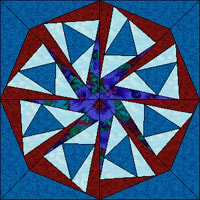
by Andrea Bishop
Welcome to the club! If you have EQ software and the Kaleidoscope Collection add-on installed, you’ll be able to follow along.
This is the eleventh of twelve Kaleidoscope lessons.
Intro
This month we are going to draw again. Make sure you brush up on the Foundation Fundamentals (Lesson 1 and Lesson 2) from earlier. We’ll be using those “rules” again for drawing inside wedges and copying & pasting them to complete the block.
Start the Project
- Open your EQ software.
- Start a new project and name it Kaleidoscope Twists. Click OK.
Get the “plain” block
- Click LIBRARIES > Block Library.
- Go to Kaleidoscope Collection > Star Corners > 01 Basics.
- Click on the first block to select it. It is called Plain Kaleidoscope 1.
- Click Add to Sketchbook in the bottom-right corner of the library window.
- Click Close to put the library away.
Edit the “plain” block
- Click the View Sketchbook
 button.
 - Click the Blocks section.
- Click on the Plain Kaleidoscope 1 block to select it.
- Click Edit. You’ll be on the block worktable now.
Pause: Let’s make sure our worktable is set up correctly.
- Turn on the Precision Bar if you haven’t already. (Click the VIEW menu. If Precision Bar doesn’t have a check next to it, click on those words to turn it on. If it does have a check, just click away from the list so you don’t turn it off.)
- Make your Precision Bar match mine (see picture below). My shorthand for this stuff will be the TAB order. So if you double-click on the Block Width, type in a new number, and press TAB, the numbers would be: 6, 6, 24, 24, 2, 2
Then, Graph Paper Cells ON, Snap to Grid OFF, Snap to Node ON, and Snap to Drawing OFF.
![]()
Draw 1 Twist
- Before we start drawing… here’s a quick recap. We need to remember rules b & d from the February lesson.
b) If you don’t want to draw all 8, it still doesn’t work to draw only one wedge – you need to draw 2 adjacent (side by side) wedges.
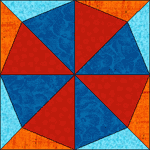
For some reason, these blocks work in two sets. You need to draw one straight wedge and one 45 degree wedge in order to be able to copy and paste around the rest of the block. For the block at the right, that means I’d need to do a red and a blue wedge. I usually pick the two that form the top-left square.
d) Copy and Paste only works when:
* Snap to grid is off
* Snap to node is ON
* Snap to drawing is off
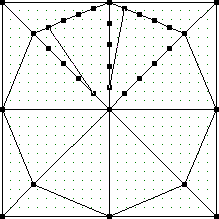
* you are copying and pasting UNIQUE LINES ONLY - meaning… you will probably crash if you paste lines on top of one another. Look at the image below where we left off with our last block from last month. Following Rule (b), I can paste the UNIQUE LINES marked in blue into the 3 spots marked “here.” I need to redraw, from scratch, my UNIQUE LINES where the red X is… and repeat.

The two tools you’ll be using for the majority of this lesson are the Line ![]() tool and the Shape/Edit
tool and the Shape/Edit ![]() tool.
tool.
- Click the Shape
 tool.
tool. - Click on a line to select it. Click BLOCK > Edit on the menu bar.
- These numbers don’t matter when you go to draw your own. But just make them the same as mine for right now. Make the number next to Partition be 5.
- One at a time, click on each of the lines marked in red, and click the Partition button. (Partition is set to 5.)

- Your block will look like this now. Click the Line
 tool.
tool.

- Draw a line in both wedges from node to node. (Make them match mine. I did one node over from the corners of the wedges.)
- From where the last line left off, start a new line in both wedges. (One node over from the corner.)
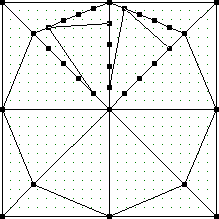
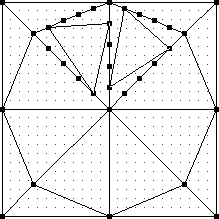
- From where the last line left off, start a new line in both wedges. (End where you started.)
- Click the Add to Sketchbook
 button to save your first twist.
Draw a 2nd Twist
- We need to add more nodes again. Click the Shape
 tool.
tool.

- Bring up the Edit box by either clicking on the red square in the tool’s image, or by right-clicking the line, or by clicking BLOCK > Edit.
- One at a time, click on each of the lines marked in red, and click the Thirds button. Your block will look like this now:
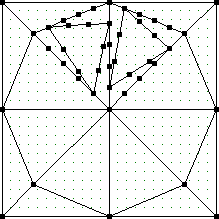
- Click the Line
 tool. (Draw lines one node over from the new corners of the triangles.)
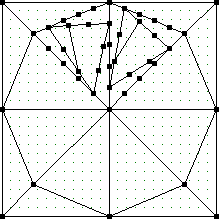
- Start where you ended the last line and draw a line in both wedges (one node over from the new corner).

- Start where you ended the last line and draw a line in both wedges (ending where you started).
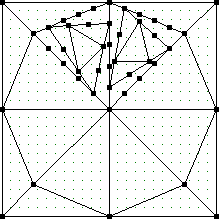
- Click the Add to Sketchbook
 button to save your second twist.
Copying and Pasting the Wedges Around
- Click the Pick
 tool.
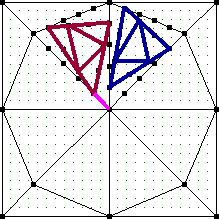
tool. - Select only the unique lines marked in red & blue AND ONE ANCHOR LINE. Use the tips in Rule (c) for selecting.
c) Know all the ways to select and deselect lines (you’ll probably need them):
* You can select lines by clicking on them (just don’t move them when you click on them).
* You can select lines by making a marquee box around them.
* You can select all the lines by doing CTRL+A on your keyboard.
* You can use a combination of SHIFT plus small marquee boxes and clicking on lines to get the group you need.
To deselect a line, you hold down your keyboard SHIFT key and click on a selected line to remove it from the group.
To deselect all the lines, click in the empty white space outside of the block outline.
I recommend using SHIFT+click and/or SHIFT plus marquee boxes to get them all. MAKE SURE you don’t select any lines other than our twists and the anchor line marked in magenta.
- Bring up the Symmetry box by clicking on the small square in the tool image of the Pick
 tool.
tool.
(BLOCK > Symmetry also works.) - Press CTRL+C and CTRL+V on your keyboard to get the next set.
- Click Rot 90 in the Symmetry box.
- Move it close to the place where you’re going to drop it, by hovering your cursor over the center crosshair and dragging the pasted lines to the next part of the block.
- Grab the selection by the crosshair and drop it into place matching the end of the anchor line to the center of the block (see image below). Once you get the selection as close as it is in the image, when you release, the end of the anchor should get sucked into the center of the block… snapping in place.
- Click the Add to Sketchbook
 button to save your drawing.
 - The group is still in your clipboard. Press CTRL+V to get the next set.
- On the Symmetry box click Rot 180.
- Drop it into place like the last one. Click the Add to Sketchbook
 button to save your drawing.
 - The group is still in your clipboard. Press CTRL+V to get the next set.
- On the Symmetry box click Rot 270.
- Drop it into place like the last one.
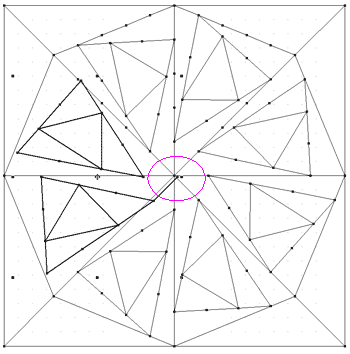
- Click the Add to Sketchbook
 button to save your drawing.
 - Let’s check the Foundation Pattern. Click FILE > Print > Foundation Pattern. It should be in 8 wedges like this:

- Click Close to put the foundation pattern window away.
- Click the View Sketchbook
 button.
 - Click the Blocks section.
- Click on the last block in the sketchbook (the one we just drew).
- Click Notecard.
- In the Name line, type: Kaleidoscope Twist 1
- Click the X to close the Notecard.
- Click Close or X to put the Sketchbook away.
- Click FILE > Save or the Save button to make sure the notecard information is saved.
That’s it for this lesson.
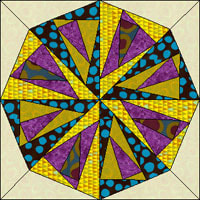
If you would like to try other blocks, vary the Partition/Stagger numbers (remember they don’t matter… they just provide the nodes). Then just draw lines to whichever nodes you want. Here are some that I drew:

