by Andrea Bishop
Welcome to the club! If you have EQ software and the Kaleidoscope Collection add-on installed, you’ll be able to follow along.
This is the fourth of twelve Kaleidoscope lessons.
So let’s finish Foundation Fundamentals Part 1! We’re going to draw like crazy.
We left off figuring out variations… visualizing some of the ways that more detail can be added. You can do:
- parallel stripes
- not-so parallel stripes
- lines coming out from the same corner as the last patch
- lopping off a corner of a bigger piece
- and you could even piece the outer star corner (I didn’t)
Next part I need you to understand is how much you can do in EasyDraw… what works… what doesn’t… and stuff you need to know in order to be able to do it on your own later. I bet you’re thinking… “oh, I’ve got this drawn, now I just can copy and paste it around in the other 7 sections.” Nope. Sorry. You need a few more steps.
I’m writing these down so that you will have them for reference. If you don’t understand them now – that’s ok. Just know that after 12 months of these lessons, if you run into problems when you’re drawing on your own later… one of these tips will most likely help. If you read the tips below and they seem kind of overwhelming, just skip down to where the lesson starts again. These tips are important, but they don’t really matter when you’re doing these lessons, because I guide you to avoid problems. : )
Follow these tips for ultimate success:
a) The safest way to get all 8 wedges is to draw all of them individually.
This means, when you split one line into Thirds, you should do it in the same place in the other 7 wedges. Then, when you draw a line from one of the nodes you created, you should draw it the same way in the other 7 wedges from the nodes you created there. This can take longer and there is a shortcut, but this method is the cleanest and safest.
b) If you don’t want to draw all 8, it still doesn’t work to draw only one wedge – you need to draw 2 adjacent (side by side) wedges.
For some reason, these blocks work in two sets. You need to draw one straight wedge and one 45 degree wedge in order to be able to copy and paste around the rest of the block. For the block at the right, that means I’d need to do a red and a blue wedge. I usually pick the two that form the top-left square.
c) Know all the ways to select and deselect lines (you’ll probably need them):
* You can select lines by clicking on them (just don’t move them when you click on them).
* You can select lines by making a marquee box around them.
* You can select all the lines by doing CTRL+A on your keyboard.
* You can use a combination of SHIFT plus small marquee boxes and clicking on lines to get the group you need.
To deselect a line, you hold down your keyboard SHIFT key and click on a selected line to remove it from the group.
To deselect all the lines, click in the empty white space outside of the block outline.
d) Copy and Paste only works when:
* Snap to grid is off
* Snap to node is ON
* Snap to drawing is off
* you are copying and pasting UNIQUE LINES ONLY - meaning… you will probably crash if you paste lines on top of one another. Look at the image below where we left off with our last block from last month. Following Rule (b), I can paste the UNIQUE LINES marked in blue into the 3 spots marked “here.” I need to redraw, from scratch, my UNIQUE LINES where the red X is… and repeat.
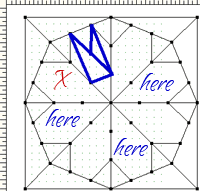
e) Pasting works best when you have the following to snap to:
* You’ve already created nodes to drop your pasted group on and let Snap to Node grab them… like our example above.
* Your selected patches include an anchor line that tags into a non-unique node. In other words, the stuff in blue below may not be unique, but you need it in order to figure out where in the world to put the line in the other wedges. (yes, I know this overrides my other rule, but I think this is the only exception.) I would only paste in one wedge at a time, saving to sketchbook in between. This way, you’re not trying to do more than one non-unique line at a time.

f) Know your Symmetry Options and how to get to them:
* Symmetry is available with the Pick ![]() tool. You need to click the tool first.
tool. You need to click the tool first.
* This Symmetry box is available when you do one of the following:
1) you click the tiny (red) square in the tool image itself
2) you have something selected and you right-click and choose Symmetry
3) you choose BLOCK > Symmetry from the menu.
* Clone - I don’t always use, it’s the same as CTRL+C, then CTRL+V. I usually have my left hand stationed over that area of the keyboard out of habit.
* Rot 90, 180, 270 work to get the rotations for the 3 other wedges when you go to copy and paste.
* Flip H and Flip V are great when you want to create something non-symmetrical.
* Flip D and Flip O are actually quite helpful in saving you steps! I never know which is which so I hold up my hands in front of me in the shape of a “V” or bottom of a heart. That tells me that “D” flips on this axis: \ and “O” flips on this axis: /
g) Know your Editing Options and how to get to them:
* Edit is available with the Shape ![]() tool. You need to click the tool first.
tool. You need to click the tool first.
* This Edit box is available when you do one of the following:
1) you click the tiny (red) square in the tool image itself
2) you have something selected and you right-click and choose Edit
3) you choose BLOCK > Edit from the menu.
* Locate - I use for creating a node in the first wedge, exactly where I want it. The line needs to be selected first, then you click locate, then you click back on the line where you want the node to go. Using Locate is difficult though, because you might have trouble getting the node in the other set of pairs.
* Xings is SO SO SO IMPORTANT. Click on a line that crosses another and click Xings and it will find the intersection/crossing of only that part… not the whole block.
Xings is awesome when you need to paste a line past the block outline. Just paste the line and let it snap to a node you already have created. Then draw another line over the block outline that crosses where you need to stop your line. Then click Xings and delete off the part that hangs off the block and that is still on the block outline (with the Pick tool and your keyboard DELETE key).
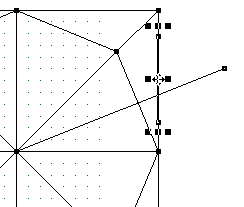
* Half - splits into two equal pieces
* Thirds - splits into three equal pieces
* Partition - splits into equal pieces according to the number you choose.
* Stagger - splits into equal pieces with the last piece split in half and put at each end according to the number you choose.
h) Use “Resize” to increase a line’s magnitude.
OK, I know I’m showing my math geek side on this one, but Resize is actually really helpful when you only have one line selected. This was a major “duh” moment for me until I finally figured it out… now I use it all the time!
If you try to resize a square, the square will get bigger… that doesn’t help when you’re trying to stay in a wedge. But, if you try to resize a line, it will get longer! This helps you make a line cross another so you can use Xings. As long as you keep horizontal % and vertical % the same, the line will keep its direction/angle/orientation. Over 100, and it gets longer… Under 100 and it gets shorter.
Too much talking and not enough drawing! I know, I know…
On to the lesson!
Open Your Existing Project from Last Month
- Open your EQ software.
- Click the Open an Existing Project tab.
- Find your project in either list called “Foundation Fun“, select it, and click OK.
Edit Gazebo 1
- Click the View Sketchbook
 button.
 - Click the Blocks section.
- Click on the Gazebo 1 block to select it.
- Click Edit. You’ll be on the block worktable now.
Pause: Let’s make sure our worktable is set up correctly.
- Turn on the Precision Bar if you haven’t already. (Click the VIEW menu. If Precision Bar doesn’t have a check next to it, click on those words to turn it on. If it does have a check, just click away from the list so you don’t turn it off.)
- Make your Precision Bar match mine (see picture below). My shorthand for this stuff will be the TAB order. So if you double-click on the Block Width, type in a new number, and press TAB, the numbers would be: 6, 6, 24, 24, 2, 2
Then, Graph Paper Cells ON, Snap to Grid OFF, Snap to Node ON, and Snap to Drawing OFF.
- Click the Shape
 tool.
tool. - We’re going to work in the upper-left quadrant in the point area of the two wedges. Click the square in the tool image to bring up the Edit box.
- Look at the picture below. We want to split those 3 lines each into thirds. With the Shape tool, click on one of the lines and click the Thirds button on the Edit box.
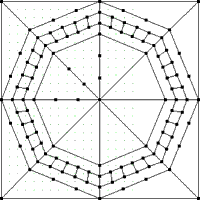
- Repeat step 10 for the other two lines that need splitting.
- Click the Line
 tool.
tool. - Draw your X within one of the two wedges.
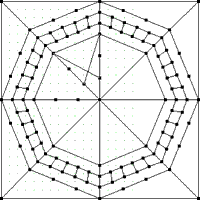
- Draw your X in the other wedge.
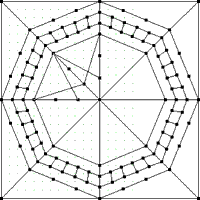
- Click the Add to Sketchbook
 button to save your drawing thus far AND TO CREATE THE INTERSECTIONS. Each line of the X will now have a long part and a short part.
- Click the Pick
 tool.
tool. - Follow the tips in Rule “c” for how to select stuff. We want to turn the X into a Y. Click on one of the short parts to select it. Press your keyboard DELETE key to remove it.

- Repeat step 17 for other wedge. Make sure it is the same line in the same position.
Tip You always want to remember where your foundation starts. I was tempted to put in a background point, but then that breaks the foundation. See? It’s because we have to start with the squares in the second row.
(If you’re okay with doing 16 sections, then cool, it’s still foundation-pieceable. Our goal though for these lessons is to stick with 8 wedges/sections.)
- So using our ideas from last month, one of the easiest ways to add detail to that section is to add a parallel or not-so parallel line. Click the Line
 tool.
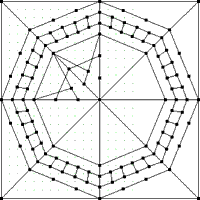
tool. - Using the “unused” set of nodes, draw a straight line through both wedges.
- Click the Add to Sketchbook
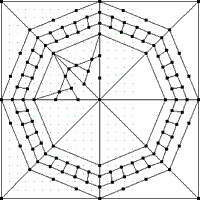
 button to save your drawing thus far AND TO CREATE THE INTERSECTIONS. Each line of will now have a long middle part and two short edge parts. We don’t want to keep the short edge parts that fall in the star points.
- Click the Pick
 tool.
tool. - Click on one of the short edge parts or make a teeny-tiny marquee box around it to select it.
- Press your keyboard DELETE key to remove the line.
- Repeat steps 23-24 for the other three remaining short edge parts.
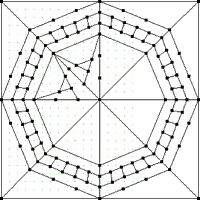
- If we check the foundation, the wedges still work. (Click FILE > Print > Foundation Pattern, to check yourself.)
- Close the foundation pattern.
- Let’s copy & paste. Click the Pick
 tool.
tool. - Select only the unique lines marked in red & blue. Use the tips in Rule (c) for selecting. I recommend using SHIFT+click and/or SHIFT plus marquee boxes to get them all. MAKE SURE you don’t select any lines other than our Y and the line that spans between the star points. If you accidentally do, SHIFT+click them to deselect them.
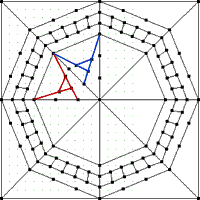
- Bring up the Symmetry box by clicking on the small square in the tool image.
- Press CTRL+C and CTRL+V on your keyboard to get the next set.
- Click Rot 90 in the Symmetry box.
- Move it close to the place where you’re going to drop it, by hovering your cursor over the center crosshair and dragging the pasted lines to the top-right quadrant of the block.
- Click the Zoom In
 tool. If you zoom in, you always want your zoom-marquee to include the crosshairs of the selection. (I shaded it in blue so you can see better what I’m zooming in on.) I recommend trying to zoom in on the middle star point so you can get a good view of what you’re trying to drop where and still grab and move the selection after you’ve zoomed.
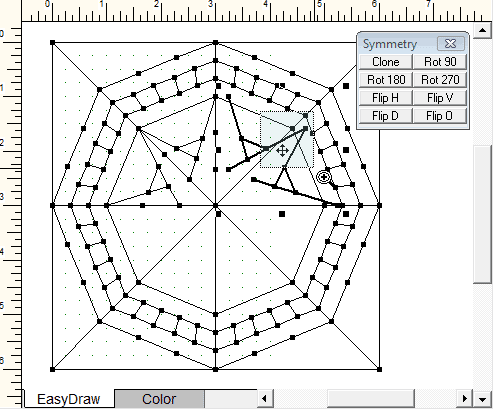
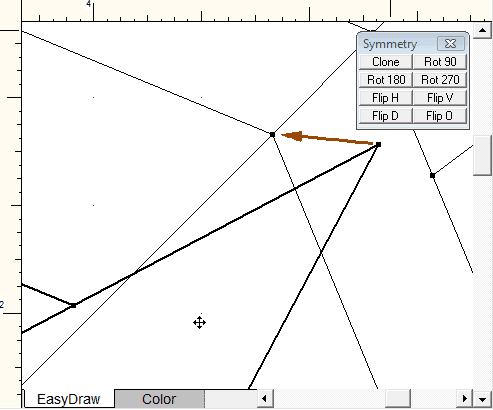
- Grab the selection by the crosshair and drop it into place matching the corner star points with the existing nodes. Make sure they snap into place!
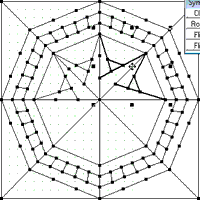
- Click the Add to Sketchbook
 button to save your drawing.
 - Click the Fit to Worktable
 button if you want to zoom back out to normal view.
 - The group is still in your clipboard. Press CTRL+V to get the next set.
- On the Symmetry box click Rot 180.
- Drop it into place like the last one. Zoom in if you need to… making sure you catch the crosshair in the zoom-marquee.
- Click the Add to Sketchbook
 button to save your drawing.
 - Click the Fit to Worktable
 button if you want to zoom back out to normal view.
 - The group is still in your clipboard. Press CTRL+V to get the next set.
- On the Symmetry box click Rot 270.
- Drop it into place like the last one. Zoom in if you need to… making sure you catch the crosshair in the zoom-marquee.

- Click the Add to Sketchbook
 button to save your drawing.
 - Click the Fit to Worktable
 button if you want to zoom back out to normal view.
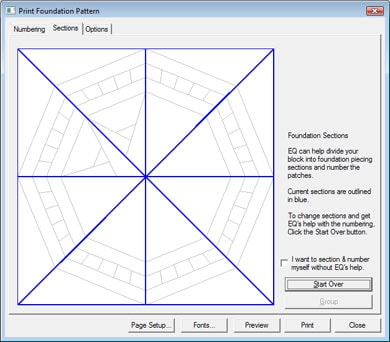
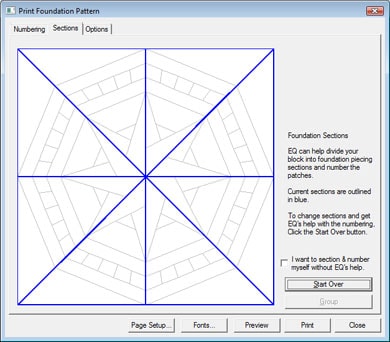
 - Let’s check the Foundation Pattern. Click FILE > Print > Foundation Pattern. It should still be in 8 wedges like this:
- Click Close to put the foundation pattern window away.
- Click the View Sketchbook button.
- Click the Blocks section.
- Click on the last block in the sketchbook (the one we just drew).
- Click Notecard.
- In the Name line, type: Gazebo Stargazing 1
- Click the X to close the Notecard.
- Click Close or X to put the Sketchbook away.
- Click FILE > Save or the Save button to make sure the notecard information is saved.
That’s it for this lesson. I hope your copy & paste skills have improved and that some of the tips helped. Try the next lesson now!
If you’re looking for more fun things to try, go ahead and try this block in a quilt and color it. Or in the remaining blocks in your sketchbook that we didn’t play with yet, draw your:
- parallel stripes
- not-so parallel stripes
- lines coming out from the same corner as the last patch
- lopping off a corner of a bigger piece
OPTIONAL MYSTERY SIDE PROJECT – SEWING INVOLVED
MONTH 3 of Sewing Project
You will flip when you see the finished sewing project I have planned.
Remember, throughout this whole process there is to be NO PEEKING with the previous work! Hide the block out of sight so it won’t influence the design decisions you make in the other months.
This month I want you to make 2 blocks (16 loose wedges):
From this project from this lesson, sew either the Gazebo 1 wedges or the Gazebo Stargazing 1 wedges.
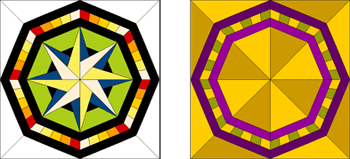
View the Sketchbook > Blocks section.
Edit your Gazebo 1 block or Gazebo Stargazing 1 block.
Choose FILE > Print > Foundation Pattern.
Go to the Sections tab.
Click the Start Over button.
Click on all the pieces of one wedge EXCEPT FOR THE STAR CORNER.
Click the Group button.
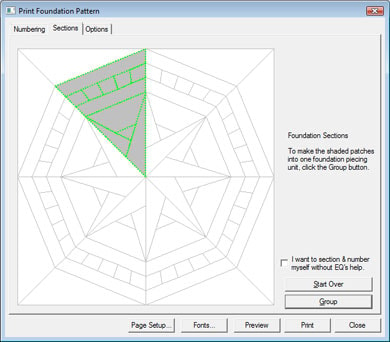
Click the star corner and click Group.
Go to the Options tab.
Make your block size 15.00 by 15.00.
Set the number of copies to 16.
Make sure the options are as follows:
Print numbering CHECKED.
Print as many as fit unchecked.
Separate units CHECKED.
Mirror – doesn’t matter here… up to you.
Grayscale – personal preference I like it CHECKED.
Print block name CHECKED.

Click Preview.
Click the Delete button at the top of your screen.
Click on the corner you grouped and press your
keyboard DELETE key.
What remains is the wedge minus the corner.
Click the Move button at the top of your screen.
Drag the section to fit cleanly on one page with no tiling onto the next page.
Click Print at the top of your screen.
16 copies of this wedge will come out.
Feel free to go to the Color tab and test out some color placement to see how to make the fabrics you’ve chosen really pop in the block. If you do the Gazebo 1 block, that large empty section would be a good place to put white, black, or your focus fabric.
Foundation Piece all 16 wedges, but do not sew the wedges together.
Put all 16 loose wedges in a bag or a box and label it so you know what’s inside. Keep them with Month 1 and Month 2 somewhere you can find them all again, but not so you can look at either of them again until roughly 5-6 months from now.
Questions
Do the wedges have to be identical?
No. This is your quilt. You can make it however you like.
What did you do for your 16 wedges?
I made 8 in one colorway and the other 8 mirrored in a different colorway.
Do I have to make the same block for all 16? Can I do 8 Gazebo 1 wedges and 8 Gazebo Stargazing 1 wedges?
It’s your quilt, so… yes, you can do whatever you like.
Remember
This quilt can get busy really fast. Use your background, black, or white in the largest spaces of this design… especially if you make the Gazebo 1 wedges.


