by Andrea Bishop
Welcome to the club! If you have EQ software and the Kaleidoscope Collection add-on installed, you’ll be able to follow along.
This is the fifth of twelve Kaleidoscope lessons.
Intro
I don’t know when I started drawing these kaleidoscopes. It started sometime in 2004 and has been a mild obsession since. The symmetry of the wedges, the complexity of design and the simplicity of construction just fascinates me.
Flowers are a natural for this foundation piecing technique.
I’ll confess… I totally fell for the poppy-craze. I guess it doesn’t help that I love decorating with the colors red and gold. I remember when poppies started appearing in all sorts of home dec paintings, fabric lines, etc. recently. Even when my wonderful mother wanted to paint me a china tea set as a wedding present, I asked if she could do poppies (and sunflowers) all over it.
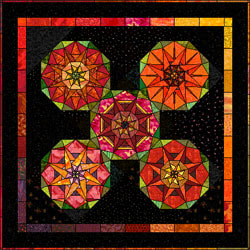
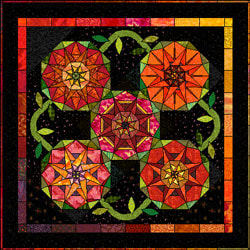
So this second mild obsession merged with the first and thus came the “Congregation of Poppies” quilt.
The very talented quilter & EQ-staffer, Margaret Okuley, ran with the design and sewed the finished quilt. You may have seen some of the blog entries from when she was sewing.
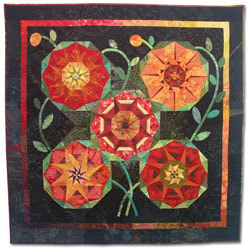
click image to see a larger version
Quilters Newsletter
We decided to submit the design to Quilters Newsletter magazine. They loved it and decided to put it in! It is in the April/May 2009 issue.
In conjunction with the release of this issue, I decided to show you how the quilt is created in EQ. This will allow you to play with your own colors.
Start a New Project
- Open your EQ software.
- Start a new project and name it Congregation of Poppies.
Start the Layout
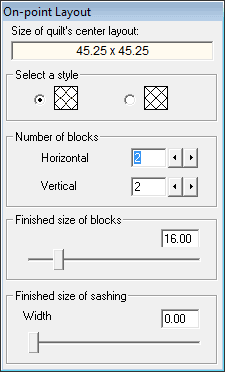
- Click WORKTABLE > Work on Quilt.
- Click QUILT > New Quilt > On-Point.
- Click the Layout tab at the bottom-left corner of your screen.
- Select the first style.
- Set the number of blocks horizontal and vertical to be 2.
- Set the finished size of blocks to be 16.
- Set the finished size of sashing to be 0.
Add Borders
- Click the Borders tab.
- Make your first border this way:
Style: Blocks
Size: 2.00
Blocks in border horizontal: 8
Blocks in border vertical: 9 - Click Add to make another border.
- Make your second/outer border this way:
Style: Long Vertical
Size: 3.50
Get the Library Blocks
- Click the Layer 1 tab.
- Click LIBRARIES > Block Library.
- Go to Kaleidoscope Collection > Square Corners > 04 Flowers.
- Scroll to the end of this style.

- Click on the first poppy, hold down your SHIFT key, click on the last poppy, and click Add to Sketchbook.
- Click Close to put the library away.
Set the Blocks in the Quilt
- Click on the Set Block tool
 . The Sketchbook Blocks palette appears.
 - Click a poppy block in the palette and click in a block space in the quilt.
- Click the next poppy block in the palette and click in a block space in the quilt.
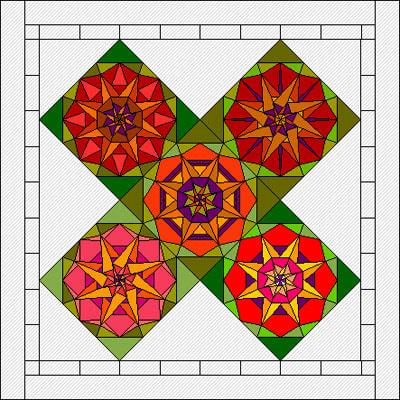
- Keep adding blocks until all 5 spaces are filled. You can make the blocks match mine below, or you can set any of the six blocks in those five spaces.
- Click on the Paintbrush
 tool. The palette will appear.
 - Inside the palette, click on the Colors tab.
- Find and click on black.
- On the quilt, click on each of the setting triangles.
- Hold down your CTRL key and click on the outer border.
- Release the CTRL key.
- Each block has 4 corner triangles. Click on each of these triangles in all five blocks.
- Click on the Fabrics tab of the palette.
- Color the entire quilt. You can use the
 Paintbrush or
  Spraycan tools. (You can also recolor the solid black with black fabrics.) Feel free to add more fabrics to this project from the Fabric library.
 - Click the Add to Sketchbook
 button to save this quilt.
The main design is done. The way you do the appliqué, if at all, is up to you.
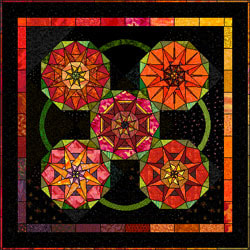
Option 1: Use a Library Block for the Appliqué
You can go to LIBRARIES > Block Library > 9 Border Blocks > Vines, and Add the first block to the Sketchbook. Close the library.
Once you do this, just use the Set Block tool ![]() to set this new block in the four largest setting triangles. Click on them with the Rotate tool
to set this new block in the four largest setting triangles. Click on them with the Rotate tool ![]() to get them to form a circle.
to get them to form a circle.
You could even edit the block and add leaves if you want and set the new block back in the quilt. (Tip: This block acts like a half-square triangle. Don’t let your leaves or vine cross the diagonal.)
Don’t forget to recolor with the Paintbrush ![]() tool.
tool.
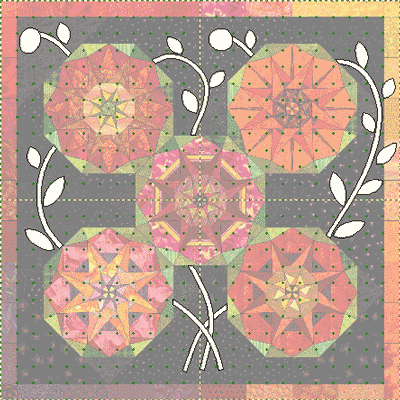
Option 2: Draw the Appliqué
Click FILE > Export Marquee Selection.
Start your cursor in the top-left corner where the border one meets border two. CLICK AND HOLD AS YOU DRAG DIAGONALLY DOWN AND RIGHT. Enclose only the quilt center and first border. Release when your cursor is in the opposite corner. Save the image to your desktop. Name it: TraceMe
Switch over to WORKTABLE > Work on Block. Click BLOCK > New Block > PatchDraw (Motif).
Change the block size to be 49.25 by 49.25. Don’t worry about snaps… we’re not going to use them… you can leave them at 24 by 24 or whatever your default is.
Click BLOCK > Import for Tracing. Import your TraceMe image. Make sure it fills the whole background square.
Using the applique tools, draw closed patches that come in and out of the poppies. You can make them cross over the first border.
Save this motif in the Sketchbook. Switch back over to the quilt worktable and set it on Layer 2. It will be 49.25 x 49.25 starting at -2.00, -2.00. Color the applique from Layer 2 with the Paintbrush tool. Add this quilt to the Sketchbook.
That’s it for this lesson. I hope you had fun. Start the next lesson now!
Want to see a finished quilt? This quilt was made by Susan Wood.
OPTIONAL MYSTERY SIDE PROJECT – SEWING INVOLVED
MONTH 4 of Sewing Project
Remember, throughout this whole process there is to be NO PEEKING with the previous work! Hide the block out of sight so it won’t influence the design decisions you make in the other months.
This month I want you to make 1 block (8 loose wedges):
Pick your favorite poppy block – - – BUT DON’T USE THE SQUARE CORNER VERSION. WE NEED THE STAR CORNER.
Go to LIBRARIES > Block Library > Kaleidoscope Collection > Star Corners > 04 Flowers.
Find your favorite poppy and add it to the sketchbook.
Close the Library.
View the Sketchbook > Blocks section.
Edit the poppy block WITH STAR CORNERS that you chose.
Choose FILE > Print > Foundation Pattern.
Go to the Sections tab.
Click the Start Over button.
Click on all the pieces of one wedge EXCEPT FOR THE STAR CORNER.
Click the Group button.
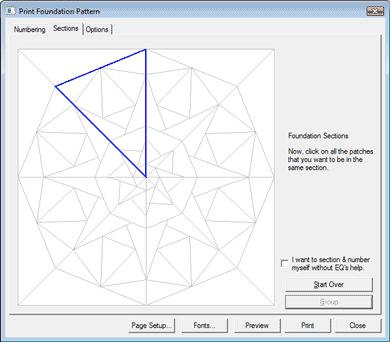
Click the star corner and click Group.
Go to the Options tab.
Make your block size 15.00 by 15.00.
Set the number of copies to 8.
Make sure the options are as follows:
Print numbering CHECKED.
Print as many as fit unchecked.
Separate units CHECKED.
Mirror – doesn’t matter here… up to you.
Grayscale – personal preference I like it CHECKED.
Print block name CHECKED.

Click Preview.
Click the Delete button at the top of your screen.
Click on the corner you grouped and press your
keyboard DELETE key.
What remains is the wedge minus the corner.
Click the Move button at the top of your screen.
Drag the section to fit cleanly on one page with no tiling onto the next page.
Click Print at the top of your screen.
8 copies of this wedge will come out.
Feel free to go to the Color tab and test out some color placement to see how to make the fabrics you’ve chosen really pop in the block. Foundation Piece all 8 wedges, but do not sew the wedges together.
Put all 8 loose wedges in a bag or a box and label it so you know what’s inside. Keep them with Months 1-3 somewhere you can find them all again, but not so you can look at either of them again until roughly 4-5 months from now.
Remember
This quilt can get busy really fast. Use your background, black, or white to rest the eye and tie the blocks together color-wise.


