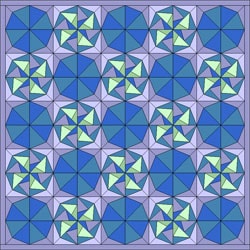
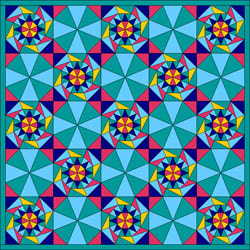
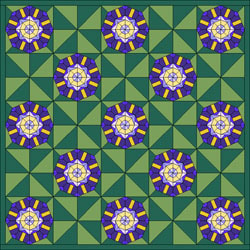
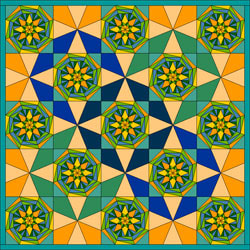
April – Alternate Blocks!
by Andrea Bishop
Welcome to the club! If you have EQ software and the Kaleidoscope Collection add-on installed, you’ll be able to follow along.
This is the sixth of twelve Kaleidoscope lessons.
Intro
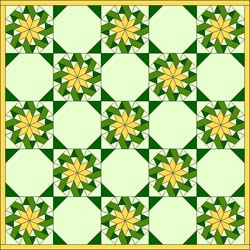
Sometimes it’s nice to give the eye a chance to rest. In this month’s lesson we’re going to draw some simple alternate blocks that work with the two different corner styles.

Then we will ALT+click away to see how our new blocks work in simple horizontal quilts.
Start a New Project
- Open your EQ software.
- Start a new project and name it Kaleidoscope Alternates.
Start the Layout
- Click WORKTABLE > Work on Quilt.
- Click QUILT > New Quilt > Horizontal.
- Click the Layout tab at the bottom-left corner of your screen.
- Set the number of blocks horizontal and vertical to be 5.
- Set the finished size of blocks to be 9.
- Set the finished size of sashing to be 0.
- Click the Layer 1 tab.
Get Blocks
- Click LIBRARIES > Block Library.
- Go to Kaleidoscope Collection > Star Corners > 01 Basics.
- Click on the first block and click Add to Sketchbook.
- From any other style in Star Corners, choose a few pieced kaleidoscopes and click Add to Sketchbook for each.
- Go to Kaleidoscope Collection > Square Corners > 01 Basics.
- Click on the first block and click Add to Sketchbook.
- From any other style in Square Corners, choose a few pieced kaleidoscopes and click Add to Sketchbook
- Click Close to put the library away.
You will need at least four blocks total:

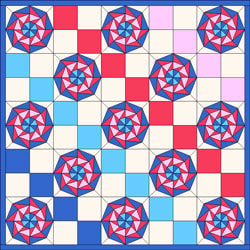
Quilt #1 – Pieced + Plain
- Click on the Set Block tool
 . The Sketchbook Blocks palette appears.
 - Click the first plain (Star cornered) kaleidoscope. Hold down ALT on your keyboard and click in any square in the quilt.
- Click the any Star cornered pieced kaleidoscope. Hold down ALT on your keyboard and click in any empty square in the quilt.
- Color it with the Paintbrush
 tool if you like. *Use the ALT key since these are alternate blocks if you choose to color them holding down one of these keys. You’ll learn quickly that if you’re using colors from the pieced block, you could accidentally replace those if you hold down CTRL.
 - Click the Add to Sketchbook
 button to save this quilt.
 - Repeat steps 18-22 for the plain Square Corner and any pieced Square Corner kaleidoscope.
Make 2 New Blocks – a little more plain
- Click the View Sketchbook
 button.
 - Click the Blocks section.
- Click on the Plain Kaleidoscope 1 block to select it.
- Click Edit. You’ll be on the block worktable now.
- Click the Pick
 tool.
tool. - Repeat this step for each line marked in blue. Click one of these lines and press your keyboard DELETE key.
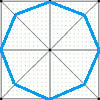 turns into this:

- Click Add to Sketchbook
 button to save this block. (It will just be a pinwheel – I know.)
 - Click the View Sketchbook
 button.
 - Click the Blocks section.
- Click on the Plain Kaleidoscope 2 block to select it.
- Click Edit. You’ll be on the block worktable now.
- Click the Pick
 tool.
tool. - Repeat this step for each line marked in blue. Click one of these lines and press your keyboard DELETE key.
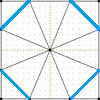 turns into this:

- Click Add to Sketchbook
 button to save this block.
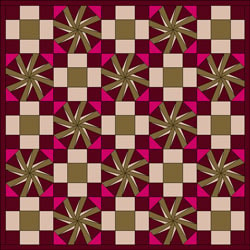
Quilt #2 – Pieced + More Plain
- Click WORKTABLE > Work on Quilt.
- Click on the Set Block tool
 . The Sketchbook Blocks palette appears.
 - Click a pieced (Star cornered) kaleidoscope in the palette. CTRL+click it in the quilt to replace all the blocks.
- Click the first new block you drew (Star cornered) kaleidoscope. Hold down ALT on your keyboard and click on any square in your quilt.
- Click the Paintbrush
 tool. Pick any fabric or color from the palette.
 - ALT+click in an empty spot in your new block. Color it however you like.
- Click the Add to Sketchbook
 button to save this quilt.
 - Repeat steps 39-44 for the new plain Square Corner and any pieced Square Corner kaleidoscope.
Make 2 New Blocks – really plain
- Click the View Sketchbook
 button.
 - Click the Blocks section.
- Click on the star cornered plain block you just drew to select it.
- Click Edit. You’ll be on the block worktable now.
- Click the Pick
 tool.
tool. - Repeat this step for each line marked in blue. Click one of these lines and press your keyboard DELETE key.
 turns into this:
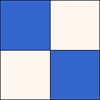
- Click Add to Sketchbook
 button to save this block. (It will just be a Four Patch – I know.)
 - Click the View Sketchbook
 button.
 - Click the Blocks section.
- Click on the square cornered plain block you just drew to select it.
- Click Edit. You’ll be on the block worktable now. Your block looks like this:
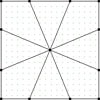
This is the first block that is “difficult.” So go slow. We’re going to try to make a 9-Patch out of this, but on a Kaleidoscope grid. Do NOT click Add to Sketchbook until I tell you to do so.
- We need to turn OFF snap to Grid. There are a bunch of ways to do this.
Option 1:
If you have the Precision Bar turned on, just make sure Snap to Node is the only one pressed in.
![]()
Option 2:
Click BLOCK > Drawing Board Setup > Snapping (under EasyDraw).
Uncheck everything except Snap to nodes of drawing.
Click OK.

- Click the Shape
 tool. (For any budding gurus out there, this will work if you have Select One node or Node select All on because of step 59.)
 - Click on one of the lines that touches the top of the block, to select it.
- Grab the end of the node that is in the middle of the block.
- Drag the node toward the opposite side of the block near the other node.
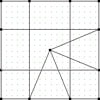
- Repeat steps 59-61 for the other line that touches the top of the block. Your block will look like this so far:
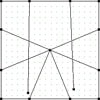
- Click the Zoom In
 tool. Make a marquee box around the two nodes so you can see them closer.

- Still with the Shape
 tool, grab the node you dropped nearby [left image below] and drop it exactly on top of the node resting on the block outline [right image below].
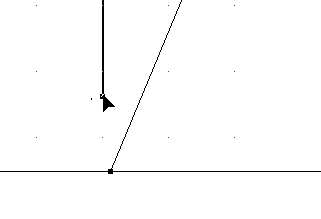
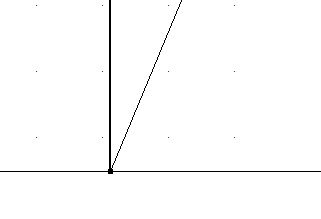
- Go back to your regular zoom
 and repeat steps 63 and 64 for the other node. Your block will look like this so far:
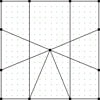
- Repeat steps 59-65 for the two lines that touch the left edge of the block. Your block will progress like this:

- Click the Pick
 tool.
tool. - Repeat this step for each line marked in blue. Click one of these lines and press your keyboard DELETE key.

- Click Add to Sketchbook
 button to save this block.
Quilt #3 – Pieced + Really Plain
- Click WORKTABLE > Work on Quilt.
- Click on the Set Block tool
 . The Sketchbook Blocks palette appears.
 - Click a pieced (Star cornered) kaleidoscope in the palette. CTRL+click it in the quilt to replace all the blocks.
- Click the Four Patch you drew. Hold down ALT on your keyboard and click on any square in your quilt.
- Click the Paintbrush
 tool. Pick any fabric or color from the palette.
 - ALT+click in an empty spot in your new block. Color it however you like.
- Click the Add to Sketchbook
 button to save this quilt.
 - Repeat steps 71-76 for your new 9-Patch-ish block and any pieced Square Corner kaleidoscope.
Make 2 New Blocks – corners
- Click the View Sketchbook
 button.
 - Click the Blocks section.
- Click on the Plain Kaleidoscope 2 block to select it.
- Click Edit. You’ll be on the block worktable now.
- Click the Pick
 tool.
tool. - Repeat this step for each line marked in blue. Click one of these lines and press your keyboard DELETE key.
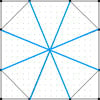 turns into this:

- Click Add to Sketchbook
 button to save this block. (It will just be a pinwheel – I know.)
 - For the “corners” version of a star block, we need to get a library block. Click LIBRARIES > Block Library.
- Scroll up to the regular EQ Libraries at the very top of the list. You may need to click to open the EQ Libraries.
- Go to 1 Classic Pieced > Diamond in Square.
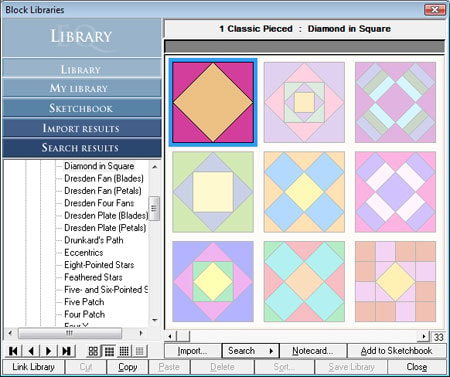
- Click on the first block and click Add to Sketchbook.
- Click Close to put the library away.
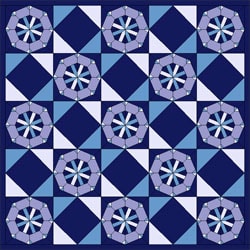
Quilt #4 – Pieced + Corners
- Click WORKTABLE > Work on Quilt.
- Click on the Set Block tool
 . The Sketchbook Blocks palette appears.
 - Click a pieced (Star cornered) kaleidoscope in the palette. CTRL+click it in the quilt to replace all the blocks.
- Click the Diamond in the Square. Hold down ALT on your keyboard and click on any square in your quilt.
- Click the Paintbrush
 tool. Pick any fabric or color from the palette.
 - ALT+click in an empty spot in your new block. Color it however you like.
- Click the Add to Sketchbook
 button to save this quilt.
 - Repeat steps 91-96 for the new just corners block and any pieced Square Corner kaleidoscope.
That’s it for this lesson. I hope you had fun. View the next lesson now! If you want more blocks to play with, try finding blocks that work well with a grid of 2 (for star corners) or a 8-pointed star grid (for the square corners). Here are some library blocks I recommend playing with:
Star corners:
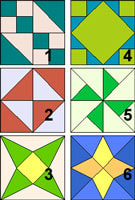 1. 1 Classic Pieced > Chains > Hour Glass
2. 1 Classic Pieced > Classics > Broken Dishes
3. 1 Classic Pieced > Simple Blocks > The Priscilla
4. 1 Classic Pieced > Diamond in Square > Art Square
5. 1 Classic Pieced > Four Patch > Turnstile
6. 1 Classic Pieced > Four X > Mill and Stars
Square corners:
 1. 1 Classic Pieced > Eight-Pointed Stars > LeMoyne Star
2. 1 Classic Pieced > Eight-Pointed Stars > LeMoyne Star 4
3. 1 Classic Pieced > Eight-Pointed Stars > Rolling Star
4. draw it by modifying an 8-Pointed Star
5. draw it by modifying #4
6. draw it by modifying #5
7. draw it by deleting the corner lines and two of the center lines in #4
8. 1 Classic Pieced > Diamond in Square > Art Square
OPTIONAL MYSTERY SIDE PROJECT – SEWING INVOLVED
MONTH 5 of Sewing Project
Remember, throughout this whole process there is to be NO PEEKING with the previous work! Hide the block out of sight so it won’t influence the design decisions you make in the other months.
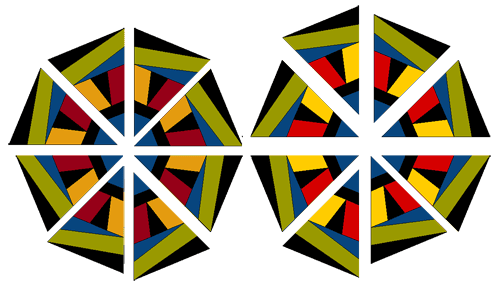
This month I want you to make 2 blocks (16 loose wedges). One set of 8 will be regular. The other set of 8 will be mirrored.
Use Snow Squall 1.
Go to LIBRARIES > Block Library > Kaleidoscope Collection > Star Corners > 07 Snow.
Find Snow Squall 1 at the end of the blocks and add it to the sketchbook.
Close the Library.
View the Sketchbook > Blocks section.
Edit Snow Squall 1.
Print the first 8 wedges
Choose FILE > Print > Foundation Pattern.
Go to the Sections tab.
Click the Start Over button.
Click on all the pieces of one wedge EXCEPT FOR THE STAR CORNER.
Click the Group button.

Click the star corner and click Group.
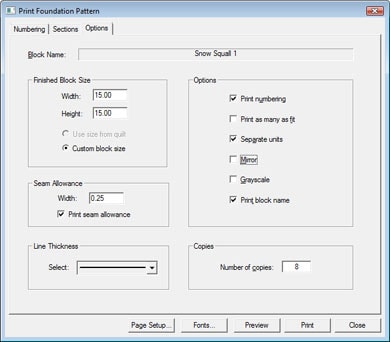
Go to the Options tab.
Make your block size 15.00 by 15.00.
Set the number of copies to 8.
Make sure the options are as follows:
Print numbering CHECKED.
Print as many as fit unchecked.
Separate units CHECKED.
Make sure Mirror is unchecked.
Grayscale – personal preference I like it CHECKED.
Print block name CHECKED.
Click Preview.
Click the Delete button at the top of your screen.
Click on the corner you grouped and press your keyboard DELETE key.
What remains is the wedge minus the corner.
Click the Move button at the top of your screen.
Drag the section to fit cleanly on one page with no tiling onto the next page.
Click Print at the top of your screen.
8 copies of this wedge will come out.
Print the last 8 wedges
Choose FILE > Print > Foundation Pattern.
Go to the Options tab.
Make your block size 15.00 by 15.00.
Set the number of copies to 8.
Make sure the options are as follows:
Print numbering CHECKED.
Print as many as fit unchecked.
Separate units CHECKED.
Make sure Mirror is CHECKED.
Grayscale – personal preference I like it CHECKED.
Print block name CHECKED.
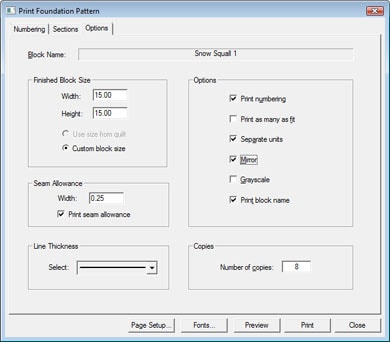
Click Preview.
Click the Delete button at the top of your screen.
Click on the corner you grouped and press your keyboard DELETE key.
What remains is the wedge minus the corner.
Click the Move button at the top of your screen.
Drag the section to fit cleanly on one page with no tiling onto the next page.
Click Print at the top of your screen.
8 copies of this wedge will come out.
Feel free to go to the Color tab and test out some color placement to see how to make the fabrics you’ve chosen really pop in the block. I recommend keeping the outside of the block the same color (black, olive, blue in image below) for all 16, but doing a lighter version of the center (red & gold) for one set of 8. Foundation Piece all 16 wedges, but do not sew the wedges together. You’ll have something like what you see below.
Put all 16 loose wedges in a bag or a box and label it so you know what’s inside. Keep them with Months 1-4 somewhere you can find them all again, but not so you can look at either of them again until roughly 3-4 months from now.
Remember
This quilt can get busy really fast. Use your background, black, or white to rest the eye and tie the blocks together color-wise.


