
Once you create a block and quilt layout, the next step is to quilt the layout. Sometimes you have no idea what would look good for a quilting stitch. EQ8 can help us decide how to quilt a design by matching a block layout pattern with a quilt stencil.
EQ has loads of stencils built into the library but they may not match exactly what you have designed for a quilt block. You can use your block drawing as a start for creating the stencil.
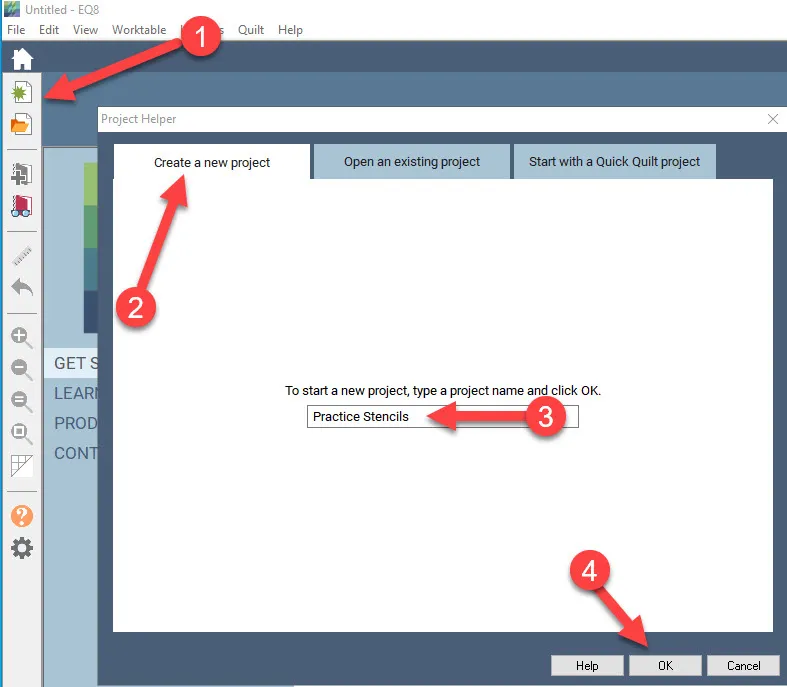
Open your EQ8 by double-clicking onto the logo on the desktop. ![]()
When the program opens name a new project file “PRACTICE STENCILS”.
Click on the block worktable icon ![]() and select NEW BLOCK>Pieced>EasyDraw for the block worktable.
and select NEW BLOCK>Pieced>EasyDraw for the block worktable.

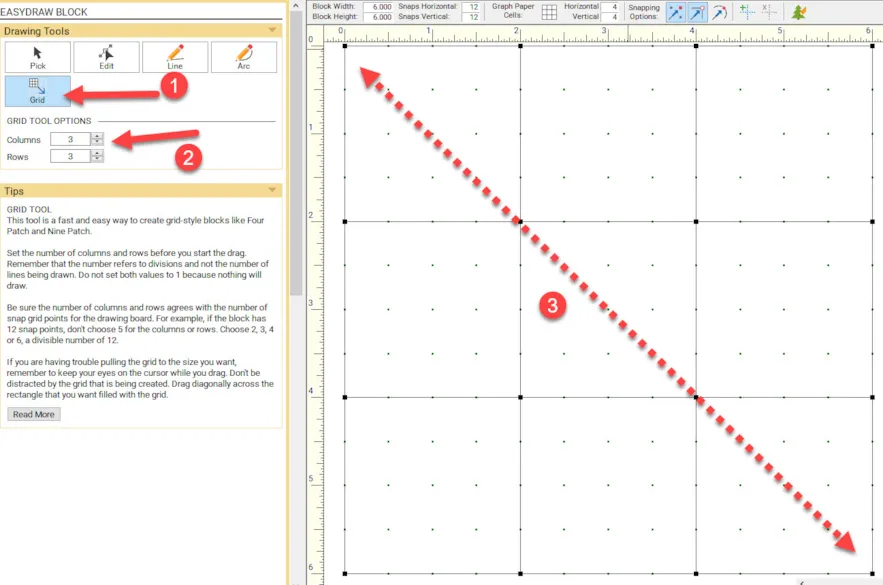
On the properties bar for the block worktable, use the default size of 6 x 6 inches and snaps at 12 x 12.
![]()
Click on the grid tool![]() to select it. The default for the grid tool is 3 x 3. Using this setting, move the cursor over to the drawing board and click/hold/drag/release a grid from the upper left corner of the block to the lower right corner of the block. This will make a 9 patch block design.
to select it. The default for the grid tool is 3 x 3. Using this setting, move the cursor over to the drawing board and click/hold/drag/release a grid from the upper left corner of the block to the lower right corner of the block. This will make a 9 patch block design.
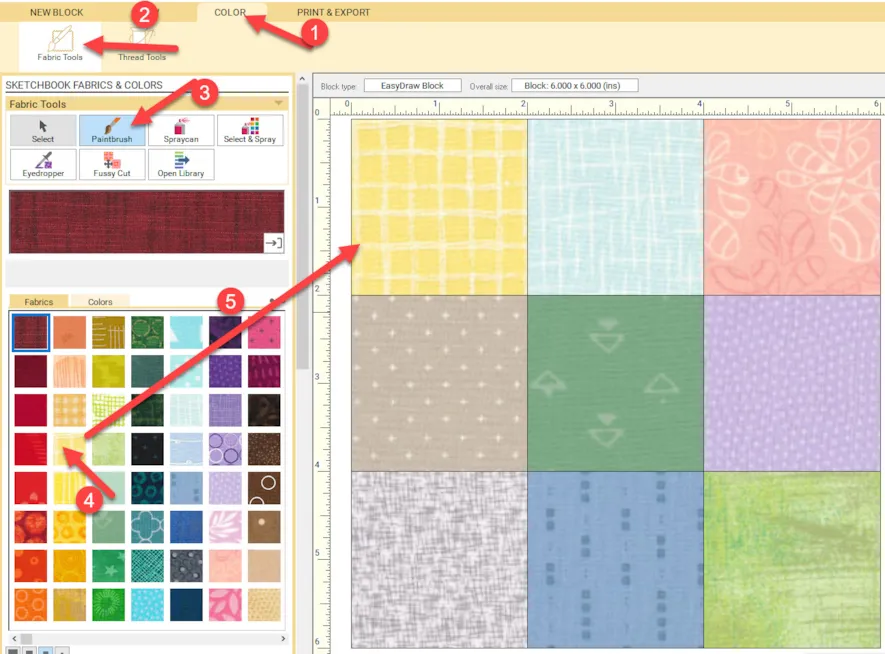
Click on the color tab at the top of the screen. Under the fabric tools on the ribbon at the top of the screen, select the paintbrush icon. Click on a color for your block, and move the cursor over to the block worktable and click once in a square to color it. Choose different colors for each square of the 9 patch block.
Add the colored block to the sketchbook.![]()
Create a NEW BLOCK>Pieced>EasyDraw. Use the same grid tool to create the same setup as the block previously.
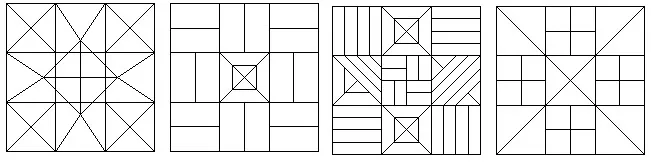
Click on the line drawing tool![]() to select it and then click/hold/drag/release the line tool to create ‘stitch’ lines within the block. Create several different blocks using this method and add each one to the sketchbook as you create it.
to select it and then click/hold/drag/release the line tool to create ‘stitch’ lines within the block. Create several different blocks using this method and add each one to the sketchbook as you create it.
Add each drawing to the sketchbook![]() as you create them.
as you create them.
Click on the view sketchbook icon![]() and open the sketchbook to the block heading. You will see each of the line drawing images at the end of the blocks.
and open the sketchbook to the block heading. You will see each of the line drawing images at the end of the blocks.
Right-click on each of the drawings one at a time and then select ‘copy to tab>stencils tab’. This will place a copy of the block drawing on the stencils tab in the sketchbook without removing the block outline drawing from the blocks tab.
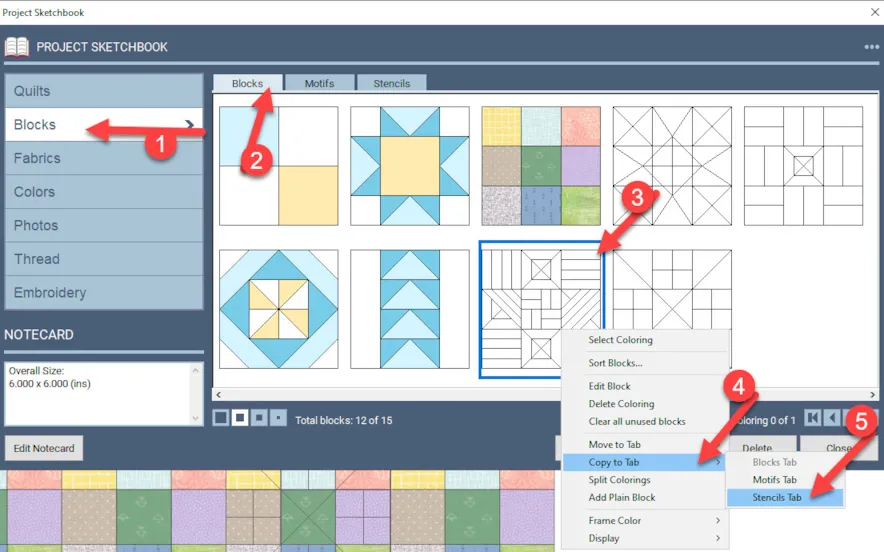
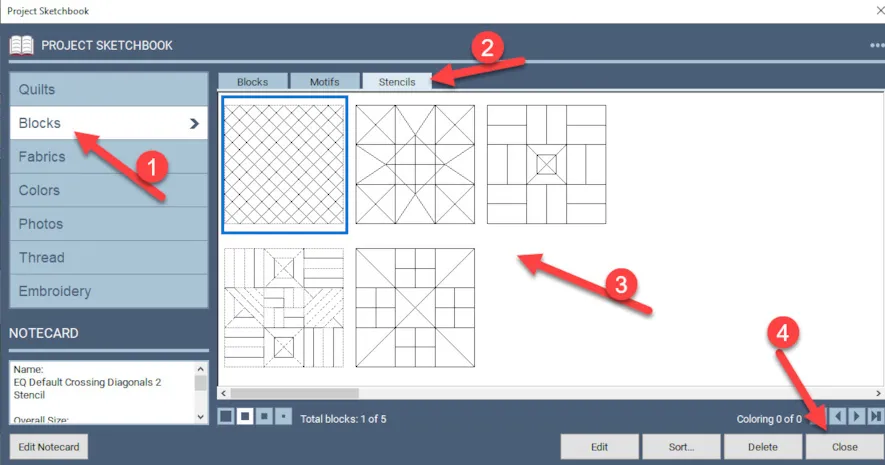
Click on the stencils tab in the sketchbook to confirm you have each of the line drawings in the stencils section. Close the sketchbook once you confirm the stencils are there.
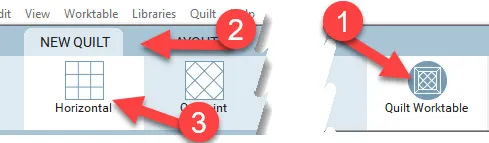
Click on the quilt worktable icon![]() on the upper right side of the screen. Click on NEW Quilt>Horizontal for the layout.
on the upper right side of the screen. Click on NEW Quilt>Horizontal for the layout.
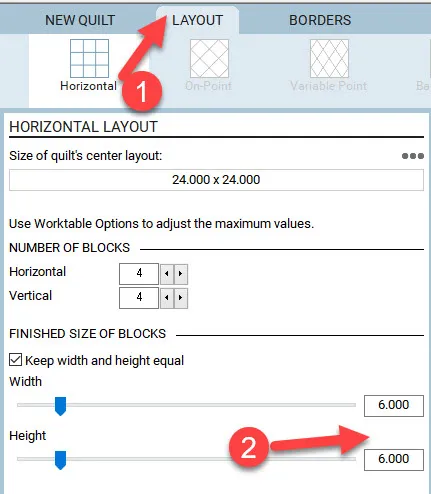
Click on the Layout tab and change the block size to 6 x 6 inches.
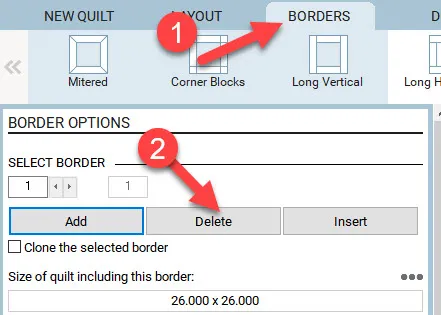
Click on the borders tab and then click on ‘delete’ to remove the default border strip.
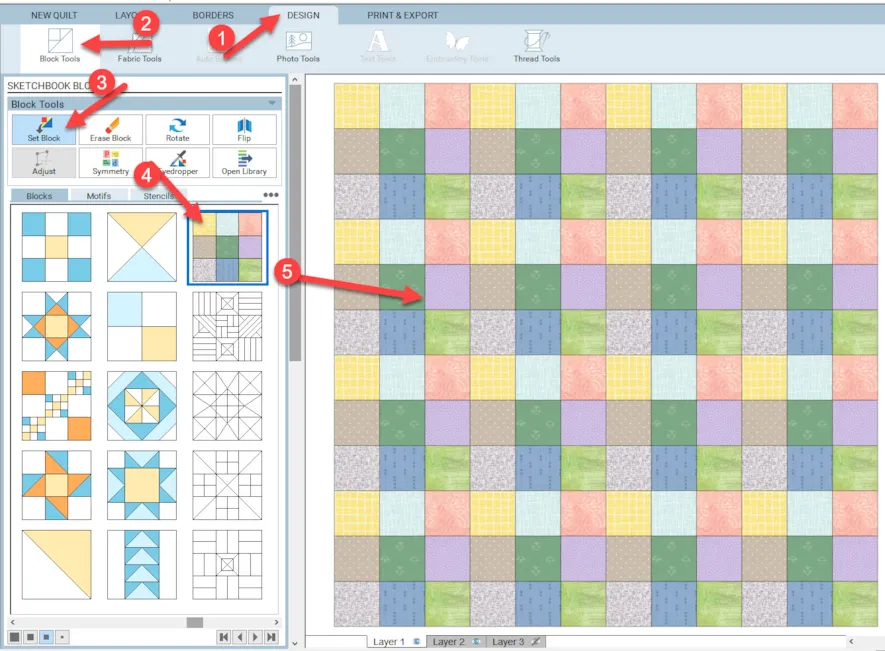
Click on the Design tab and select Block Tools>Set Block. Under the blocks heading, click on the colored 9 patch block you created and then move the cursor over to the worktable, and while holding down the control key on the keyboard, click once to set all the blocks into the quilt layout.
Add the layout to the sketchbook ![]()
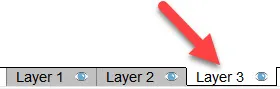
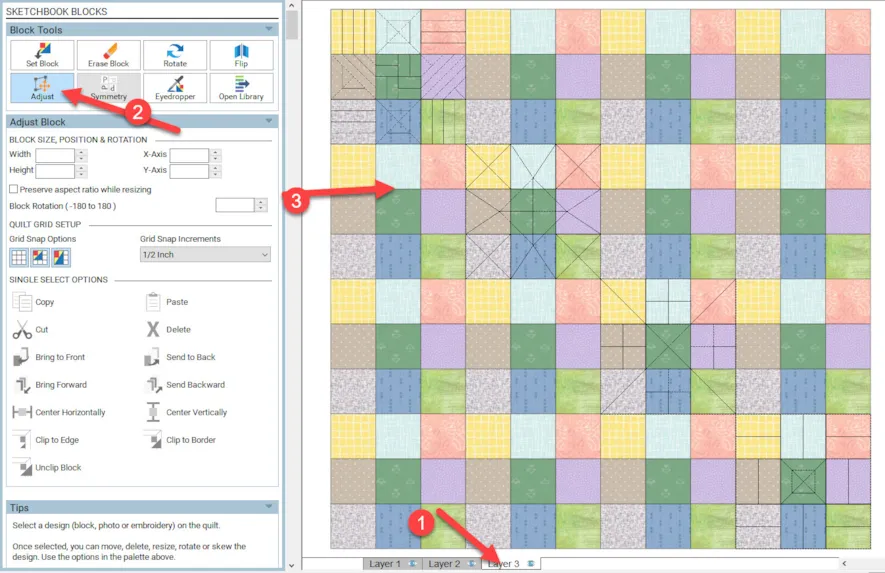
Stencils need to be added to the quilt worktable on layer 3 of the quilt. Click on the Layer 3 tab at the bottom of the quilt layout design.
Click on the stencils tab in the middle of the sketchbook blocks tools. Click onto each one of the blocks to select it and then drag it onto the worktable. Just place them randomly, to begin with.
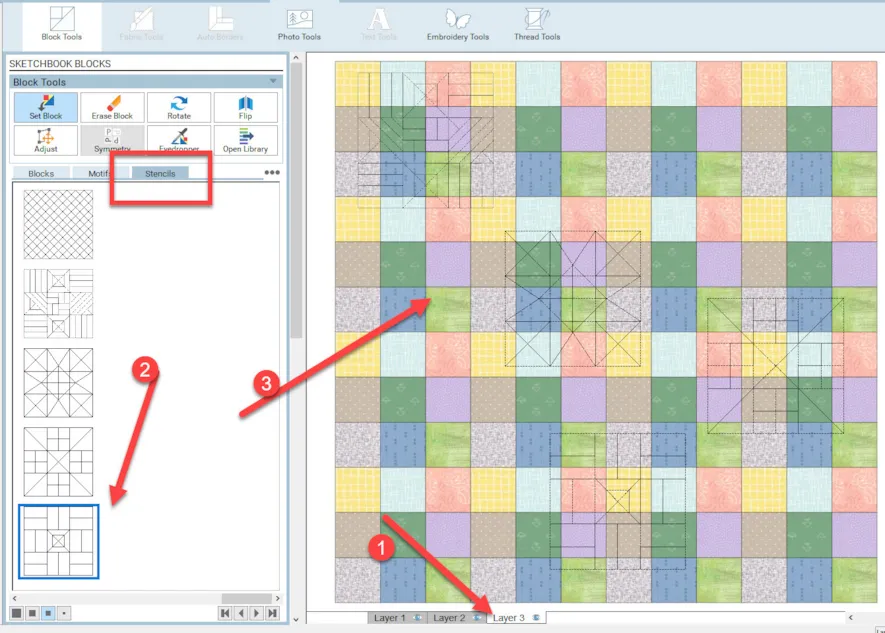
Click on the adjust tool icon![]() to select it. Move the cursor over to the worktable and click/hold/drag/release each stencil block to a new position that perfectly covers a 9 patch block.
to select it. Move the cursor over to the worktable and click/hold/drag/release each stencil block to a new position that perfectly covers a 9 patch block.
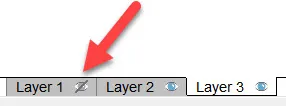
To better see the designs with the background block, click on the little eyeball on the layer one tab at the bottom of the screen. This will soften the colors of the blocks so you can see your stencil outline with the block in the background.
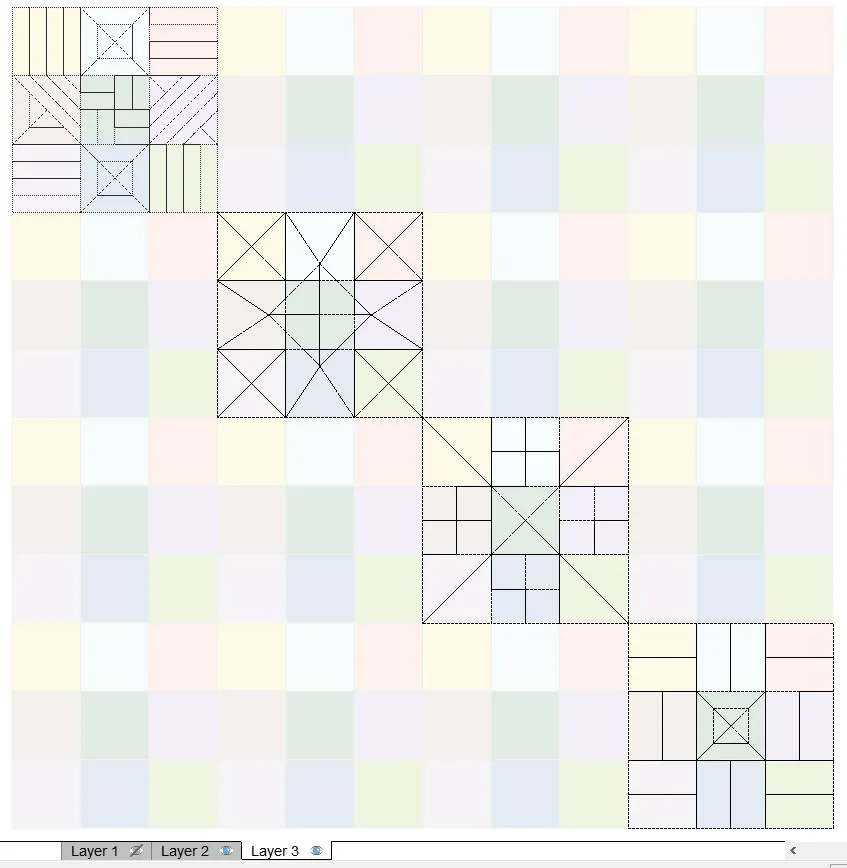
Preview the stencil designs to determine if they will work as quilt designs for your layout. This linear design would work well for doing quilting with ruler work. You may decide that you want to create an entirely different design now that you can see it against your background blocks.
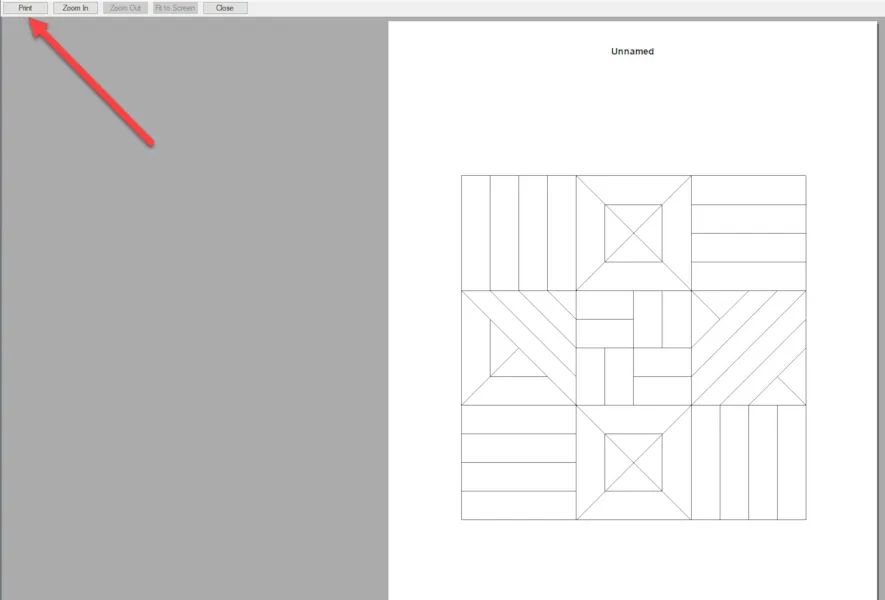
Click on the print & export tab at the top of the screen. Click onto a stencil block to select it. In the print block dialogue box, change the style to outline drawing and then click on the preview at the bottom of the box.
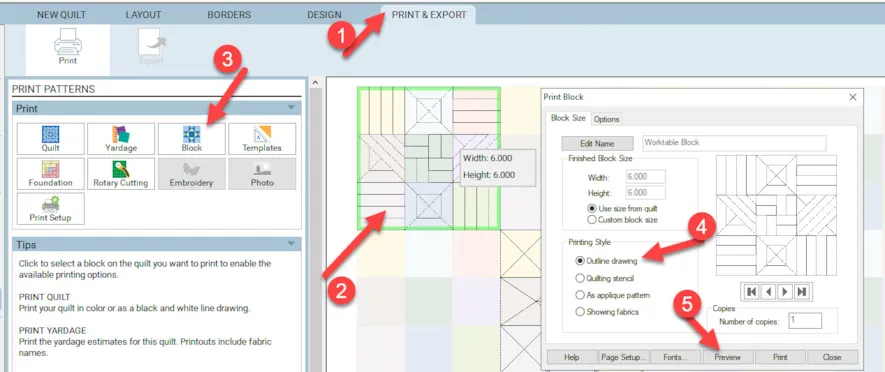
On the print screen, you would print your pattern from this screen.
Remember to turn your layer one back on by clicking on the eyeball on the layer 1 tab.
Test different design patterns on your quilt layout to see what looks best to you. You can always use a built-in stencil in the EQ8 program, but if you want to customize the stencil design you can use your block tools to create something unique to you.


07-18-2021
12:37 pm
Thanks for this article. I have made stencils with the Stencil Tool but as far as I can tell it only makes stencils with curves. I appreciate knowing how to make stencils with straight lines as well.
07-18-2021
1:00 pm
Victoria–Yes the stencil maker tool makes stencils with curves. They are not specific to any quilt block. Using the drawing tools I suggested in this article you can make your own stencils specific to your block and use straight lines.
07-18-2021
12:48 pm
I have not had EQ8 very long and have been unable to spend much time to learn the program. Your post sounded interesting to me. However, after reading all the steps necessary, I couldn’t help but think that I’m a long way of even attempting to try this process. It just sounds overwhelming. I’ll try to spend more time in learning the basics of the program. I do want to commend you for taking the time to spell out all the steps. I guess like most programs, knowing the program and repetition make the steps seem easy. Happy quilting! Carol
07-18-2021
1:41 pm
Yvonne taught me to use this program and I love it. Print out your notes and start at number 1 and you find you are able to follow them very easily. Yvonne does extremely user friendly notes.
07-18-2021
1:01 pm
Carol-Like any new program, you do need to spend time learning the tools and how to apply them in different situations. We all have to learn this was even if we have been using the program for a while. Don’t give up. Keep practicing. Baby steps will lead to full learning with time.
07-18-2021
1:39 pm
Hi Yvinne!
I have been working hard, with your notes, to get really good at this program. I am loving it.
Thanks for this article. I will print it and add it to my book.
07-18-2021
3:01 pm
Kasey- Hello! I am glad you have been following the notes. Glad to hear you are loving the program. Keep at it!.
07-18-2021
2:47 pm
I’m going to have to try this next time I get something to the quilting stage. Thanks for the great ideas.
07-18-2021
3:02 pm
Chris–Glad you enjoyed this idea on creating quilt stencils. There is always something new to learn.
07-18-2021
6:40 pm
Hi Yvonne im new to stencils i hope this isn’t a silly question but after audditioning your stencils designs do you then quilt them freestyle yourself on your machine or is there a template you print off and draw it on your quilt before quilting? Thany you Louise
07-19-2021
9:15 am
Louise–EQ8 is a design program. It does not teach us how to sew the designs we create. There are so many different ways to sew our quilts and you will find the way that best suits you. YouTube has great instructional videos on how to accomplish the quilting of the quilt you design. The pattern for the stencils can be printed from the EQ8 program. Once you print the stencils, the method you use to quilt the design is up to you. Often, local sewing stores will have classes on how to quilt a quilt layout. There are so many different methods. Free motion quilting, ruler work quilting, tracing the pattern onto the quilt and following the lines, creating the stencil as an embroidery program to stitch in the hoop, creating an iron-on stencil to use repeatedly across the quilt top are just a few ways to stitch the patterns. Look into lessons on how to accomplish this through a local quilt guild, quilt store, small quilt group, or on the internet. You will find which way works well for you. Good Luck and Happy Stitching!
07-19-2021
4:07 am
Thanks Yvonne
always I am happy to learn more about using EQ8
I am sure I don’t use all the possibilities in EQ08 and am glad to progress using it
07-19-2021
9:08 am
Arnould–I don’t use all the possibilities of EQ8 either. I have my favorite way of doing things and usually default to don’t that. I do use the program more as an educator because I need to show the students all the possibilities of the program. However we choose to use the program is up to the individual. I just enjoy discovering new ways to do old things.
07-20-2021
10:03 am
I’m brand new to EQ8 as I just purchased. My question is can you export your design as an SVG file to cut your stencil on a digital cutter?
07-20-2021
10:06 am
Laurie at this point in time EQ8 does not support SVG FILES for export. BlockBase+ does support exporting .svg.
07-31-2021
2:50 am
Fantastic lesson ty
07-31-2021
8:03 am
Fendi-glad you enjoyed it.