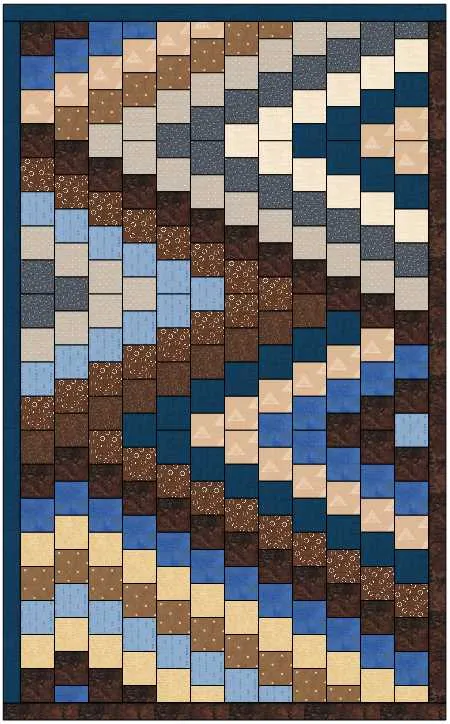
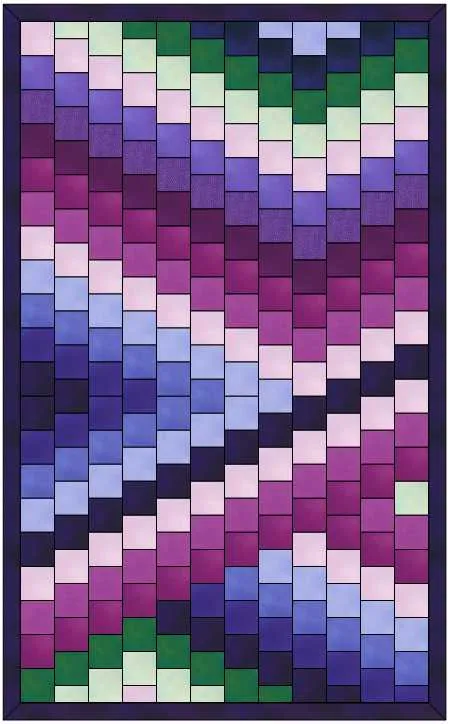
Welcome to Design and Sew 2 – Lessons with Yvonne. This is lesson three (3) in this series. I hope you have enjoyed the first two lessons with this series. We are continuing with creating quilts in the EQ8 program without having to draw our blocks. There are thousands of blocks built into the program that we can use as they are or edit them slightly to create a block unique to us. This is also true for quilt layouts. There are many quilt layouts all ready for us to explore and add our unique touch to make them specific to us. This is a stand-alone lesson and you do not have to do the first two lessons in the series to do this one. However, we learn new tips and techniques in each lesson so you may want to try the lesson without doing any sewing of your designs to get the full impact of this series of classes.
The video for this lesson is at the bottom of the blog page. I suggest you watch the video to start with and then do the written lesson after. This way you will have a good idea as to how we are going to step through the lesson to create the quilt designs.
We are concentrating on quilt layouts in this lesson. You will learn how to explore the different layouts and how to use them to design your patterns.
Launch your EQ8 program  from your desktop. If you have changed the preference settings in the program since the last class, you need to go back and set the program to the default settings. This can be done by referring to lesson one (1) and following the steps there to reset the preferences.
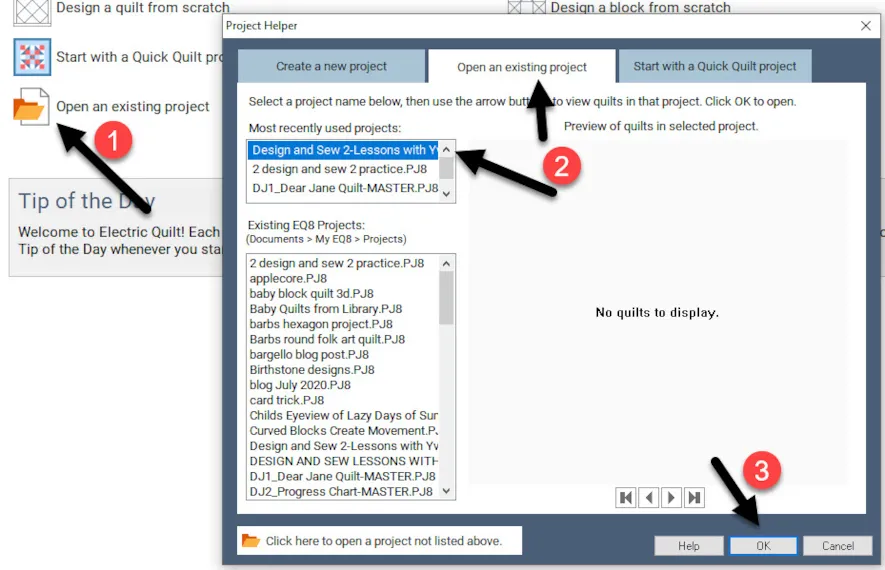
Once the program opens and you have the default preferences set on the opening page, click on the ‘open an existing project’ icon in the center of the screen and navigate to the Design and Sew 2-Lessons with Yvonne project and click on the OK at the bottom of the box to open the project we created in lesson one (1).
Make sure the project name is showing at the top of the screen.
Close the project sketchbook.
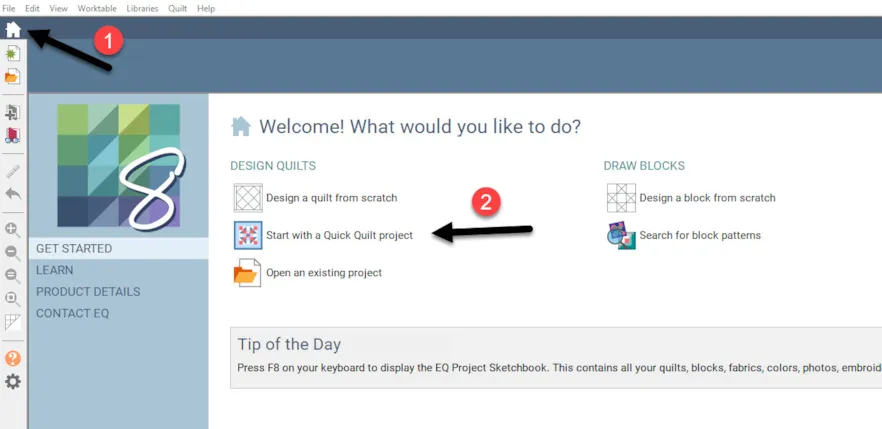
There are complete quilt projects all ready to use in the EQ program. Click on the little home icon ![]() on the upper left side of the screen to return to the opening screen of EQ8. On the opening screen, you will see the start with a quick quilt project in the center.
on the upper left side of the screen to return to the opening screen of EQ8. On the opening screen, you will see the start with a quick quilt project in the center. ![]() Click on it to open the completed quilt layouts in EQ8.
Click on it to open the completed quilt layouts in EQ8.
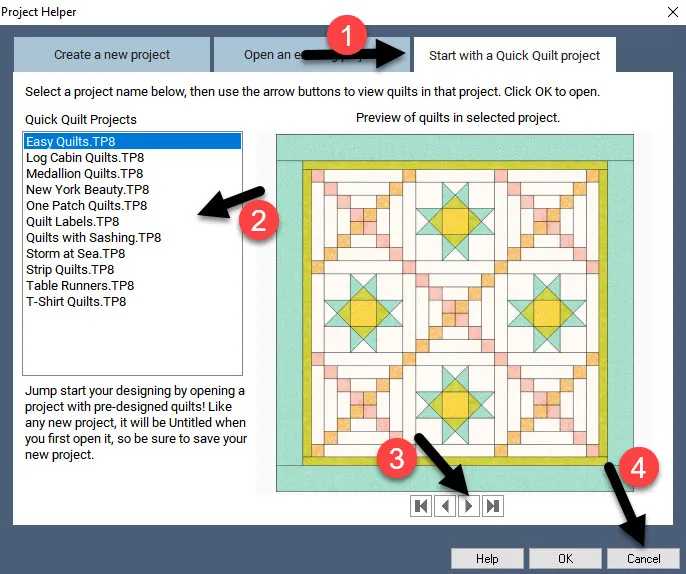
NOTE: You can return to the home screen at any time by clicking on the home icon. You will not leave your project when you do this if you are only viewing the layout options. If you click on one of the layouts to select it and say OK you will now be directed to a different project. This project is no longer in the Design and Sew 2 project file. DO NOT SELECT ONE OF THESE. JUST BROWSE THROUGH THEM TO SEE WHAT IS AVAILABLE AND GATHER IDEAS. CLICK ON THE WORD ‘CANCEL’ AT THE BOTTOM OF THE PROJECT HELPER BOX AFTER BROWSING THROUGH.
We will use similar layouts in the EQ8 program to create our quick quilts using the blocks we choose to design with.
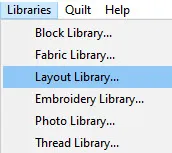
Click on LIBRARIES>Layout Library at the top of the screen.
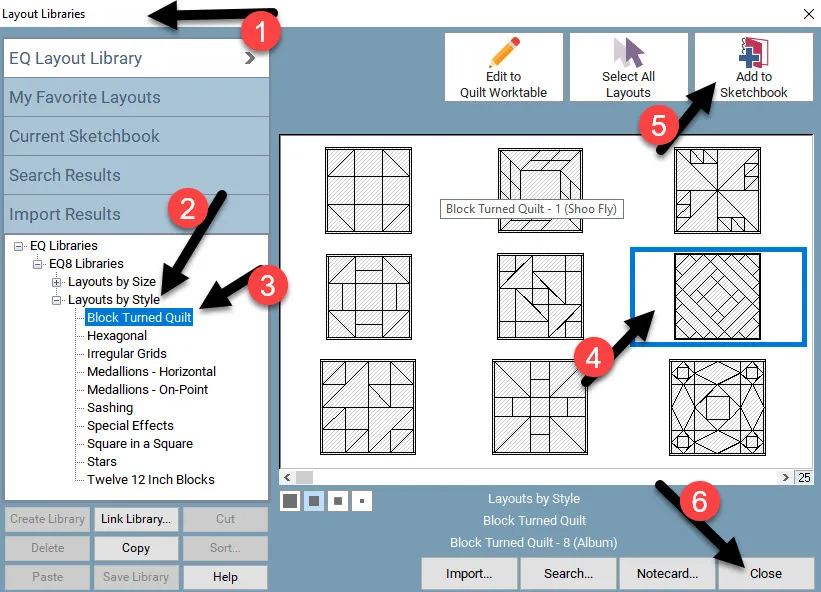
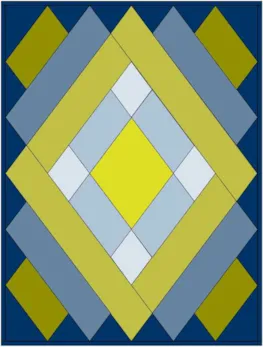
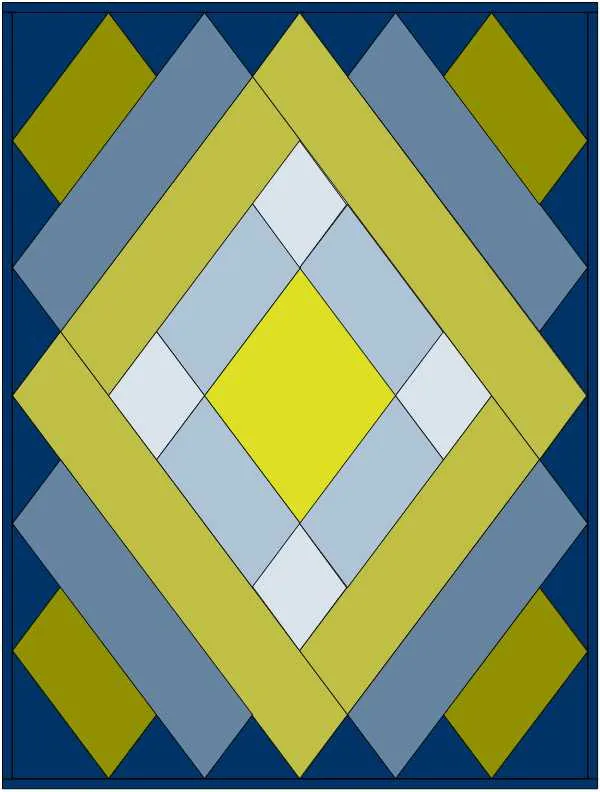
In the layout library box, you will see EQ8 lists the layouts by style and by size. Click on the Layout by Style and select the Block Turned quilt layouts. Click on the Block Turned #8 and then add it to the sketchbook. Click on the close at the bottom of the box.
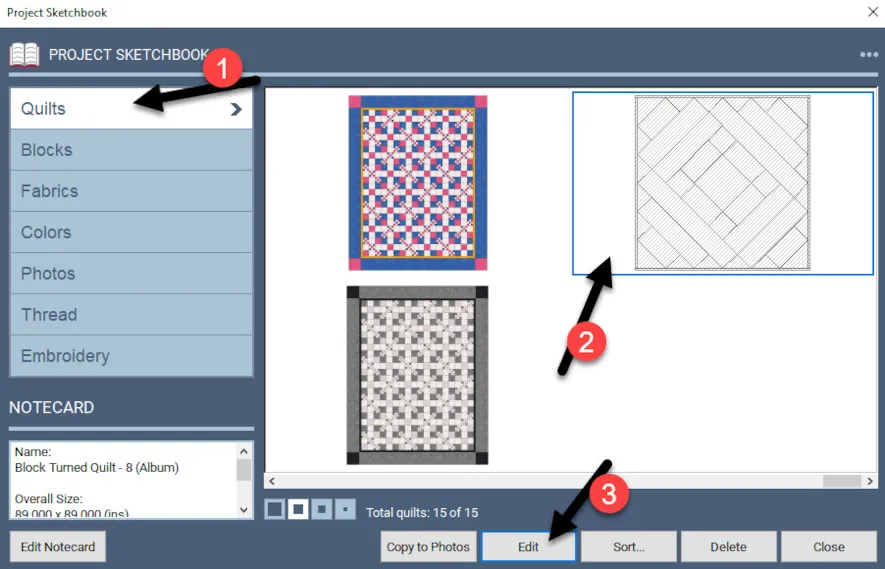
Click on the view sketchbook icon![]() to open your sketchbook. Under the quilts heading, scroll to the end of the quilts to see the layout we just added. Click on the layout to select it and then click on the word ‘edit’ at the bottom of the box to place it on the quilt worktable.
to open your sketchbook. Under the quilts heading, scroll to the end of the quilts to see the layout we just added. Click on the layout to select it and then click on the word ‘edit’ at the bottom of the box to place it on the quilt worktable.
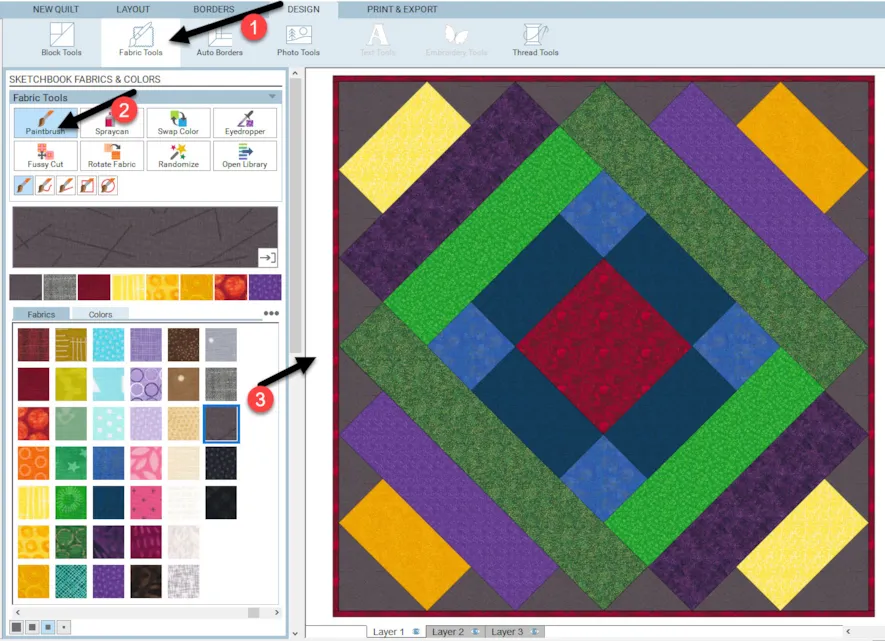
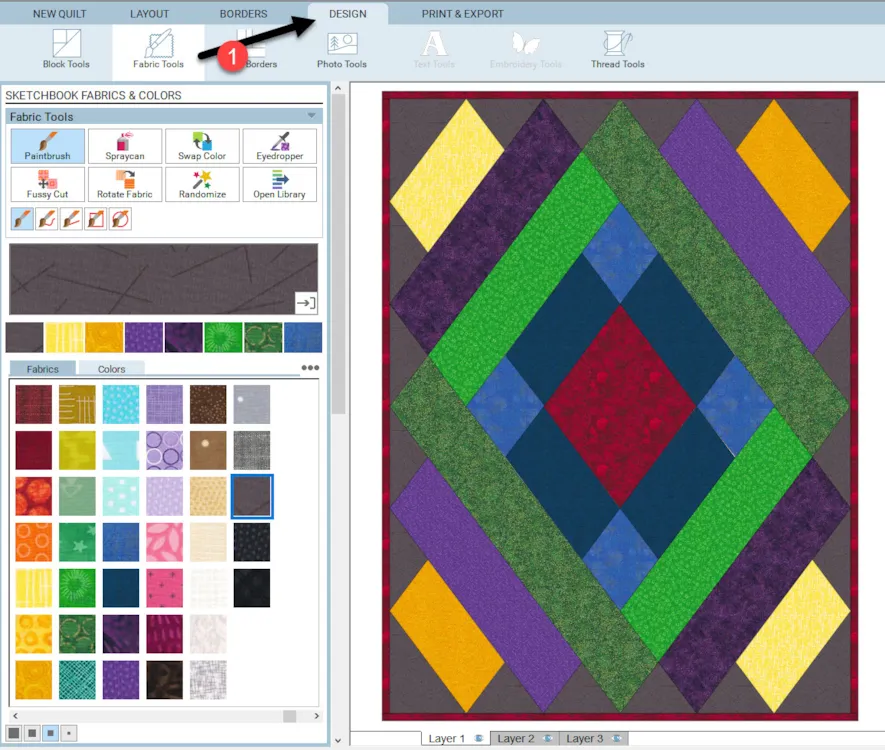
The quilt is placed on the quilt worktable ready to have the fabric colors added. Color your quilt by clicking on a fabric color and then moving the cursor to the worktable and clicking to color all the elements of the quilt including the border.
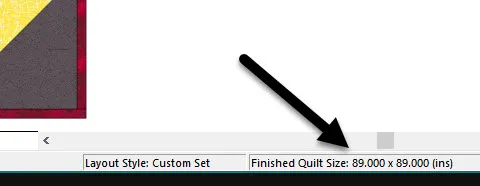
Note the size of the quilt on the lower right edge of your screen. This says the finished size of the quilt is 89 x 89 inches.
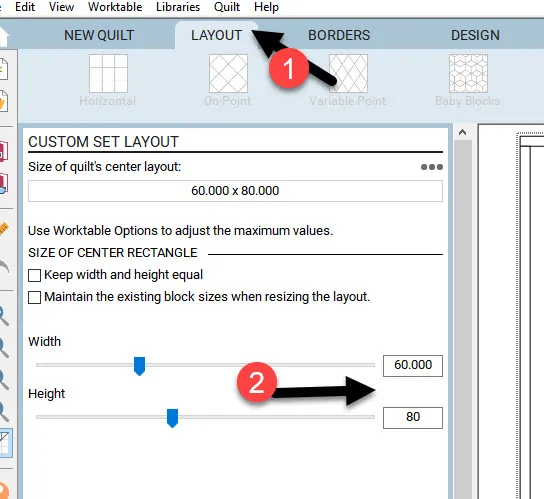
You can change the size of the quilt without having to recreate it. Click on the layout tab at the top of the screen and change the size of the quilt to be 60 x 80 inches.
Click on the Design tab at the top of the screen to see the new layout dimensions.
Add the layout to the sketchbook. ![]()
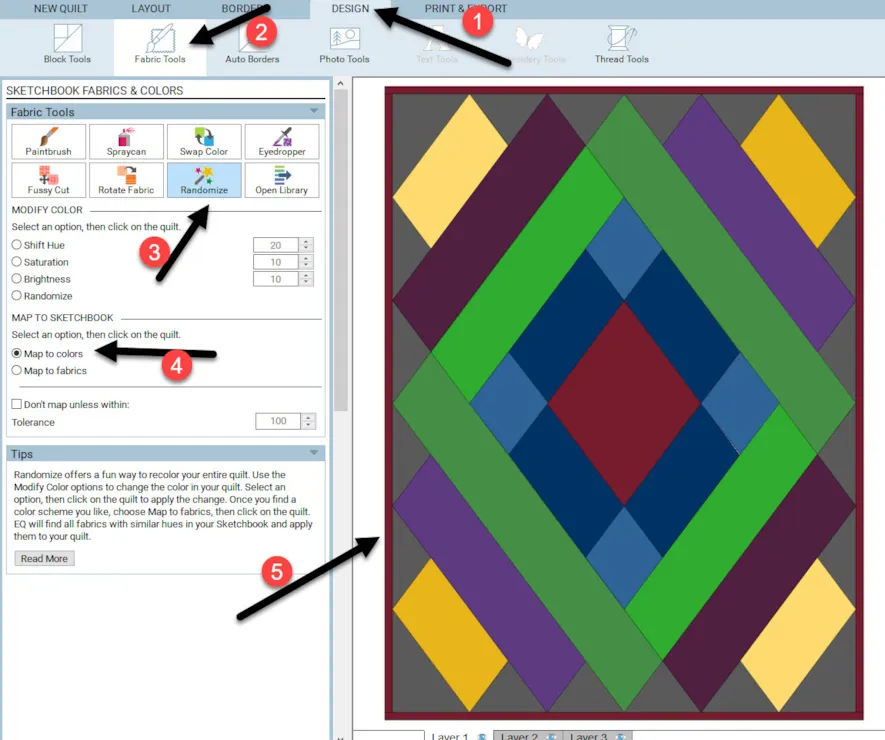
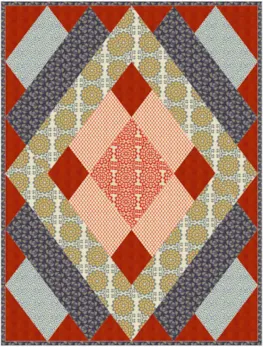
Click on the randomize tool icon ![]() to select it. Click on the ‘map to colors’ radio dial to select it. Move the cursor over to the worktable and click once to change the fabric selections to solid colors.
to select it. Click on the ‘map to colors’ radio dial to select it. Move the cursor over to the worktable and click once to change the fabric selections to solid colors.
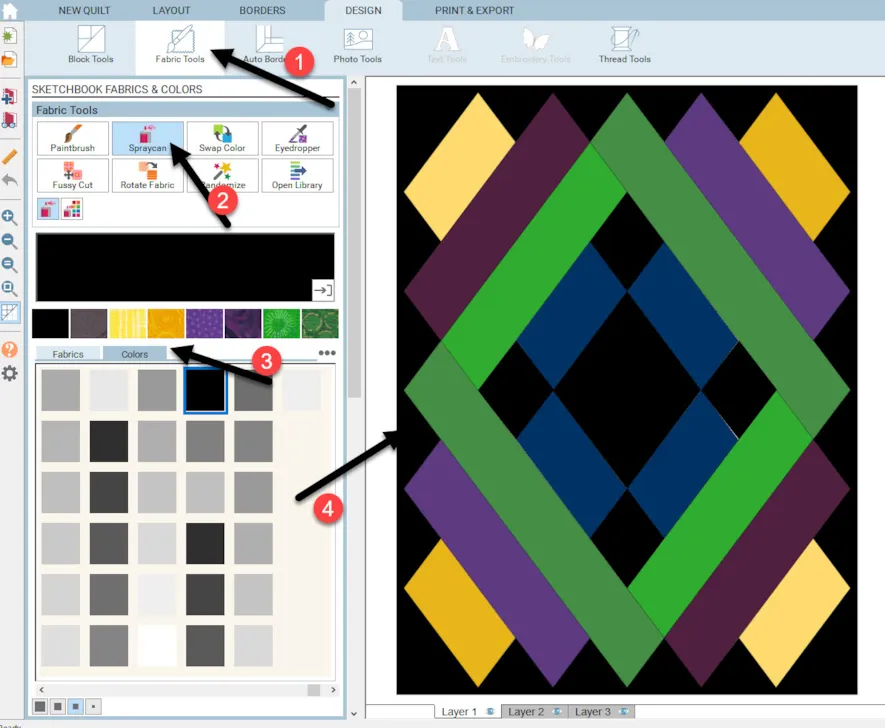
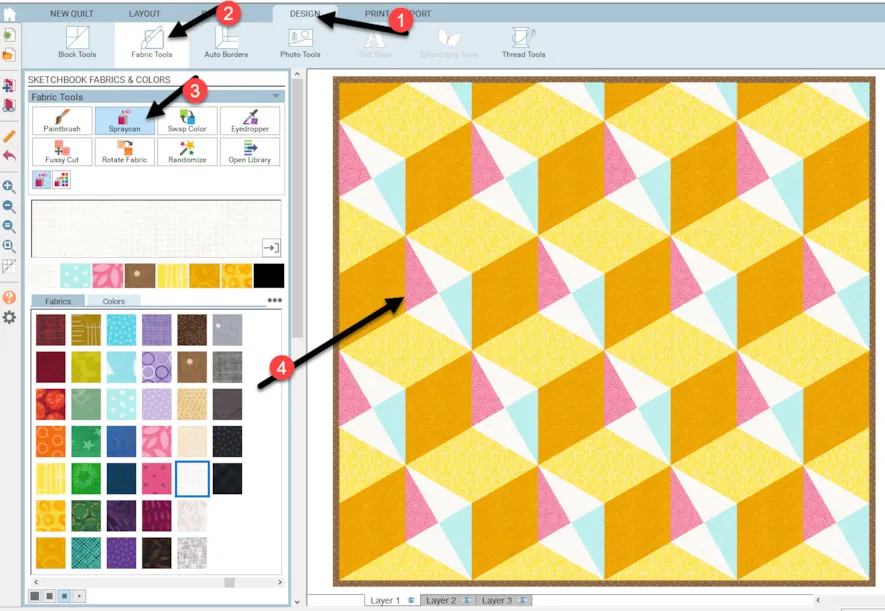
My quilt has a more modern quilt look to it with solid colors. I can change a few colors quickly by selecting the spray can icon ![]() clicking on the image and it will look more like an Amish style of quilt. NOTE: The spray can tool will turn all similar color patches to the new color with one click.
clicking on the image and it will look more like an Amish style of quilt. NOTE: The spray can tool will turn all similar color patches to the new color with one click.
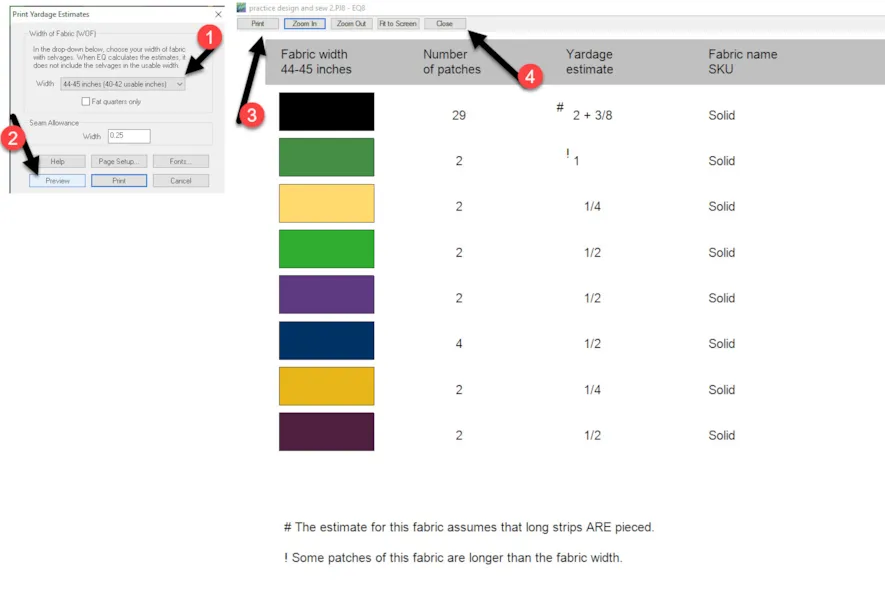
To see the yardage you require for the design you have created, click on the print and export tab at the top of the screen and then click on the yardage icon.![]()
In the print yardage estimates box, click on the down arrow and select the width of the fabrics you will be using. Click on ‘preview’ to see what the requirements are. You will print your yardage estimates from the print box that shows up with the requirements on it. Close the print page when done.
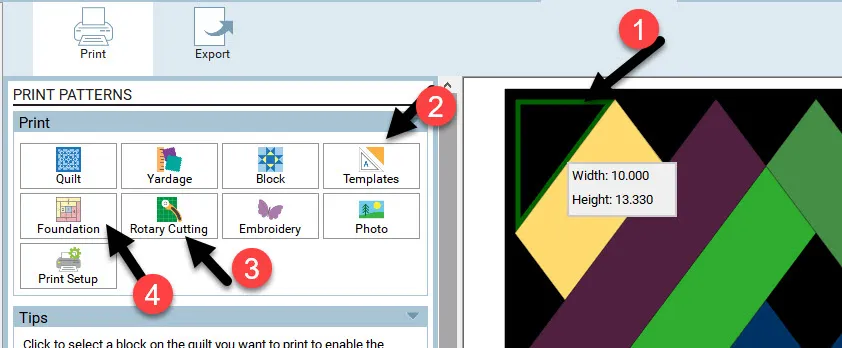
On all the quilt layout worktables, you must select the section of the quilt first before you select the type of cutting instructions you want to use. Once you click on an area of the quilt to select it, it will have a green box around it. Consider if you want rotary cutting, templates, or foundation piecing for each of the fabric pieces in the quilt layout.
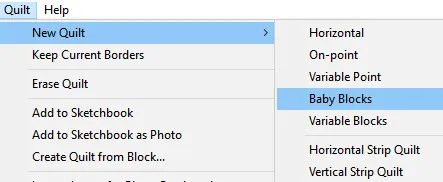
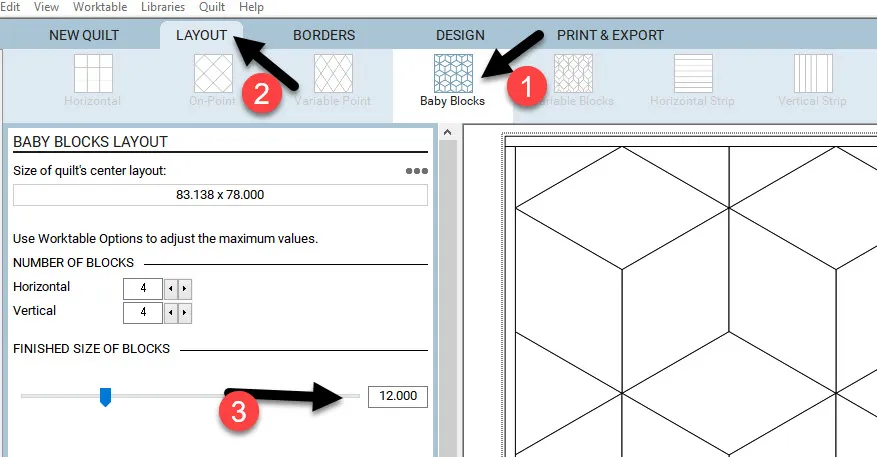
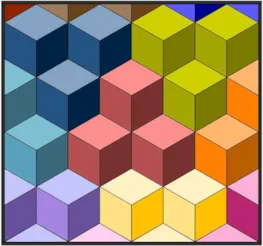
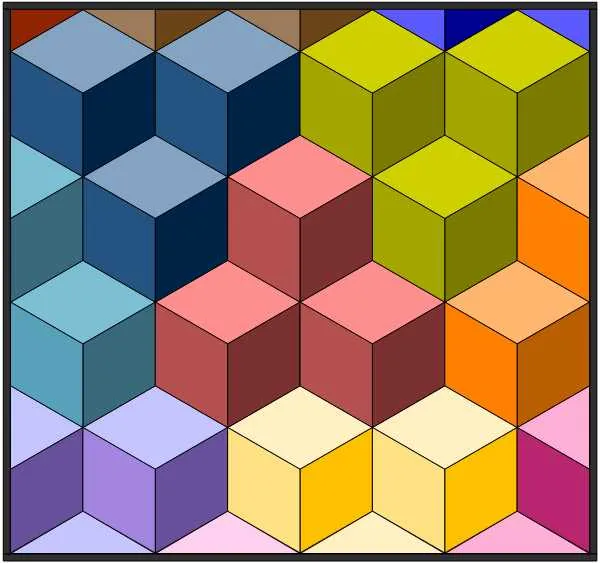
Let’s create a new quilt using the built-in functions in EQ8. Click on QUILT>New Quilt>Baby blocks at the top of the screen.
Click on the layout tab at the top of the screen and change the finished size of the blocks to be 12 inches.
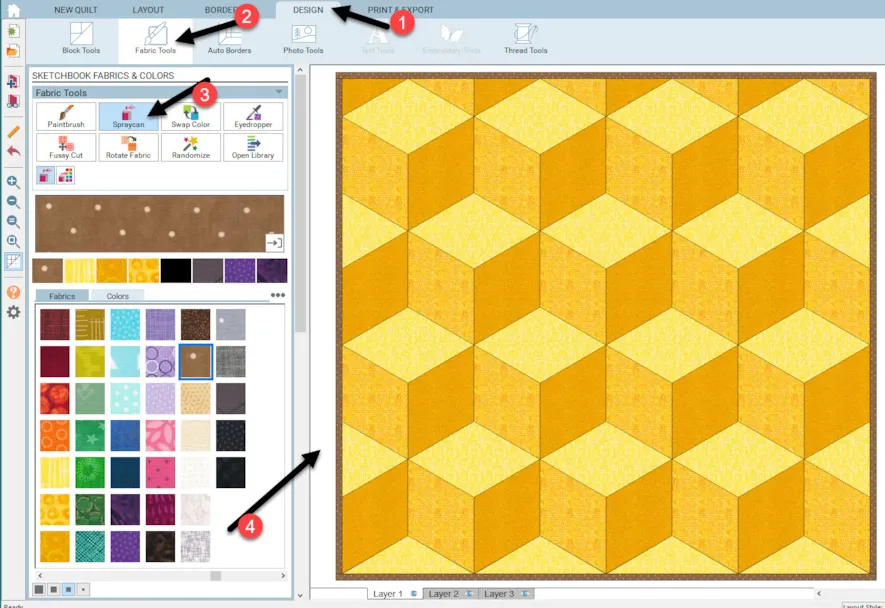
Click on the Design tab at the top of the screen and select the fabric tools.
Click on the spray can tool icon ![]() to select it and then select a light, medium, and dark color for each of the sides of the block. Hold down the control (CTRL) key on the keyboard as you click on a block segment to color all the same segments of the blocks at one time.
to select it and then select a light, medium, and dark color for each of the sides of the block. Hold down the control (CTRL) key on the keyboard as you click on a block segment to color all the same segments of the blocks at one time.
Add the colored layout to the sketchbook.![]()
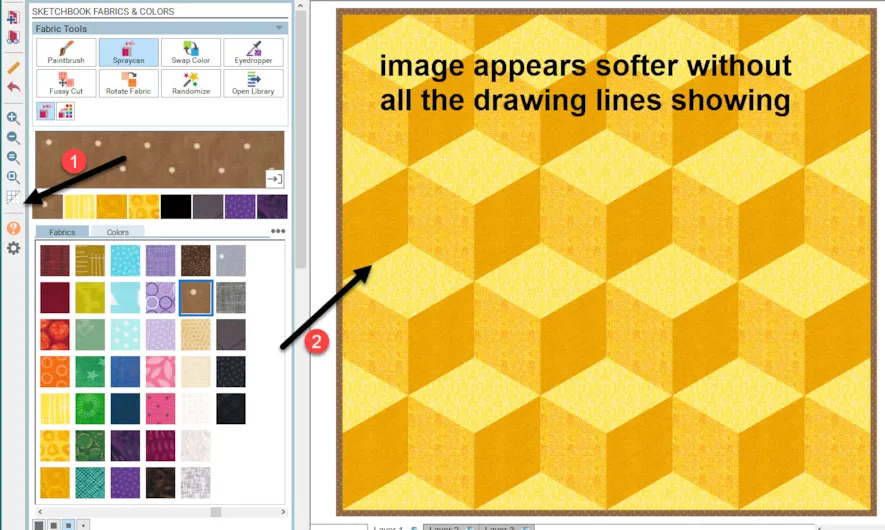
You may get a better view of how the quilt layout will look if you click on the hide/show quilt patch lines ![]() on the left side of the screen. This is a toggle switch that you click on and off to see the lines.
on the left side of the screen. This is a toggle switch that you click on and off to see the lines.
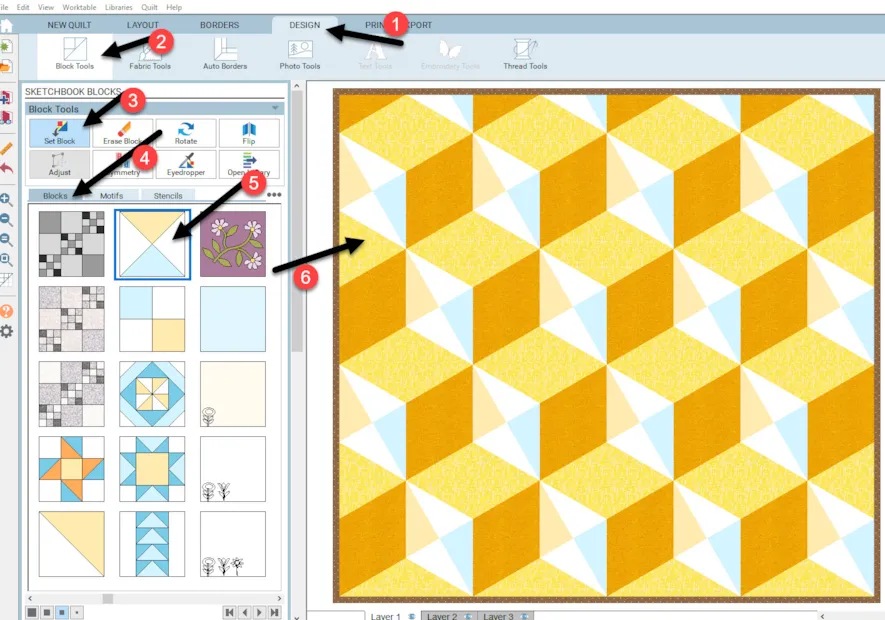
Because we made the blocks larger, there is ample room to substitute a pieced block or an applique motif into the sides of the baby block.
Click on the Design tab at the top of the screen and select the block tools. Click on the set block icon and navigate to the built-in blocks in EQ8 that is the 4 patch cross block. Move the cursor over to the quilt layout and while holding down the control (CTRL) key on the keyboard, click once to place the block onto the left side of each of the baby blocks in the layout.
Click on the fabrics tools at the top of the screen and using the spray can,![]() while holding down the control key (CTRL) on the keyboard, click in each area of the 4 patches to color all the similar segments of the blocks on the entire layout with one click.
while holding down the control key (CTRL) on the keyboard, click in each area of the 4 patches to color all the similar segments of the blocks on the entire layout with one click.
By adding a pieced block to one side for the baby block, the visual perspective of the quilt is altered. You can easily change the look of baby blocks by simply changing the elements within each block or by changing the colors of the blocks and varying where you place the light, medium, and dark fabrics.
Practice with a multicolor baby block design and add it to the sketchbook![]()
On the quilt worktable, click on the tab, NEW QUILT>Vertical Strip.
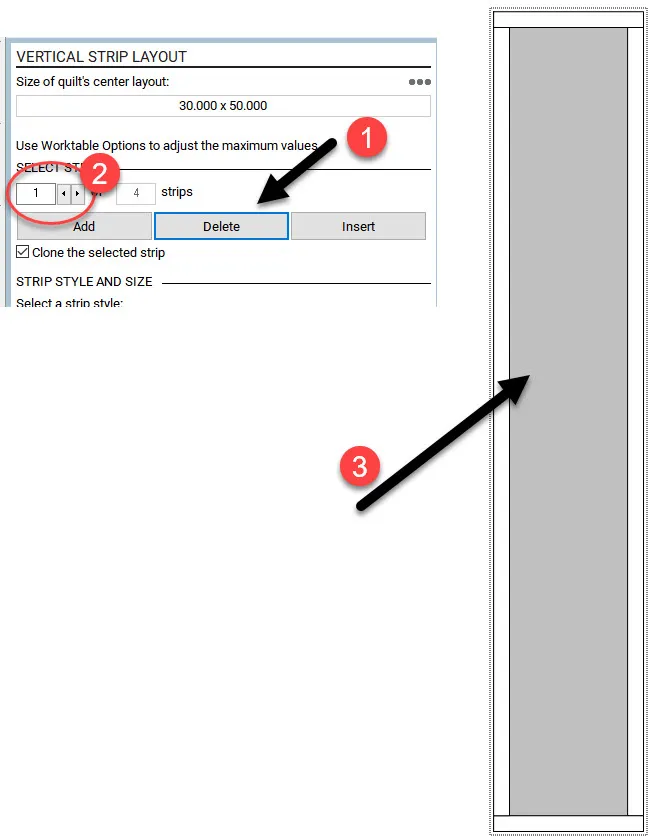
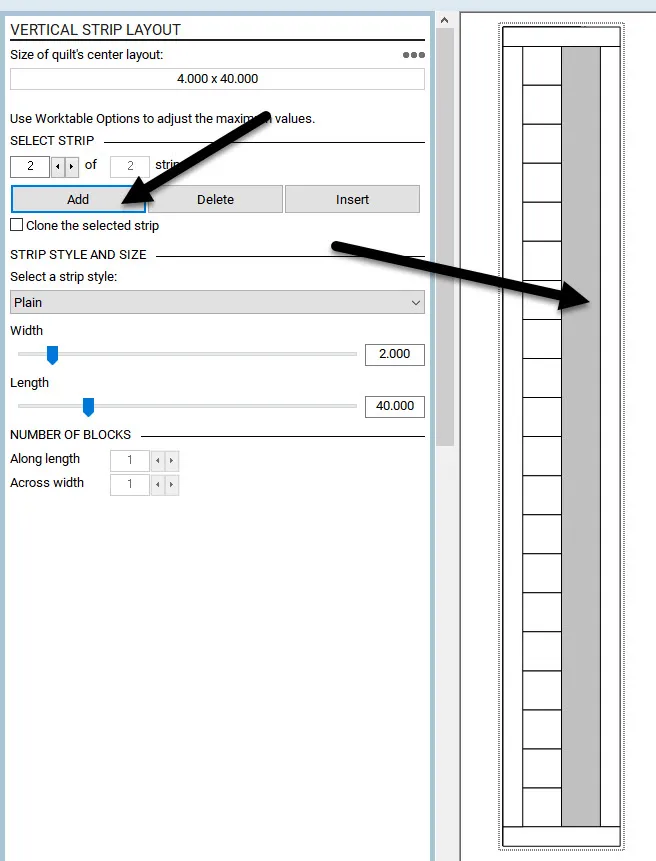
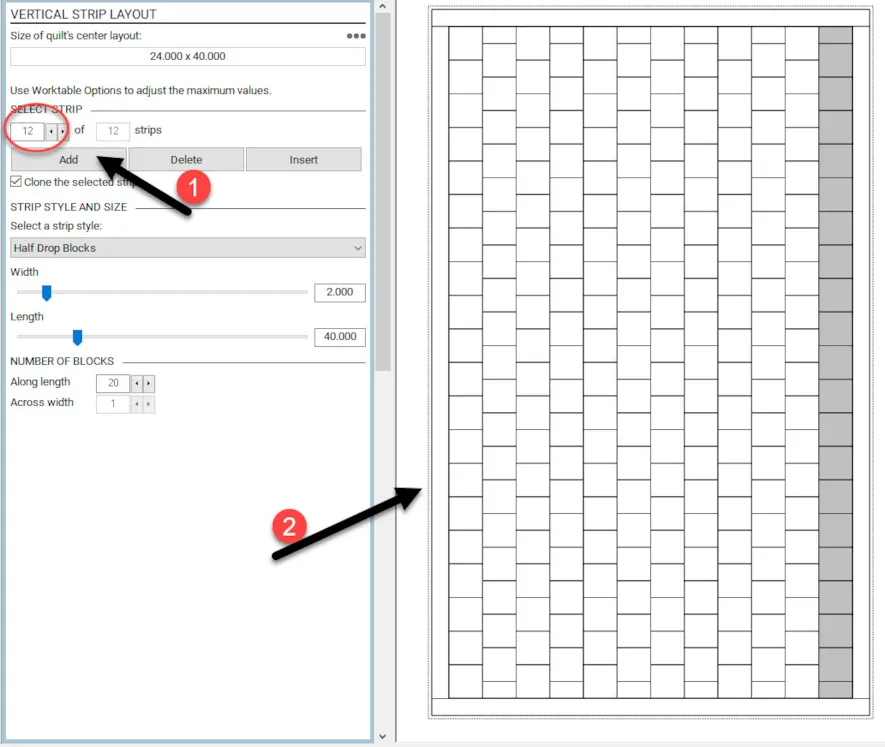
In the vertical strip layout, click on the word ‘delete’ three (3) times so you only have one remaining strip on the worktable.
The remaining strip is automatically selected and appears gray.
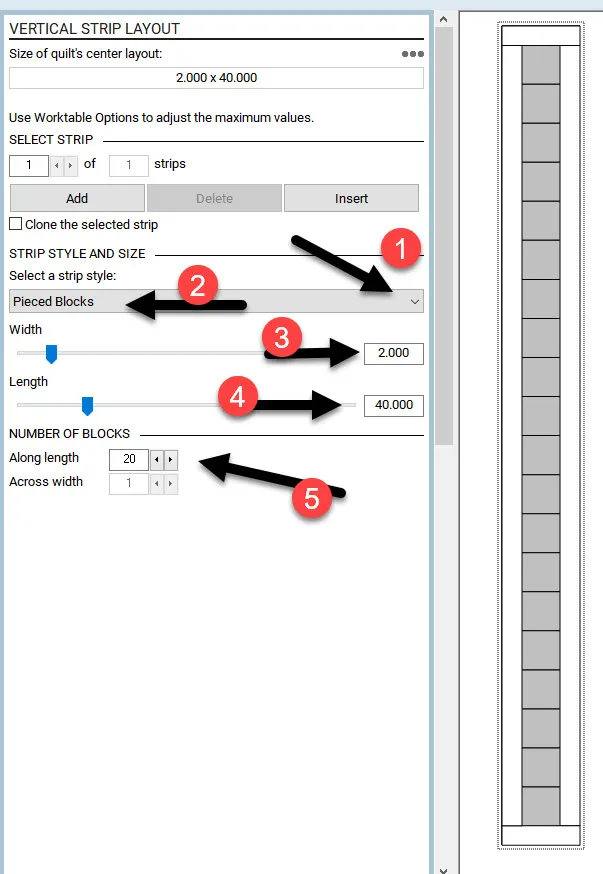
Set the properties of this strip to be pieced blocks (select from the drop-down menu), width 2 inches, length 40 inches, and the number of blocks to be 20 along the length.
Click on the word ‘add’ in the layout box at the left to add another strip to the right of the first strip we created. A new plain strip will be added and is highlighted gray ready to add the properties for that selected strip.
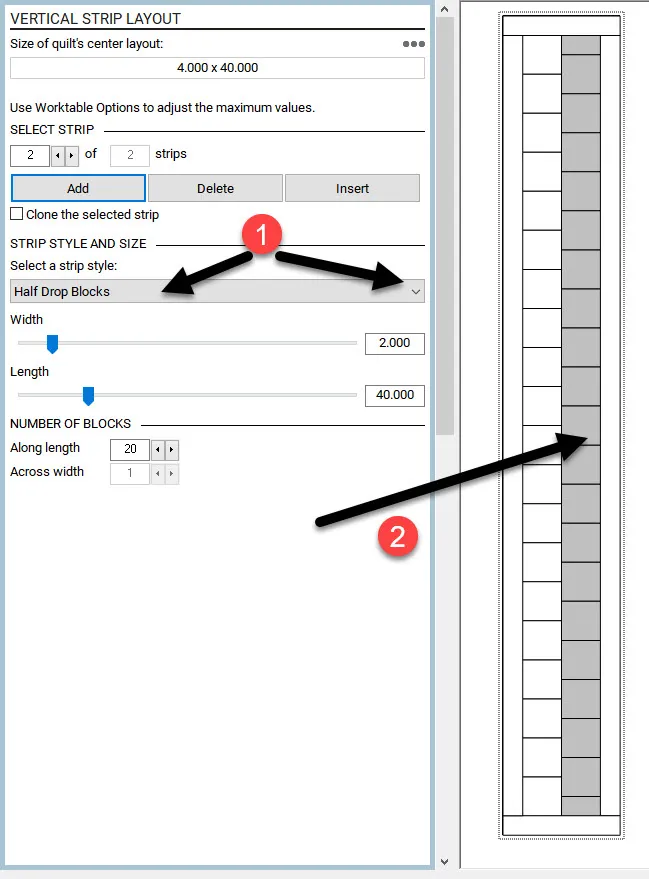
With the new plain strip selected, change the layout properties to be half drop blocks selected from the drop-down menu. The width and strip length with the number of blocks is automatically set for this new second strip.
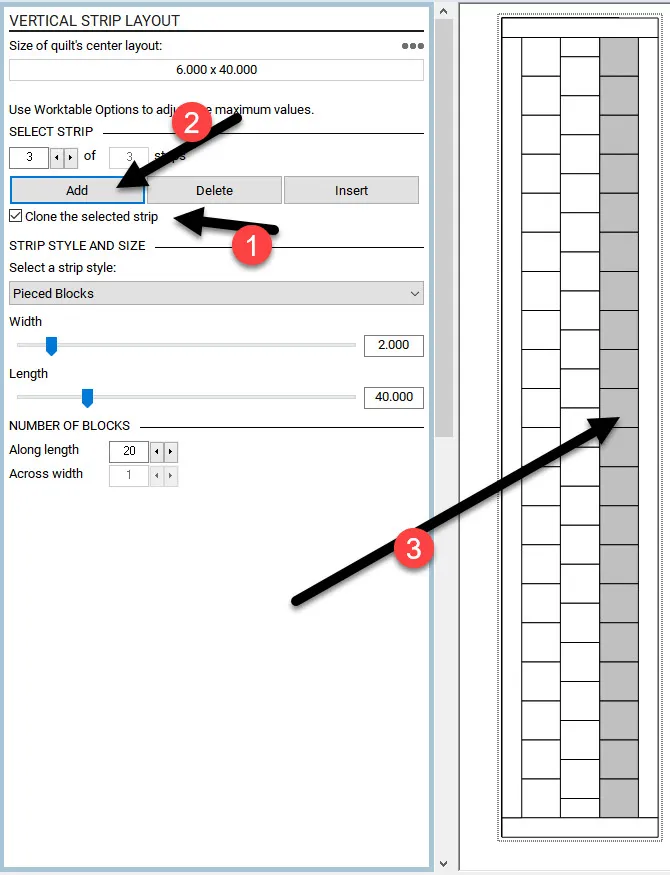
Click on the strip directly to the left of the current highlighted strip (strip one) to select it. Place a checkmark in front of the words ‘clone selected strip’ and then click on the word ‘add’ directly above that. A new strip will be added with the same properties we set for that first strip.
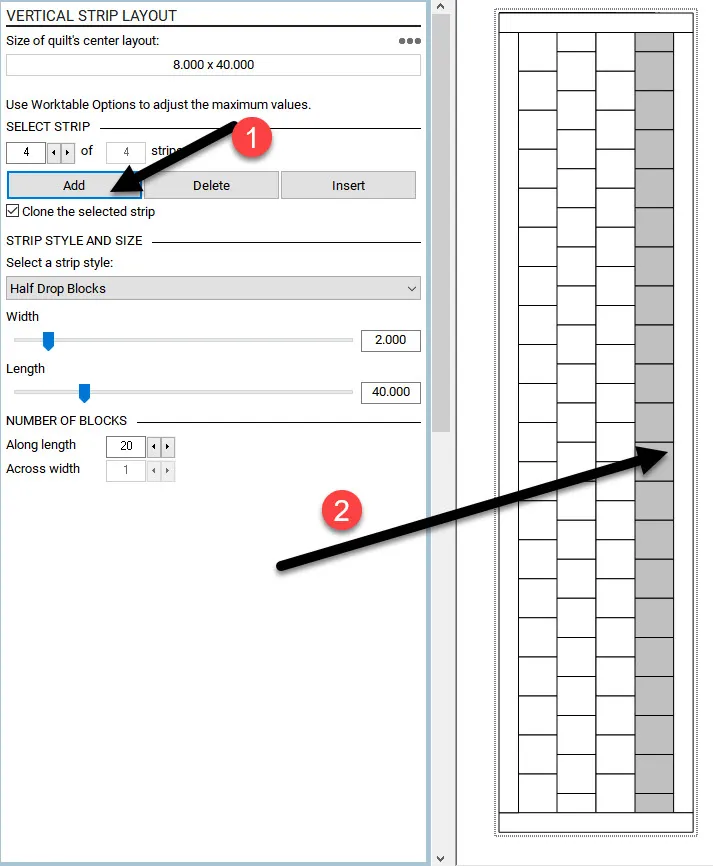
Now click on the strip directly to the left of the current strip (the second set of pieced half drop blocks) and click on the word ‘clone’ and then click on add to have another strip added that is an exact copy of the second strip we created.
Continue repeating this pattern of selecting the strip just to the left of the current strip by clicking on it and then clone and add to have a copy of that strip. Every other strip will have half drop blocks. Do this until you have a total of twelve (12) vertical rows with alternating patterns.
Add the layout to the sketchbook.![]()
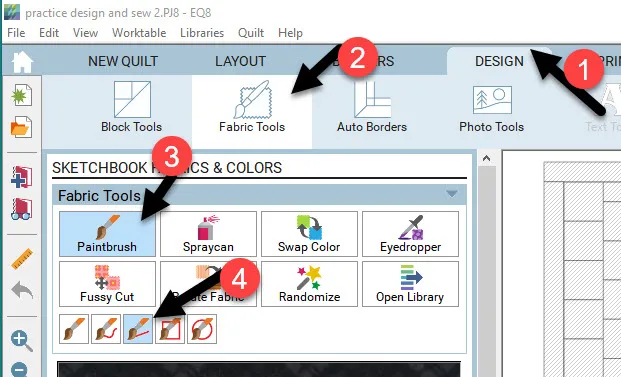
Click on the Design tab at the top of the screen and select the fabric tools.  With the paintbrush selected, click on the straight line paintbrush
 ![]() in the center of the box.
in the center of the box.
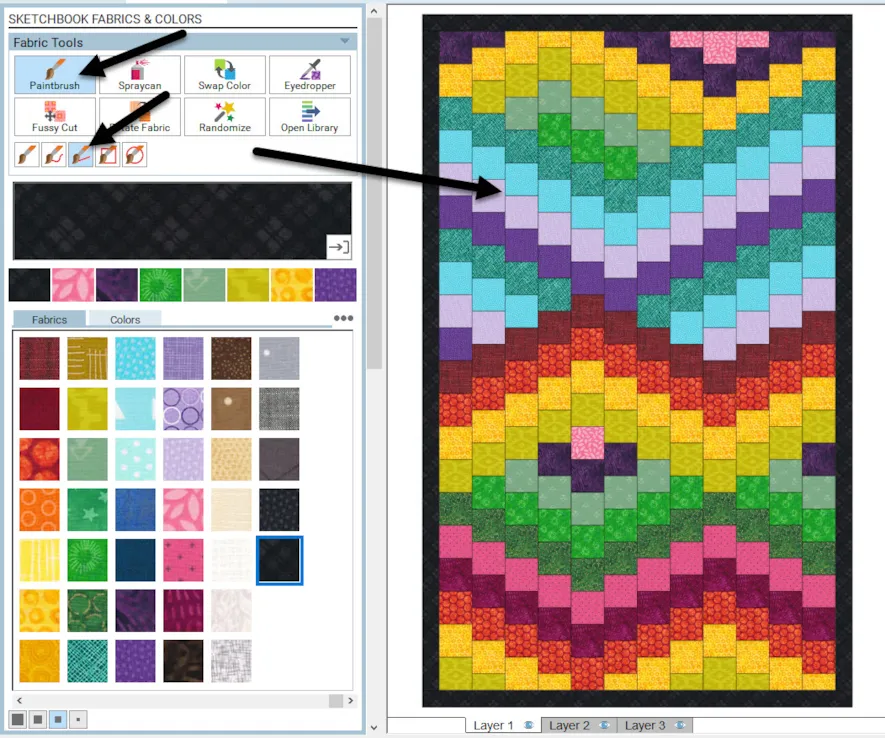
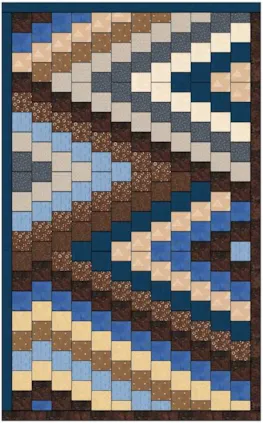
The straight line brush acts in two different ways. With a single click, you can color one block area. If you click/hold/drag/release the brush in a straight line it will color all the elements that line crosses over in one stroke.
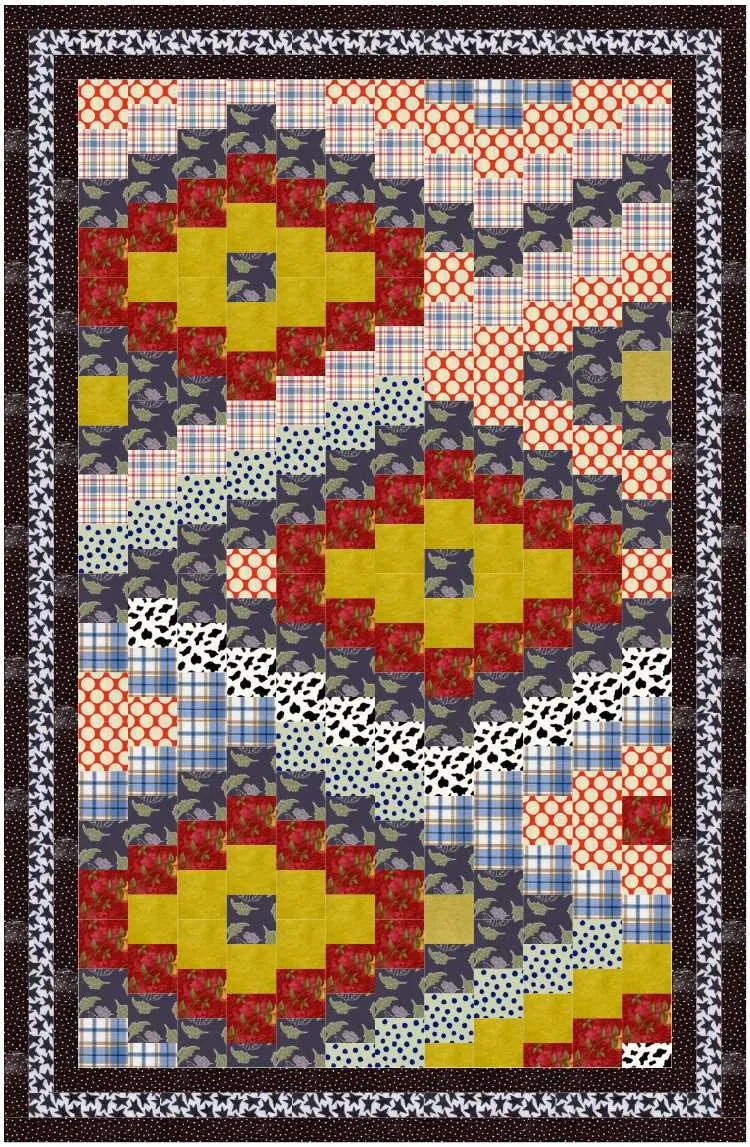
Select a fabric color to begin with, and then move the cursor over to the layout and click/hold/drag/release the cursor to color in straight line segments of color. If you make a mistake and color the blocks where you didn’t quite want them, just click on the ‘undo icon’ ![]() at the far left of the screen to remove the last segment you colored. Repeat this process with several different colors to fill in the layout. Don’t forget to color the border edges. Color in your lines with any pattern you wish to create a repeat of the colors selected.
at the far left of the screen to remove the last segment you colored. Repeat this process with several different colors to fill in the layout. Don’t forget to color the border edges. Color in your lines with any pattern you wish to create a repeat of the colors selected.
Add the completed design to the sketchbook.![]()
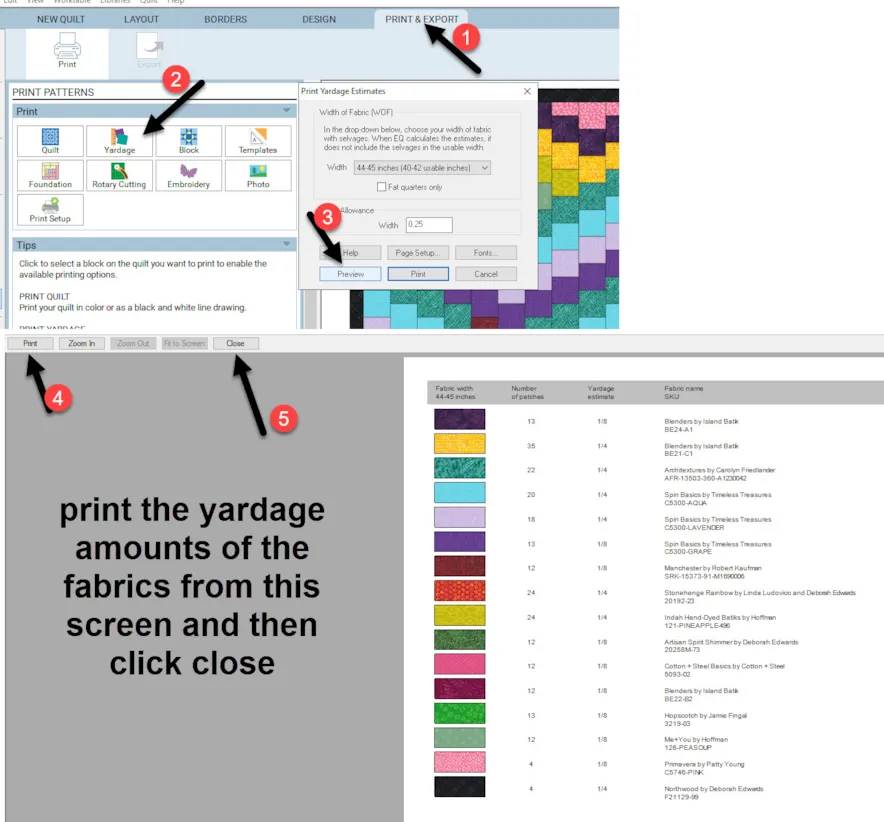
Click on the print and export tab at the top of the screen. Click on the yardage icon. In the estimates box, click on preview at the bottom of the box to see the fabric requirements that you chose to use in your design layout. Close the box when done printing.
The pattern is easy to figure out. The blocks in each strip are 2 inches finished so you need 2.5-inch strips. That is a jelly roll measurement if you want to use it instead of yardage. Each block is 2.5 inches square in a repeat pattern and then sewn together.
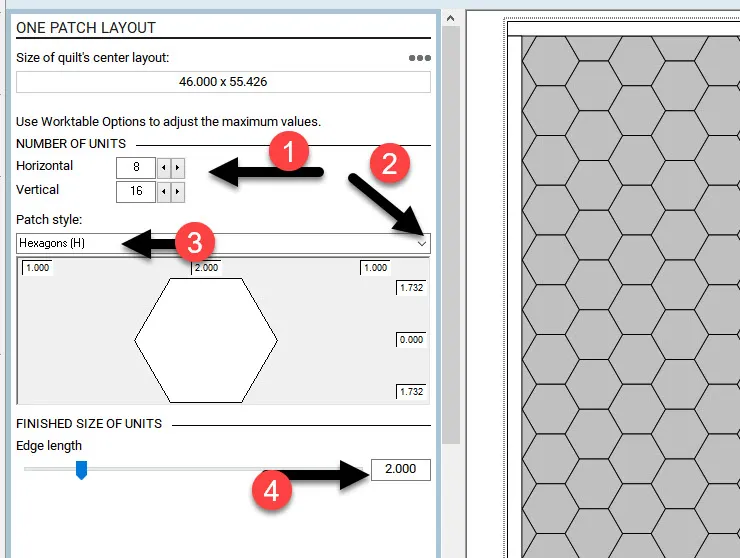
Create a new quilt with a built-in one patch design. On the quilt worktable, click on New Quilt>One patch at the top of the screen.
Click on the layout tab at the top of the screen. Set the number of units to be 8 horizontal and 16 vertical. In the drop-down menu select the hexagons (H) and set the finished size of the units to be 2 inches.
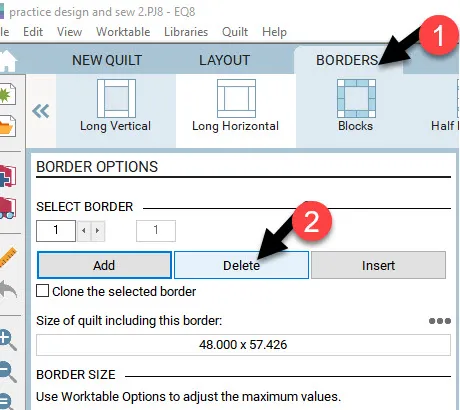
Click on the borders tab at the top of the screen and select the word ‘delete’ from the options box to remove the border from the quilt layout.
Add the layout to the sketchbook.![]()
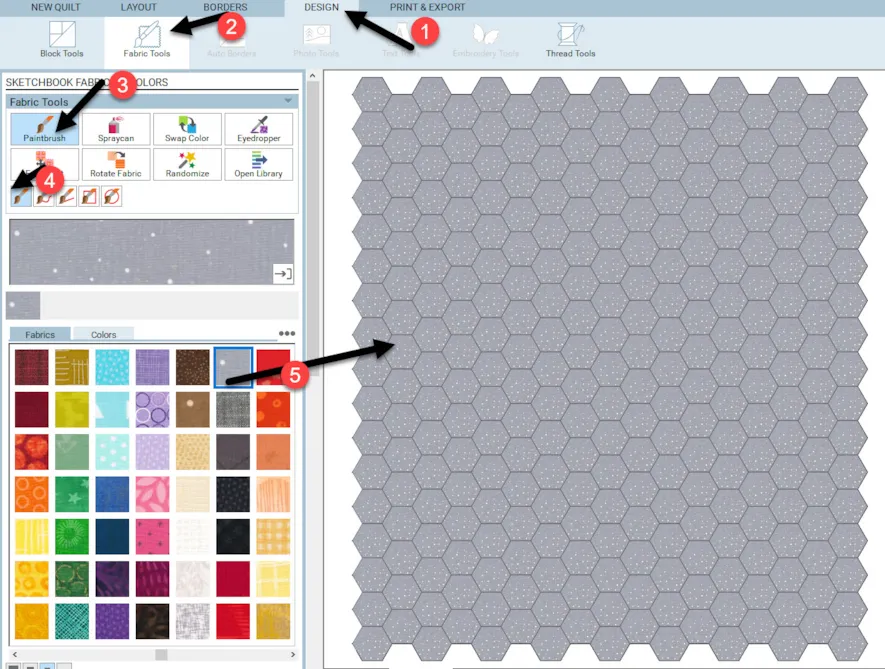
Click on the Design tab at the top of the screen and select the fabric tools icon. Using the paintbrush, while holding down the control key (CTRL) on the keyboard click on the first two columns to color all of them with a neutral, fairly light background color.
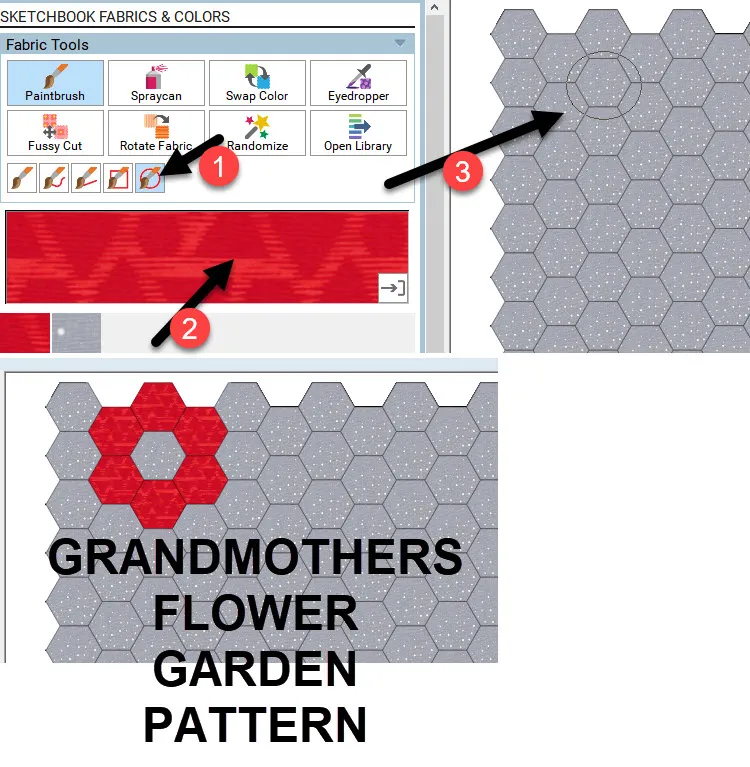
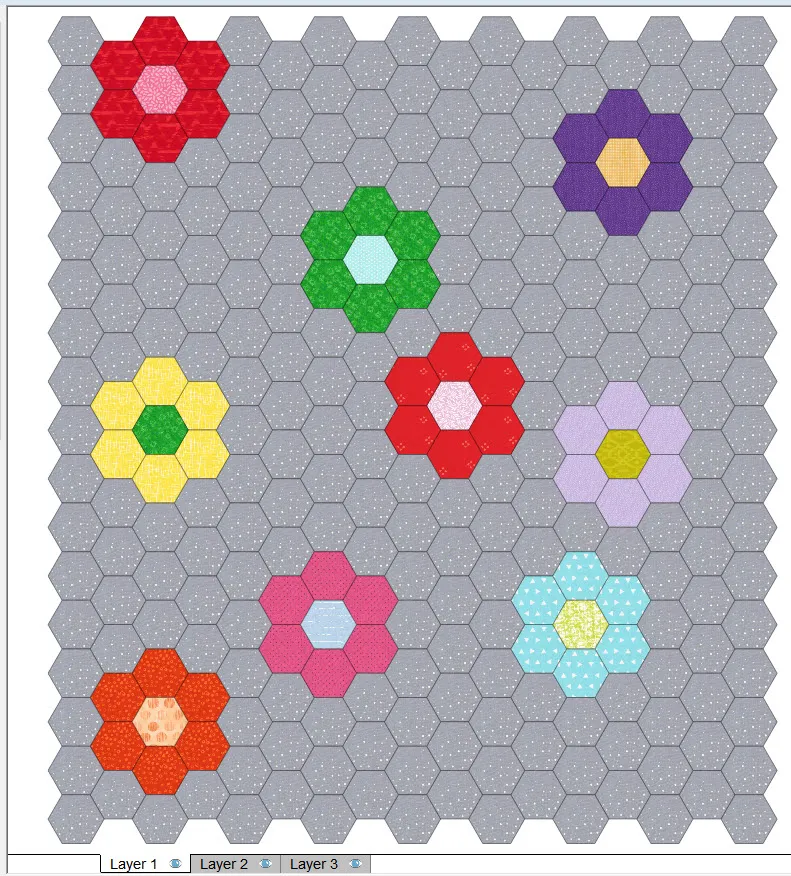
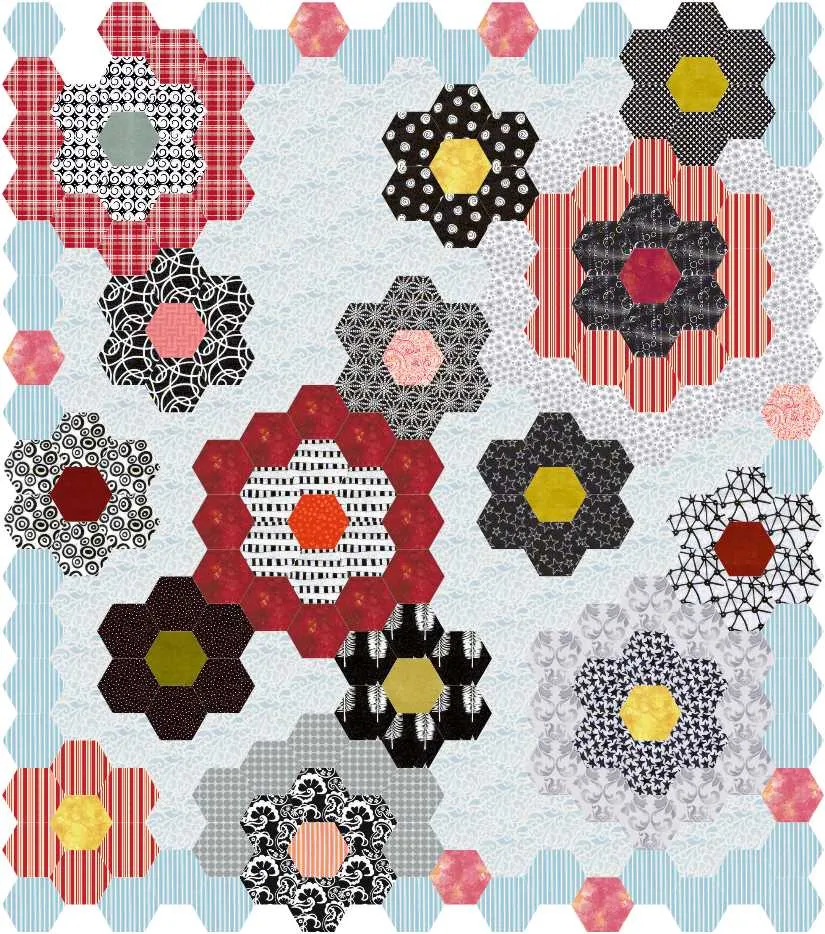
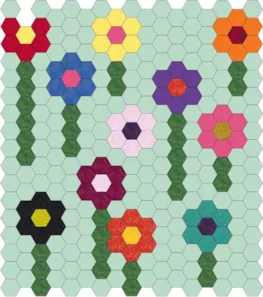
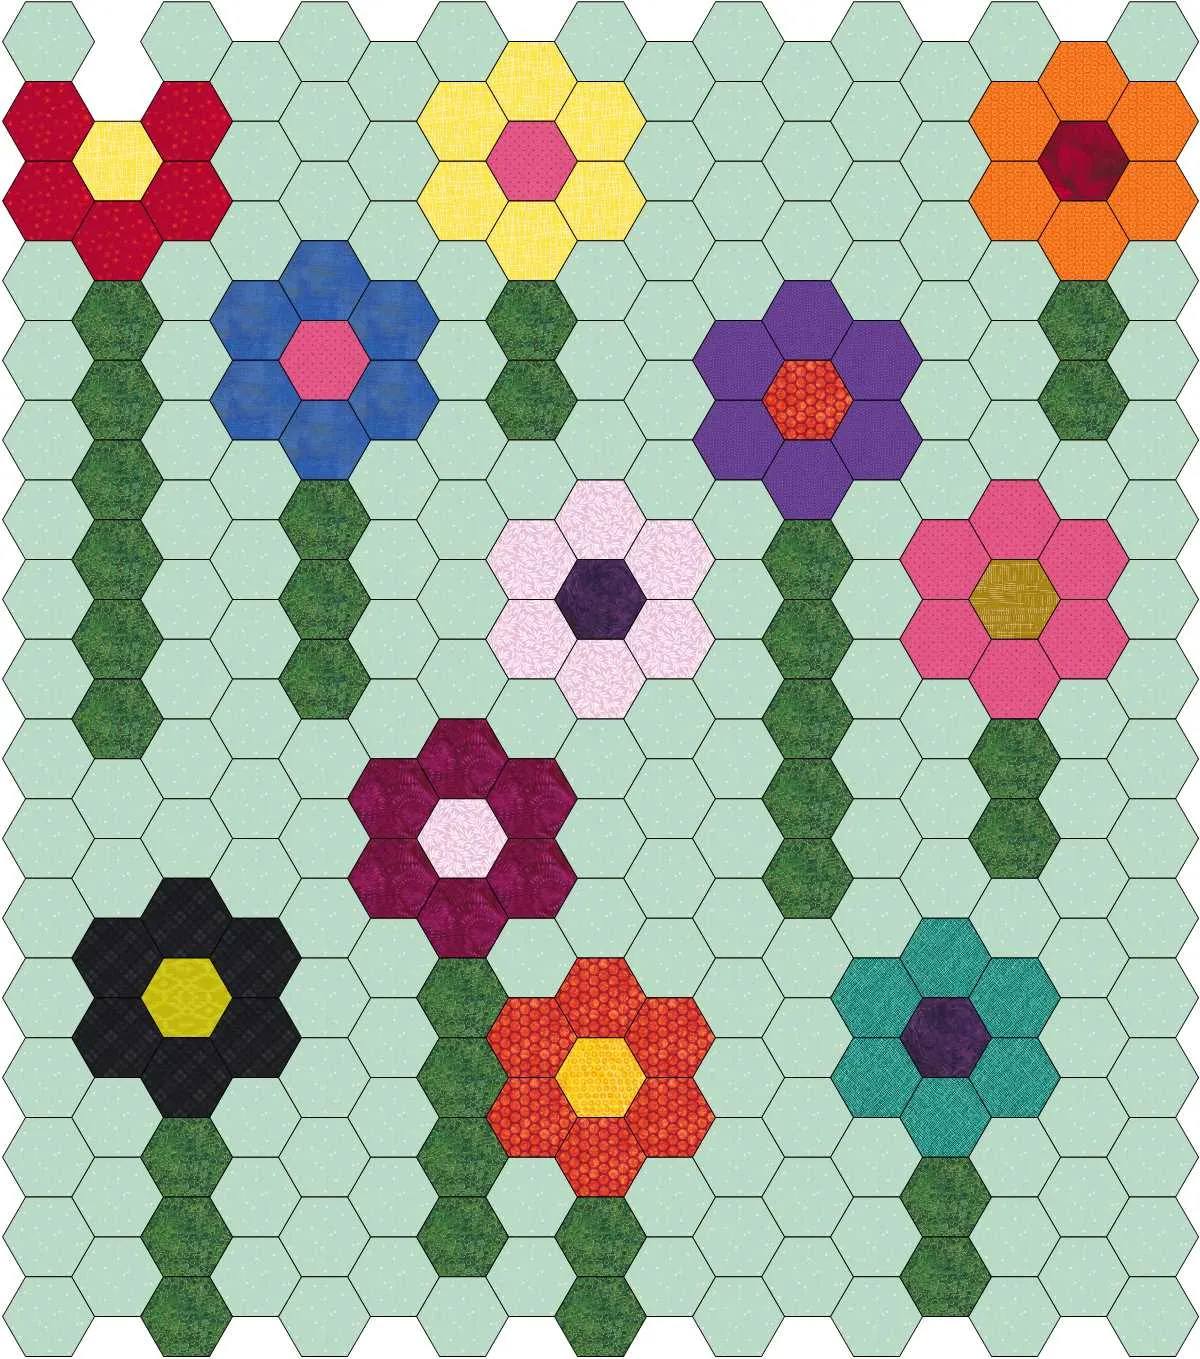
Click on the circle paintbrush option and select a bright color from the color palette. Move the cursor over to the worktable and click/hold/drag/release a circle to fill a pattern area that looks like a grandmother’s flower garden.
All the patches that the circle touches will be colored. If you have the wrong patches colored, simply click the undo icon ![]() on the far left side of the screen.
on the far left side of the screen.
Use the circle paintbrush to scatter several different bright colored flower patterns over the top of the quilt layout. Fill the center of each of the flowers with one click even though you still have the circle paintbrush tool and a contrasting color to the flower ring.
NOTE: The reason we colored the background first was so we would not have to go around each of the elements and meticulously color each of the patches around the flowers. It is faster to color the background first and then replace the color with the circle paintbrush tool.
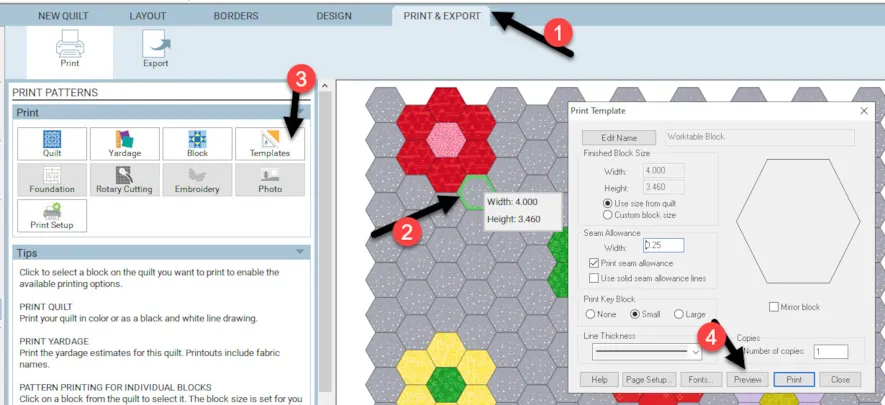
Click on the print and export tab and then select the block hexagon patch by clicking onto it. There will be a green outline around it when selected. Once selected click on the templates icon to see the print template box. Click on preview at the bottom of the box.
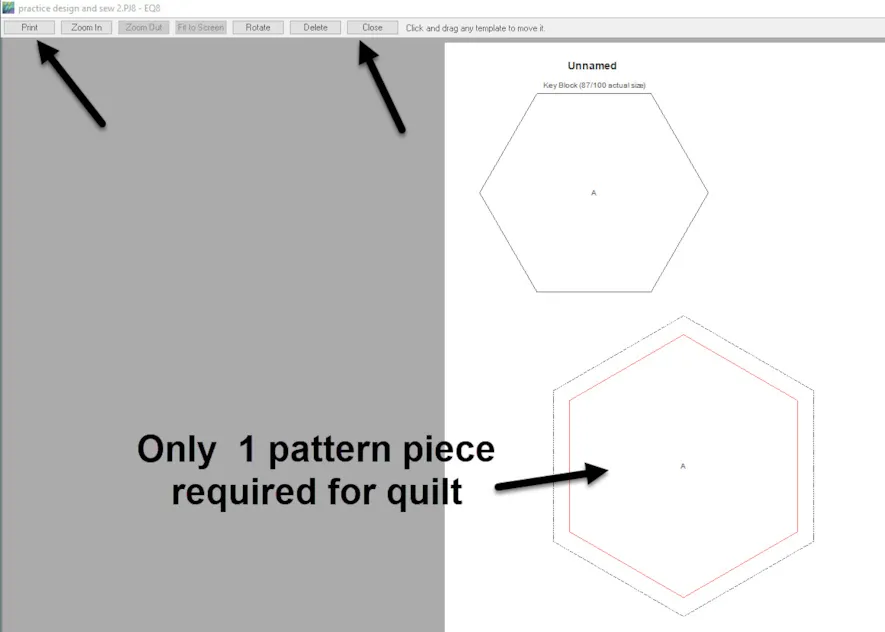
Since the entire quilt is the same size hexagon in different colors, there is only one pattern piece to print. You can use the same piece to create all the blocks. Print from this screen and then close the screen when done.
Close the print screen and the preview box for the Hexagon quilt layout.
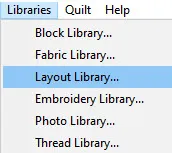
Click on the LIBRARIES>Layout library at the top of the screen.
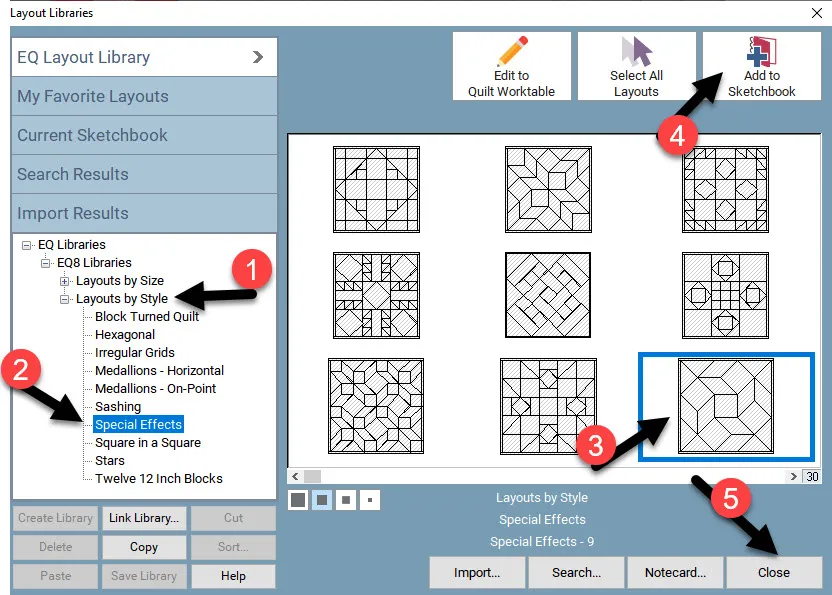
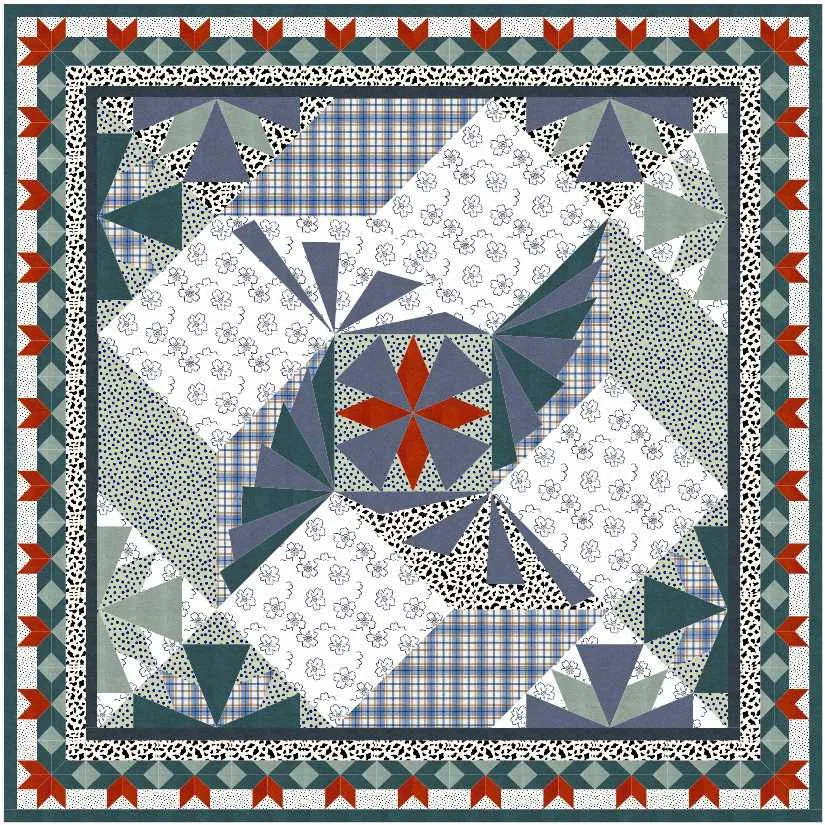
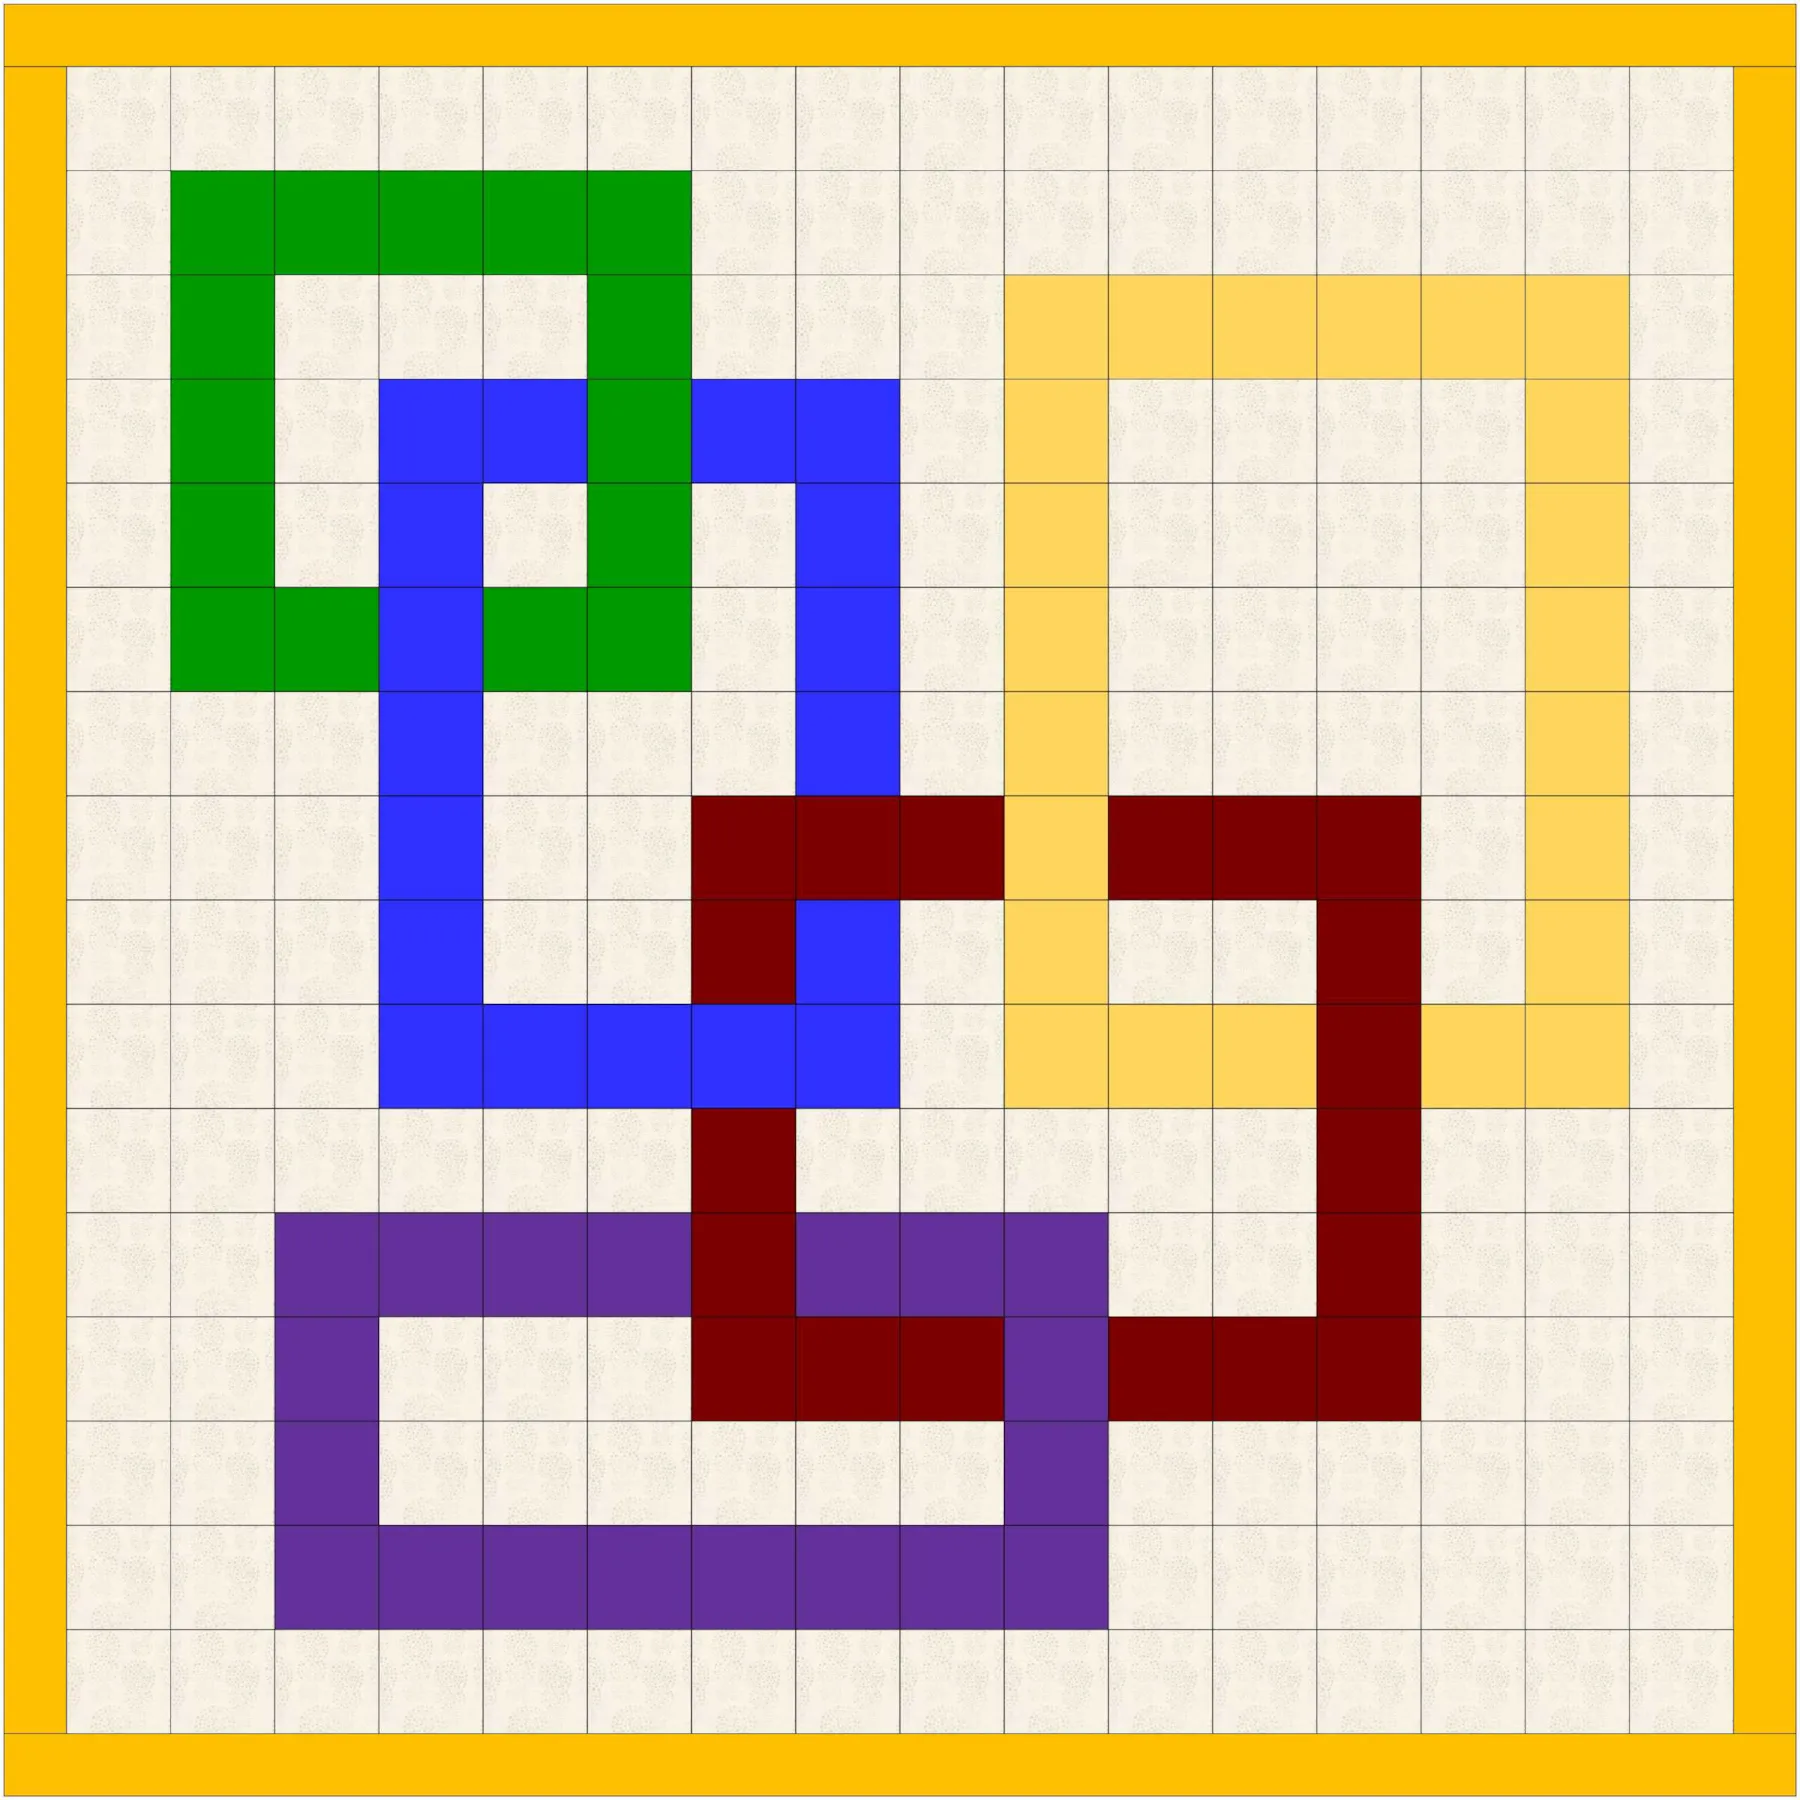
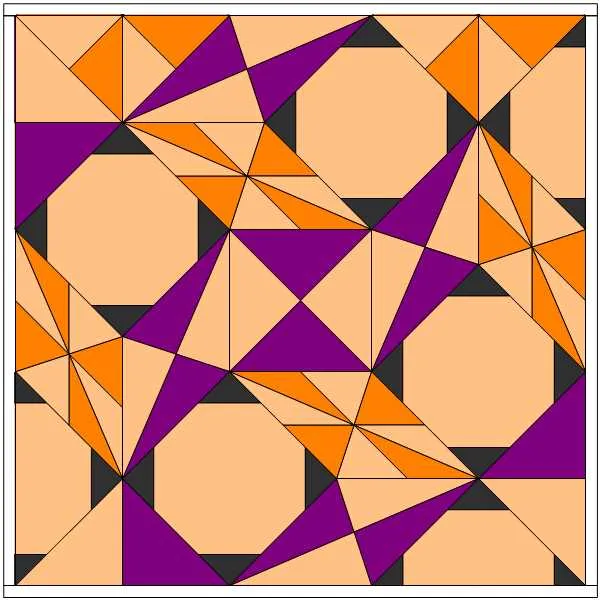
In the layout box, click on the Layouts by Style on the left side and select the special effects category. Select the Special Effects – 9 quilt layout. Click on add to the sketchbook once it is selected. Close the box at the bottom.
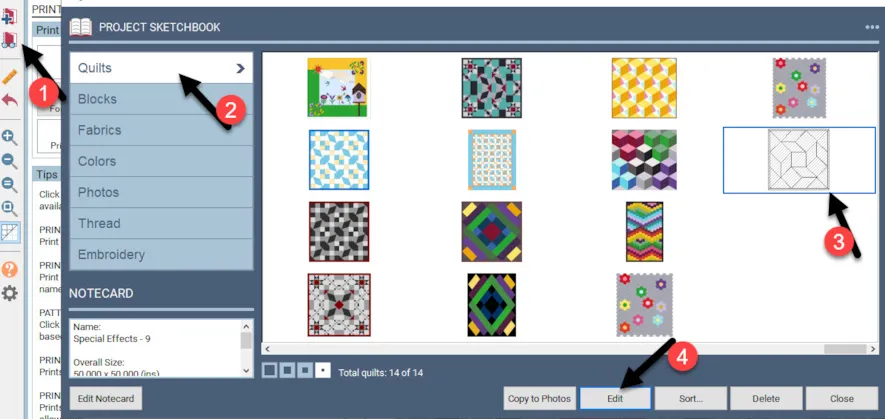
Click on the view sketchbook icon ![]() at the far left side of the screen. In the project sketchbook, under the quilts heading, click on the layout of the special effects we just added and then click on the word ‘edit’ at the bottom of the box to place the design on the quilt worktable.
at the far left side of the screen. In the project sketchbook, under the quilts heading, click on the layout of the special effects we just added and then click on the word ‘edit’ at the bottom of the box to place the design on the quilt worktable.
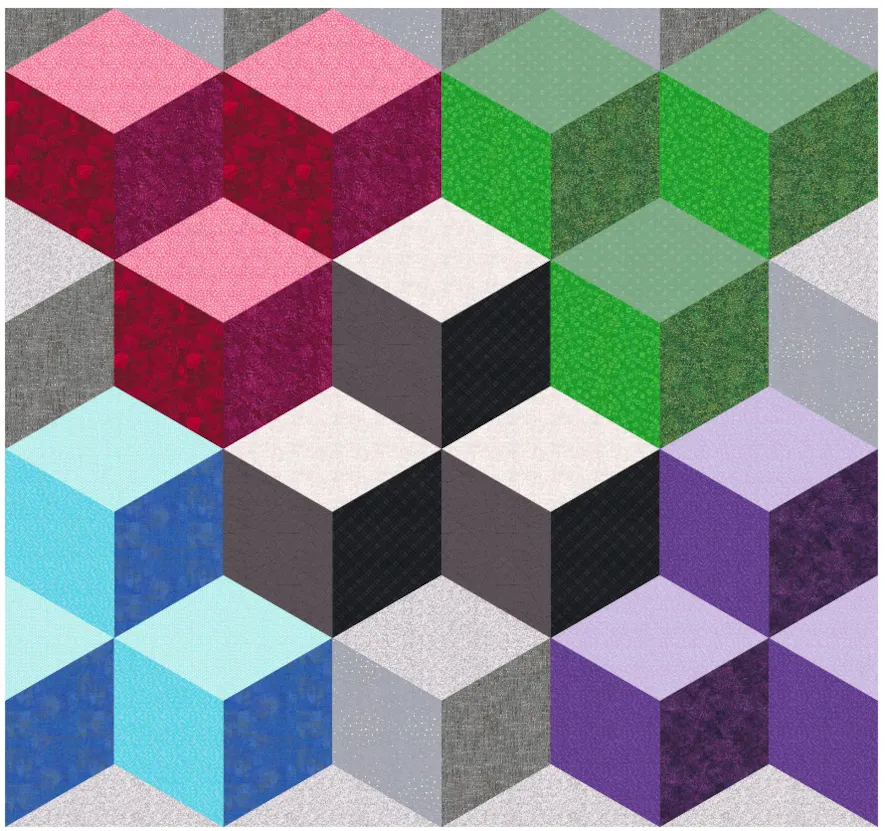
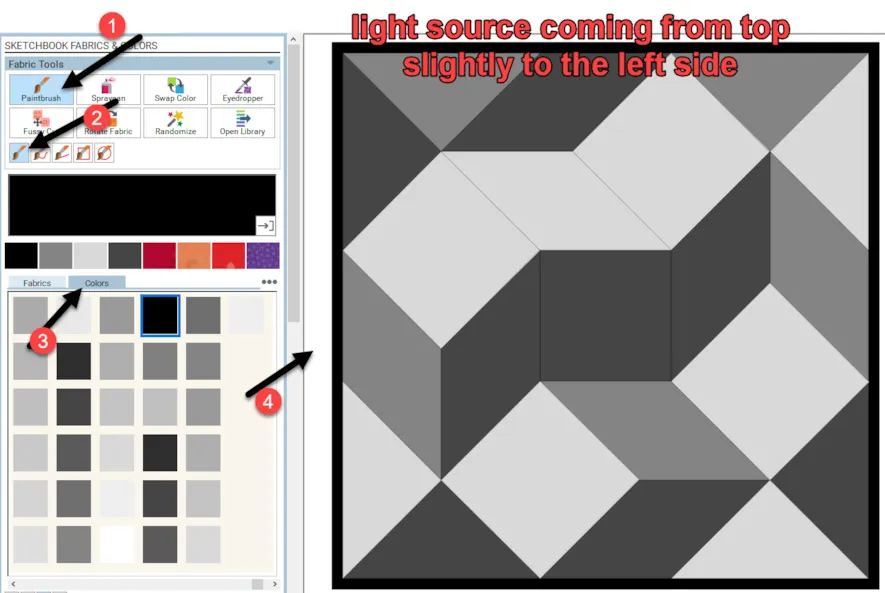
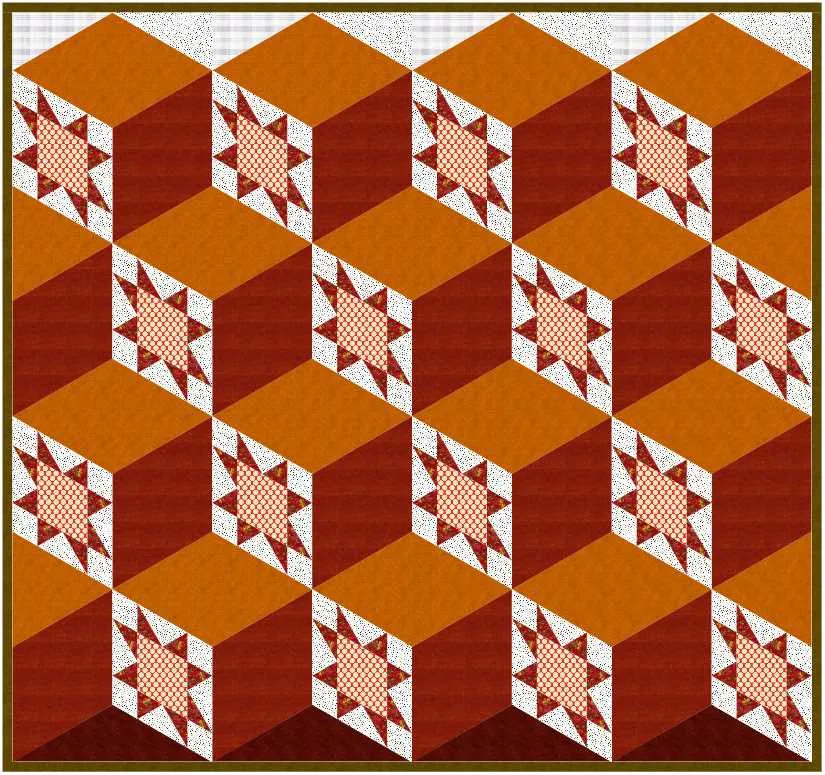
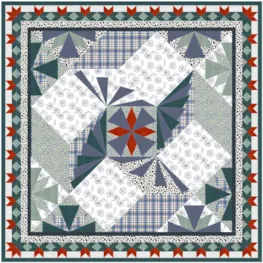
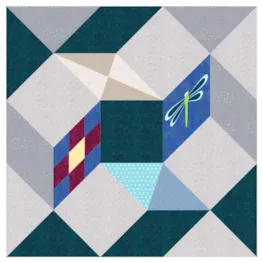
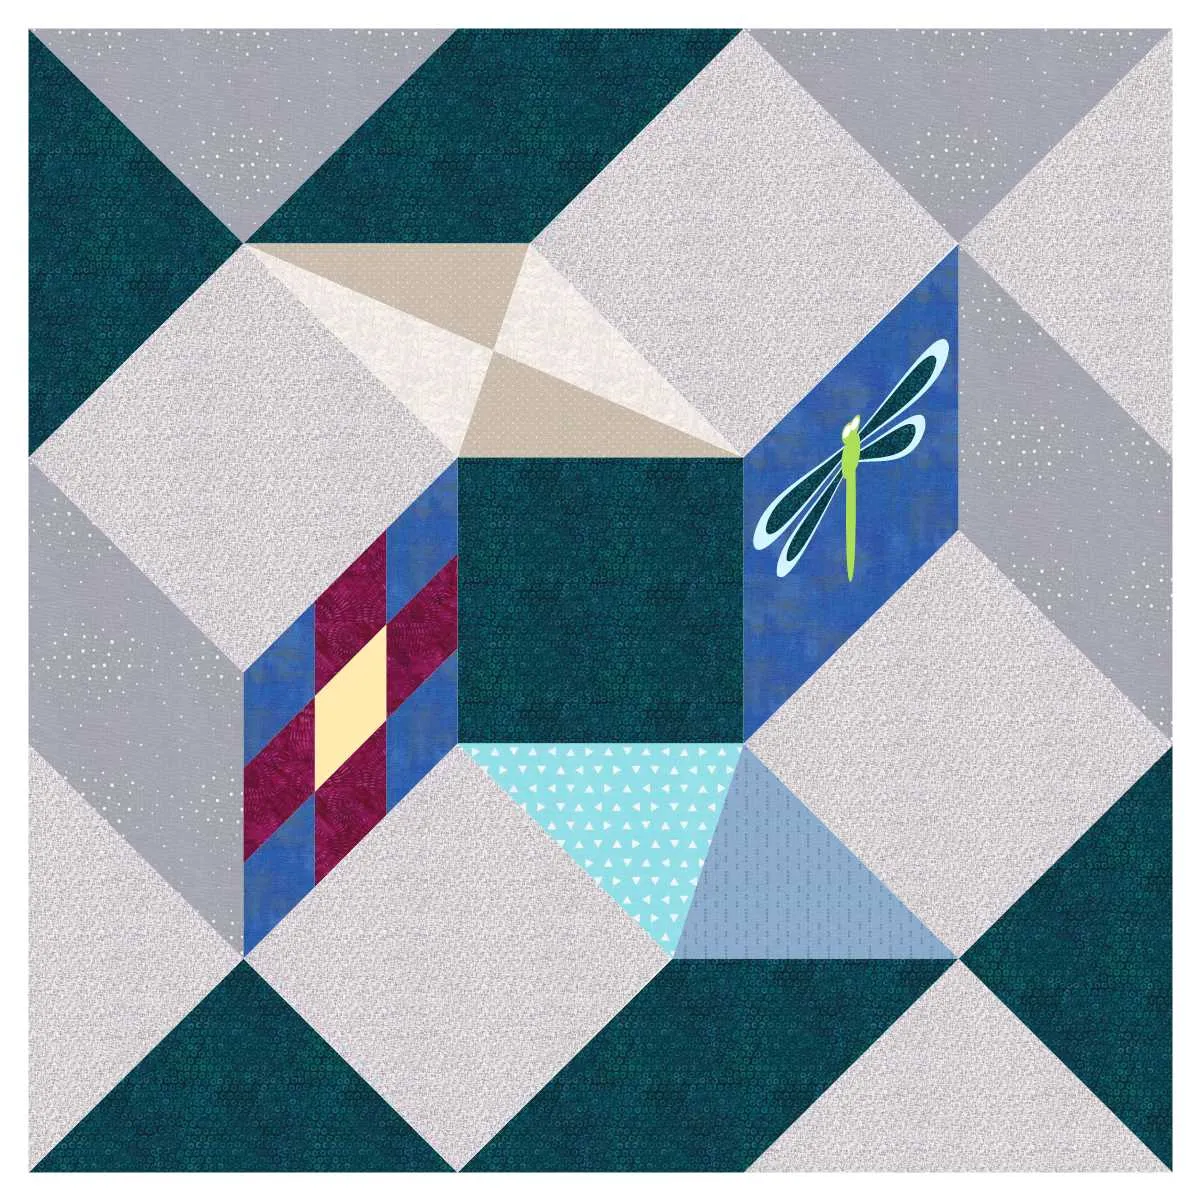
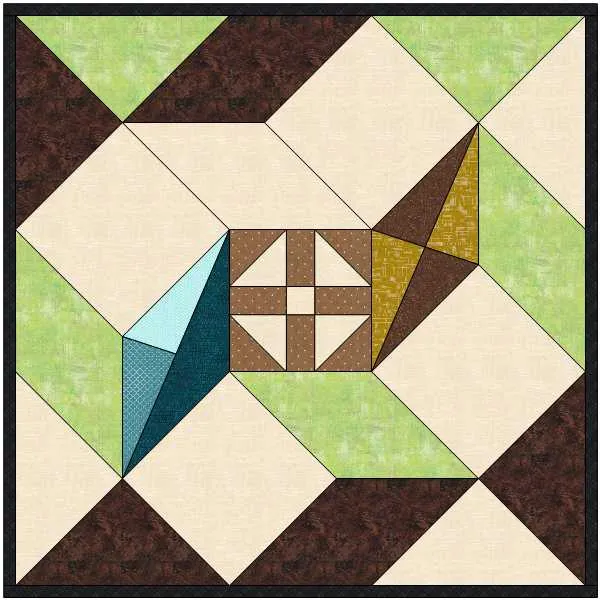
A special quilt layout is unique in that the blocks are at different angles. To highlight this layout, using the light source for highlighting and contrast between light, medium, and dark colors, you can make the design seem to pop off the quilt.
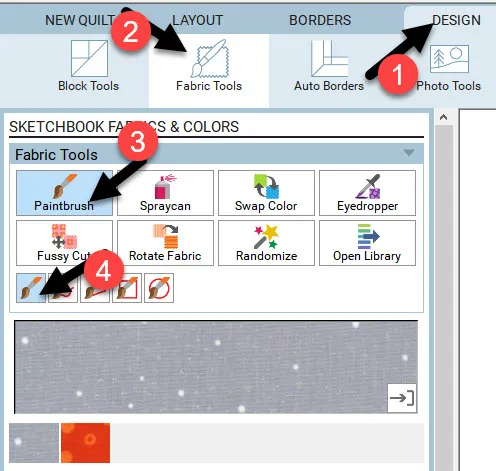
Click on the fabric tools  at the top of the screen and use the one dot paintbrush option to select colors to design your quilt with a single click in each area.
To get the light direction correct, I often color my quilt in solid color gray tones to start with and then apply fabrics later. In my quilt layout below, I am imagining the light source coming from the top of the quilt slightly to the upper left corner of the quilt. I am viewing my design as some sort of tilted blocks with the left side of the block in partial shadow with the front of the block getting the least amount of light so it is the darkest in color.
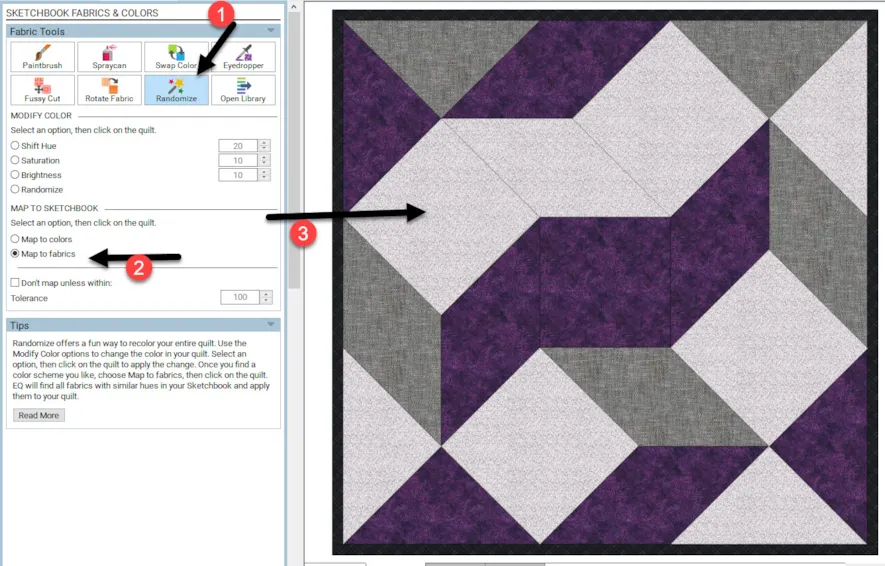
Click on the randomize tool icon to select it and then choose ‘map to fabrics’. Move the cursor over to the layout and click once to change your layout to fabrics.
You can change the layout again by adding pieced blocks to any of the elements of the design and color it in the light to dark shades of the layout.
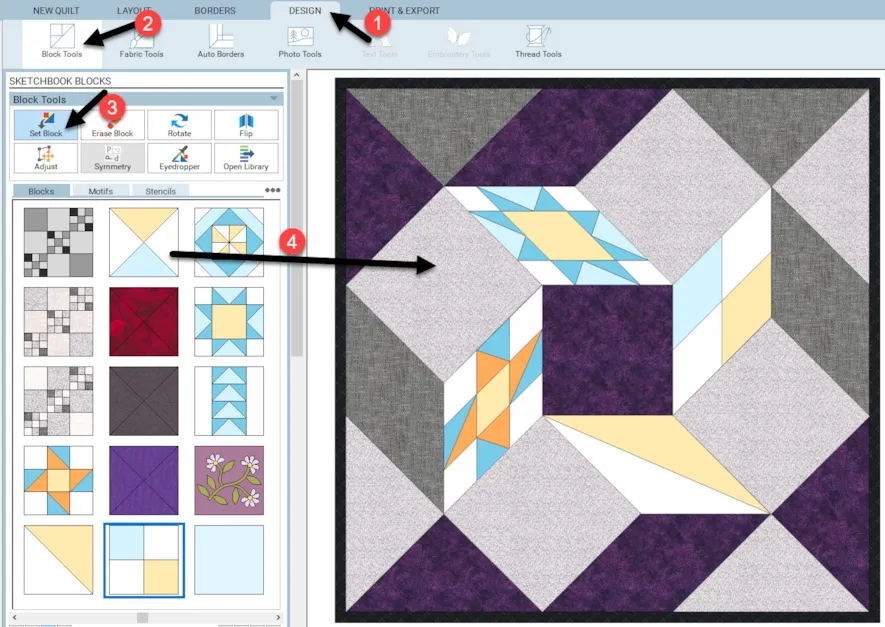
Click on the block tools icon at the top of the screen and then click on set blocks. Using the built-in blocks in EQ8, click on it to select it. Move the cursor over to the layout and click once on the block area to change the blocks to pieced segments.
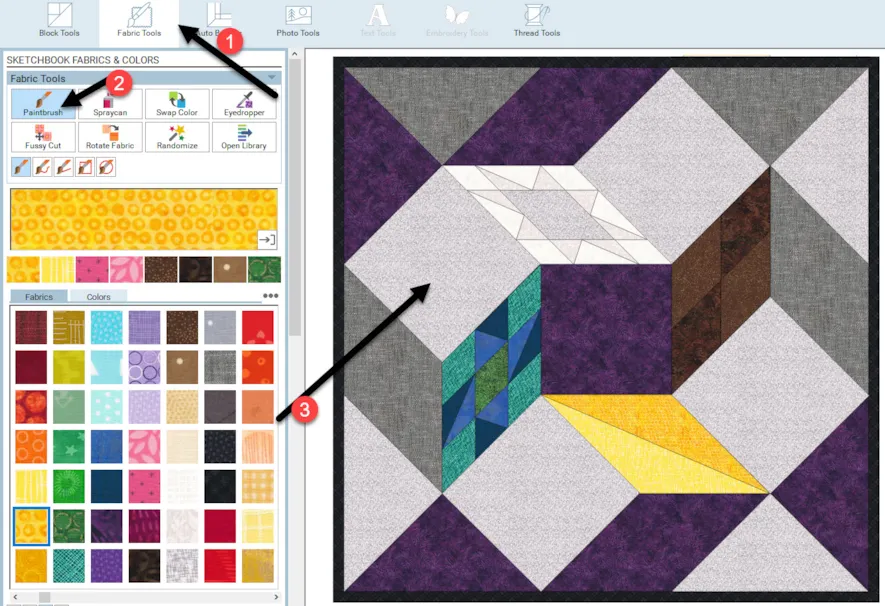
Click on the fabric tools icon and color the EQ8 built-in blocks you added.
Your designs will look different than mine does according to your color choices. Get creative and design according to your choices.
We have only scratched the surface of the quilt layouts built into the EQ8 program. You now know how to access those built-in layouts after completing this lesson. You can create forever making design layouts without ever drawing a single block.
Refer back to lesson one (1) of this Design and Sew 2 series to review how to save an image of your design. Choose your favorite design from the sketchbook and then create an image to share with us in the comment section at the end of the blog lesson.
Be sure to add your favorite design from this class lesson to the comment section of the blog page.
WATCH THE VIDEO BELOW
Want to download the video to watch later? Click an option below:


