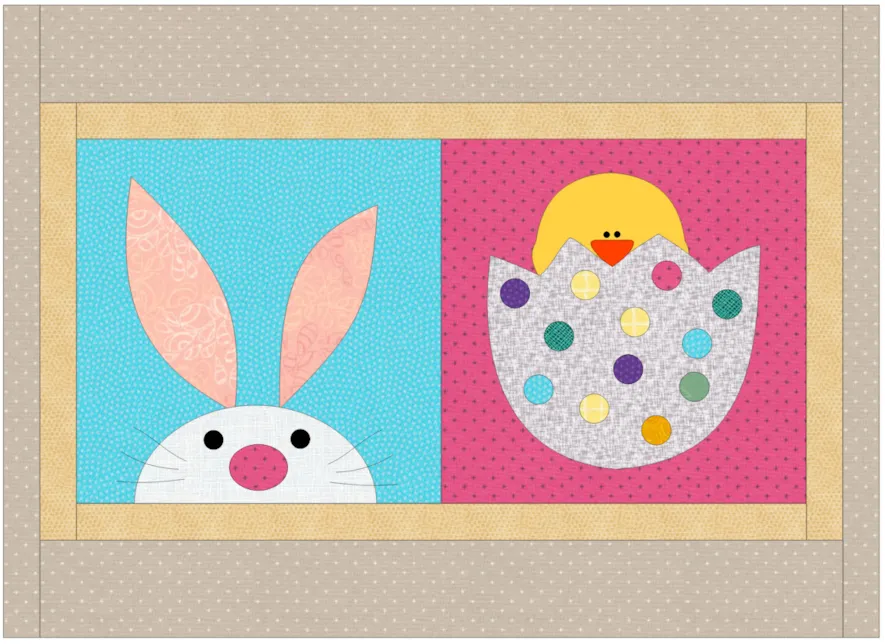
Did you know that EQ8 has placemat options already built into the program ready for us to personalize and use for our favorite festive occasions? It makes designing and sewing these mini-projects really quick and simple.
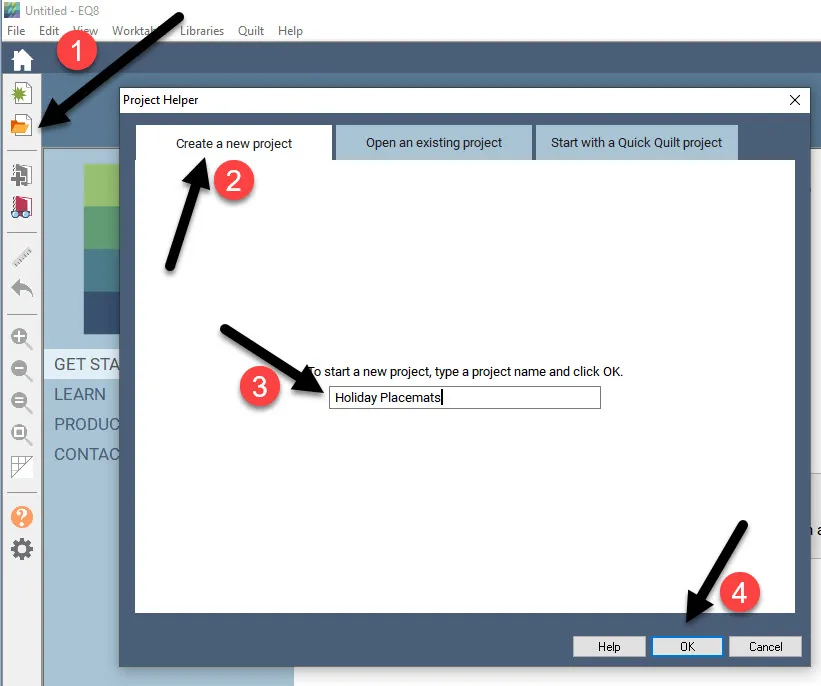
Launch your EQ8 program from the desktop.
Click on the folder on the left side of the screen and name your new project ‘Holiday Placemats’.
Look at the top of your screen and make sure the named project is at the top. This way, all the work you do on placemats will be in this one project folder.
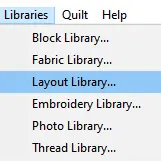
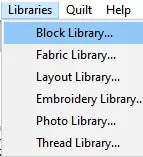
Click on LIBRARIES>Layout Libraries at the top of the screen.
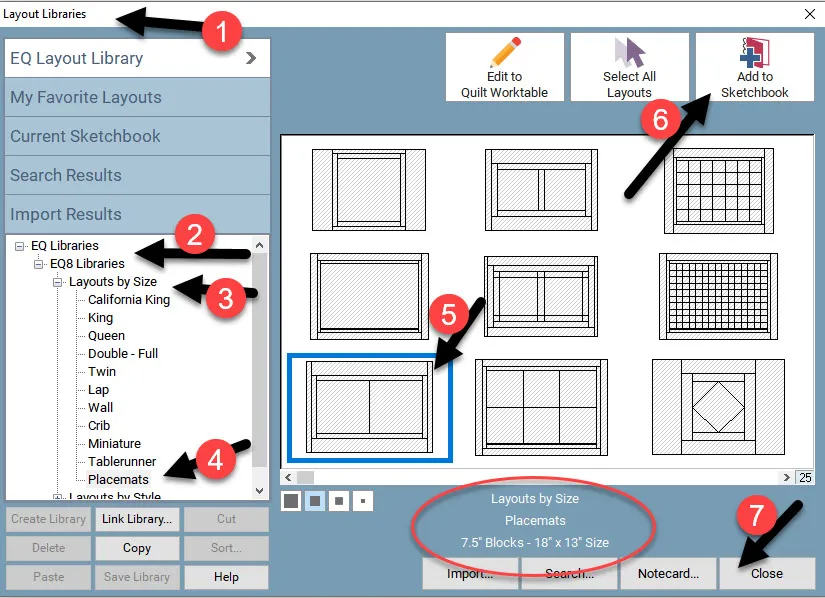
In the layout library box, on the left side of the box, navigate to EQ8 Libraries>Layouts by size>Placemats.
Select the third layout in the pane by clicking on it. A blue selection box will appear around it. Add it to the sketchbook.
NOTE: Most of these preset placemats are 18″ x 13″ in the library. The odd layout may be slightly different in size.
Close the box once you have added it to the sketchbook.
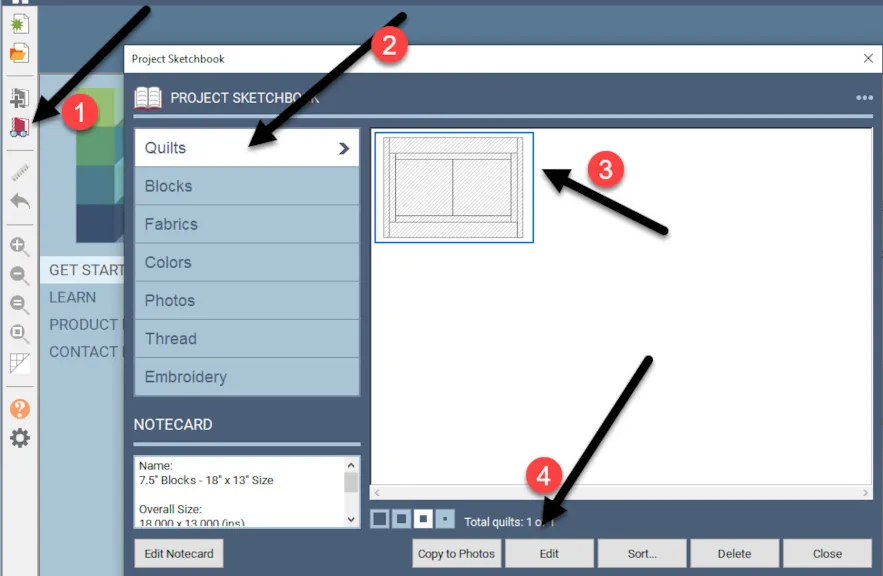
Click on the view sketchbook icon![]() . In the project sketchbook, click on the quilts heading to see the placemat we just downloaded from the EQ8 library. Once selected, click on edit at the bottom of the box to place it on the quilt layout worktable.
. In the project sketchbook, click on the quilts heading to see the placemat we just downloaded from the EQ8 library. Once selected, click on edit at the bottom of the box to place it on the quilt layout worktable.
Add blocks that celebrate special occasions from the block library.
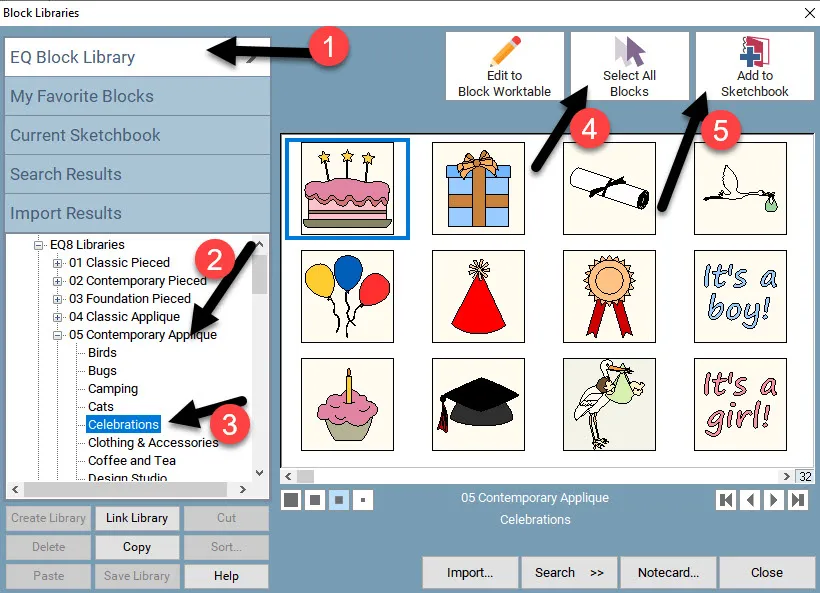
Click on LIBRARIES>Block Library at the top of the screen.
In the block libraries box, create a collection of celebration/holiday blocks into the project sketchbook.
Click on 05 Contemporary Applique>Celebrations. When the celebration blocks show in the pane, click on ‘select all blocks’ and ‘add to the sketchbook’.
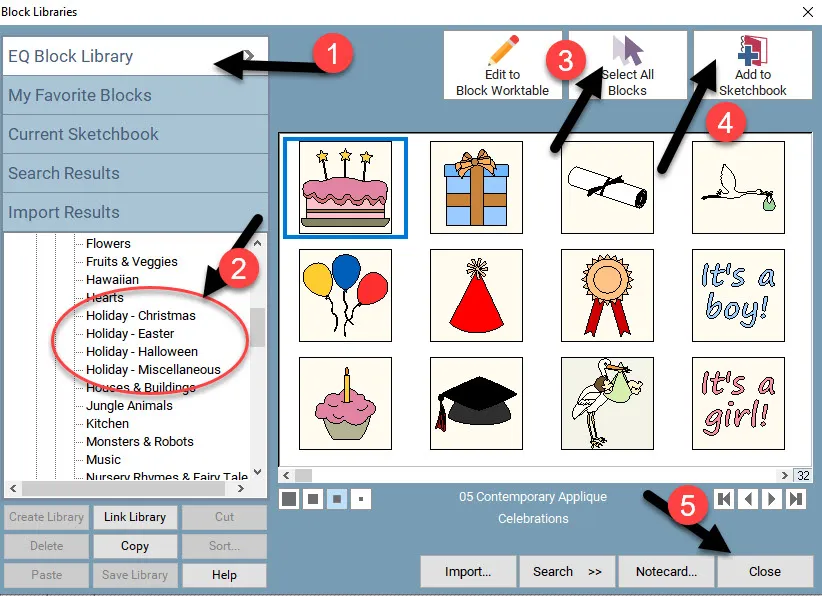
Repeat this same collection of blocks listed under the contemporary applique heading with the ‘Holiday’ collections and add them to the sketchbook. Close the box when done.
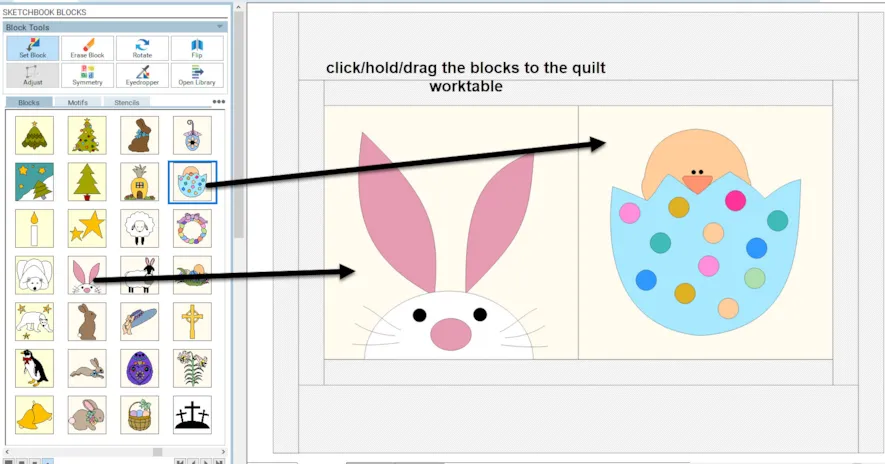
Click on the quilt worktable icon at the upper right side of the screen. In the sketchbook blocks box at the left side of the screen, click on the set block icon.
![]()
In the sketchbook blocks menu at the left side of the screen, all the blocks you added for holiday theme placemats will be there. Use the scrollbar at the bottom of the box to scroll right to see all the blocks for use.
Click and drag any blocks of your choice and place them onto the block area of the placemat layout.
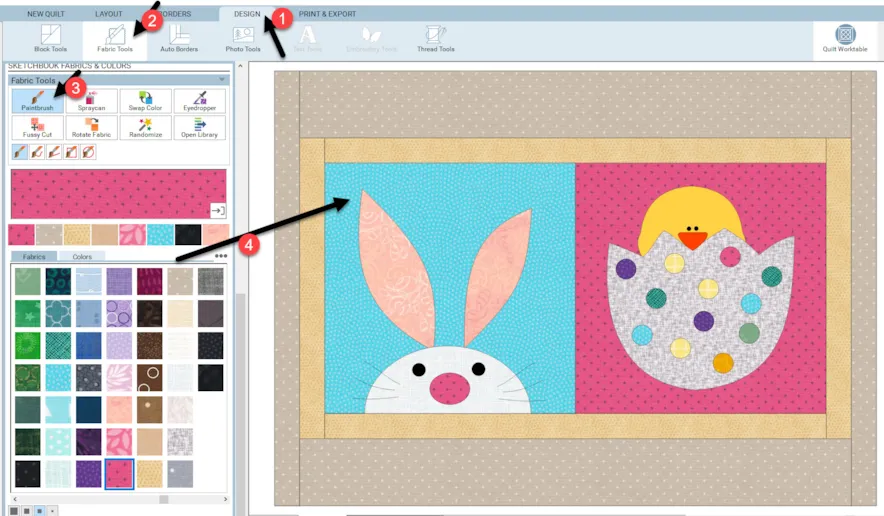
Click on the Design tab at the top of the screen and click on the fabric tools on the ribbon. Using the paintbrush tool, click on a fabric color of your choice and then click on the design on the worktable to apply the fabrics.
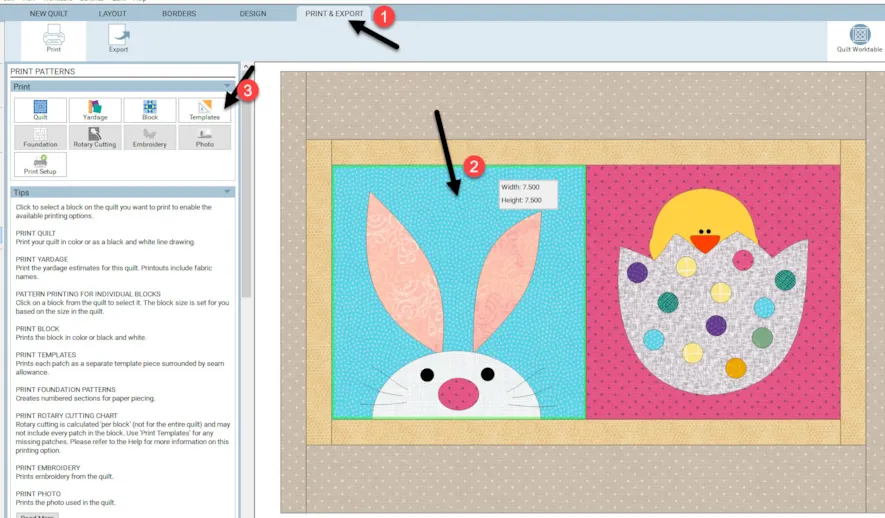
Click on the print and export tab a the top of the screen. Click on a block from the placemat design to select it and then choose your type of pattern printing to create your pattern for your placemat design.
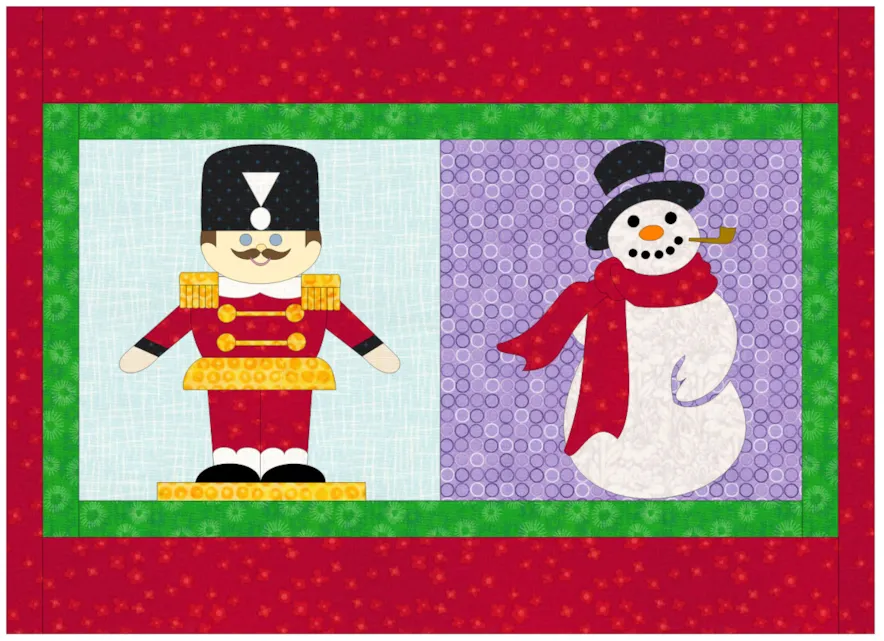
Create a whole series of celebratory placemats to use throughout the year for those special occasions.





03-15-2020
11:33 am
Thanks for teaching me to explore EQ 8 more fully!
03-15-2020
2:50 pm
There were so many cute designs to choose from and I spent awhile playing with them. Then I got a little whimsical and made a table runner design instead showing the eggs in the grass, the bunny looking over his shoulder and the sheep holding the basket of eggs. And I’m calling it “Who Stole My Eggs?”.
03-16-2020
11:02 am
This is awesome! Thank you!
03-16-2020
11:51 am
Great tutorial. It was clear and concise. Just love the multiple arrows showing the steps at a glance. It’s genius.
03-16-2020
12:55 pm
I never paid any attention to the sizes in the Layout library!!! You opened up a whole new avenue for me. Thanks!!!!
03-16-2020
4:03 pm
Awesome! Thanks for the inspiration and detailed how-to get it done!
0
03-16-2020
6:04 pm
Great, practical application of techniques!! I will use this a lot!
03-16-2020
7:32 pm
So glad to hear everyone is happy with the placemat designs in EQ8. It is good to know you are expanding your knowledge of the program.
03-17-2020
5:25 pm
Following your lesson was really fun, now to actually get to cut and sew some out. Having these lessons along the way makes learning lots of fun. Thank you!
03-20-2020
9:47 pm
Karla–Glad you are enjoying these little mini-lessons/ideas.
05-19-2020
3:53 am
This may the first lesson to design I’ve done in under 10 minutes. Instant gratification. Thank you, Yvonne.
05-19-2020
9:33 am
Gwyned-Glad you like this! So easy to create!