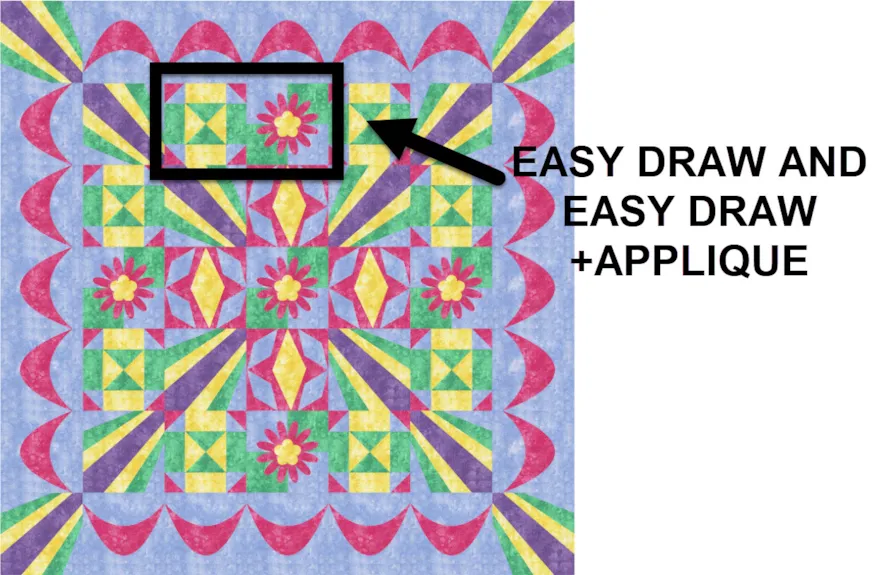
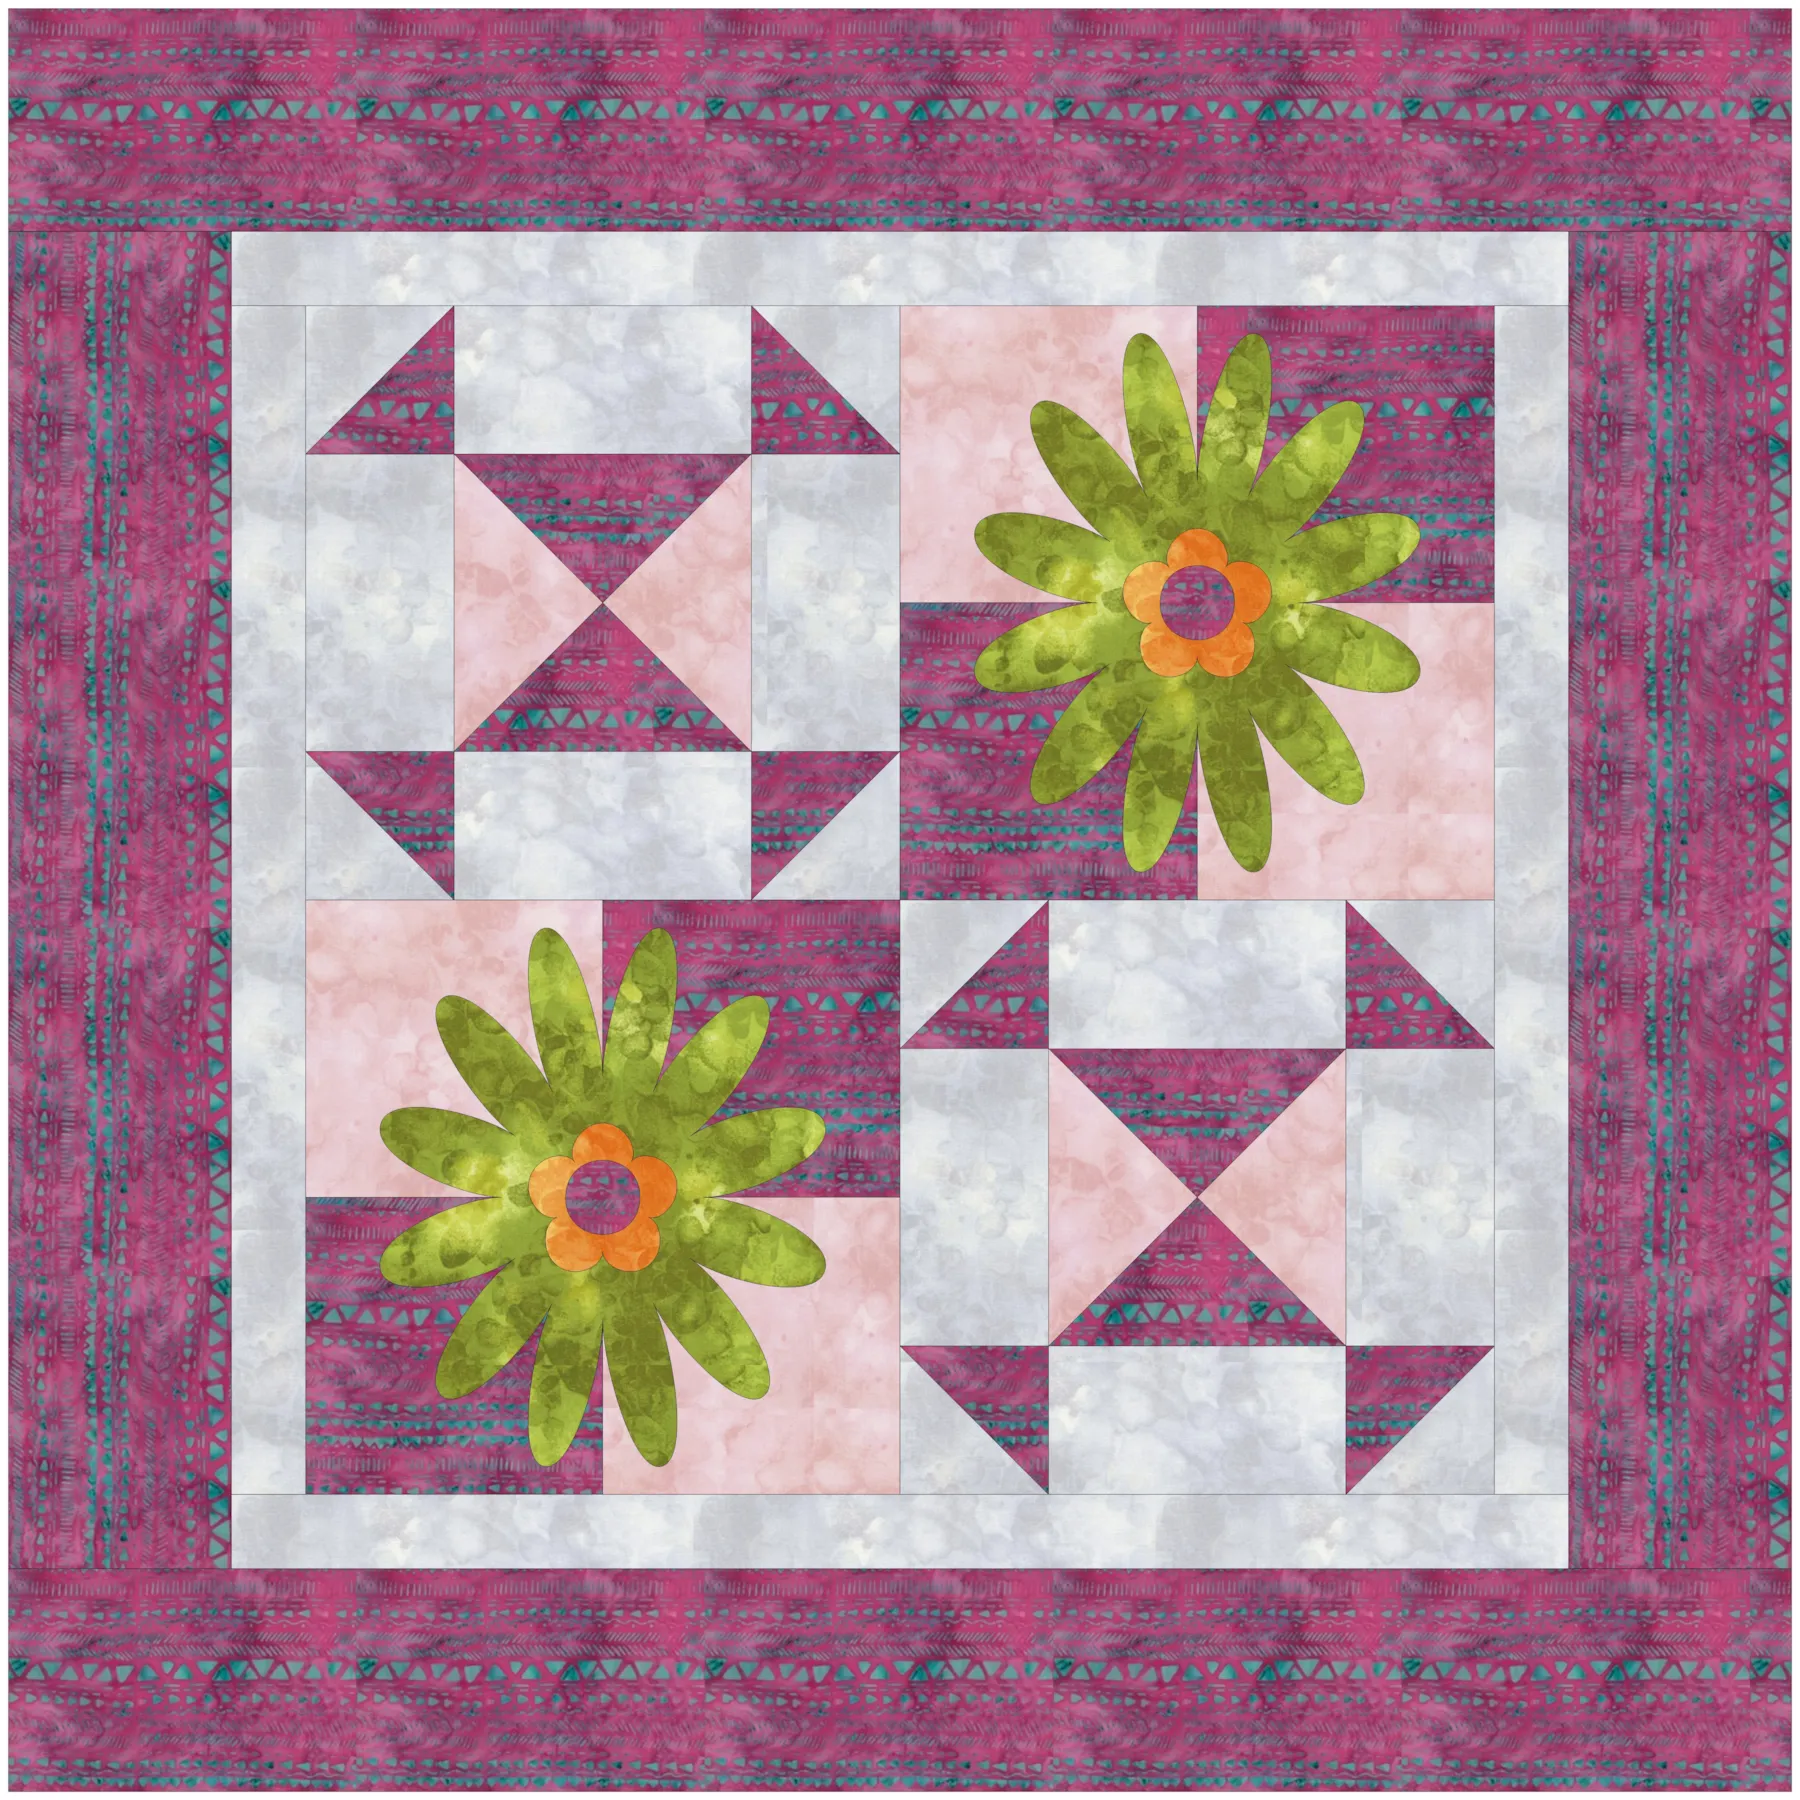
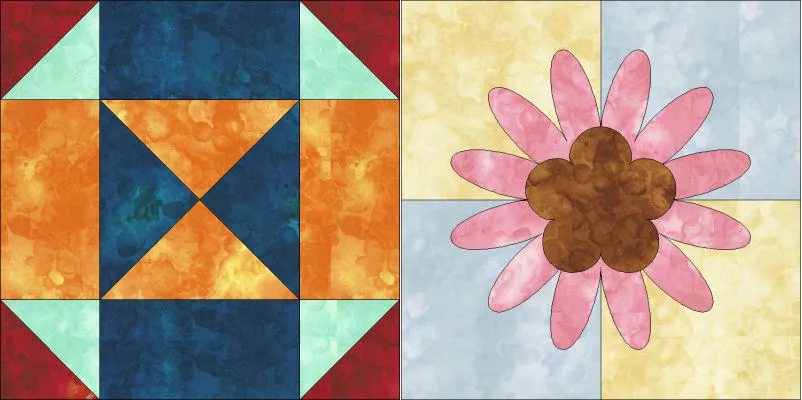
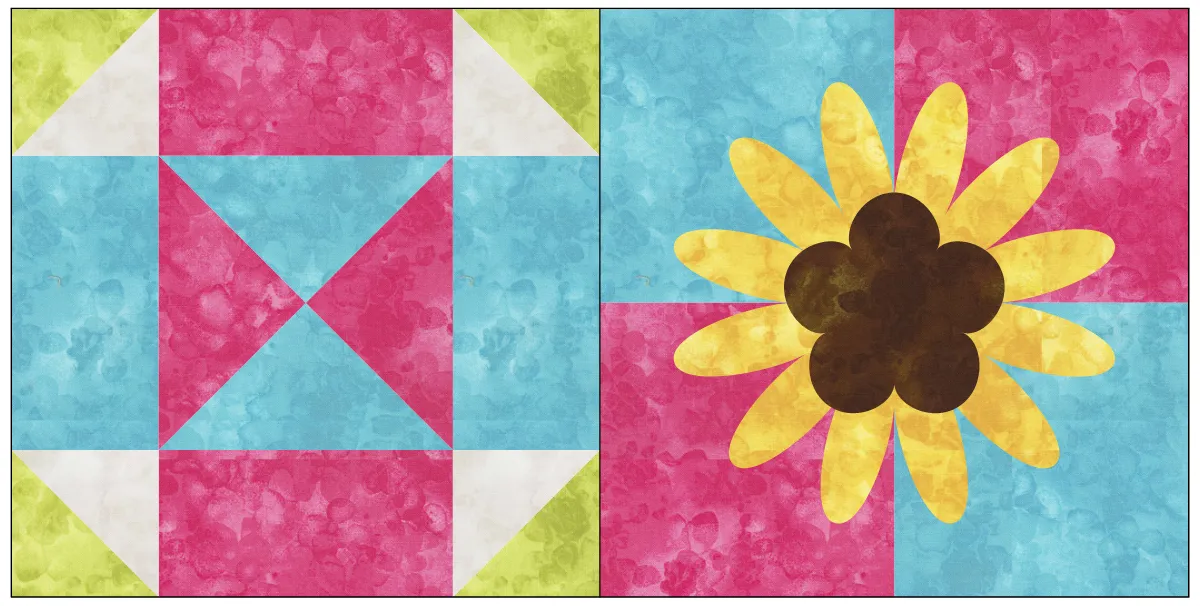
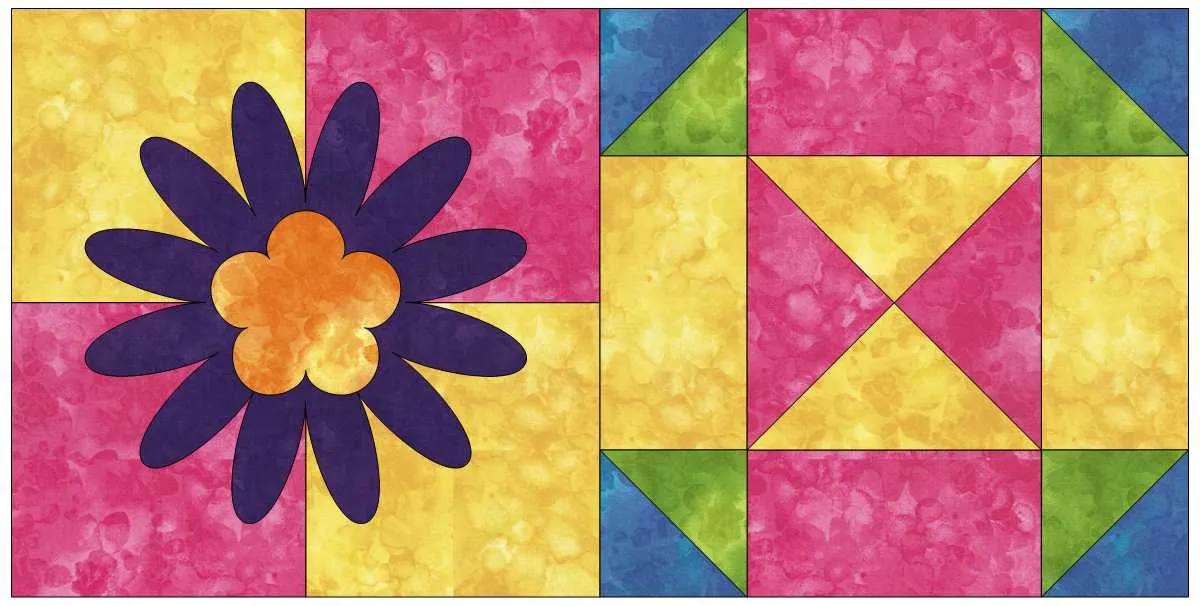
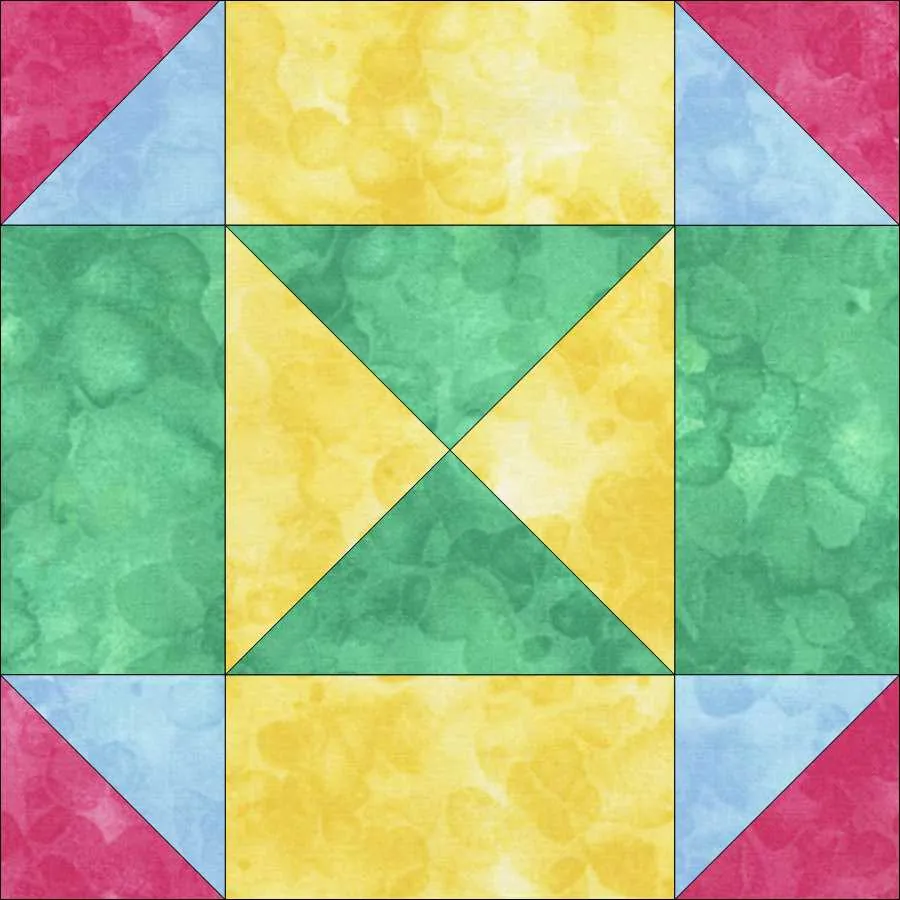
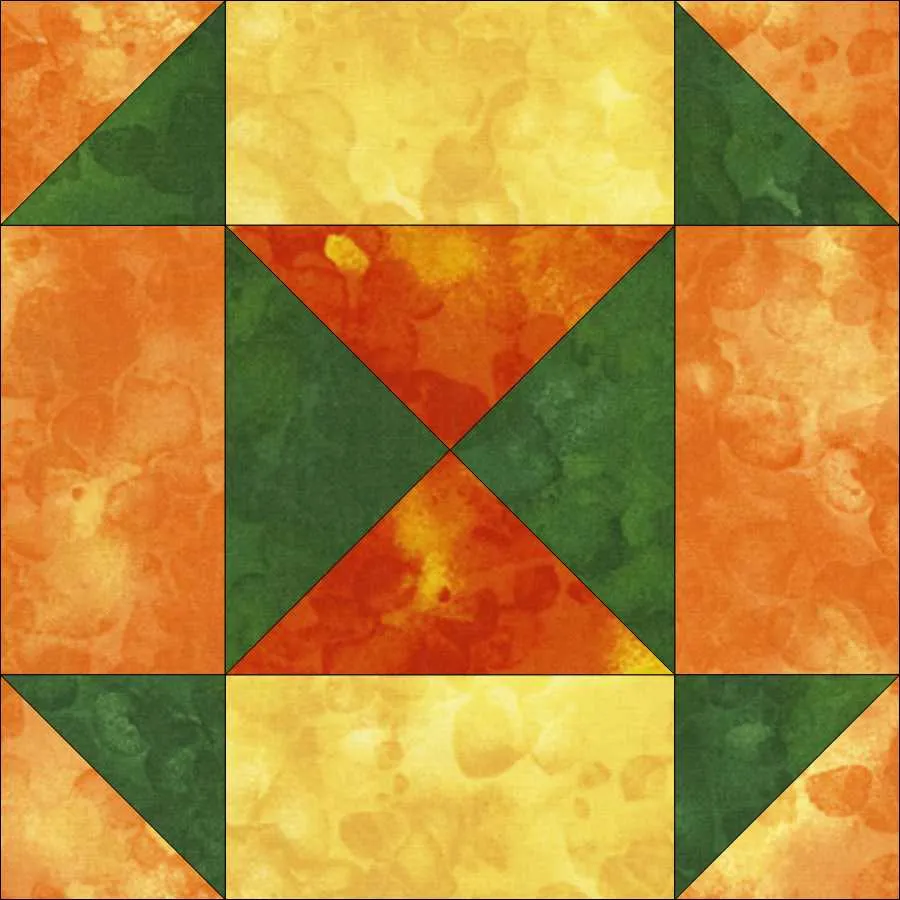
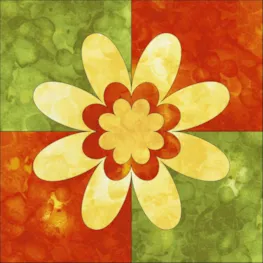
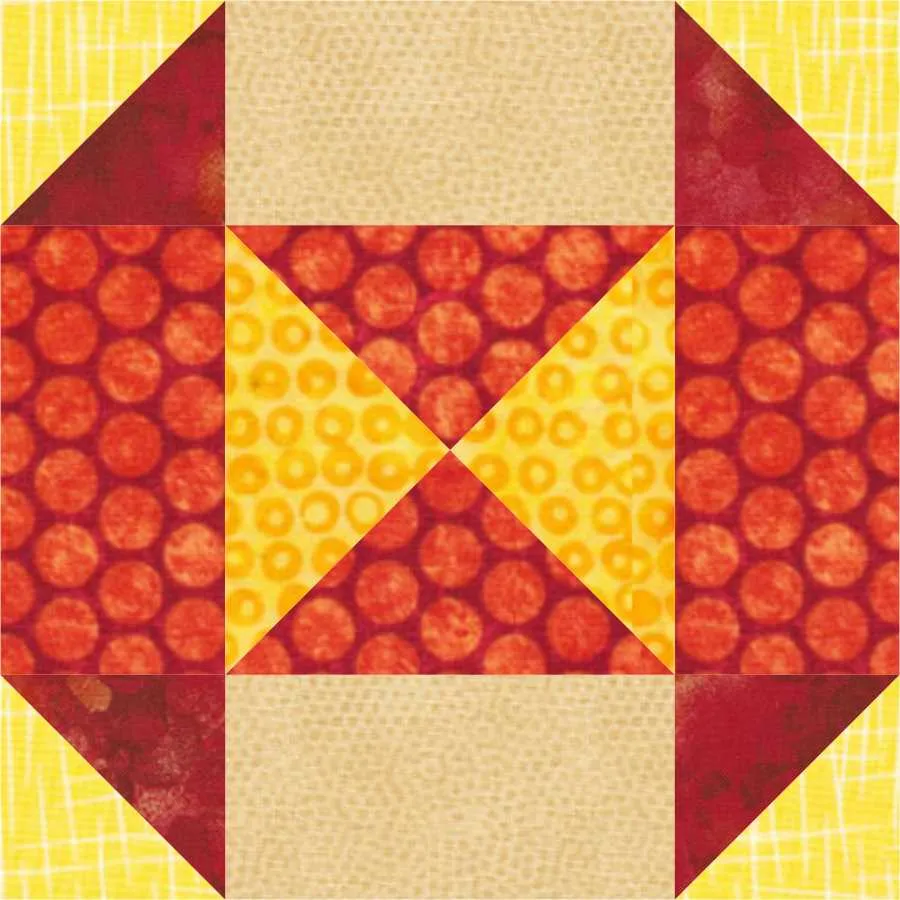
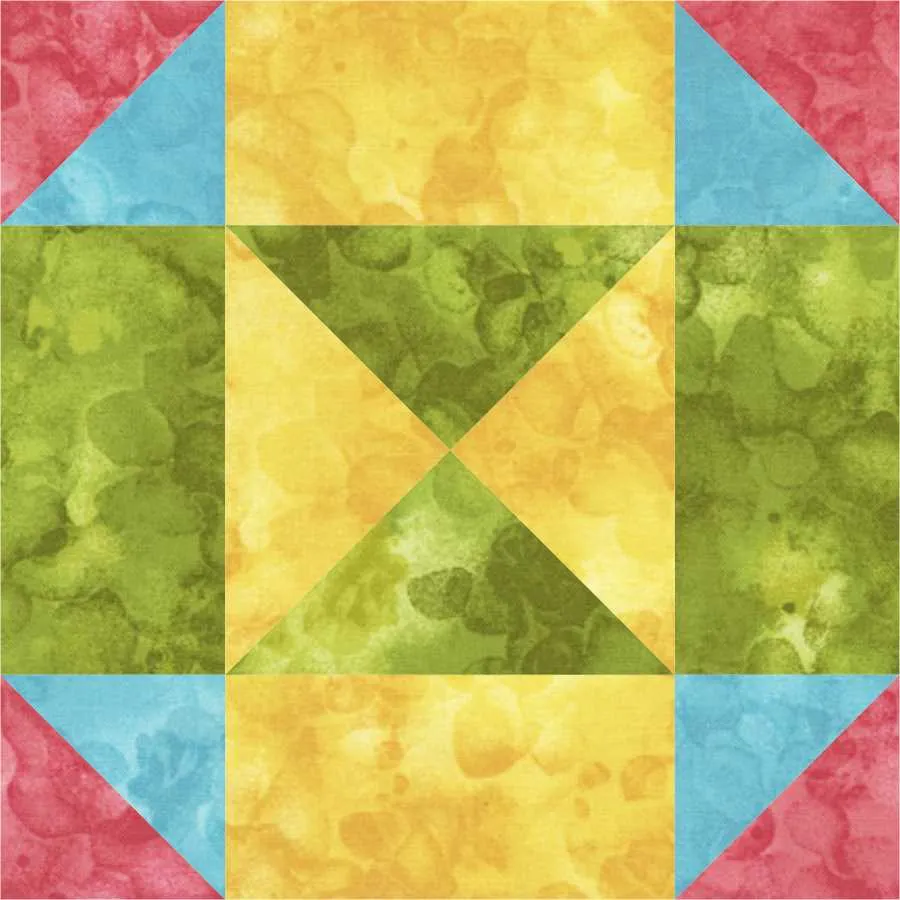
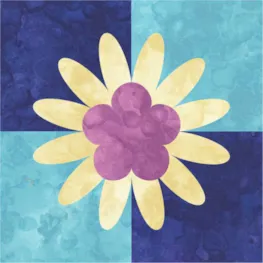
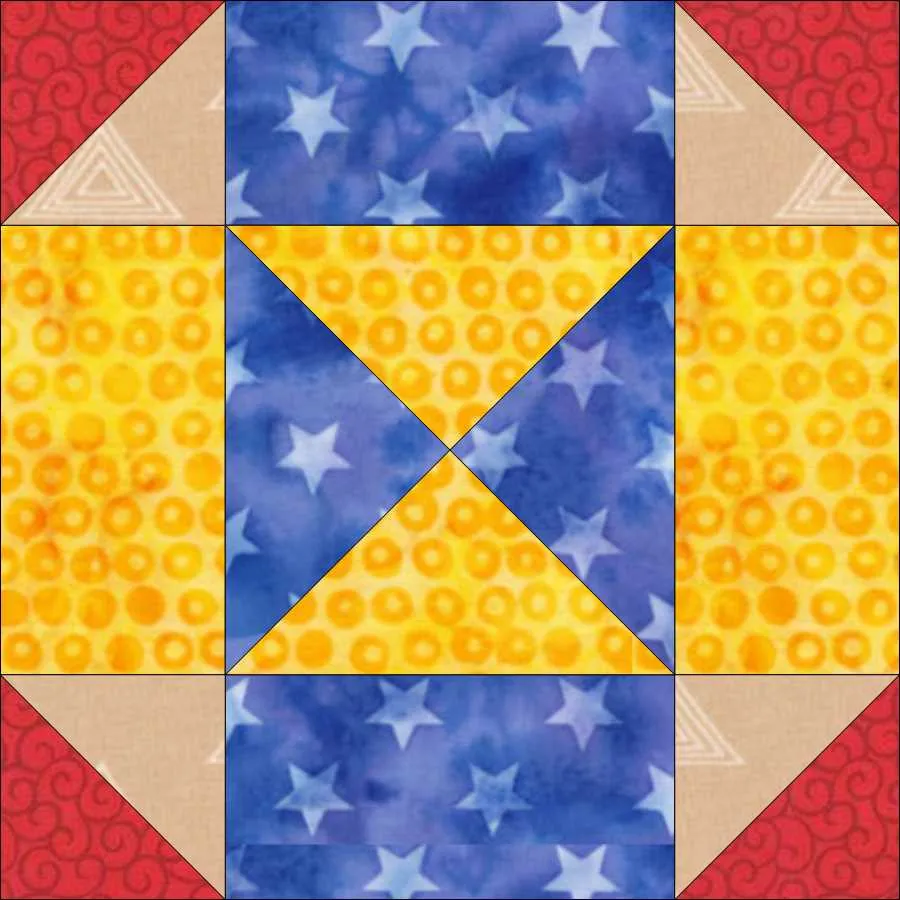
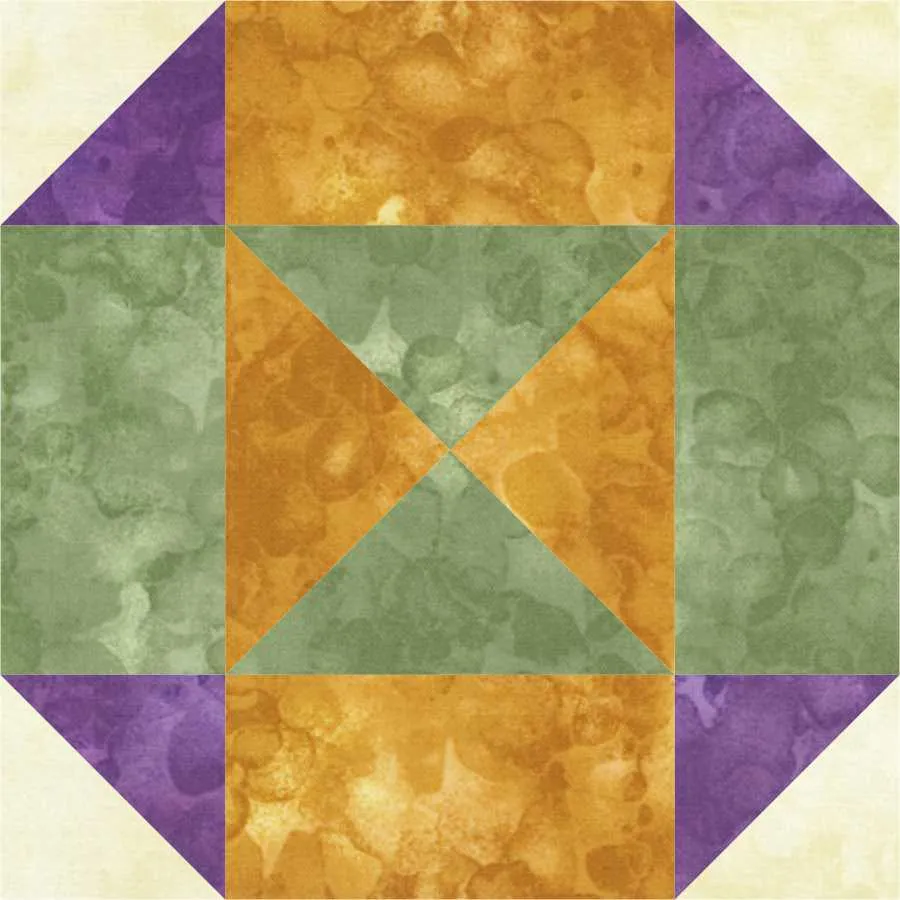
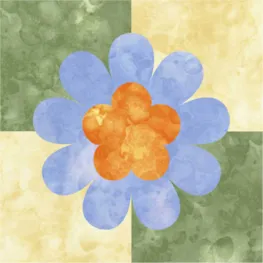
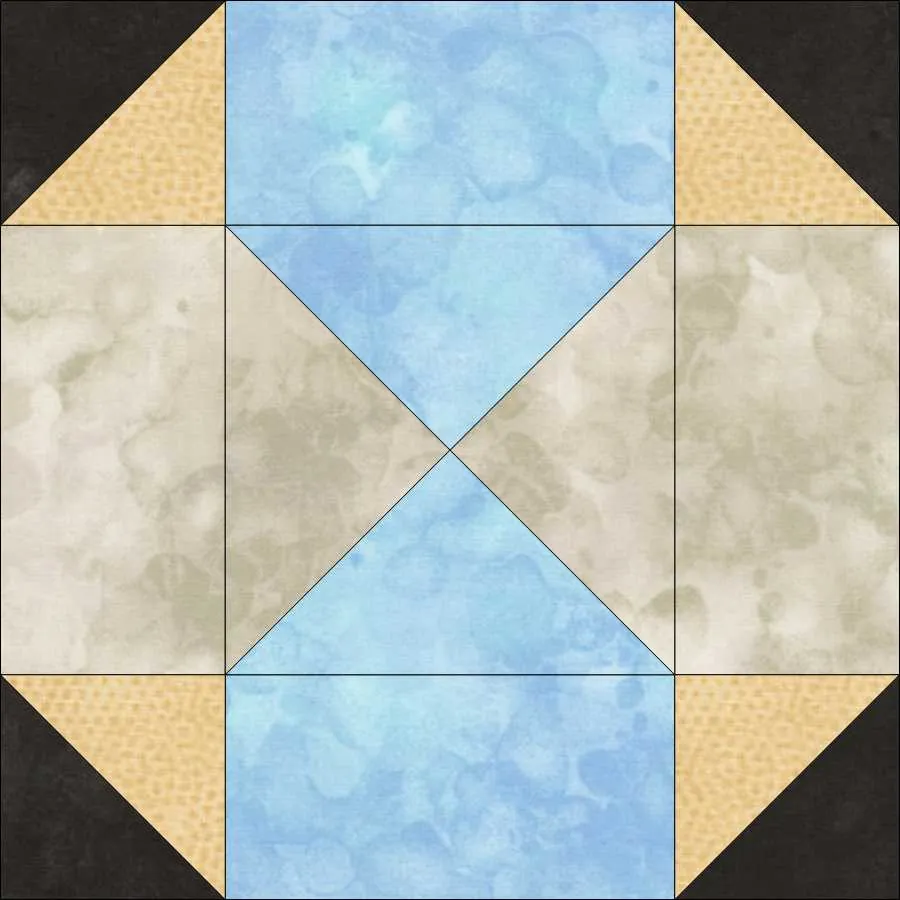
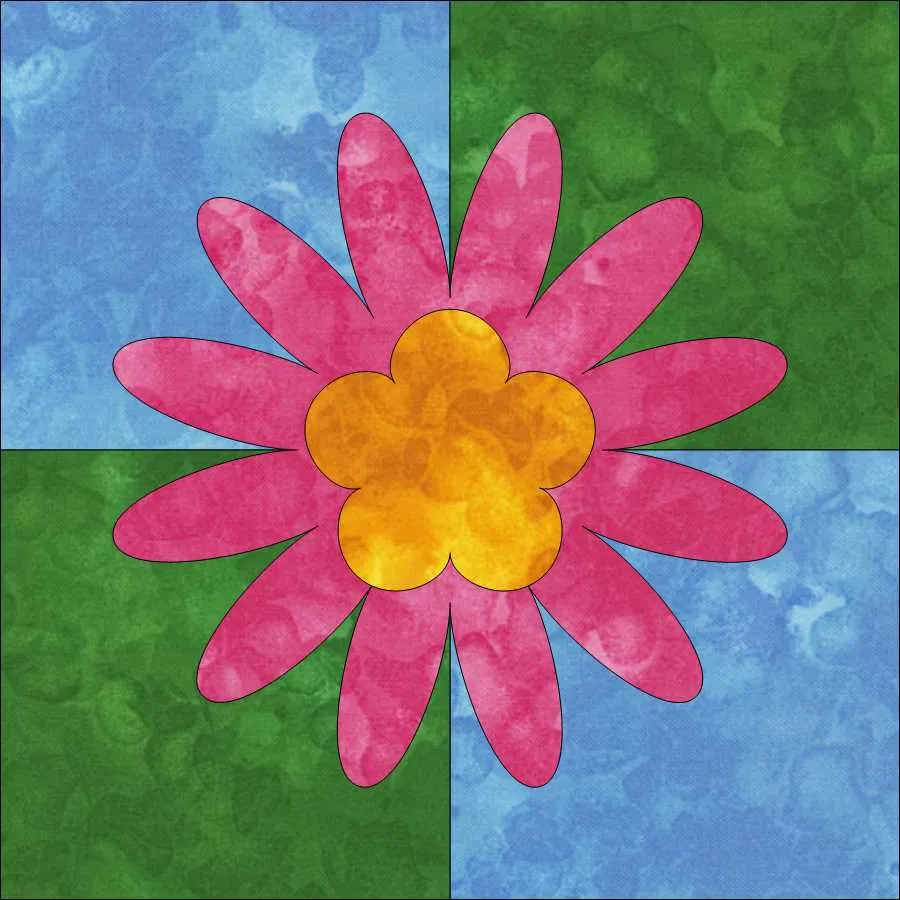
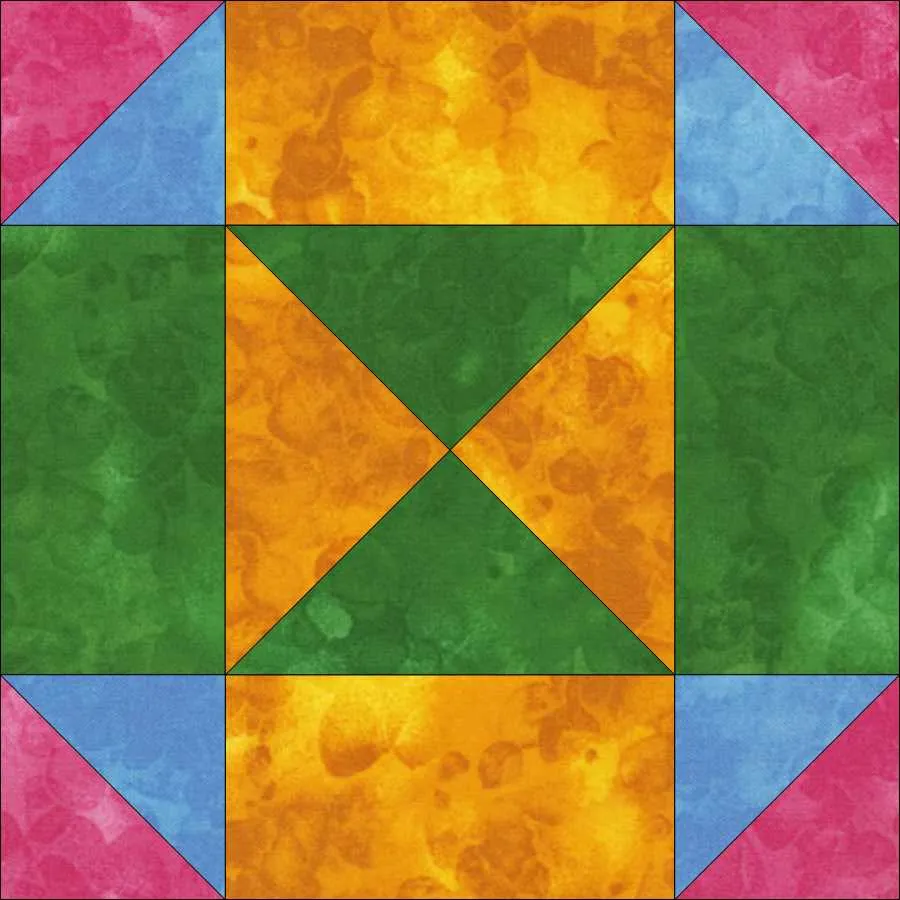
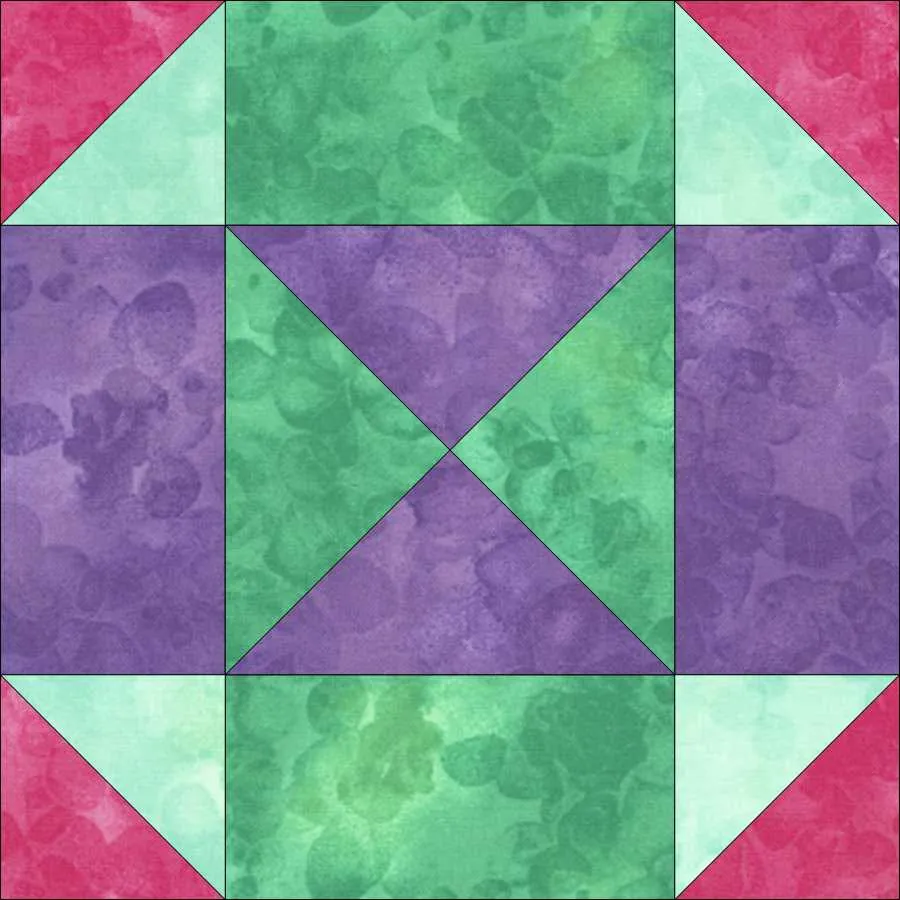
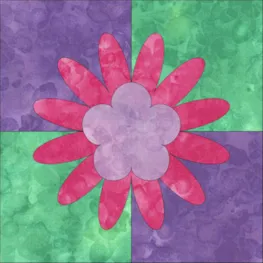
Welcome to Lesson 3 of DESIGN AND SEW WITH YVONNE. I hope you were successful in creating and stitching the last lesson on paper piecing. In this lesson we are creating two very similar types of blocks; Easy Draw and Easy Draw with Applique.
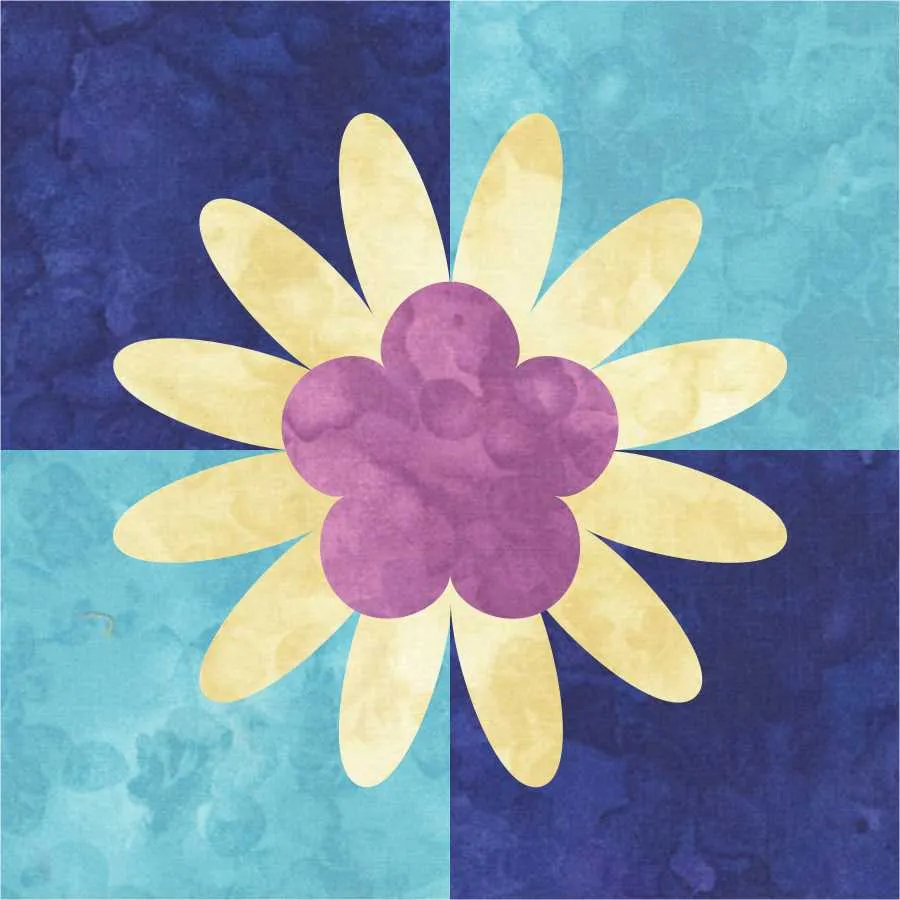
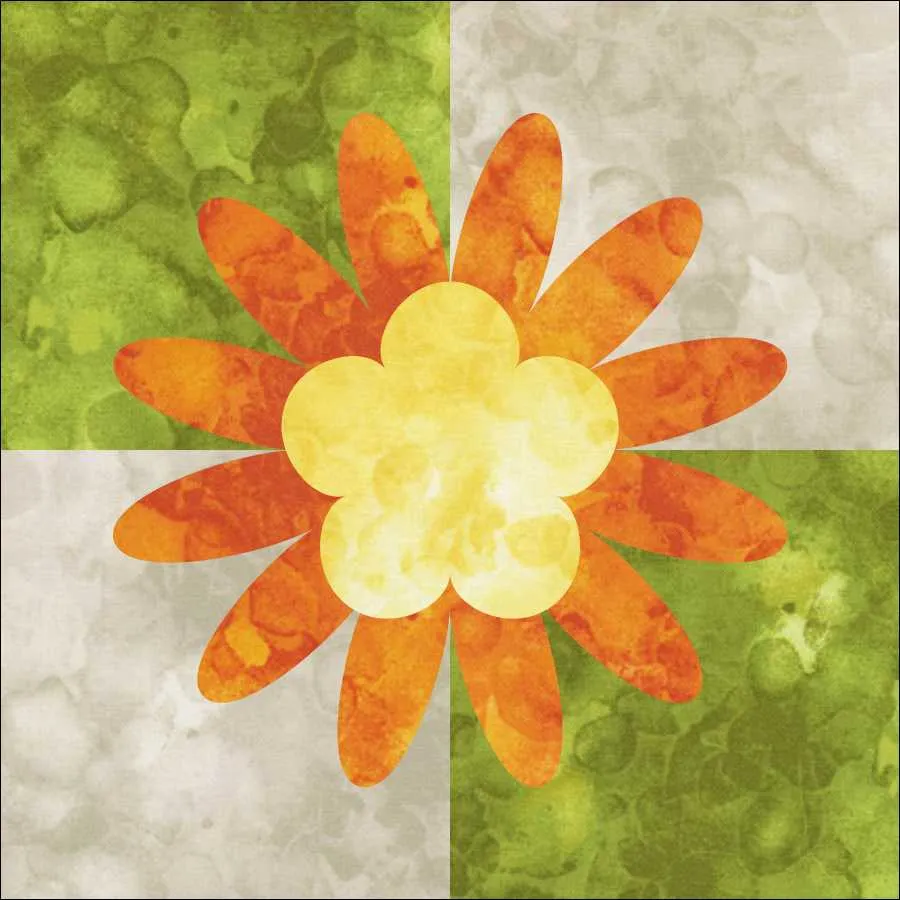
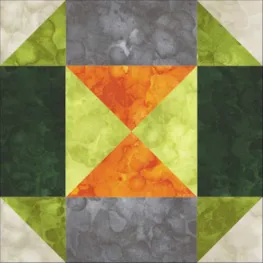
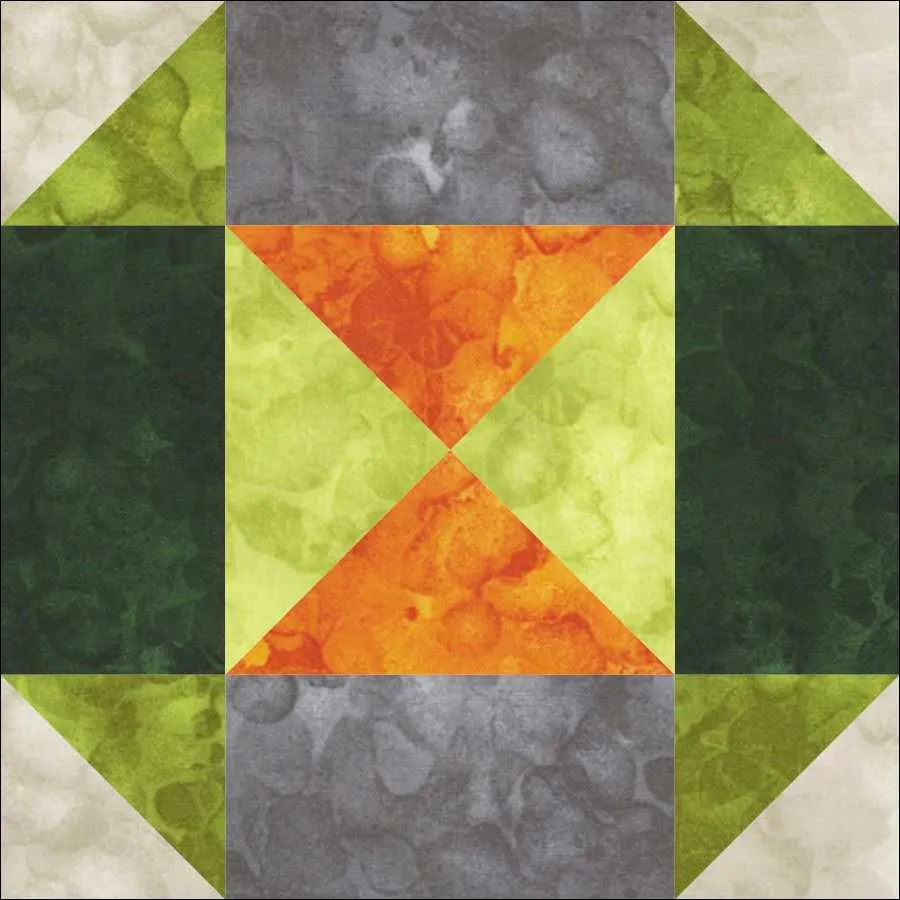
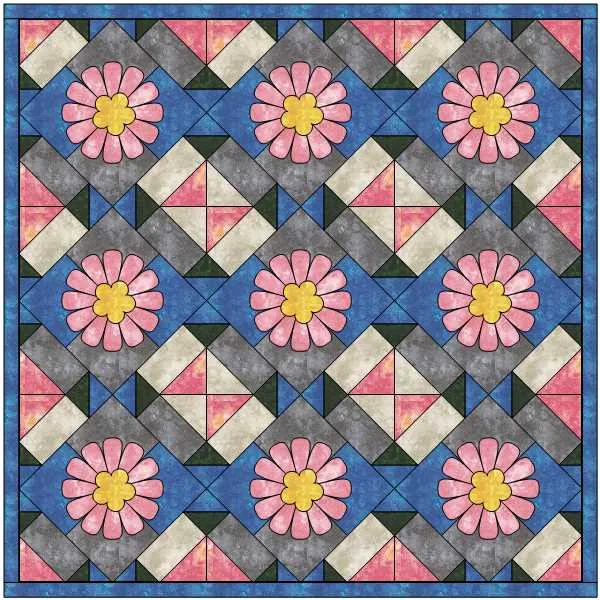
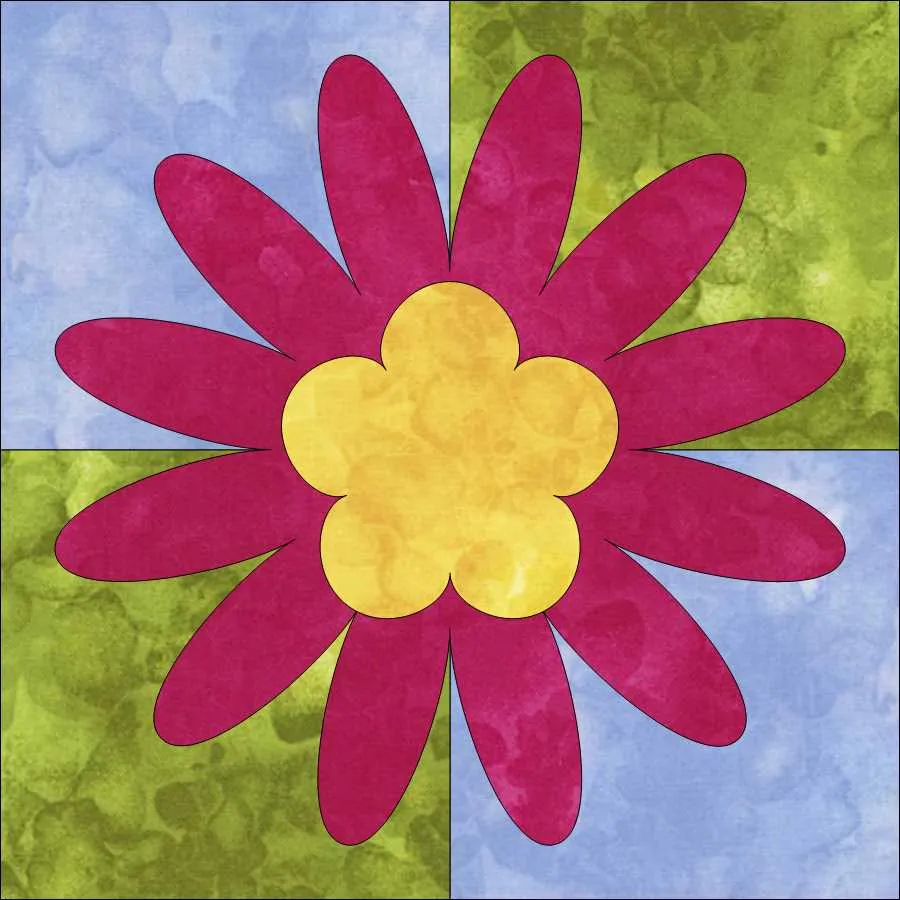
There are a total of 8 Easy Draw (pieced blocks) and 5 Easy Draw + Applique blocks.
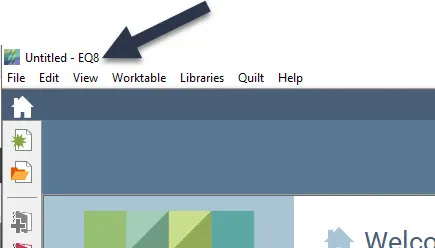
Launch your EQ8 program . The opening screen will open to an ‘untitled’ project.
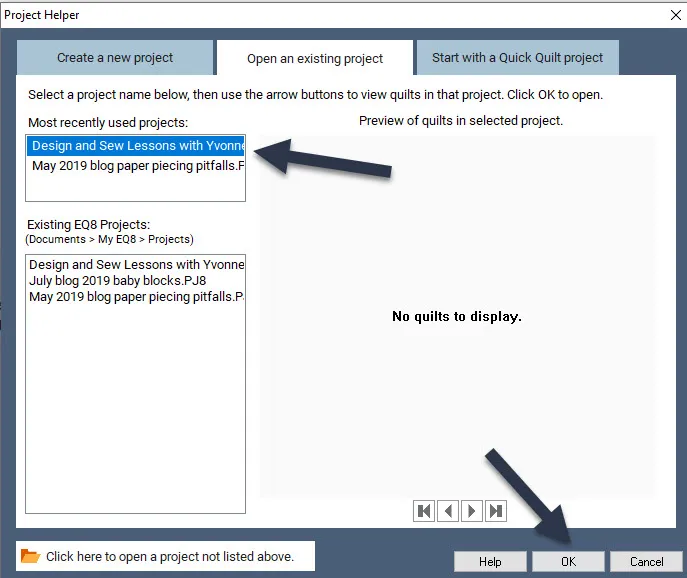
Navigate to the project named ‘Design and Sew Lessons with Yvonne’ using either the folder icon![]() on the left side of the screen or the ‘open an existing project’
on the left side of the screen or the ‘open an existing project’  in the center of the screen. Click on the name of the project and then click on the ‘OK’ at the bottom of the screen.
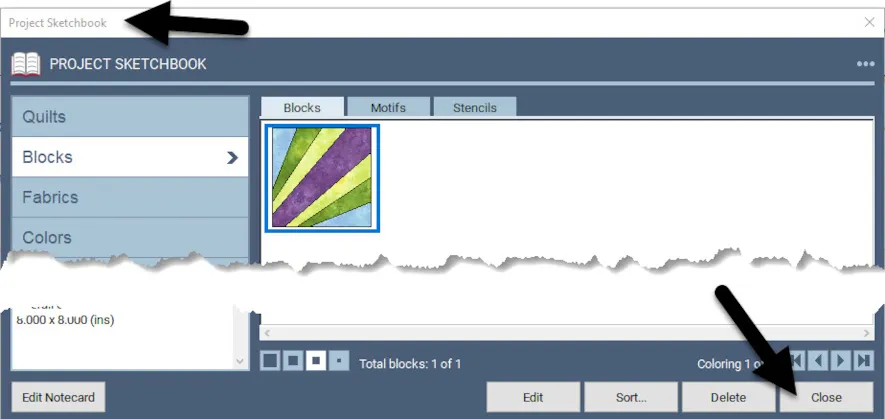
The project sketchbook will open. Just click on the ‘close’ at the bottom of the sketchbook.
Confirm at the top of your screen that you are indeed in the DESIGN AND SEW LESSONS WITH YVONNE project folder.
Click on the block worktable icon  on the upper right side of the screen to open the block worktable.
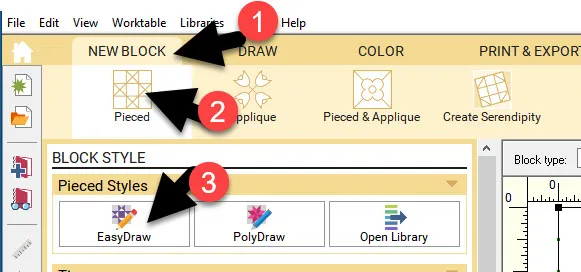
Click on the New Block tab then Pieced>Easy Draw icons.
All of our blocks for this quilt design are going to be 8 inches with the snaps set to 32 snaps on the worktable. Check to make sure that is what you have entered on your block design area.
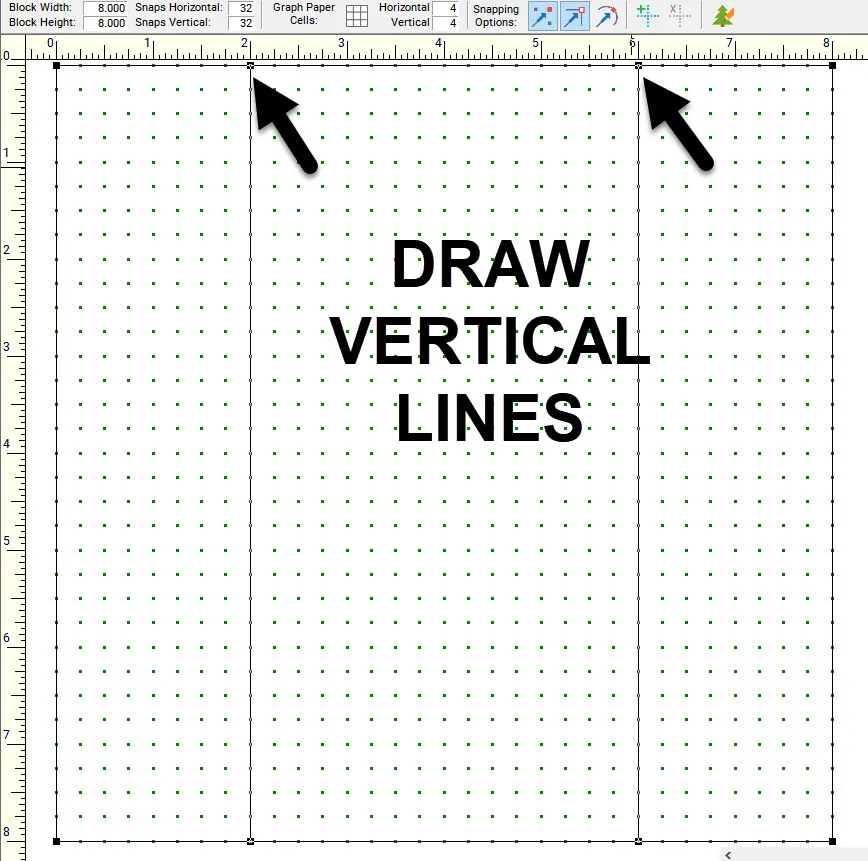
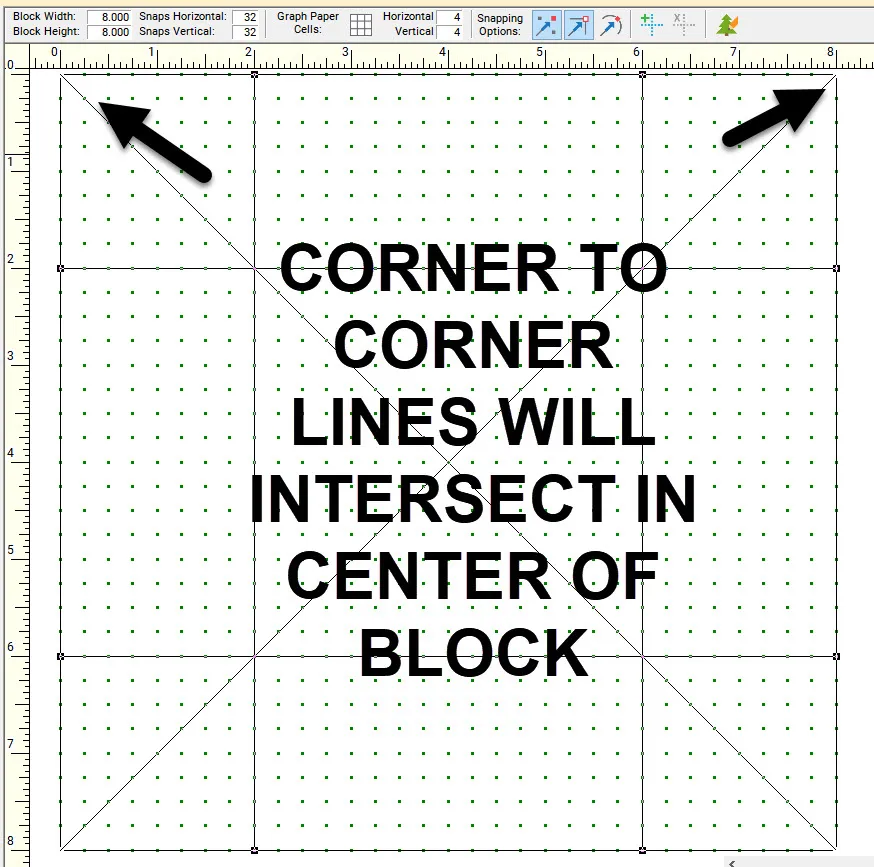
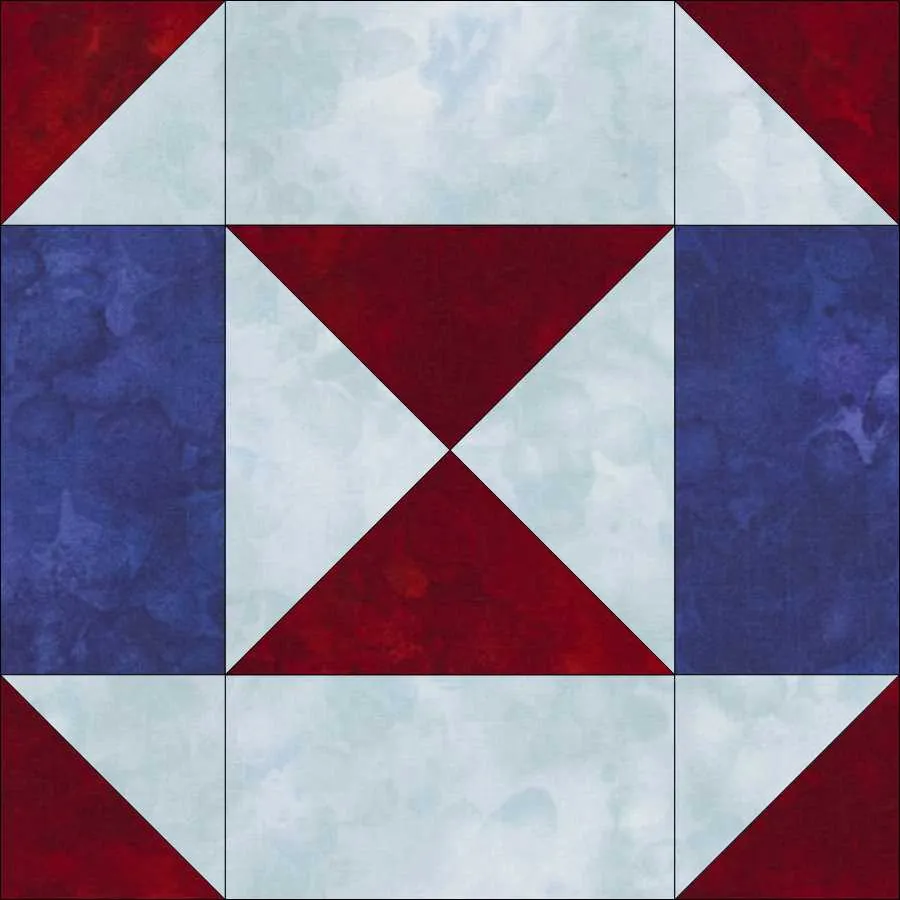
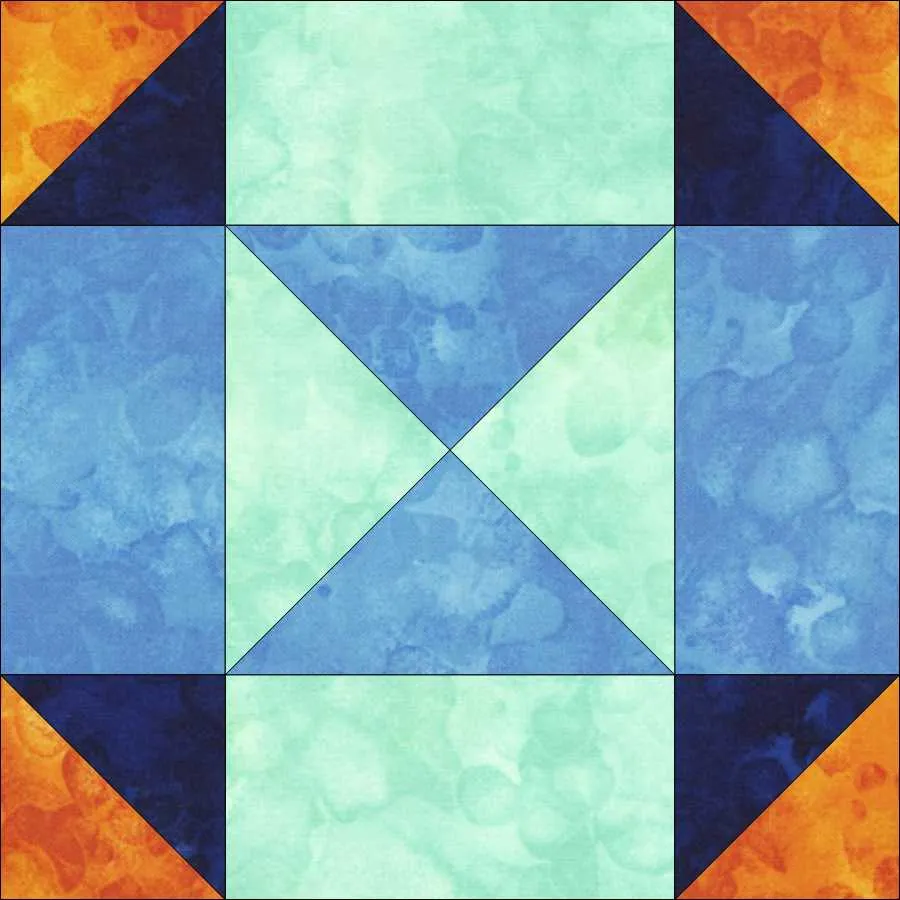
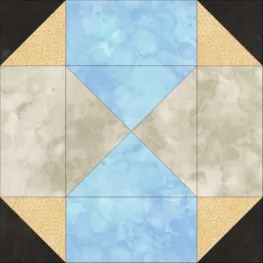
Using the line drawing tool![]() move the mouse to the block drawing board area and click/hold/drag/ release a line from top to bottom at the 2 inch and 6 inch marking on the block.
move the mouse to the block drawing board area and click/hold/drag/ release a line from top to bottom at the 2 inch and 6 inch marking on the block.
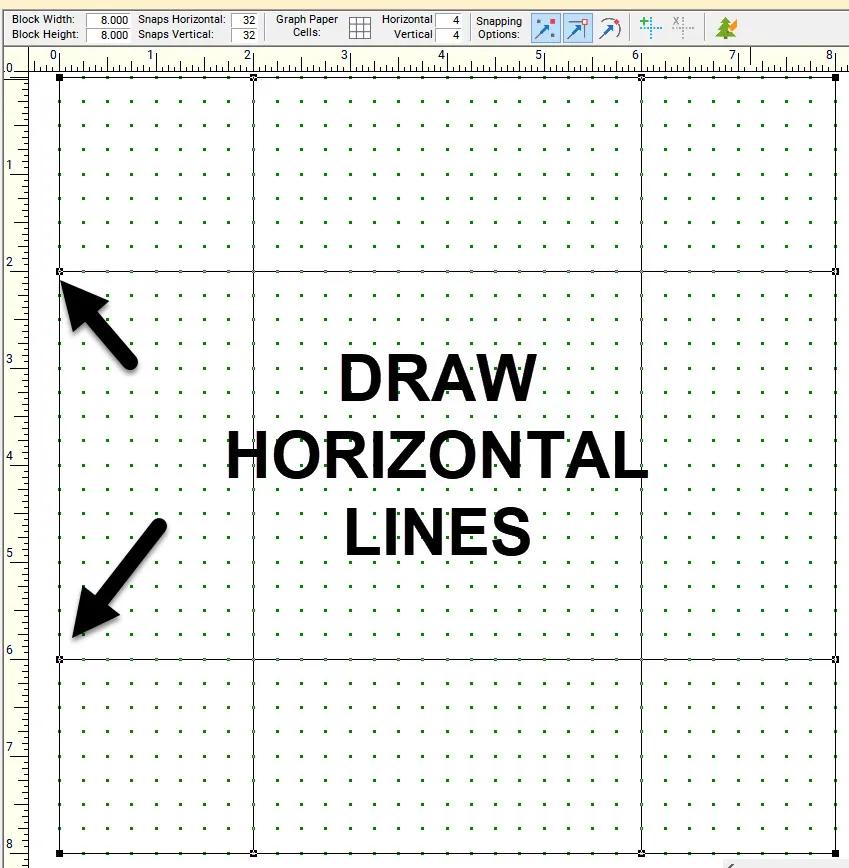
Continue using the line drawing tool ![]() and draw horizontal lines at the 2 and 6 inch marking across the block.
and draw horizontal lines at the 2 and 6 inch marking across the block.
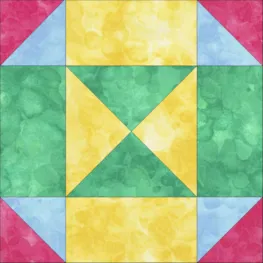
Draw two more lines from corner to corner that will intersect in the center of the block.
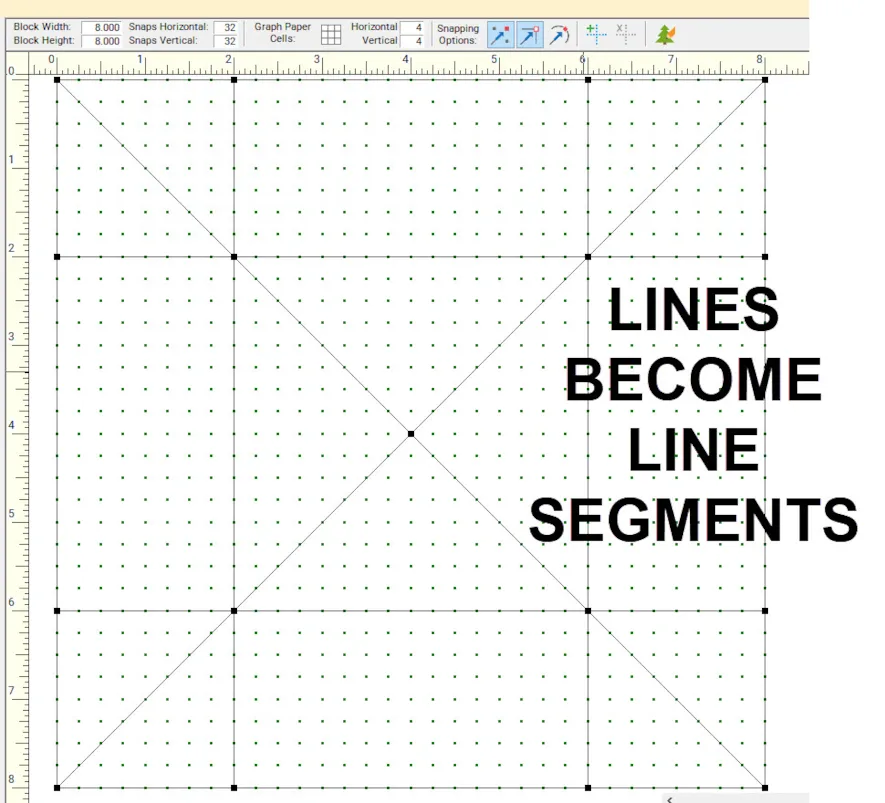
NOTE– The nodes only appear on the outer edge of the block at this time. All of the lines intersect with one another at some point but they are actually one complete line. When you save the line drawing to the sketchbook, all the intersecting lines will now have another node added at the intersection and can be edited as line segments rather than a full line across the width of the block.
Now that the lines are segmented we can edit each segment individually. The corner units drawn are rotated in the wrong direction. Click on the pick tool icon ![]() in the drawing tools box at the left side of the screen to select it.
in the drawing tools box at the left side of the screen to select it.
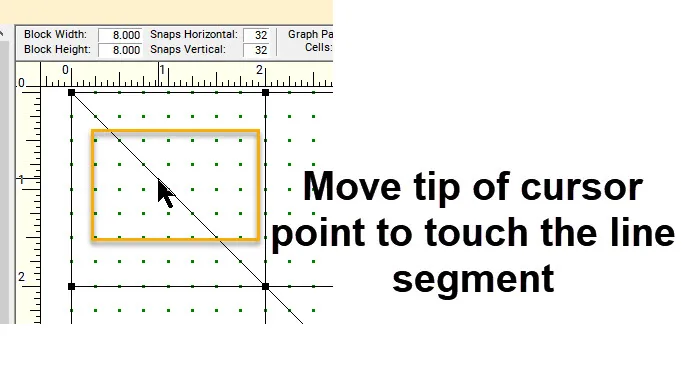
Move the tip of the cursor point directly on the line segment and click once to select the segment.
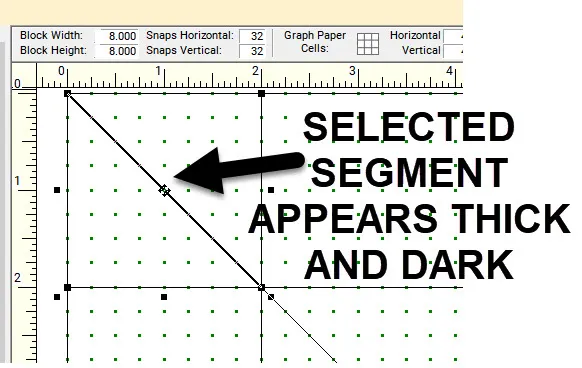
The segment will appear thicker and darker than the rest of the lines once it is selected.
Once the segment is selected, click on the delete key on your keyboard (DEL) to remove just that segment. Delete all the lines in the four corners of the block. Re-draw the line segment with the line drawing tool ![]() to have the direction of the line being in the opposite direction. Do this for all four corners of the block.
to have the direction of the line being in the opposite direction. Do this for all four corners of the block.
NOTE– You could just as easily have drawn the block this way to start with, but I wanted to demonstrate the addition of nodes on lines to create segments so they are able to be edited.
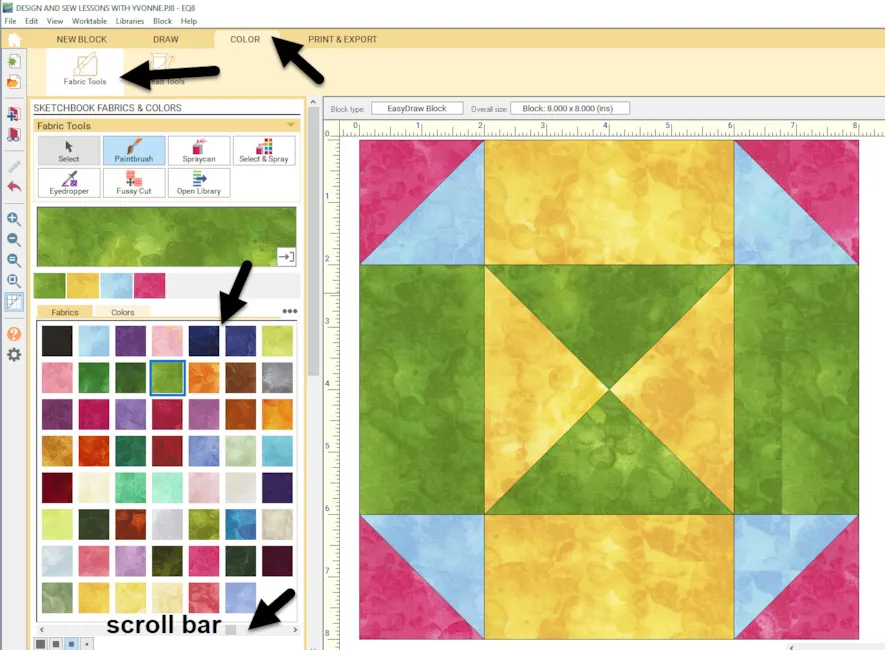
Click on the color tab at the top of the screen. Select your fabric color from the palette on the left side by clicking on it and then move the cursor over to the drawing board and click once in each segment to color the elements of the block. (Remember, the fabrics we added in lesson one are at the end of the color palette so use the scroll bar to see the fabrics at the end.)
Click on the view sketchbook icon![]() on the far left side of the screen.
on the far left side of the screen.
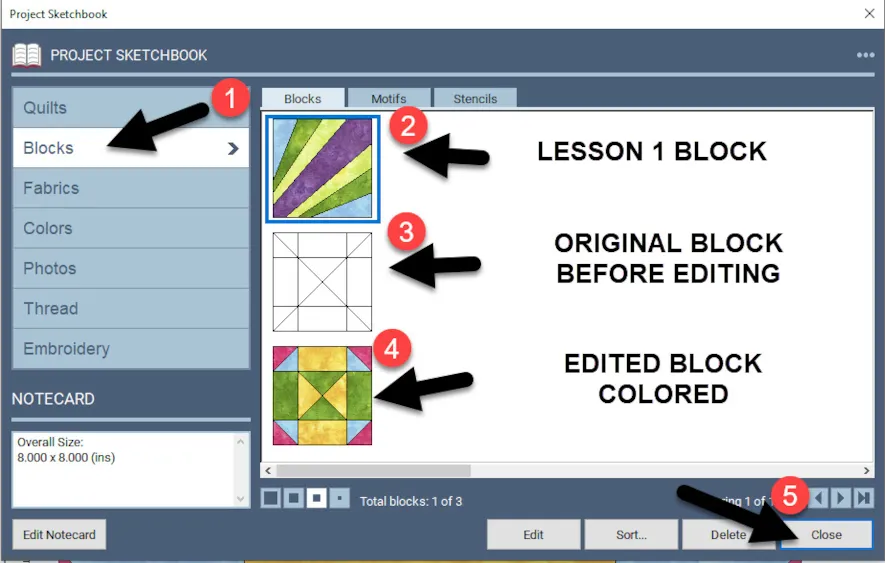
In the project sketchbook, click on the blocks heading to see the blocks we have created so far. You will see an outline drawing of the block before we edited the corner elements along with the colored version of the block we just created. Once you have confirmed they are indeed in the sketchbook, click on the ‘close’ at the bottom of the box.
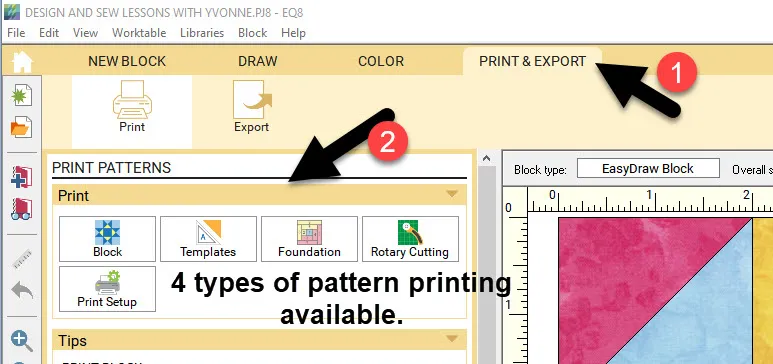
With the colored block still on the block worktable, click on the Print and Export tab at the top of the screen.
Let’s review the four types of printing for this block in the ‘print patterns’ box at the left side of the screen.
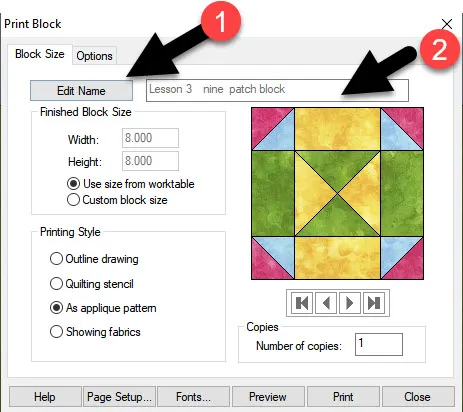
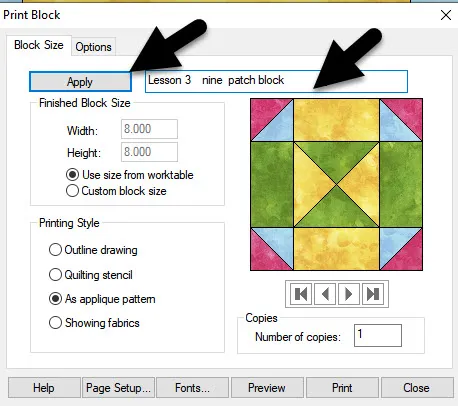
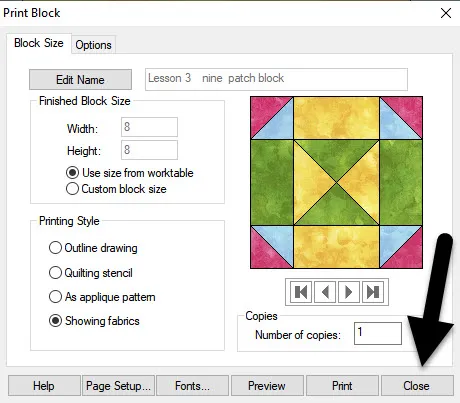
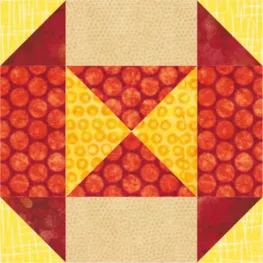
1. The first print option is to print the block. Click on the block icon![]() under the print patterns options. The print block definition box will pop up. Start by clicking on the’ edit name’ and type in the name of this block to be ‘lesson 3 nine patch block’. Click on ‘apply’ after you type in the name.
under the print patterns options. The print block definition box will pop up. Start by clicking on the’ edit name’ and type in the name of this block to be ‘lesson 3 nine patch block’. Click on ‘apply’ after you type in the name.
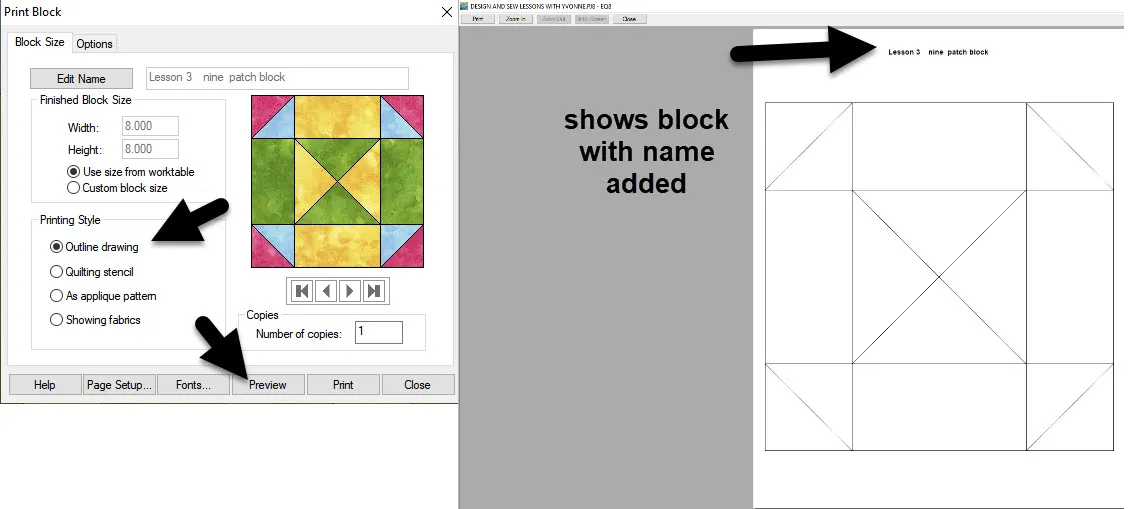
Now the name of the block will be printed on all the patterns you produce for this block. I only add a name if I am writing a pattern for someone else. I don’t really need a name if I am making the pattern for myself to use.
The default for the EQ8 program is to list the printing style as an applique pattern. There is no applique so change the selection to ‘outline drawing’ in the box and then click on ‘preview’ at the bottom of the box to see how the block image would print with the name attached.
Click on the ‘close’ at the top of the screen to return to the print block preferences box.
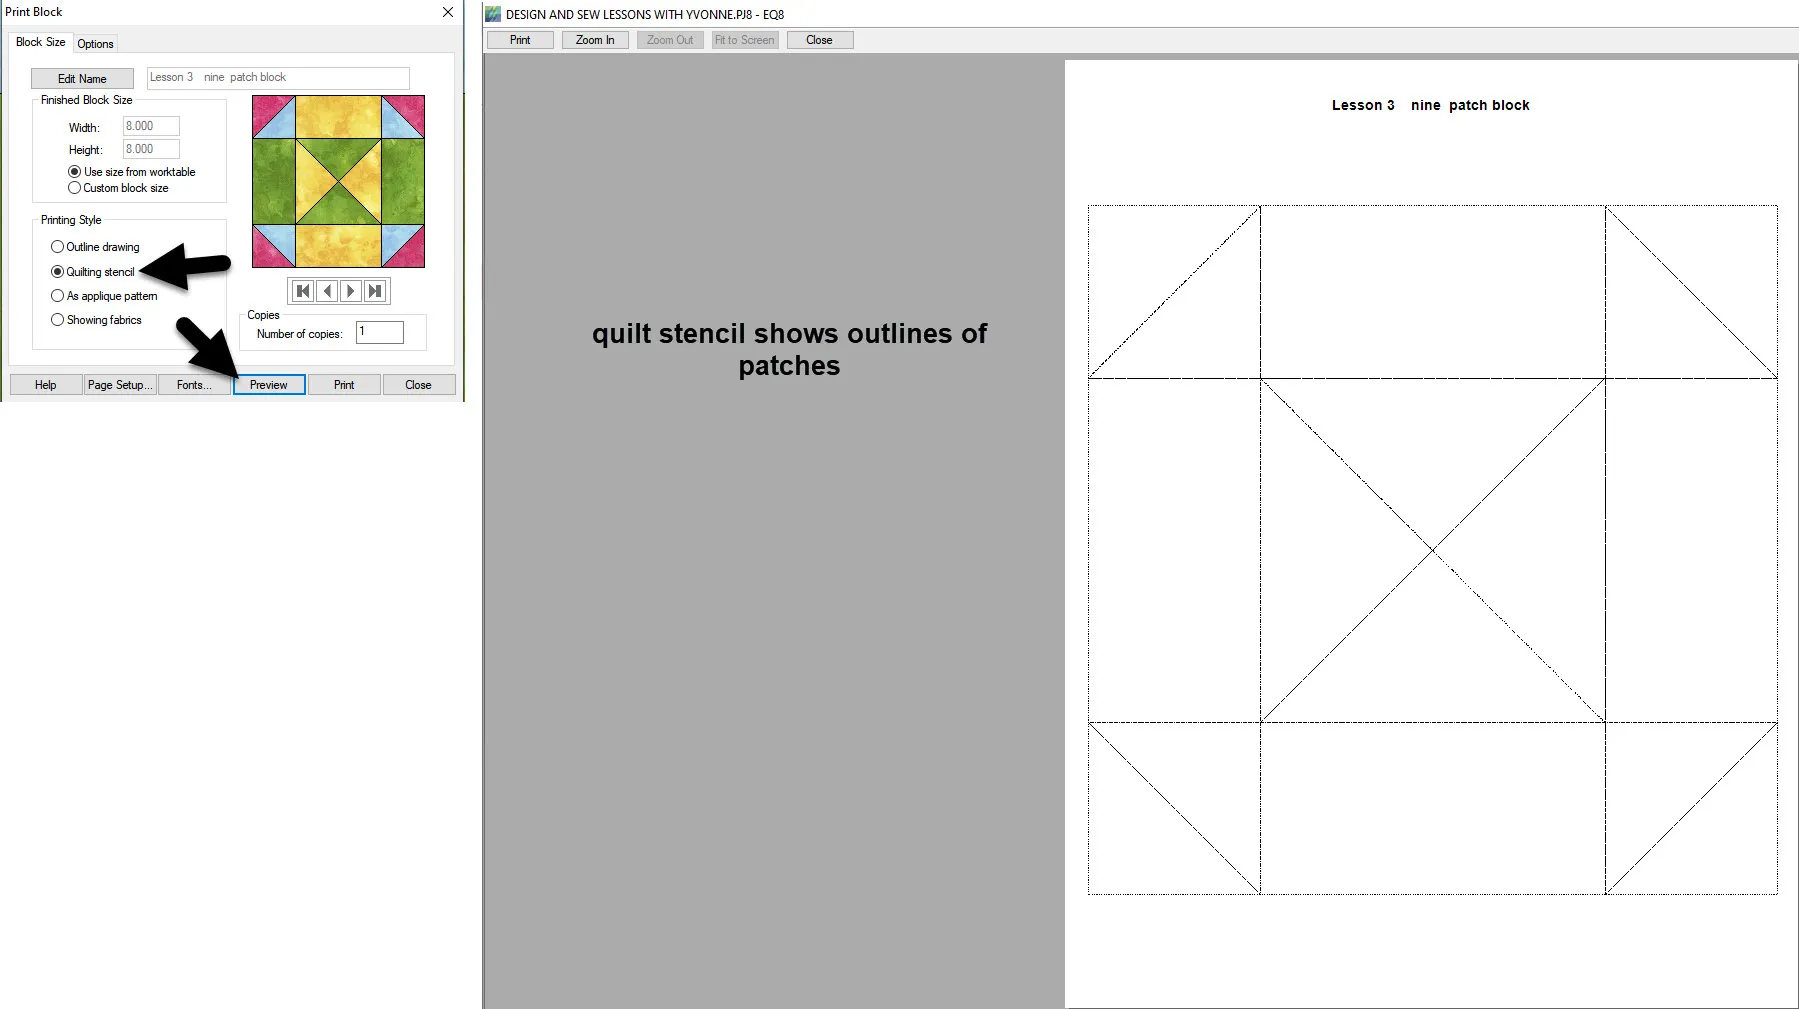
Click on the print ‘quilting stencil’ on the preferences box and then click on preview to see how the quilting stencil would print.
Click on the word ‘close’ at the top of the preview page.
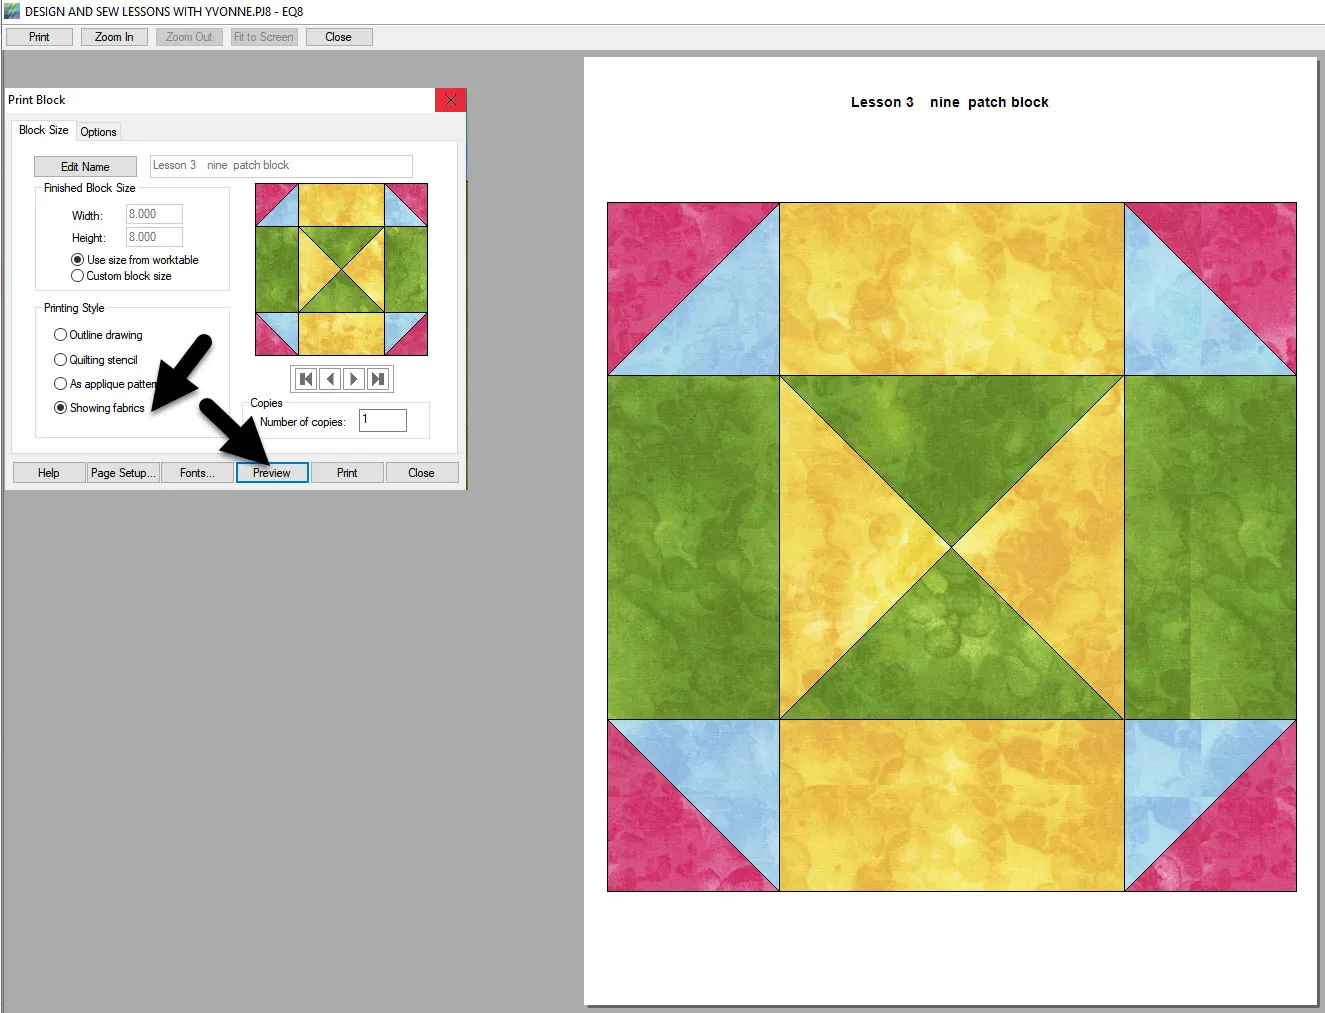
In the print block box click on the ‘showing fabrics’ and then click on the preview at the bottom of the box.
If I were writing and printing patterns for sale, I might use this image of the block with fabrics to print to include in my pattern package along with the cutting and assembly instructions that I would write.
Close the preview box at the top of the preview page.
Close the Print Block box by clicking on the ‘close’ at the bottom of the box.
2. The second print option is to use the templates option to print our design. While we are still on the print/export tab of the block worktable, select the templates icon ![]() at the left side of the screen.
at the left side of the screen.
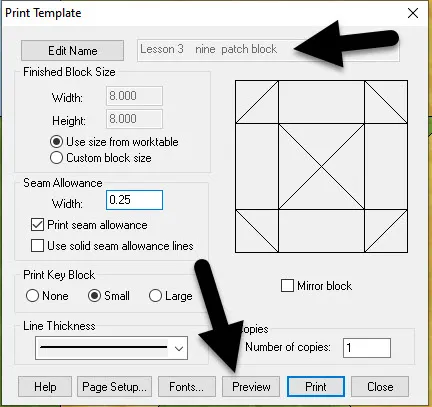
In the template box you will see the name of the block was held from naming it previously. This block name will stay with the project file and appear on all print options.
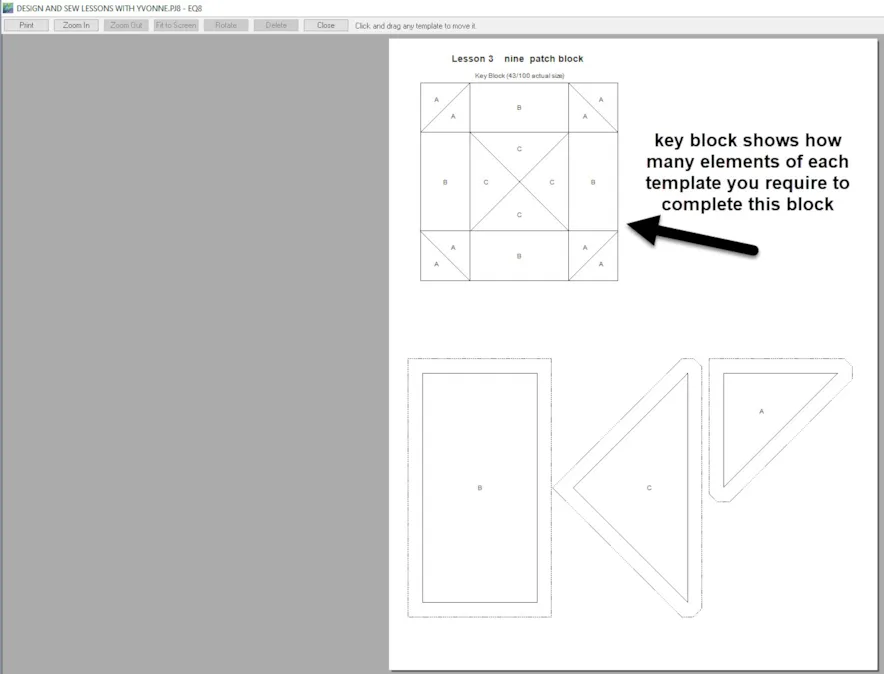
Click on the ‘preview’ at the bottom of the box to see how the design page will print.
We don’t use templates for piecing very much today. With the invention of the rotary cutter, straight cut pieces are usually cut from strips rather than create templates for each of the pieced elements. We do however use templates with applique designs. For this block all the templates fit nicely on one piece of paper.
NOTE–When we design blocks in EQ8 they are the finished size. The pattern printing will automatically add the 1/4 inch seam allowance for the pattern pieces.
Close the template pattern screen by clicking on the ‘close’ at the top of the pattern.
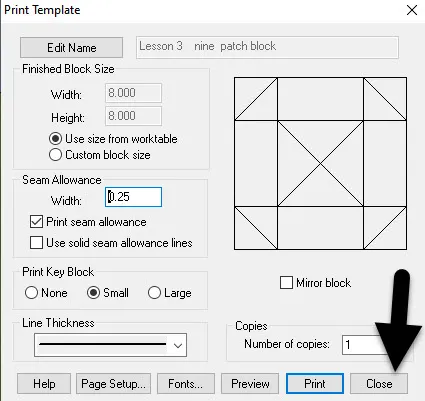
Close the print template box by clicking on the word ‘close’ at the bottom of the box.
3. The third style of printing a pattern is by foundation piecing (also called paper piecing). Click on the foundation print icon ![]() to the left side of the block in the print patterns box.
to the left side of the block in the print patterns box.
The print foundation pattern box opens with the default being the sections tab. This shows the pattern can be created in four separate sections then joined together to create the complete block.
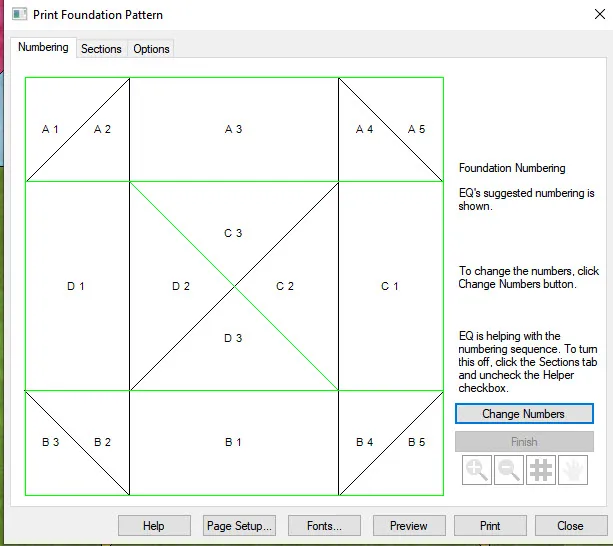
Click on the numbering tab at the top of the box. The block sections are numbered for construction based on the sections that were recognized.
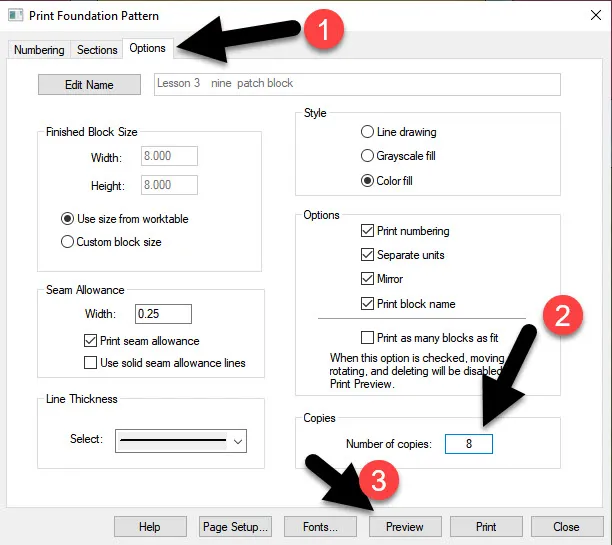
Click on the options tab at the top of the box. This is where you would type ’8′ for the number of blocks that will be needed to complete this quilt layout. The EQ program automatically recognizes that we are making 8 inch blocks. Click on the ‘preview’ at the bottom of the box.
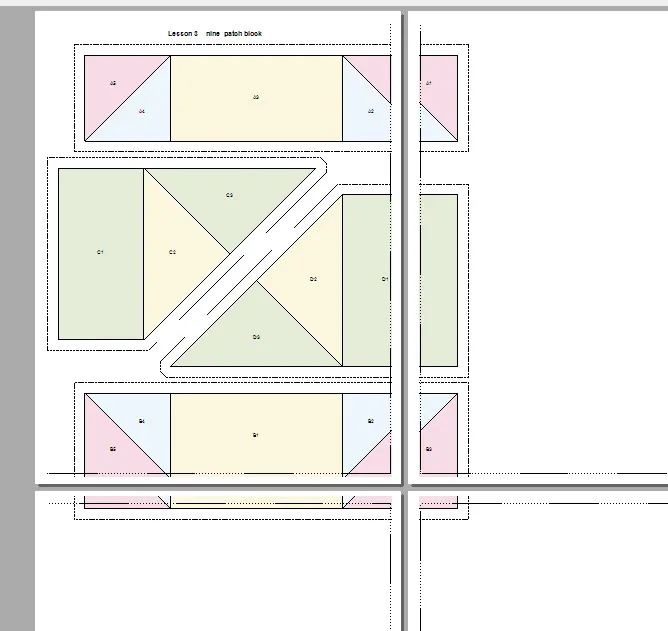
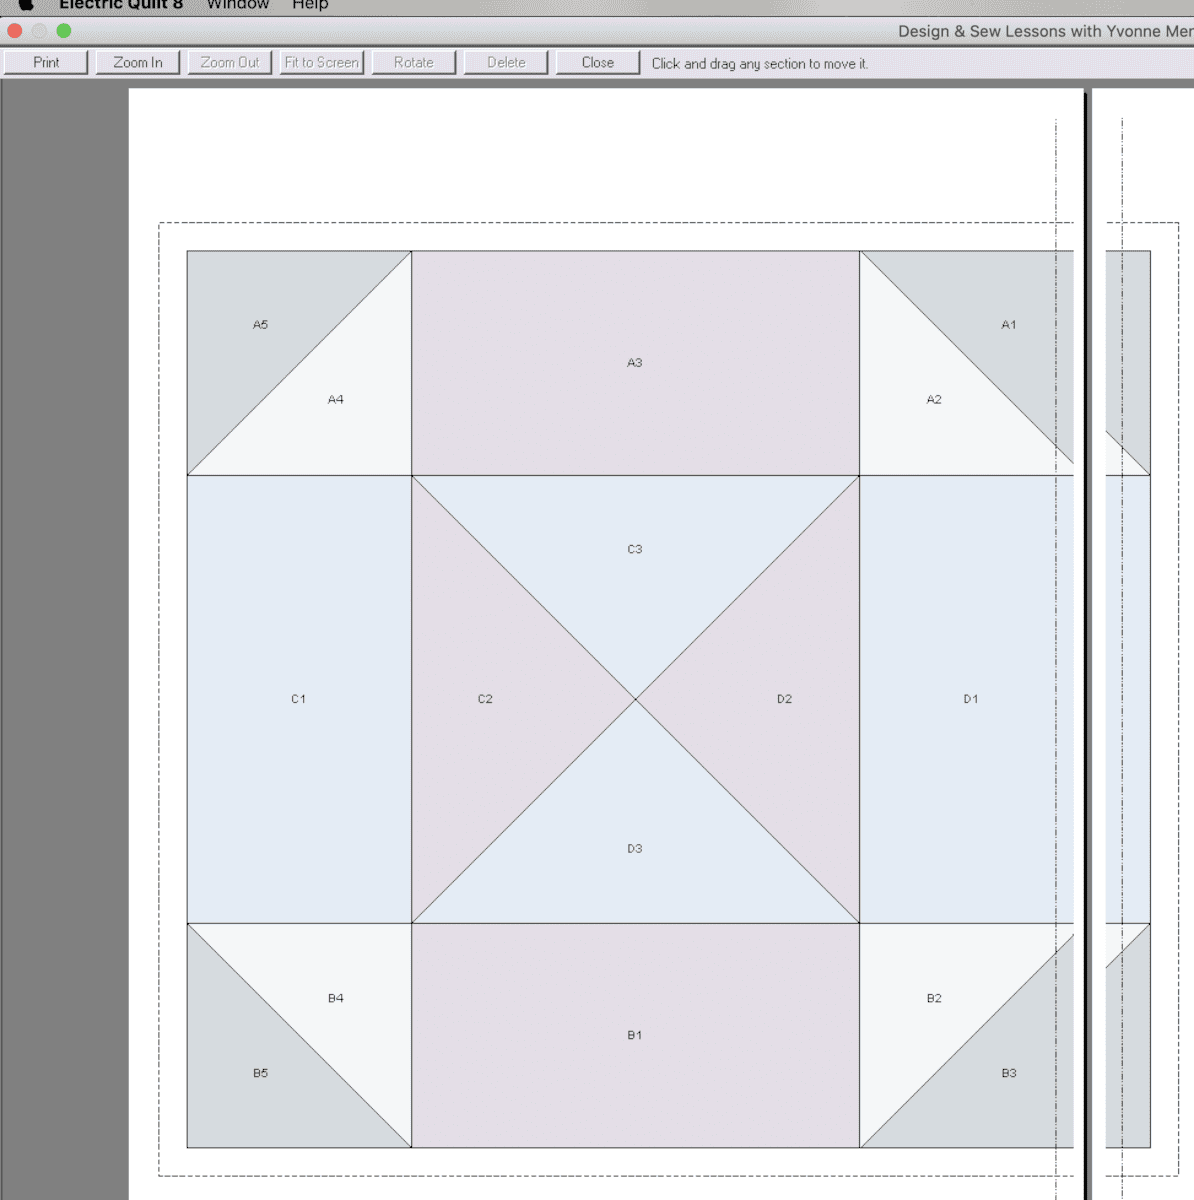
The preview of the pattern printout is not ideal. These items can be made to fit the paper pages better.
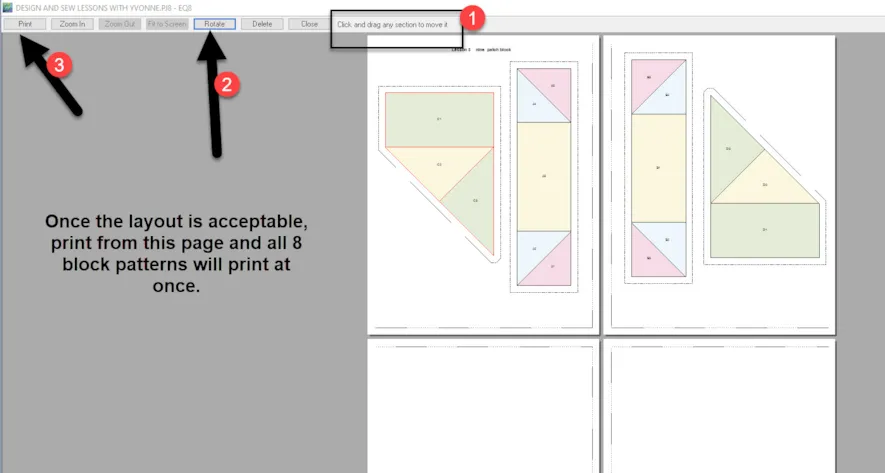
Correct the layout by clicking and dragging the pieces to different places on the page. Rotate each piece by clicking on it to select it (selected item will be outlined in red) and then clicking on the word ‘rotate’ at the top of the screen. You will need to click the ‘rotate’ more than once to have it in a better layout position. Doing this will avoid having the pattern pieces cross over from one piece of paper to another.
Click on the ‘close’ at the top of the page after printing if you choose to use this method of construction.
NOTE: If you close this screen and come back to it, you will need to rearrange the pieces of the pattern again. The program does not remember your print pattern layout.
Close the print foundation pattern box by clicking on the word ‘close’ at the bottom of the screen.
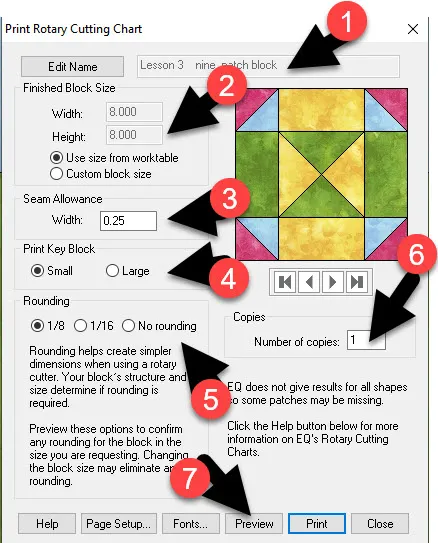
4. The fourth style of printing patterns is rotary cutting. This is the most used method today with the ease of use of the rotary cutter. Click on the rotary cutting icon![]() in the print box at the left side of the screen.
in the print box at the left side of the screen.
The rotary cutting chart box will open. Notice the size from our block worktable is already entered for us to use. The EQ program will add the seam allowance to the pieces to cut for us. You may choose to print the key for the block in two different sizes. (I always use small to conserve paper when printing). Rounding will give you options to the sizes listed on the cutting strip pieces. I don’t measure smaller than 1/8 of an inch so I rarely change this. The number of copies is listed at ’1′. I know I have 8 blocks for this quilt but I only need one set of cutting instructions.
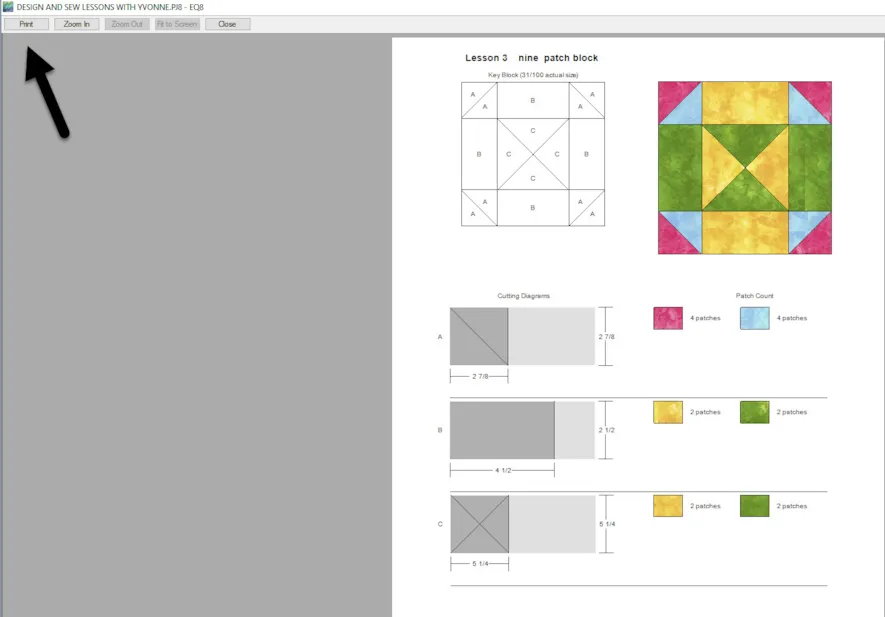
Click on ‘preview’ at the bottom of the box to see the rotary cutting instructions for this one block.
Print the rotary cutting instructions from this page. The colors of the fabrics you used plus the number of elements you need to cut for this one (1) block are listed. The program does not tell us how to sew the pieces. If you have multiple blocks, (we have 8 blocks), you need to multiply the number of strips and cuts from the strips by that amount for the entire quilt layout.
After printing the cutting instructions, close the screen at the upper ‘close’ on the screen.
Close the rotary cutting preferences box by clicking on the ‘close’ at the bottom of the box.
NOTE: The strip cutting for the corner squares lists the size of the strip to be 2 7/8 inches in size. If this is too small for you to easily cut, I would cut the strip to 3 inches and piece the two sections then square it up to be 2.5 inches. The program does not tell me this. I just know this from experience as a quilter. If you were writing a pattern, you would make that notation in your written pattern instructions.
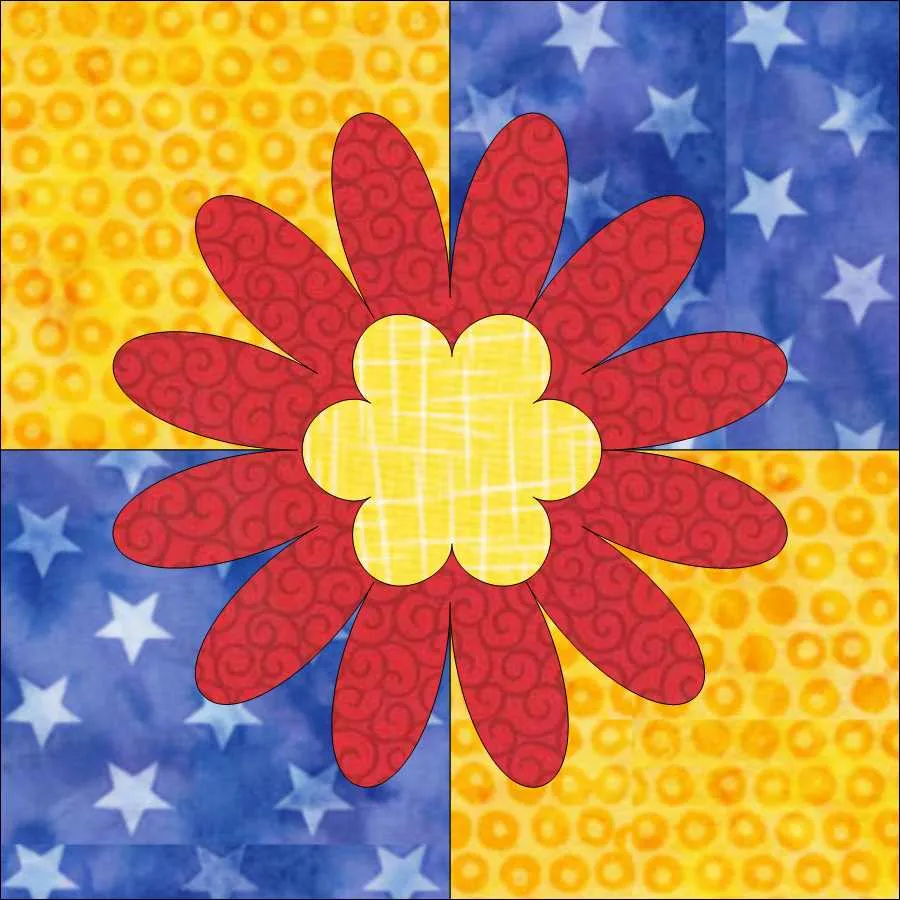
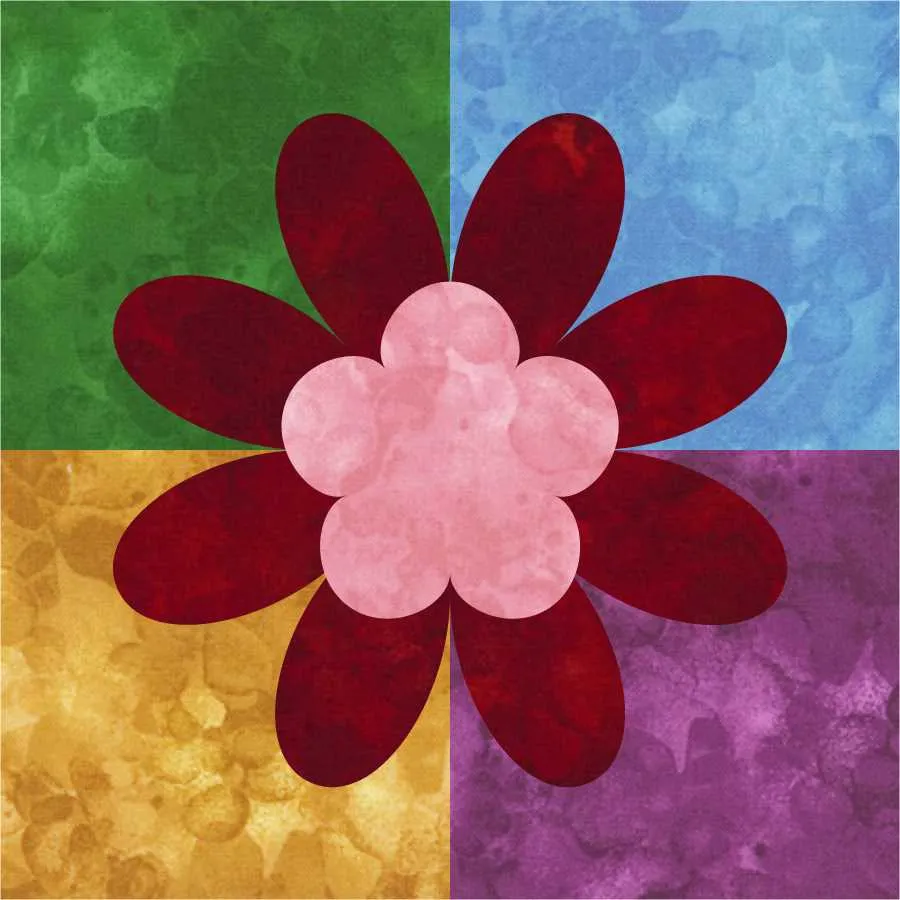
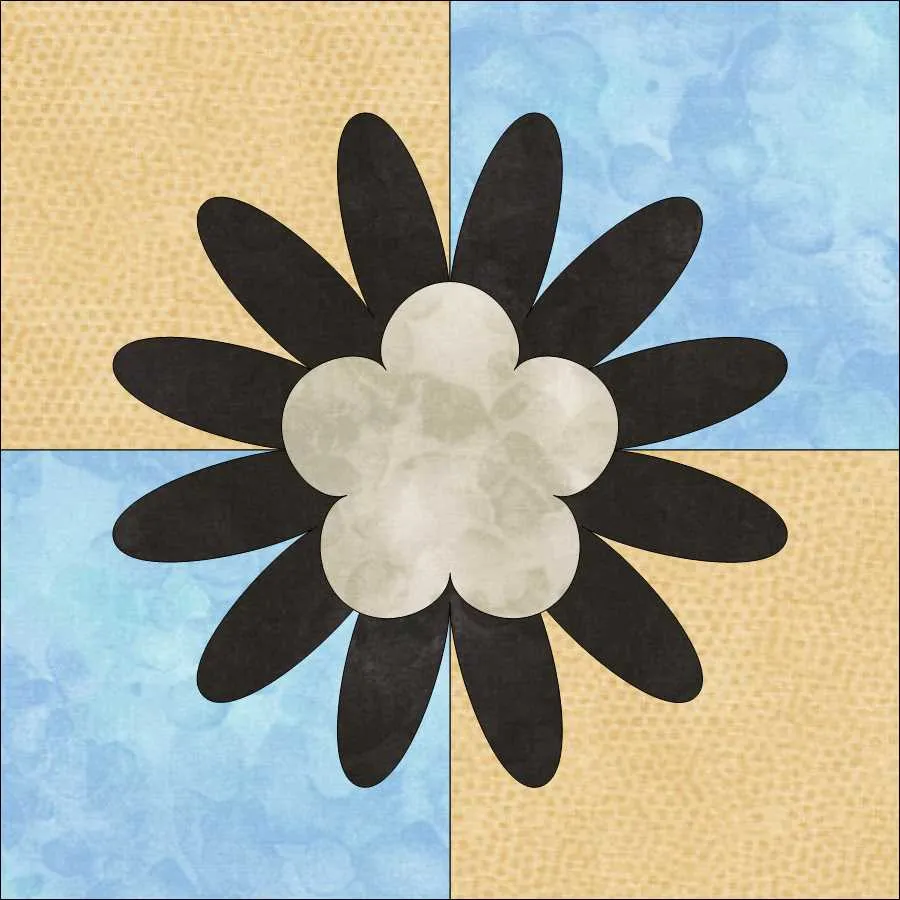
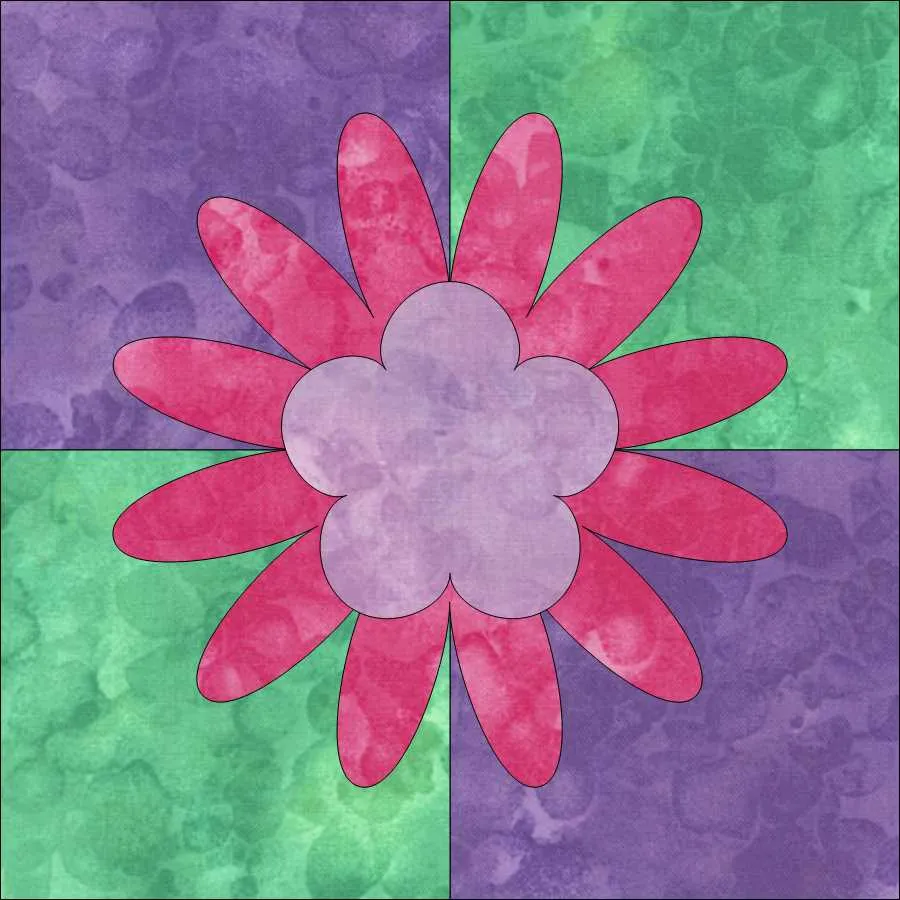
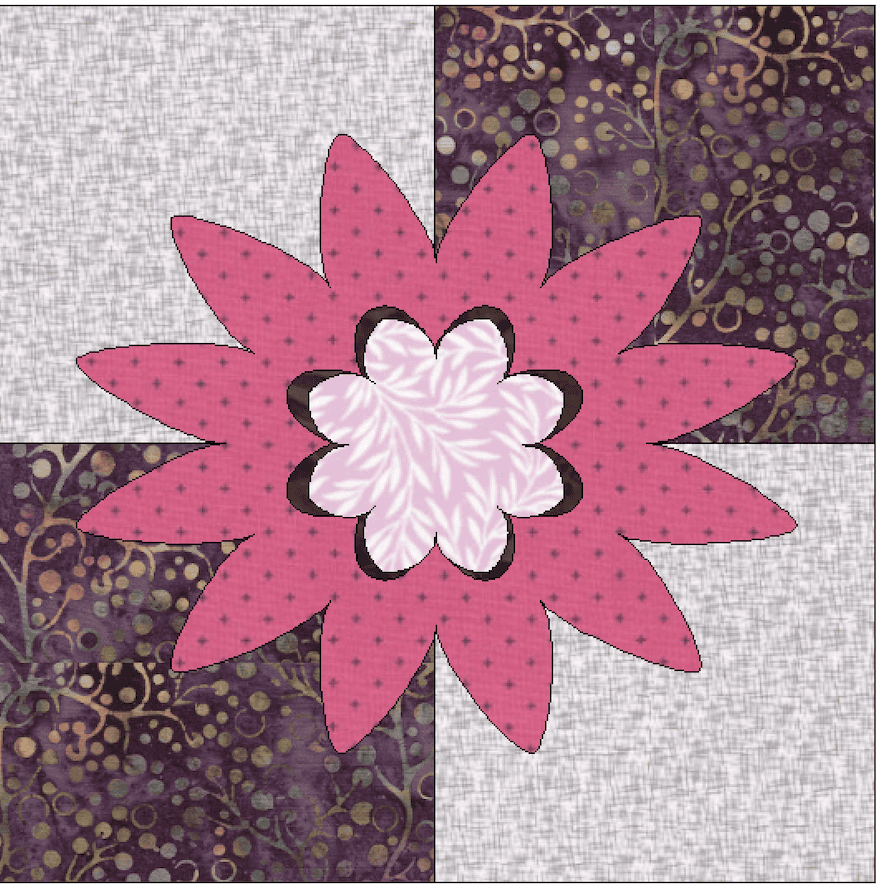
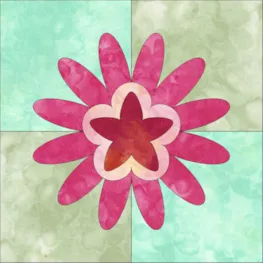
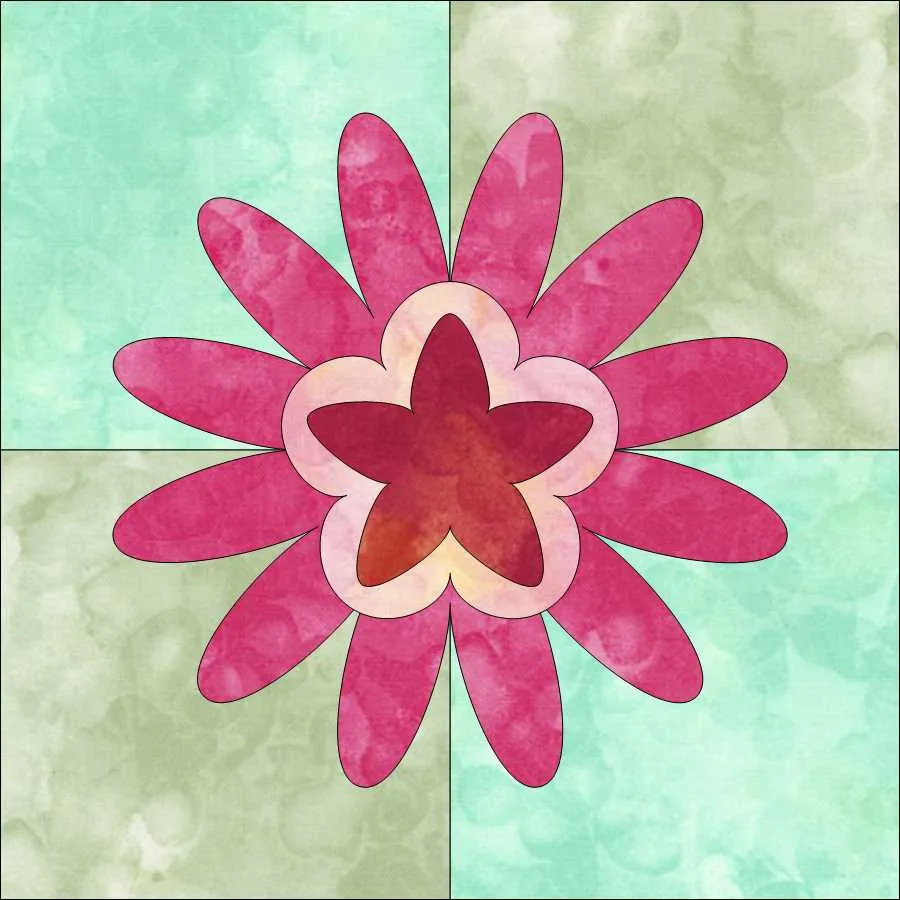
Our first block for this lesson is complete. We will construct a second block that is also an Easy Draw block but it has an added element of applique on the block.
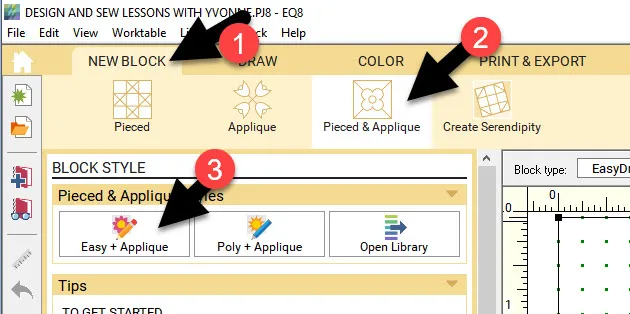
Still on the block worktable, click on the New Block tab at the top and select the Pieced & Applique icon then click on Easy + Applique icon
 ![]() under the block style block types.
under the block style block types.
The block size and the snaps are still held with the project folder we named. These settings stay until we change them.
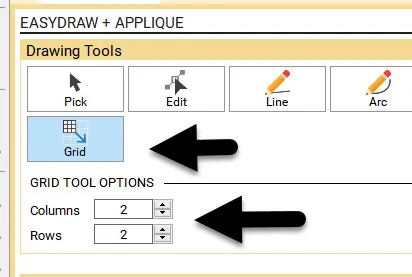
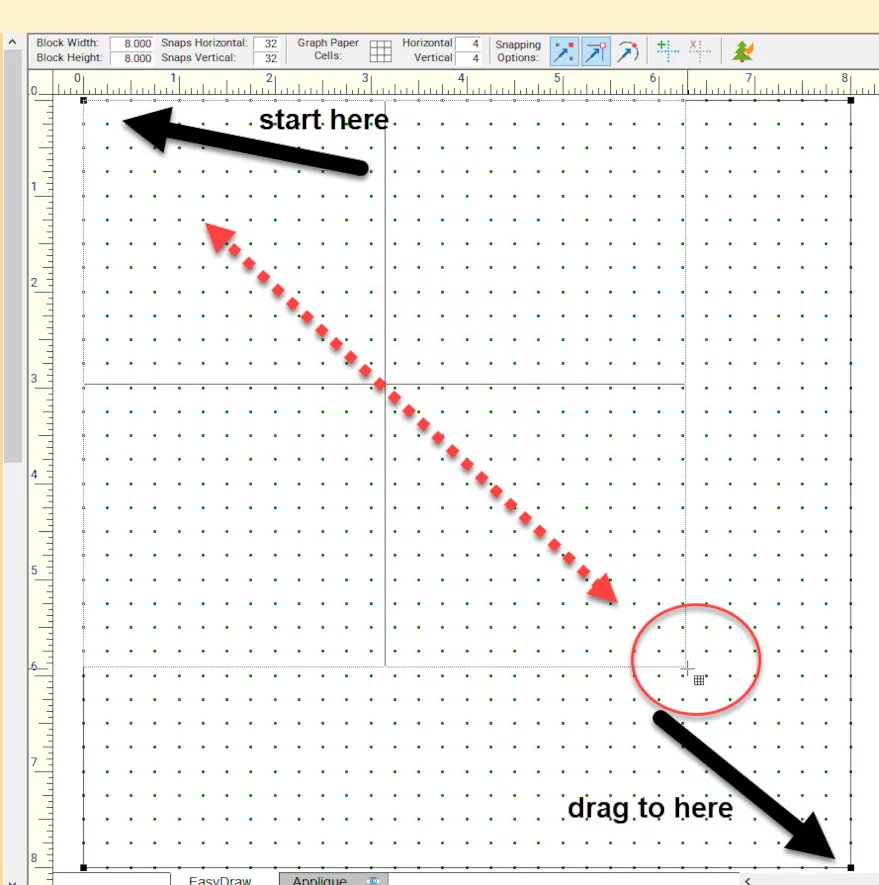
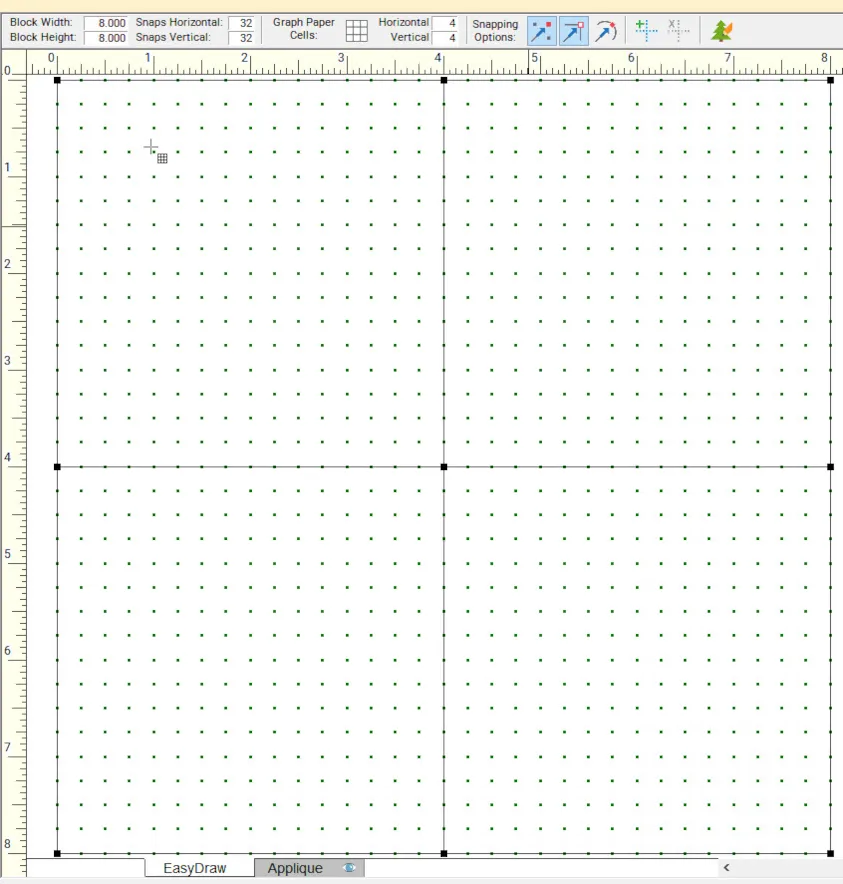
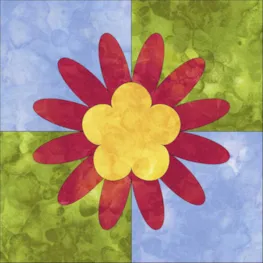
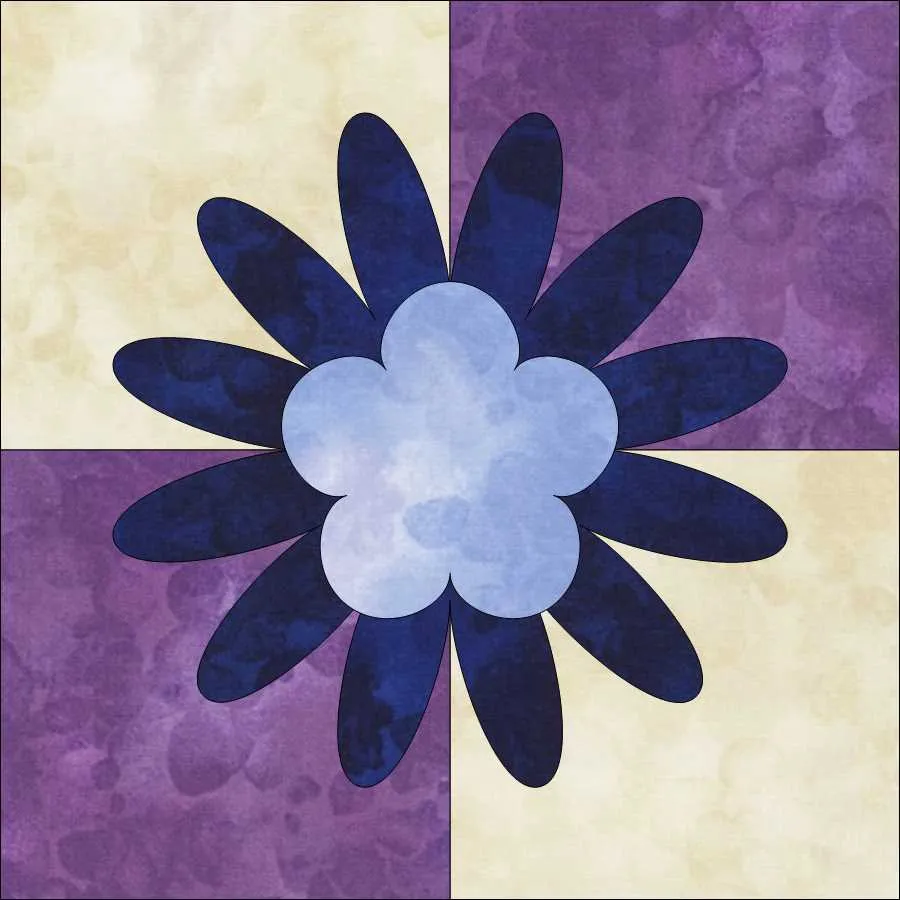
Click on the grid tool icon ![]() in the drawing tools box to select it. In the options, set the columns and rows to 2 x 2 . This will create a 4 patch block.
in the drawing tools box to select it. In the options, set the columns and rows to 2 x 2 . This will create a 4 patch block.
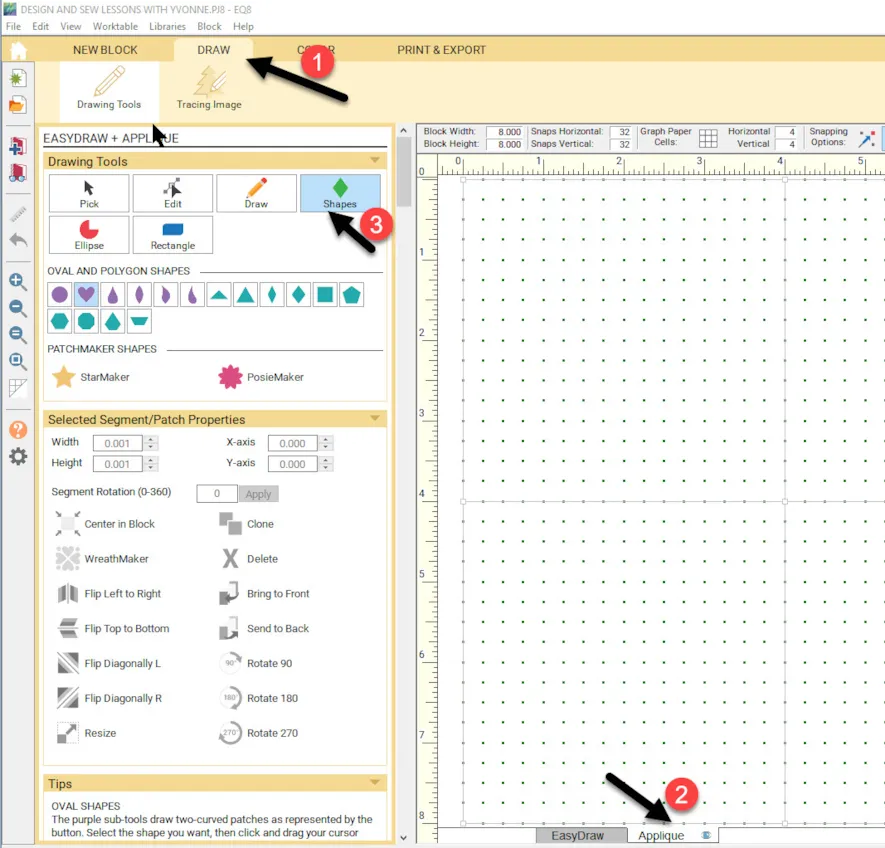
Notice on the bottom of the screen that this worktable has two tabs. One is for drawing the pieced block (easy draw) and the other is for adding applique to the pieced block.
We are drawing our pieces for the block on the easy draw tab.
Move the cursor over to the upper left corner of the drawing block and click/hold/drag /release the cursor from the upper left corner to the lower right corner of the block to create the 4 patch.
If you accidentally release the cursor before it gets to the lower right corner of the block, simply click on ‘undo’ icon![]() on the tools at the far left side of the screen and redraw with the grid tool.
on the tools at the far left side of the screen and redraw with the grid tool.
Once you have the 4 patch drawn correctly on the worktable, add to sketchbook.![]()
NOTE: Once the drawing is added to the sketchbook the intersecting lines now have nodes in the middle and could have each segment edited instead of a complete line. You could just as easily have drawn this with the line drawing tool, but using the grid tool insures you have equally segmented areas.
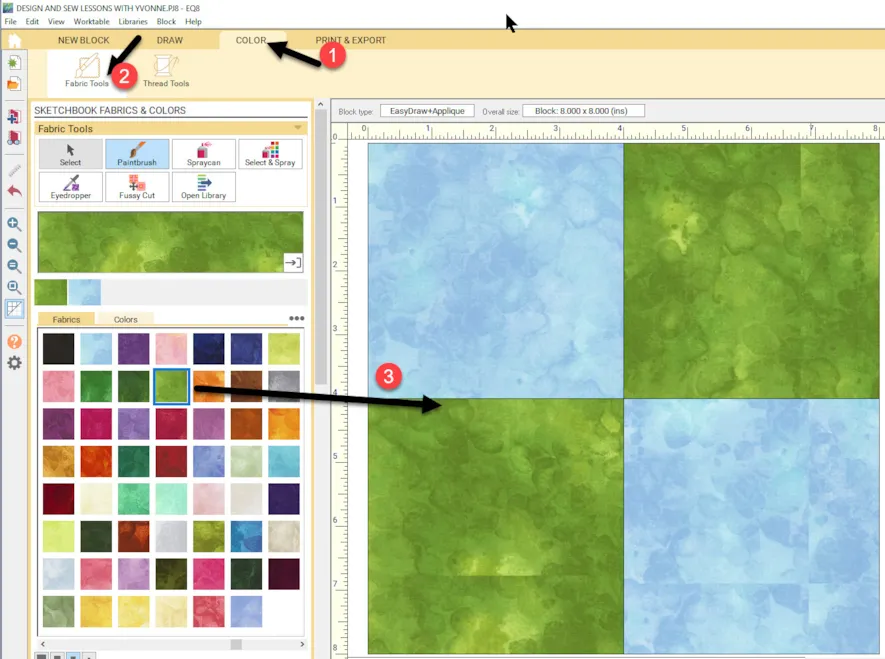
Click on the color tab at the top of the screen. Using the fabric tool, click on a fabric of your choice and move the cursor over to the block and click once in an area to color the block. Add to sketchbook![]() when you have finished adding the color fabrics to your block.
when you have finished adding the color fabrics to your block.
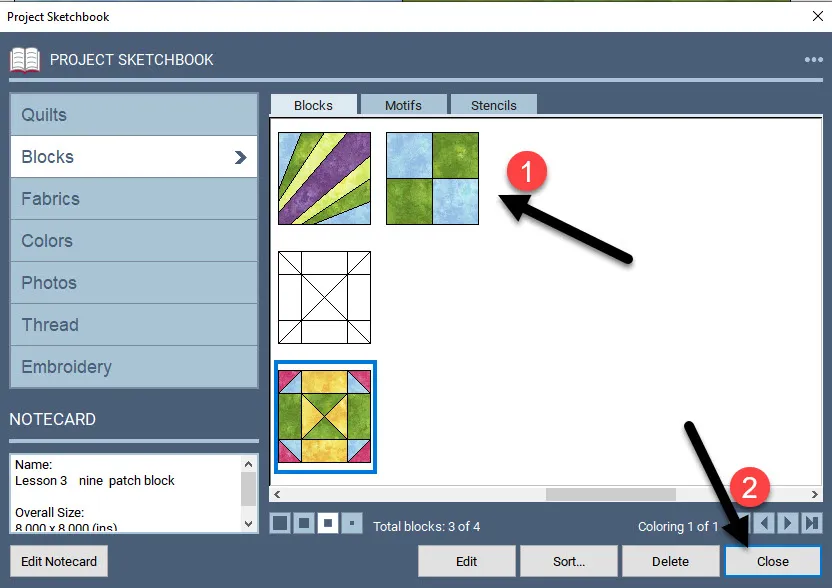
Click on the view sketchbook icon![]() and check to make sure you added the colored block to the sketchbook before you leave this screen.
and check to make sure you added the colored block to the sketchbook before you leave this screen.
Click on the draw tab at the top of the screen. Click on the applique tab at the bottom of the screen to add our applique design to our block. Click on the shapes tool![]() on the left side in the drawing tools box.
on the left side in the drawing tools box.
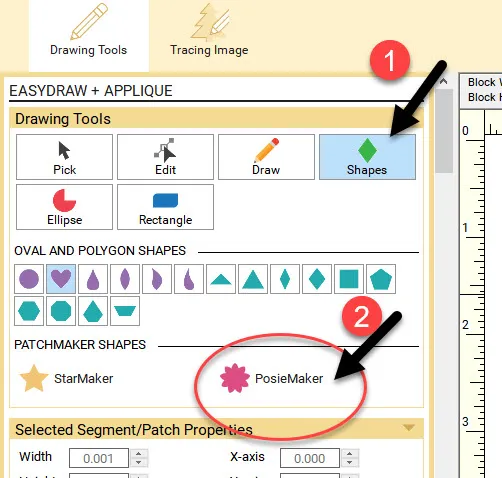
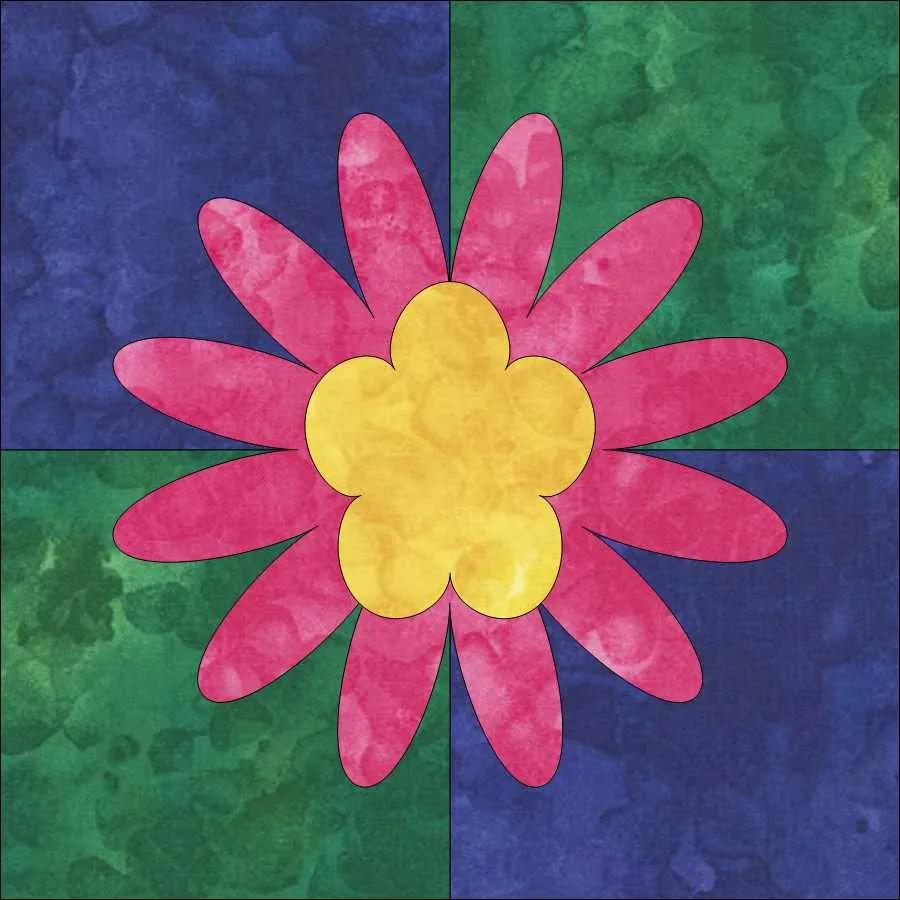
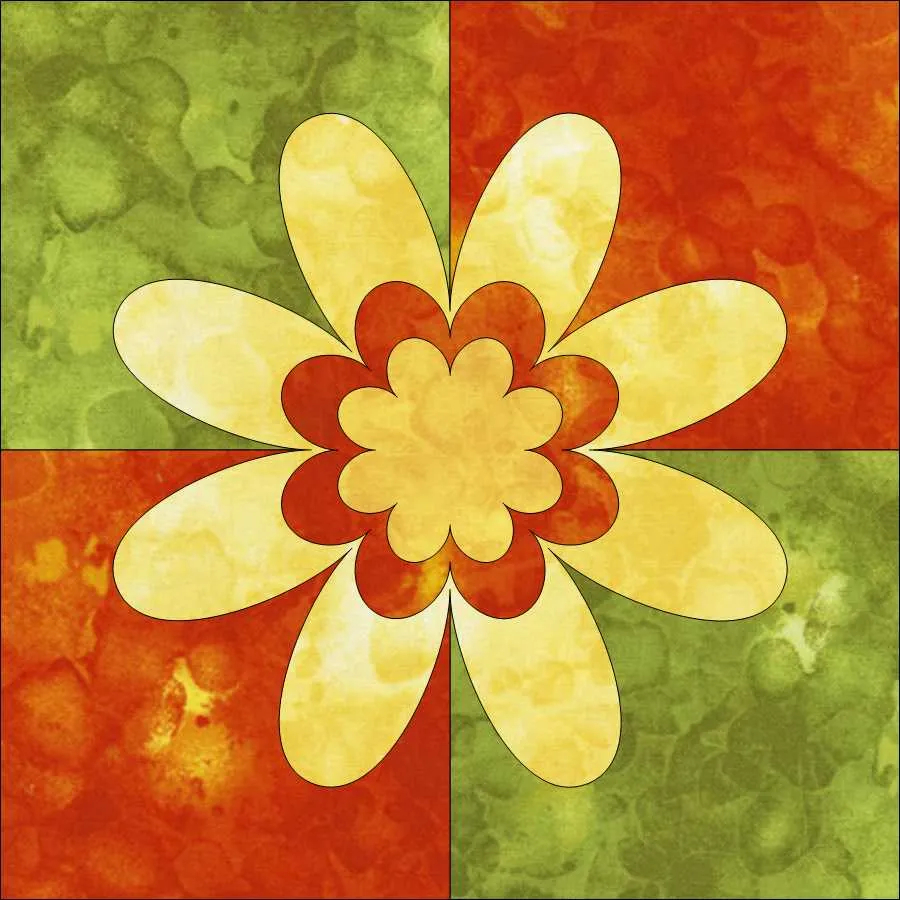
Once the shapes tool has been selected you will have multiple options of drawing shapes. We will be using the posiemaker tool.![]()
THE RULE FOR APPLIQUE SHAPES IN EQ8 IS THAT THE DRAWN SHAPE MUST BE CLOSED. ALL BUILT IN SHAPES ALL READY MADE FOR US IN EQ8 ARE CLOSED SHAPES. NOTE: You can always draw your own shapes with the drawing tools, but it is up to you to make sure the shape is closed. If you do not completely close the shape, you will not be able to fill it with fabric.
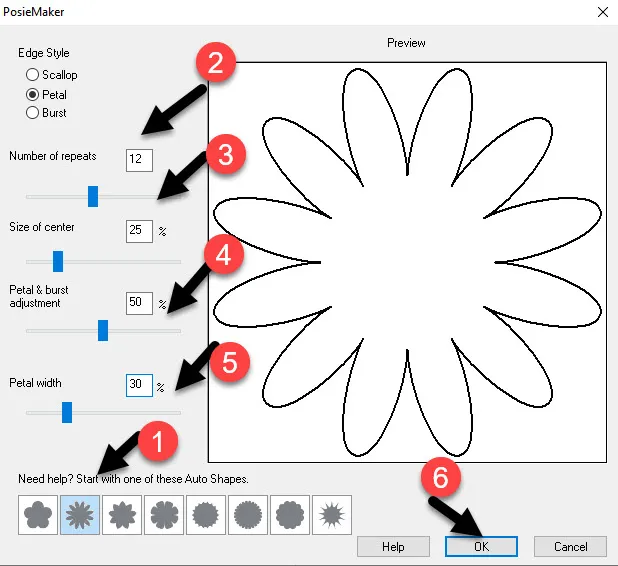
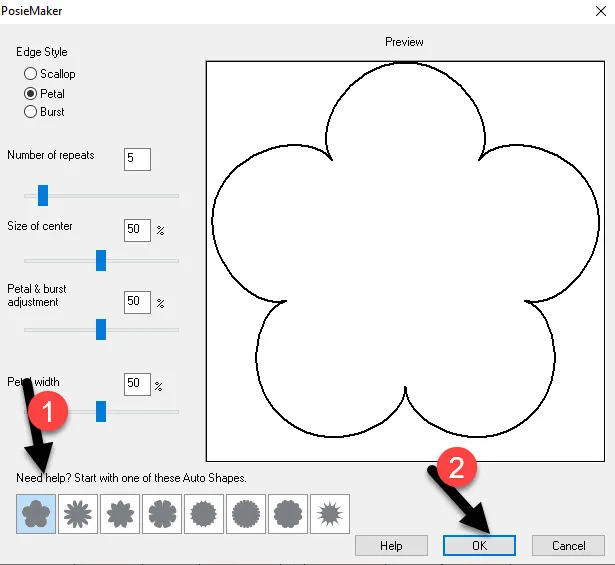
Click on the PosieMaker tool icon![]() to select it. The PosieMaker properties box will open up. You can change the look of the shape by clicking on an auto shape at the bottom of the box and then using the slider bars to create the shape you want to use.
to select it. The PosieMaker properties box will open up. You can change the look of the shape by clicking on an auto shape at the bottom of the box and then using the slider bars to create the shape you want to use.
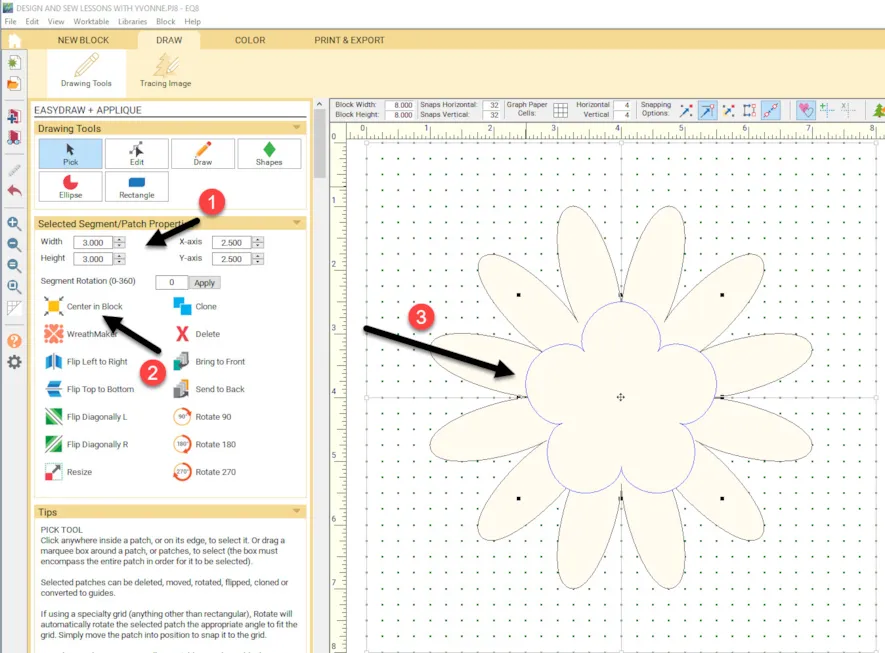
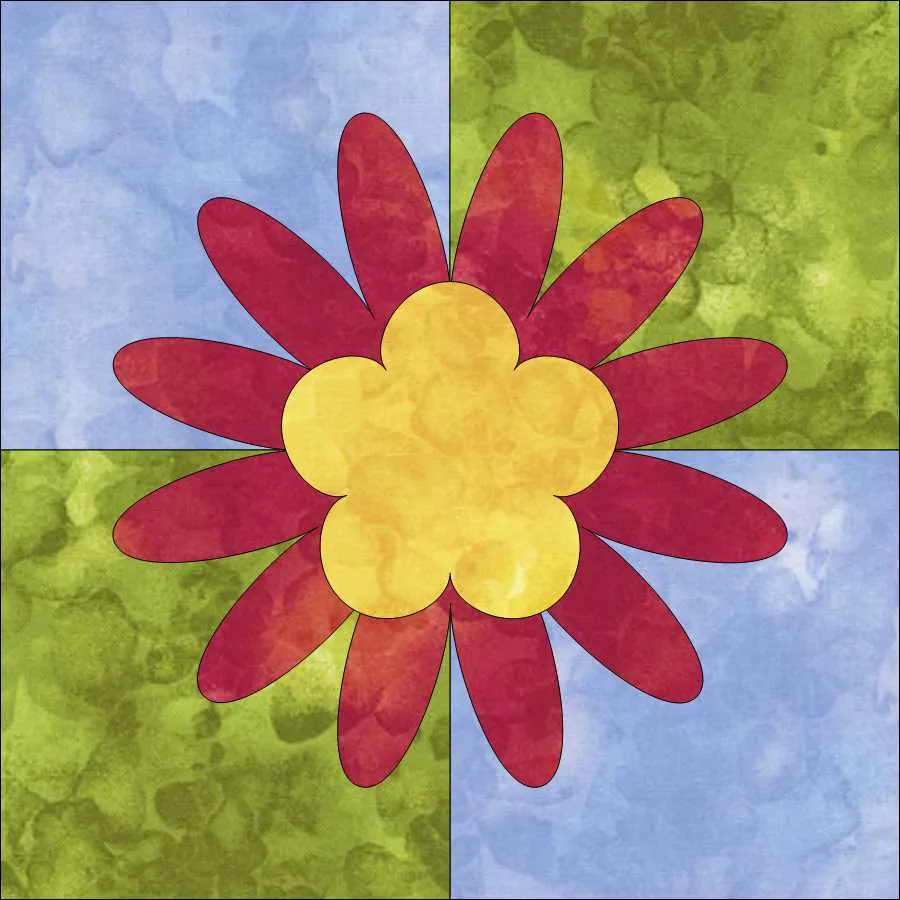
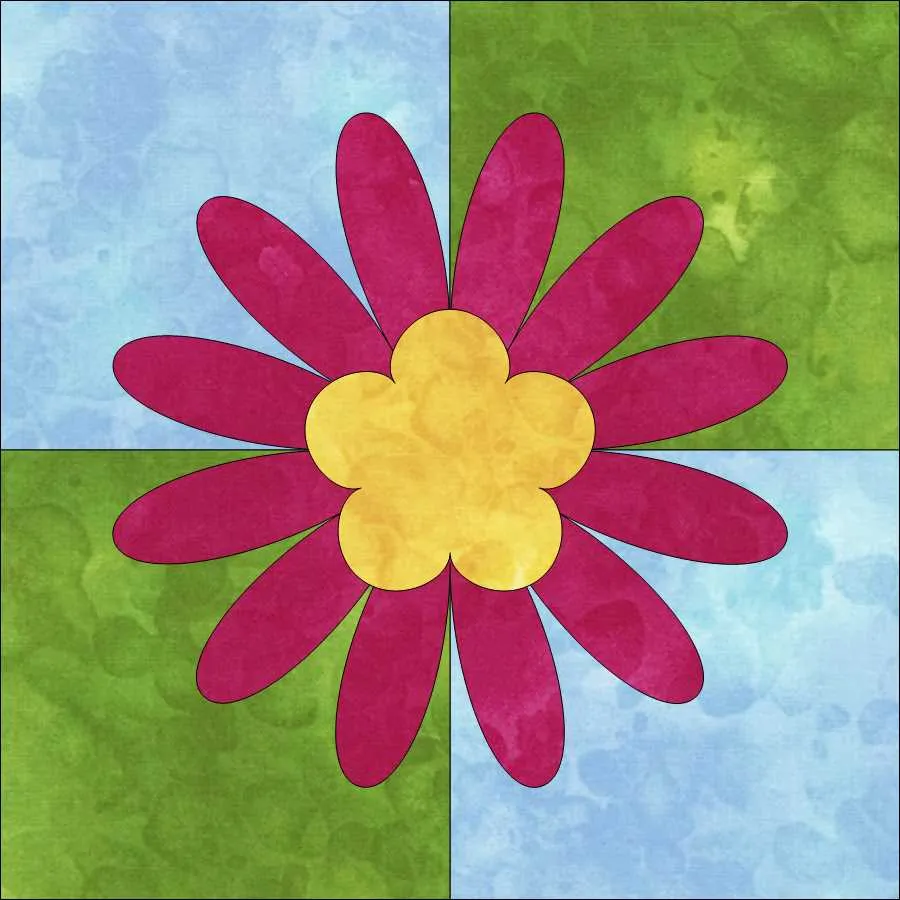
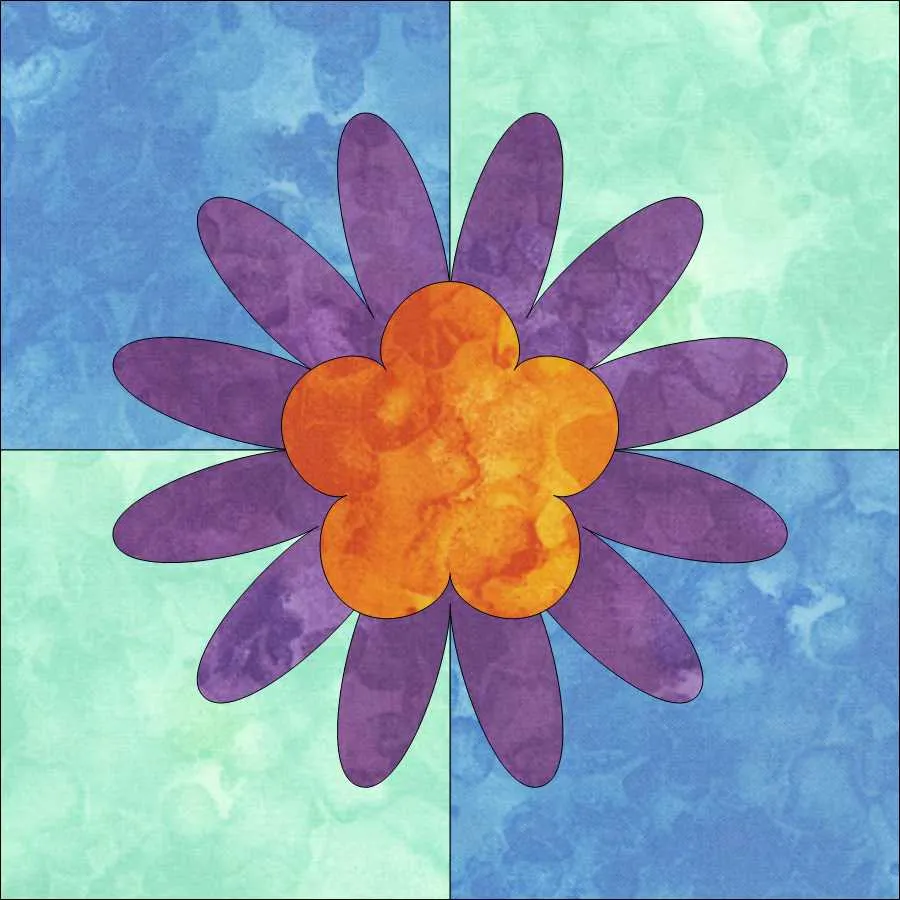
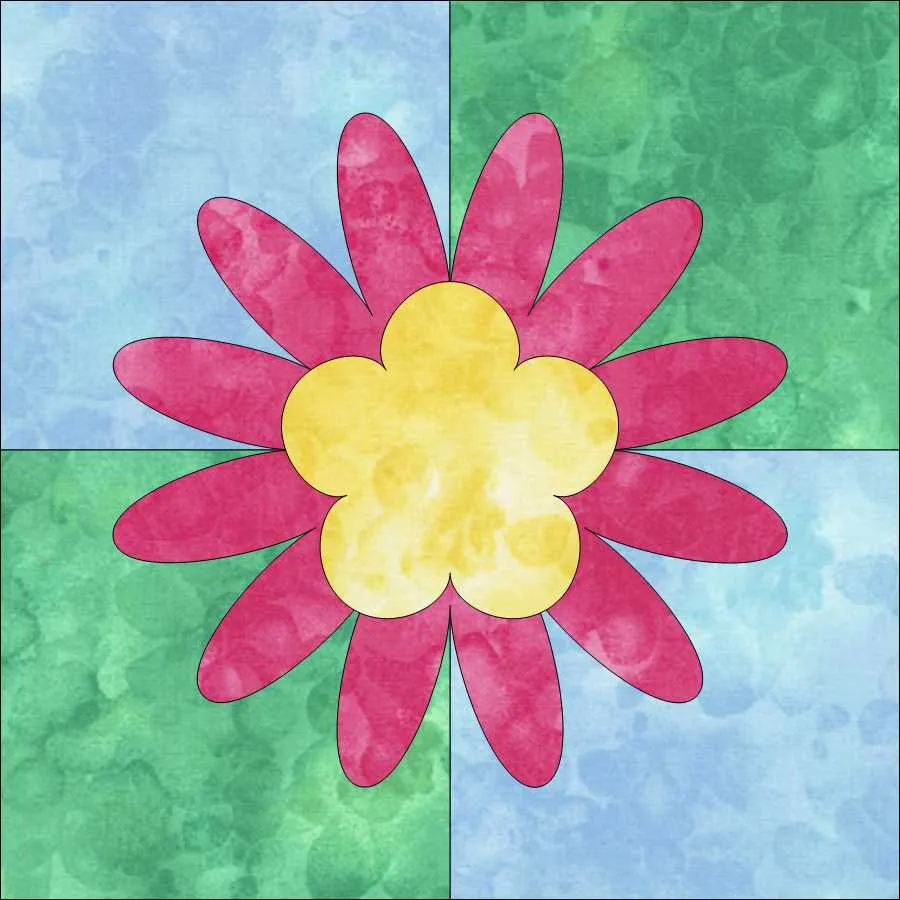
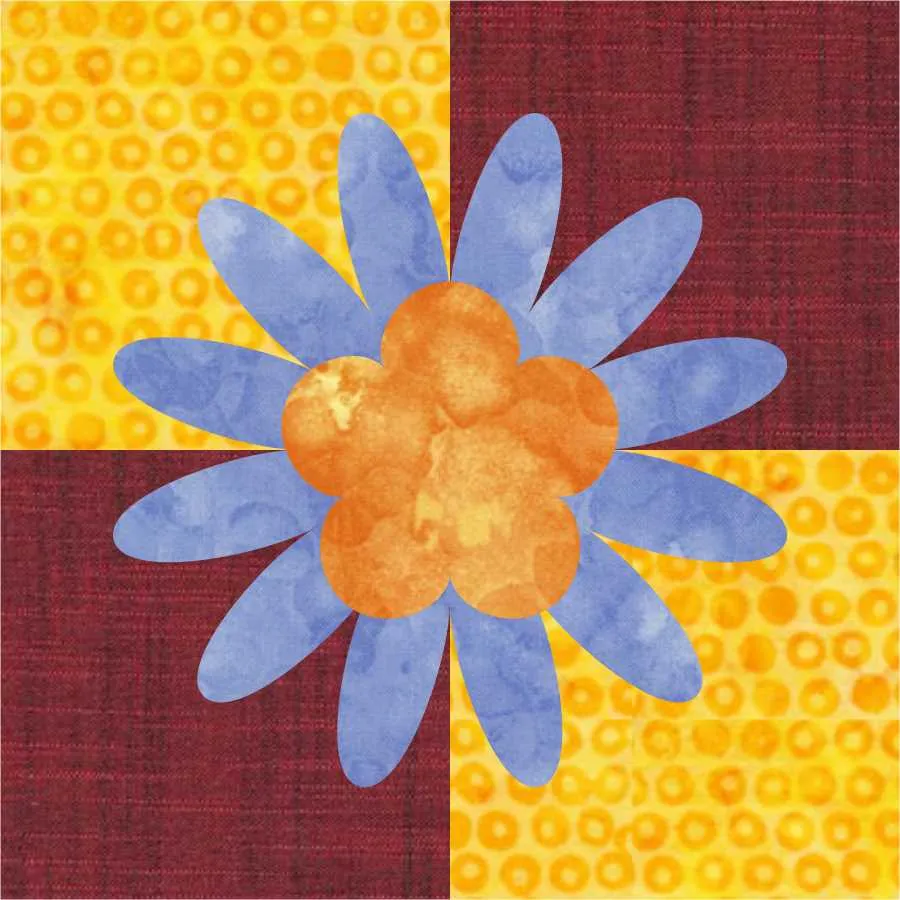
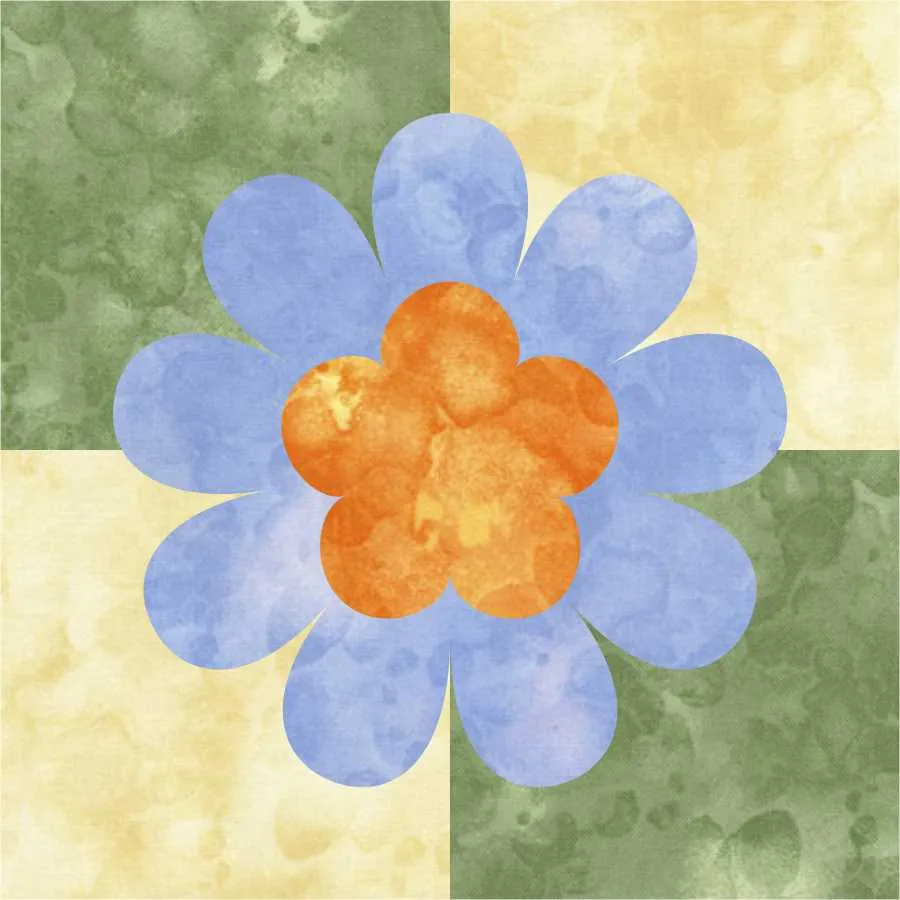
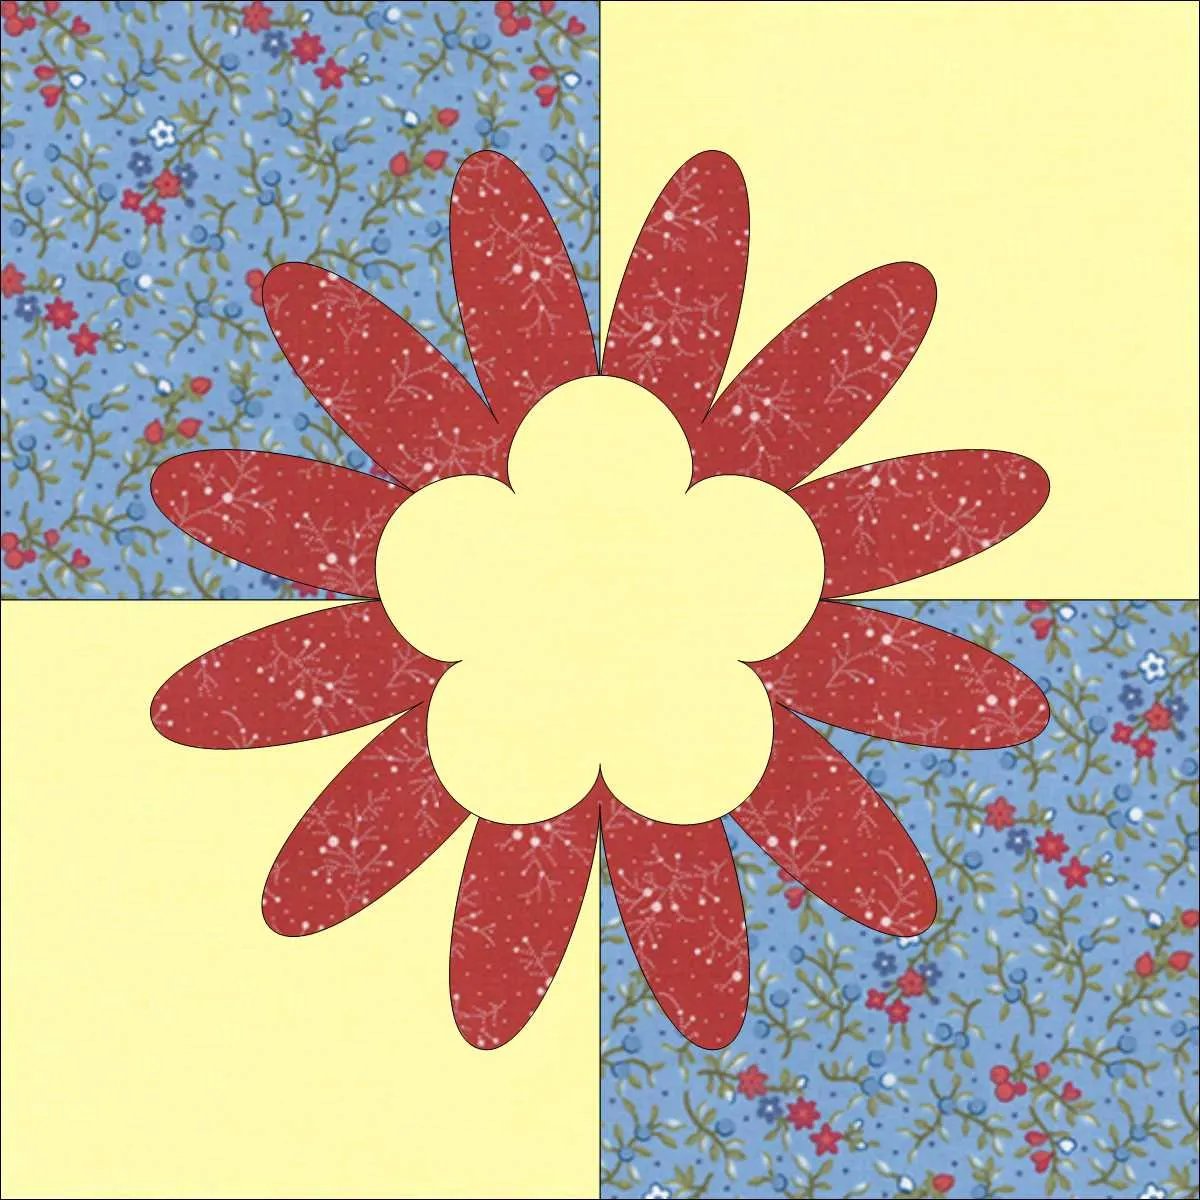
I selected the second auto shape at the bottom of the box and reset the number of petals to 12, size of center to 25%, left the petal and burst at 50%, and changed the petal width to 30%. Once done I click on the ‘OK’ at the bottom of the box to create the design.
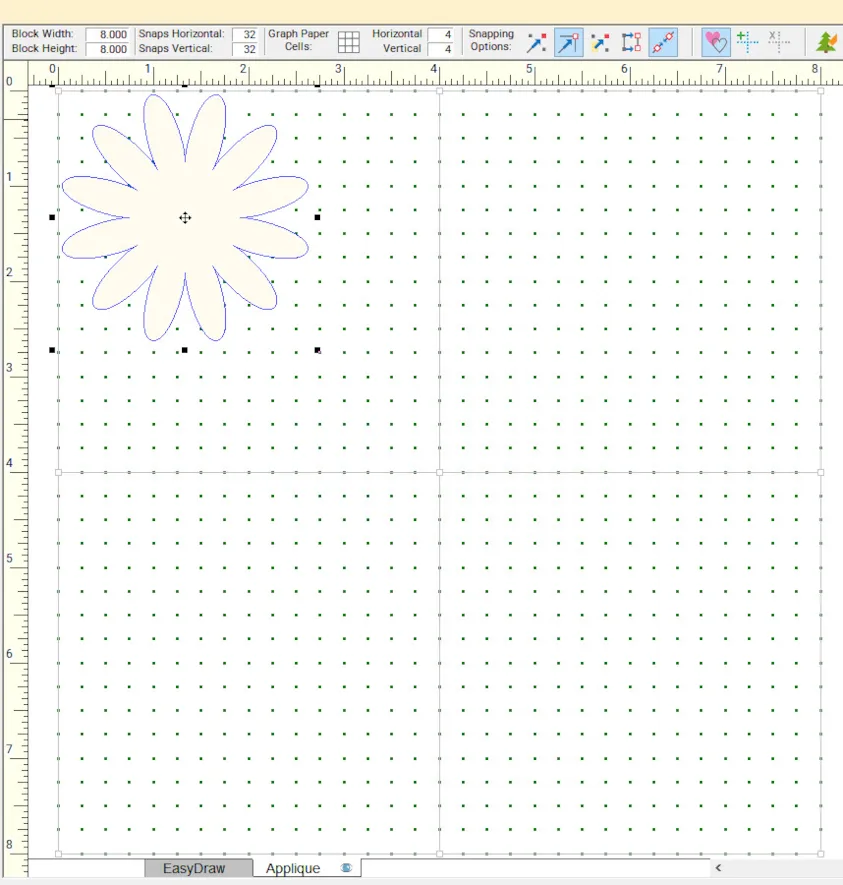
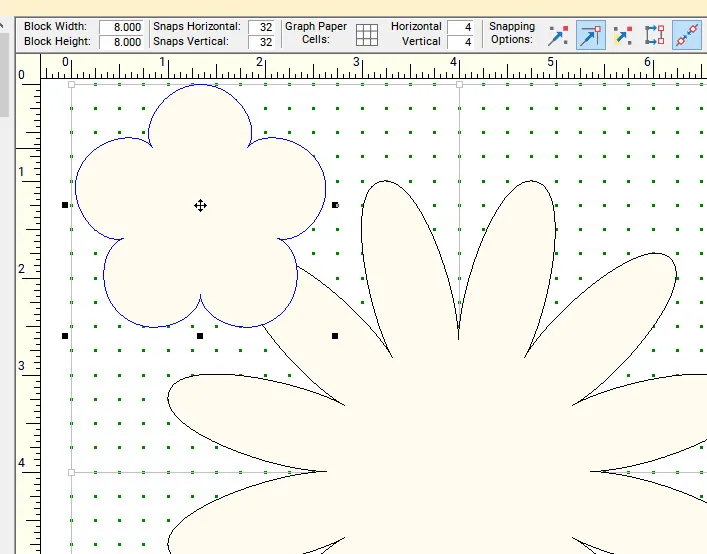
The design will come in at the upper left side of the worktable.
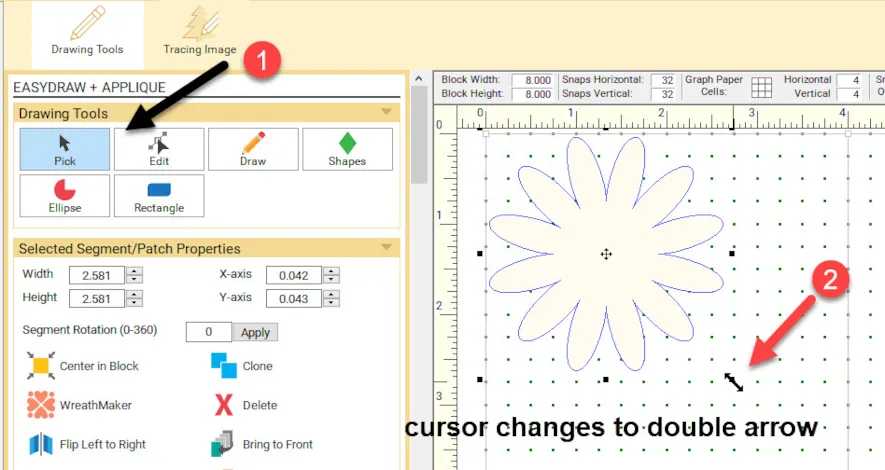
Click on the pick tool icon![]() on the drawing tool box. Move the cursor to the lower right selection handle of the selection box You will see a double pointed arrow. While holding down the control key (CTRL) on your keyboard, click/hold/drag/release the mouse to create a larger shape on the worktable. NOTE: Holding down the control key insures that the shape does not become distorted while resizing.
on the drawing tool box. Move the cursor to the lower right selection handle of the selection box You will see a double pointed arrow. While holding down the control key (CTRL) on your keyboard, click/hold/drag/release the mouse to create a larger shape on the worktable. NOTE: Holding down the control key insures that the shape does not become distorted while resizing.
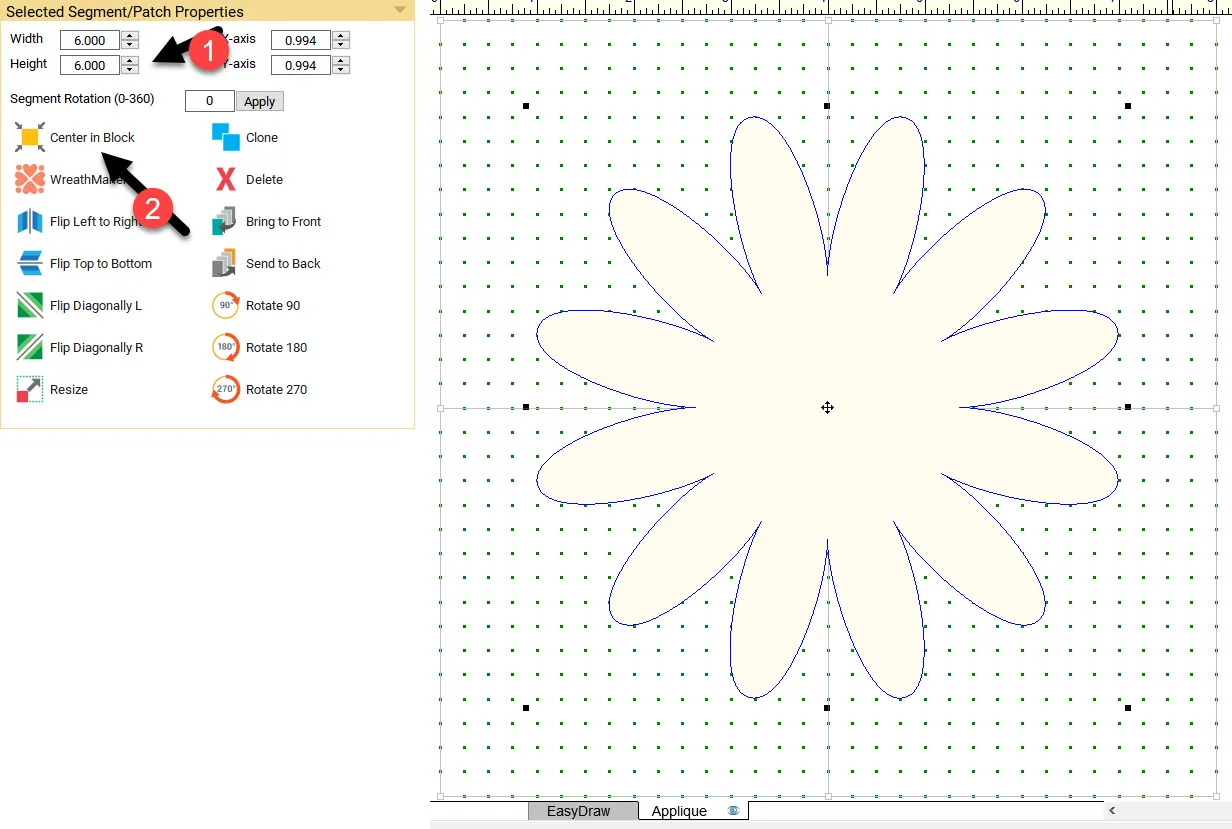
With the resized shape still selected, type in the size 6 x 6 inches and then click on the center in block icon.
Click on the shapes tool icon ![]() again to see the PosieMaker tool.
again to see the PosieMaker tool.![]()
Click on the PosieMaker tool icon![]() at the left side of the screen.
at the left side of the screen.
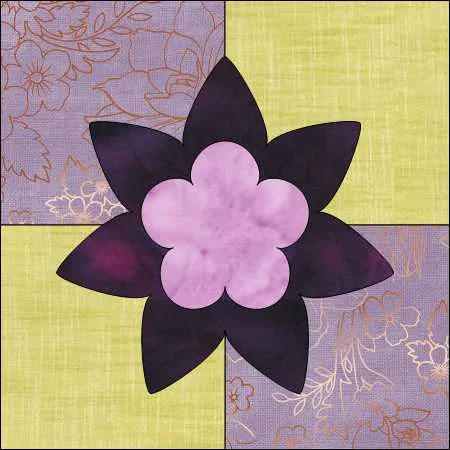
This time click on the first auto-shapes at the bottom of the box. We are not going to change any of the settings here. Just click on the ‘OK’ in the bottom of the box.
The shape will open in the upper left corner of the block worktable.
While the image is still selected, type in the size of the applique to be 3 x 3 inches. Once it is resized, click on the center in block icon![]() in the properties box at the left.
in the properties box at the left.
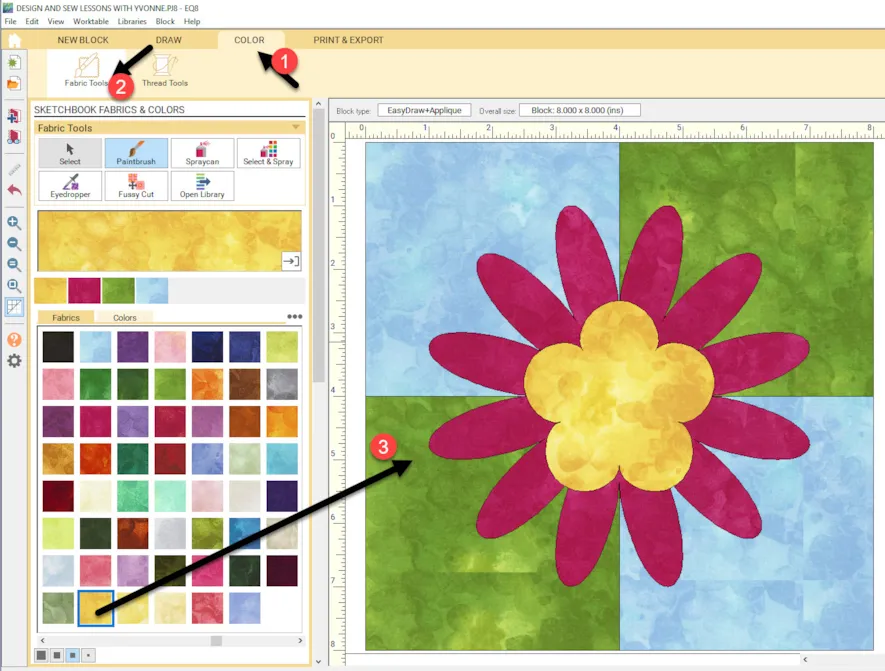
Click on the color tab at the top of the screen. Use the fabric tools to select your fabric then click once in each area to color the applique elements.
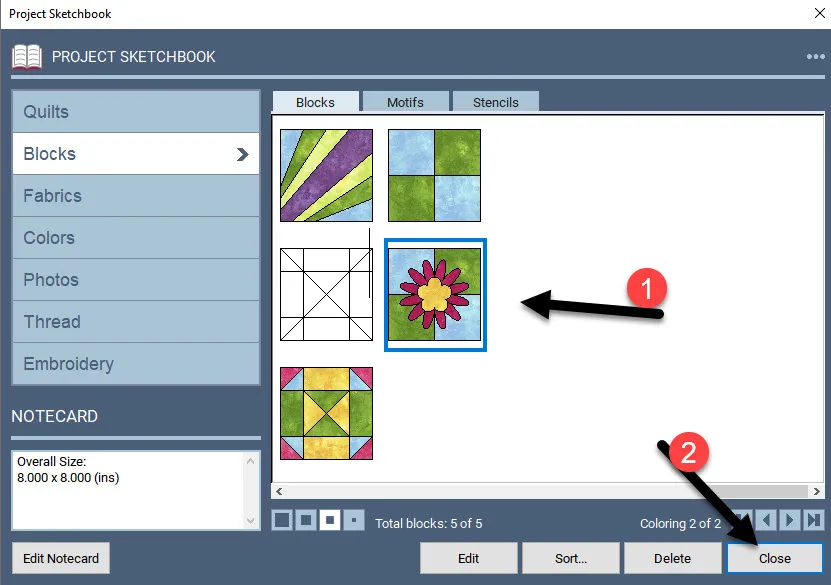
Before leaving this screen, open the view sketchbook![]() and make sure your saved design is in the sketchbook.
and make sure your saved design is in the sketchbook.
Although it is not absolutely necessary to check the sketchbook each time if you are sure it has been saved, it is a good habit to double check the sketchbook.
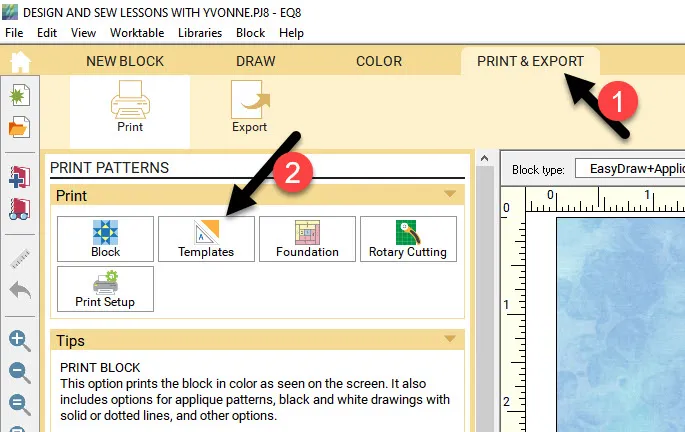
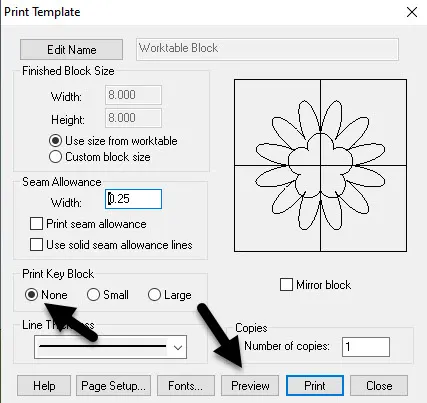
From the block worktable, click on ‘Print/Export’ tab at the top of the screen. Choose the ‘templates’ tool![]() from the print patterns box. We only need the template of the flower itself.
from the print patterns box. We only need the template of the flower itself.
In the print template box uncheck the set the print key block to ‘none’, uncheck the ‘print seam allowance’ and then click on ‘preview’ at the bottom of the box. Since I am not printing any seam allowance, I will use this as a fusible applique. If you want to do needle turn for the applique, you would need to keep the seam allowance checked on.
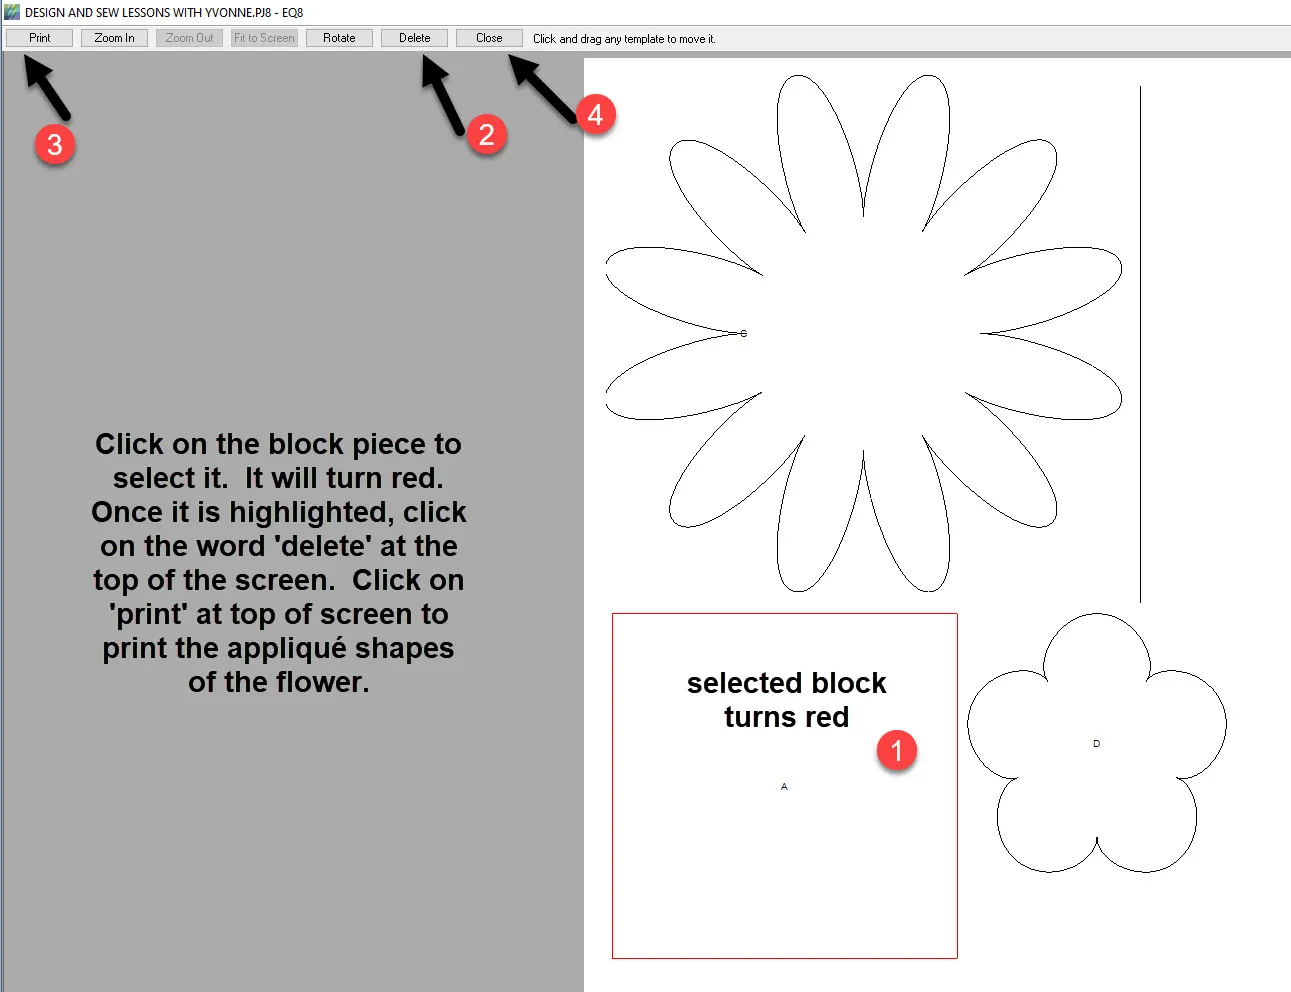
On the pattern box, click on the block to highlight/select it. Now click on Delete at the top of the page. We only need the flower elements as appliques. Click on print at the top of the screen to print the applique flower elements. Close the box when done printing.
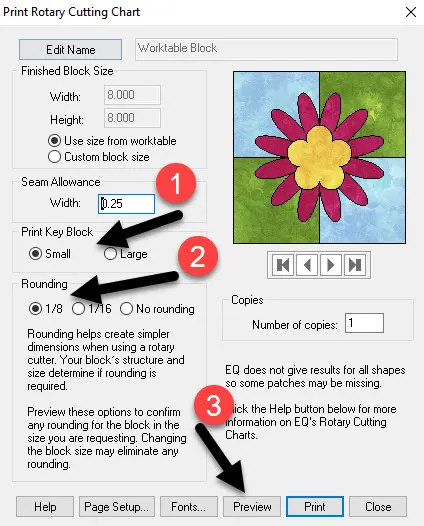
On the block worktable under the print and export tab, select the rotary cutting tool.
In the pop up box for rotary cutting, set the print key block to small and the rounding to 1/8 inch. Click on the ‘preview’ at the bottom of the box.
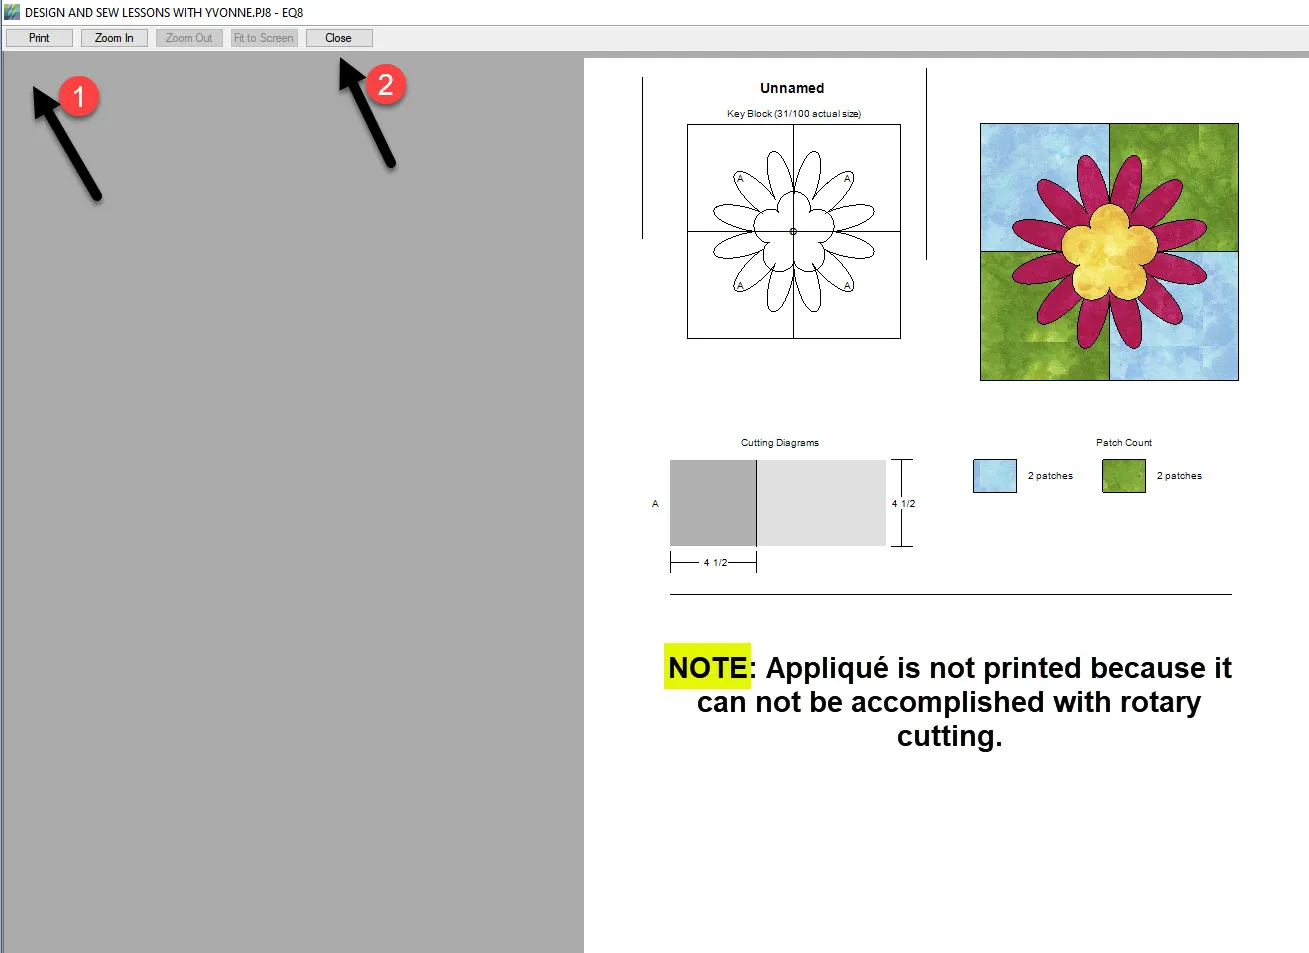
In the print pattern screen, click on the ‘Print’ to print out the cutting directions. Click on’ Close’ to close the print pattern box.
There are a total of five (5) blocks in the quilt layout of this 4 patch with applique so you need to cut 5 times the amount on the pattern cutting instructions.
Watch the video below and then upload your images and comments for this class. You may need to visit lesson 2 to see how to upload the images of your blocks for this class.
Watch a Video Lesson!
Click play to watch the video for this lesson.
Want to download the video to watch later? Click an option below:


