I spend a lot of time designing quilt blocks for piecing in Electric Quilt, but I also like the look of applique. The good news is that with EQ8, you can easily design your own applique blocks and motifs. And once you have designed it, you can use the tools in EQ8 to make it any size you would like. In this lesson, we will take an existing drawing and create an applique motif.
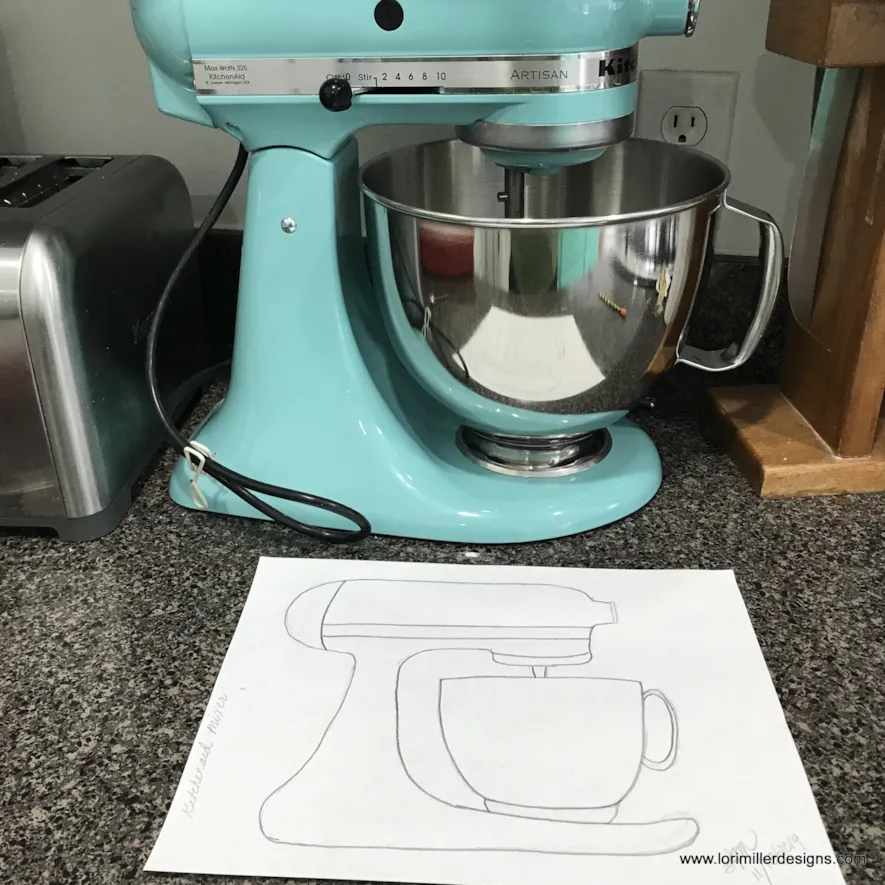
Last year for Christmas, I finally received a much coveted gift of a Kitchenaid Mixer. I always had a little hand mixer, but how I dreamed of mixing up cookies and goodies with a stand mixer. I decided I really wanted an applique motif of my mixer to use for kitchen related items like aprons and tea towels. So I sketched a picture of my wonderful mixer.
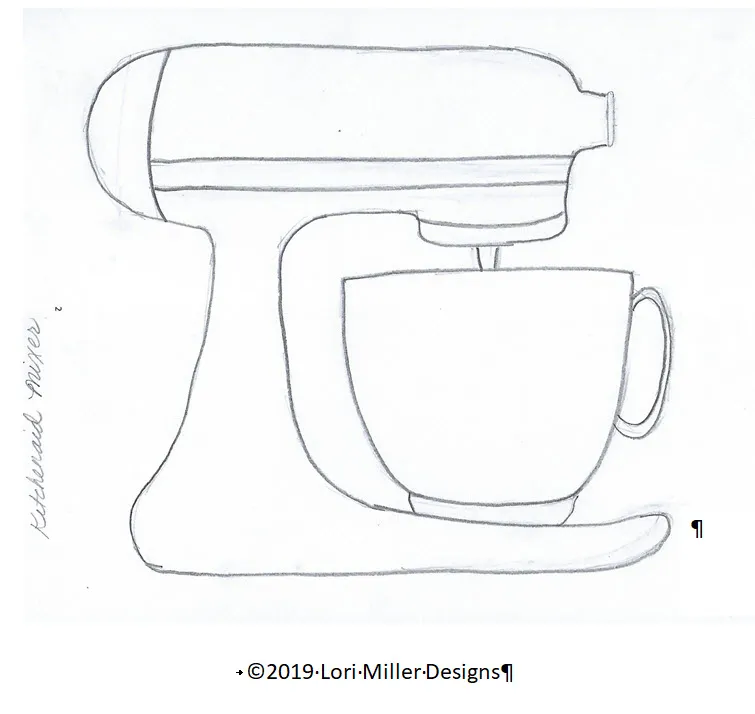
I scanned in my hand drawing to use to trace as a drawing guide.
Kitchenaid Mixer Applique Motif
Skillset: Beginner/ Advanced Beginner
Skill Builders:
- Trace a picture
- Draw an applique motif
- Right click on the hand drawn picture above and save as jpg file under My EQ8/Images or somewhere where you can find it later.
- Open EQ8.
- Let’s name the Project. The project name appears at the top left of the EQ8 Window. Right now the project says Untitled – EQ8.
- On the left side toolbar, click the New project button.

- On the Create a new project tab, type in the project name field Mixer Applique.
- Click OK. The box will close. Notice the project name Untitled has been replaced with Mixer Applique.
- Go to the Block Worktable
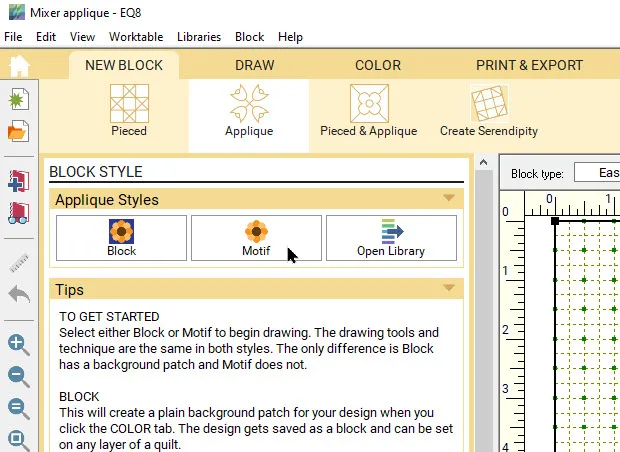
- New Block, Applique, Motif.
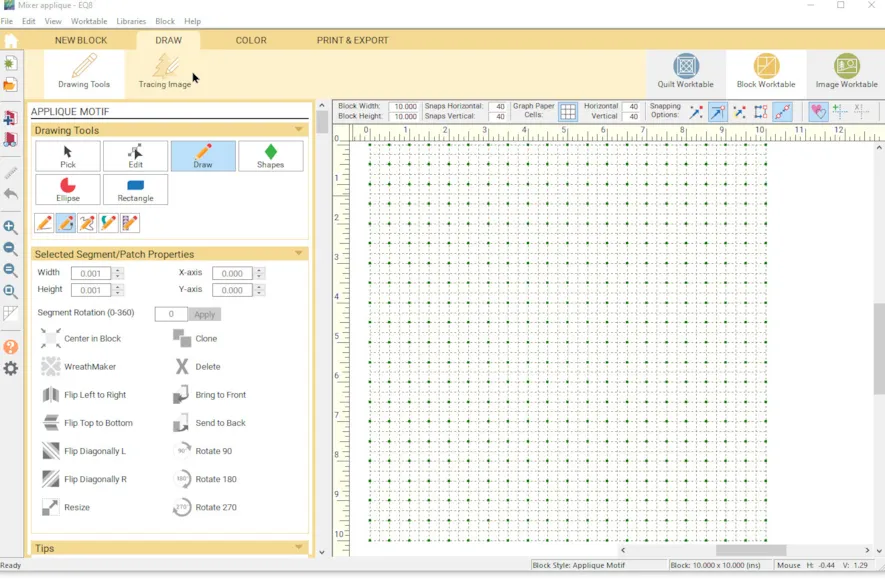
- In the precision bar, make sure the block width and height is 8″ x 8″.
- This will bring up the Applique Motif palette tools. Under the DRAW tab, find Tracing Image and select it.
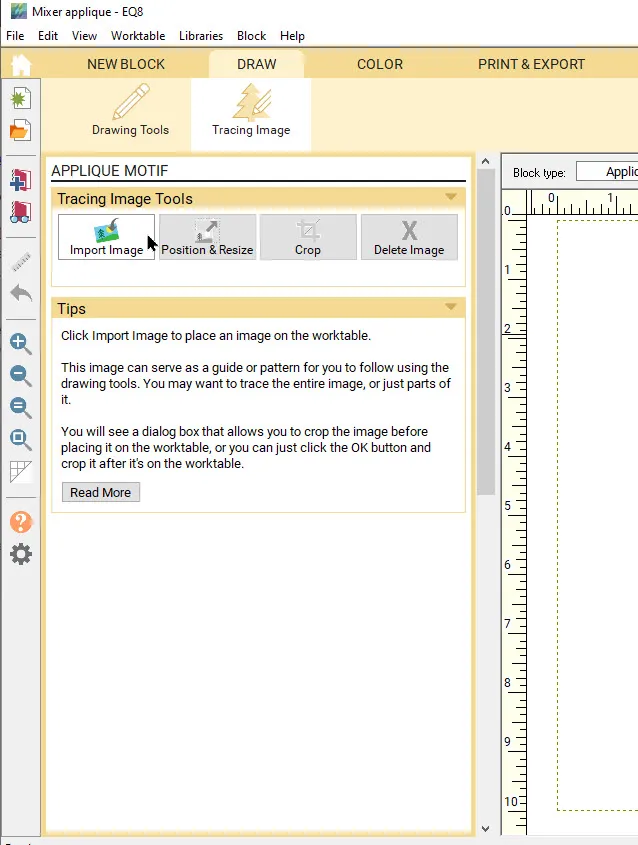
- Click on Import image and navigate to where you stored the kitchenaid mixer drawing and select it.
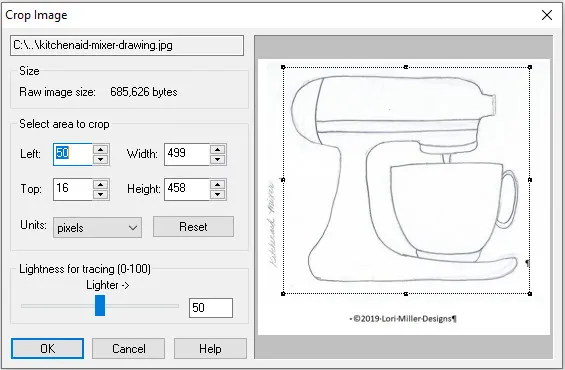
- A Crop Image window will display. Pull the dotted lines that frame the drawing to crop the picture close to the mixer. Click OK.
- You will now be on the Position and Resize button. I used an image lightness for tracing of 25%.
- Go to the Drawing Tools tab. If your drawing is not dark enough to see to trace, go back to the Tracing tab and adjust the image lightness until you like it.
- Hint: Before we start drawing, lets use some critical thinking when tracing the mixer. Consider the layers of the applique, which pieces are underneath and which items are on top of the different applique pieces. I am going to start with the large body of the mixer first. As I trace, I will extend past some edges so that when we layer the pieces, there are no gaps between the pieces.
- Select the Draw pencil button
 , then choose the Freehand drawing tool
  . Click and hold to anchor the initial node and then drag the mouse around on the line. I click periodically as I trace and drag to create a curvy line with multiple segments, especially where the lines change direction to follow the outline of the drawing. You may need to try a couple of times to get the hang of using the freehand tool. Hint: Don’t forget about the undo button. And don’t worry too much if it is not exactly on the lines, we can do some adjustments with the edit tool later.
 - Click the link to see me trace around the main body of the mixer. Trace Mixer outline
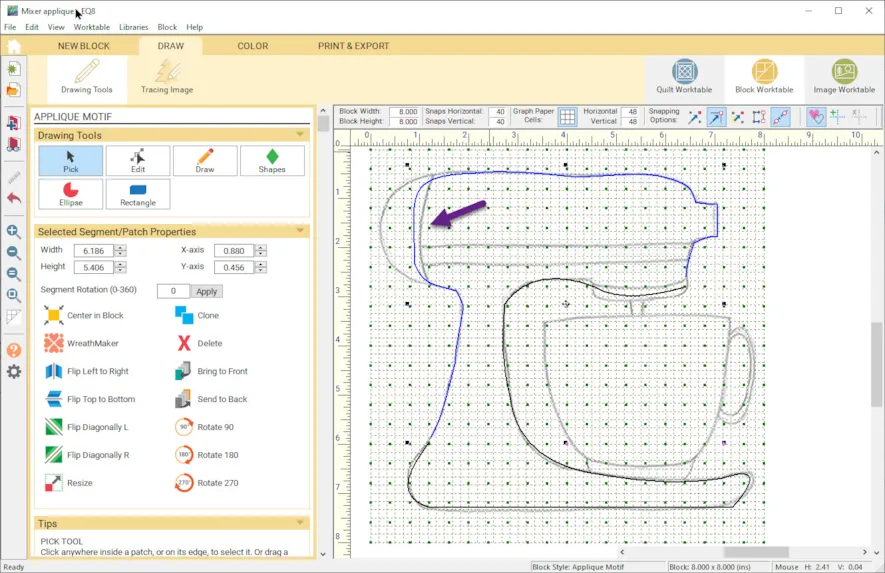
- Take a look at my drawing. I extended a little into the back end of the mixer that will layer under the end cap. You can use the Pick button
 to make select the outline you have drawn. It should show a blue line when selected. If the whole outline is not BLUE, then zoom in to the drawing and use the freehand drawing tool to connect the lines.
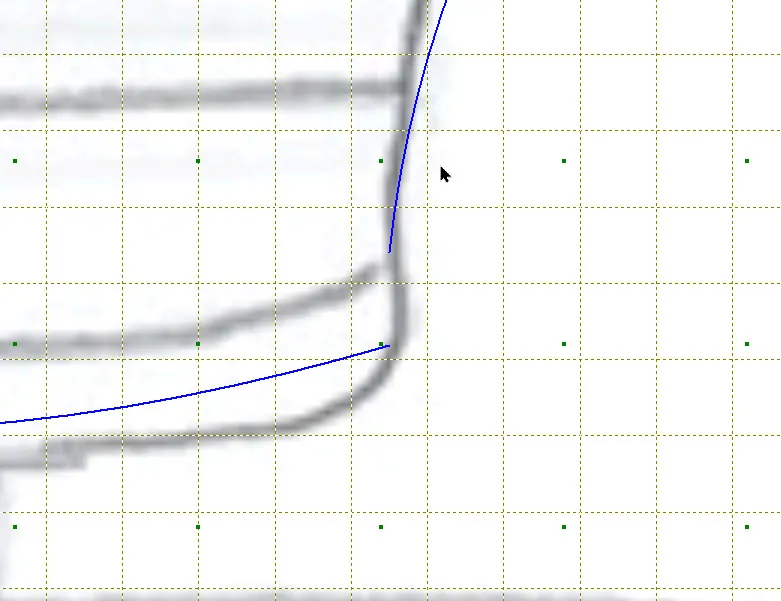
- In the picture above, I need to connect some lines as only the top half is blue. Here is a closeup of one area that needs to be connected. Once you have an enclosed motif, the whole motif will be blue AND the center will be opaque or filled in.
- Once you have the main body of the mixer drawn, you may need to adjust your lines to better align them along the lines of the drawing. In order to see your tracing lines, you may need to turn off the Hide/ Show Autofill button.
 Hint: Toggle this on and off as you are drawing to make sure you have closed motifs or can see the tracing lines.
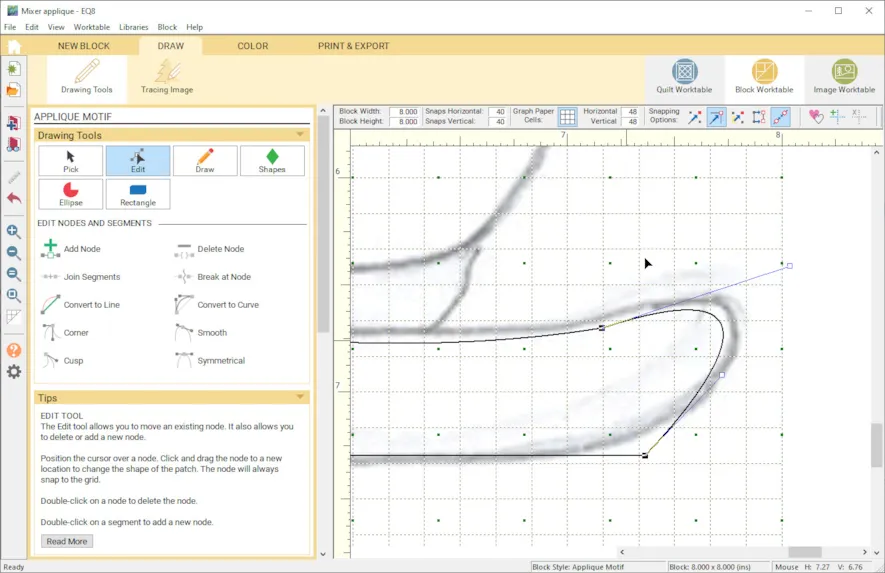
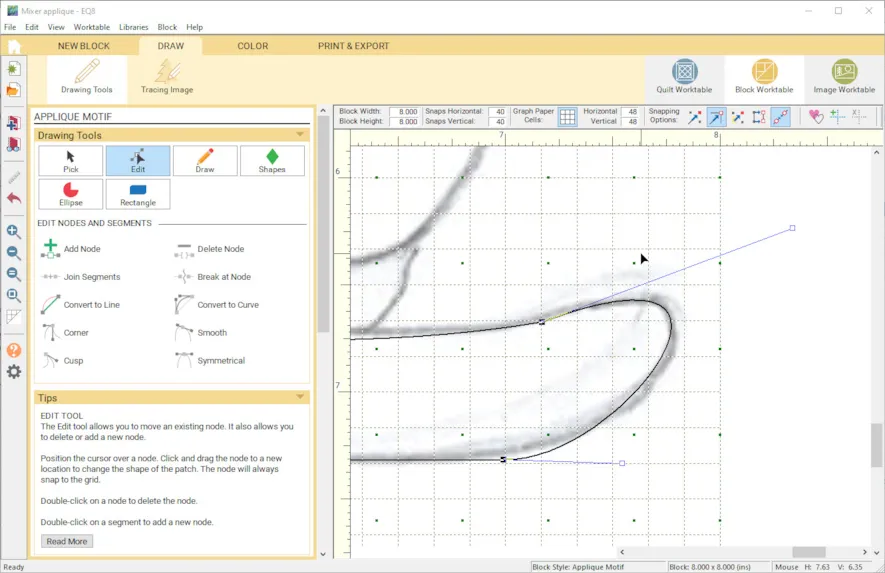
- Choose Edit button
 and click on the segment in the area that you want to adjust. You should see line segment highlighted with two handles. You can use the handles to move and adjust the nodes of the line segment to better match the drawing. This takes some practice, move the handles, move the notes and you will get the hang of the adjustments.
 - There is an option to add more nodes to the segment to allow more flexibility when adjusting the line shapes. To add a segment, Click the Edit button and click on a segment, then click on Add a Node.
 Practice a few times to see how your adjustments work. When you like the result, add your drawing to the sketchbook.
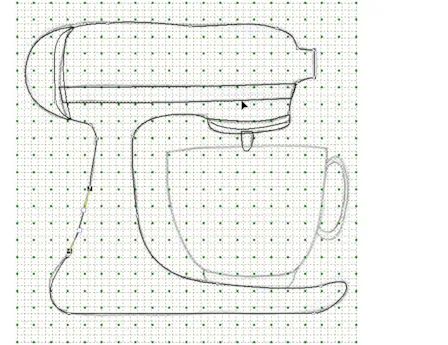
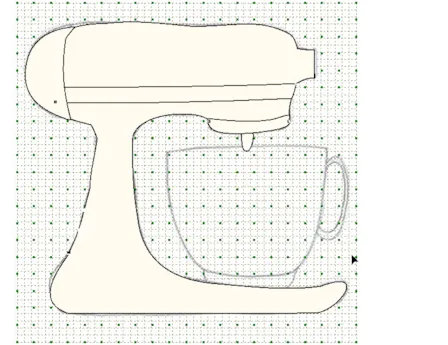
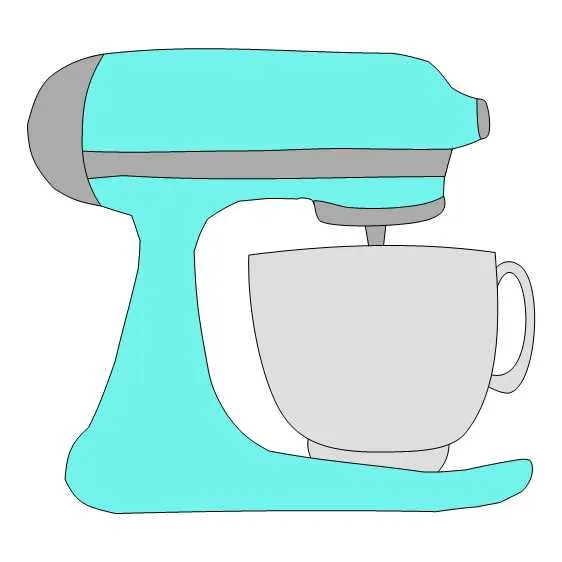
- Continue to draw each applique motif. As you draw each motif, add it to the sketchbook so you have a recent backup in case you need to step back to draw a motif again. Extend the shape if it will be covered by another motif to avoid gaps in the applique pieces. Use the Bring to Front or Send to Back tools while drawing to position the layers of the motifs. In the drawings above, the first drawing has autofill off and shows the overlaps of the shapes, the second drawing has autofill on and shows the motifs layered.
- Once you are satisfied you have drawn and adjusted all of the motifs, add to sketchbook.
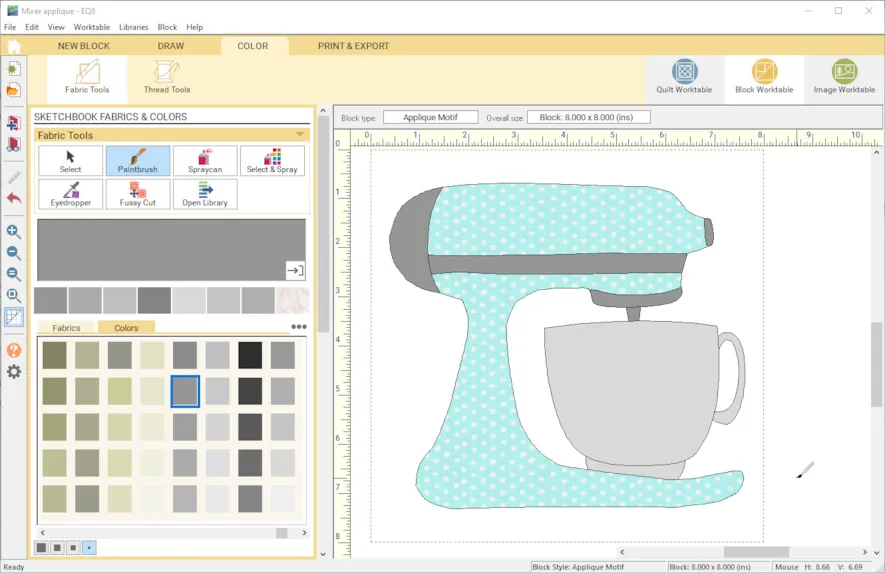
- Go to the Color tab and add colors or fabrics to your mixer.
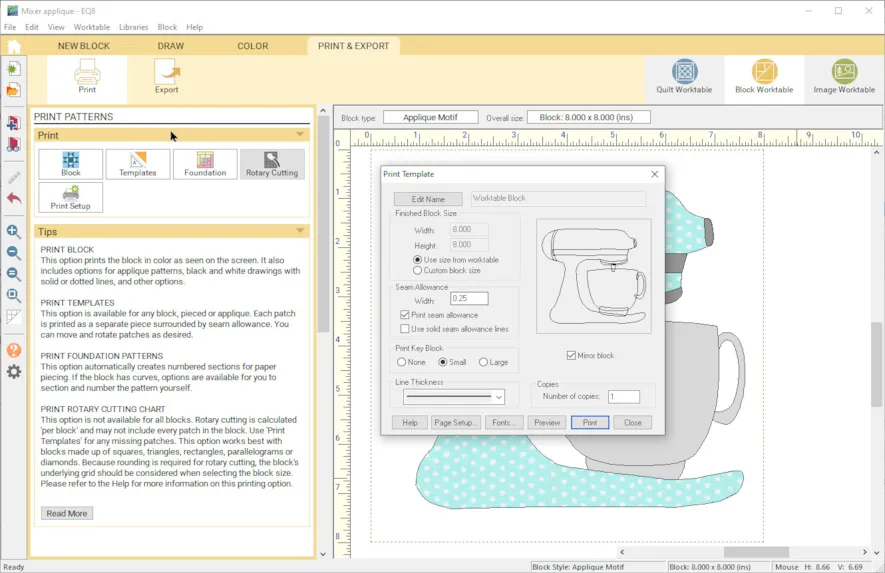
- Let’s take a look at printing the applique pieces. Go to the Print & Export tab, select Print, Templates.
- Since we are going to use a fusible backing to create these applique pieces, we do not want a seam allowance . We also want to mirror the motifs since we will draw them on the fusible backing to attach to the wrong side of the fabric. Uncheck the seam allowance box. Check Mirror block. Select to print a Large Key Block.
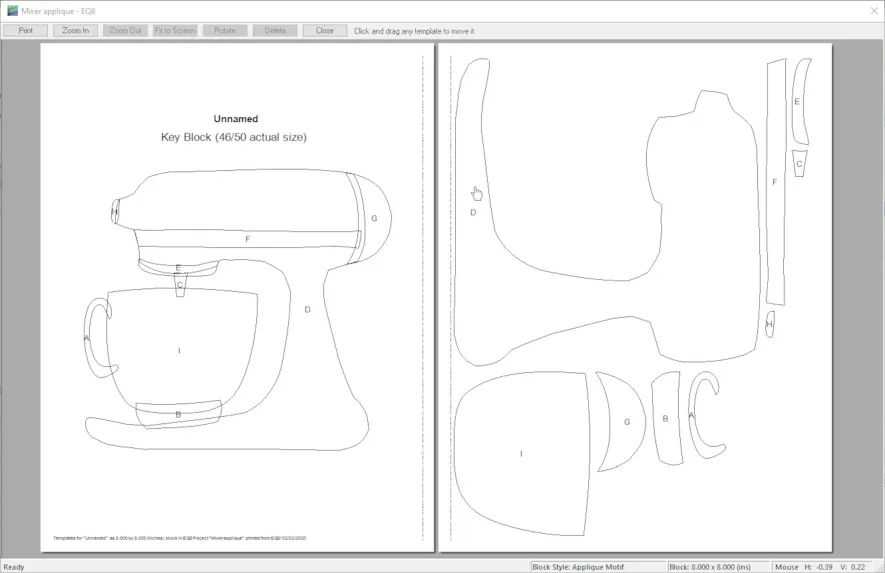
- Taking a look at the key block, you will find the applique pieces are in alphabetical order which corresponds to the order of adding the applique pieces, building them from the bottom up. then the next page to print is your actual applique templates. Remember: This was an 8″ block size, but you can resize your mixer to whatever you want with your EQ8 tools.
Congratulations! You have now created your own applique templates for the kitchenaid mixer. EQ8 provides the tools to create any applique from your hand drawn creations.
Now that you have designed this cute kitchen applique with EQ8, why not add this applique to something fun? You can find the applique templates and see an adorable apron where I added the applique on my Lori Miller Designs Blog
Questions or Feedback?
Lori J. Miller lives in Oxford, Michigan, where she designs, stitches and sews quilts and quilty things. She loves experimenting with fun colors and designs to make playful and clever products for the modern sewist. She loves designing using Electric Quilt 8. You can follow her quilting adventures on her blog at lorimillerdesigns.com or on instagram @lorimillerdesigns




02-25-2020
11:35 am
Great blog – the KitchenAid pattern is adorable!
02-25-2020
2:40 pm
Wonderful idea, I love my KitchenAid. Thanks for the instructions, I’ll reduce my design to make a pot holder.
03-01-2020
9:41 am
J’adore !! Je cherchais une manière de dessiner des éléments de cuisine. Maintenant c’est chose faite. Je dessine souvent sur papier.
Merci
Je suis Française.
03-01-2020
10:23 am
Nathalie,
Merci
J’espère que tu apprécies. I had to use a translator so hope that made sense.
Thank you. I hope you enjoy it.
04-02-2020
4:38 pm
Lori, this is so cute!! Now, if I wanted to make this into my embroidery machine, how would I go about doing that?
06-09-2021
6:27 pm
Carol,
I am not sure if you are asking how to create an embroidery machine applique or how to embroider this. If you want to create a machine applique, you can follow the same techniques. With so many different machines and embroidery software, I don’t have the expertise to help with creating embroidery. I hope you try the applique!
04-25-2020
3:14 pm
Thank you so much Lori for the super clear instructions… and the photos! I’m a really visual learner so that helped so much. I can’t believe that I’ve just created an applique design on my own computer… I think I might have to make something for my kitchen now!
Many thanks
Shelley (New Zealand)
12-28-2020
9:57 am
I have pes embroidery file of an elephant that I like too add too a block. can I do that in EQ8? I guess I can see what it looks
06-09-2021
6:30 pm
Rita, if you have the design with an exp extension, you can bring that into EQ8 to audition the embroidery on the quilt on layer 3. EQ8 cannot design or digitize embroidery. But I find that I can bring in the exp version of a design and get a good idea of how the quilt will look.
06-08-2021
9:26 am
Great tutorial, Lori. I am trying to create a butterfly from scratch using the Edyta Sitar Butterfly Die from Accuquilt. I have imported the jpg file into the block worktable but I need to resize it. Is there anyway I can lock the proportions when I resize it?
06-09-2021
6:18 pm
Shawn, \When you go to resize the picture you have brought in, check the box that says MAINTAIN ASPECT RATIO. I think that is what you are looking for. Try it! Thanks, Lori
05-16-2023
7:08 am
I often have this issue as well. When you are making a motif, you can resize the motif to any size on the quilt worktable. However, if you are making a block, when you resize the block, the applique gets resized as well. One way to fix this is to select all applique elements, write down the size of all the elements selected together, then resize the block. For example, if you draw a 5″ circle on a 10″ block, hilight the applique and the size will be 5 x 5. Once you put the applique into the resized block, change the size of all the selected elements to the same size they were in the origional block. For example, of you make the block size 20 x 20, the applique will resize automatically to keep the same proportion. In this case, the circle will change to a 10″ circle. In the 20″ block, hilight the applique circle, and change the size to 5 x 5. This is how I resize my blocks, as I don’t like using motifs for applique. It takes a little getting used to, but with loads of repetition, it has finally stuck in my head that I need to select all the applique, write down the size on the origional block, then change the size in the new block. It’s not hard once you find this secret!