|
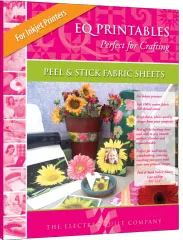
Our Peel & Stick Inkjet Fabric is on sale right now! It is 40% off! (Use the code CRAFTY) The sale is today only! | |
|
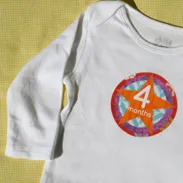
There are so many fun projects you can do with Peel & Stick Inkjet Fabric but one of my favorites is onsie stickers. You may have seen these in baby photos. There is a sticker for each month. You put the sticker on the baby’s onsie and take a photo on the monthly “birthday”. |
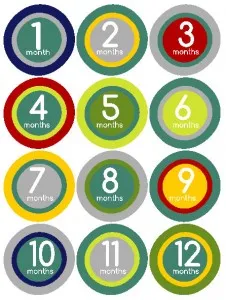
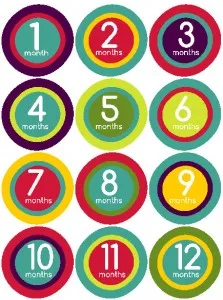
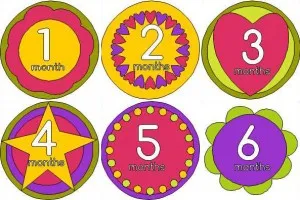
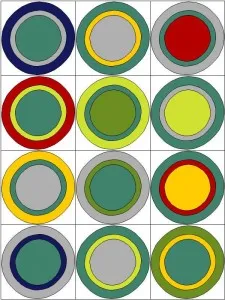
Here are some I made in EQ7! You can download the EQ7 file here.
(With EQ you can change the color, size, font, and there are 6 more blocks to choose from.)
Or you can download the PDF versions of these too!
|
Get the Grey PDF version here | |
|
or the Pink PDF version here. |
|
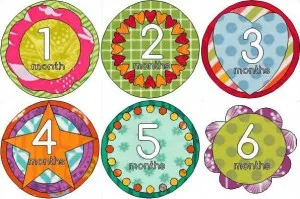
As previously mentioned, there are more blocks to choose from in the EQ7 project. | |
|
And of course, you can recolor, change the font, edit the blocks, add more months, and more |
And now, in case you’d like to know, here is how I did this in EQ7.
First, I drew the blocks.
Click Worktable > Work on Block
Block > New Block > EasyDraw + PatchDraw > click the Applique tab at the bottom of your screen
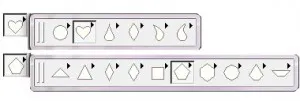
Use the Oval ![]() and Polygon
and Polygon ![]() tool to draw your shapes. Click on the black triangles to see that they both have fly out menus that contain more shapes.
tool to draw your shapes. Click on the black triangles to see that they both have fly out menus that contain more shapes.
Also helpful are the Send to Back and Bring to Front buttons (pink) and the Center button (purple).
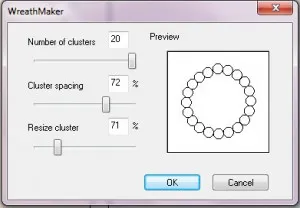
With a block like “2 months” below, I used another tool – The Wreathmaker (orange).
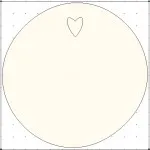
First I drew my circle and one small heart.
Then, I clicked the Wreathmaker ![]() tool. You can adjust all the sliders and the preview will show how it effects the block. If you don’t like your results, hit undo and try again (and again and again, if you’d like).
tool. You can adjust all the sliders and the preview will show how it effects the block. If you don’t like your results, hit undo and try again (and again and again, if you’d like).
Each time you are done with a block, don’t forget to click Add to Sketchbook ![]() to save it.
to save it.
Ok, so now let’s start on the “quilt”.
Click Worktable > Work on Quilt
Quilt > New Quilt > Horizontal
Click your Layout tab at the bottom of your screen.
Make your quilt 3 x 4 (=12 for 12 months)
Click the Borders tab at the bottom of your screen.
Delete any borders.
Click the Layout tab at the bottom of your screen.
Make the finished size of your blocks 2.75 x 2.75 (This makes your quilt 8.25 x 11. This is important because you want to print the “quilt” on a piece of Peel & Stick Inkjet Fabric which is 8.5 x 11)
Click the Layout tab at the bottom of your screen.
Click the Set Block ![]() tool and click in a square on the quilt.
tool and click in a square on the quilt.
Click the Layer 2 tab at the bottom of your screen.
Click the Set Applique Text ![]() tool.
tool.
Hold down the SHIFT key on your keyboard and drag out a text box.
You can use the Paintbrush ![]() tool to change the color or fabric.
tool to change the color or fabric.
Use the Adjust ![]() tool to change the size and location on the text.
tool to change the size and location on the text.
Don’t forget to Add to Sketchbook ![]() when you’re done.
when you’re done.
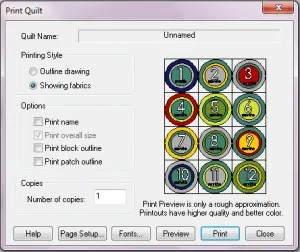
Click File > Print > Quilt
Uncheck all the boxes under Options.
If you are printing on Peel & Stick Inkjet Fabric change your printer settings to thick paper, if possible.
Then, just cut out the circles, and you’re done! They make a great baby shower gift ![]()
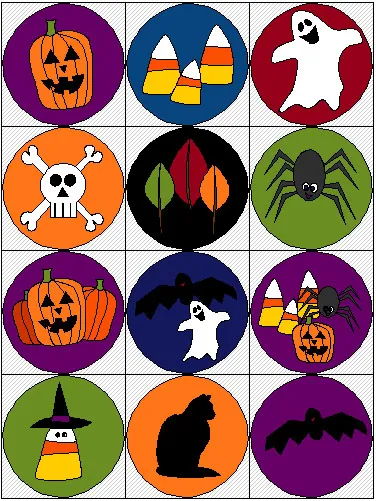
BUT WAIT…THERE’S MORE! You can also download these cute Halloween Peel & Stick Inkjet Fabric printouts too! Of course, with EQ7 you can recolor, resize, move, layer, etc.
You can download this EQ7 project here.
They would work for onsies but would be great for lots of other fun things too!
If this inspires you to make something, let us know! Email photos to Heidi@electricquilt.com.






10-02-2014
12:55 am
wow – this ist a good idea, thank you for sharing
08-03-2015
11:32 am
What is supposed to download, please?
I have a series of circles but no designs in Blocks. In Quilts the designs are shown but I do ‘get’ what I then do.
Sorry still struggling to learn to use EQ7/Stitch…
08-04-2015
9:15 am
Hi Toni,
These “quilts” are made to print out on Peel & Stick fabric to use as fabric stickers. So you would open the quilt, make any changes you’d like (recolor or whatnot), then click File > Print > Quilt. It is already sized to fit on a piece of Peel & Stick (or a normal piece of paper). Does that help?
Thanks,
Heidi