This year’s QuiltCon 2023 Community Outreach Challenge is to create quilts that show a color shift, or gradient, in the piecing. This is a fun challenge to play with in EQ8 because it’s easy to add gradated colors, and of course, play with lots of different design ideas!
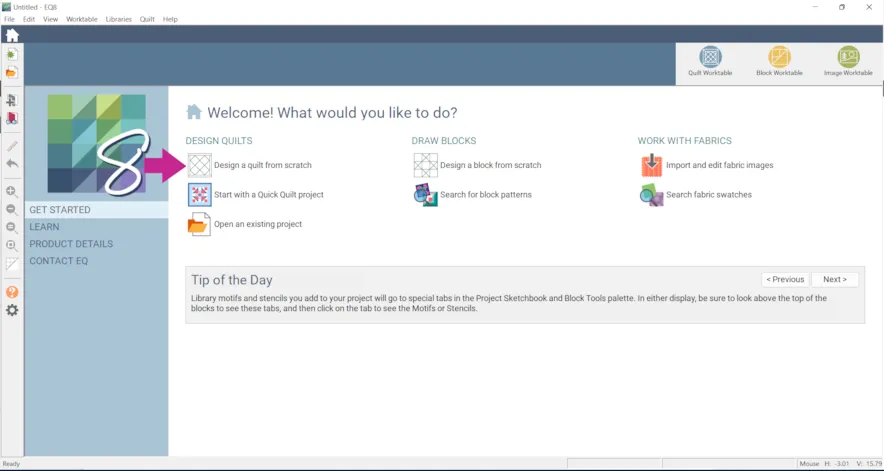
- Open EQ8 and click Design a quilt from scratch
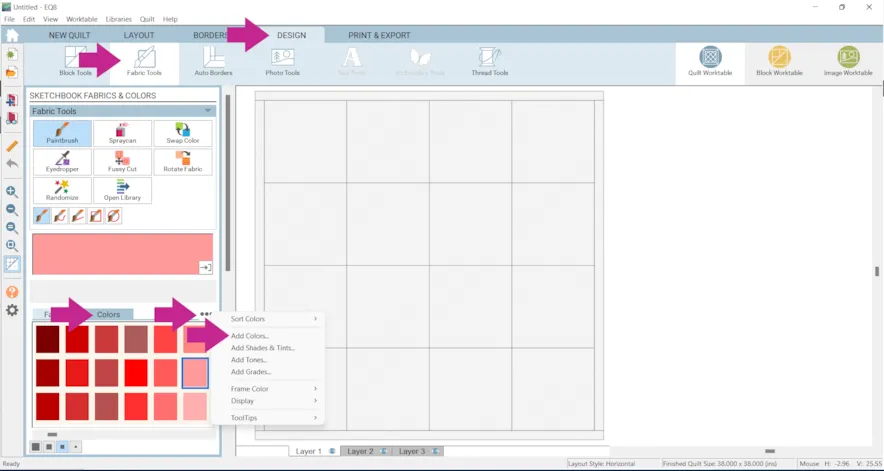
- Click the DESIGN tab > Fabric Tools > Colors tab
- Click the three dots and choose Add Colors…
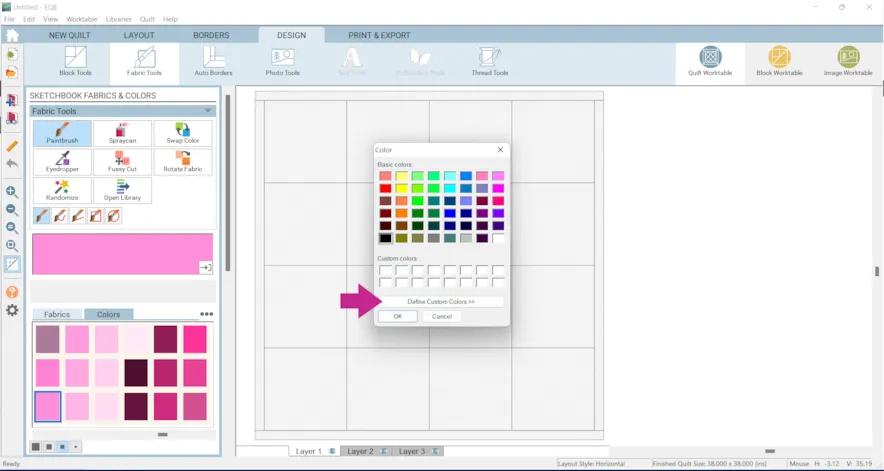
- Click Define Custom Colors >>>
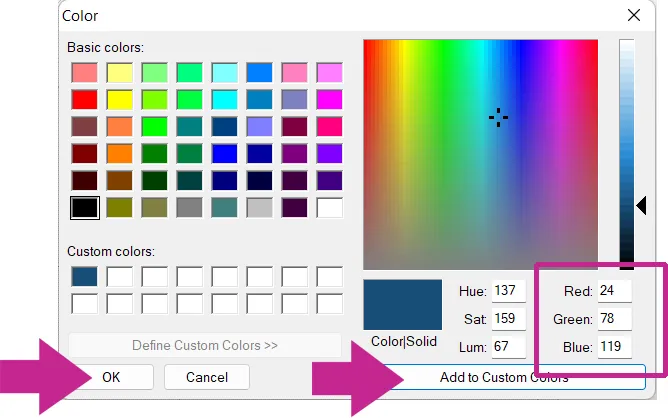
 The dark-teal RGB value is:
R: 24
G: 78
B: 119 - Enter those numbers as shown.
- Click Add to Custom Colors.
- Click OK
- Repeat for these other three colors. The lime-green RGB value is:
R: 217
G: 237
B: 146

The eggplant-purple RGB value is:
R: 70
G: 17
B: 106
The pink RGB value is:
R: 234
G: 105
B: 139

- Scroll to the end of all your colors and you’ll see the new colors we added! (You’ll also see some whites but you can ignore those.)
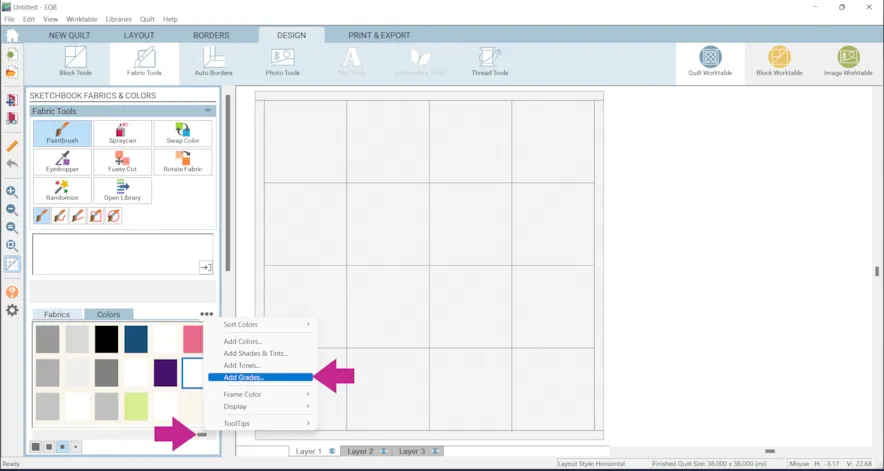
- Click the three dots and choose Add Grades…
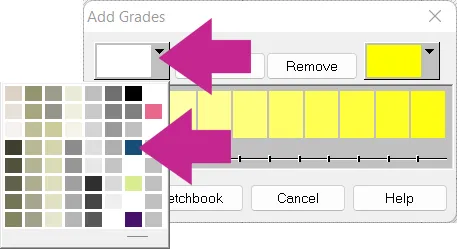
- Click the black triangle to see more colors, scroll to the end and choose the dark teal.
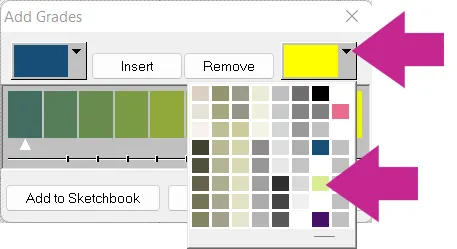
- Click the second black triangle to see more colors, scroll to the end and choose the lime green.
- Click Add to Sketchbook
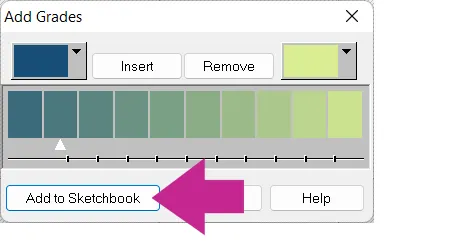
Want to add more or fewer colors? Click the Insert or Remove buttons. Here is more information. - Repeat steps 10-13 for Eggplant Purple and Pink. You should now see the gradient colors at the end of the original default colors, but the four colors we first added are not with the gradients, so let’s sort them.
- Click the three dots > Sort Colors > Manual…
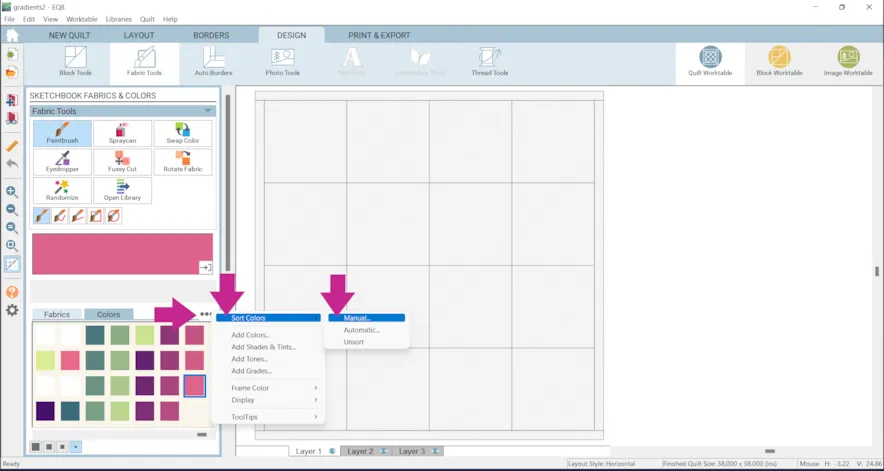
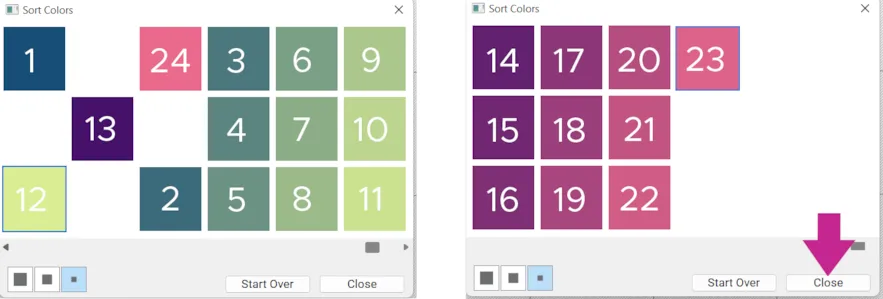
- Scroll to the end of the colors and click on the colors in the order shown below.
- When you are done, click Close.
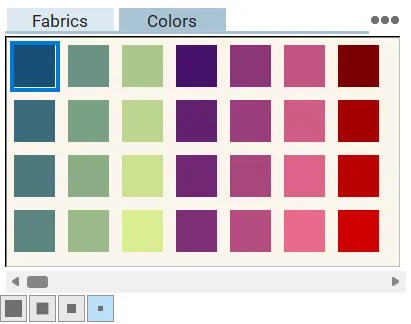
 Your Colors palette should now look like this.
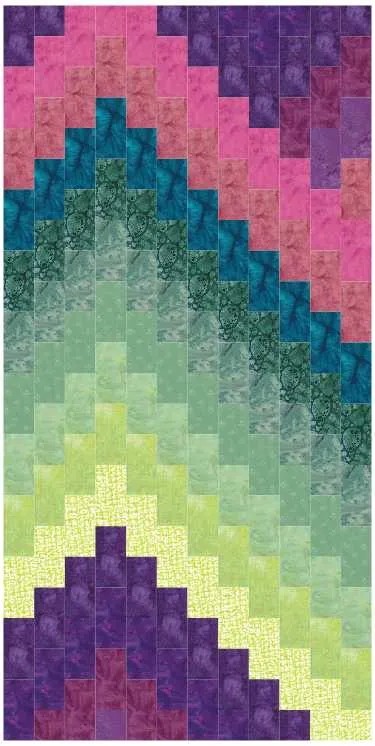
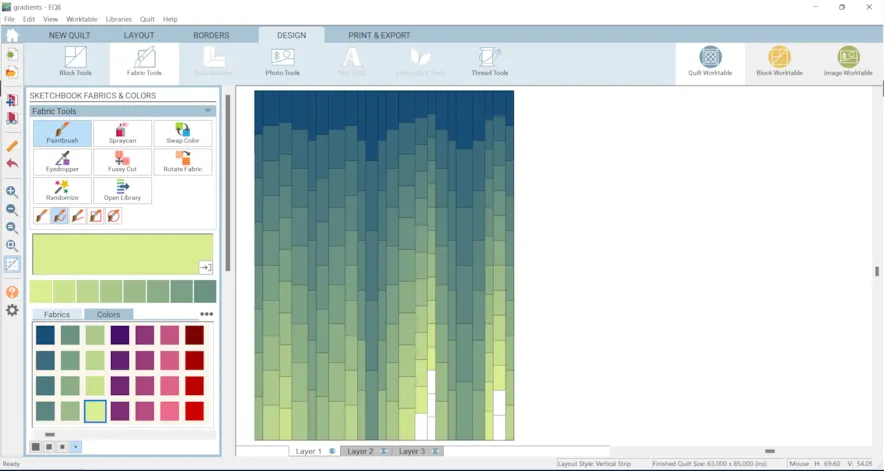
More about display settings if you’d like to change the size of your colors. Now let’s design some quilts! If you’re designing something with the intent to submit it to the QuiltCon 2023 Community Outreach Challenge, please be sure to read all of their rules. (The following examples may not follow all of their rules.) First, I tried the gradients in a bargello quilt. Here is a past Design & Discover to see how to design one. - Once I had created the layout I started coloring with my gradients. You can do each piece at a time but it may be easier to use one of the Paintbrush Subtools.
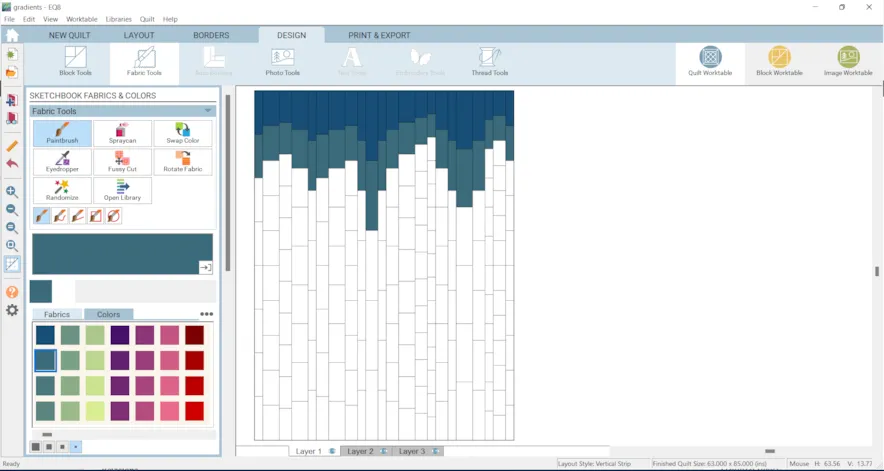
However, I got to this point and ran out of colors. So, let’s add some more!
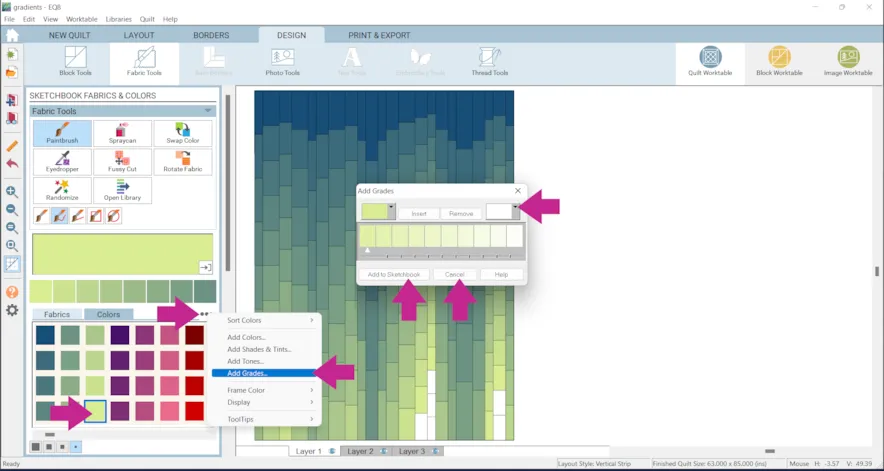
- Click on the lime-green swatch.
- Click the three dots > Add Grades…
- Your first box will already have the lime-green color selected. Choose another color for the second box. I choose white.
- Click Add to Sketchbook.
- Click Close.
- If you’d like, you can resort your colors.
- Now you can finish coloring your quilt.
- When you are done, experiment with Hide/show patch lines
- Click Add to Project Sketchbook
 . If the project is unnamed EQ8 will prompt you to do so. (To be saved, your item needs to be in the Sketchbook AND your project needs to be named. Here is more information.)
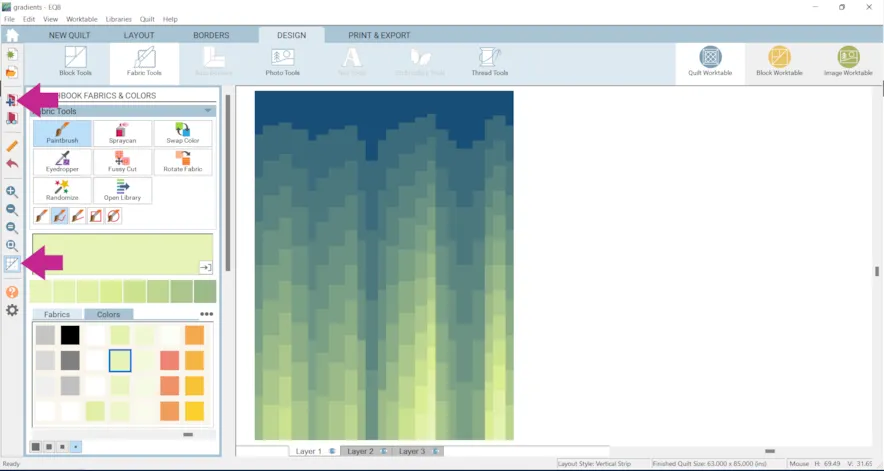
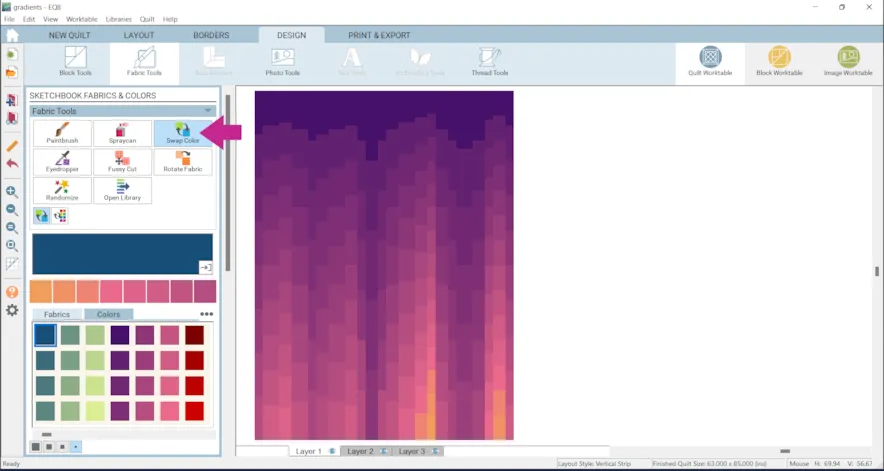
- Now use the Swap Color tool to recolor the whole quilt in just a few seconds.
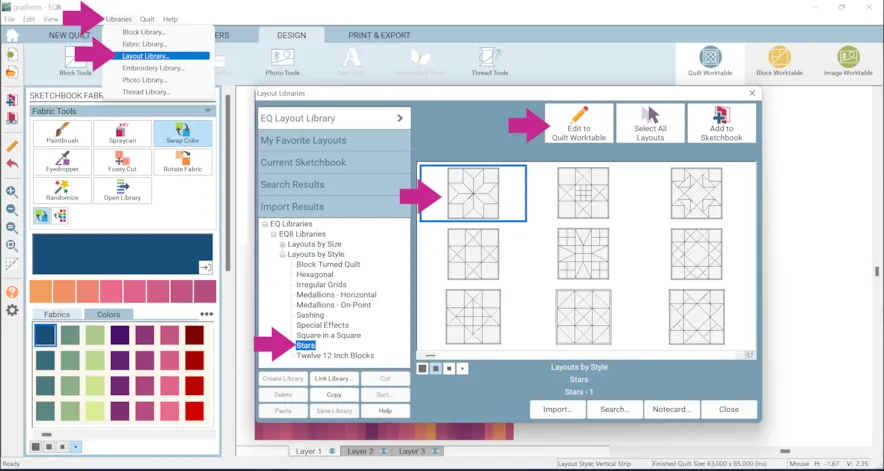
For the next example we’ll use a quilt from the Layout Library. - Click Libraries > Layout Library > Layouts by Style > Stars
- Click on the first one Stars – 1
- Click Edit to Quilt Worktable
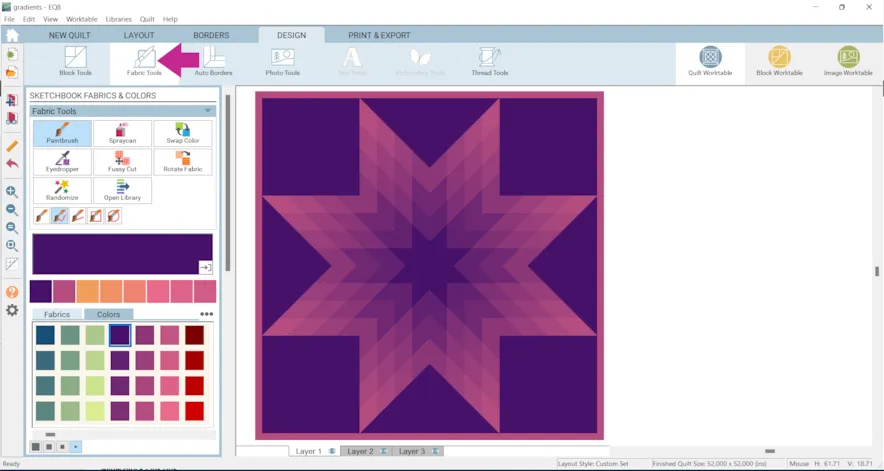
If you see a blank screen turn your patch lines back on. - Click Block Tools > Set Block and place a block into the layout. Sixteen Patch is shown in the example. If you need more help with this see how to get a block from the Library.

- Click Fabric Tools and recolor as you would like.
- Don’t forget to click Add to Project Sketchbook
 for anything you’d like to save.
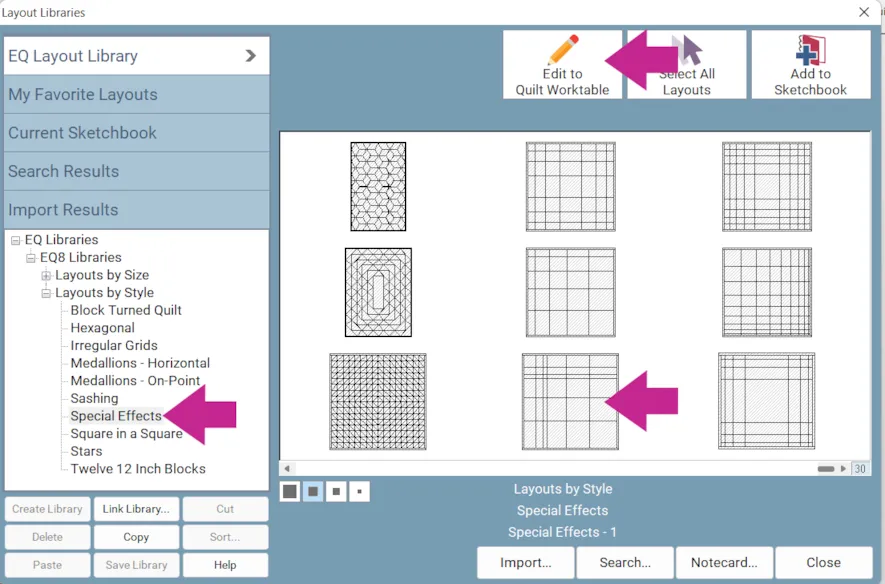
In the Layout Library you may also want to try layouts from other styles, like Special Effects. - Click Libraries > Layout Library > Layouts by Style > click on the layout you want
- Click Edit to Quilt Worktable
Here are a few examples…
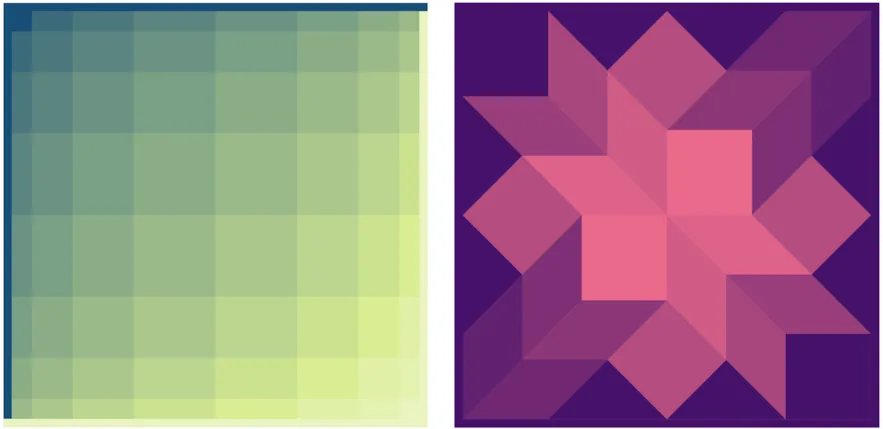
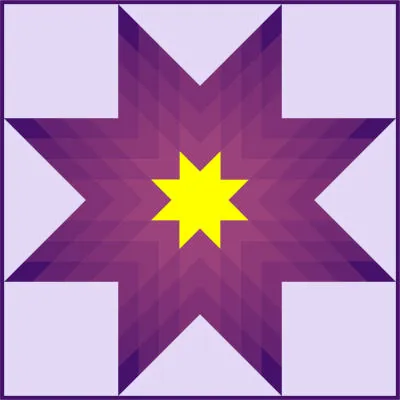
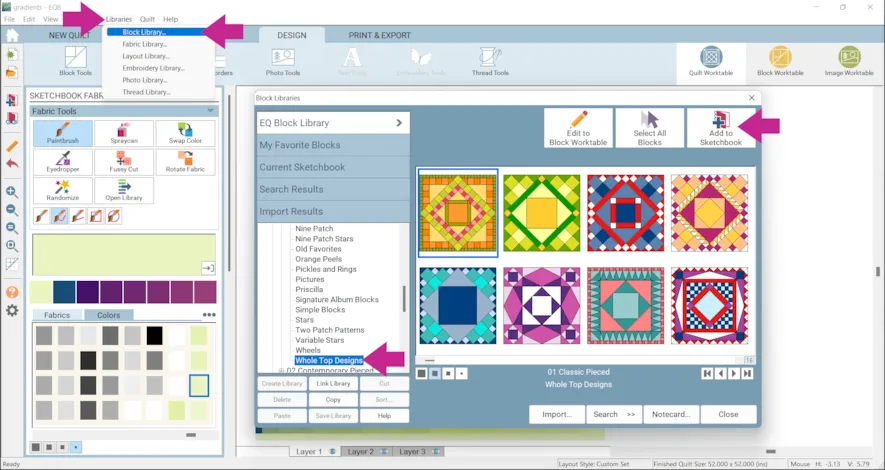
The last example is using blocks from the Whole Top Designs style in the Block Library. - Click Libraries > Block Library > 01 Classic Pieced > Whole Top Designs
- Click on any block(s) you’d like and click Add to Sketchbook.
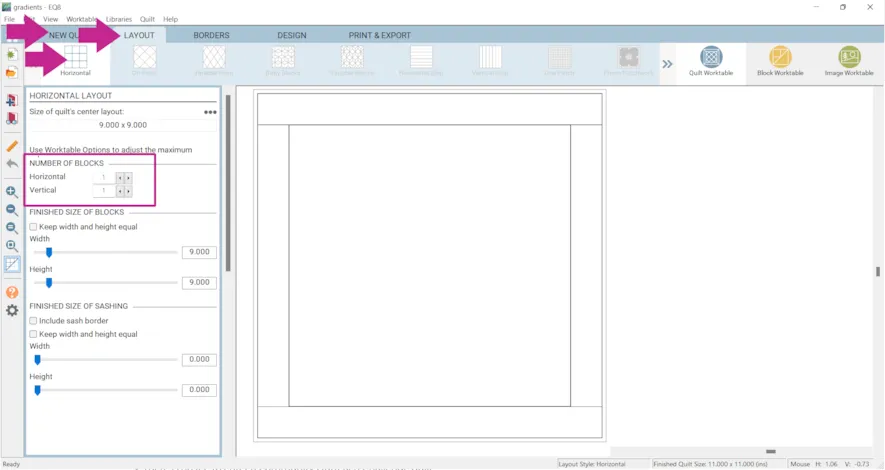
- Click NEW QUILT > Horizontal
- Click LAYOUT
- Under NUMBER OF BLOCKS enter:
- Horizontal: 1
Vertical: 1
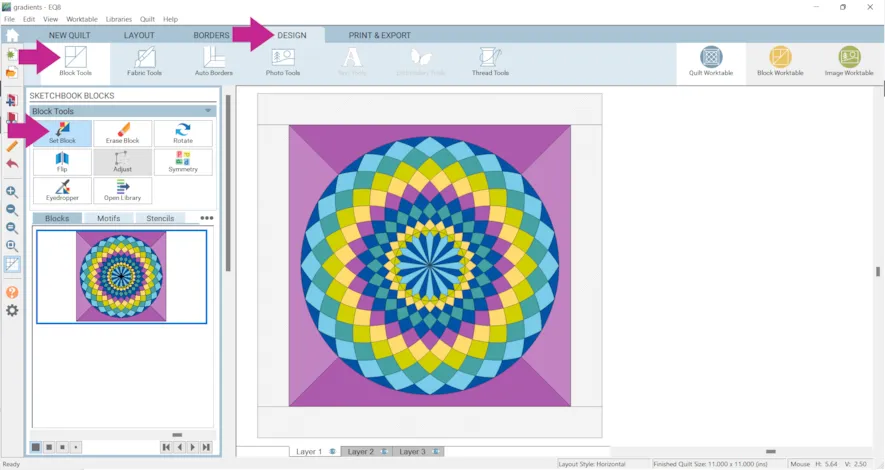
- Click the DESIGN tab > Block Tools > Set Block
- Click on the block and click to set it in the quilt.
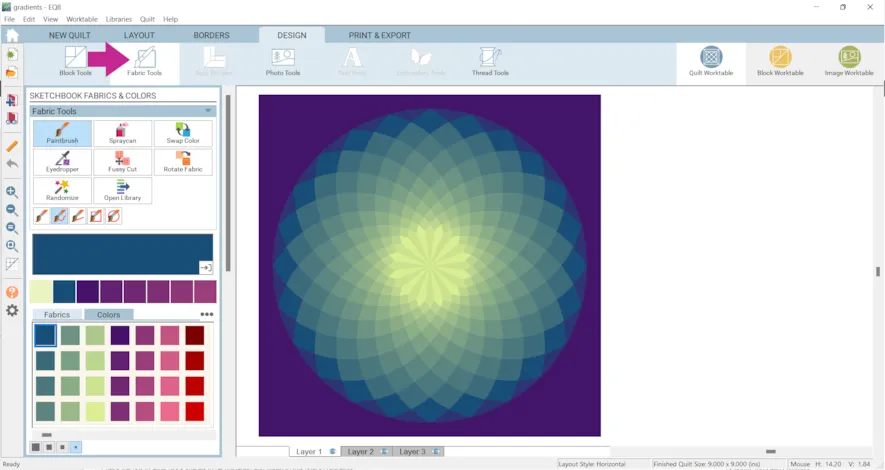
- Click on Fabric Tools and recolor your quilt.
- Don’t forget to Add to Project Sketchbook
 when you want to save something!
Here are a few other examples.

What if you want to try to find real fabrics to match all these gradients?
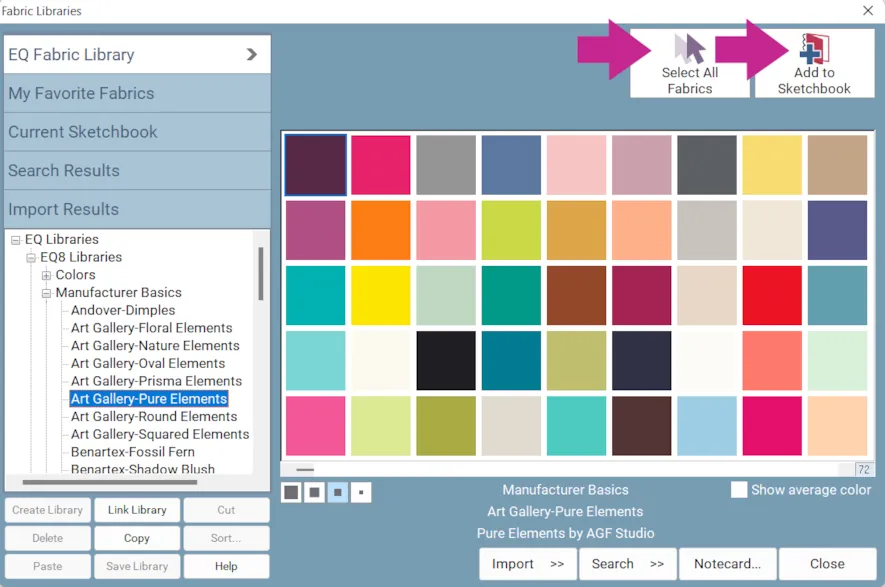
We’ll be using the Randomize Tool to turn the solid colors into fabrics. The Randomize Tool replaces each color with the closest fabric from the current Sketchbook. However, because I want all my fabrics to be solids I’m going to add lots of solid fabrics (the more fabrics EQ8 has to choose from that are in the Project Sketchbook, the closer a match the Randomize Tool will find.) and delete the default fabrics. - Open the Fabric Library > Manufacturer Basics
Click Art Gallery – Pure Elements > Select All Fabrics > Add to Sketchbook
Click Moda – Bella Solids > Select All Fabrics > Add to Sketchbook
Click RJR - Cotton Supreme Solids > Select All Fabrics > Add to Sketchbook
Click Robert Kaufman – Kona Cotton I > Select All Fabrics > Add to Sketchbook
Click Robert Kaufman – Kona Cotton II > Select All Fabrics > Add to Sketchbook
Feel free to add more too, if you’d like!
Click Close when you are done.
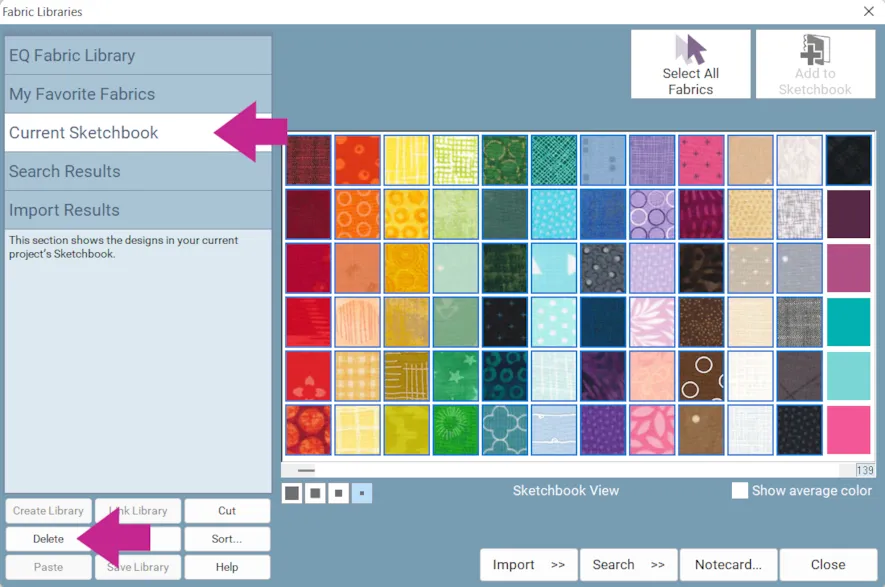
- Click Current Sketchbook
- Hold down the Shift key on your keyboard and click on the first and last of the default fabrics to select them.
- Click the Delete button.
- You will see a message that says, “Delete selected items. OK?” Click Yes.
- Click Close.
- Click View Project Sketchbook > click on a quilt you would like to see fabrics for > click Edit.
- Click Fabric Tools > Radomize > Map to Fabrics and click on the quilt.
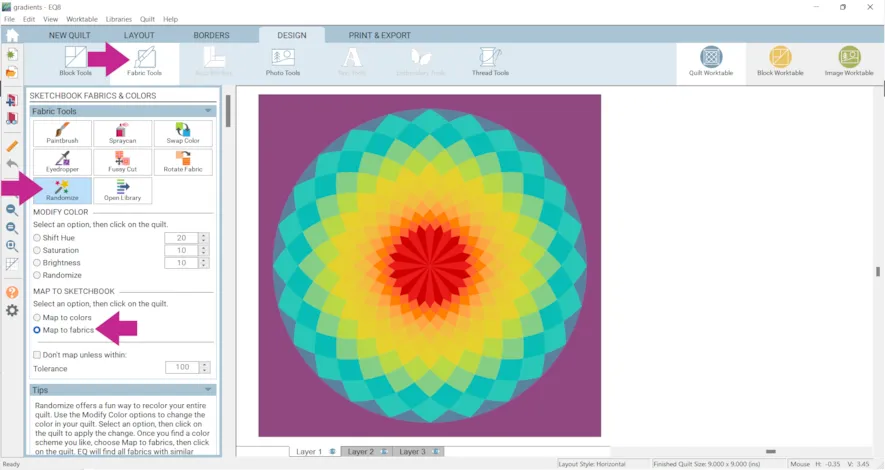
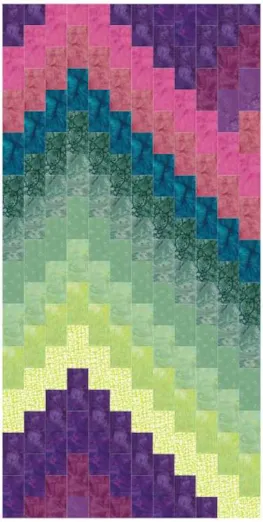
The quilt below is shown in fabrics. EQ8 did a pretty good job, but the two aqua fabrics towards the edge are too close for me so I did change one to be a little darker.
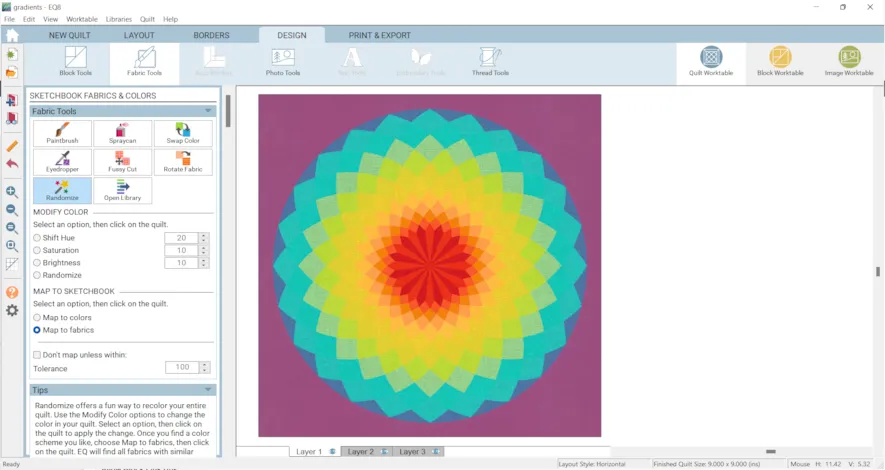
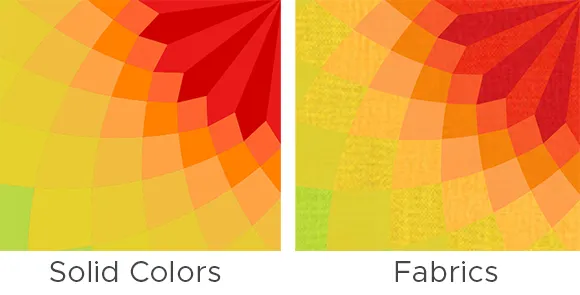
Below is a close up of the quilt with solid colors and with fabrics. You can hardly tell a difference except that the quilt colored with fabrics has a little more texture.
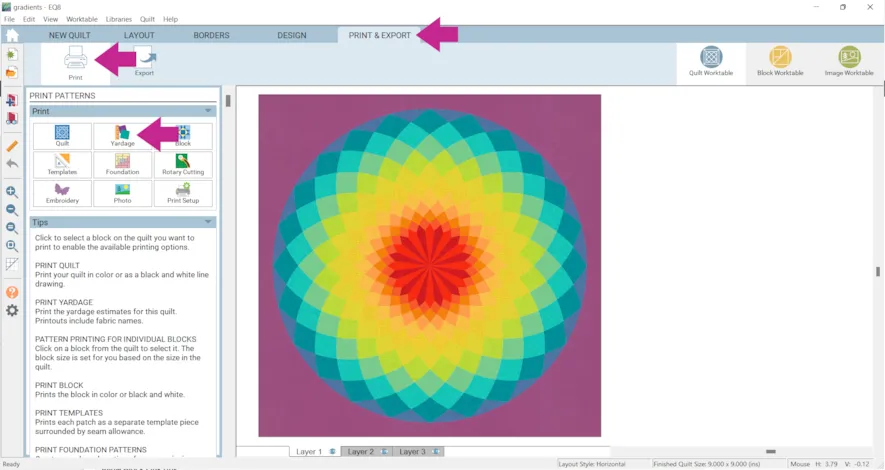
- Click the PRINT & EXPORT tab > Print > Yardage > Preview
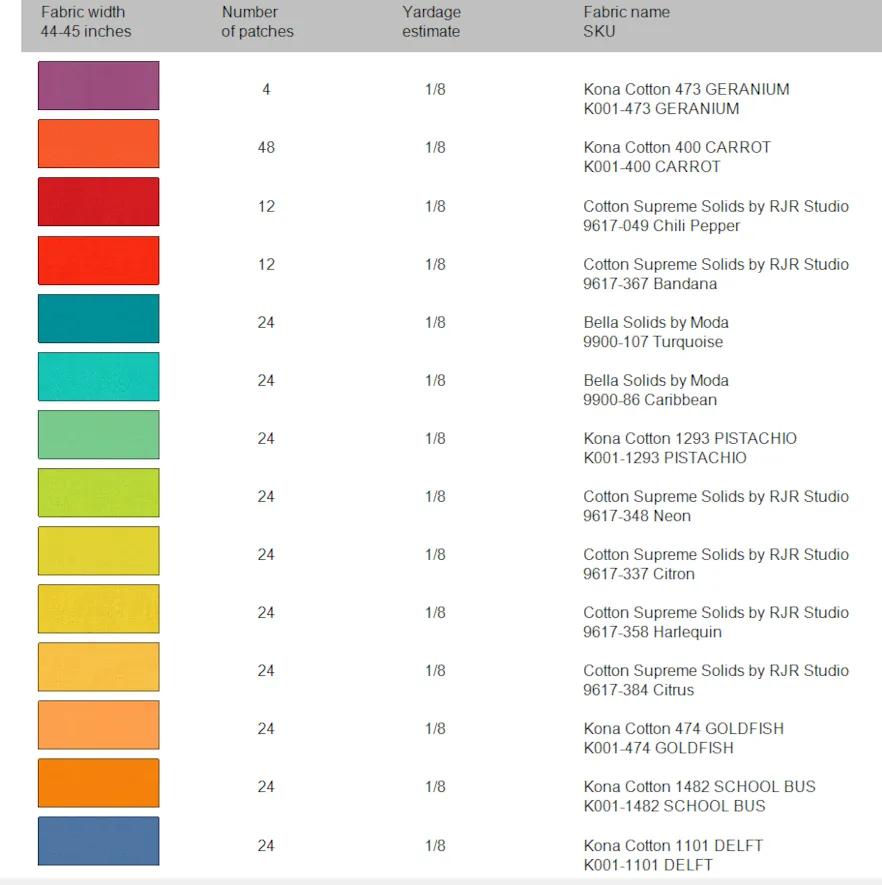
 Then you will see all the fabrics listed in your Fabric Yardage Estimate!
If you want to post images of your quilt, here is how to export the images.
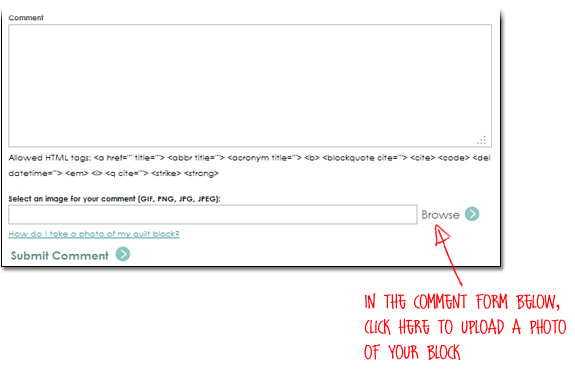
To post your image click to comment on this post.Fill in your info and then click Browse.
Go to: Documents\My EQ8\Images
I can’t wait to see what you’ve done! I hope you enjoyed the lesson!
If you have questions about the lesson feel free to post them below.
If you have questions about something else EQ related, please contact techsupport@electricquilt.com.
If you have suggestions for new Design & Discover lessons feel free to comment below or email Heidi@electricquilt.com


