

Let’s celebrate Spring! I am trying to be positive, it is still snowing where I live. I really want Spring.
1. Double Click on the EQ8 Icon on your desktop and launch the program. 
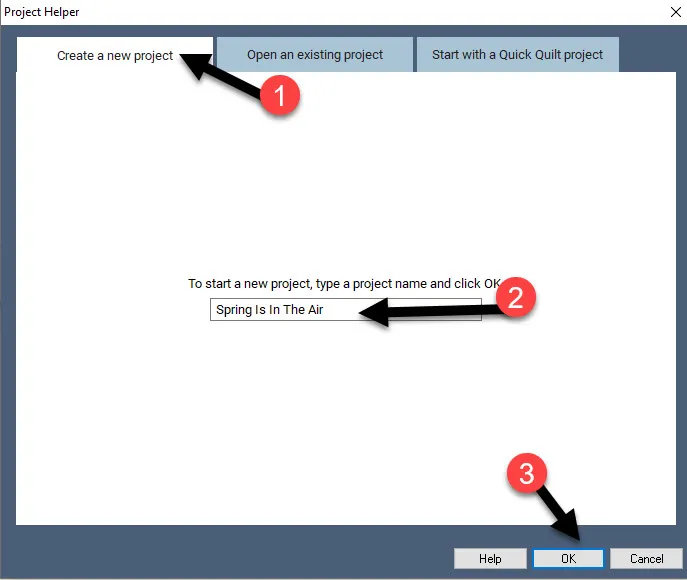
When the program opens, click on the New Project icon ![]() and name the new project ‘Spring Is In The Air’. Click on the OK at the bottom of the box.
and name the new project ‘Spring Is In The Air’. Click on the OK at the bottom of the box.
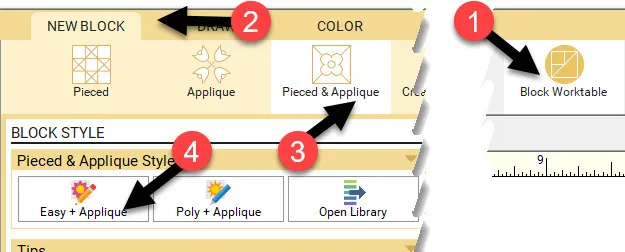
2. Click on the block worktable icon on the upper right side of the screen. Click on NEW BLOCK>Pieced and Applique>Easy + Applique at the top of the screen.
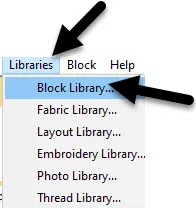
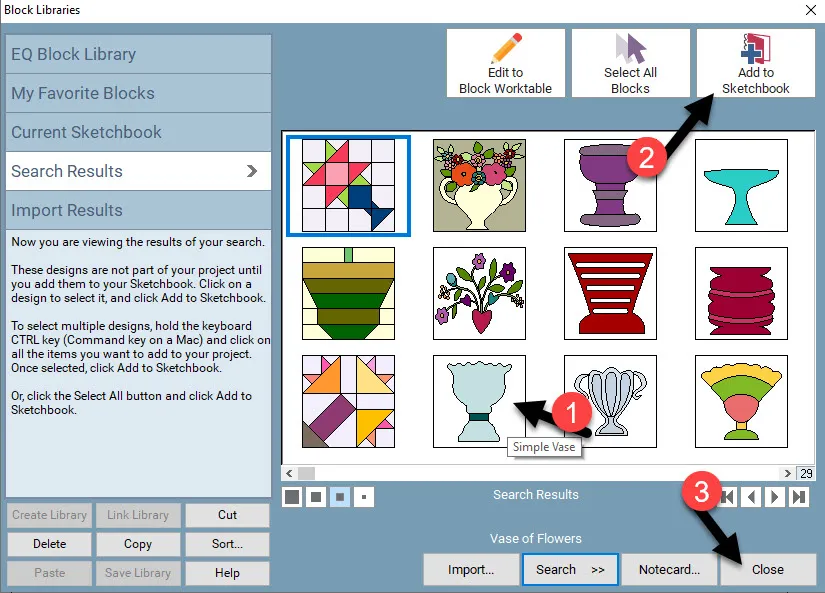
3. At the top of the screen, click on LIBRARIES>Block Library.
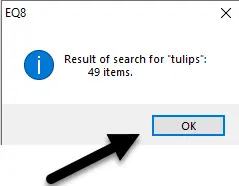
4. In the block library box, click on search>by notecard. Type in the search word ‘tulips’. Click on the word ‘search’ at the bottom of the box.
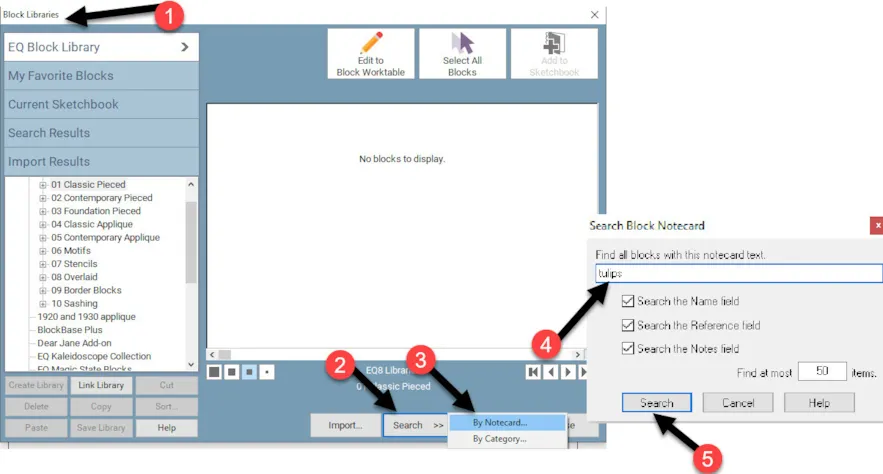
Click on the OK in the search results box.
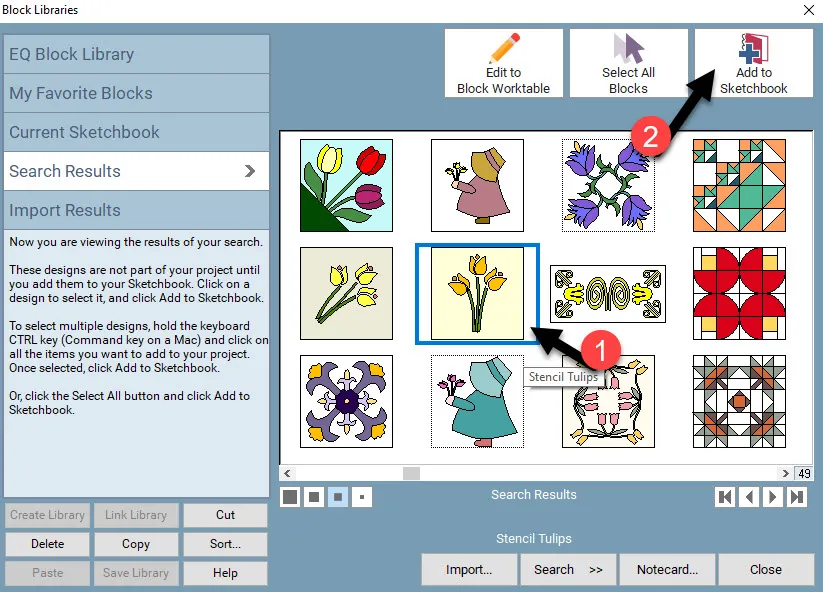
5. Scroll over in the box until you find the ‘stencil tulips’. Click on it to select it. It will have a blue selection box around it. Click on the ‘add to sketchbook’ in the upper right corner of the box.
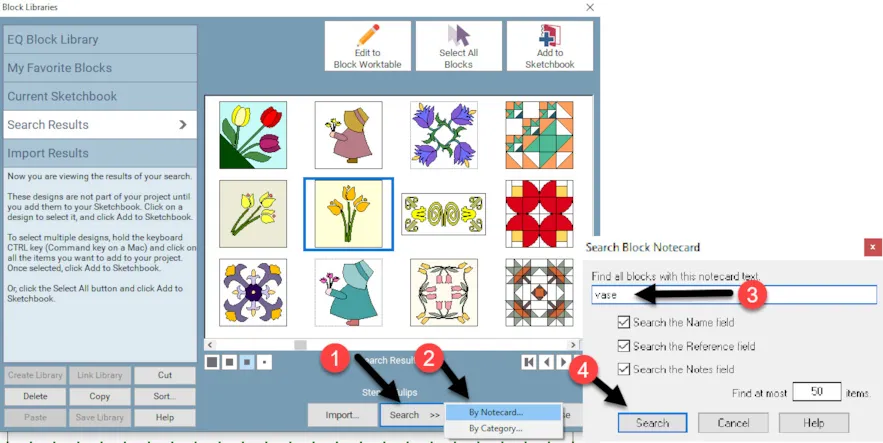
6. Still in the blocks search box, click on the word ‘search>by notecard, at the bottom of the box. This time type in the word ‘vase’ into the search box and click on the word ‘search’.
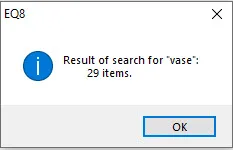
Click on the OK in the search results box.
7. Scroll over to locate the ‘simple vase’. Click on it to select it. It will have a blue selection box around it. Click on the ‘add to sketchbook’ in the upper right corner of the box. Click on the word ‘close’ at the bottom of the box.
8. Click on the ‘view sketchbook’ icon ![]() on the far right side of the screen.
on the far right side of the screen.
In the sketchbook, under the Blocks heading, click on the tulips to select them. Click on the word ‘edit’ at the bottom of the box.
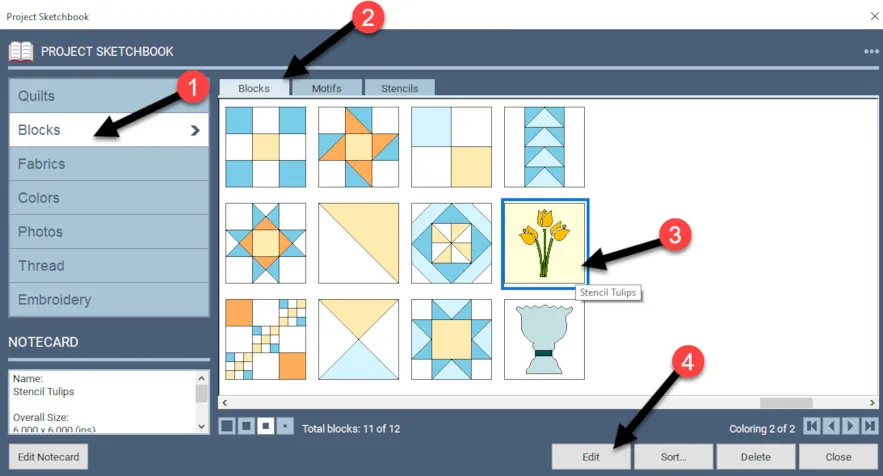
The design will now appear on the block worktable.
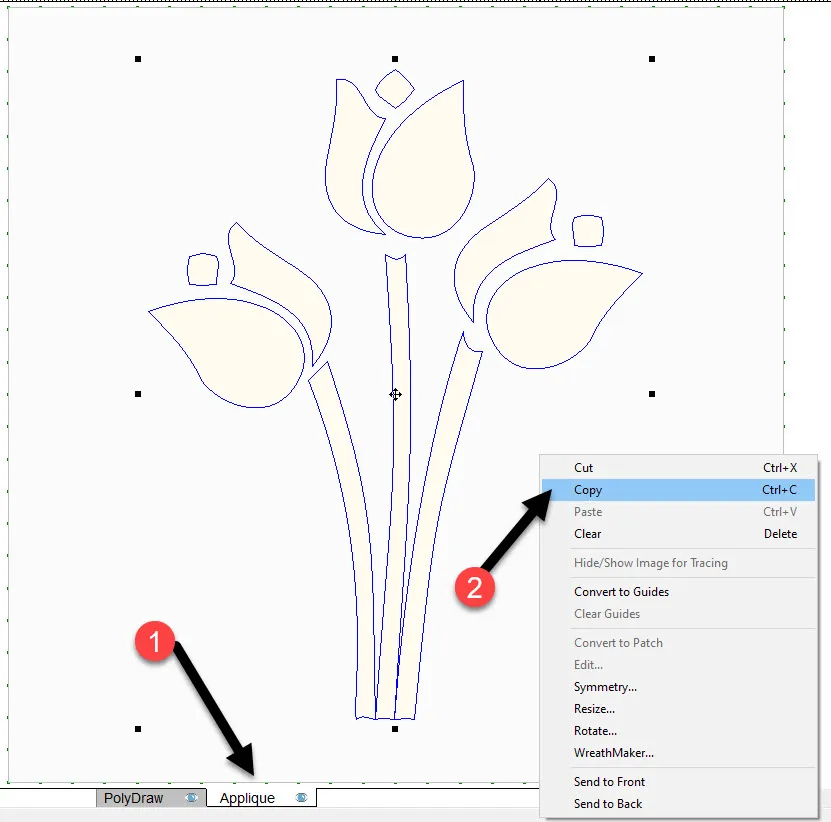
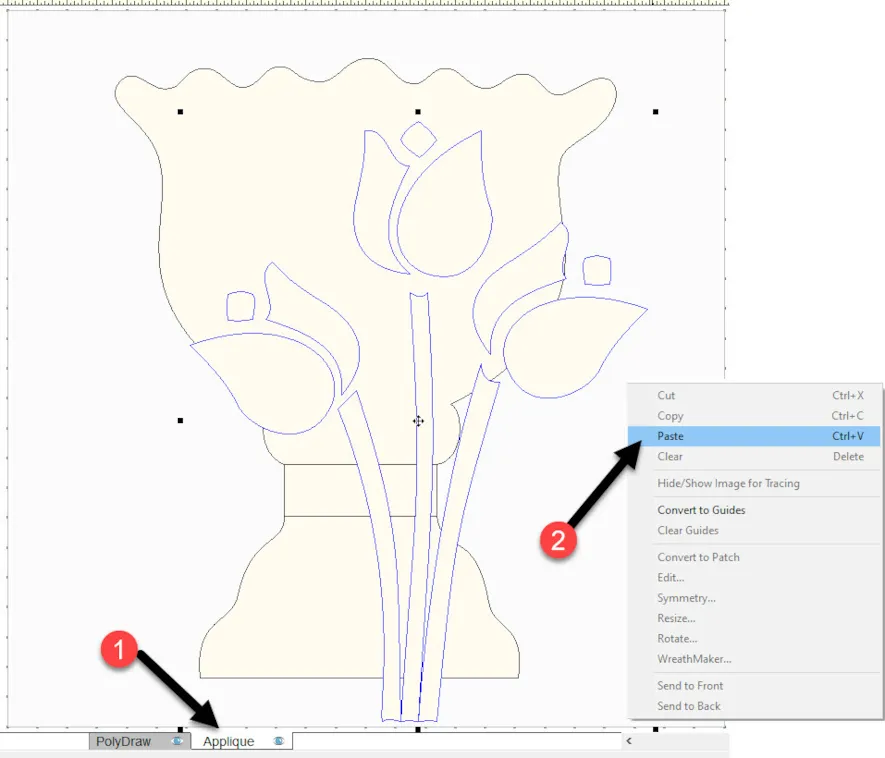
9. Click on the applique tab a the bottom of the worktable. Click on Control +A on your keyboard (Command +A on a Mac) to select all the elements of the design. Right click>Copy to place a copy of the tulips on the clipboard.
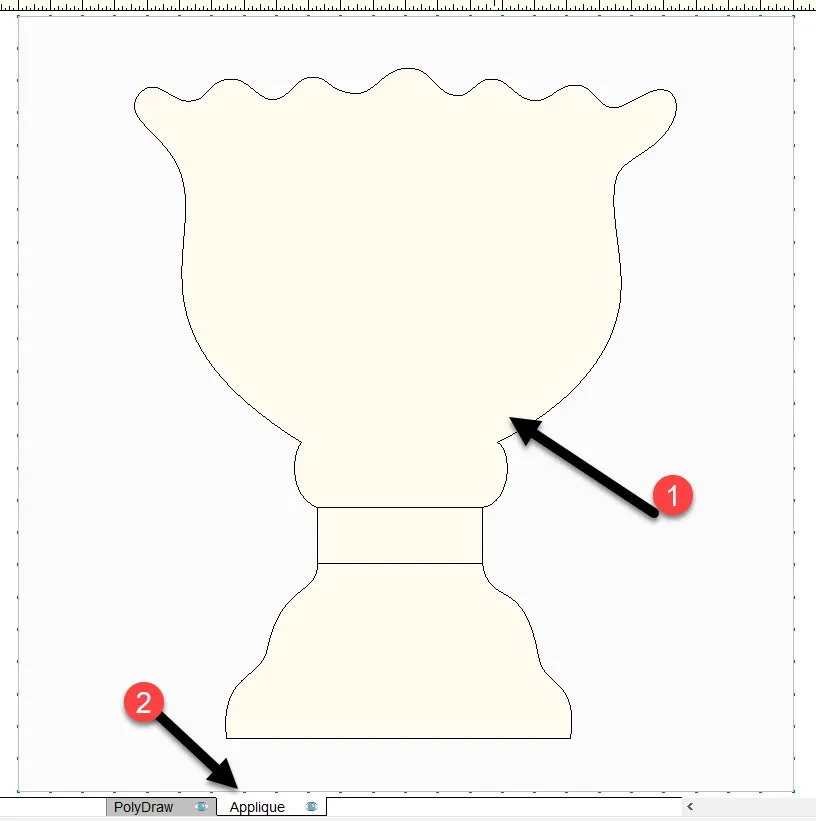
10. Click on the view sketchbook icon on the far left side of the screen. Under the Blocks heading, locate and click on the vase. Click on the word ‘edit’ at the bottom of the box.

The vase design will open on the block worktable. Click on the applique tab at the bottom of the worktable.
11. Move the cursor over to the worktable and right-click> paste to add the tulips to the block.
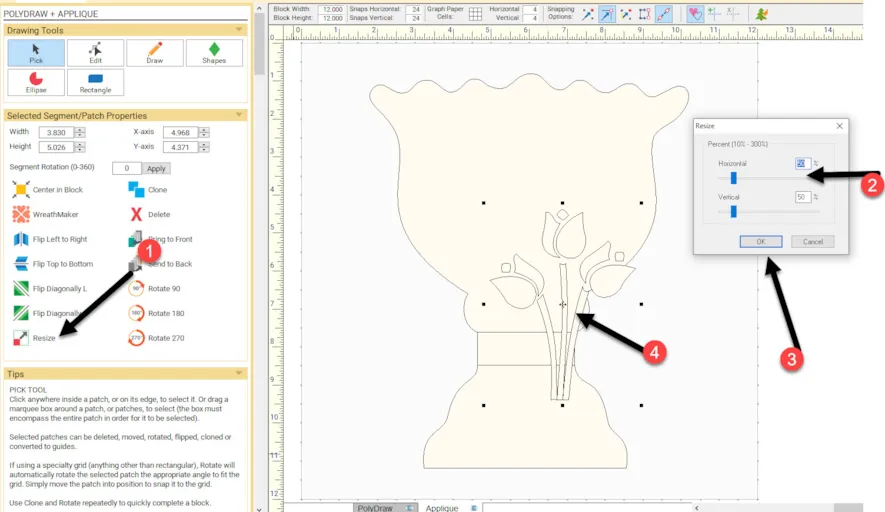
12. The default size of the block is 6 inches. This is way too small for all the elements we want to add. Type in the size of the block to be 12 x 12 inches on the properties bar at the top of the worktable.

All the elements on the worktable will resize to fill this new 12-inch block size.
13. With the tulips still selected, click on the resize icon ![]() in the patch properties box at the left. In the pop-up resize screen change the size to be 50% horizontal and vertical. Click OK at the bottom of the box.
in the patch properties box at the left. In the pop-up resize screen change the size to be 50% horizontal and vertical. Click OK at the bottom of the box.
14. Using the pick tool ![]() , hold down the shift key on the keyboard and click on both the vase and the band on the bottom of the vase to select the entire vase image. Click on the resize icon in the patch properties box at the left and then resize the elements to 50% both horizontal and vertical. Click OK at the bottom of the resize box.
, hold down the shift key on the keyboard and click on both the vase and the band on the bottom of the vase to select the entire vase image. Click on the resize icon in the patch properties box at the left and then resize the elements to 50% both horizontal and vertical. Click OK at the bottom of the resize box.

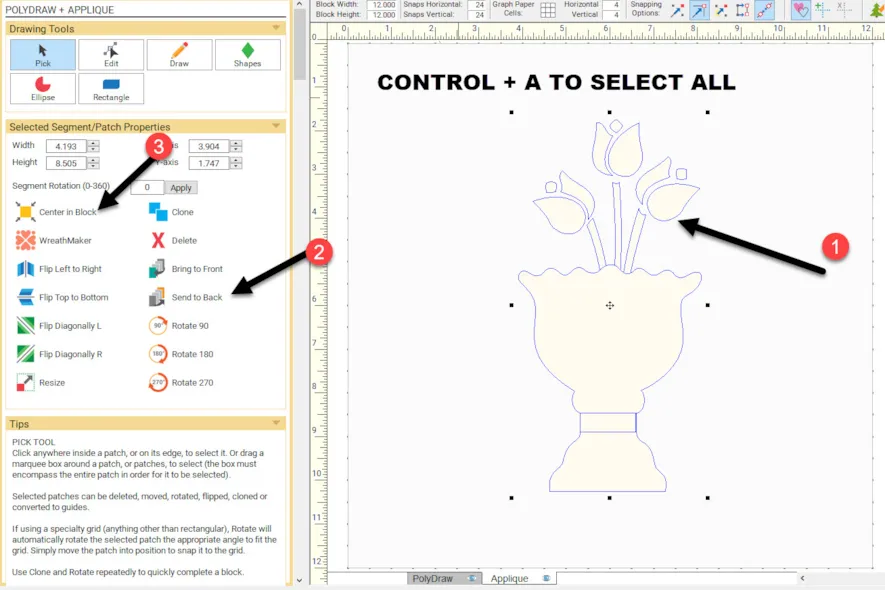
15. Using the pick tool ![]() select just the elements of the tulips and move them to the top of the vase. Once they are in position, click on the ‘send-to-back’ icon
select just the elements of the tulips and move them to the top of the vase. Once they are in position, click on the ‘send-to-back’ icon ![]() on the patch properties box. Once they are in position, click on the control +A on your keyboard (Command +A for Mac) to select everything on the page. Once it is all selected click on the center in block icon
on the patch properties box. Once they are in position, click on the control +A on your keyboard (Command +A for Mac) to select everything on the page. Once it is all selected click on the center in block icon ![]() on the patch properties box at the left.
on the patch properties box at the left.
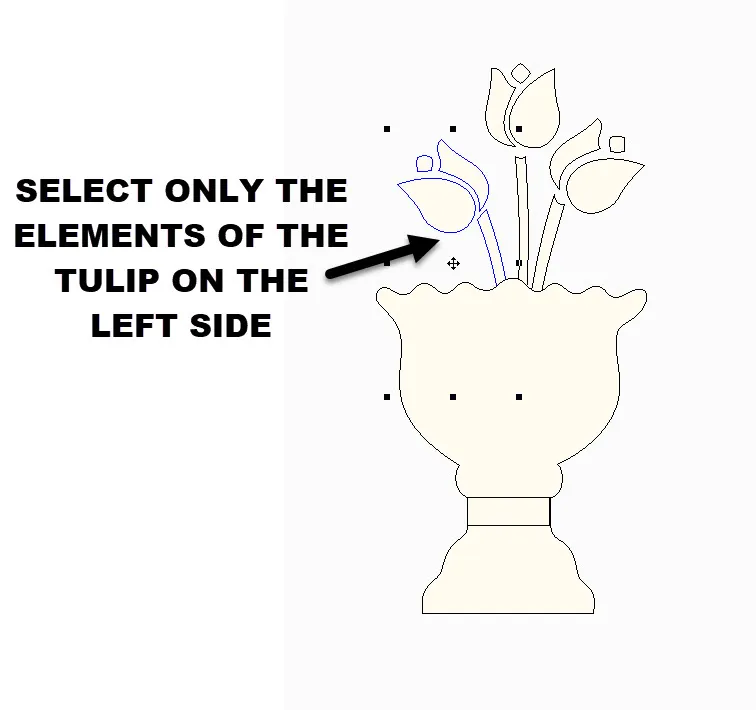
16. Using the pick tool![]() , hold down the shift key on the keyboard and click on each of the elements of the tulip on the left side of the vase.
, hold down the shift key on the keyboard and click on each of the elements of the tulip on the left side of the vase.
17. Once the elements are selected, click on the word ‘clone’ ![]() in the properties box to get a copy of the flower. Move the pick tool cursor over to the center crosshair and click/hold/drag/release the flower to the side so you have room to edit it.
in the properties box to get a copy of the flower. Move the pick tool cursor over to the center crosshair and click/hold/drag/release the flower to the side so you have room to edit it.
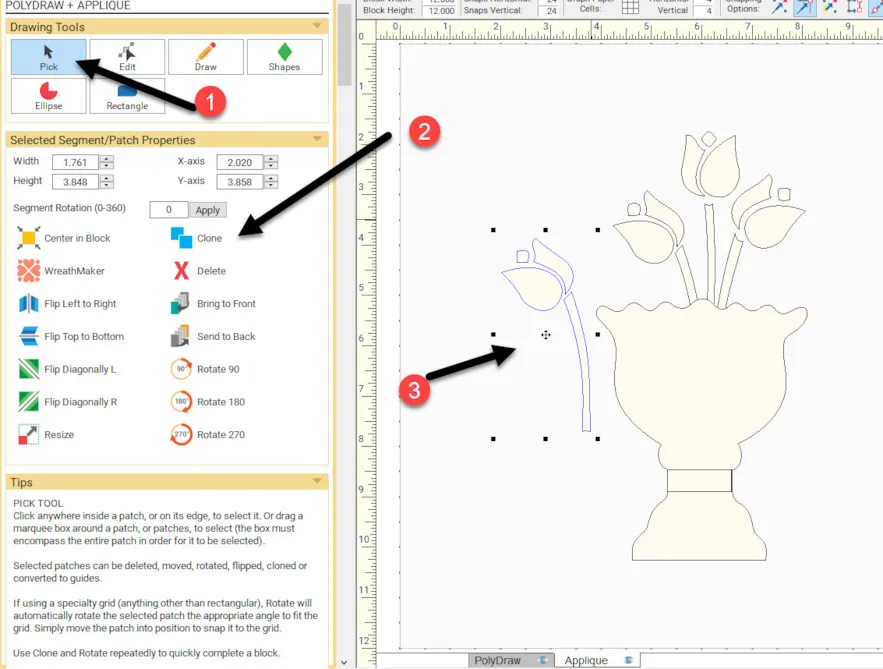
18. While the tulip is still selected, type in the rotation to be 270 and click on the word ‘apply’ to turn the tulip to the side. ![]()
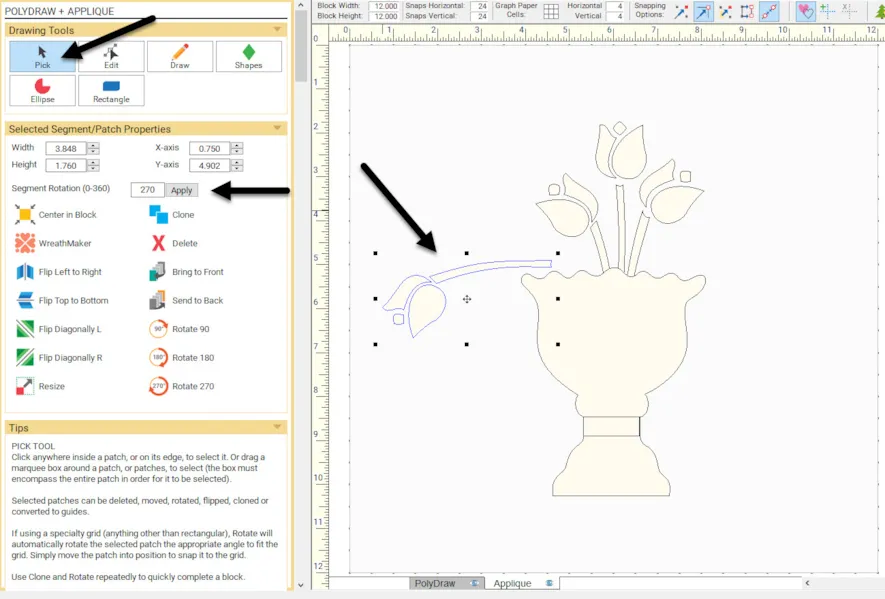
19. Click on the edit tool ![]() to select it. With the edit tool, click on the stem of the tulip. Click on the corner nodes of the stem and pull them down into the vase area.
to select it. With the edit tool, click on the stem of the tulip. Click on the corner nodes of the stem and pull them down into the vase area.
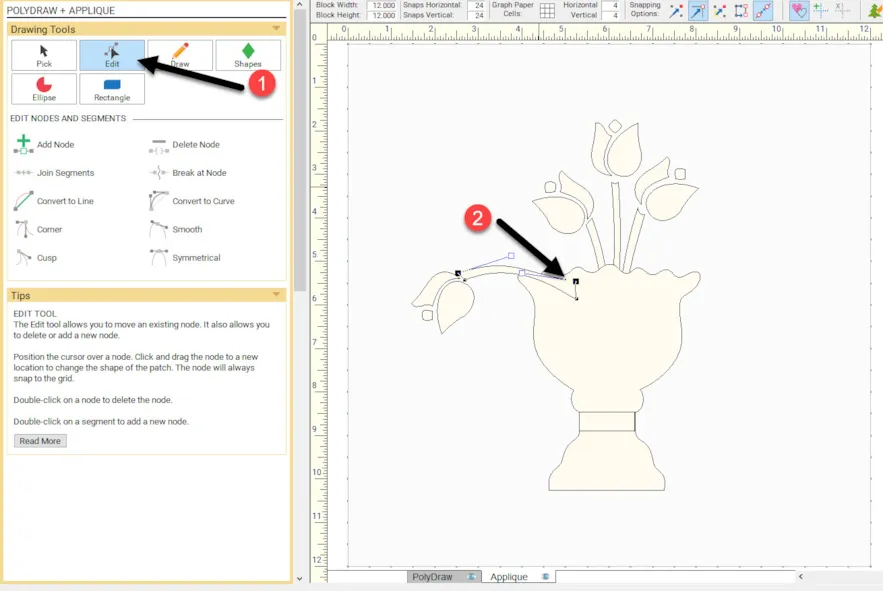
20. Click on the pick tool ![]() to select it. Hold down the shift key on the keyboard and click on each of the tulip elements to select them all including the stem. Click on the ‘send to back’ icon
to select it. Hold down the shift key on the keyboard and click on each of the tulip elements to select them all including the stem. Click on the ‘send to back’ icon ![]() in the patch properties box.
in the patch properties box.
21. While the tulip is still selected, click on the word ‘clone’ ![]() in the patch properties box. Move the cursor over the center crosshair and click/hold/drag/release it on the opposite side of the vase. Click on the ‘flip left to right’ icon
in the patch properties box. Move the cursor over the center crosshair and click/hold/drag/release it on the opposite side of the vase. Click on the ‘flip left to right’ icon ![]() to change its direction. Once it is in the proper direction, click on the ‘send to back’ icon
to change its direction. Once it is in the proper direction, click on the ‘send to back’ icon![]() to place it behind the vase.
to place it behind the vase.

22. Click on the shapes tool icon in the patch properties box. Select the half hexagon shape by clicking on it.
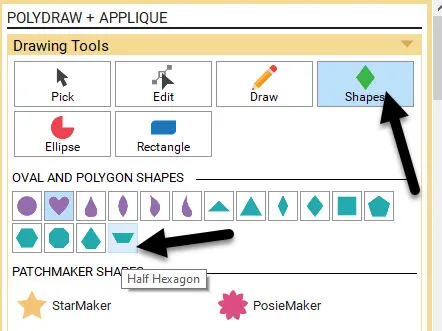
Move the cursor over to the worktable and click /hold/drag/release a shape on the worktable.
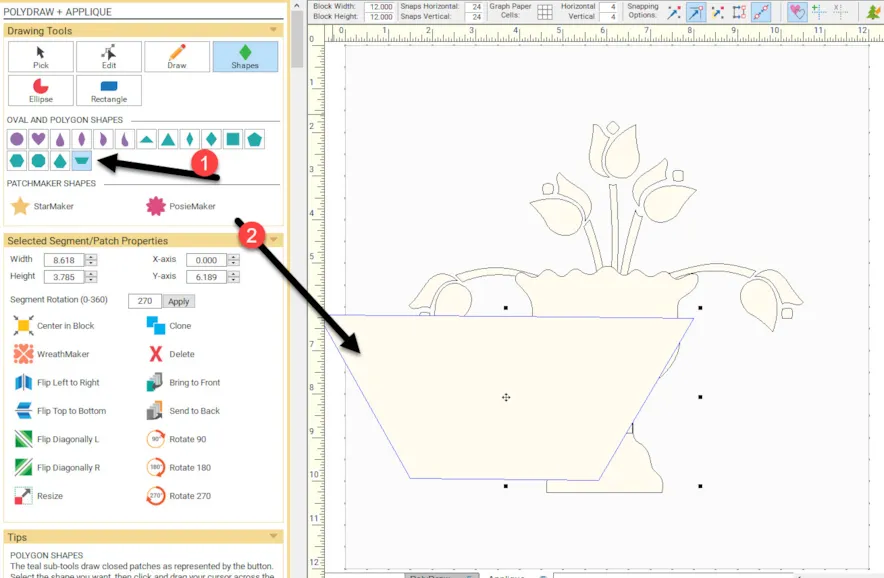
23. With the half hexagon still selected, click on the ‘flip top to bottom’ icon![]() in the patch properties box. Click on the center crosshairs with the pick tool to move the element into position under the vase’s lower edge. Click on the ‘send to back’ icon
in the patch properties box. Click on the center crosshairs with the pick tool to move the element into position under the vase’s lower edge. Click on the ‘send to back’ icon ![]() in the patch properties box.
in the patch properties box.
The vase of flowers now appears to be sitting on a tabletop.
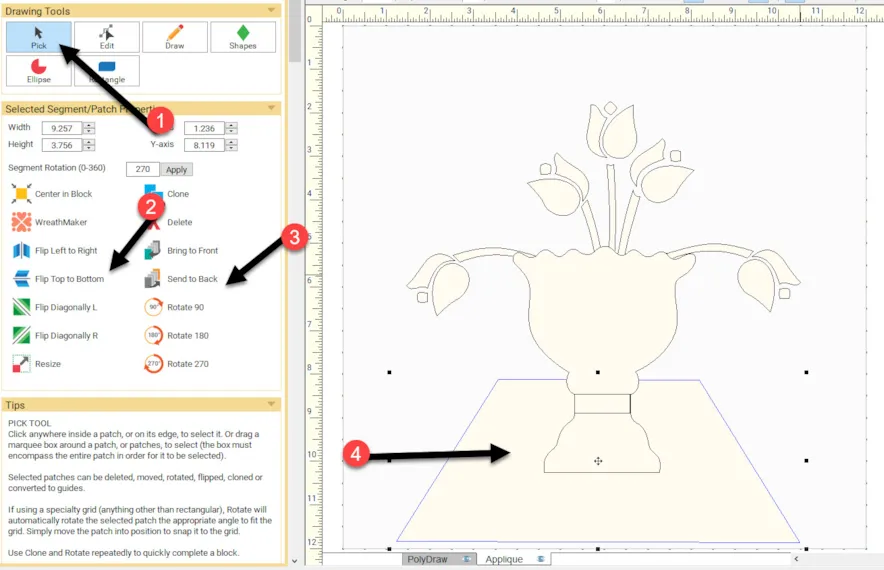
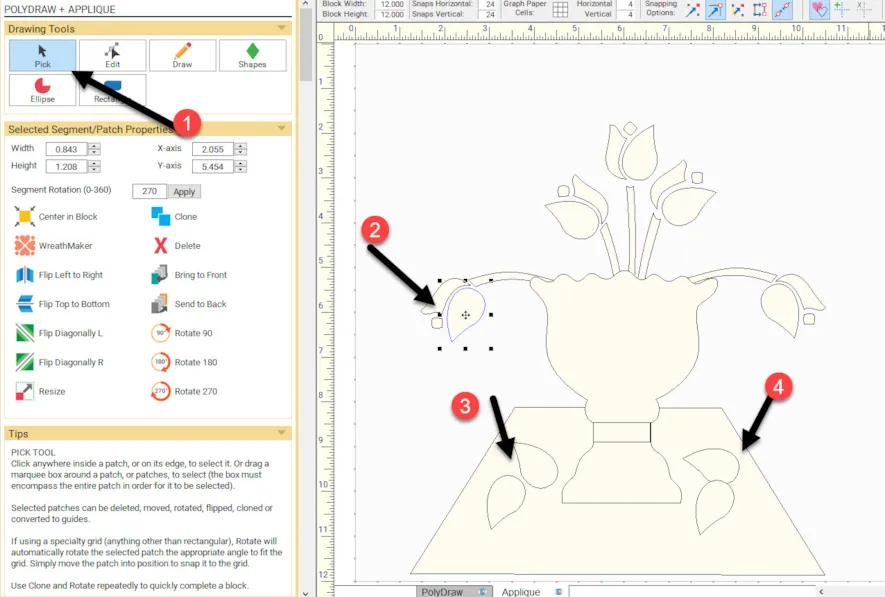
24. Using the pick tool, click on one of the petals of the tulip. Click on the word ‘clone’ ![]() four (4) times. Use the pick tool to drag the petals onto the tabletop. Place them in any direction you wish.
four (4) times. Use the pick tool to drag the petals onto the tabletop. Place them in any direction you wish.
Add the design to the sketchbook ![]()
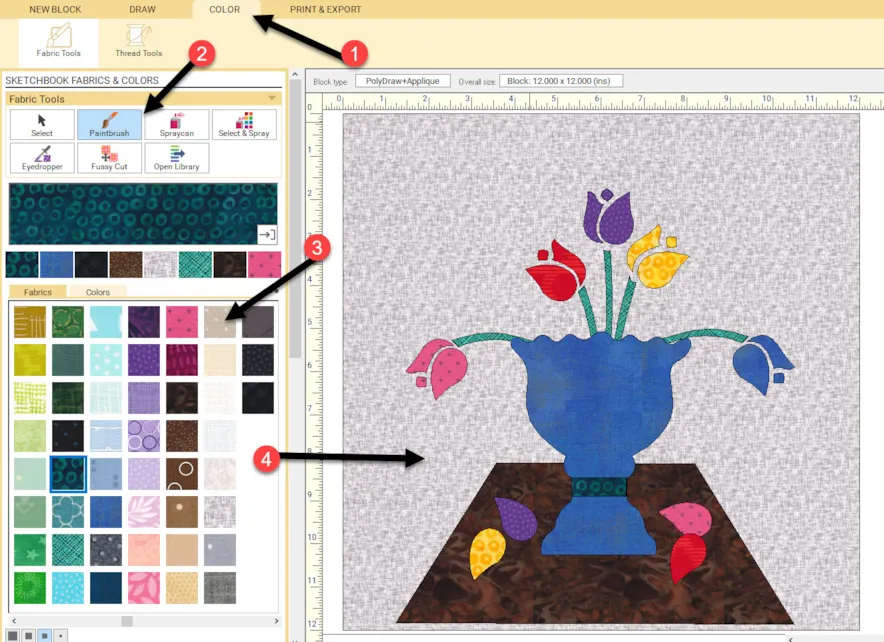
25. Click on the color tab at the top of the screen. Using the paintbrush tool,![]() select different fabrics and click on the elements of the design to color them in.
select different fabrics and click on the elements of the design to color them in.
Add to sketchbook ![]()
Enjoy your spring flowers. They won’t last long but they sure are pretty to see after a long cold winter!


05-15-2022
12:32 pm
I left out the fallen petals, but added a tulip leaf!
05-15-2022
12:34 pm
Elizabeth I absolutely love it when someone takes my idea and changes it to make it their own. Good for you!
05-15-2022
2:33 pm
Hola me regalaron un programa de estos pero no se como usarlo gracias
05-15-2022
2:38 pm
Maria just follow along on all the blog mini lessons and you will be able to learn the program. There are also tutorials on the EQ website to help you.
05-15-2022
9:13 pm
Thanks for the lesson. It pushed me to try new things. added it to my reference notebook.
05-15-2022
9:14 pm
Thanks for the lesson. It pushed me to try new things. Will add this printout to my reference notebook
05-15-2022
9:40 pm
Karen–So glad you were inspired to try new things.
05-16-2022
5:13 am
Thank you for the lesson and tips very useful for designing appliqués. What format best is used for printing when using appliqués? Due to the multiple curve shapes and different odd sizes it will not be suitable for rotary cutting.
Most of the tutorial only mention making up the pieces but not how we can actually print it out from each tutorial. As each one is different. Some can only be done with fpp others can be done with rotary, fpp,
May be it would be a good idea for future references for next lesson to cover that as well. It just a thought;)
05-16-2022
10:49 am
Sheila thanks for your thoughts. These little lessons are only snippets of information about using different tools in the EQ program. It is not meant to write a complete lesson on block/quilt construction. To get the pattern for the block, go to the print/export tab and select the foundation piecing option. Choose the print block work table size (not custom size) and click on preview at the bottom of the box to see the pattern pieces.
05-16-2022
10:02 am
Would you please give a lesson on how to put applique in a border, I tried yesterday with no success.
05-16-2022
10:51 am
Bev appliqué motifs are placed on layer 2 of the quilt work table. A border of blocks could have the appliqué bocks you create placed on layer one of the quilt work table.
05-20-2022
4:02 am
Thank you and I will try that project, for I love applique and wondered how to use EQ8 for that. Karen
05-20-2022
12:00 pm
Karen–There are so many applique shapes built into EQ8. You can use them as they are or combine them as I did in this lesson. Enjoy yourself as you discover all you can do with applique in EQ8!