The ClubEQ challenge for this month is to convert a traditional setting for a quilt in a Quick Quilt Projects Folder to a quilt in the Modern Quilt style. It’s sometimes difficult to define a Modern Quilt other than “you’ll know it when you see it,” but it may be helpful to include lots of negative space (often it’s white), solid colors or bold prints, blocks that may be traditional but interpreted in a different way with coloring, and plain borders.
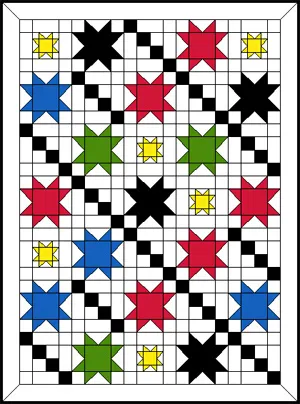
The two examples on the DoYouEQ website for ClubEQ this month are revised from the Quick Quilt Project named Sawtooth Chain. The two quilts started with the same traditional layout from the project file and changes were made to coloring, layout, and block design to create a quilt with a Modern look.
For the challenge, you do not have to duplicate what I did for the examples. The challenge is to take any of the Quick Quilt Projects and edit one or two quilts to have a Modern Quilt look.
Here is a lesson in what I did, in case you’d like to follow along and then go on your way with an inspiration to create something unique for you. Please note that my illustrations are from EQStitch, which is EQ7 plus the digitizing add-on program.
Open a Quick Quilt Project
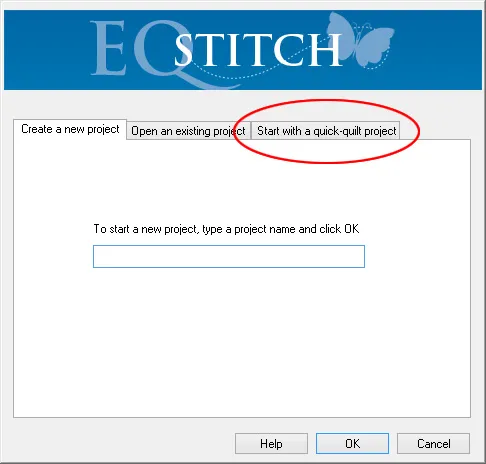
- This dialog box is called the Project Helper. It is available when you first open the program to begin a new project or you may find it by going to FILE > New or clicking on the blue icon in the upper left corner of the worktable screen that is for starting a New project.
- Instead of naming a new project, click on the tab “Start with a quick-quilt project.”
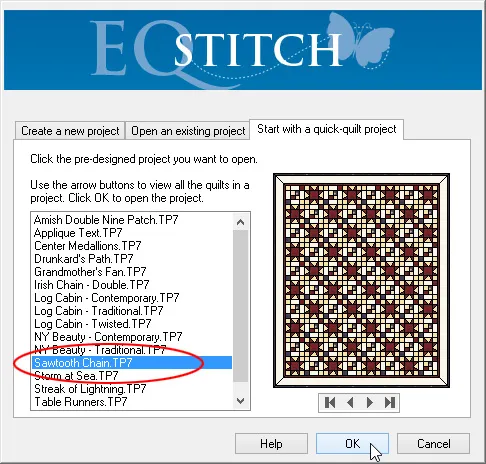
- A menu will appear with several options for pre-designed quilts. It’s like opening a magazine, since all the quilt designs are done for you! Browse to see what might catch your fancy. I selected “Sawtooth Chain.” Click OK.
- Close the Sketchbook.
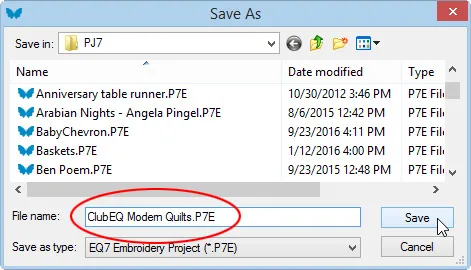
- These quick-quilt project files have their own file extension to keep them permanent to EQ7. If you want to Edit a file, you must convert it to an EQ7 file by clicking on FILE > Save as. This is also one of the few times you could use the Save icon on the Project Toolbar. You can Save as by naming your project.
- With the newly named project open in EQ7, click on View Sketchbook to browse through the quilt designs. Choose one that you might like to edit to create a Modern quilt.
Edit a Quick Quilt Project
From here, I will step out what I did to create my examples in case there are instructions or ideas you might use. I do NOT expect you to submit a copy of my example as your challenge submission. Please create your own.
- Open the Sketchbook and choose the Full Quilt Sawtooth Chain. Click Edit.
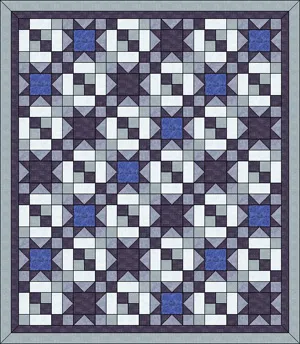
- First, to follow my favorite guideline of using an odd number of blocks when I create a two-block quilt, go to the Layout tab to change the horizontal number of blocks to 5. Vertical is 7, and that’s okay. Size of the blocks is okay.
- On Layer 1, play with colors and substitute a solid white for most of the background prints.
- Substitute solid bright colors for the stars and black for the dark print.
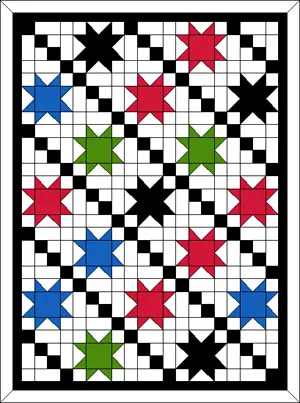
- Insert some smaller stars in the layout. You’ll have to create a block. Go to View Sketchbook > Blocks tab > Frayed Four Patch block. Edit
- Eliminate the center lines to make this block “eligible” to accept a Merge with the Variable Star. (To make the space “eligible,” the patch must have a side that measures greater than 1/3 the size of the block.) With the Pick tool, select the cross lines in the center of the block to create an open square there. Add to Sketchbook.
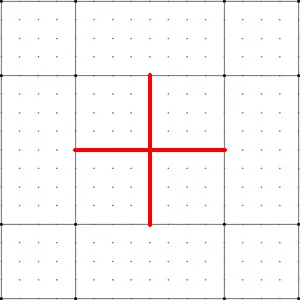
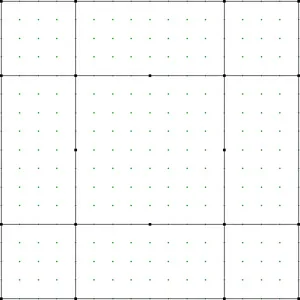
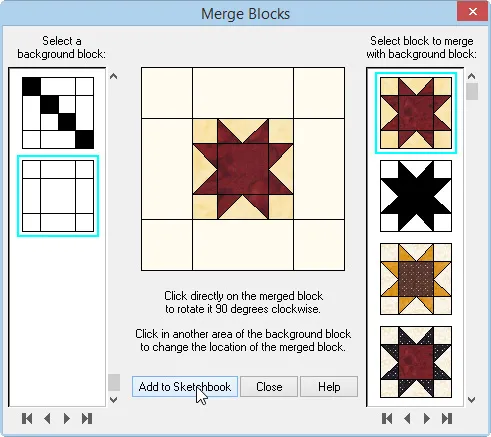
- On the Block worktable, click on BLOCK > Serendipity > Merge Blocks.
- On the left column, select the Frayed Four Patch block. From the right column, select the Variable Star for the center. Add to Sketchbook. Close.
- On the Quilt worktable, substitute these little star blocks for some of the Frayed Four Patch blocks. Color them with bright colors.
- If you want to eliminate a block on the quilt, use the Erase tool on the right Design toolbar.
- Continue playing with color and layout, including borders, until it pleases you. Add to Sketchbook.
- For a visual review, with the quilt on the Quilt worktable, right click and click to eliminate Patch outlines and Block outlines. This will take the black lines away from the quilt on the worktable for review. Don’t forget to undo this step so you can see the outlines on the next quilt you design!
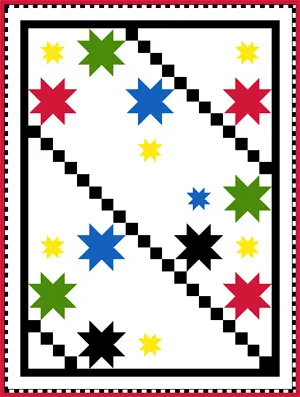
- Continue to edit the quilt as desired. Add to Sketchbook. Submit to the ClubEQ challenge!
We hope you enjoyed the ClubEQ Lesson!
ClubEQ is a free club any EQ user can join, simply by using EQ to design a quilt. The club leader presents monthly challenges. Those EQ users who join the challenge (and the fun) send in a project file. These projects are displayed together on the web. Participants receive projects from all the other challenge participants that month. So send in one project file, and receive many more in return! No sewing necessary! Find out more!


