For this month’s Design & Discover I was inspired by Margaret J. Miller’s Block Bender Quilts book, which uses irregular grids. Playing with irregular grids can return some fun and unexpected results. Let’s get started!
The first and easiest way to do this is to use a layout from the Layout Library.
- Open EQ8
- Click Design a quilt from scratch

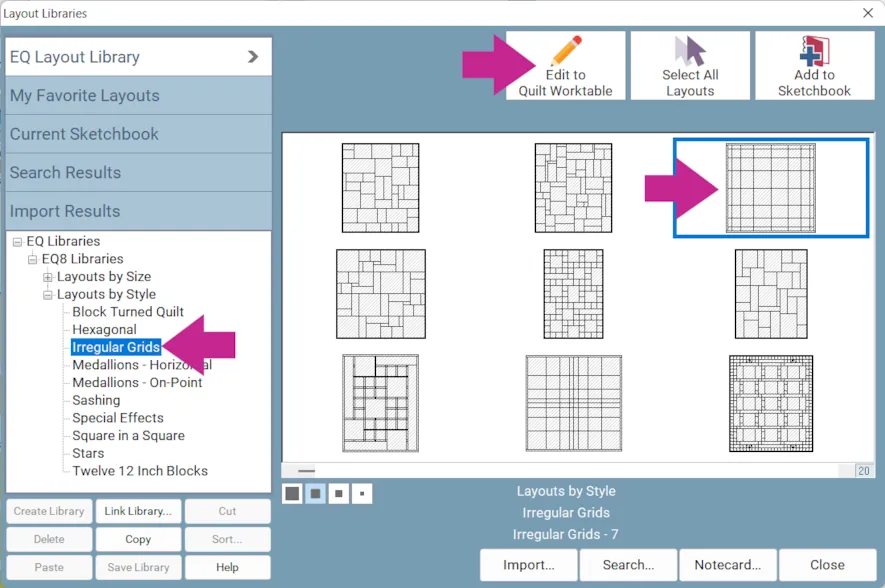
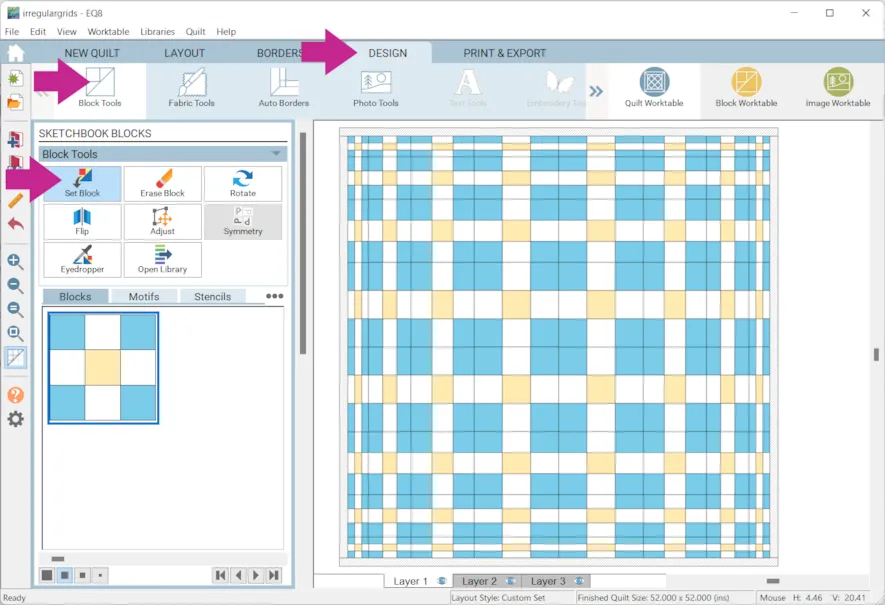
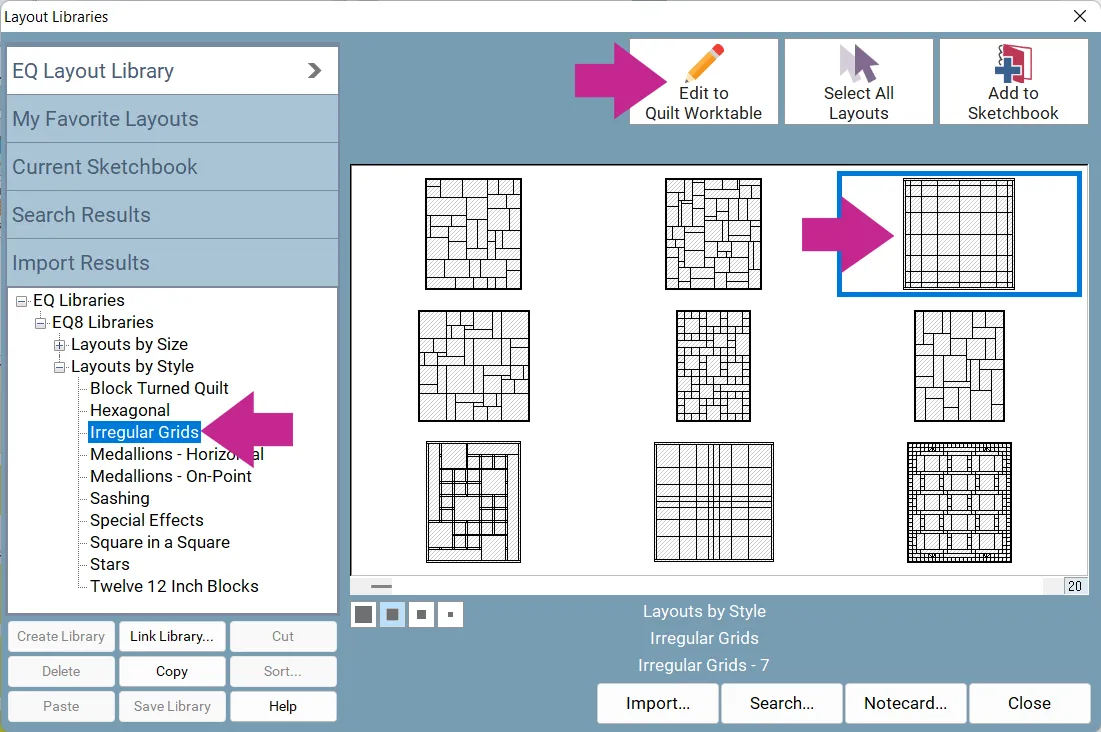
- Click Libraries > Layout Library >Layouts by Style > Irregular Grids
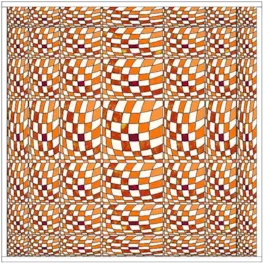
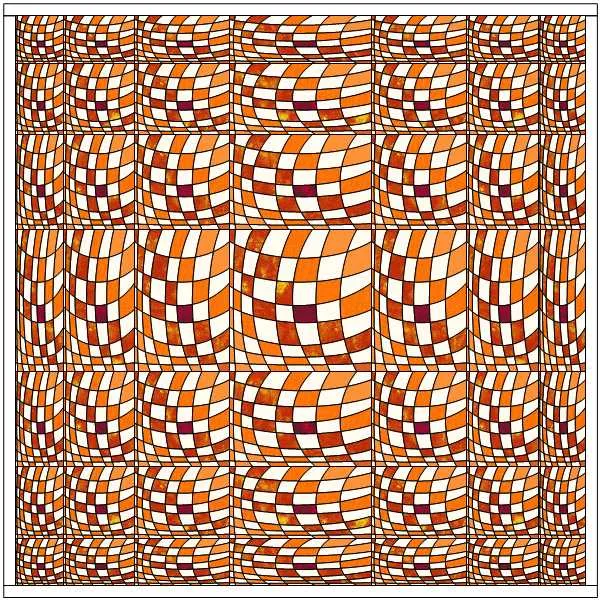
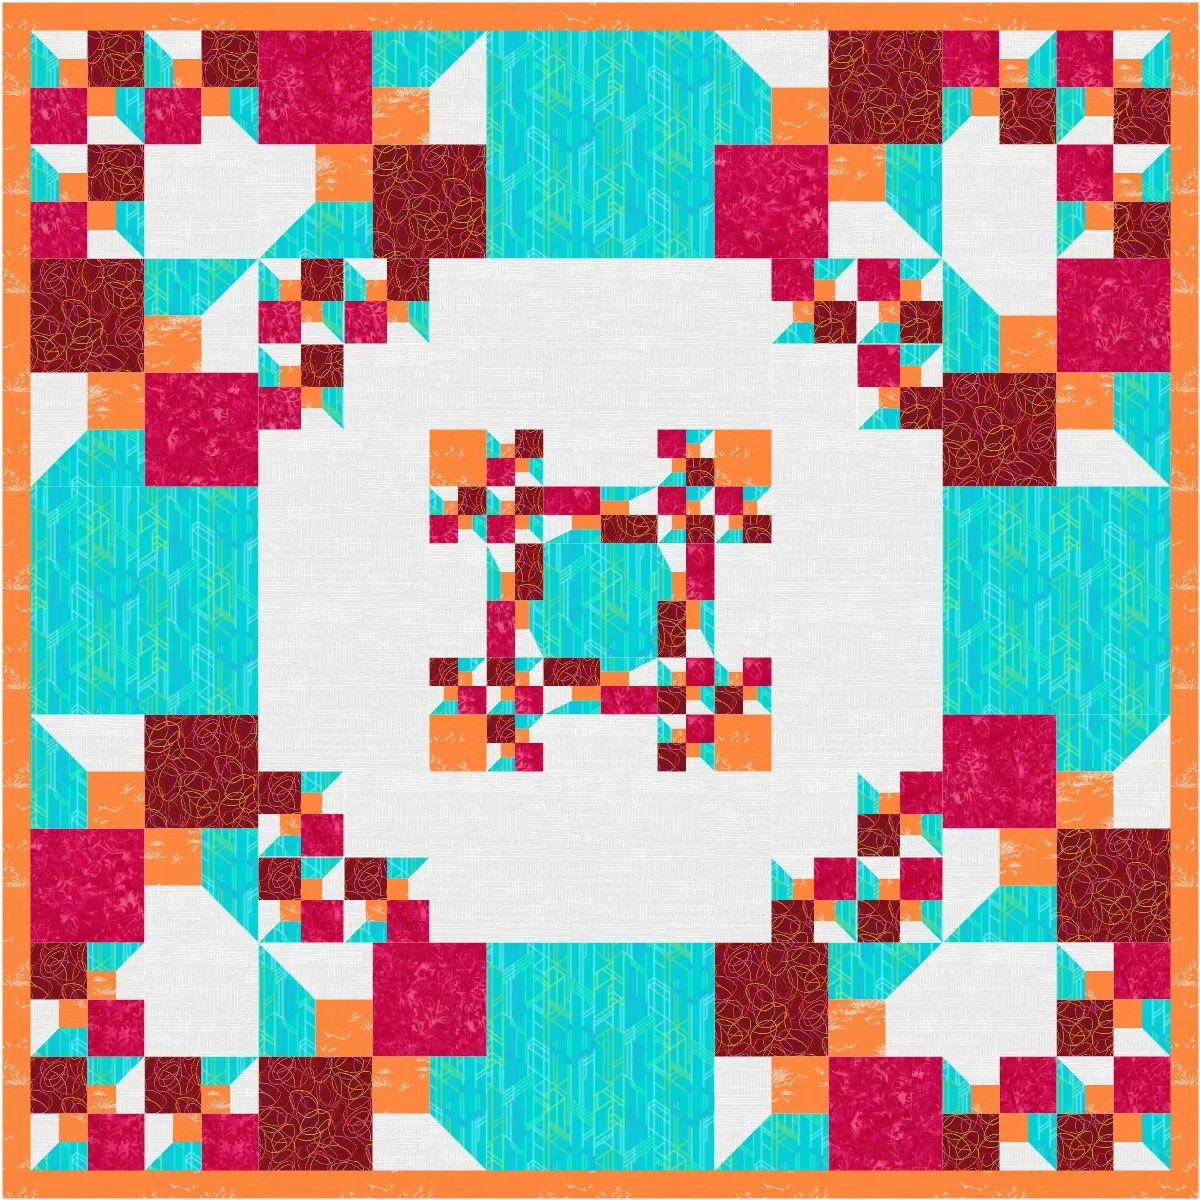
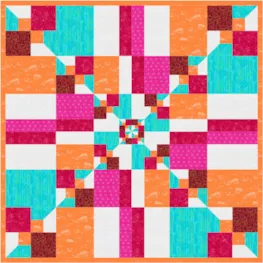
- Click on Irregular Grids – 6 or Irregular Grids – 7. (In the example I used Irregular Grids – 7.)
- Click Edit to Quilt Worktable.
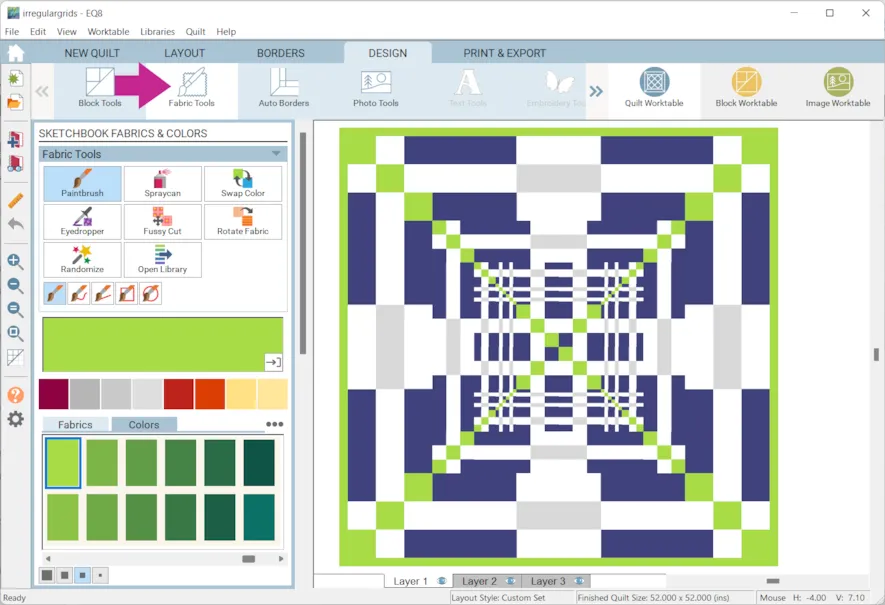
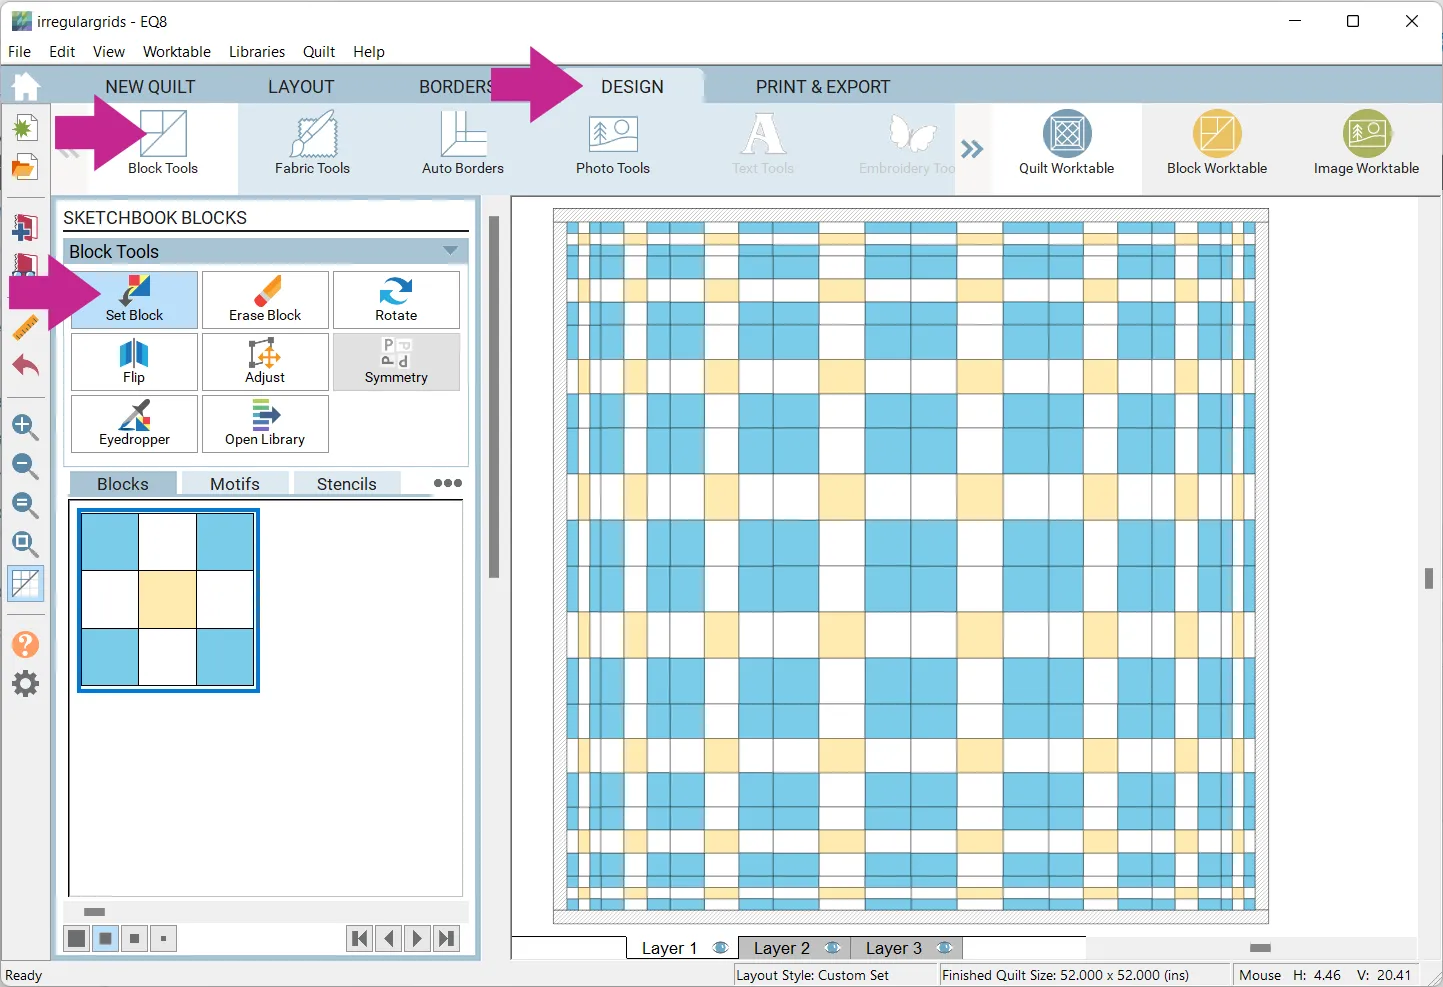
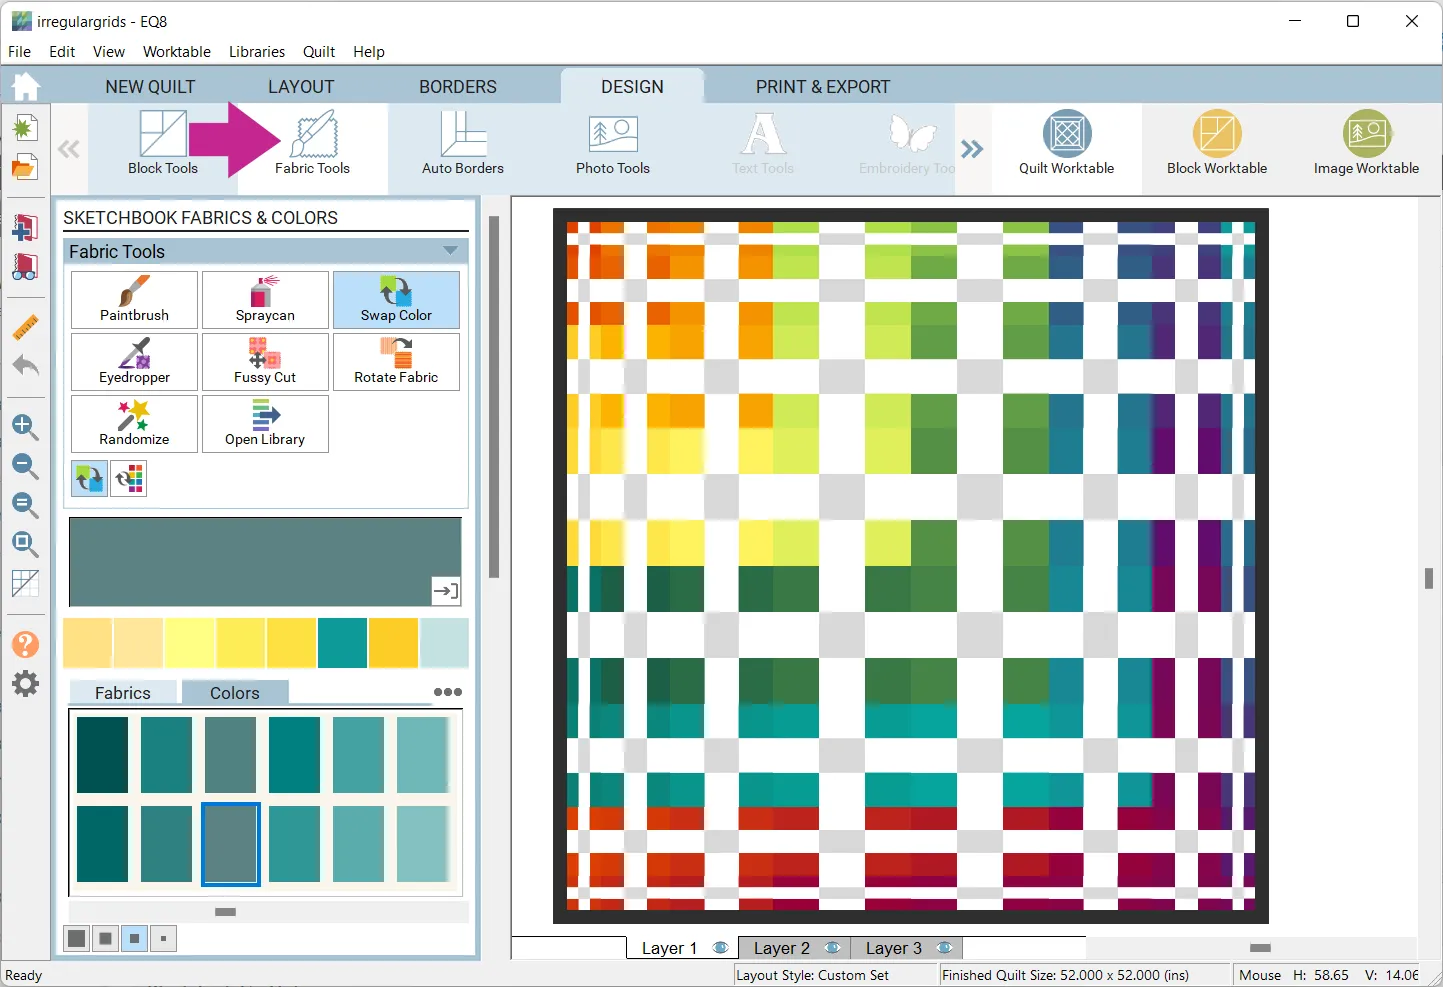
- Click the DESIGN tab > Block Tools > Set Block
- Experiment with different blocks and the effects they create.
Remember holding down the Ctrl/Command key on your keyboard will set the block in each patch.
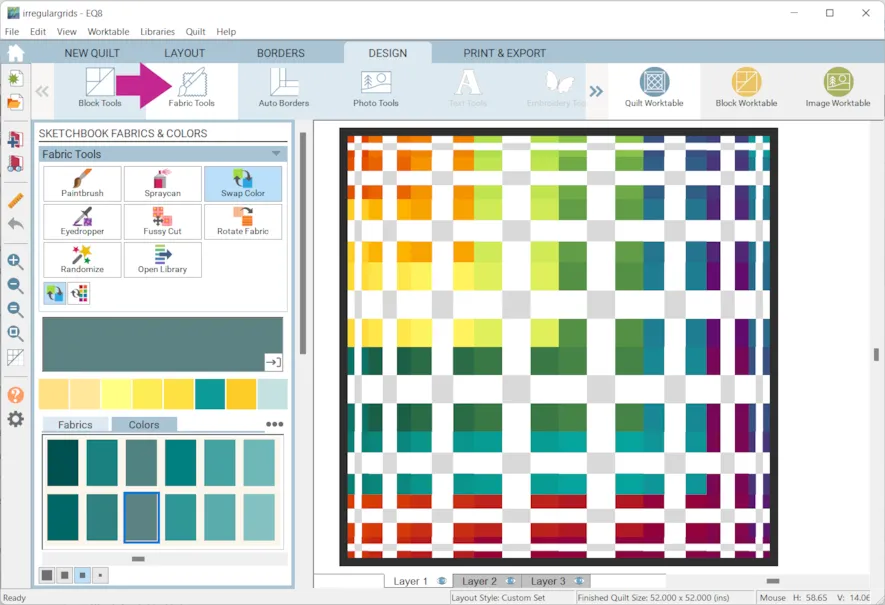
- Click Fabric Tools and recolor. It can really make a big difference!
- When you are done, click Add to Project Sketchbook
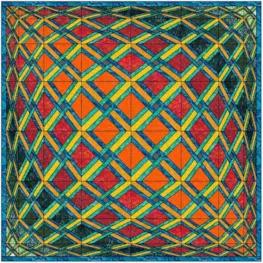
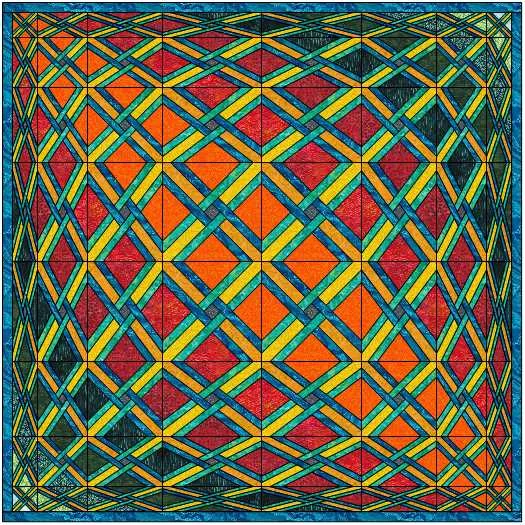
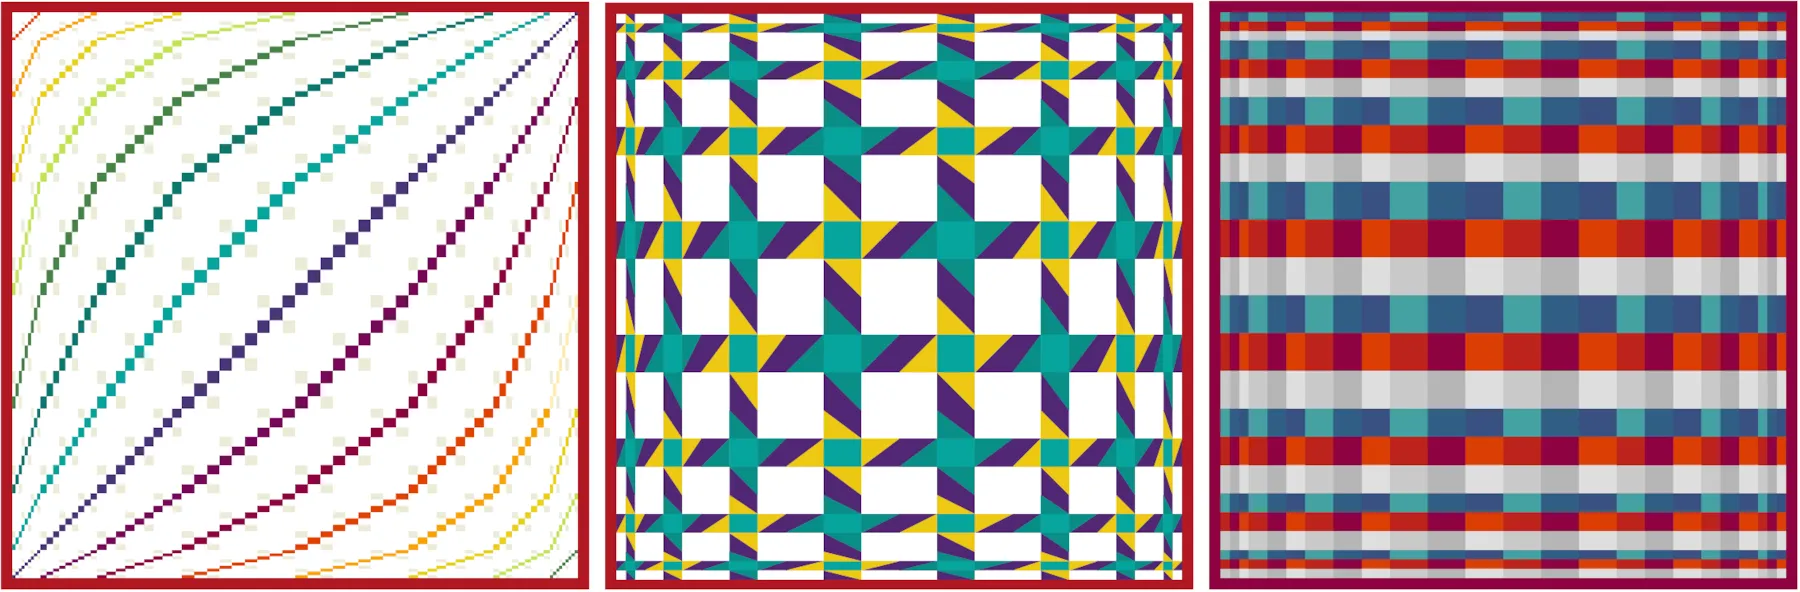
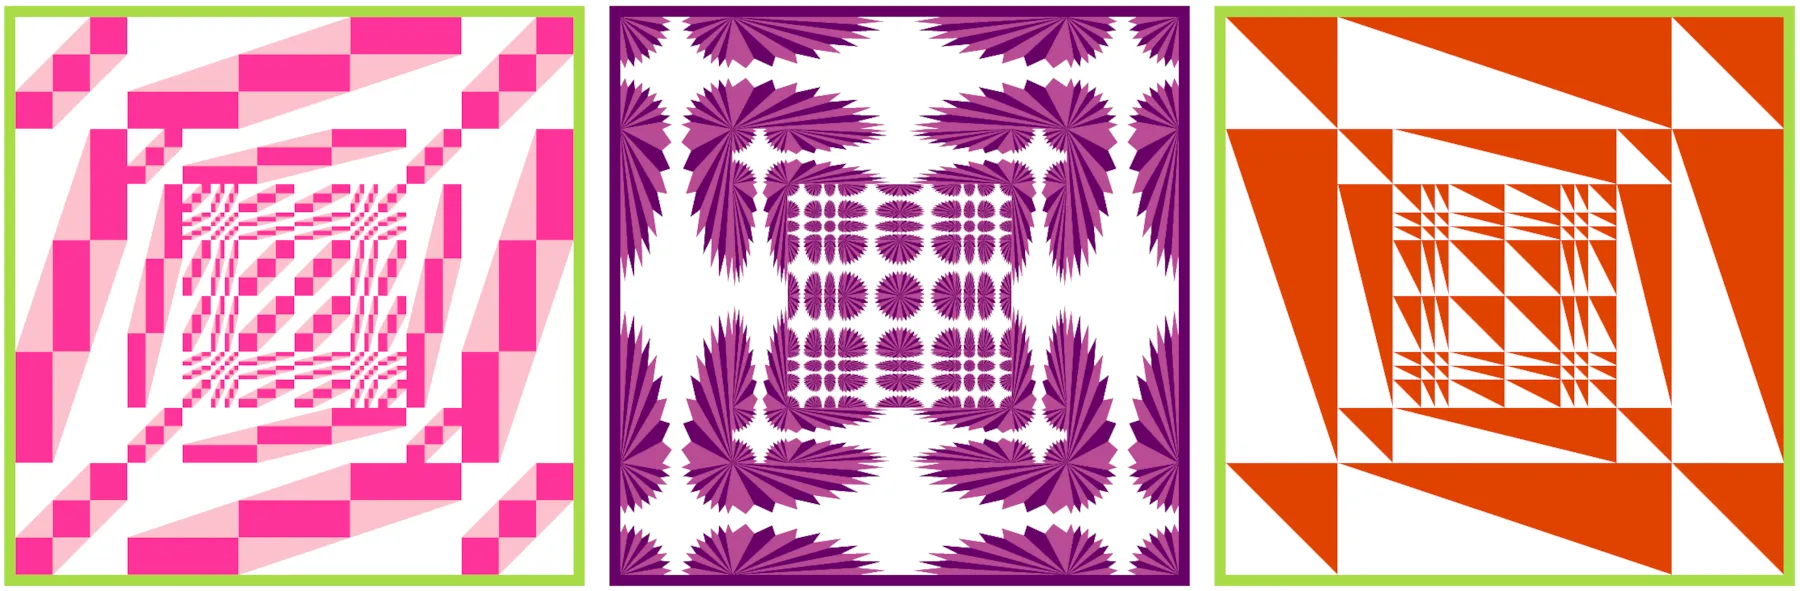
 . If the project is unnamed EQ8 will prompt you to do so. (To be saved, your item needs to be in the Sketchbook AND your project needs to be named. Here is more information.)A few more examples using this layout. (I promise the first one is square even though it doesn’t look like it!)
 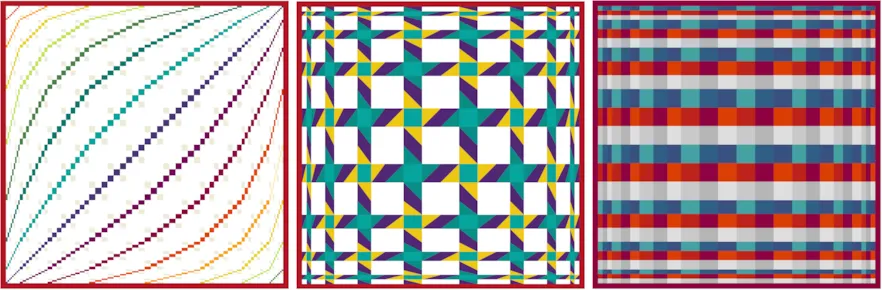 Let’s try something else.
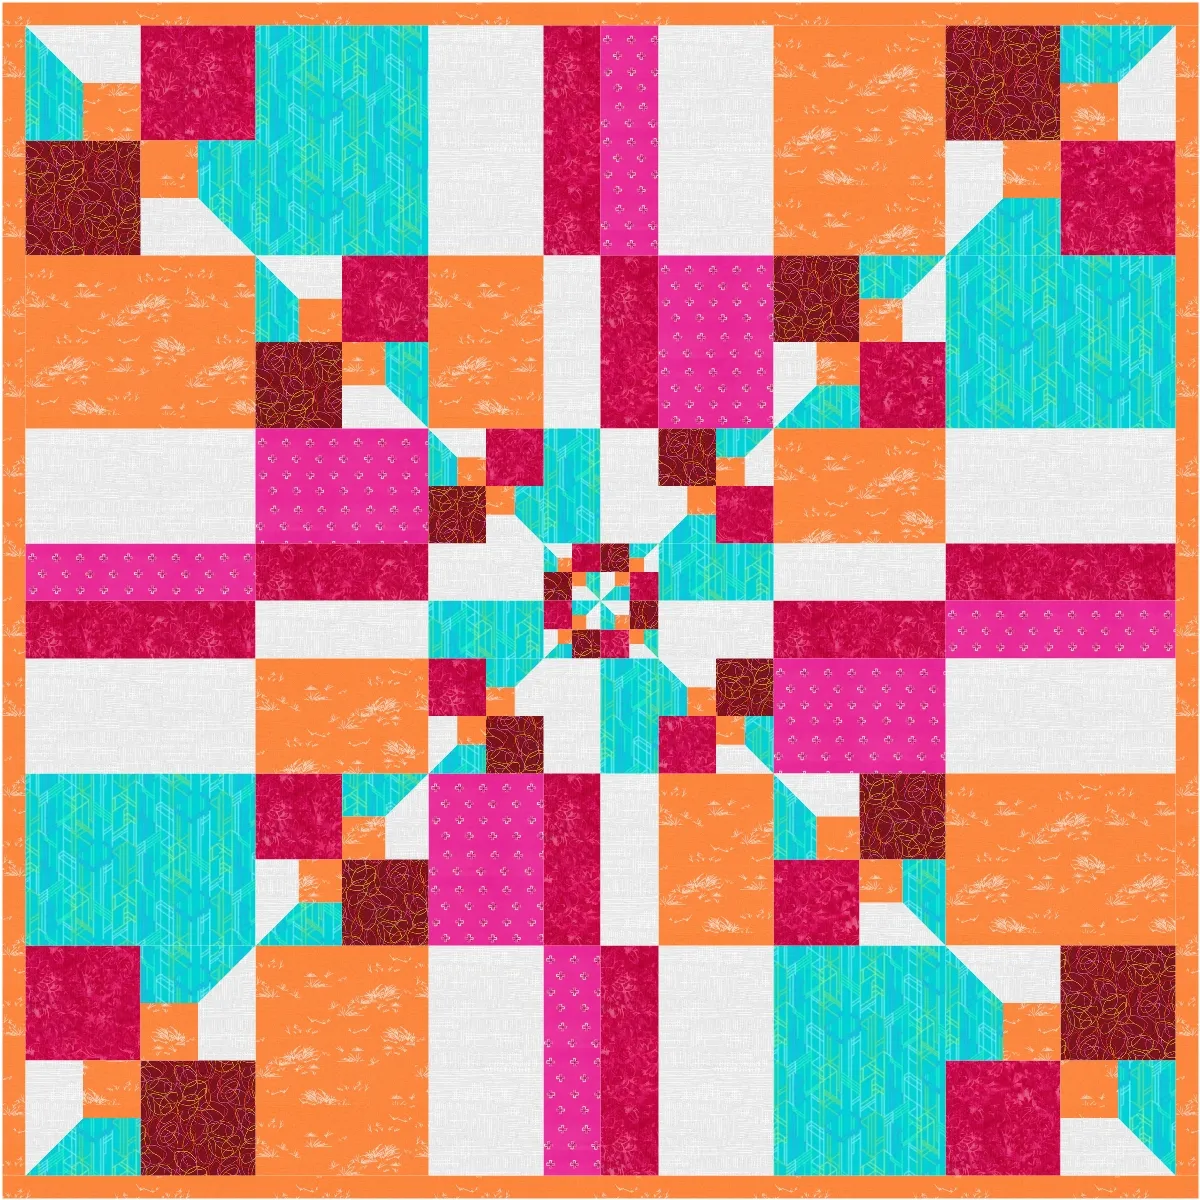
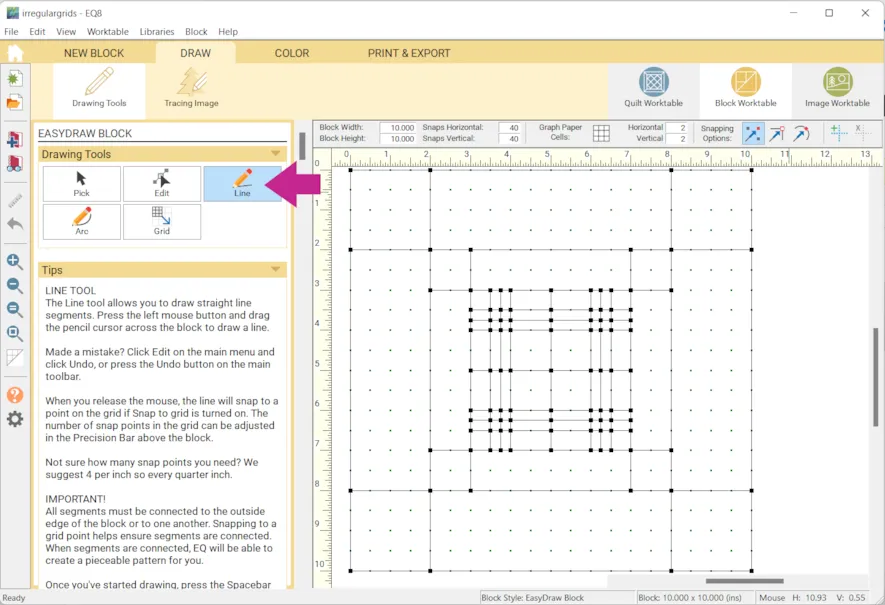
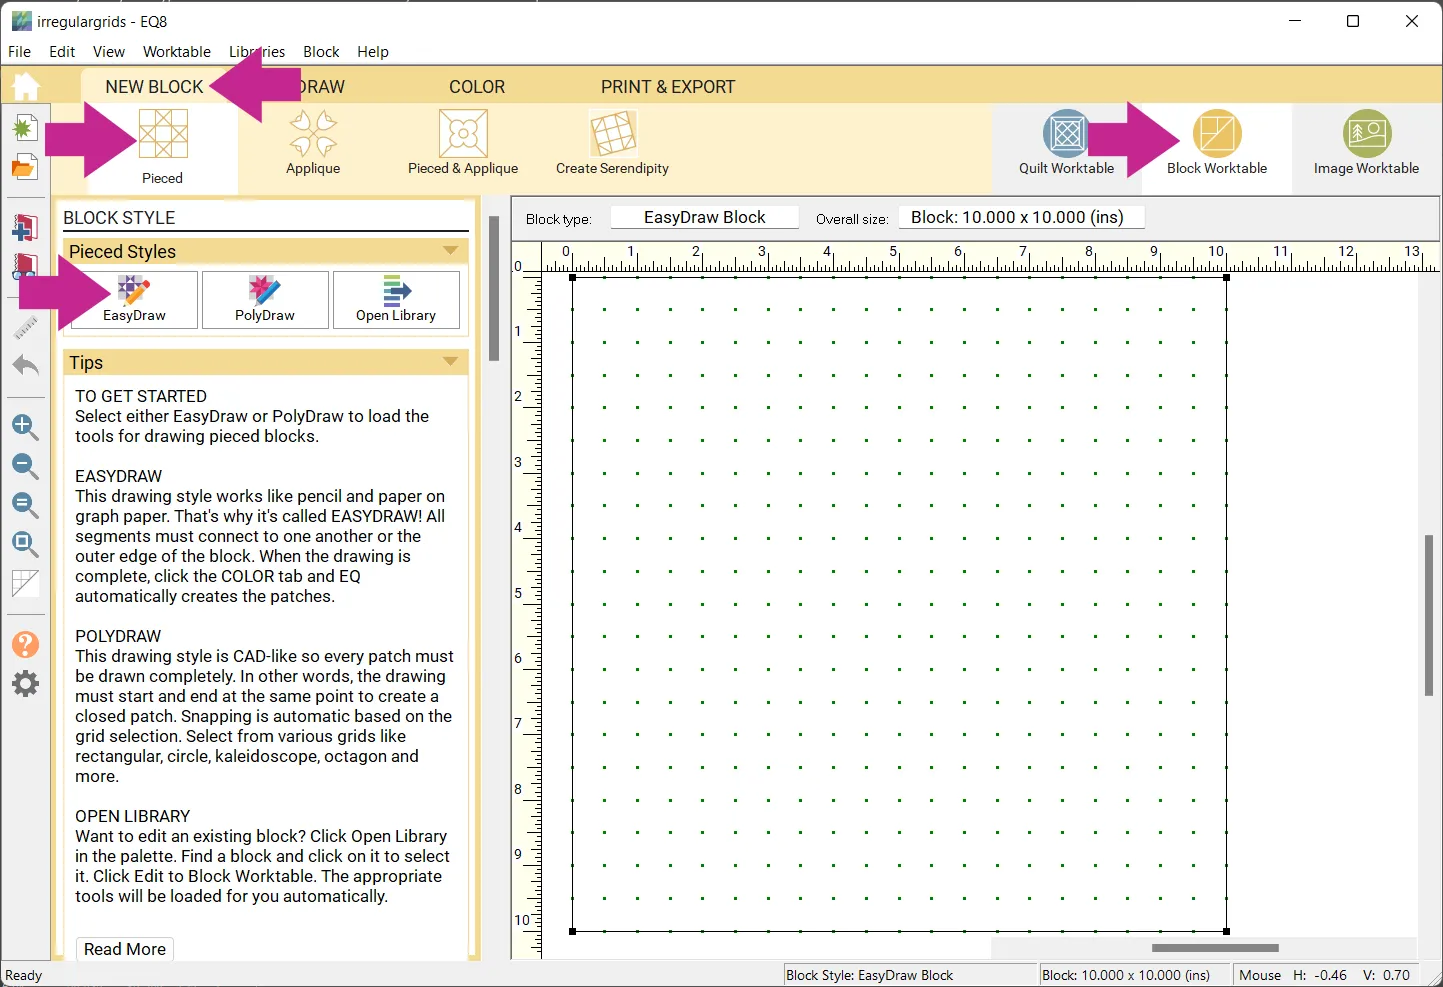
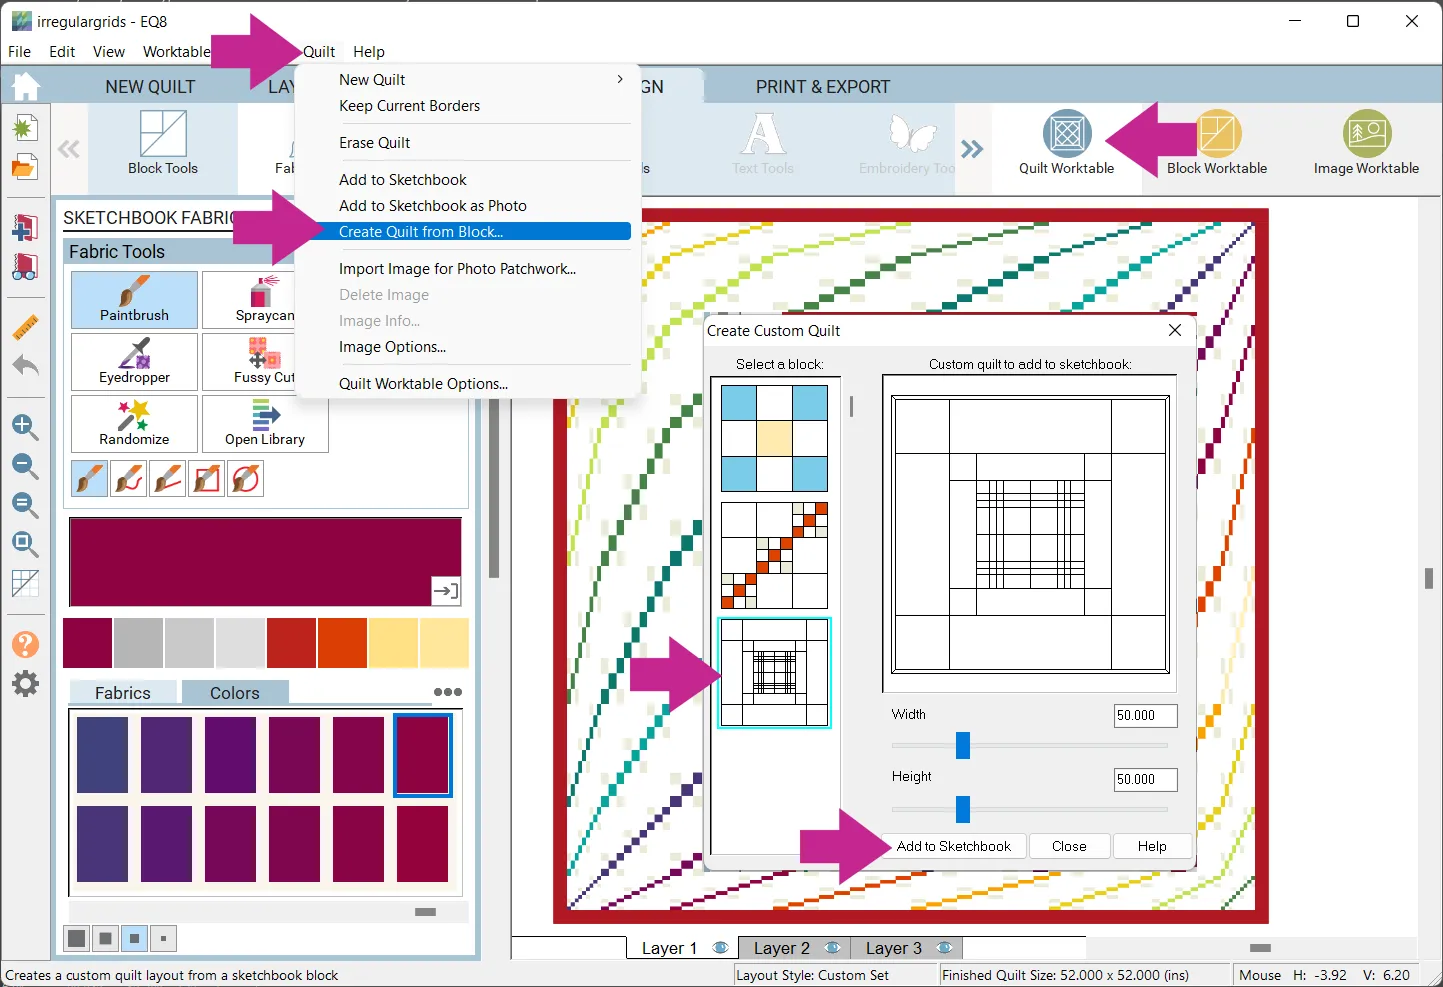
 - Click Block Worktable > NEW BLOCK > Pieced > EasyDraw
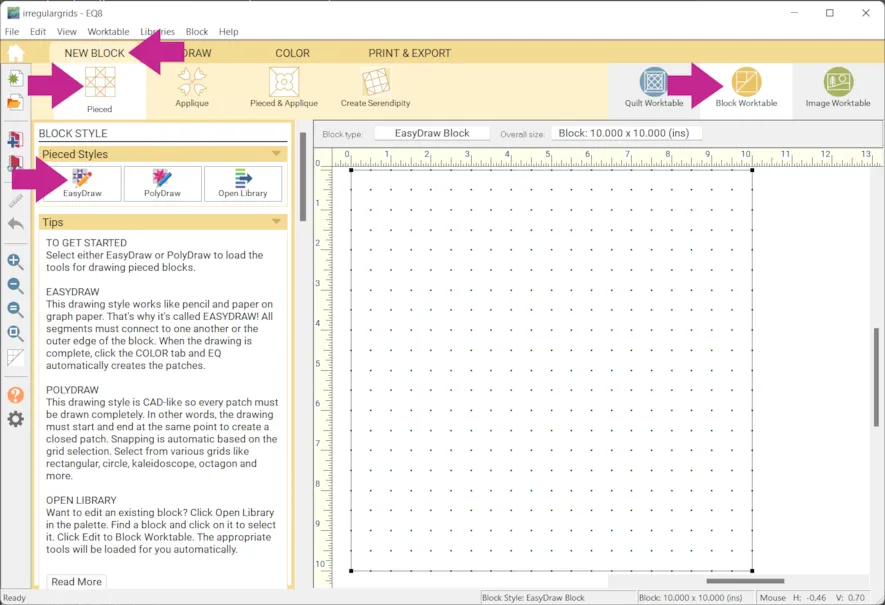
- Set the Block Width and Block Height to 10 x 10
- Set the Snaps Horizontal and Snaps Vertical to 40 x 40
- Turn Snap to grid points on worktable ON

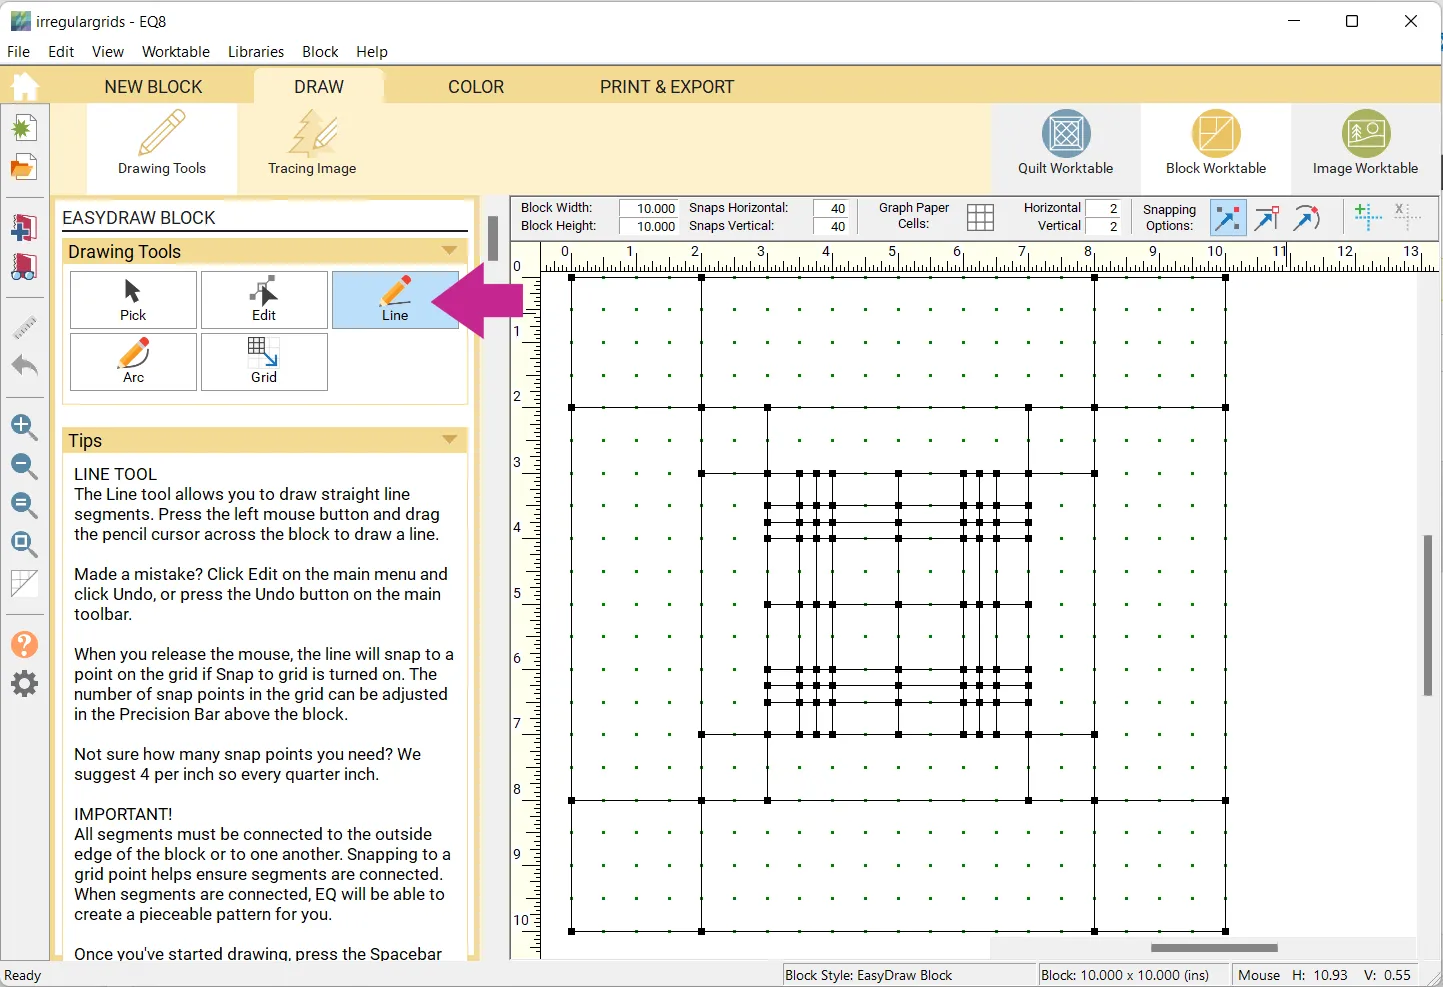
- Click the Line tool to draw a block something like the example below. It doesn’t need to be exact but it does need to have different widths of strips/columns. It also must not have any diagonal lines. This will be your next quilt’s layout!
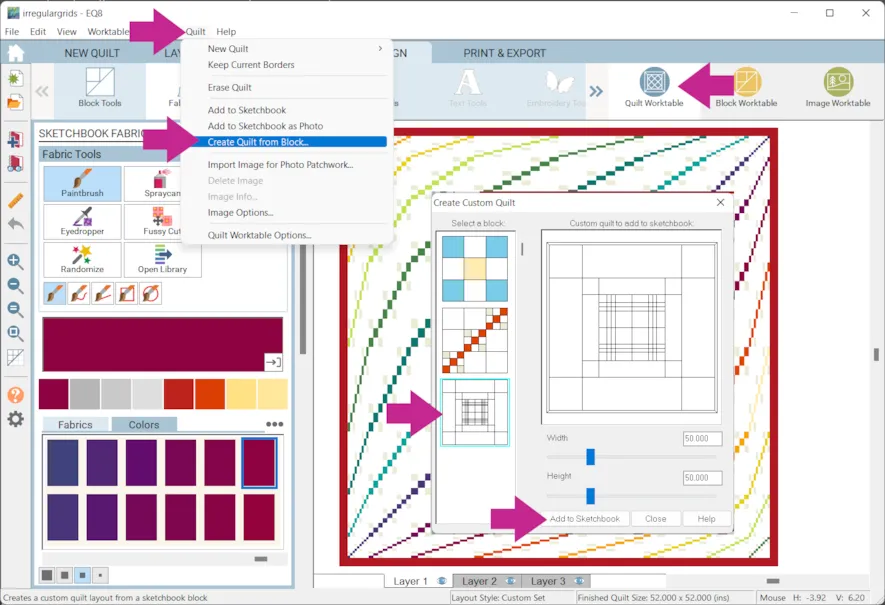
- Click Add to Project Sketchbook
- Click Quilt Worktable
- Click Quilt in the top menu bar > Create Quilt from Block
- Click on the block you just drew. You can also set the size of the quilt here if you would like.
- Click Add to Sketchbook
- Click Close
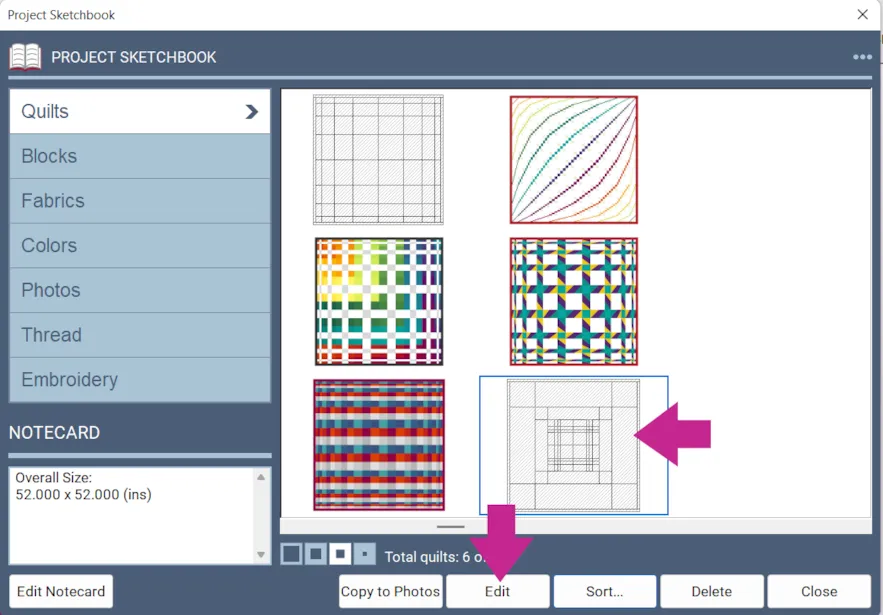
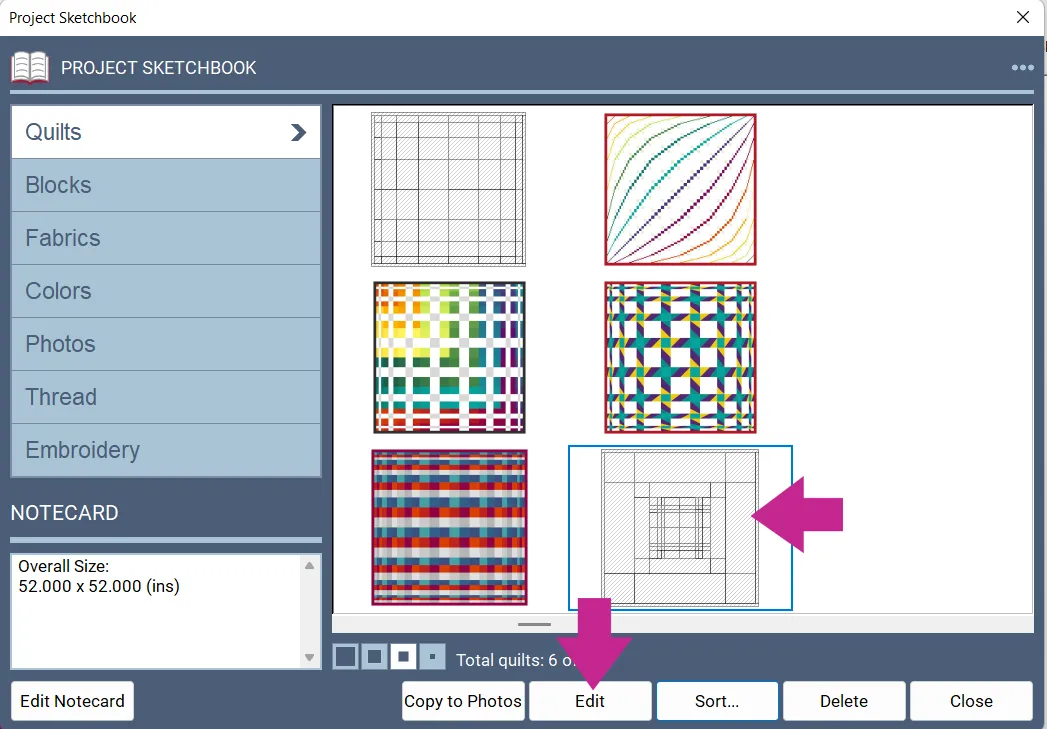
- Click View Project Sketchbook > Quilts
The layout we just created will be the last one in your sketchbook. - Click on it and click Edit.
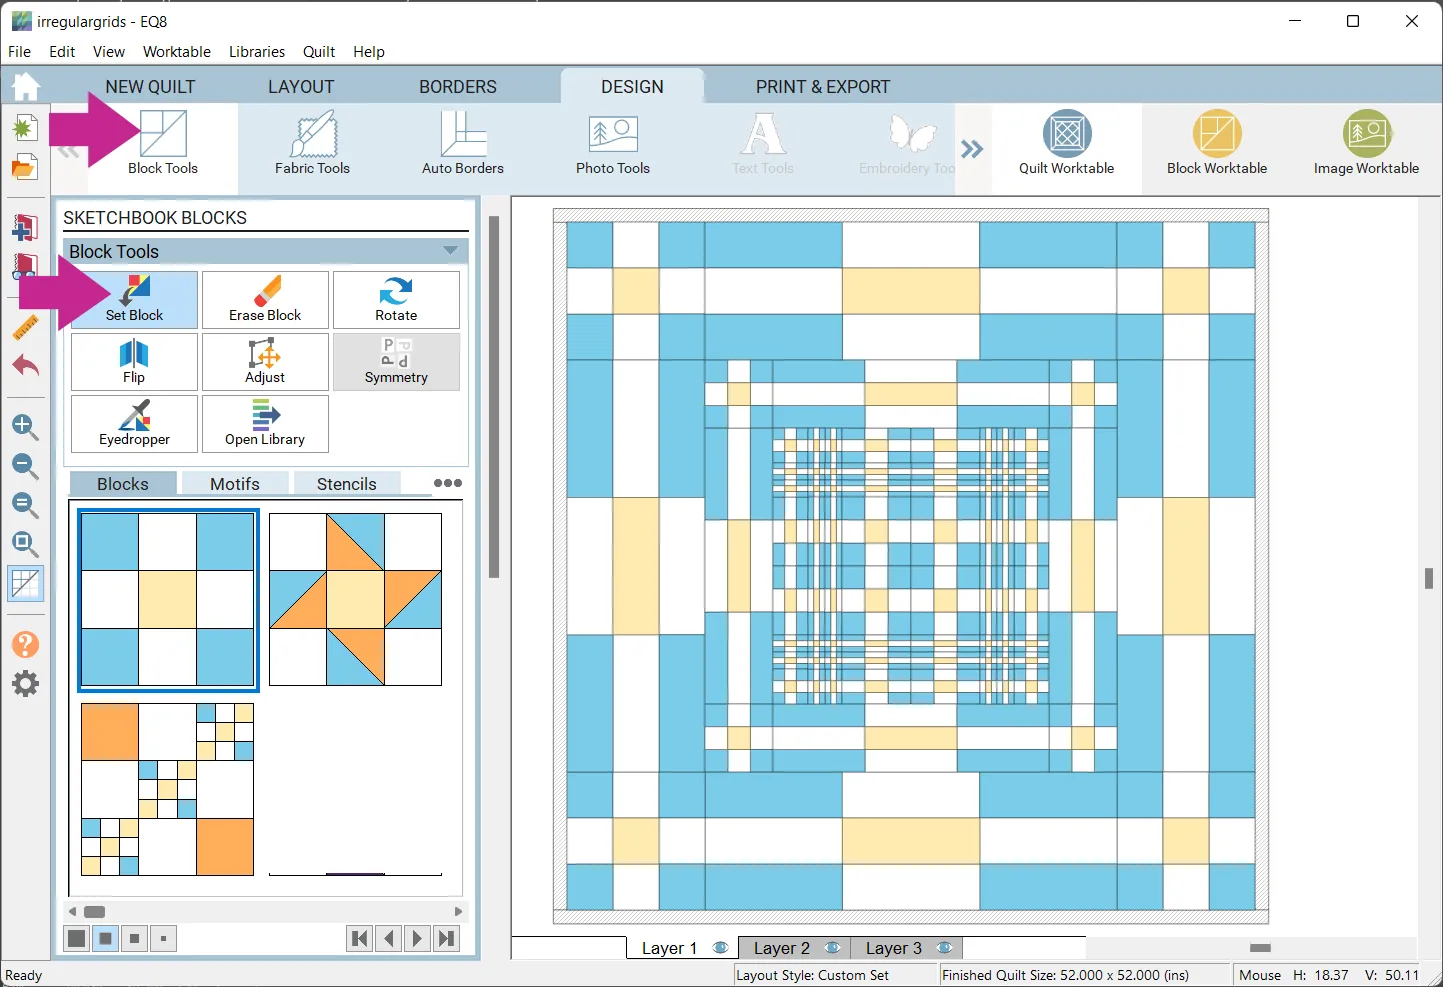
- Click Block Tools > Set Block and experiments with more blocks.
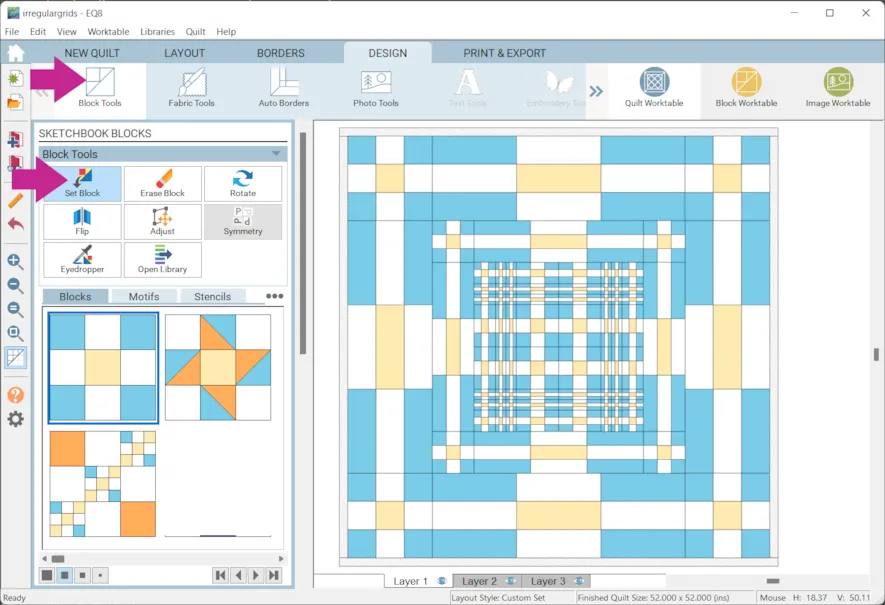
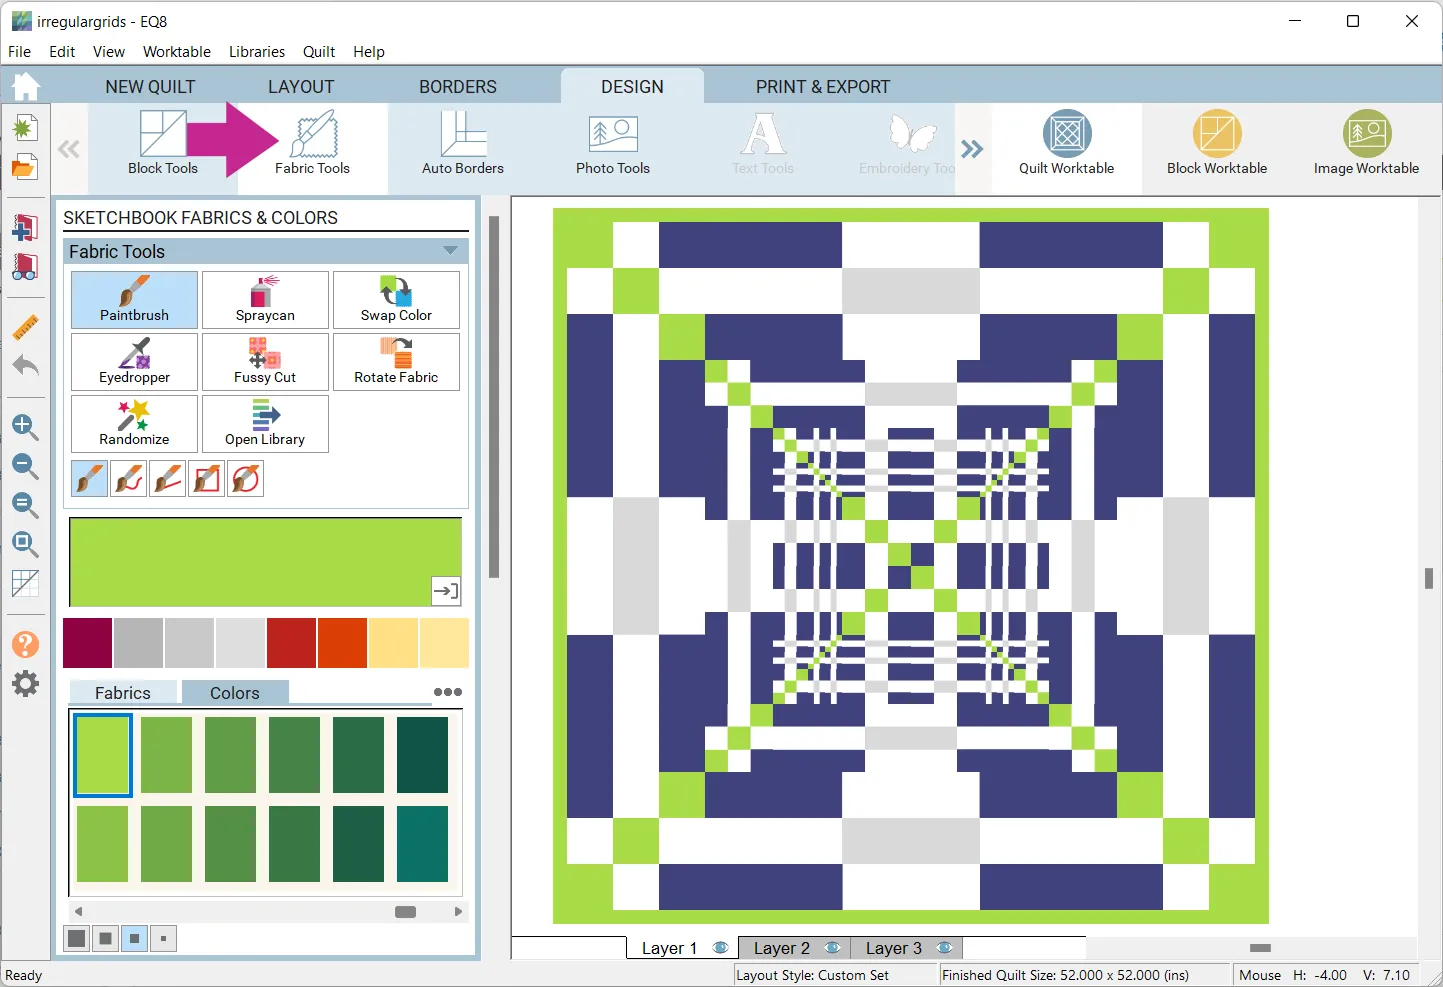
- Click Fabric Tools and see how the colorings change the design!
- Click Add to Project Sketchbook
for anything you would like to save.
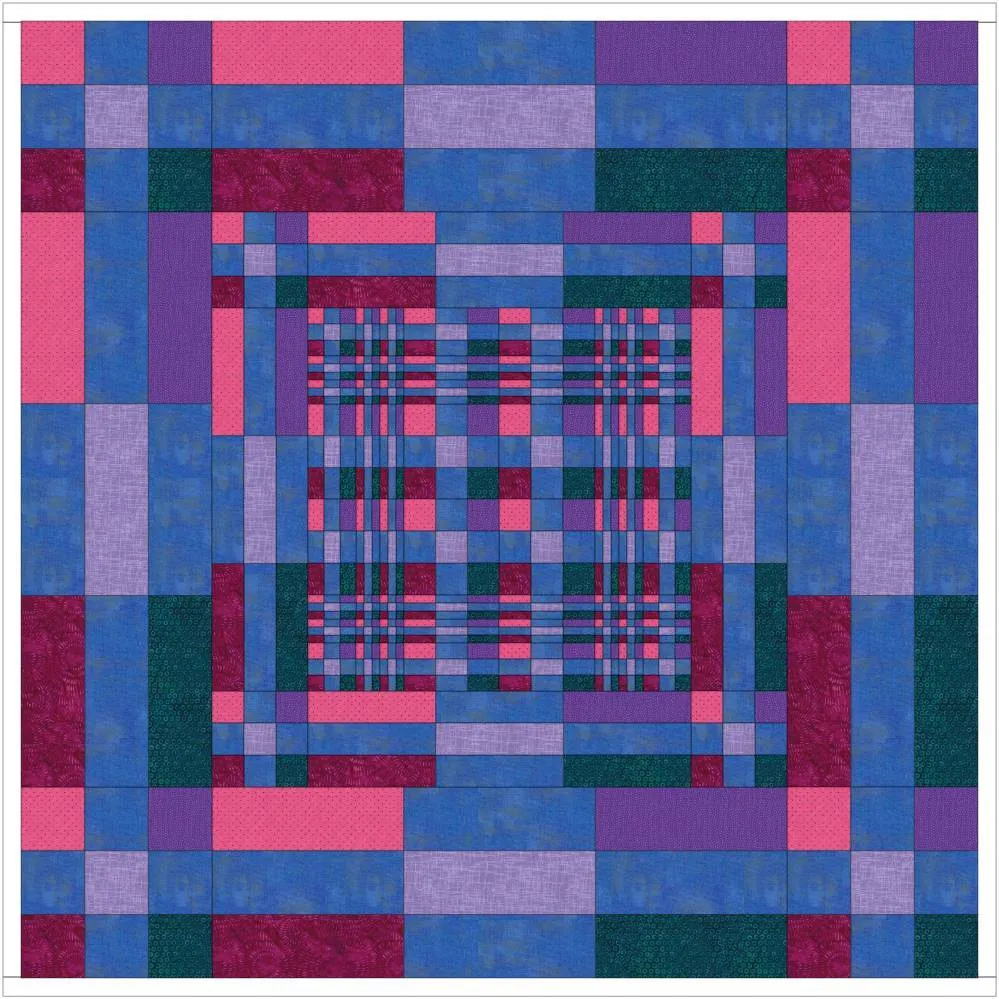
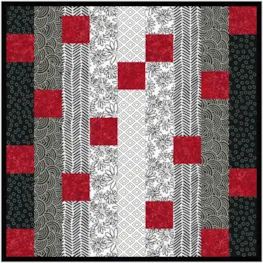
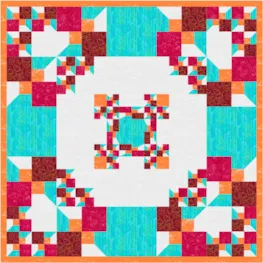
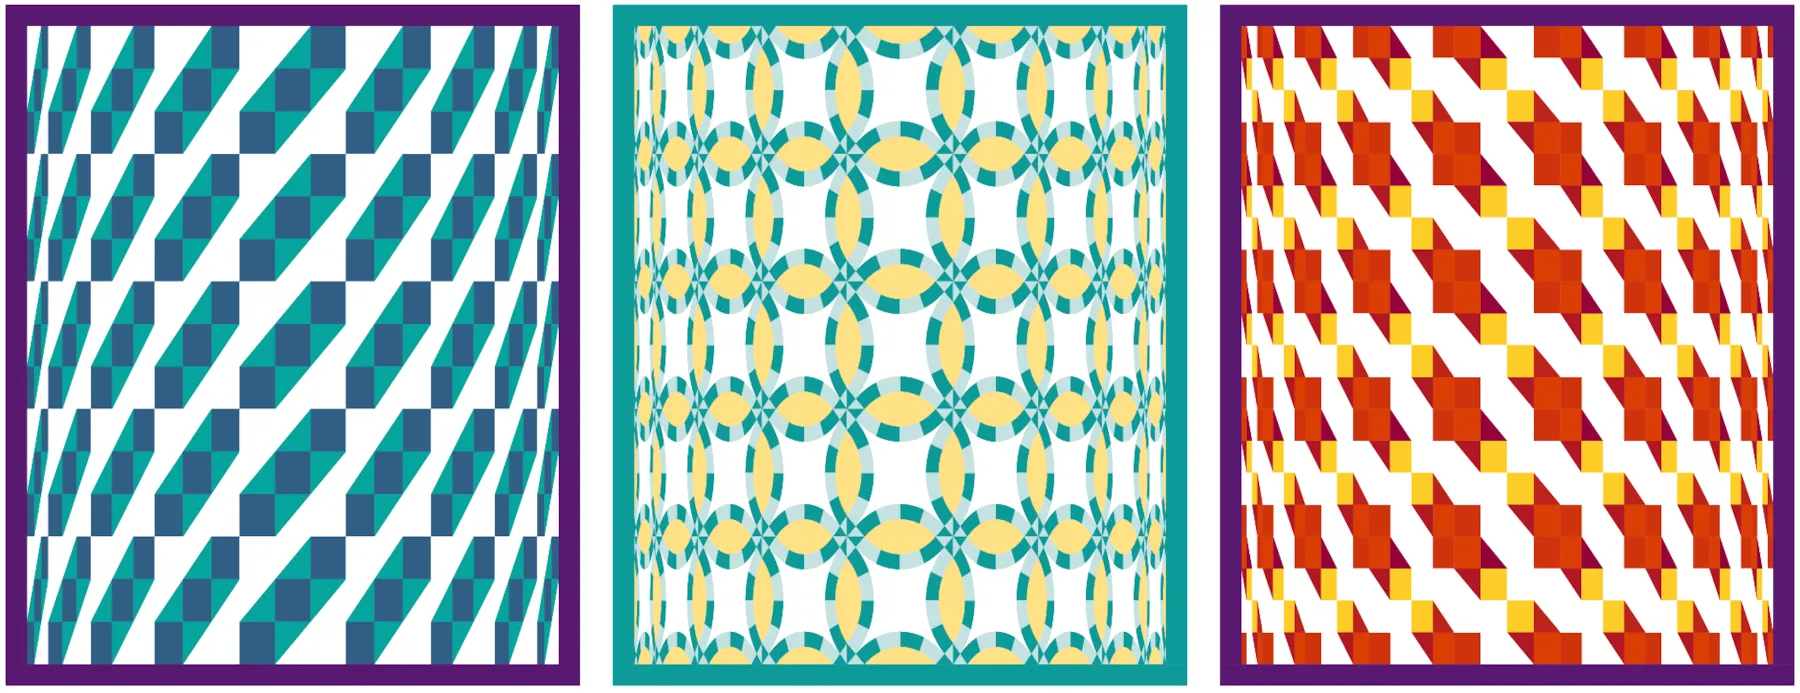
Here are a few more examples:


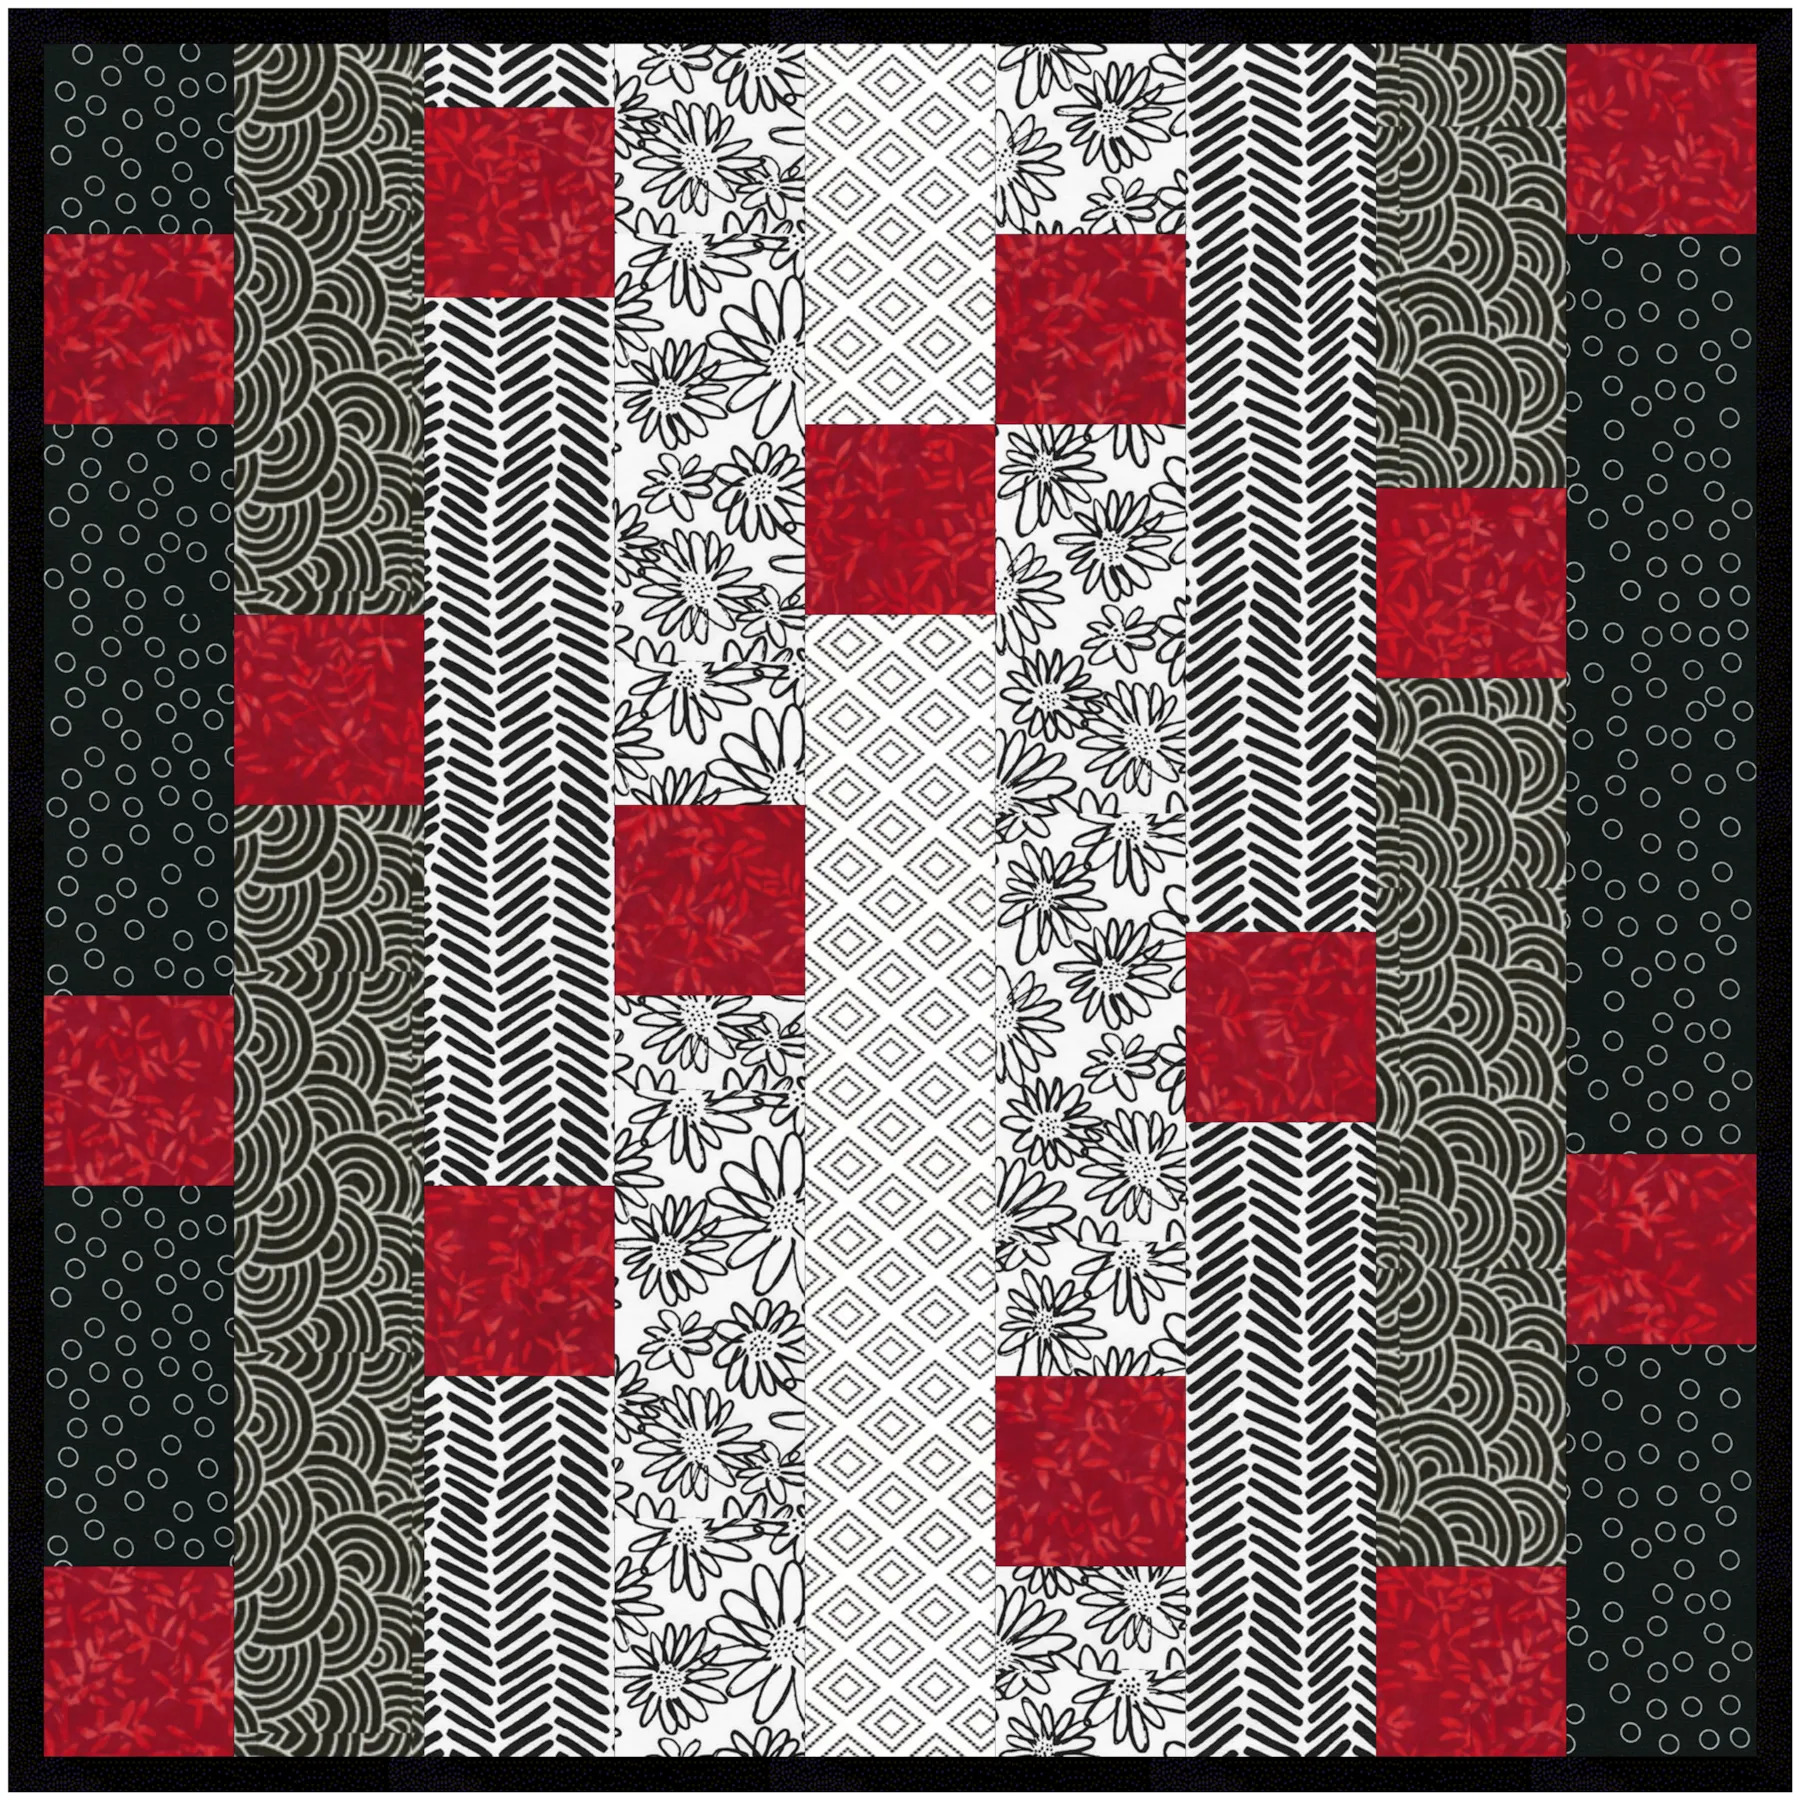
Another way to design quilts with irregular grids is to design a strip quilt. Here is a previous Design & Discover that explains how to design strip quilts. In the examples below I created a quilt with nine strips with varying widths. Each strip style is Pieced Blocks with 5 blocks in each strip.
If you want to post images of your quilt, here is how to export the images.
To post your image click to comment on this post.Fill in your info and then click Browse.
Go to: Documents\My EQ8\Images
I can’t wait to see what you’ve done! I hope you enjoyed the lesson!
If you have questions about the lesson feel free to post them below.
If you have questions about something else EQ related, please contact techsupport@electricquilt.com.
If you have suggestions for new Design & Discover lessons feel free to comment below or email Heidi@electricquilt.com.