With EQ8 you can import fabric, photos, and more. But, images with transparent backgrounds can also be imported and used.
If you don’t have software that can remove the background from images, there are free websites that can do it, too. One example is www.remove.bg/upload
Once you have your images saved as a PNG and the backgrounds removed, it’s time to import them into EQ8.
Please note: If you plan to print the image onto paper or Printable Fabric, make sure your images are 150dpi. If you are using it in EQ just for visual reference and have no plans to print it, then 72dpi is fine. It’s always a good idea to print your images on paper as a test, before Printable Fabric so that you are sure you’re getting the results you want.
- Open a project in EQ8 that you would like to add images to or design a quilt to from scratch. If you need inspiration try this lesson.
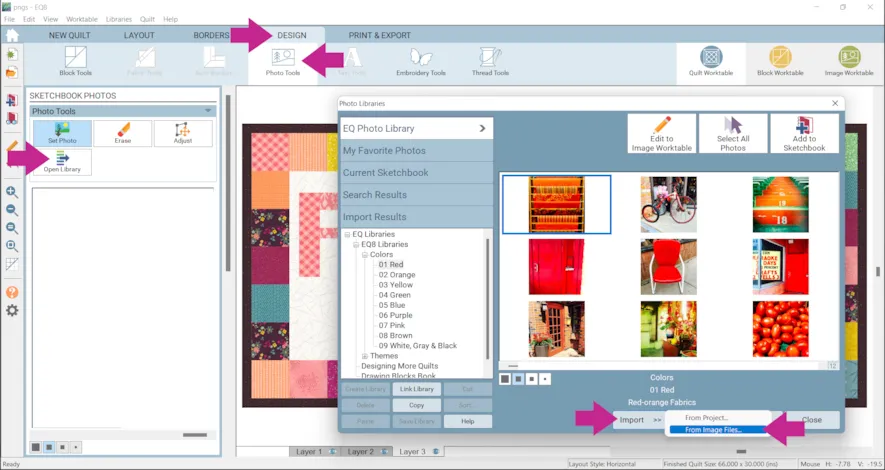
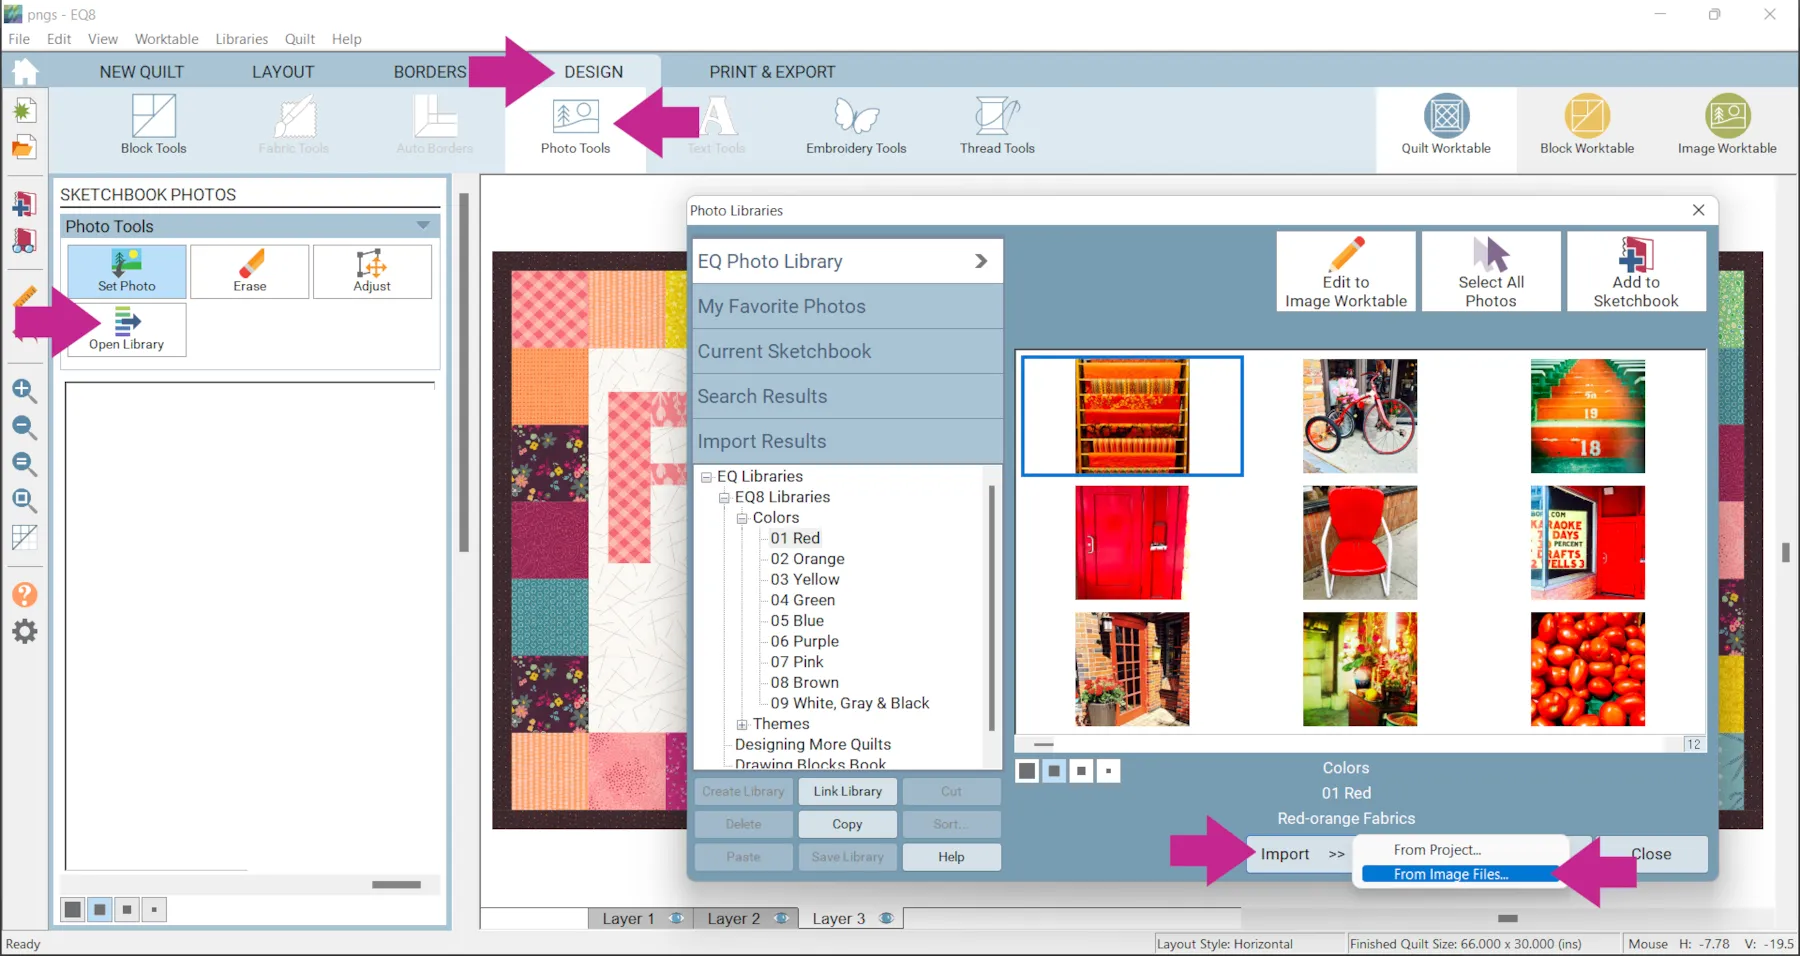
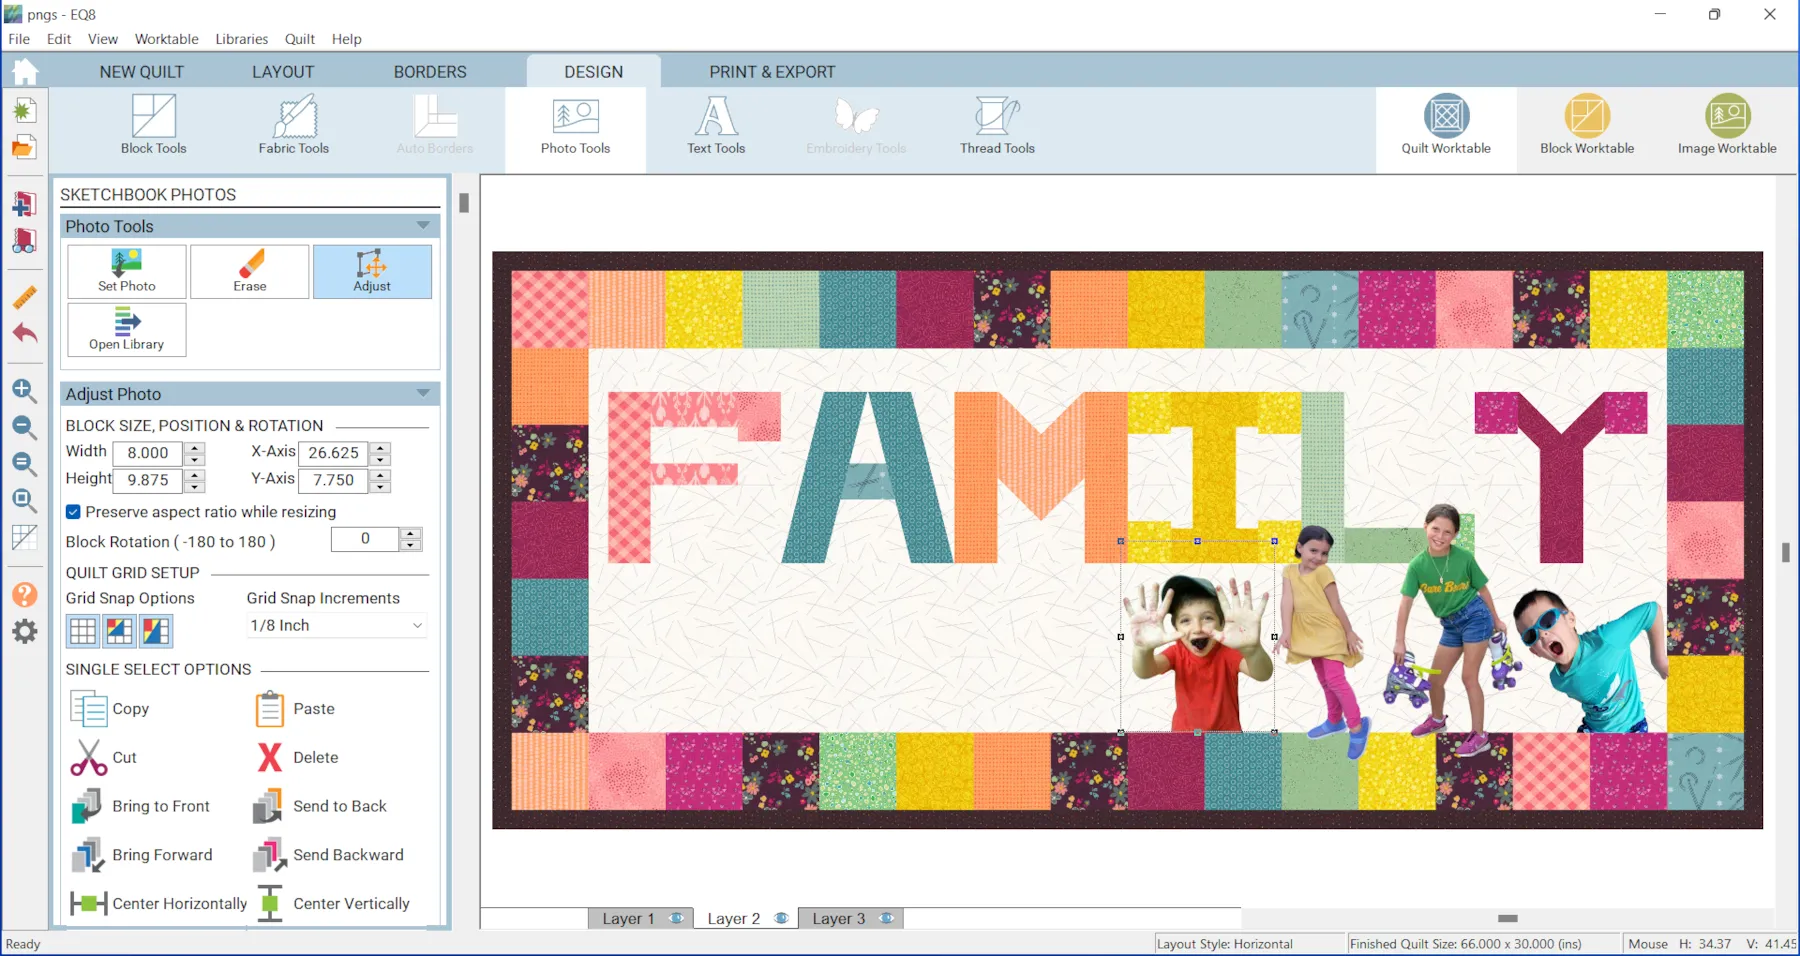
- On the Quilt Worktable, click the DESIGN tab > Photo Tools
- Click Open Library
- Click Import > From Image Files
- Navigate to where your images are saved.
- Hold down the ctrl /cmd key on your keyboard and click to select multiple images, if desired.
- Click Open
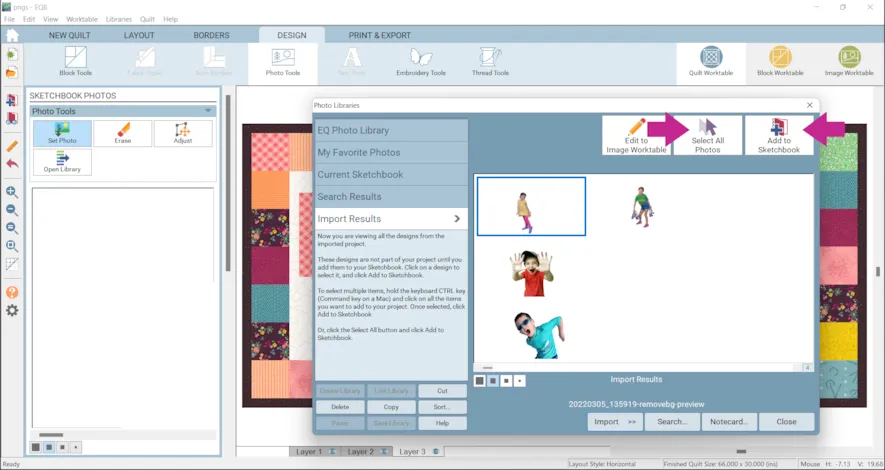
- Click Select All Photos if you have multiple images.
- Click Add to Sketchbook.
- Click Close
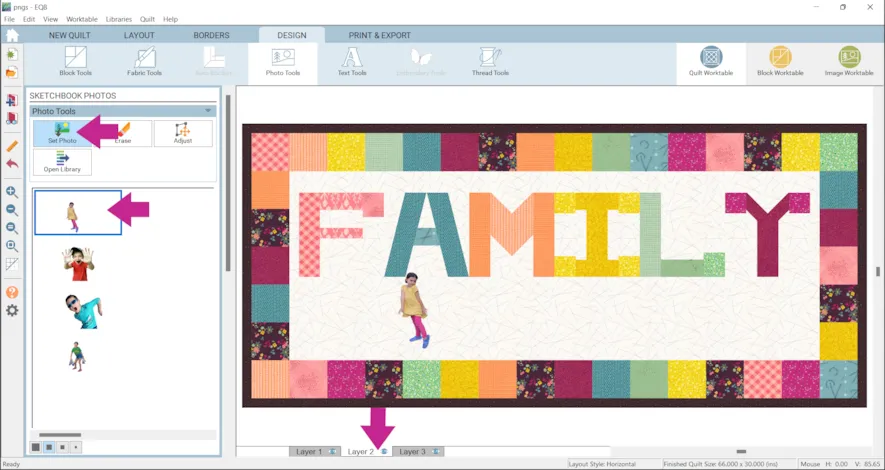
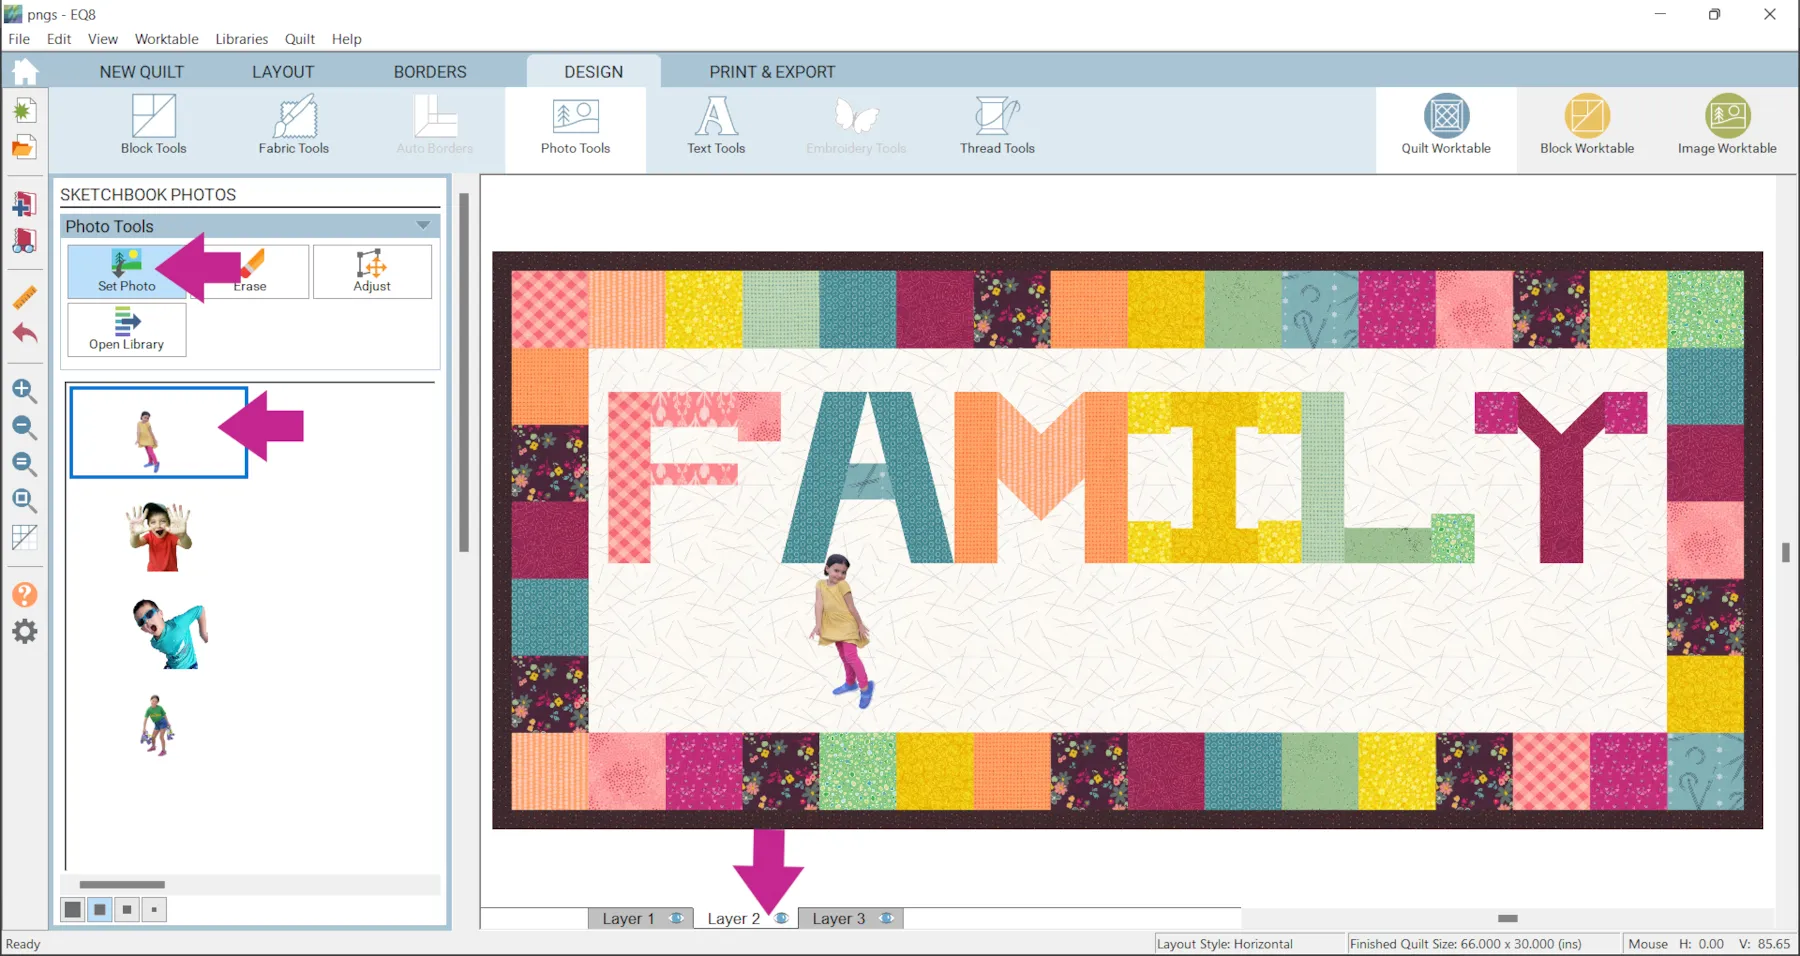
- Click Layer 2 at the bottom of your screen
- Click the Set Photo tool
- Click on a photo and drag it onto your quilt
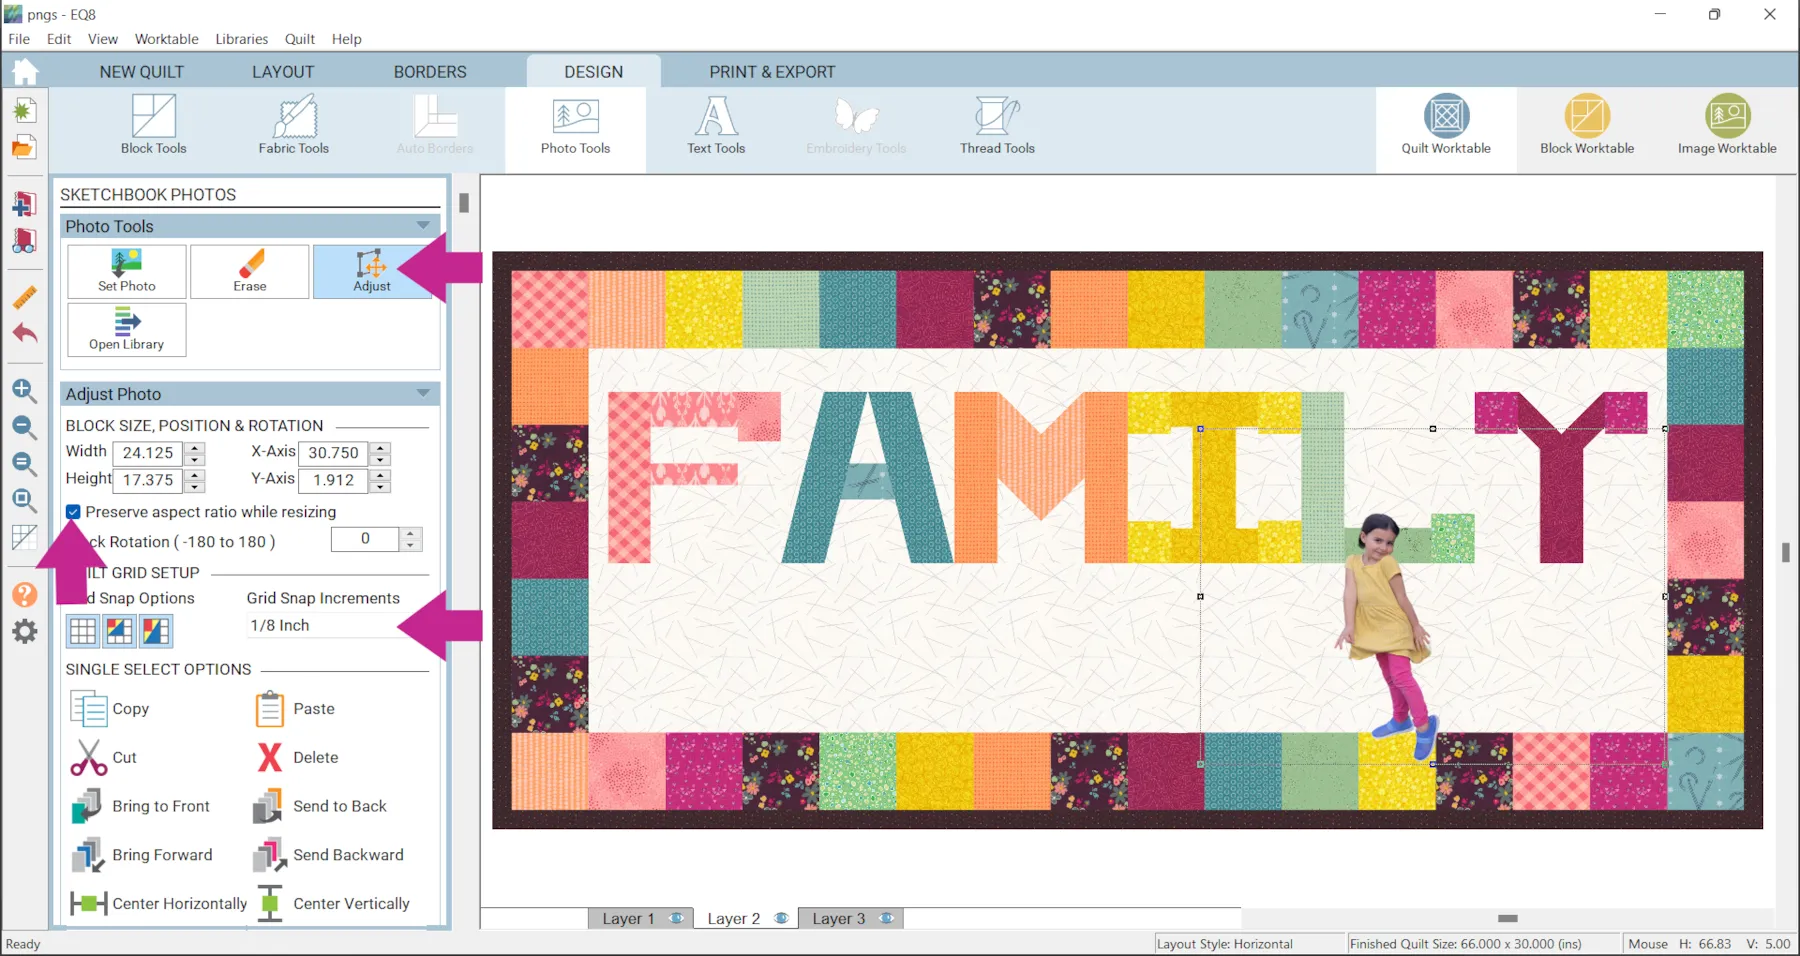
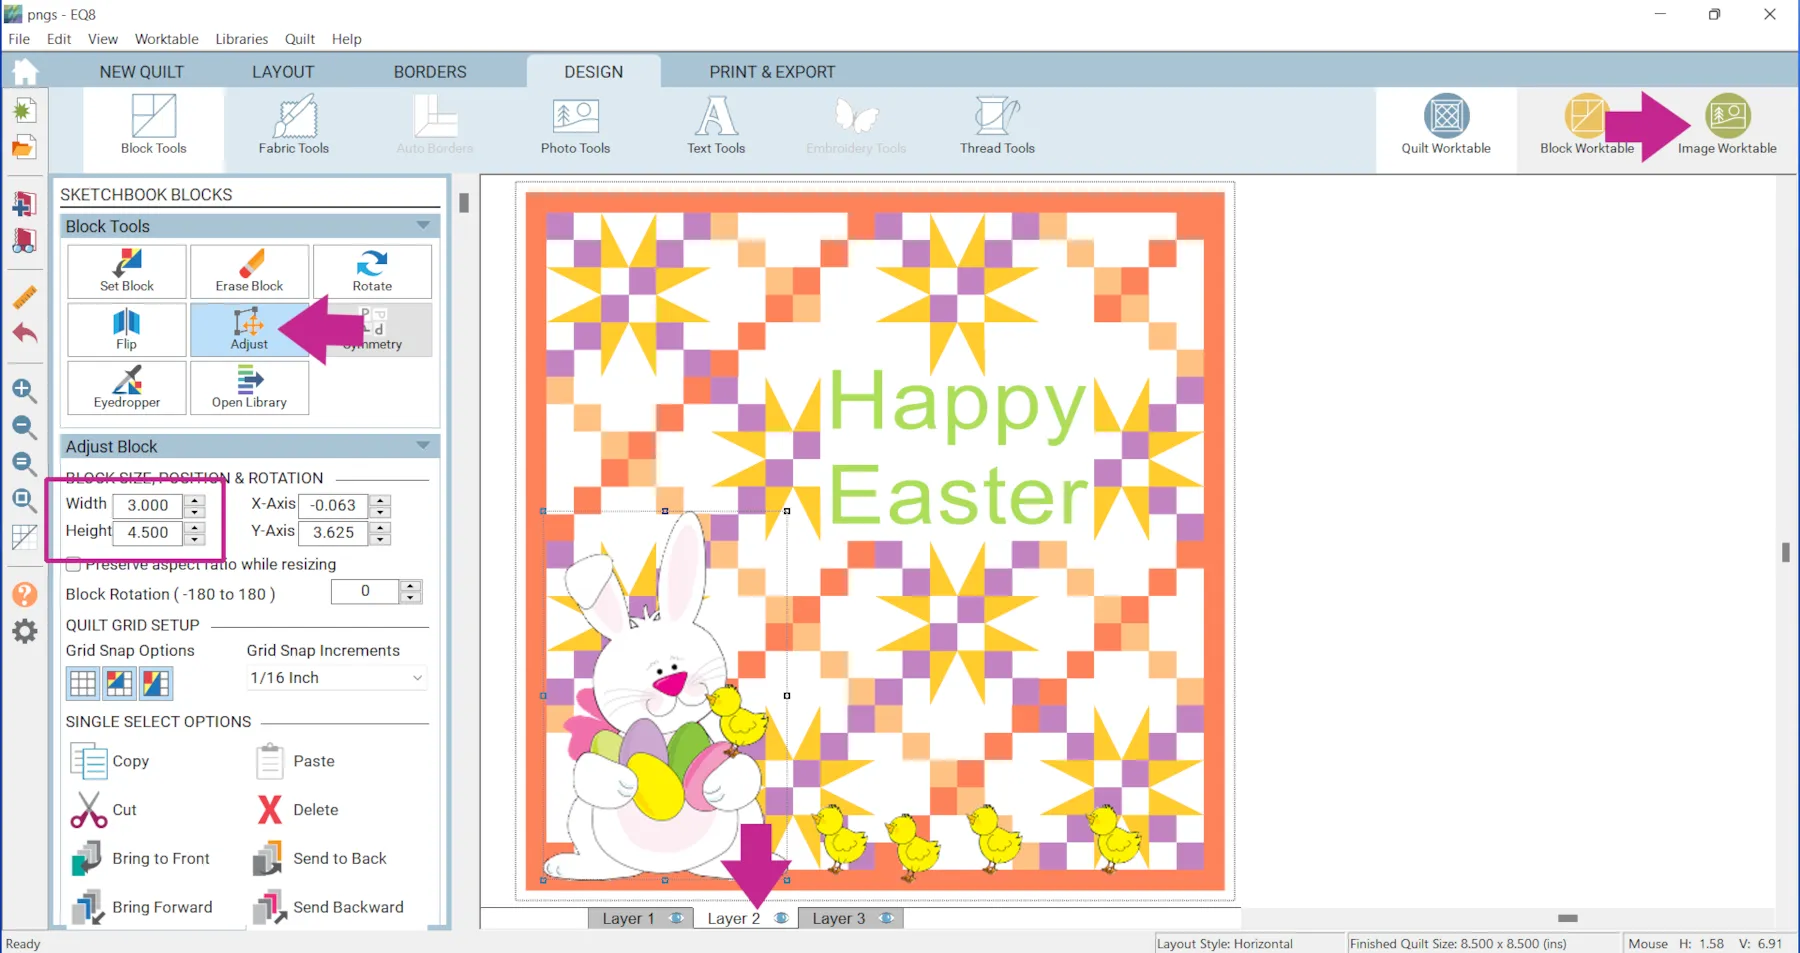
- Click the Adjust tool
- Check the box next to Preserve aspect ratio while resizing
- Click on the image to move it or click on the selection box to resize.
- If you are having trouble getting the image exactly where you want it, adjust the Grid Snap Increments.

- Keep adding and adjusting the images until you have them the way you would like.
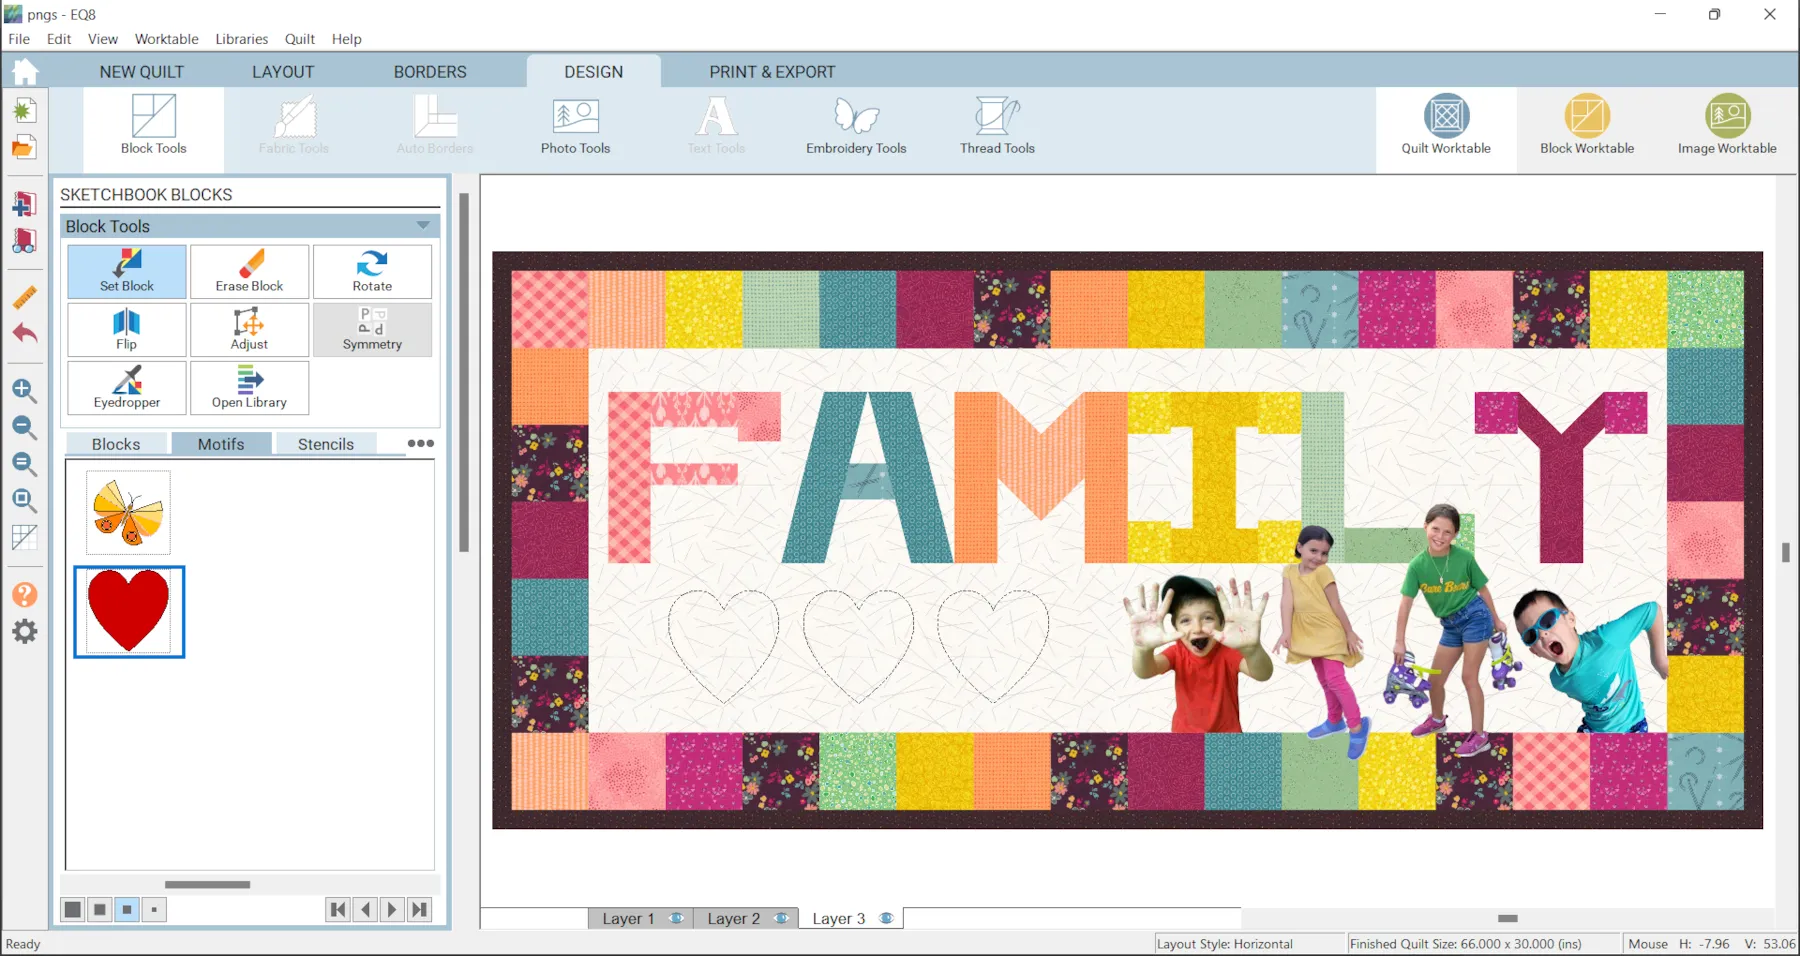
 In the example I also added a Motif to Layer 3 and recolored it using the Thread Tools.

- When you are done, click Add to Project Sketchbook
 . This project is already named but if it wasn’t, EQ8 will prompt you to do so. (To be saved, your item needs to be in the Sketchbook AND your project needs to be named. Here is more information.)
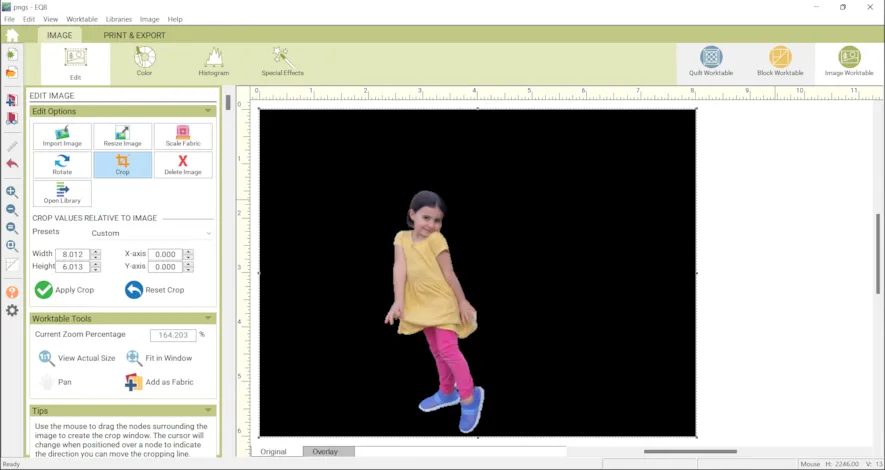
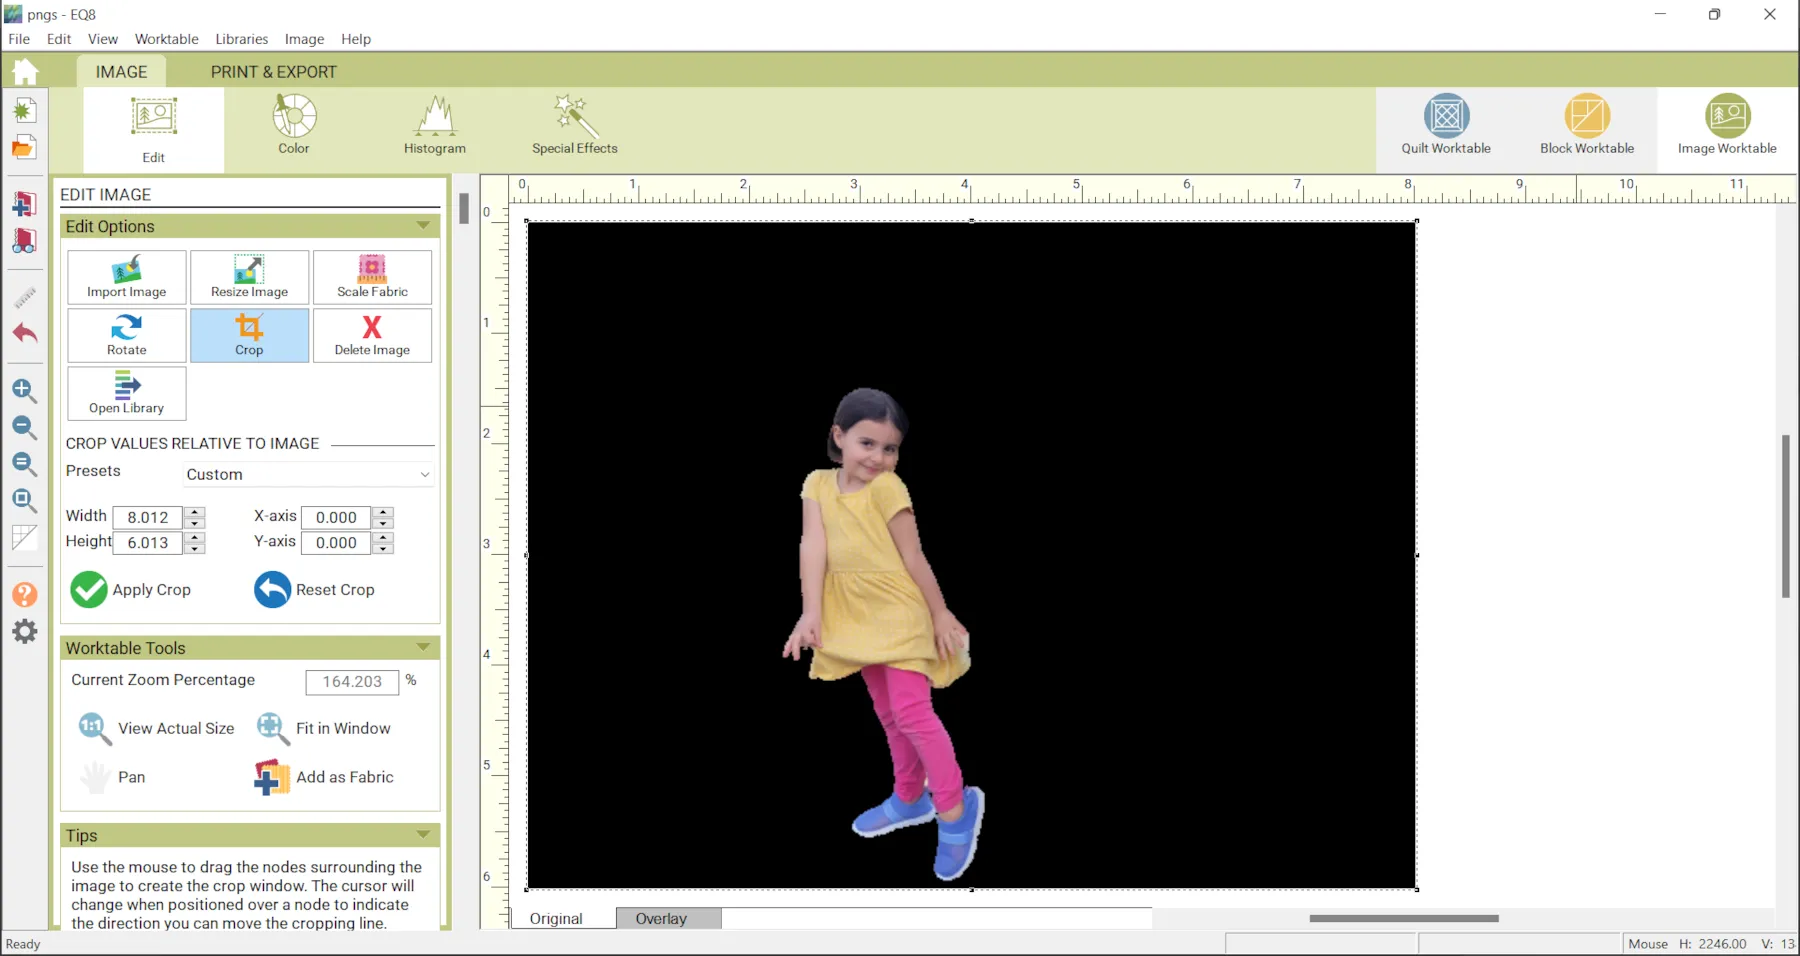
Please note: PNGs cannot be imported to the Image Worktable. They must be imported as a photo in the Photo Library.
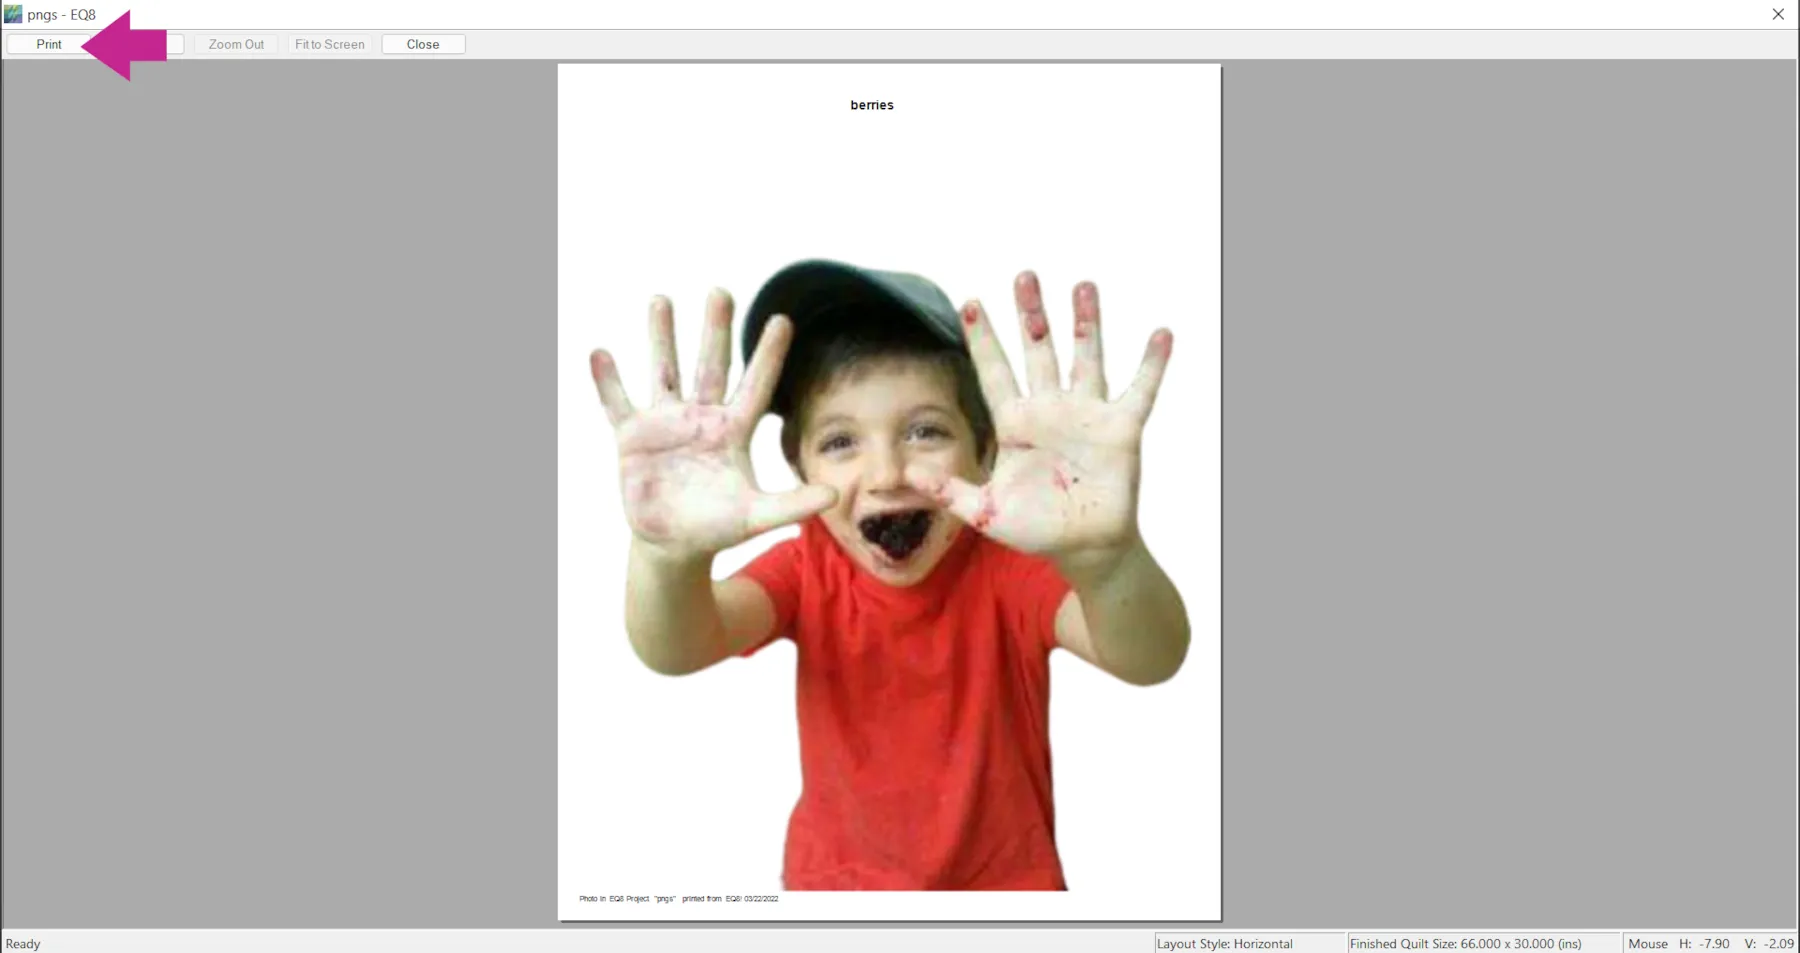
Also, do not edit PNGs on the Image Worktable. EQ8 will automatically add a black background, as shown below. However, you can use the Photo Layout feature with PNGs as shown in step 34.
 If you would like to actually sew a quilt like the example you would want to print the photos on printable fabric then applique them onto the quilt.
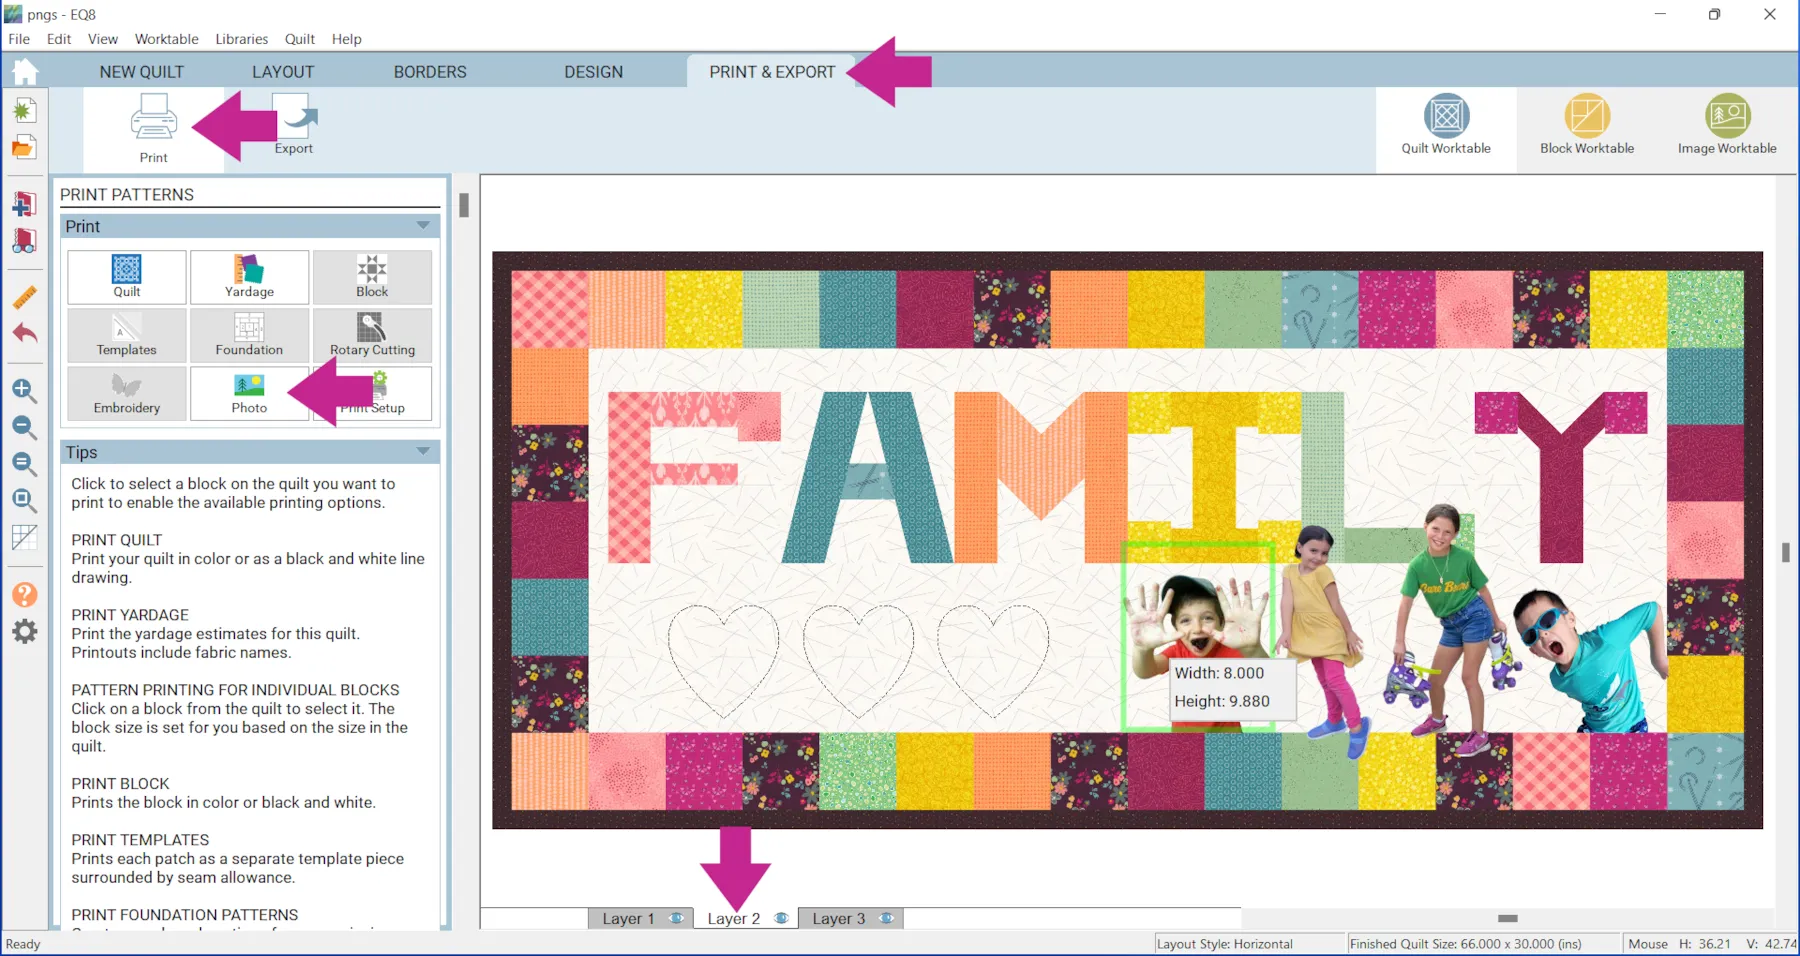
 - Click the PRINT & EXPORT tab > Print
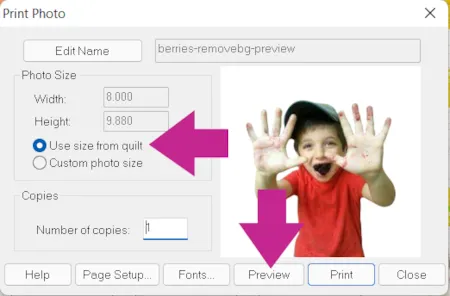
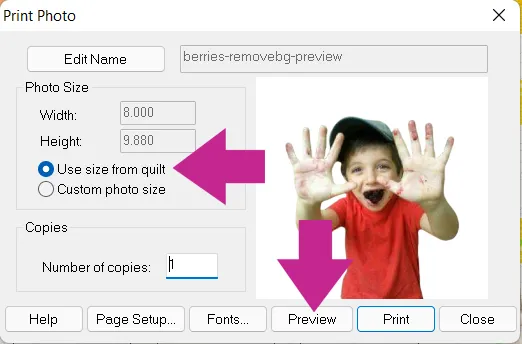
- Make sure that you are still on the Layer 2 tab and click on an image.
- Click Photo

- Select Use size from quilt
- Verify that your photo will fit on your printable fabric. For example, if you are using standard 8.5 x 11 printable fabric you cannot print a photo that is 13 x 11.
- Click Preview.
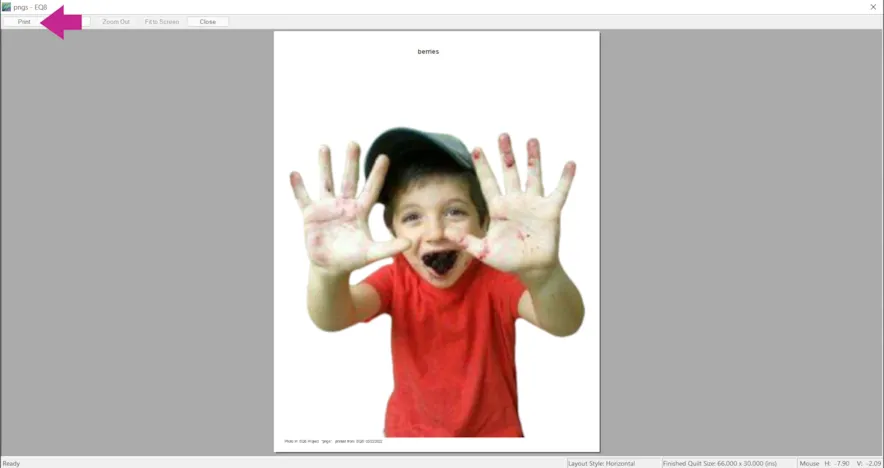
- Make sure everything looks ok. Again, you may want to print out your photo on paper as a test.
- Click Print.
- Repeat steps 17-23 for all of your images.
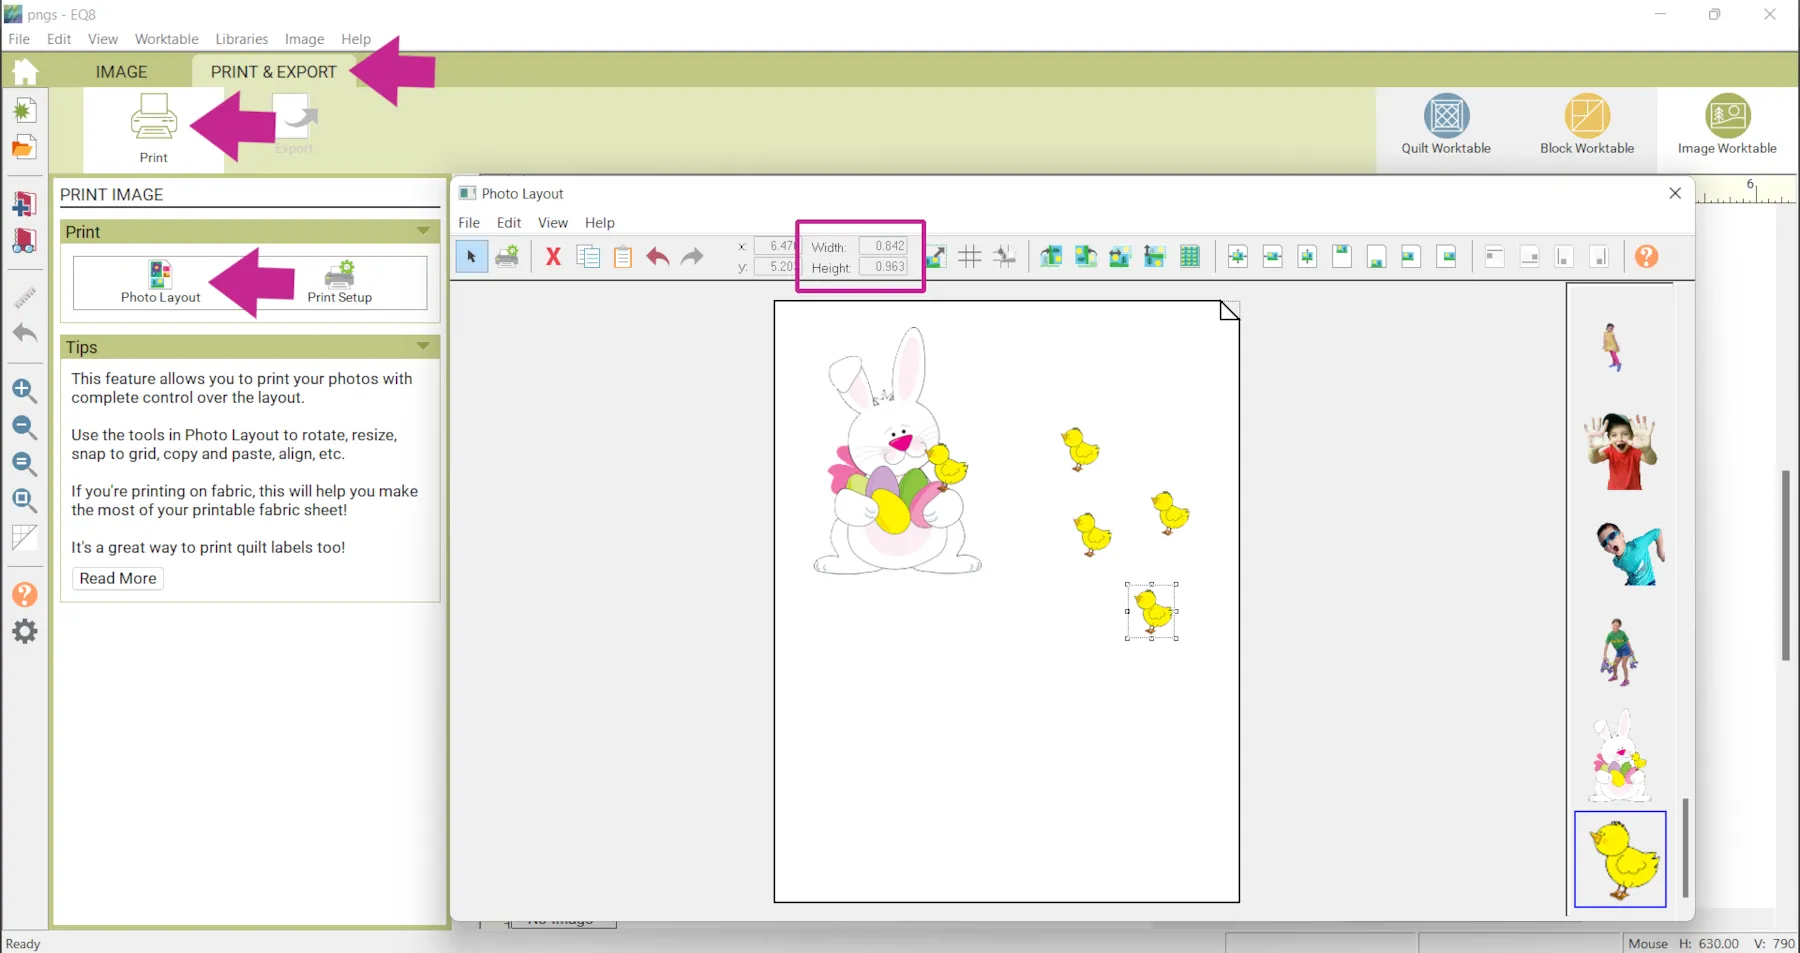
If you have a quilt with smaller images you can use Photo Layout to print them on fabric sheets together.
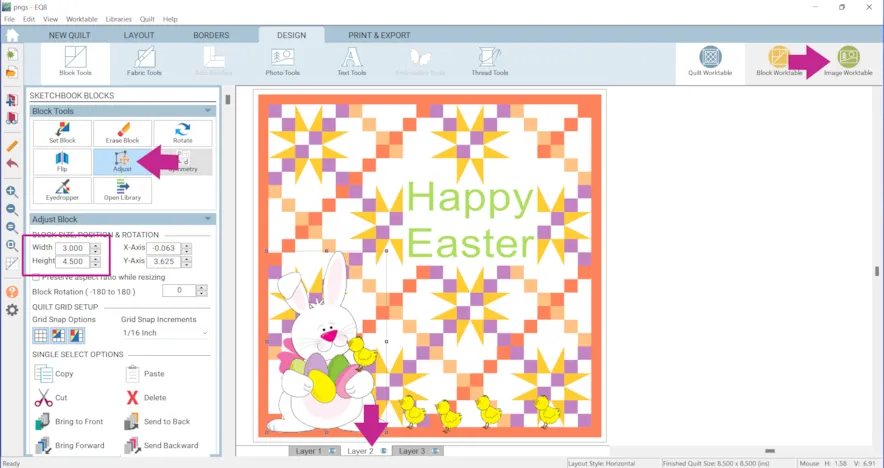
- Make sure you are on Layer 2.
- Click the Adjust tool
- Click on an image
- Note the size of each image you want to print. In this example the bunny is 3 x 4.5 and the chicks are each .8 x 1.
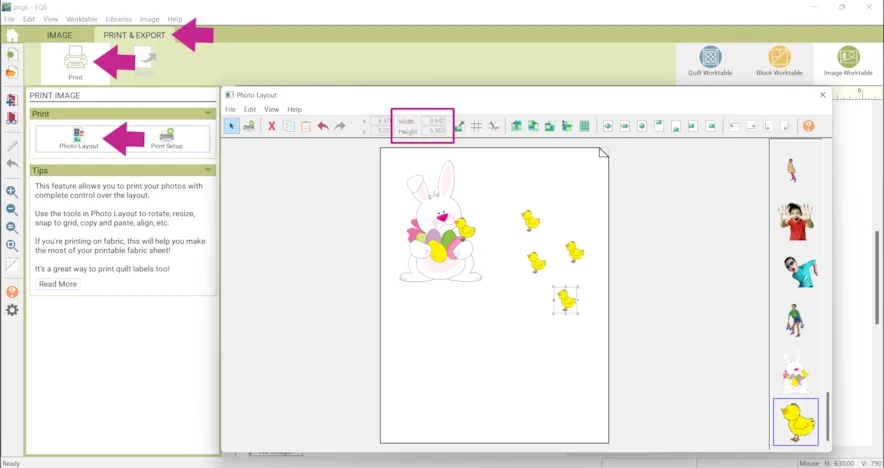
- Click the Image Worktable
- Click PRINT & EXPORT > Print > Photo Layout
- Drag your images onto the sheet.
- Resize the images by dragging the selection box. You will see the size displayed at the top. In the example we would want the bunny to be 3 x 4.5 and each chick to be .8 x 1.
Please note: You can not type numbers into the width and height boxes.
- When you are done click File > Print or the Print icon.It would also be fun to add your photo to quilt labels!
 If you want to post images of your quilt, here is how to export the images.
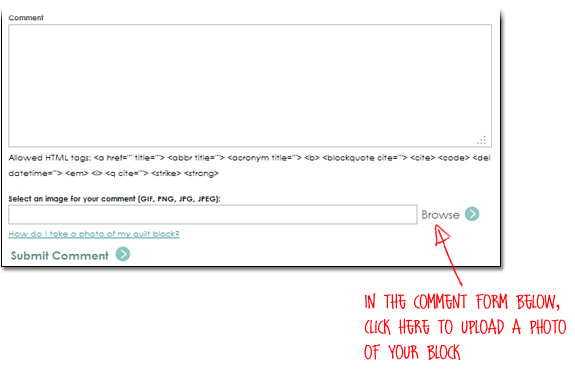
To post your image click to comment on this post.Fill in your info and then click Browse.
Go to: Documents\My EQ8\Images
I can’t wait to see what you’ve done! I hope you enjoyed the lesson!
If you have questions about the lesson feel free to post them below.
If you have questions about something else EQ related, please contact techsupport@electricquilt.com.
If you have suggestions for new Design & Discover lessons feel free to comment below or email Heidi@electricquilt.com.


11-26-2023
7:31 pm
I am interested in using this software for quilt designing. I have not noticed any quilting designs being shown on your videos showing what you can do with the software. I believe you would increase sales if this aspect is included in the video. If you already have one made, please send me a link.
11-27-2023
2:19 pm
Hi Donna,
Unfortunately, we can’t post links in the comments because of spam comments. Please look for an email from techsupport@electricquilt.com with more information.