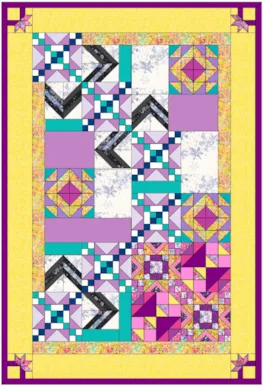
Do you have a lot of different sized blocks that you want to put together into a quilt? Maybe you have a lot of Orphan blocks (blocks left over from other projects) or maybe you were gifted a stack of different sized blocks, there is a way to put them all together in EQ8 using a Custom Set Quilt. I want to share with you some tips to using this approach to combining your myriad of quilt blocks.
Designing a custom quilt may take a little more time, but once you try it, you will find it is a great technique to build your skills toolbox. I am going to share my tip and tricks for this versatile method of quilt design too.
Quilt Name
Skillset: Advanced Beginner
Skill Builders:
- Design a custom set quilt
- Drag and drop blocks
- Use grid snap settings
- Open EQ8.
- Let’s name the Project. The project name appears at the top left of the EQ8 Window. Right now the project says Untitled – EQ8.
- On the left side toolbar, click the New project button.

- On the Create a new project tab, type in the project name field Custom Quilt Play
- Click OK. The box will close. Notice the project name Untitled has been replaced with Custom Quilt Play.
- Select Design a Quilt from Scratch.
- NEW QUILT > Custom Set (You may have to scroll almost to the end of the ribbon bar to find Custom Set)
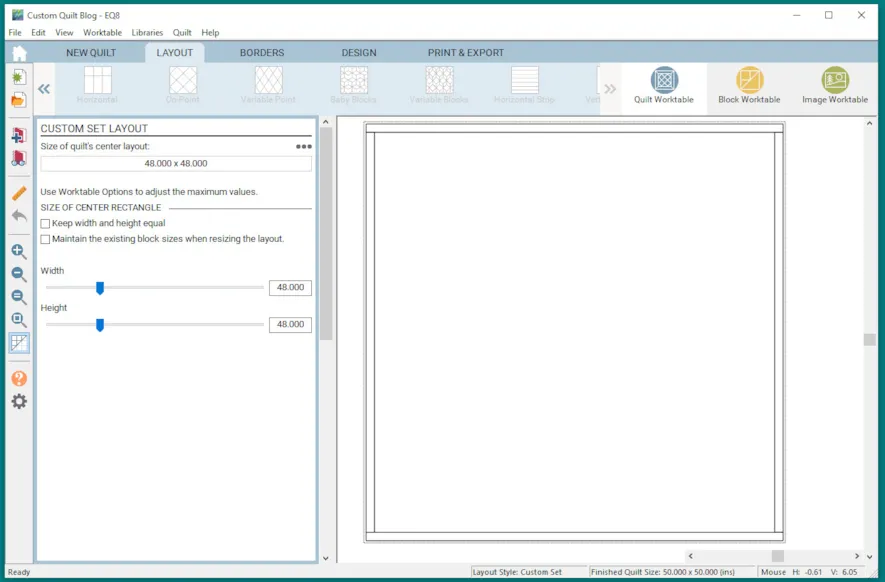
- LAYOUT >
Take a look at the Custom Set Layout palette. You can place a check in the keep width and height equal box if you want them equal.
The next Check Box is used when you want to maintain the existing block sizes when resizing the layout.
 If you have already set blocks in the custom layout and you want to change the size of the quilt center, check this box to keep the current blocks the same size when you resize the quilt top. Check the box to maintain the existing block sizes when resizing the layout.
 - SIZE OF CENTER RECTANGLE > W – 24″, H – 24″
- BORDERS tab> Style: Mitered, Lock All 1″
- DESIGN tab
- BLOCK TOOLS, SET BLOCK
Since there are no predefined spaces for your blocks to pop into, you have the set the blocks differently.
Click and hold, then drag the block from the palette to where you want it on the quilt and release. The block will appear transparent until you release the mouse.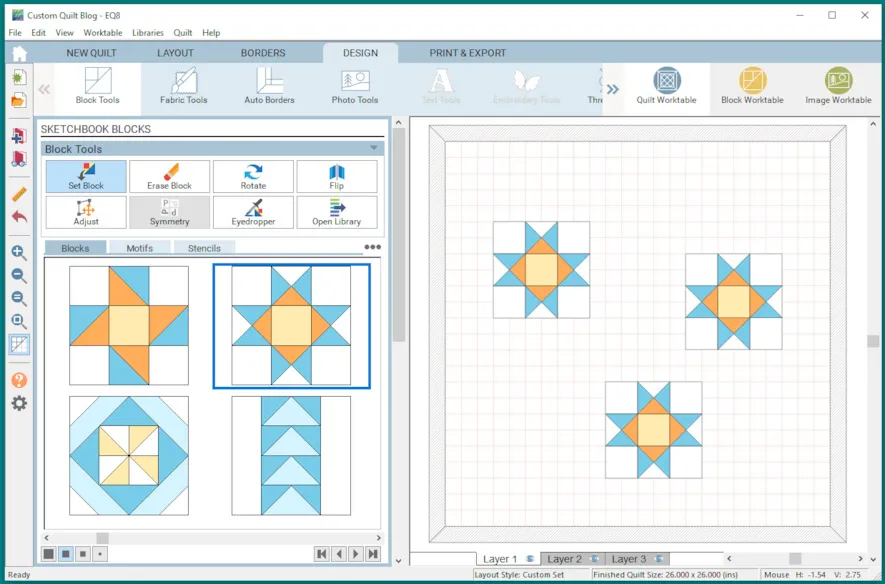
Let’s Try that. Find the EQ Default Ohio Star block. Drag and drop it a few times onto the quilt. Don’t worry about the size or placement of the block right now. Add to Sketchbook.
Use Grid Snap Settings Wisely! There are adjustable snap settings for the Grid that make working in a Custom Set Quilt layout so much easier. Snap settings will tell your quilt blocks how to snap to the quilt layout grid.
BLOCK TOOLS, ADJUST Tool By selecting the Adjust Tool, you can see the Quilt Grid Setup. There are three Grid Snap setting buttons. They show a blue border when selected.
 Show grid This first button determines whether or not you can see the grid lines on the quilt. Wherever you have not filled in a block on the quilt, you will see the grid lines.
 Snap block position to grid This second button, when selected, if you move the block with the Adjust tool, it’s position will snap to the grid when you release. So if you have not moved the block to align with the grid, when you let go of the block, it will snap to the grid lines. This makes it easier to align blocks of different sizes.
 Snap block size to grid This third button, when selected, when you drag the corner of the block or the side handle of the block with the Adjust tool, the size will snap to the grid when you release. This button does not affect how the block is set on the grid, only its size while adjusting with the Adjust tool. For example, if the grid is set to snap every 6 inches so the grid lines are visible at 6″, 12″, and 18″. When pulling the right corner of the block to adjust the size, the block size will snap to the next closest multiple of 6. So the size will snap to the grid line closest to it.
GRID SNAP INCREMENTS Next to the words Grid snap every is an increment amount. This is the size of the grid squares. I usually recommend choosing an increment that divisible by all of your block sizes. It might be 4″ or it might be 1″. You may need to experiment with the best option. The increments go from 1/32 of an inch all the way to 12 inches.
If you are having trouble positioning a block on your quilt, check your snap settings. You may even want to try turning the Snap block position to Grid off if needed. - Try turning on and off the different snap settings and using different snap increments with the blocks to get the feel of how they work.
- BLOCK, ADJUST TOOL > Select SHOW GRID, Select Snap Block Position to Grid, Set Grid Snap to every 1″.
- Let’s clean up the quilt by removing all of the quilt blocks. Using the Adjust tool, select each block and delete.
- For the next part of this lesson, we are going to use a plain block. Right click on any block in your palette. Scroll down in the drop down menu and select Add Plain Block.
- BLOCK TOOLS > SET BLOCKS Drag and drop four plain blocks onto the quilt.
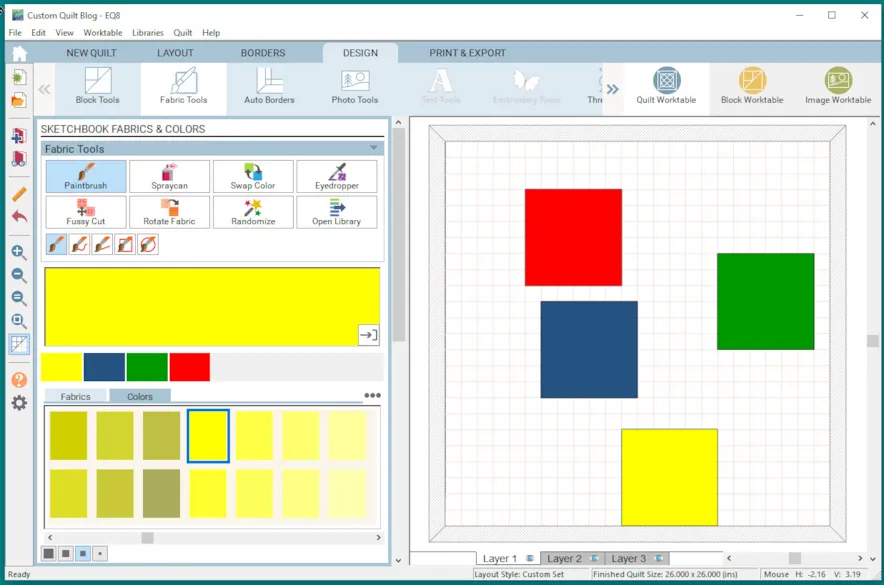
- FABRIC TOOLS > Paintbrush Color the blocks green, red, blue and yellow.
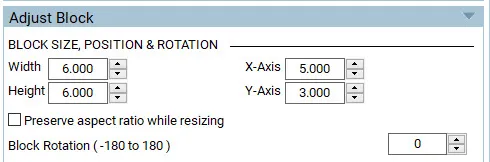
- Back to BLOCK TOOLS. We will change the block sizes using the Adjust Tool. First select Adjust Tool, then select the block. When you click on the block, you will see the Block size, position and rotation information in the Palette.
- Put a check mark in the Preserve aspect ratio while resizing box. This will keep the block proportions the same when you resize.
By selecting to Preserve the aspect ratio while resizing, the block proportions remain the same. If you change the width, it will keep the same proportions with the height. This is very helpful if you choose to use the handles of the block to resize too. - Use the Width and Height boxes in the palette to resize all of the blocks as follows;
Red – 4″ square
Green – 6′ square
Blue – 7″ square
Yellow – 8″ square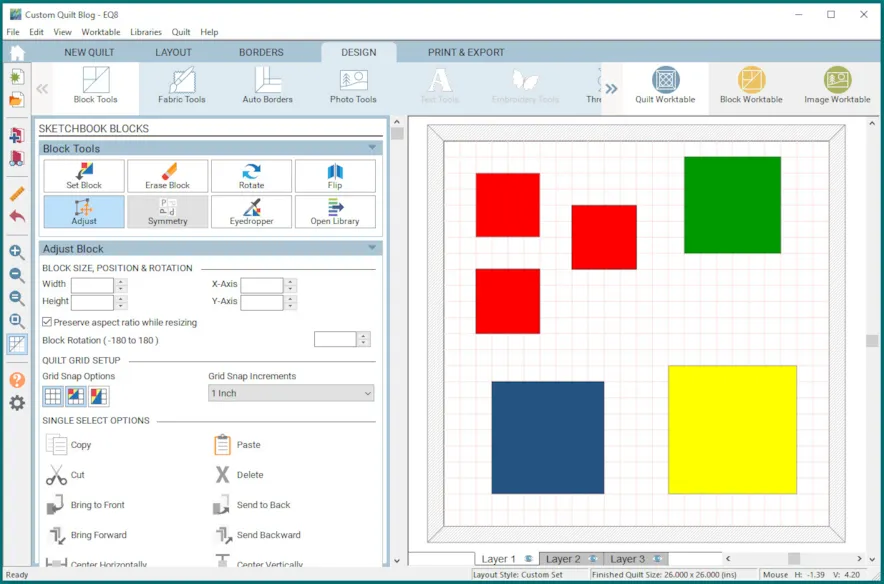
- Make two extra red 4′ squares. Select the red block, choose Copy and Paste in the Single Select Options under the Palette. If you copy and paste, they will not retain the red color so you will need to go to Fabric Tools and color them red. Arrange the blocks around the quilt top. Because we have Snap Block Position to Grid (Middle button) turned on, and because the snap grid increment is 1″, your blocks will snap to the grid along the 1′ lines.
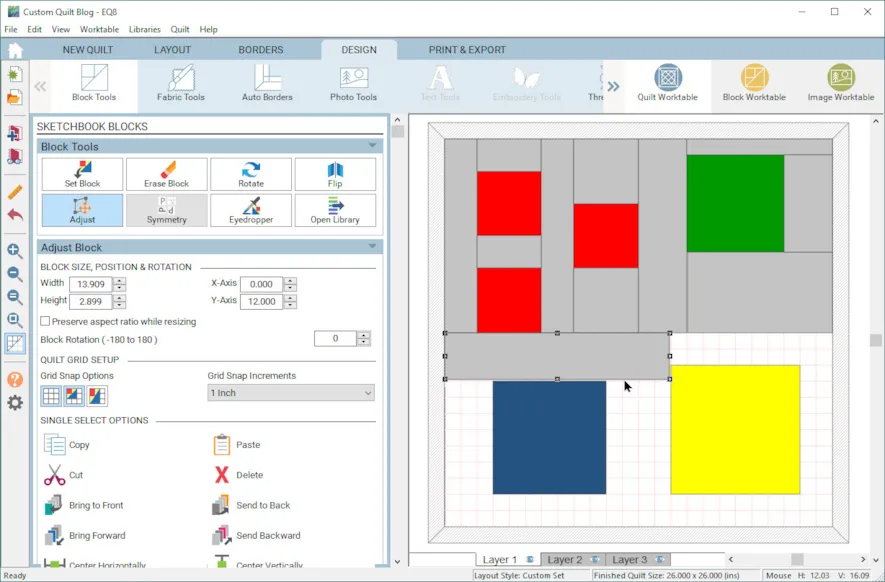
A custom quilt expects all of the spaces to be filled in, so just placing the quilt blocks on the grid is not enough to make a quilt. You need to create the sections between the blocks like irregular sashing. This is the more time consuming part of designing a custom quilt. Use a blank block to fill in the spaces and then size them to fit. Don’t forget to consider how you will sew your quilt together as you create these “sashings”. You want it easy to sew together. - The different sized blocks are all arranged on the quilt, but the spaces between the blocks where you can see the grid need to be filled in.
- BLOCK TOOLS, Set Block Drag and Drop a plain block to one of the open spaces.
- In the Palette, remove the check mark for Preserve Aspect Ratio because we need these blocks to be all different sizes and shapes.
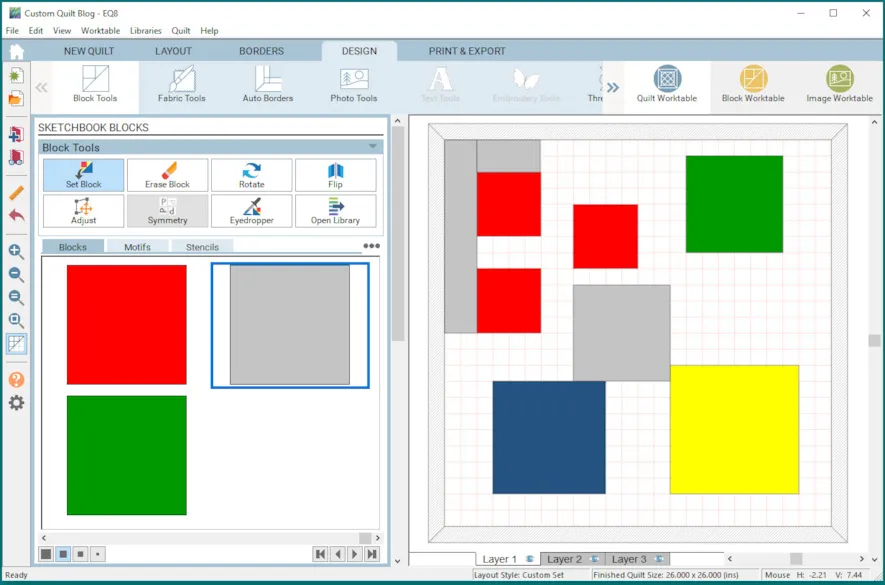
- Adjust Tool, Use this tool to size the plain block to fit the space using the height and width in the palette or by using the handles of the block. Color this block a light gray so it is easier to see what sections you have and have not covered. Add to sketchbook so that you have the grey colored plain block to use.
- Keep adding the blocks and adjusting the sizes as you go.
If you use the handles of the gray solid block to resize the block, sometimes you can be just a little off on the sizing as you can see in the palette width and height above. Use that very same palette width and height arrows to adjust the size to an even number that will fit properly in the space.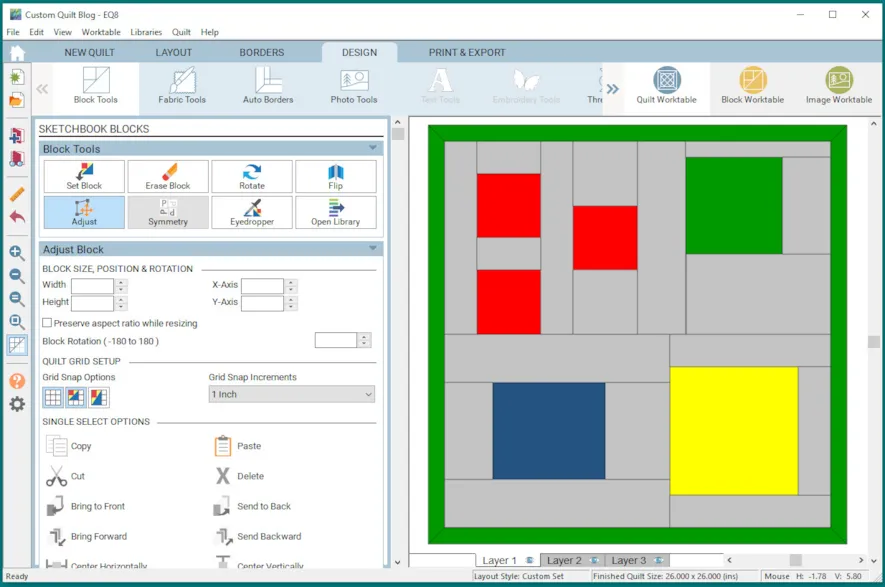
- Continue to fill the space until it is completed.
- Fabric Tools > Color in the Border. Add to Sketchbook.
I hope you discovered a few tips you had not tried and that you decide to make your own unique, custom quilt.
Happy Designing!
Questions or Feedback
Lori J. Miller lives in Oxford, Michigan, where she designs, stitches and sews quilts and quilty things. She loves experimenting with fun colors and designs to make playful and clever products for the modern sewist. Lori continues to share her knowledge with others teaching quilting and EQ8 classes around the country. A self professed EQ8 superfan, you can follow her quilting adventures on her blog at lorimillerdesigns.com or on instagram @lorimillerdesigns