Welcome everyone to the DESIGN AND SEW ALONG LESSONS WITH YVONNE. This is lesson number four(4). I think you may have noticed up to this point that we can accomplish designing quilt blocks in several different ways. You will determine what is your favorite way to use in the future. This lesson will challenge you a bit more in thinking about how to create a quilt block/layout and how you will be able to print the pattern.
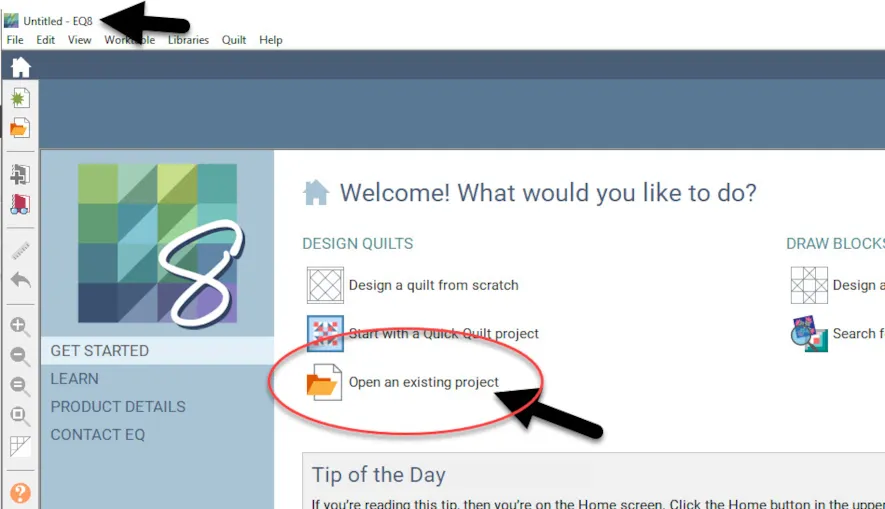
Open your EQ8 program![]() and then open the existing projects folder
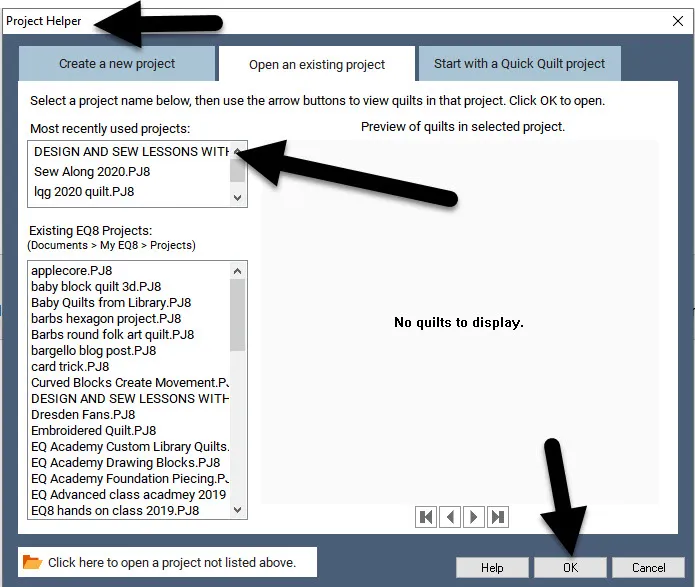
and then open the existing projects folder ![]() to find the DESIGN AND SEW LESSONS WITH YVONNE project.
to find the DESIGN AND SEW LESSONS WITH YVONNE project.
Close the project sketchbook when it opens.
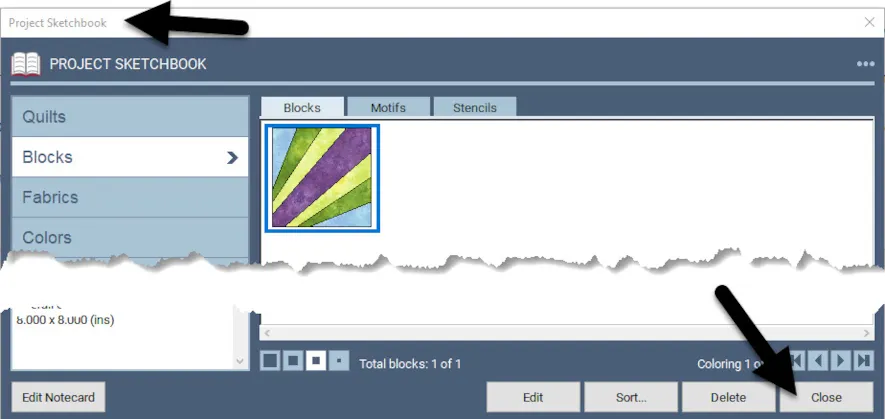
Confirm that the project name is at the top of your screen. This is a good double-check to make sure you are indeed in the correct project for this lesson.
Click on the block worktable icon  on the upper right side of the screen.
We will be making the motifs for our blocks on the quilt layout. Motifs are applique shapes that are applied to the quilt layout. They do not have a block background associated with them. Because they are not attached to a block background fabric, you can lay them any way you want when you are ready to create your quilt layout. The number one rule for a motif is the same as for an applique block–your shape must be closed to create the motif shape. You can always choose to create your shapes with a freehand drawing tool, but by using the built-in shapes into EQ8 you can be assured they are automatically closed.

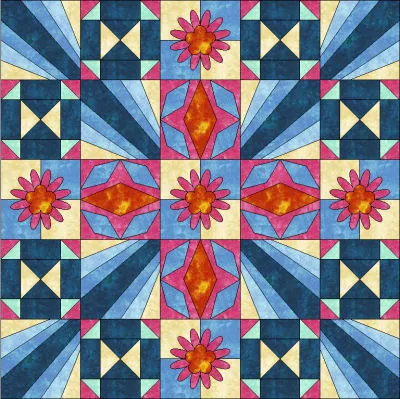
There are four (4) motif designs set onto the quilt layout in our quilt project.
These are going to be designed a little differently and used in a slightly different way than we have before.
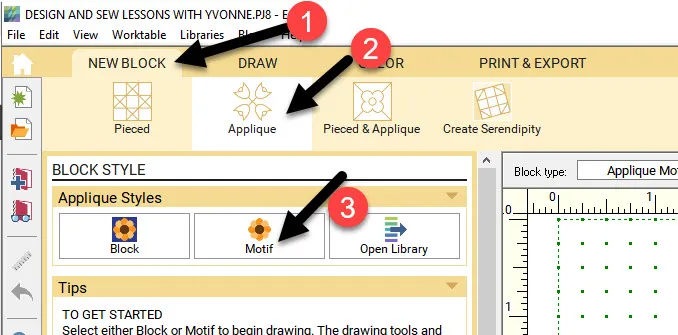
On the block worktable, click on the New Block tab, Applique, and Motif style.
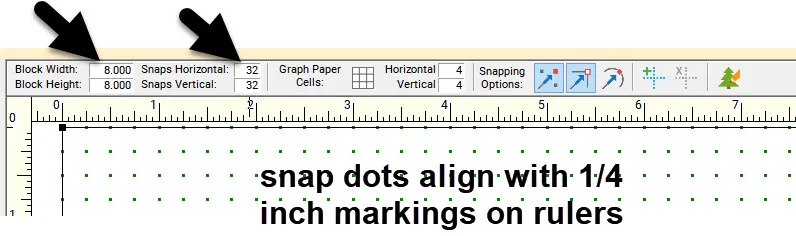
Check the properties of the block worktable at the top to make sure the block size is still 8 x 8 inches with 32 x 32 snaps. This should not have changed from our previous lesson.
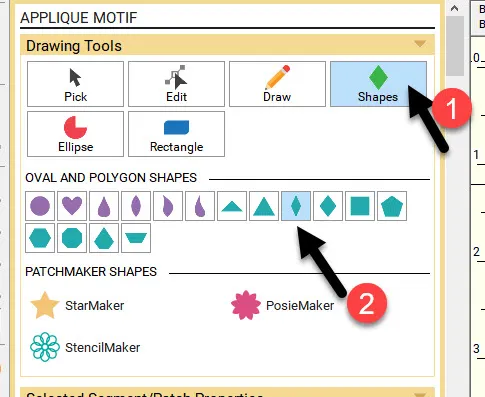
Click on the shapes icon ![]() on the left side in the drawing tools box. Select the slender diamond shape (acute diamond) by clicking on it.
on the left side in the drawing tools box. Select the slender diamond shape (acute diamond) by clicking on it.
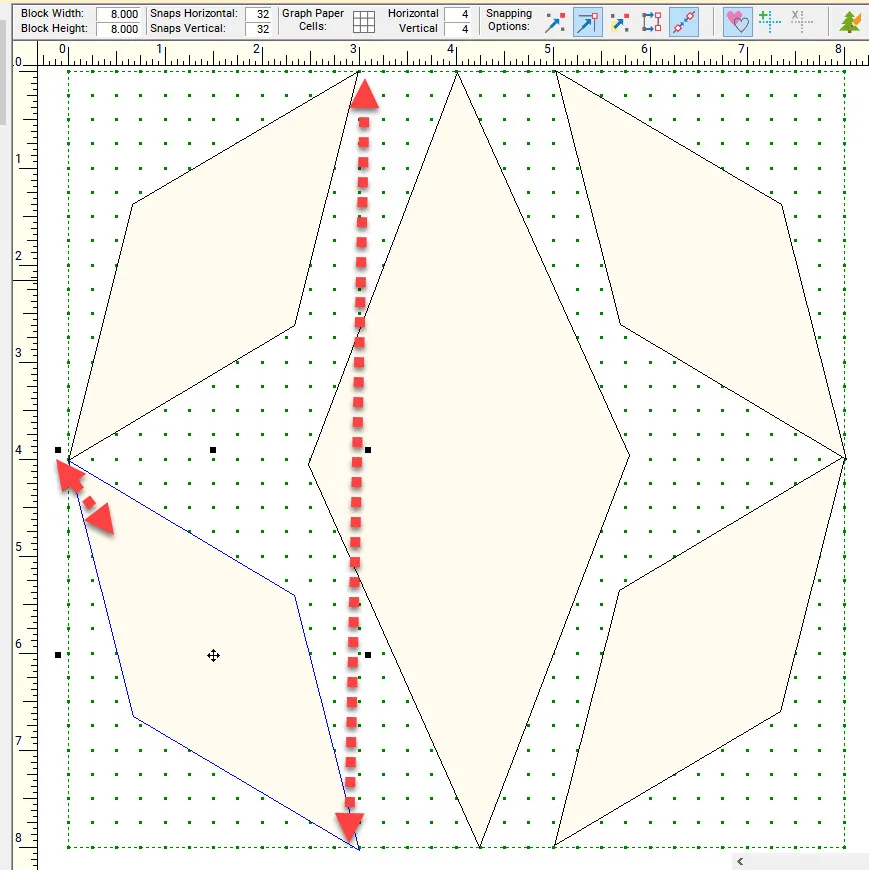
Move the cursor over to the drawing board and click/hold/drag/release a diamond shape from the 4-inch mark on the ruler from top to bottom.
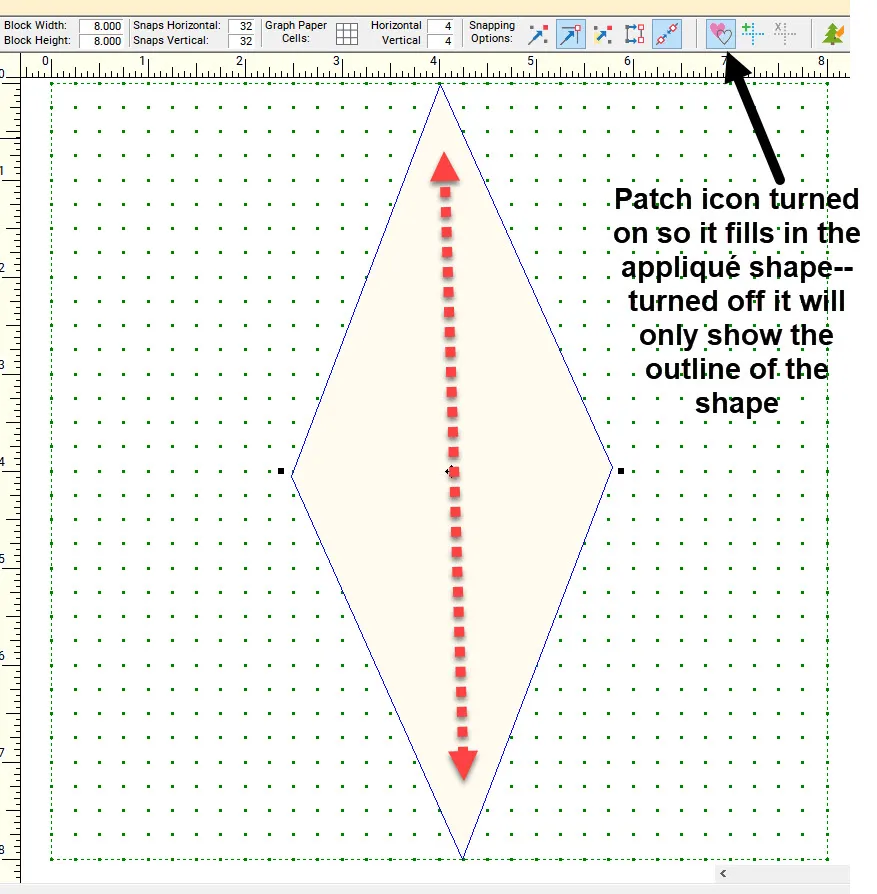
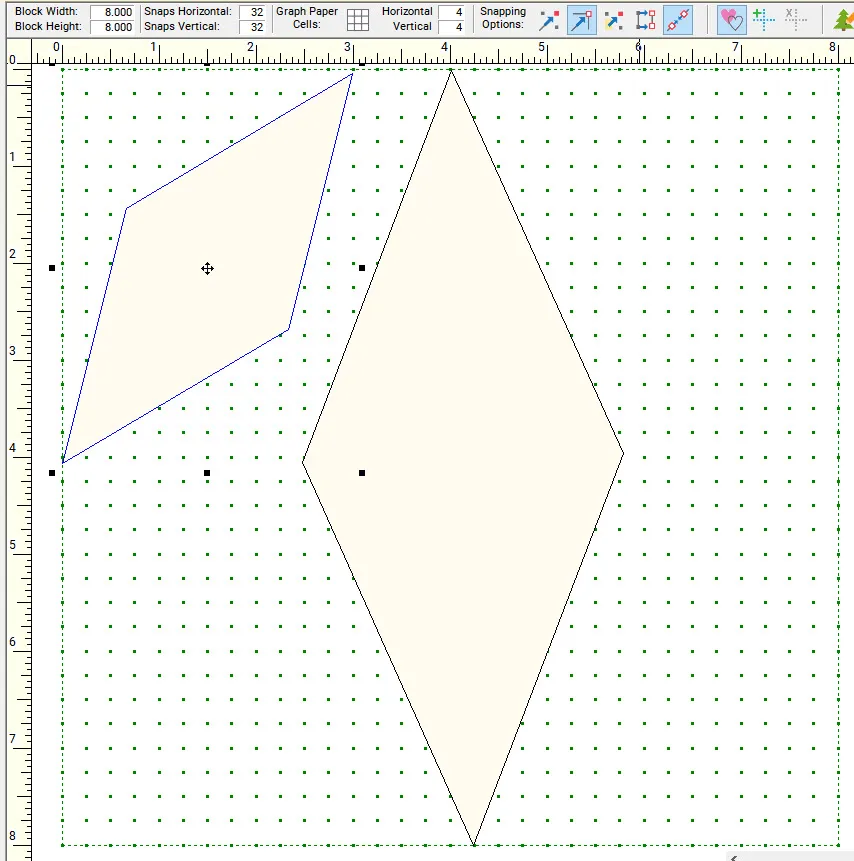
Still using the acute diamond shape tool, click/hold/drag/release another shape from the 3-inch mark on the top ruler to the 4-inch mark on the side ruler.
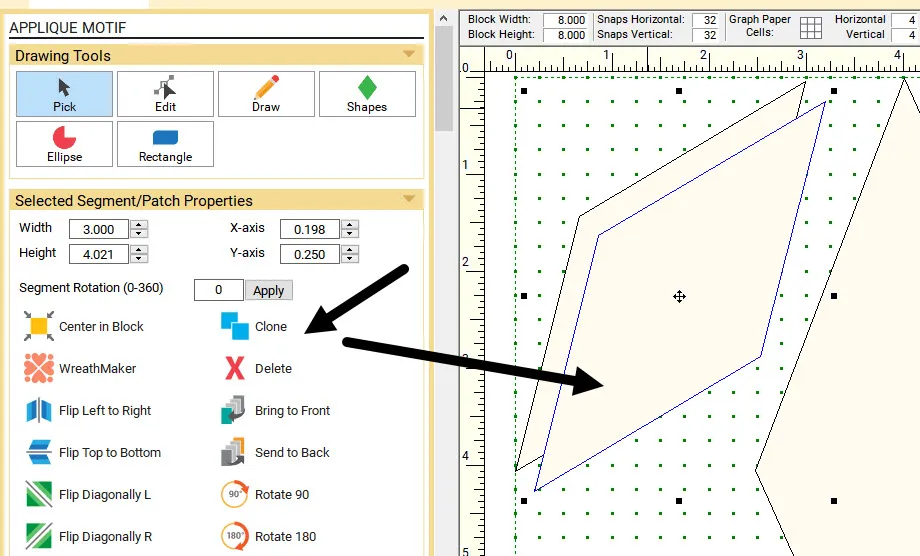
With the shape still selected, click on the ‘clone’ icon![]() in the properties box on the left side. NOTE: If you clicked off the shape you will need to click on the pick tool
in the properties box on the left side. NOTE: If you clicked off the shape you will need to click on the pick tool ![]() and click on the new small diamond shape to select it again.
and click on the new small diamond shape to select it again.
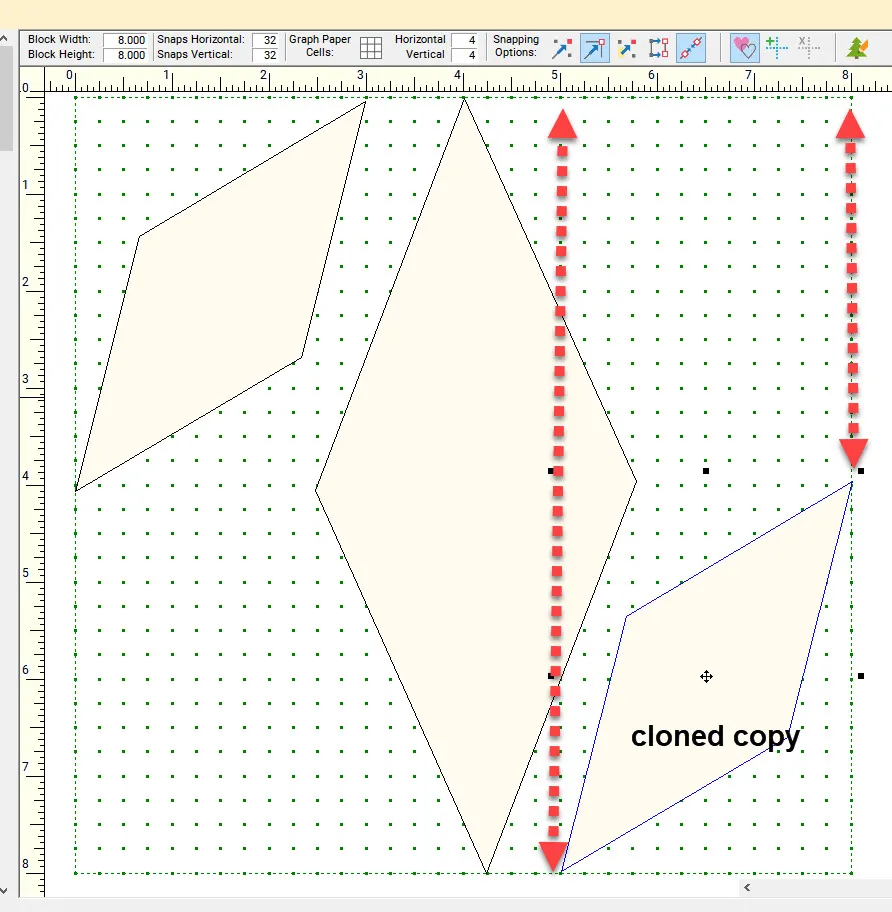
A second copy of the shape will appear below and to the right of the original shape.
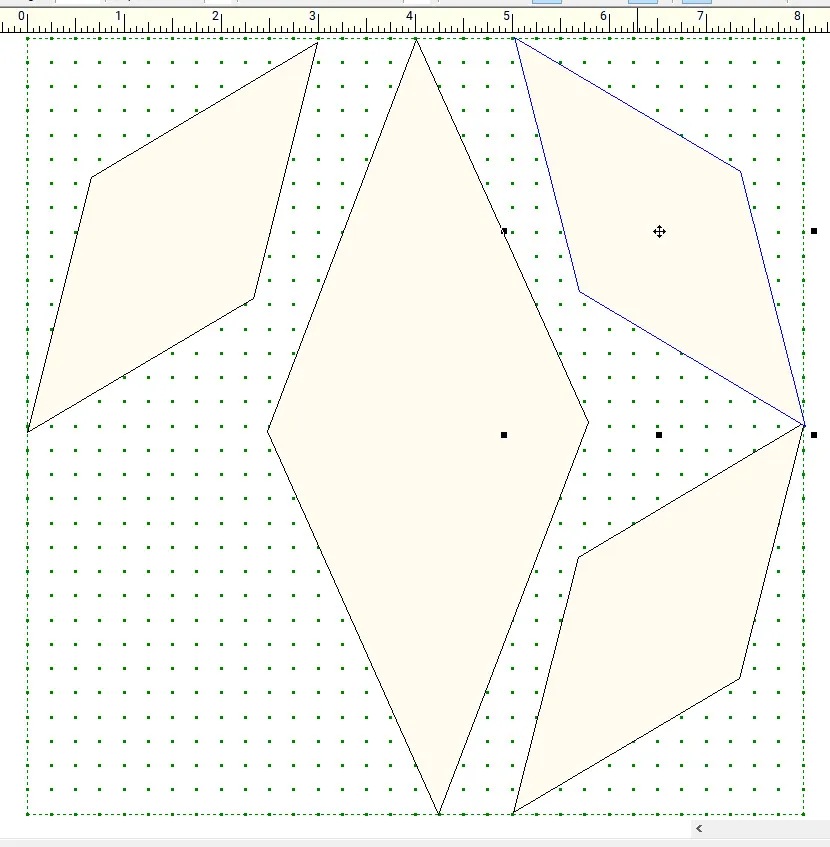
Click/hold/drag the shape to the lower right corner of the worktable with the tip on the 8-inch mark on the upper point and the 5-inch mark on the lower tip of the shape on the upper ruler bar.
With the shape still selected, clone it again by clicking on the clone icon![]() on the left side of the screen.
on the left side of the screen.
Once the shape is cloned, click on the ‘flip left to right’ icon ![]() on the left side of the screen.
on the left side of the screen.
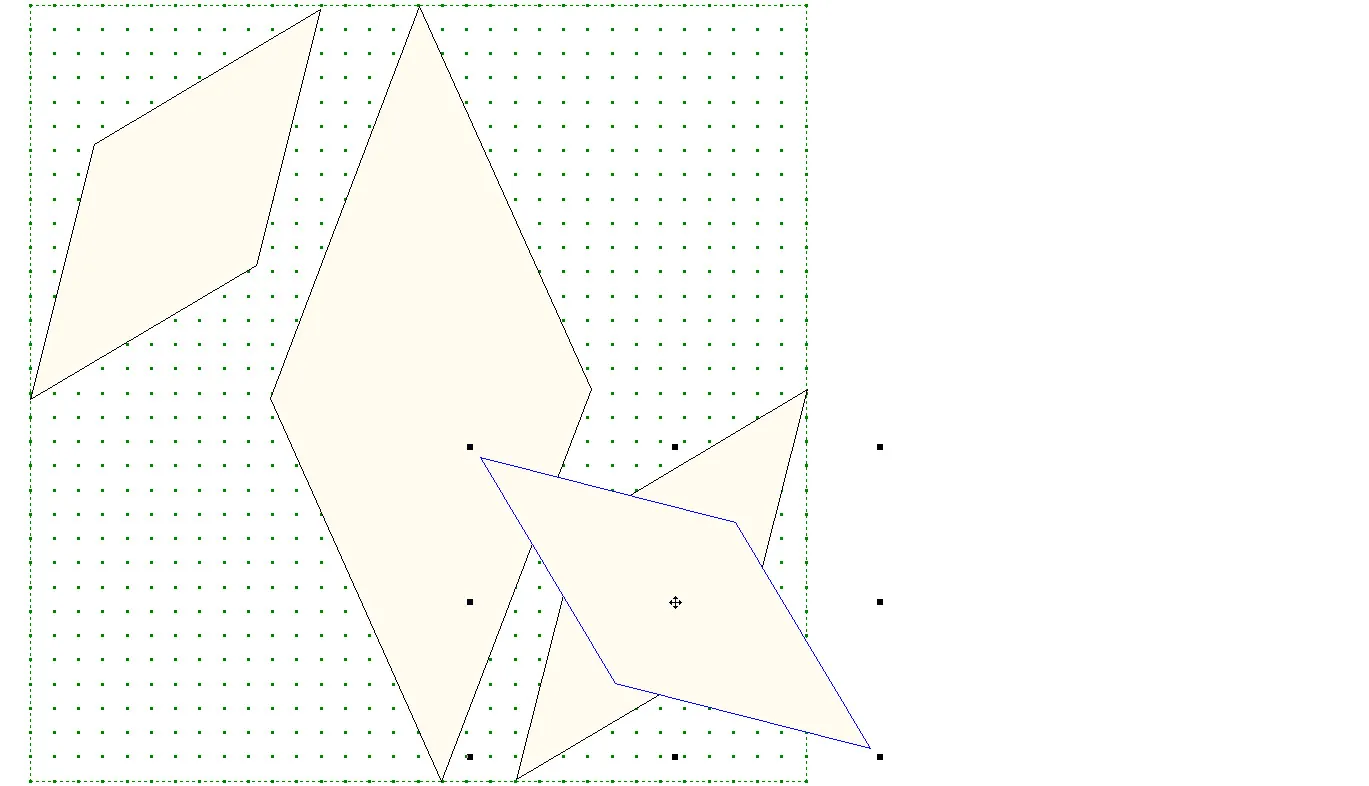
Once it is flipped, click/hold/drag/release the diamond shape to move it to the upper right corner.
With the shape still selected, click on the clone icon ![]() to create another shape. Click/hold/drag/release the new copy to the lower-left corner of the block worktable. The upper point of the shape will be on the 4-inch mark on the ruler at the left and the lower point will be on the 3-inch mark on the upper ruler.
to create another shape. Click/hold/drag/release the new copy to the lower-left corner of the block worktable. The upper point of the shape will be on the 4-inch mark on the ruler at the left and the lower point will be on the 3-inch mark on the upper ruler.
Once all the shapes are on the worktable, add the design to the sketchbook. ![]()
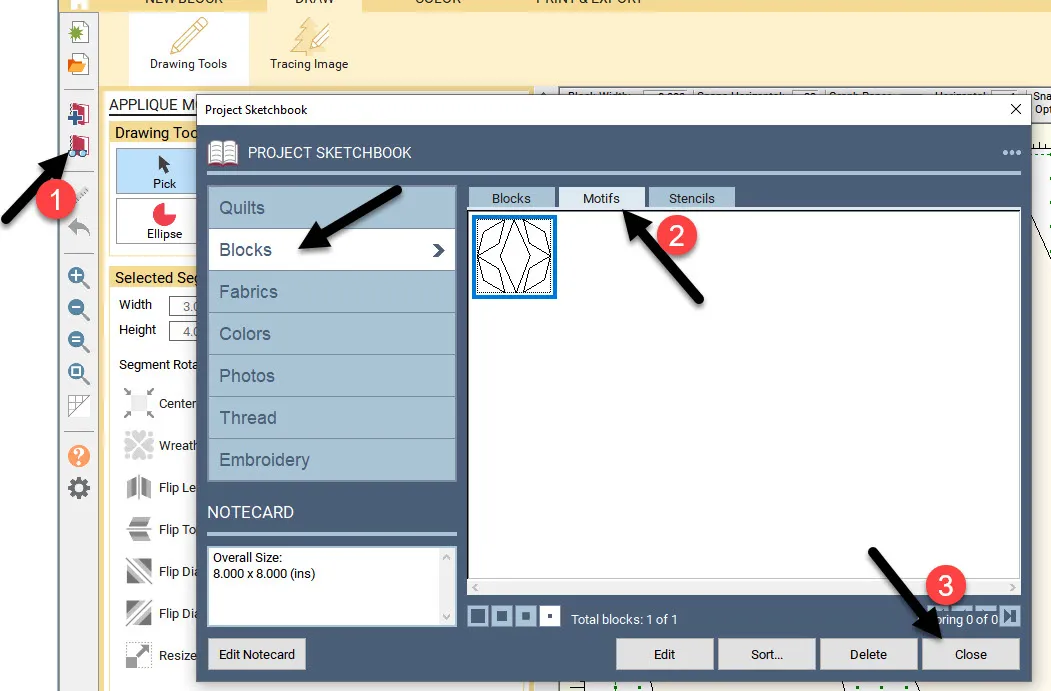
Click on the ‘view sketchbook’ icon![]() to confirm the shape is indeed in the sketchbook. It will be located under the ‘Blocks heading’ beneath the ‘Motifs’ tab. Close the sketchbook when done.
to confirm the shape is indeed in the sketchbook. It will be located under the ‘Blocks heading’ beneath the ‘Motifs’ tab. Close the sketchbook when done.
Now that the design is complete and in the sketchbook, click on the color tab at the top of the screen and color your elements. When finished coloring, add it to the sketchbook.

Add to sketchbook![]()
NOTE: You can draw your shape instead of using the shapes tool. For accuracy, we created the shape and cloned it to have the same size patches for each of the four corners. If you were to draw your shapes they may not be the same size. If they are slightly different in sizes, the program will want to print the pattern elements for each different patch. If they are cloned they will be the same size and shape and therefore the program will create only one applique patch pattern.
Click on the Print & Export tab at the top of the screen and then select the ‘templates’ icon ![]() in the print patterns box.
in the print patterns box.

NOTE: Not all print patterns are available. EQ grays out the options that do not suit this shape or style of block pattern.
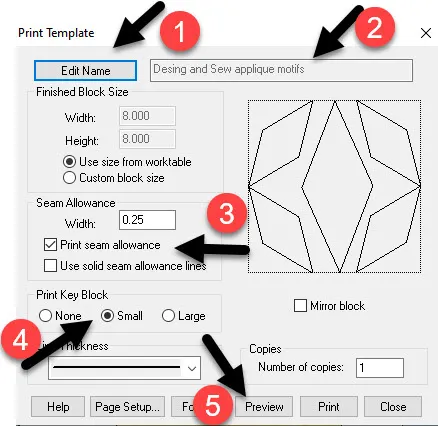
In the print template box, click on ‘Edit name’ and type in the name ‘Design and Sew applique motifs’ and then click on ‘apply’ to have the name stick to the pattern.
If you want to create needle turn applique elements, click on the ‘print seam allowance’. If you want to create fusible applique elements uncheck the ‘print seam allowance’.
Click on the ‘small’ print key box option.
Click on the preview to see how the patterns will print.
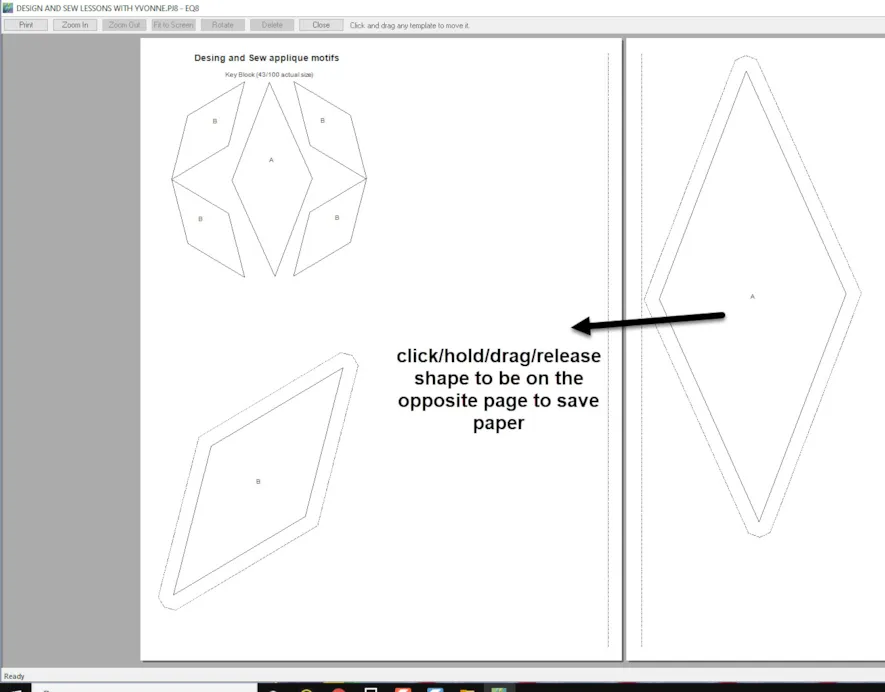
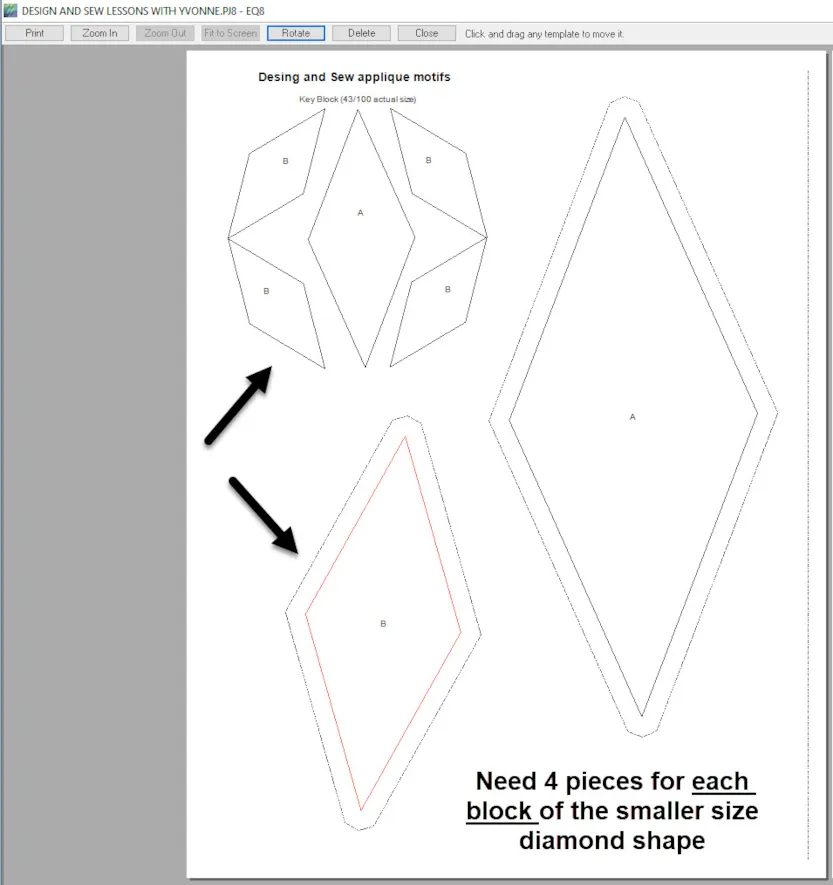
There is only one piece B (smaller shape) shown but the key shows that there are four(4) pieces in the block. There are a total of 4 blocks in the quilt so you will need 16 pieces of this one shape. You decide if you need to print 16 pieces or if you can reuse/trace the smaller shape multiple times for your fabric pieces to be cut out.
Print from this screen.
Click on close at the top of the preview screen to close this page. Click on the word ‘close’ at the bottom of the print template box in the lower right corner of the box.
MOTIFS are applied to the quilt layout and not added to background blocks as they are being created. To apply the applique elements to the quilt layout we need to be on the Quilt Worktable.
Click on the quilt worktable icon on the upper right side of the screen.
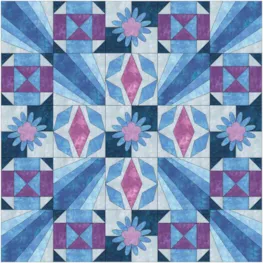
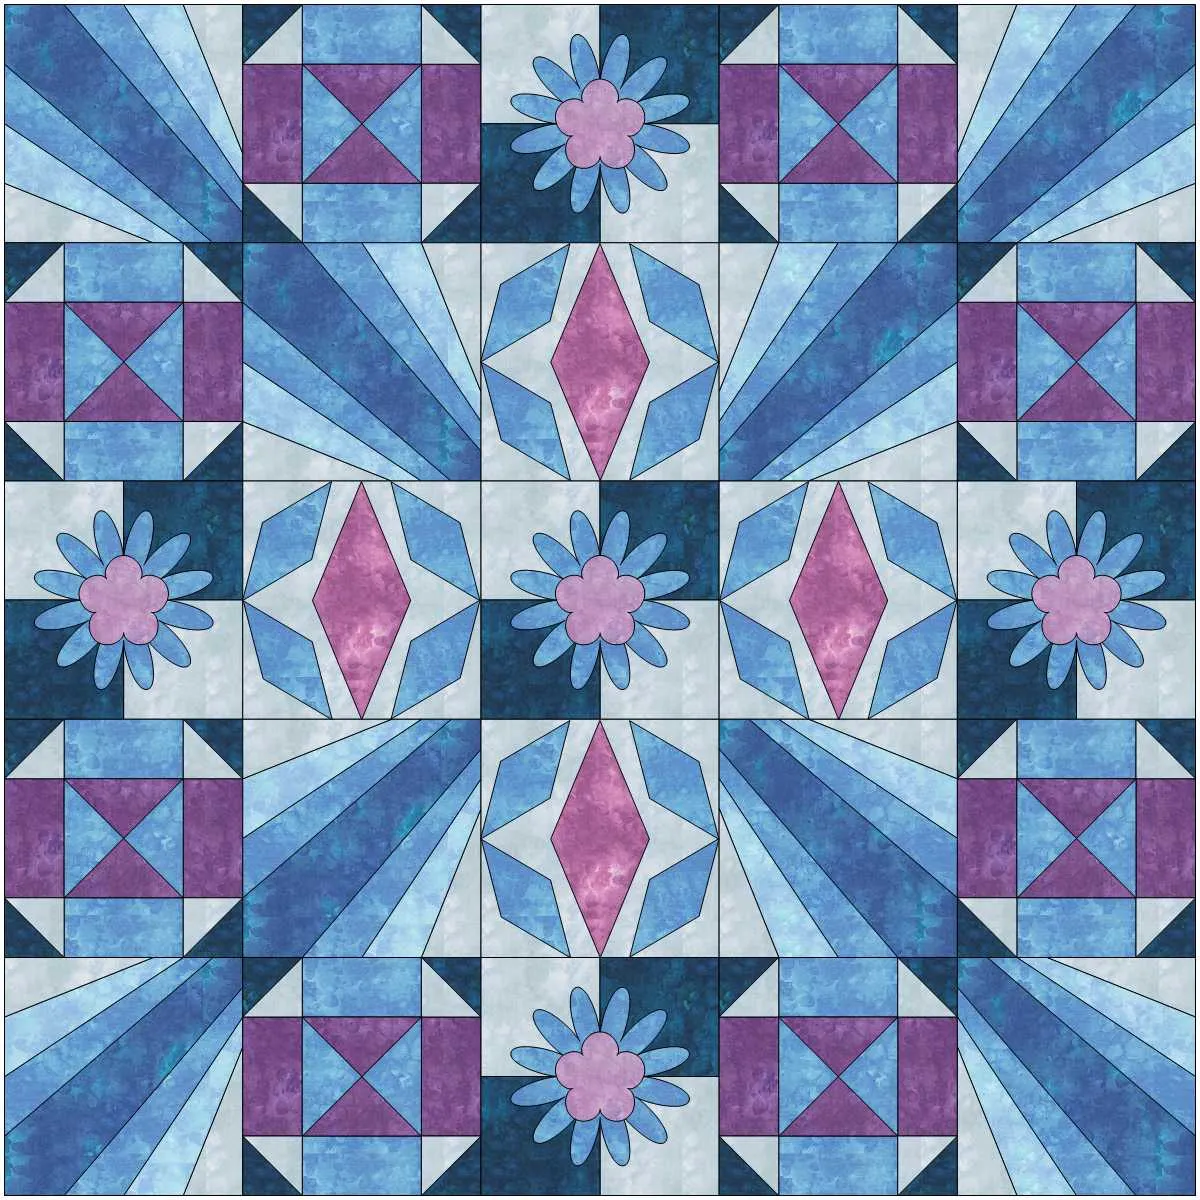
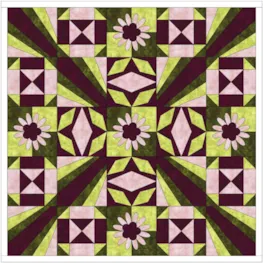
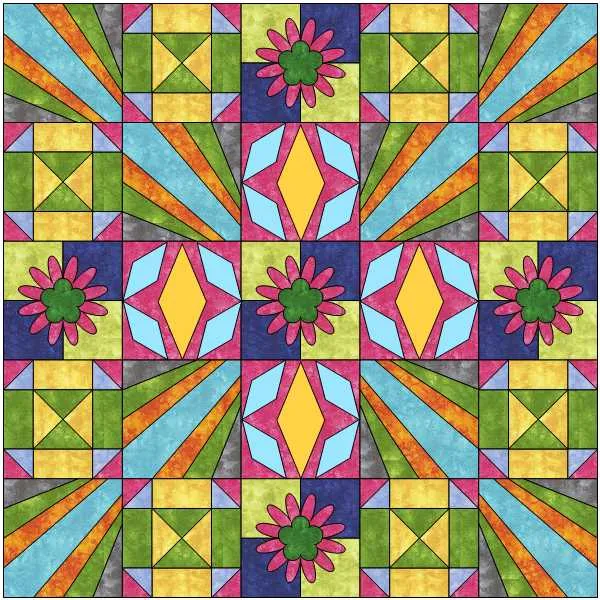
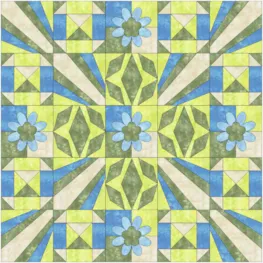
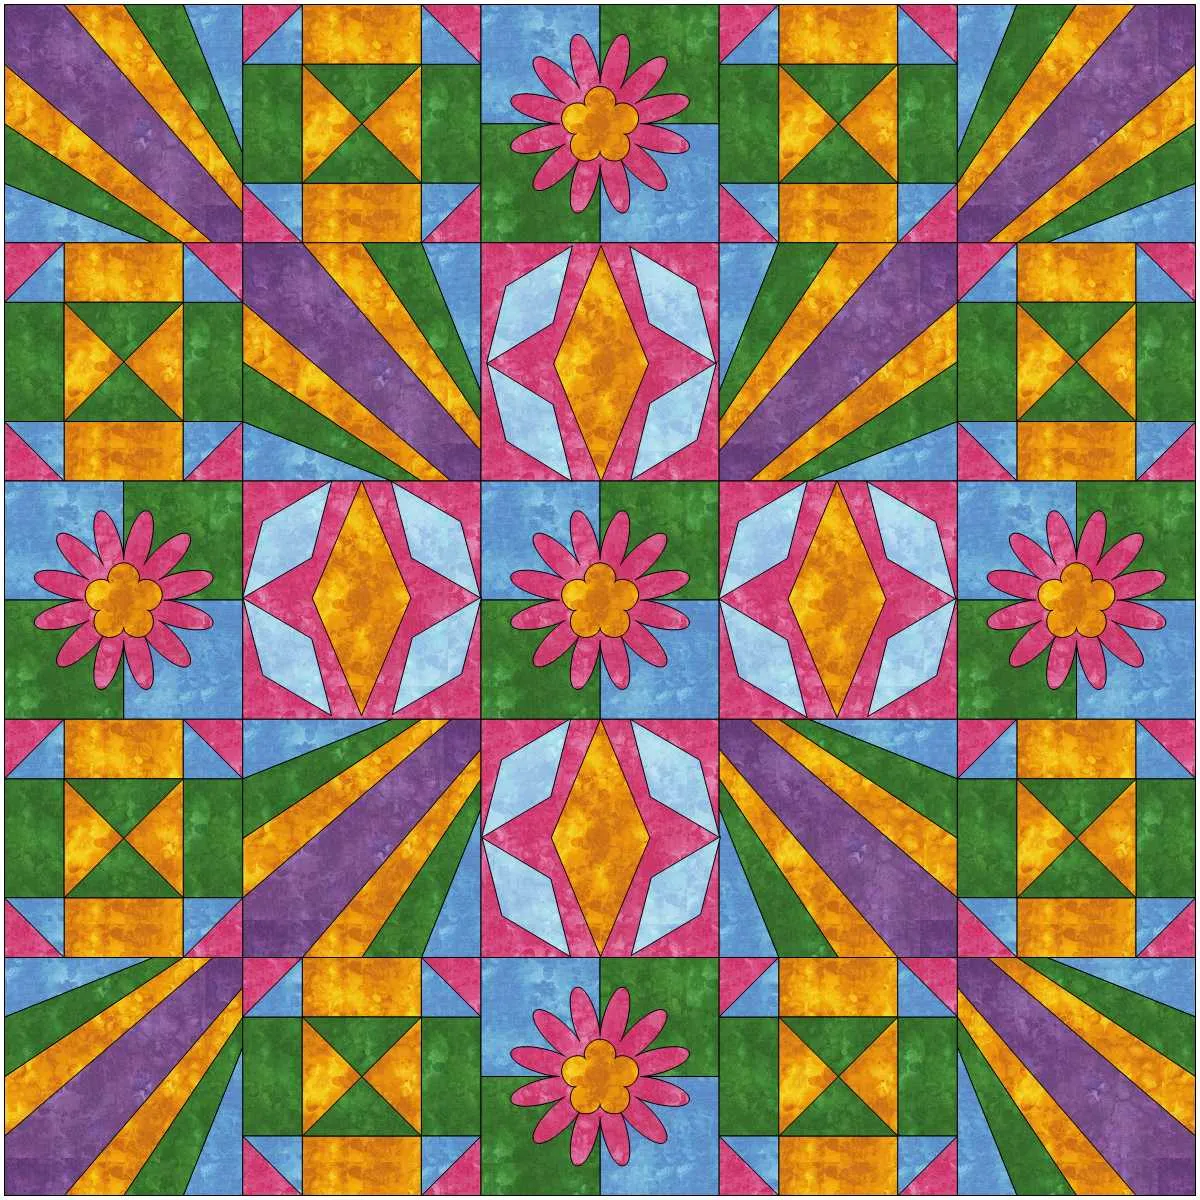
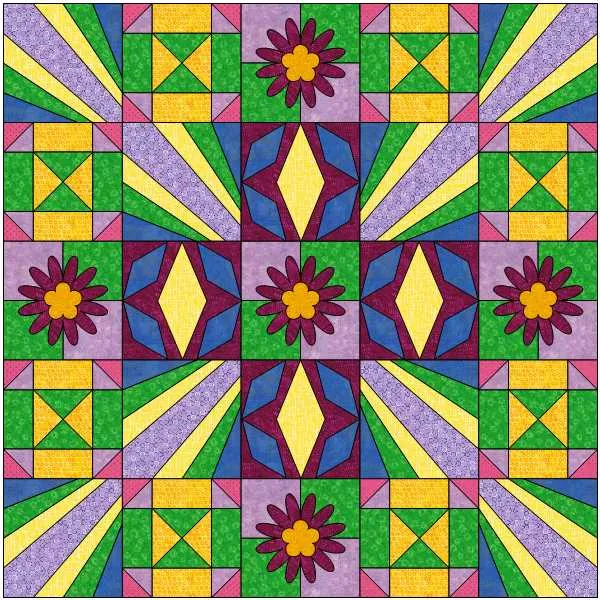
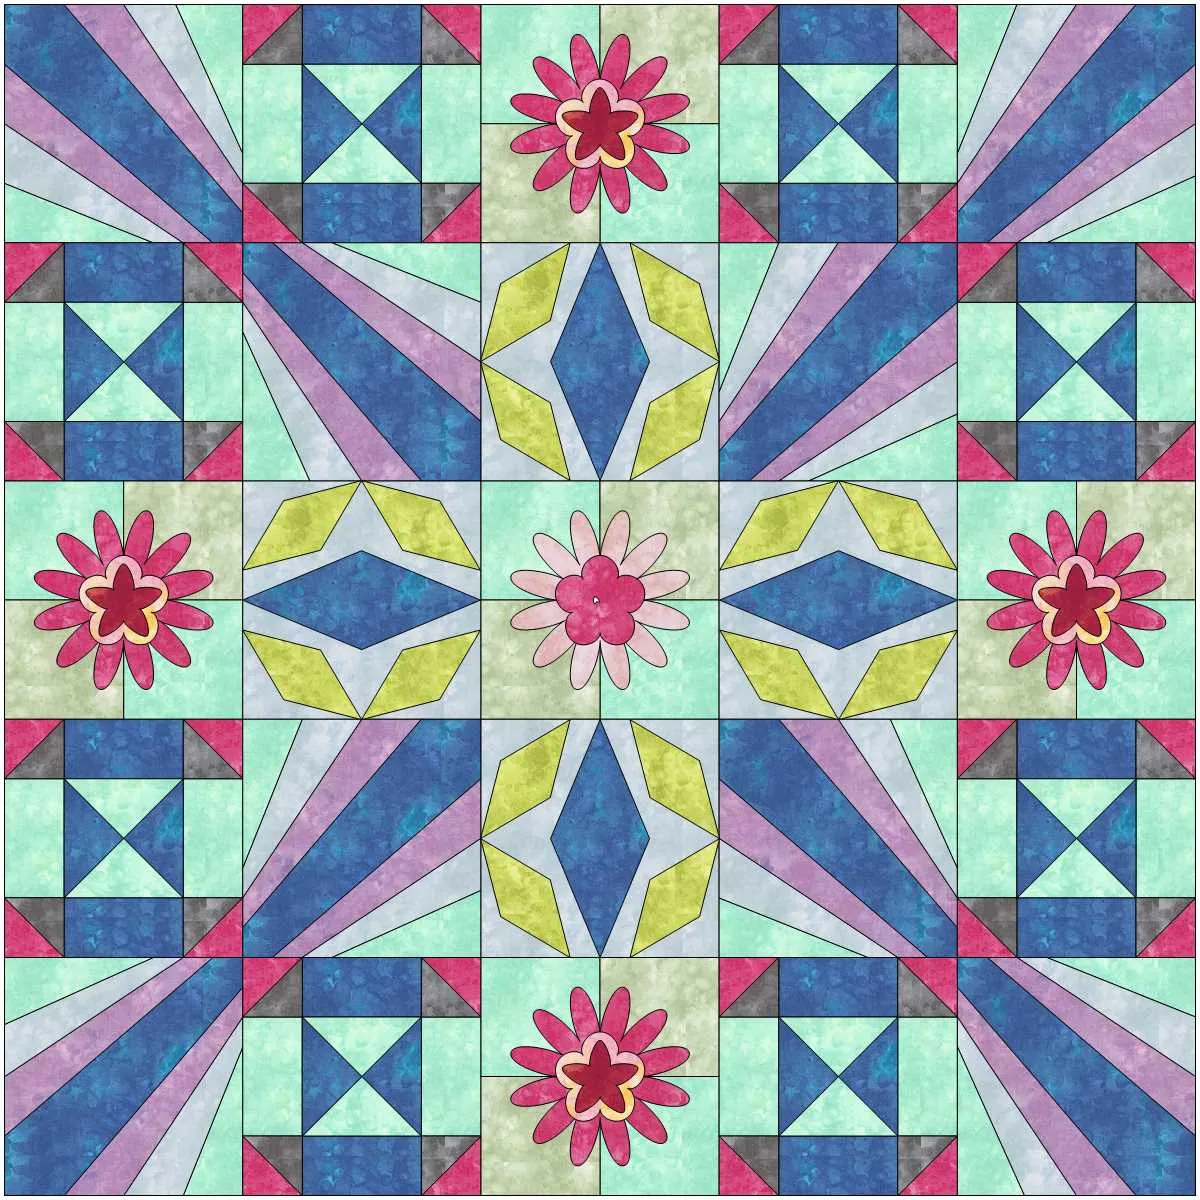
To apply this motif we just created, we need to create our quilt layout in EQ8. Start by creating the center area of the quilt layout. We will create the borders for this quilt in the next lesson. (I often do not create my borders until I have the center of my quilt designed first. After the center is designed, I can then ‘see’ how a border will affect the overall look of the quilt.)
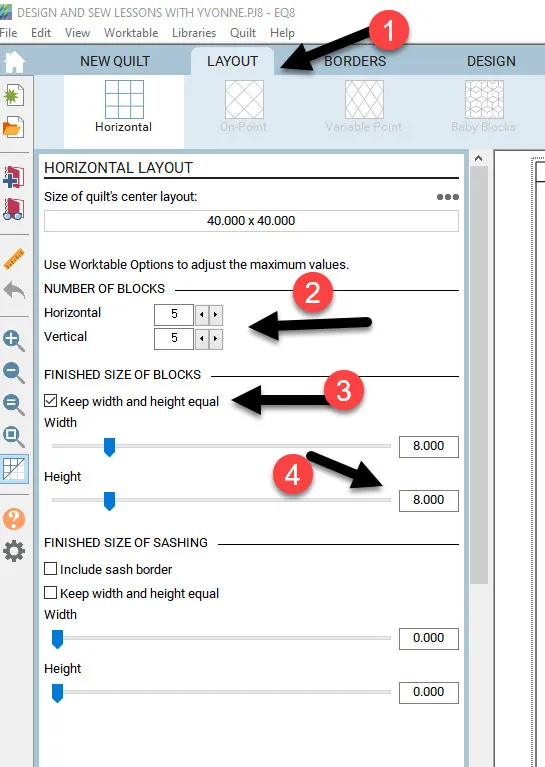
Click on the New Quilt tab at the top of the screen and select the Horizontal layout option.

Click on the layout tab at the top of the screen.
Set the number of blocks to 5 x 5 and the finished size of the blocks to be equal height and width of 8 x 8 inches.
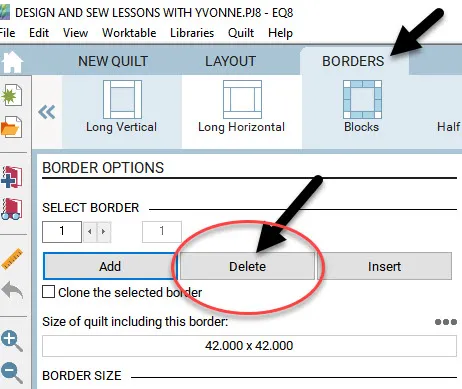
Click on the Borders tab at the top of the screen and remove the default border that EQ8 assigns (represents the binding edge), and then click on the word ‘delete’ to remove the outer edge border.
Once these properties for our center area of the quilt are set, add the layout to the sketchbook.![]()
EQ8 builds quilts in layers. Blocks are placed on layer 1, applique motifs and text are placed on layer 2, and images, embroidery, and quilt stencils are placed on layer 3 of the quilt. The layers are selected on tabs at the bottom of the quilt worktable screen.
![]()
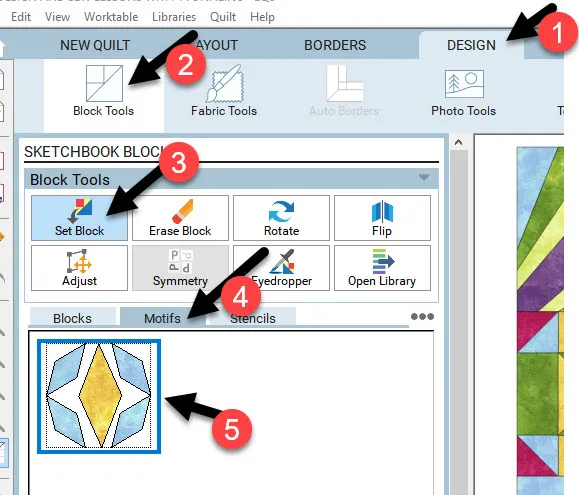
Click on the Design tab at the top of the screen. Make sure you have the ‘set block’ icon ![]() selected to see all the blocks we have created up to this point.
selected to see all the blocks we have created up to this point.
![]()
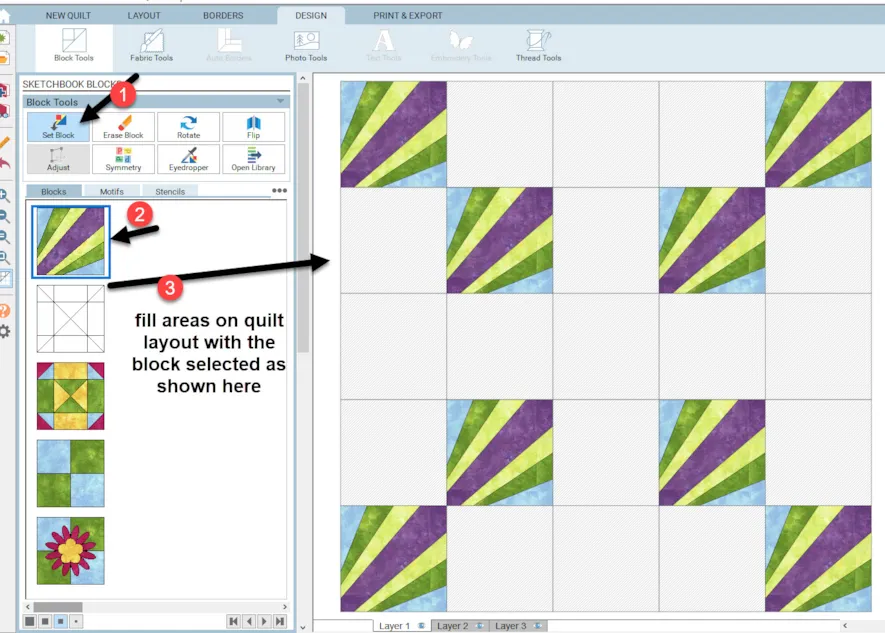
NOTE: To set a block onto layer one of the quilt layout you can either (1) click and drag the block from the block tools box to the worktable OR you can (2) click on the block to select it and then move the cursor over to the quilt layout worktable and click on each of the block areas you want to fill with the block design.
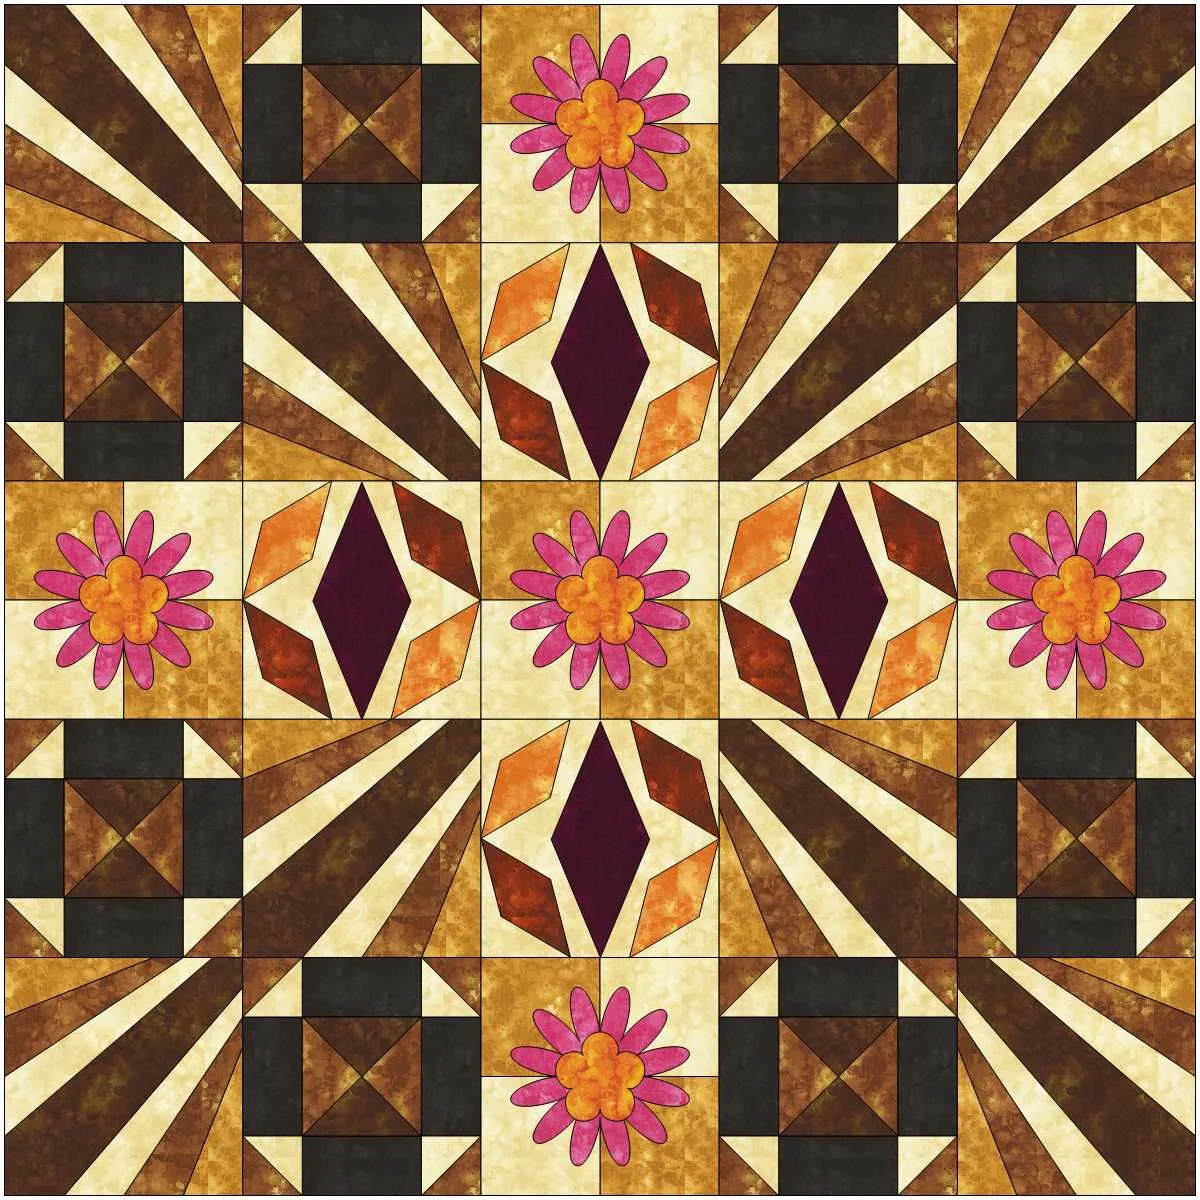
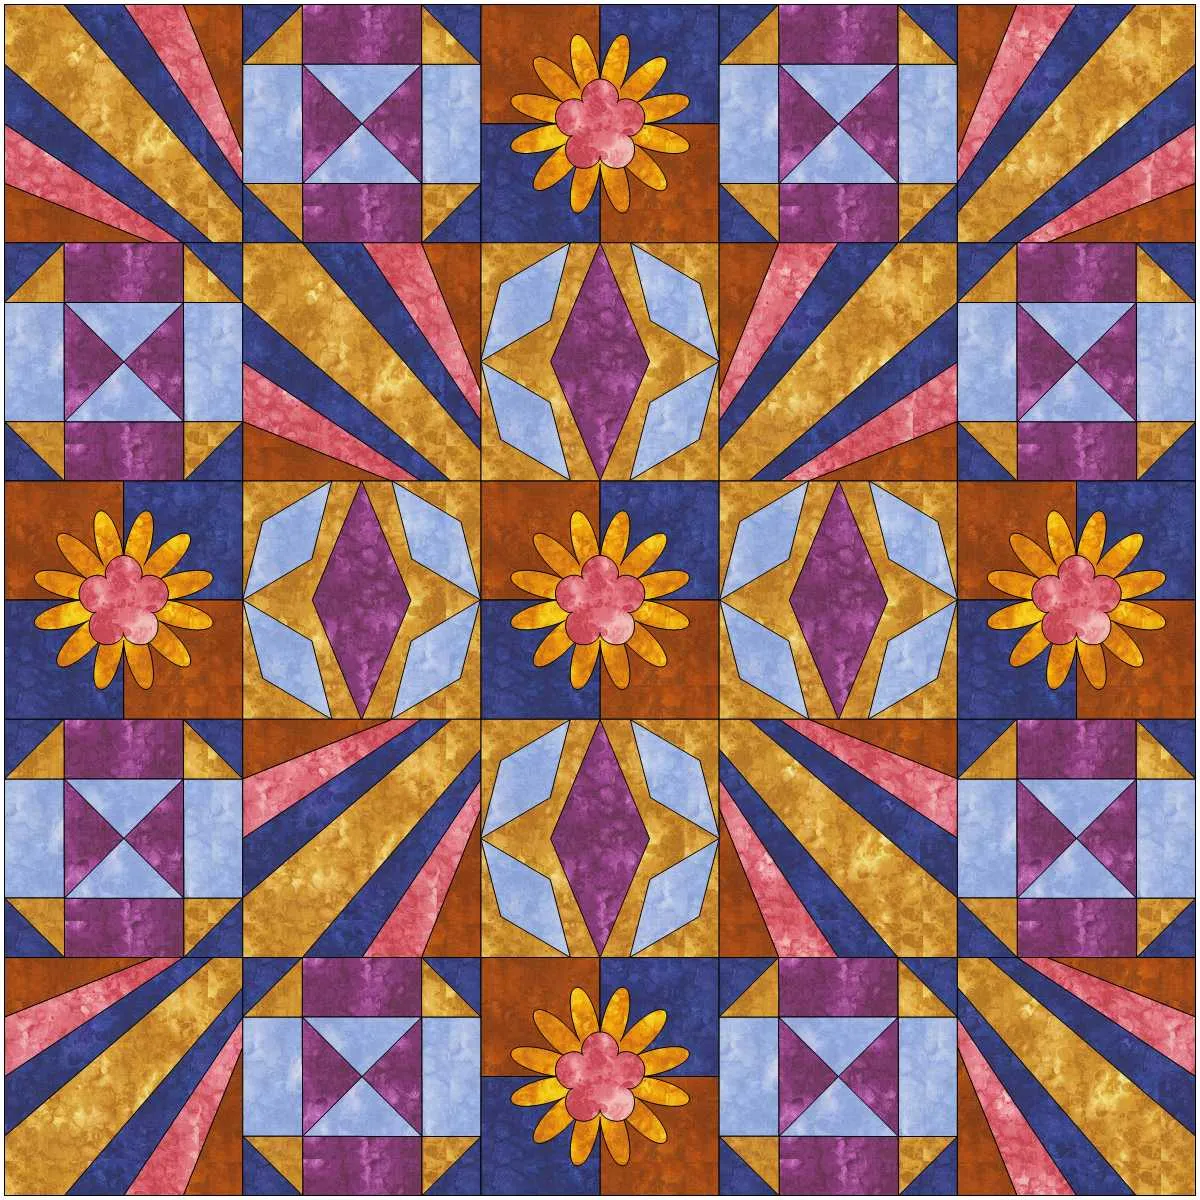
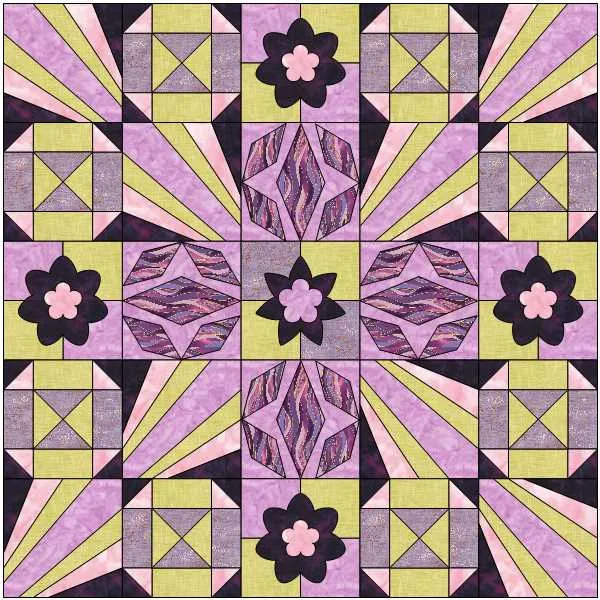
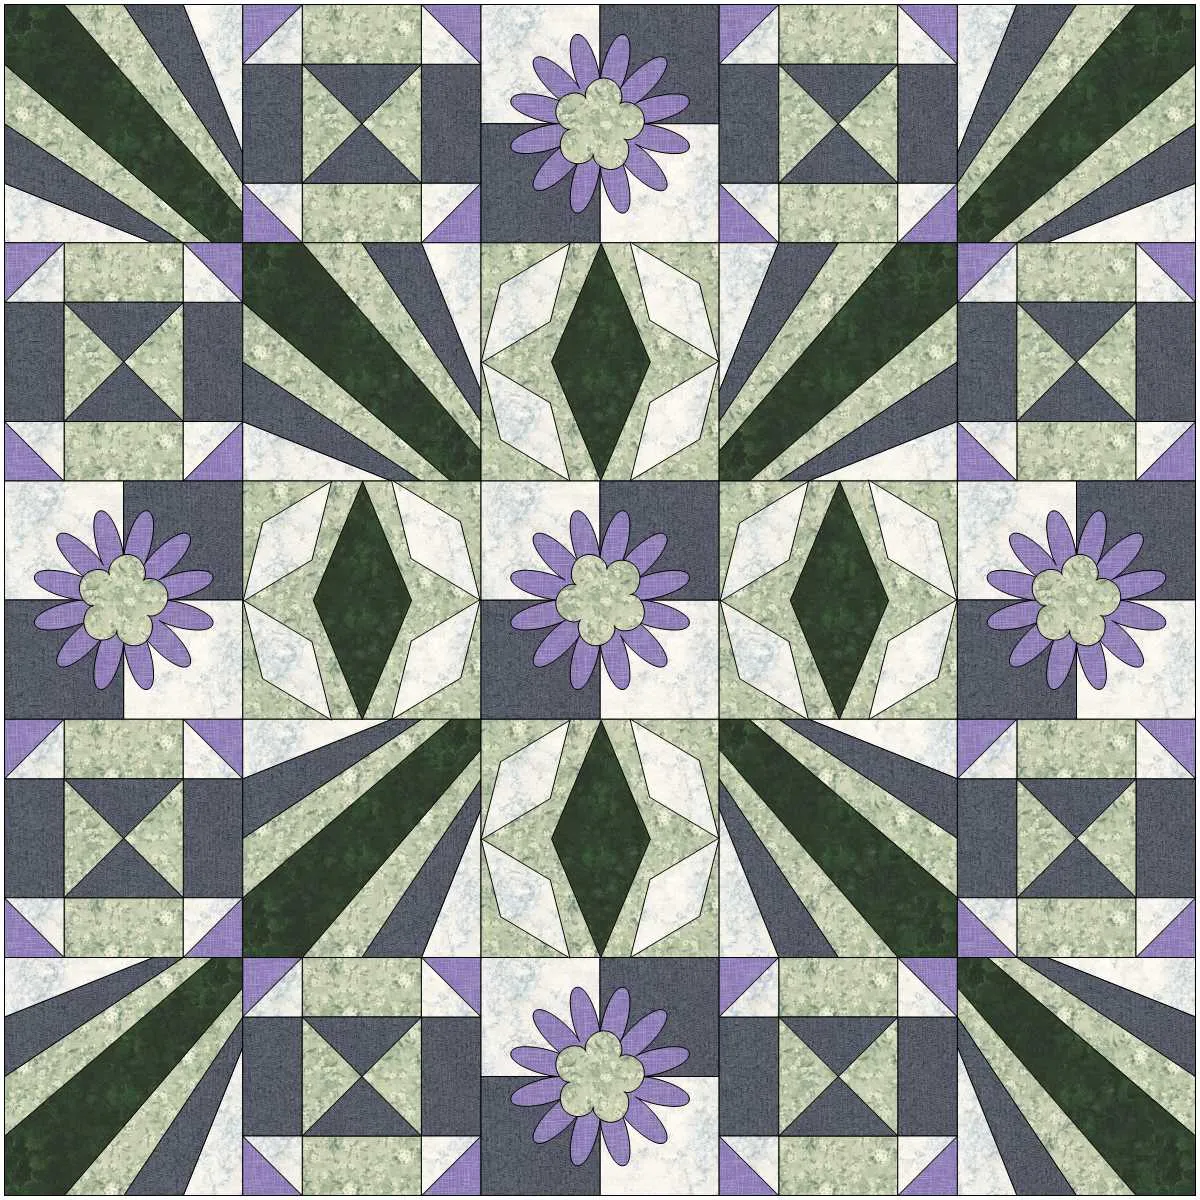
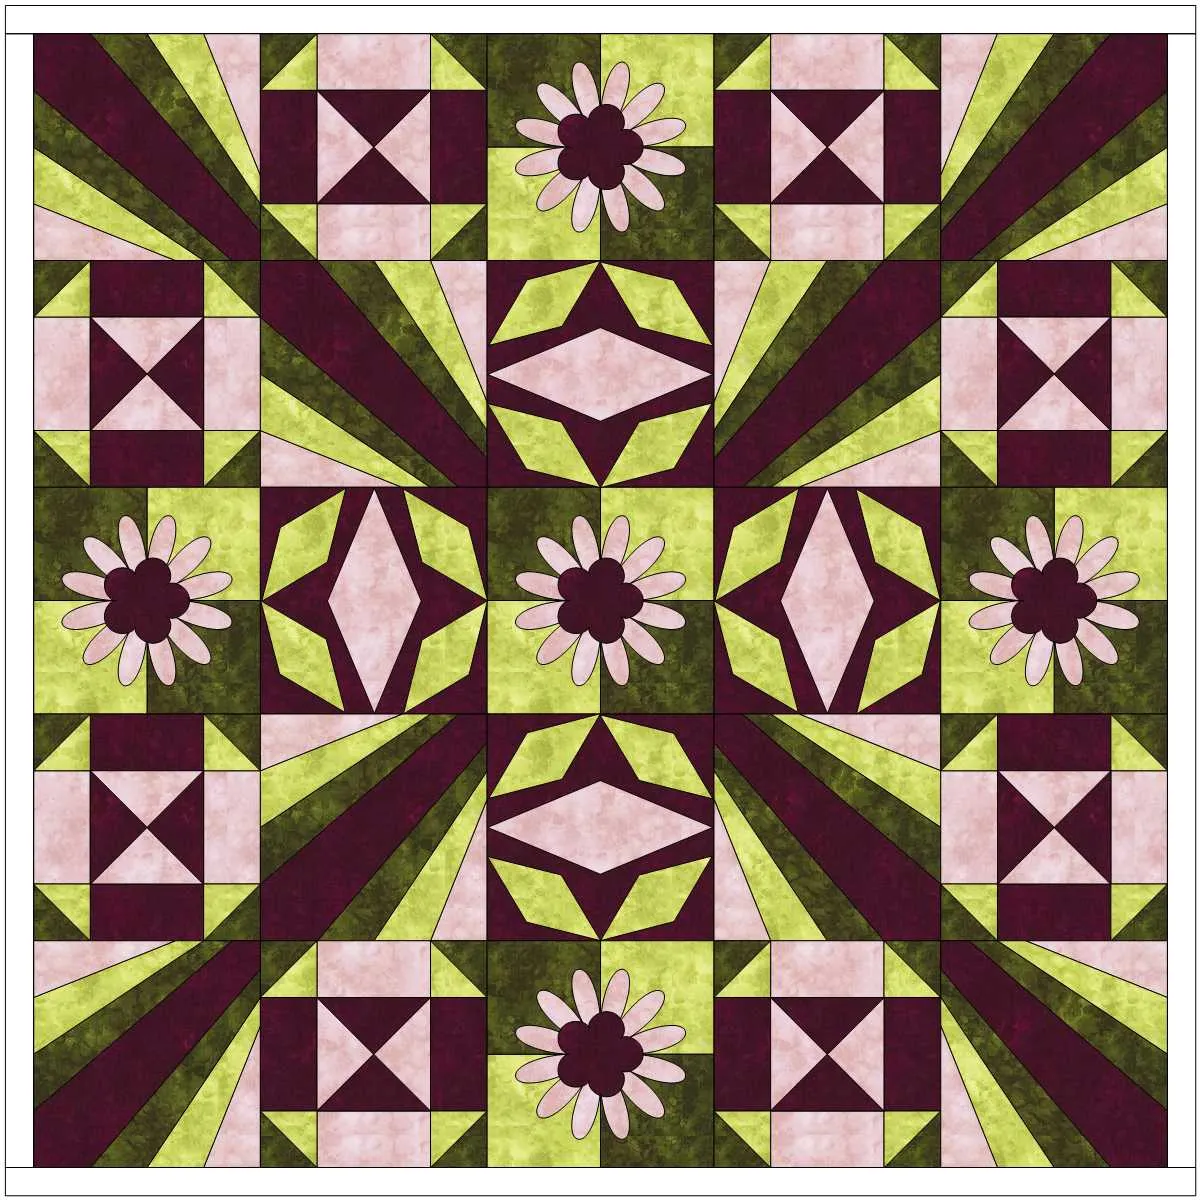
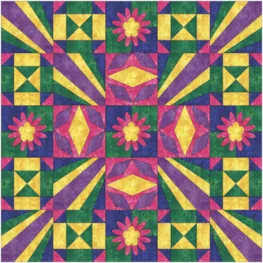
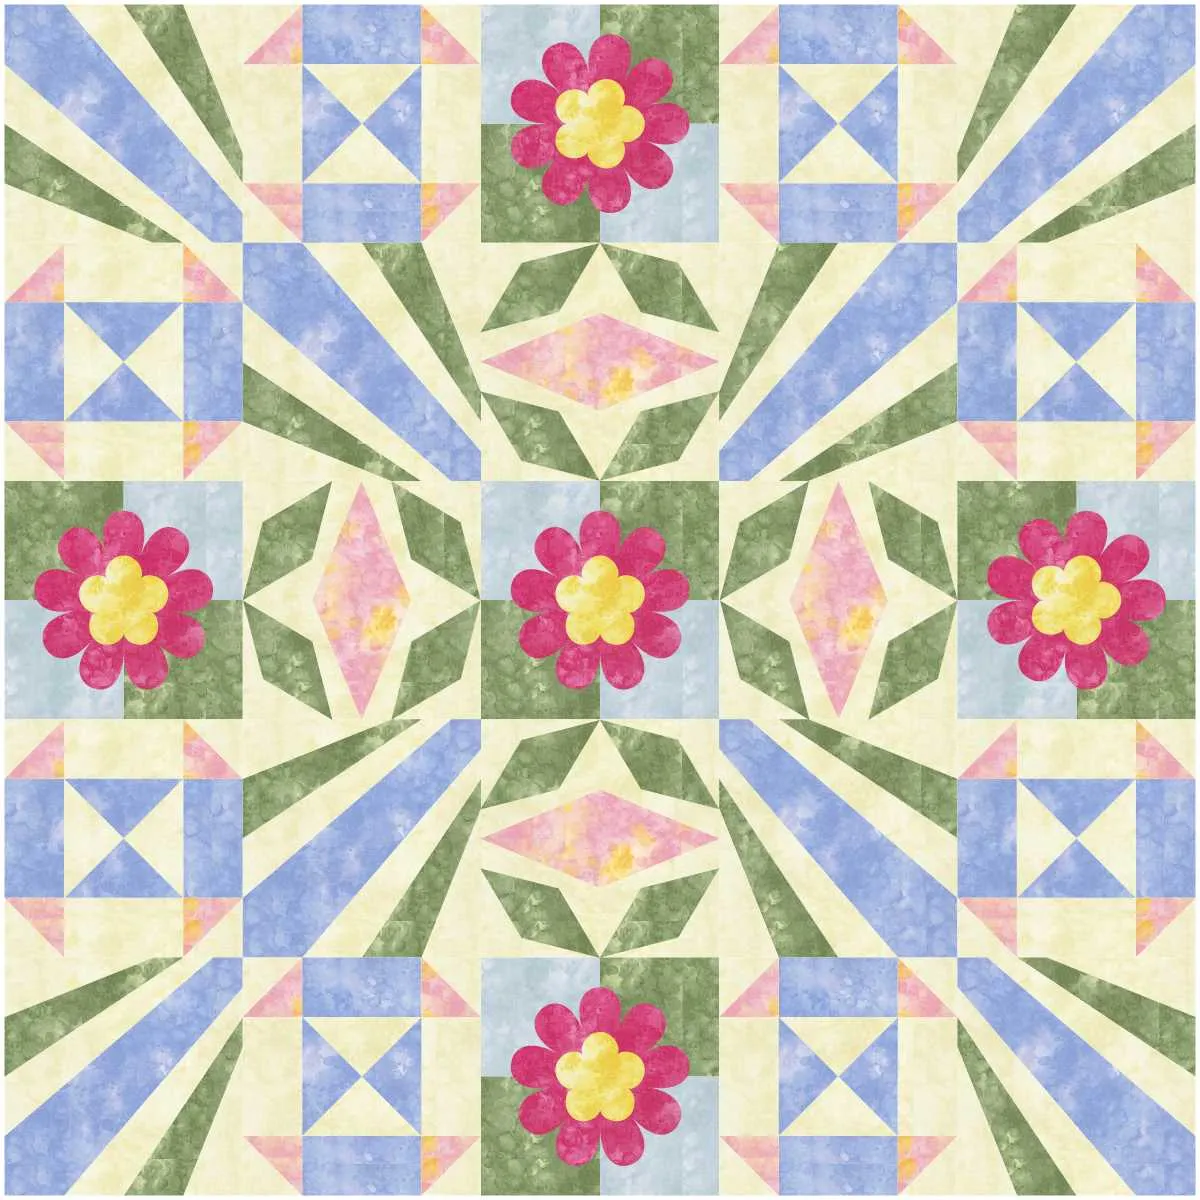
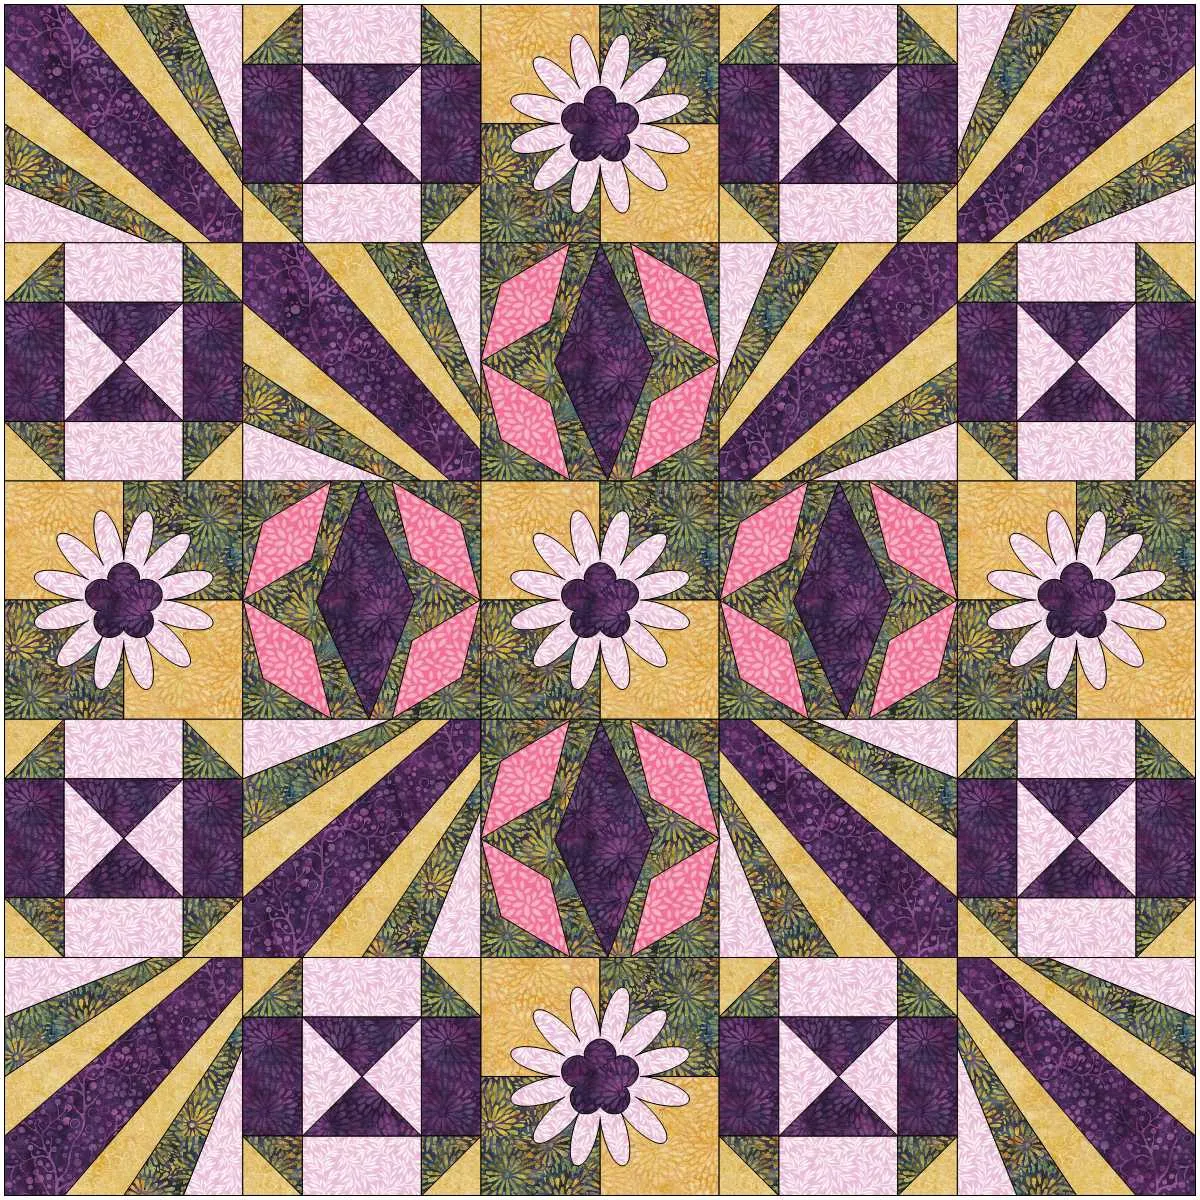
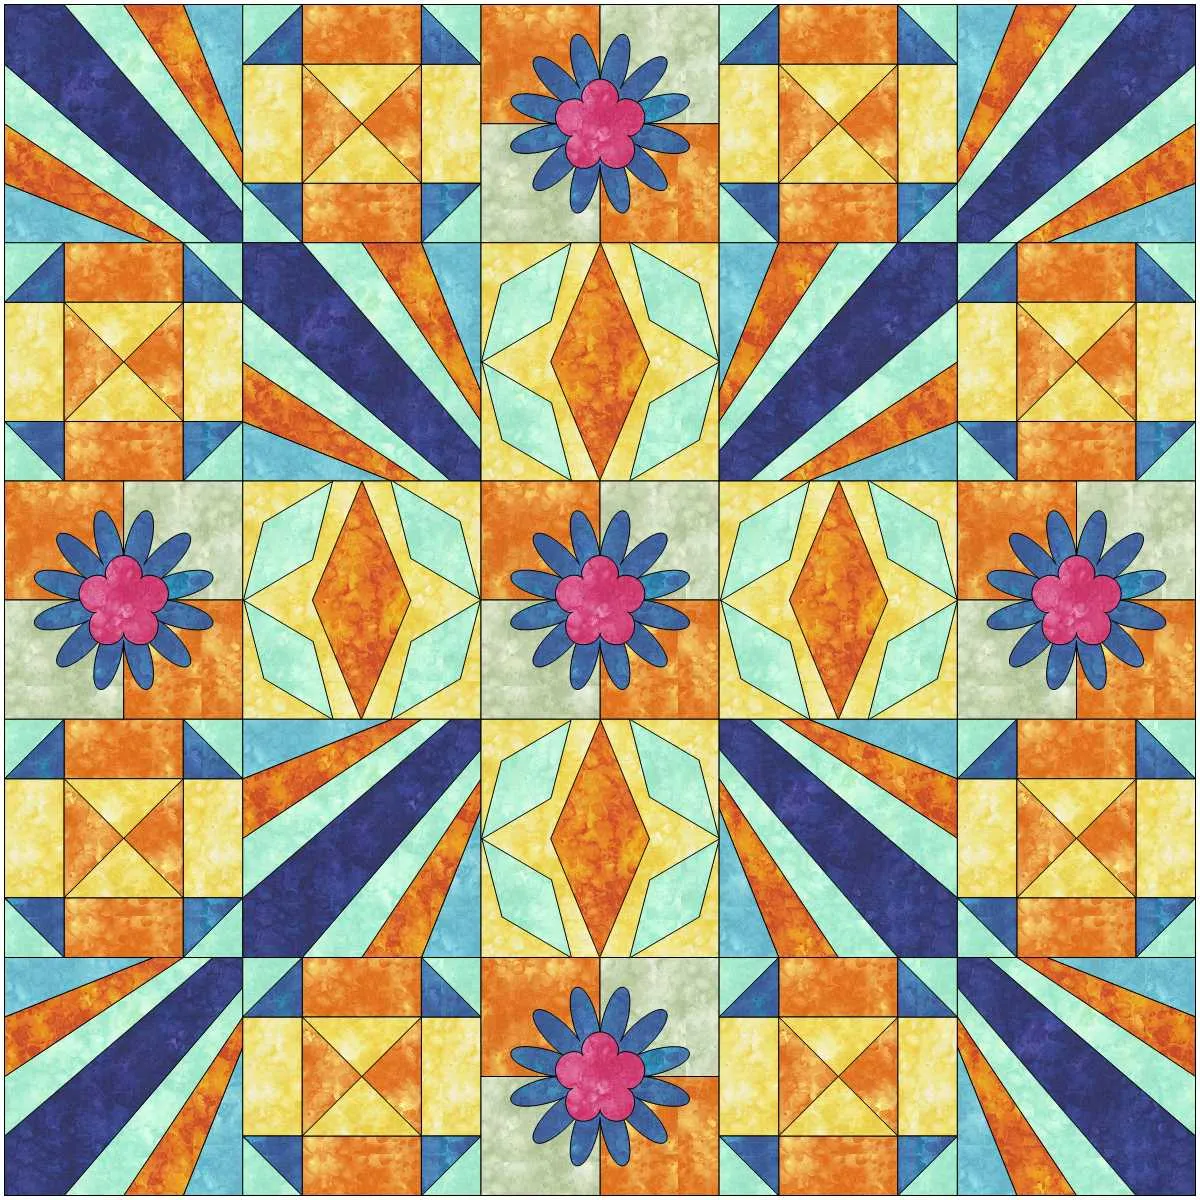
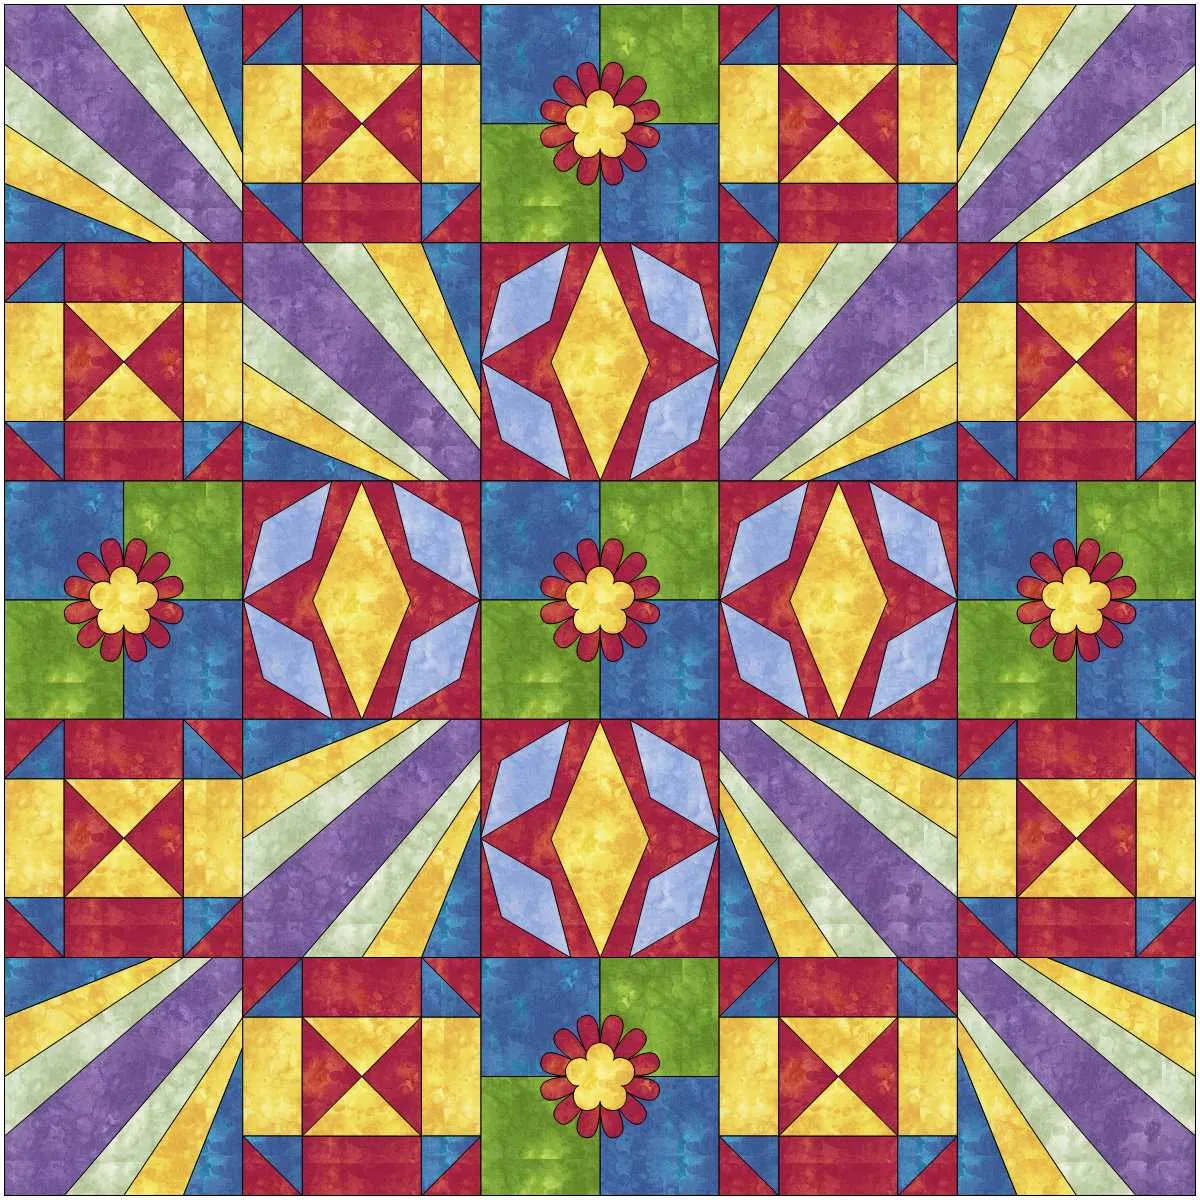
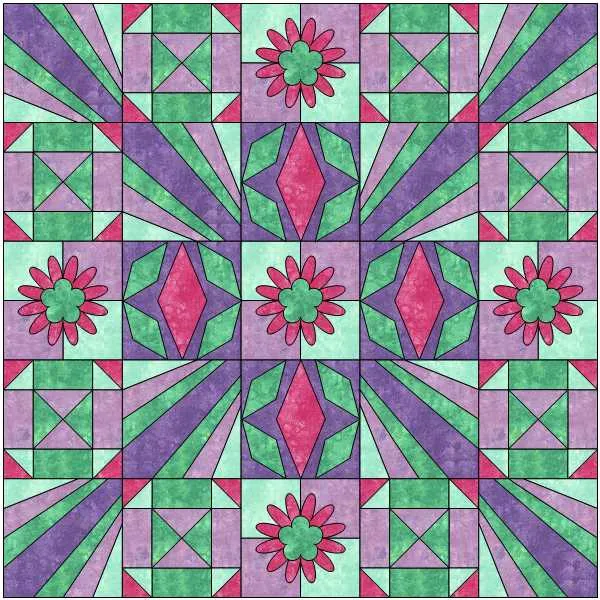
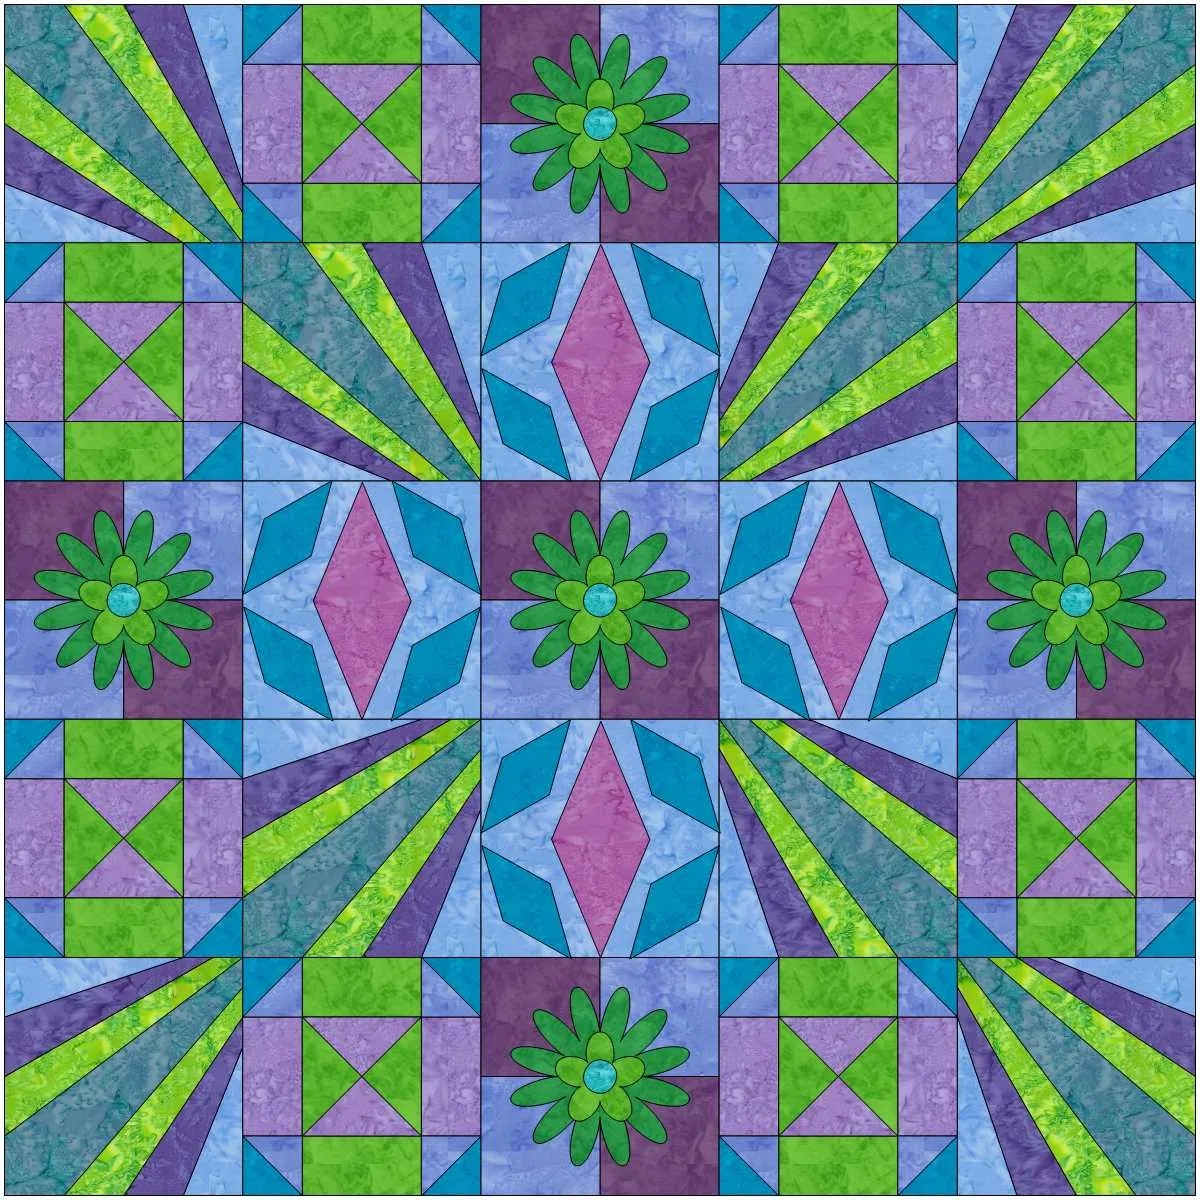
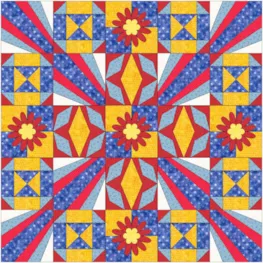
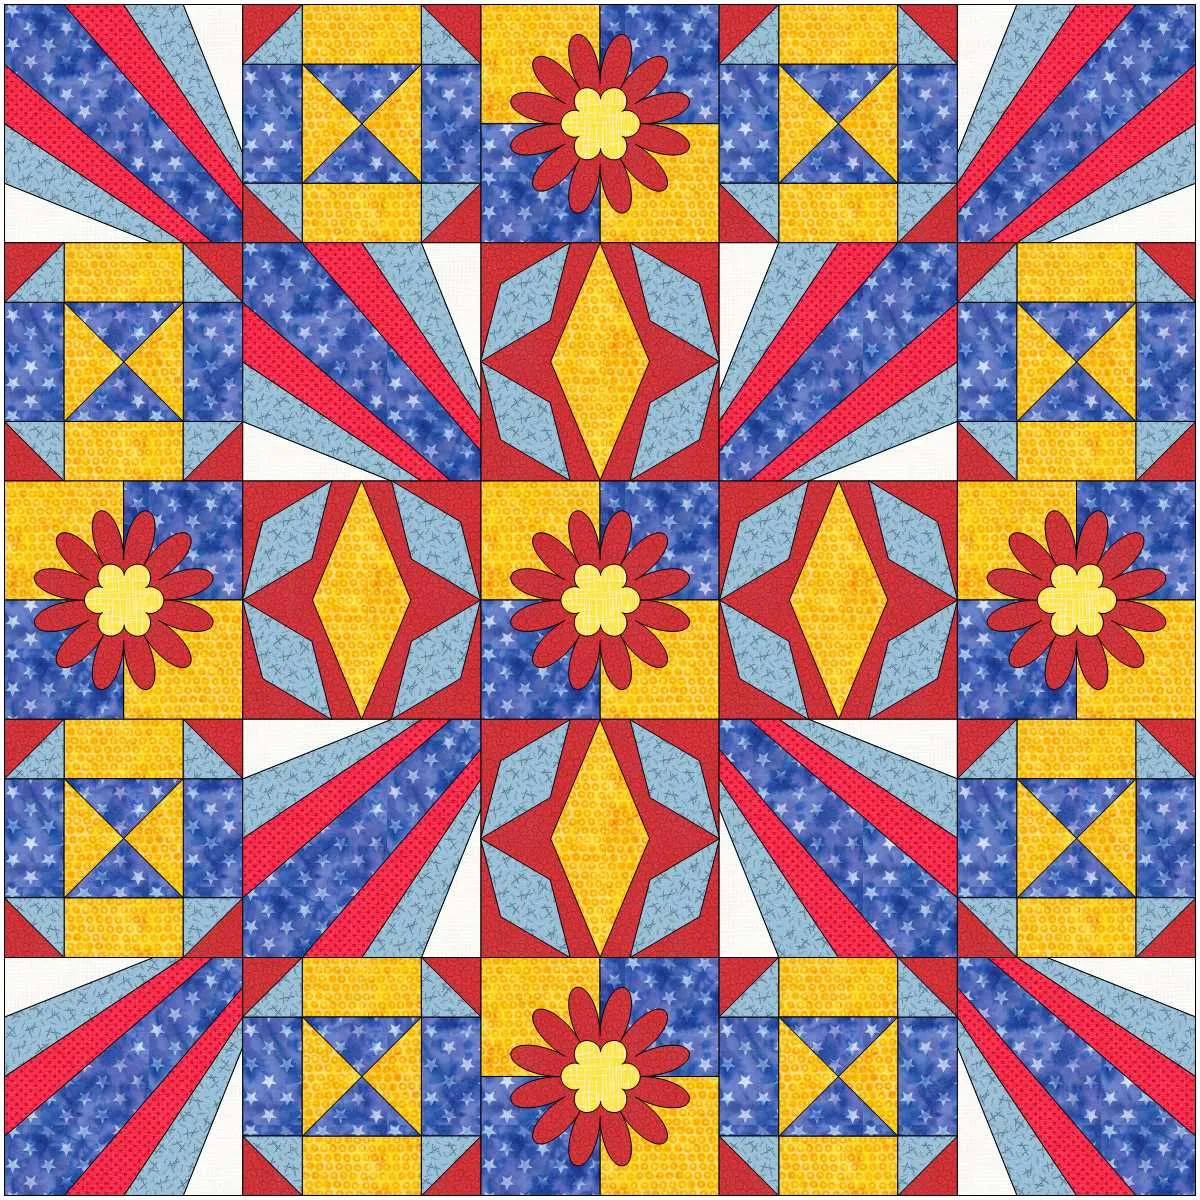
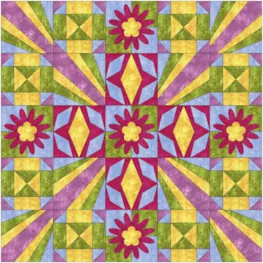
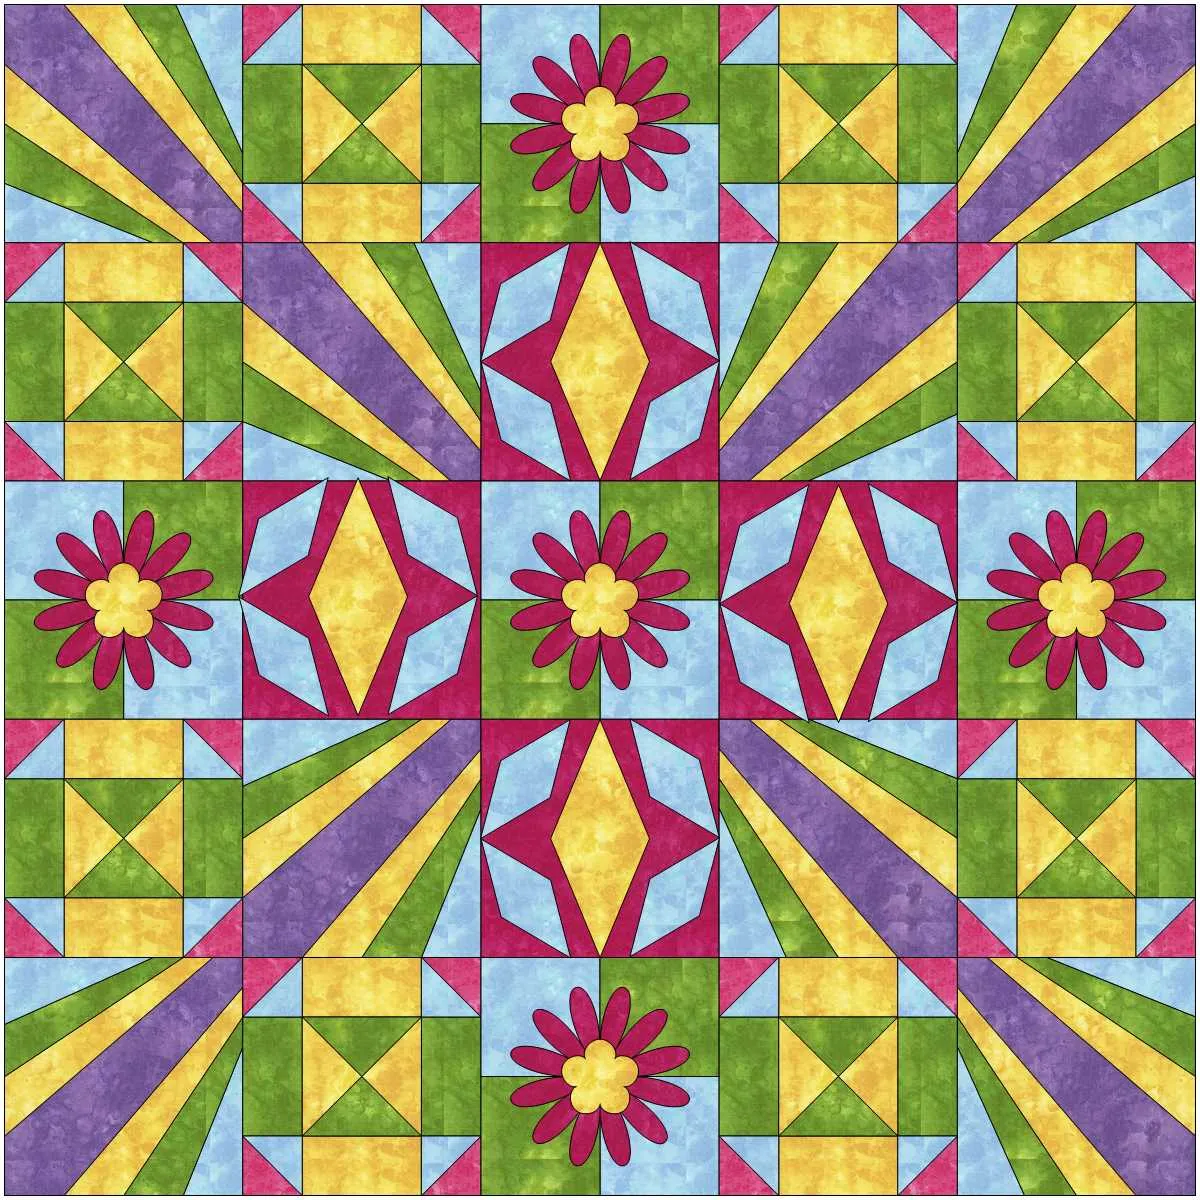
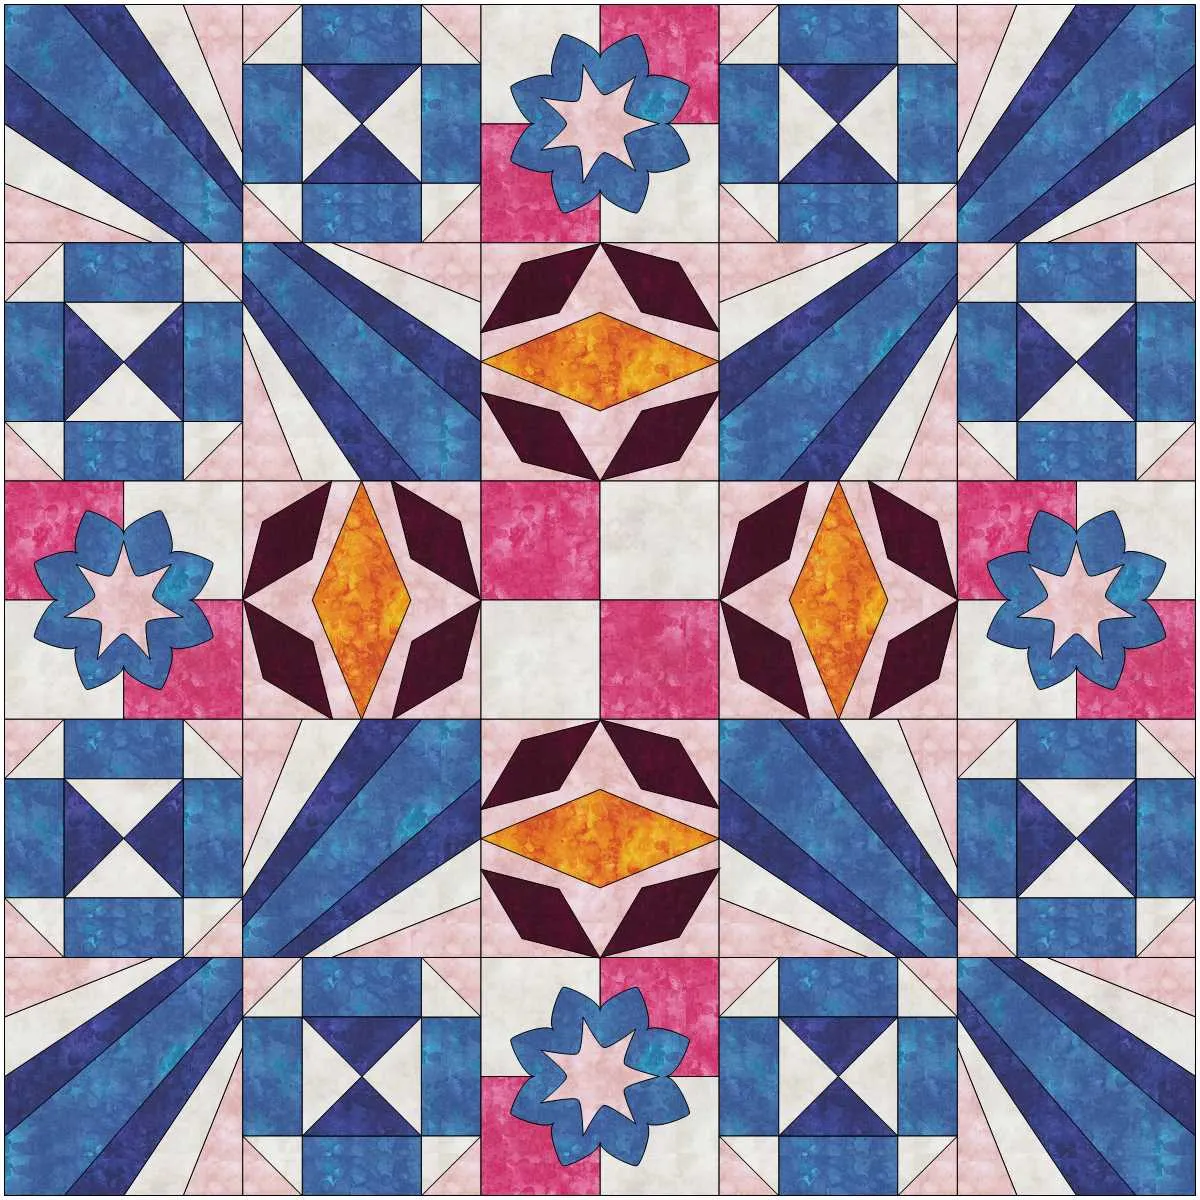
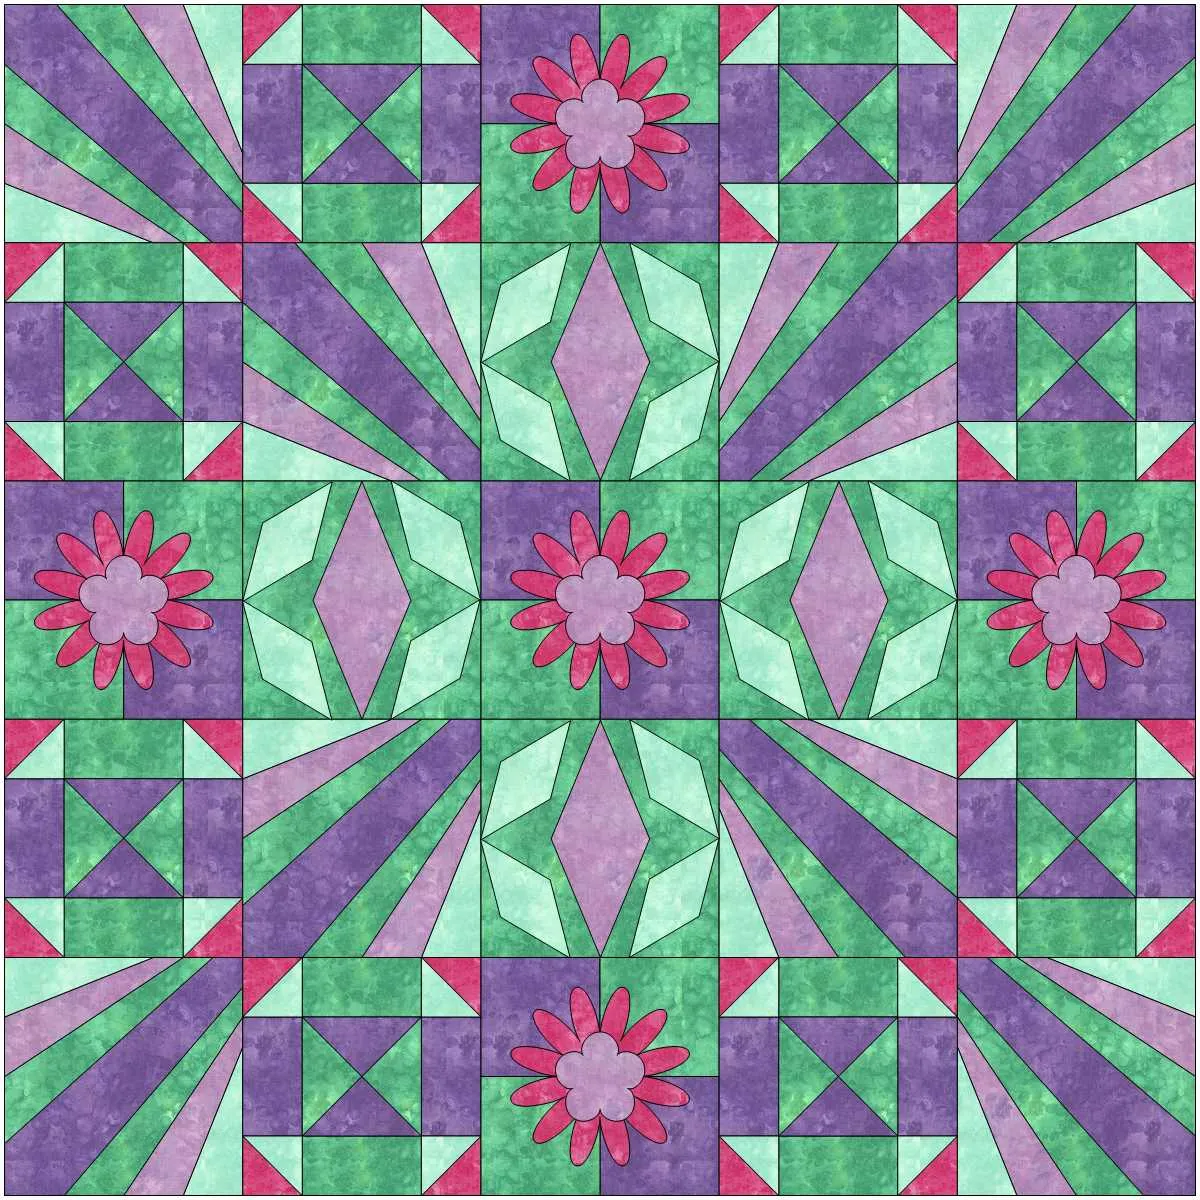
Under the blocks tab in the sketchbook blocks at the left side of the screen, click on the foundation pattern block (paper pieced design) we created early in our lessons. Once it is selected, place it on the quilt layout in the sections shown here.
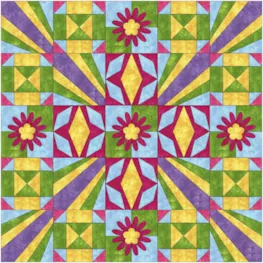
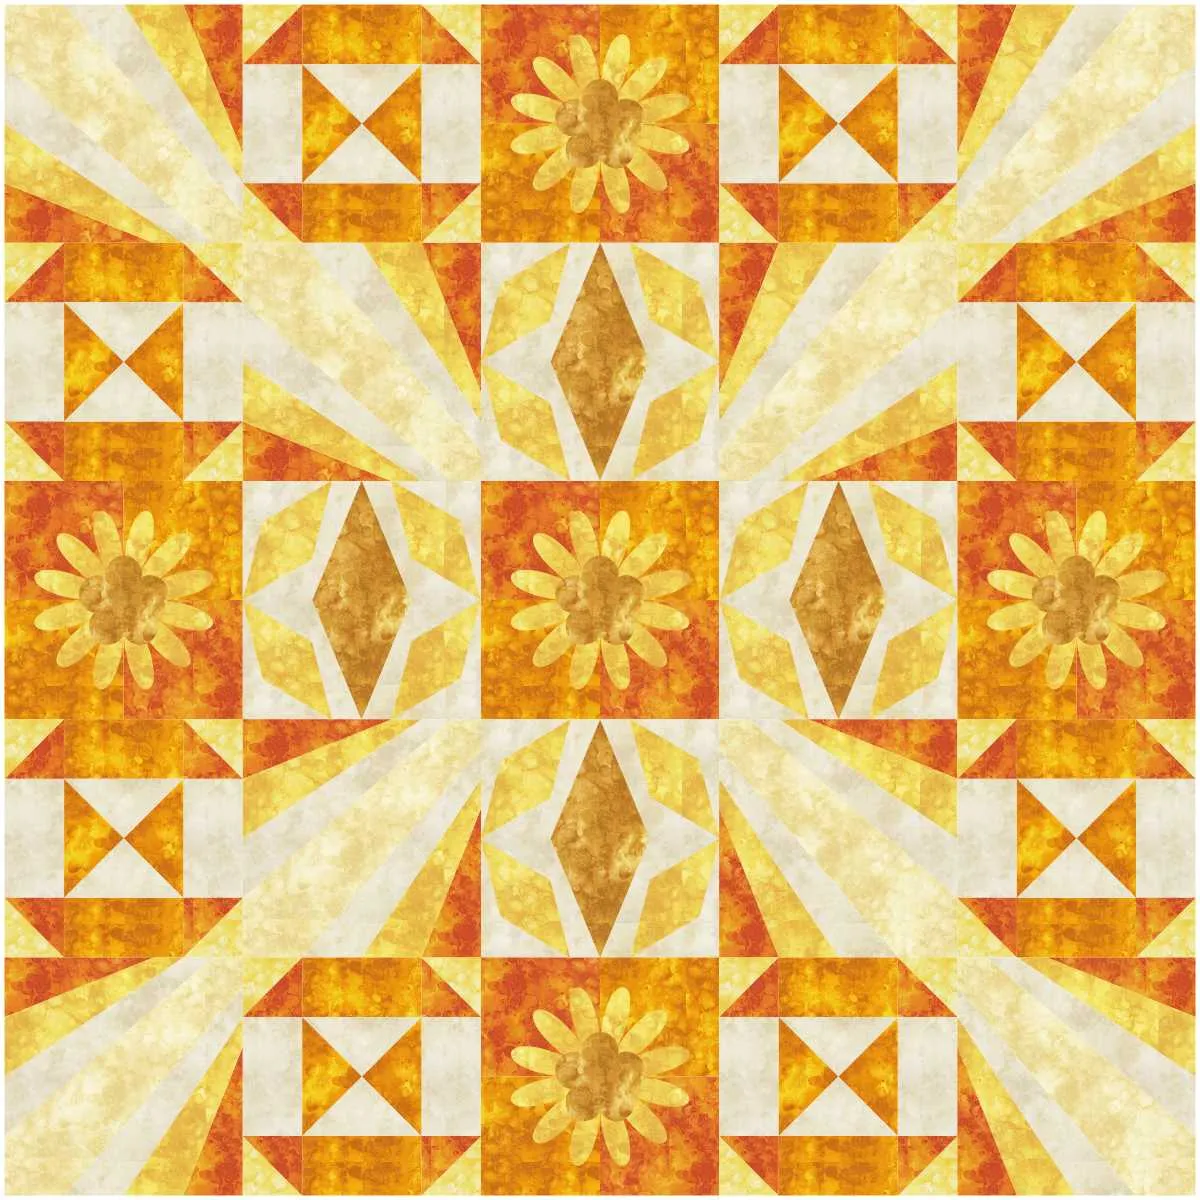
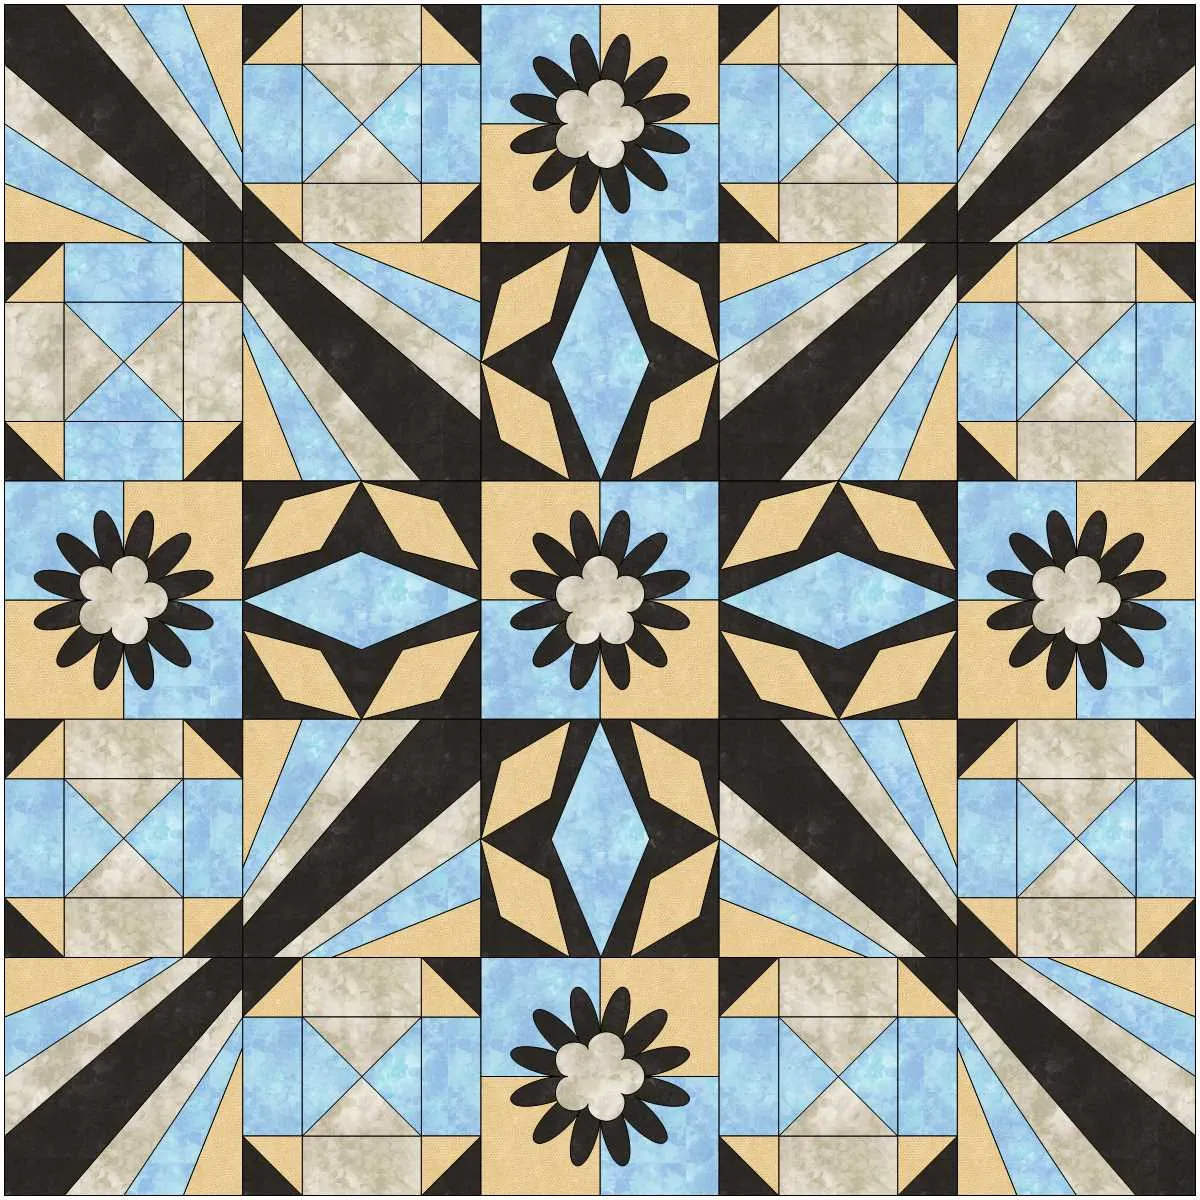
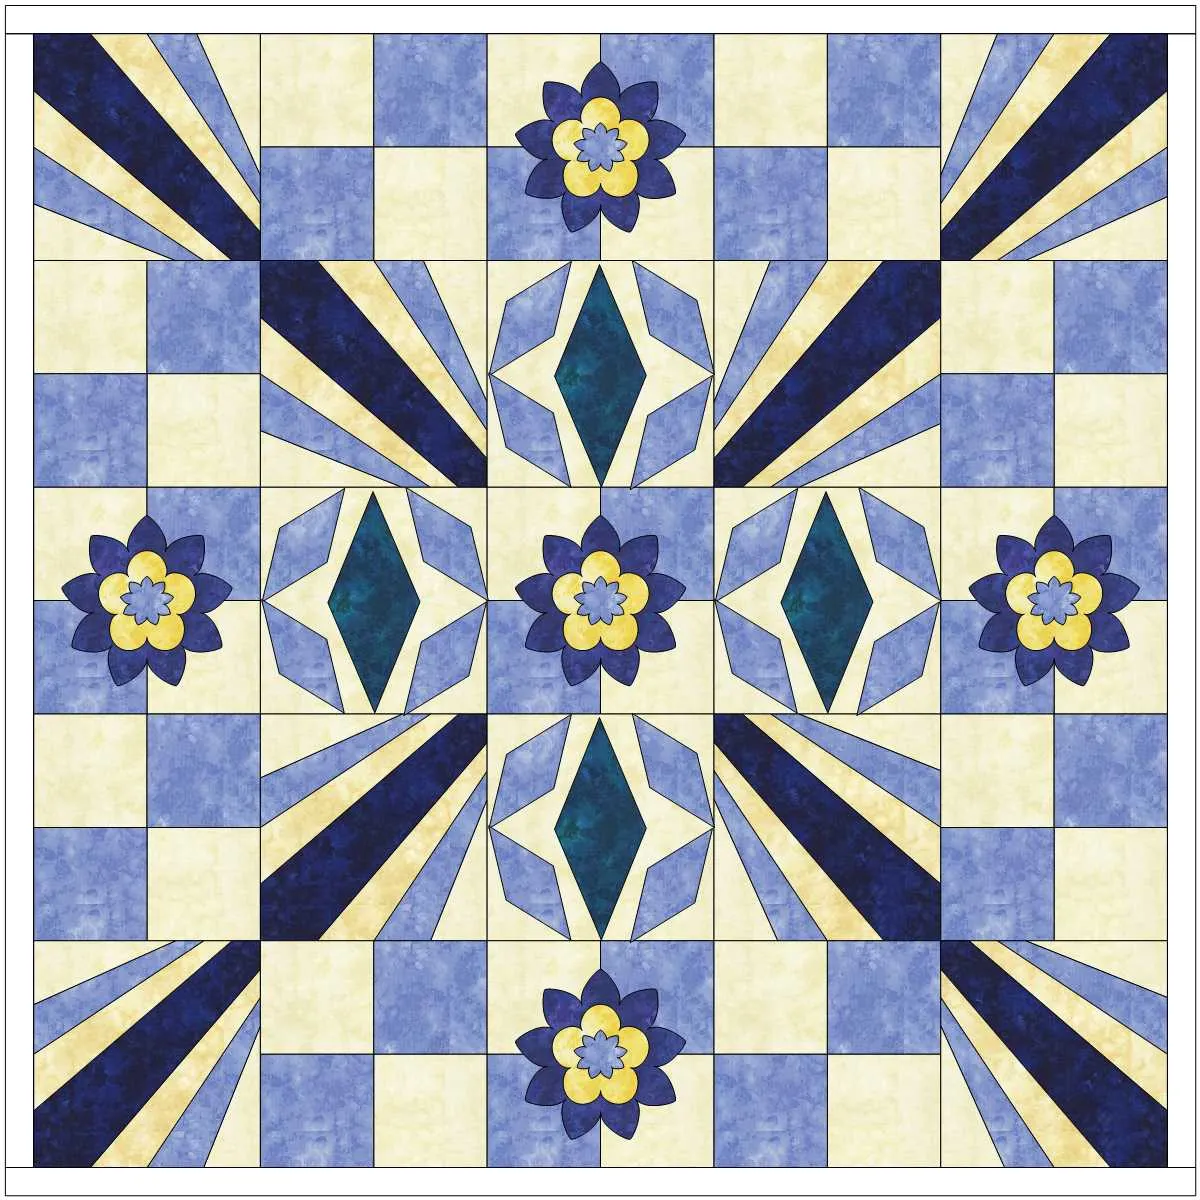
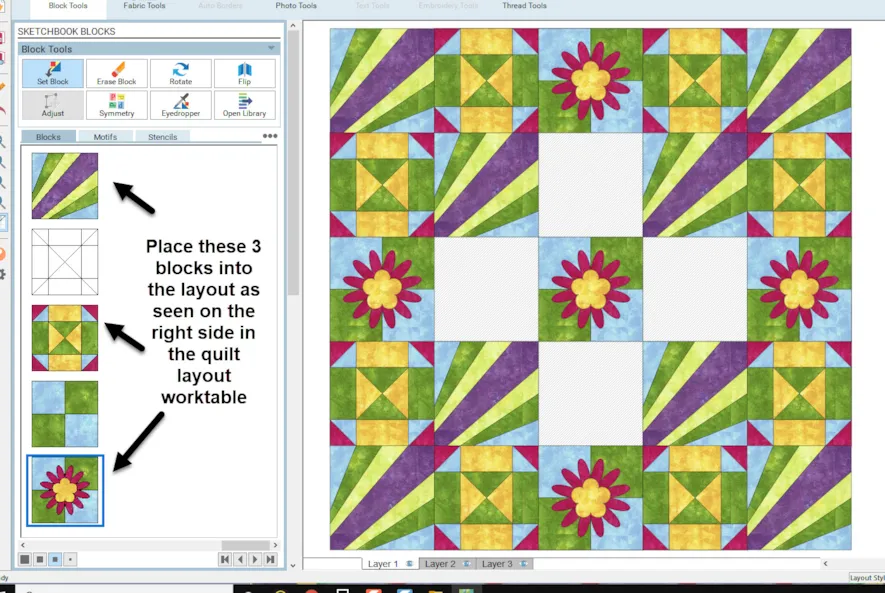
Using the same selection and placement options we just applied with the paper pieced (foundation) block, click on each of the remaining colored blocks and place them into the quilt layout as seen here.
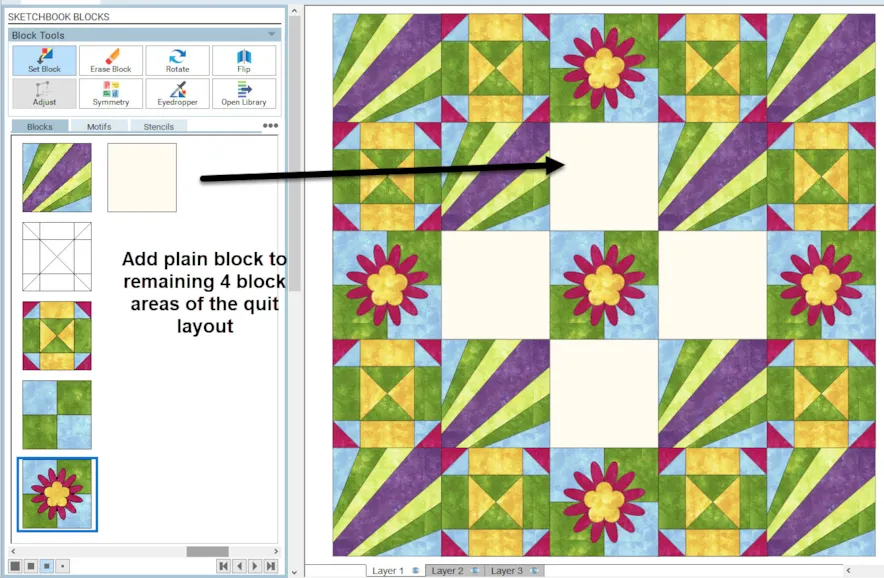
The four remaining block areas on the layout will have the motif design added. We need to create a background block first before we can apply the motifs to the area.
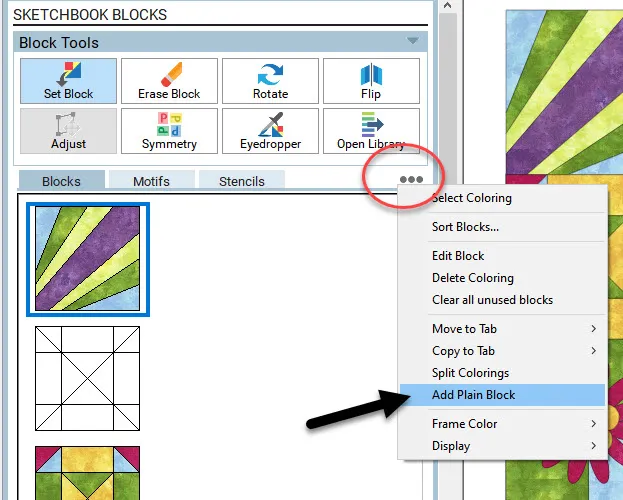
You can add a plain block to the sketchbook blocks area at the left by two different techniques. (1) Click on the three little dots and select the ‘add plain block’ from the menu OR (2) right click with your cursor in the blank area of the blocks box and select the ‘add plain block’ from the menu.
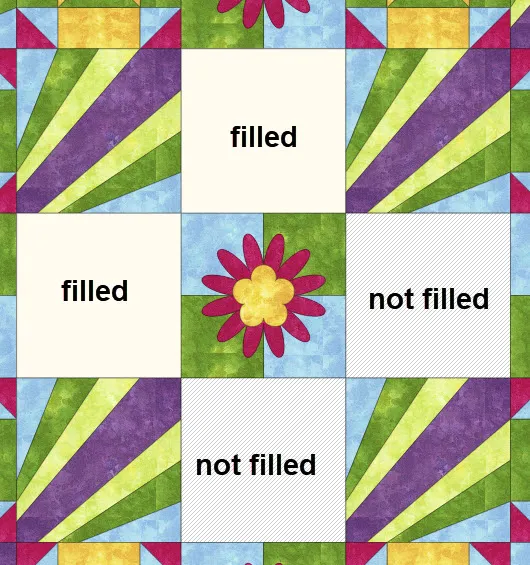
Click on the plain block to select it and then click on each of the four remaining block areas to set the plain block into the layout. The plain block, when set on the quilt layout on layer one, will be a creamy solid color. If you still see the light little lines in the block area it means it has not been filled.
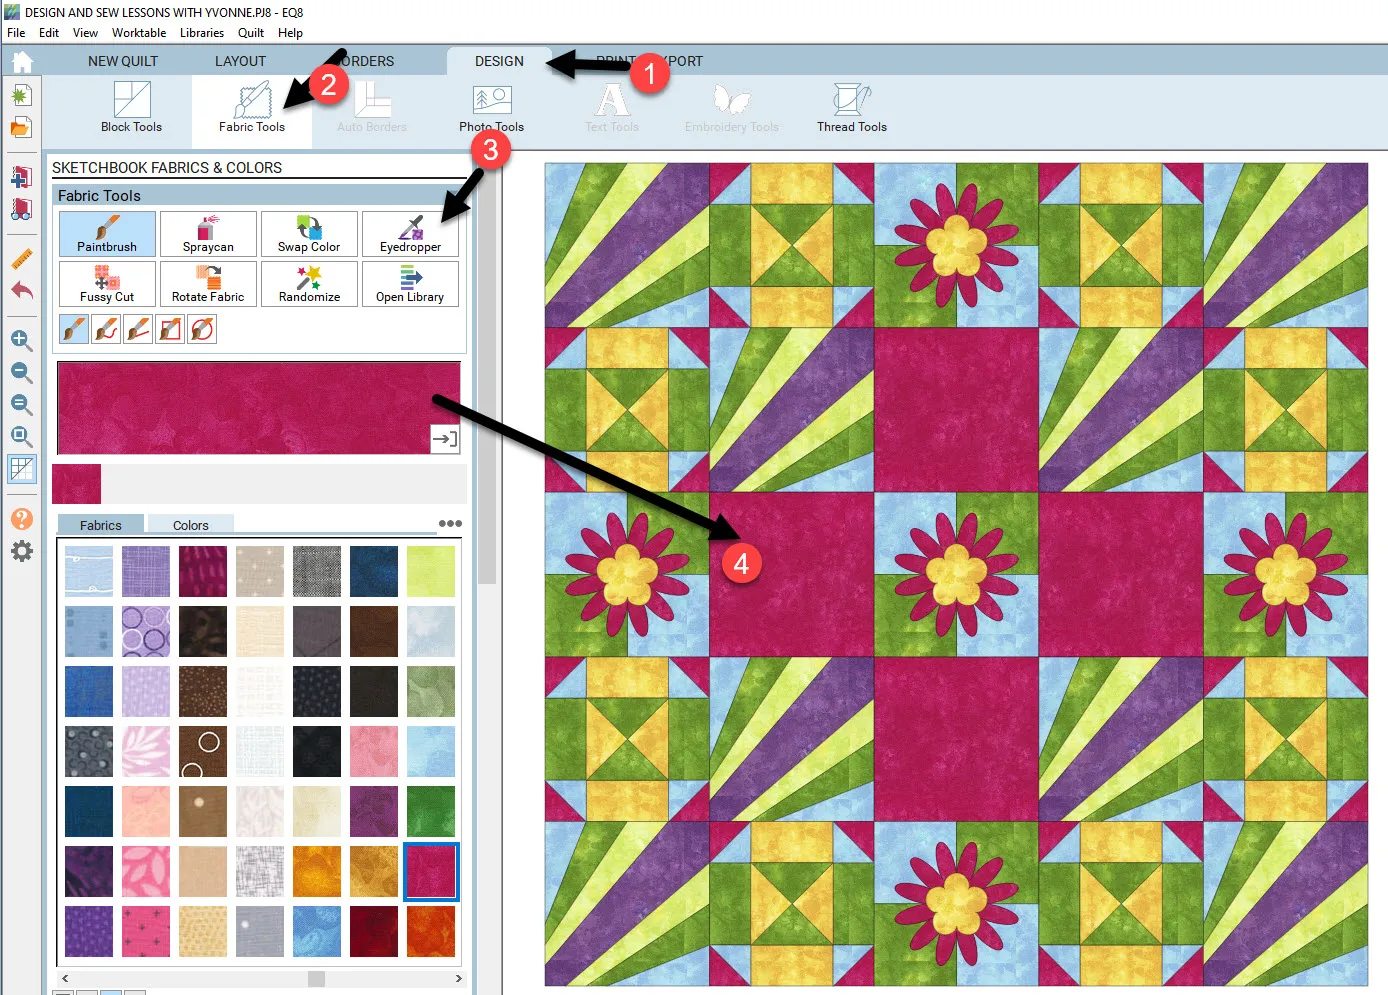
Click on the ‘Fabric Tools’ heading at the top of the screen.
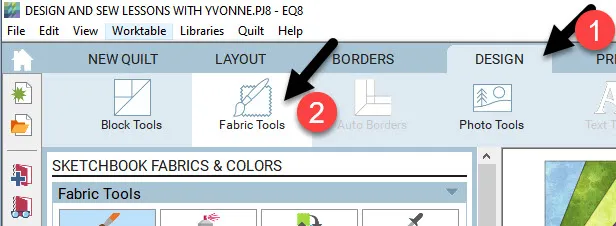
Click on the eyedropper tool icon![]() to select it. Move the tip of the eyedropper tool over to the quilt layout to a block with the color area on a block that you want to pick up and click once to pick up that color. Move the tool over to the plain blocks and click once in each block to release that color into the block area.
to select it. Move the tip of the eyedropper tool over to the quilt layout to a block with the color area on a block that you want to pick up and click once to pick up that color. Move the tool over to the plain blocks and click once in each block to release that color into the block area.
Add the colored layout to the sketchbook.![]()
Motifs are added on layer two (2) of the quilt worktable. Click on the Layer 2 tab at the bottom of the screen.
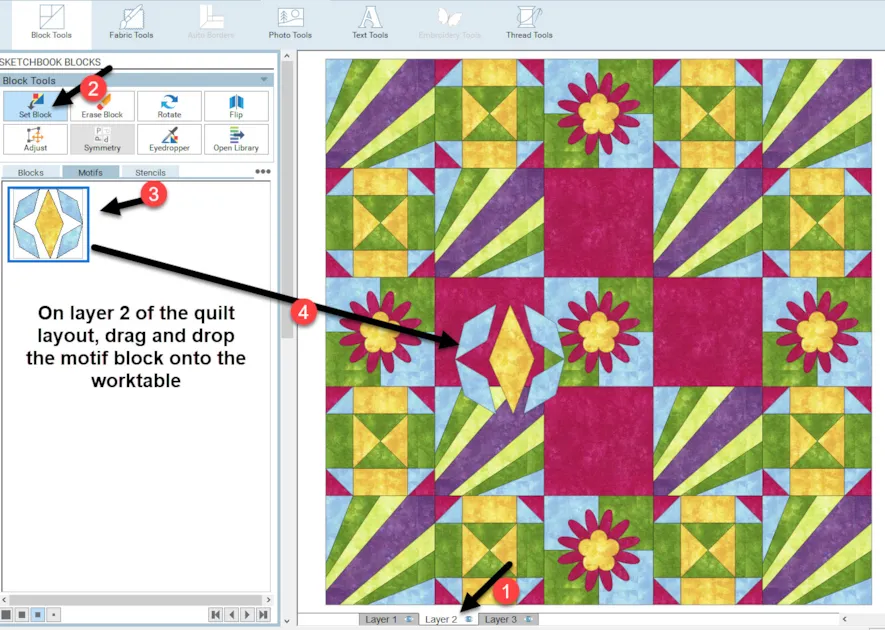
Once you are on layer 2 of the quilt worktable, click back onto the ‘block tools’ icon ![]() at the top of the screen and then click on the motifs tab. The motifs we colored will be there. Click on the motif block image to select it.
at the top of the screen and then click on the motifs tab. The motifs we colored will be there. Click on the motif block image to select it.
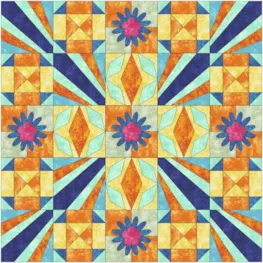
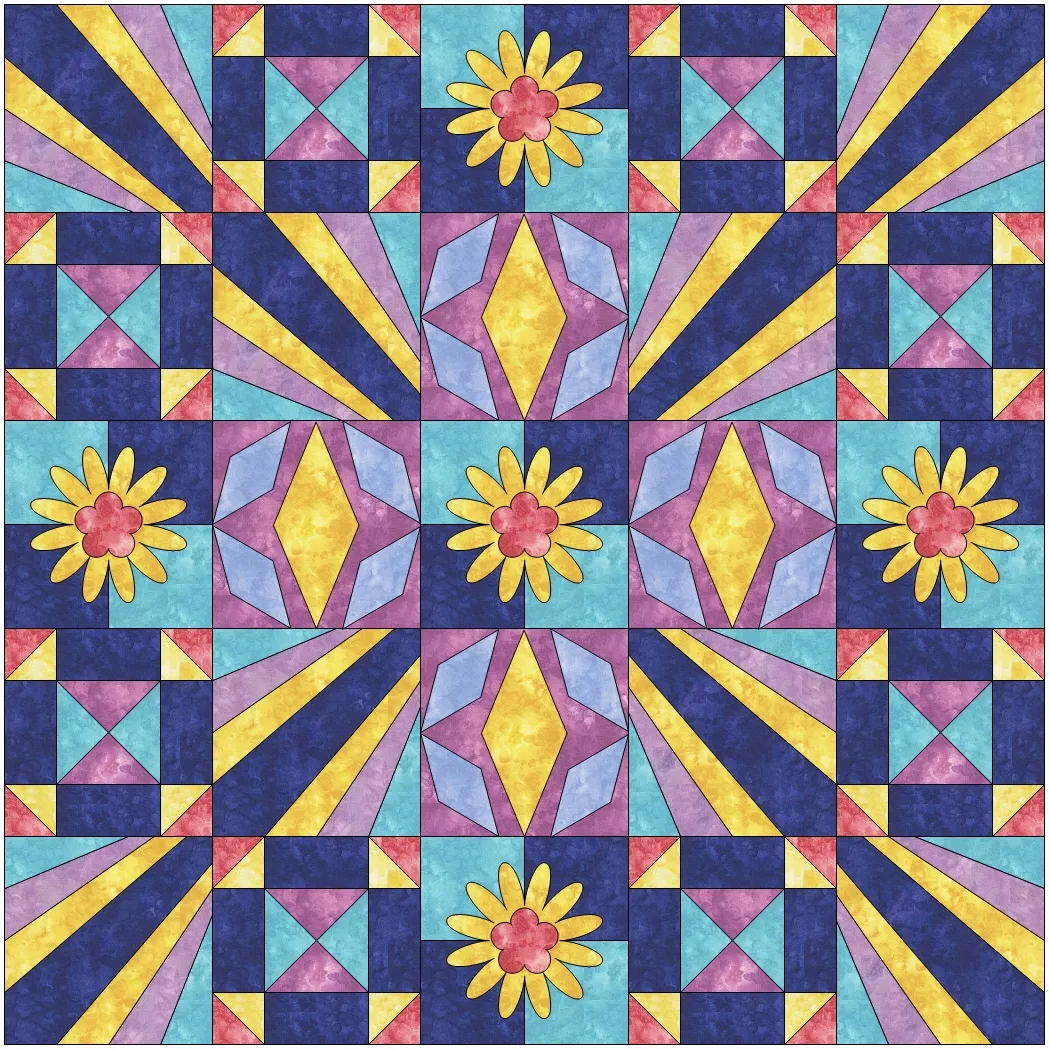
Once the motif block is selected, drag and drop the design onto the worktable. Set all four of the motifs on the worktable.
Do not worry about where it lands, to start. You will adjust the placement.
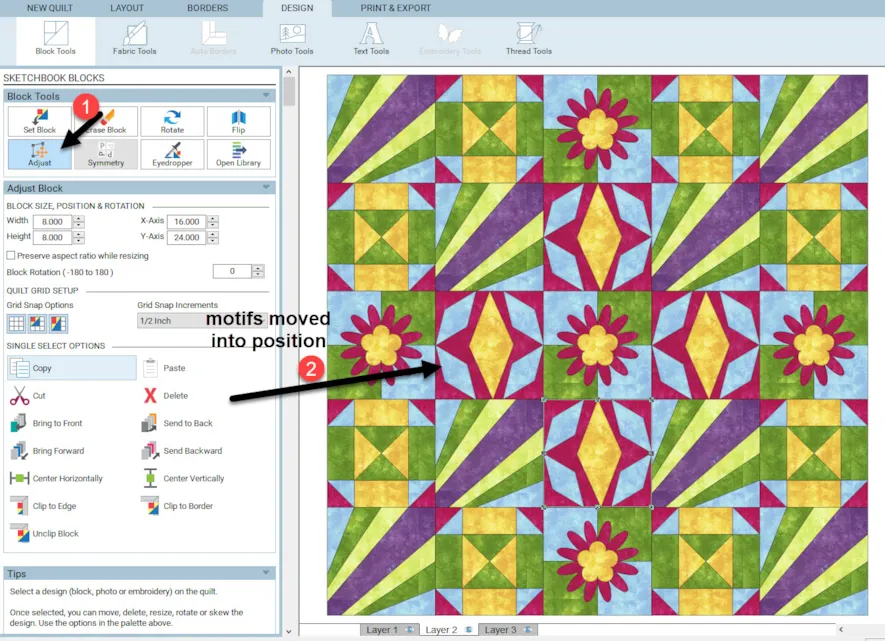
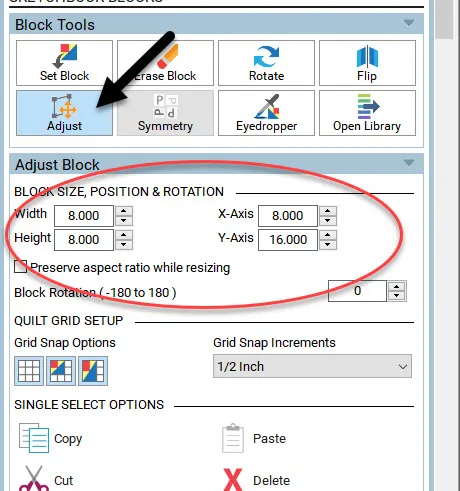
Click on the adjust tool icon![]() to select it. Move the cursor over the motif block and click once to select it with the adjust tool. Click/hold/drag/release the motif into the correct position on top of the solid colored block. Repeat the process for all four of the solid blocks.
to select it. Move the cursor over the motif block and click once to select it with the adjust tool. Click/hold/drag/release the motif into the correct position on top of the solid colored block. Repeat the process for all four of the solid blocks.
Add to sketchbook![]()
NOTE: When you select the motif with the adjust tool![]() you will see the block size and position of the block. EQ remembers the size of the block where you first drew/created your motif design.
you will see the block size and position of the block. EQ remembers the size of the block where you first drew/created your motif design.
Click on layer 1 of the quilt worktable at the bottom of the screen.
![]()
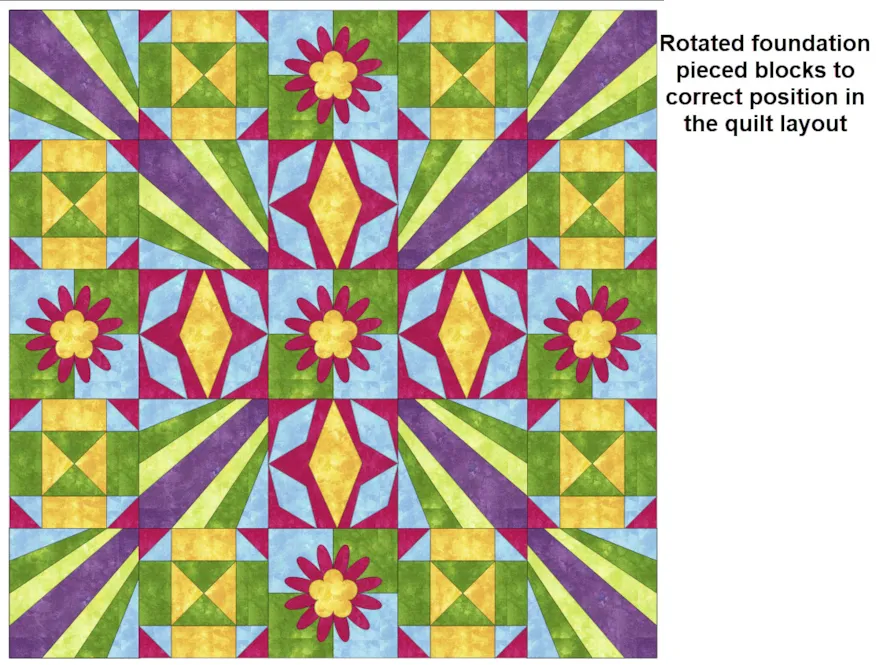
The foundation pieced blocks are not oriented in the correct position.
Click on the rotate tool icon  in the block tools box on the left side of the screen.
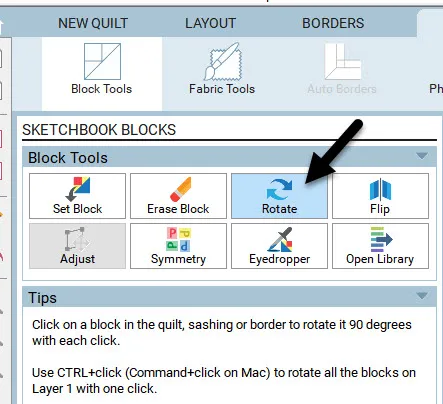
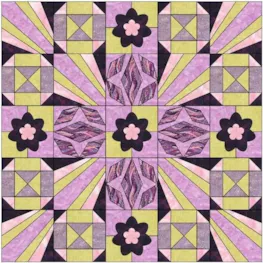
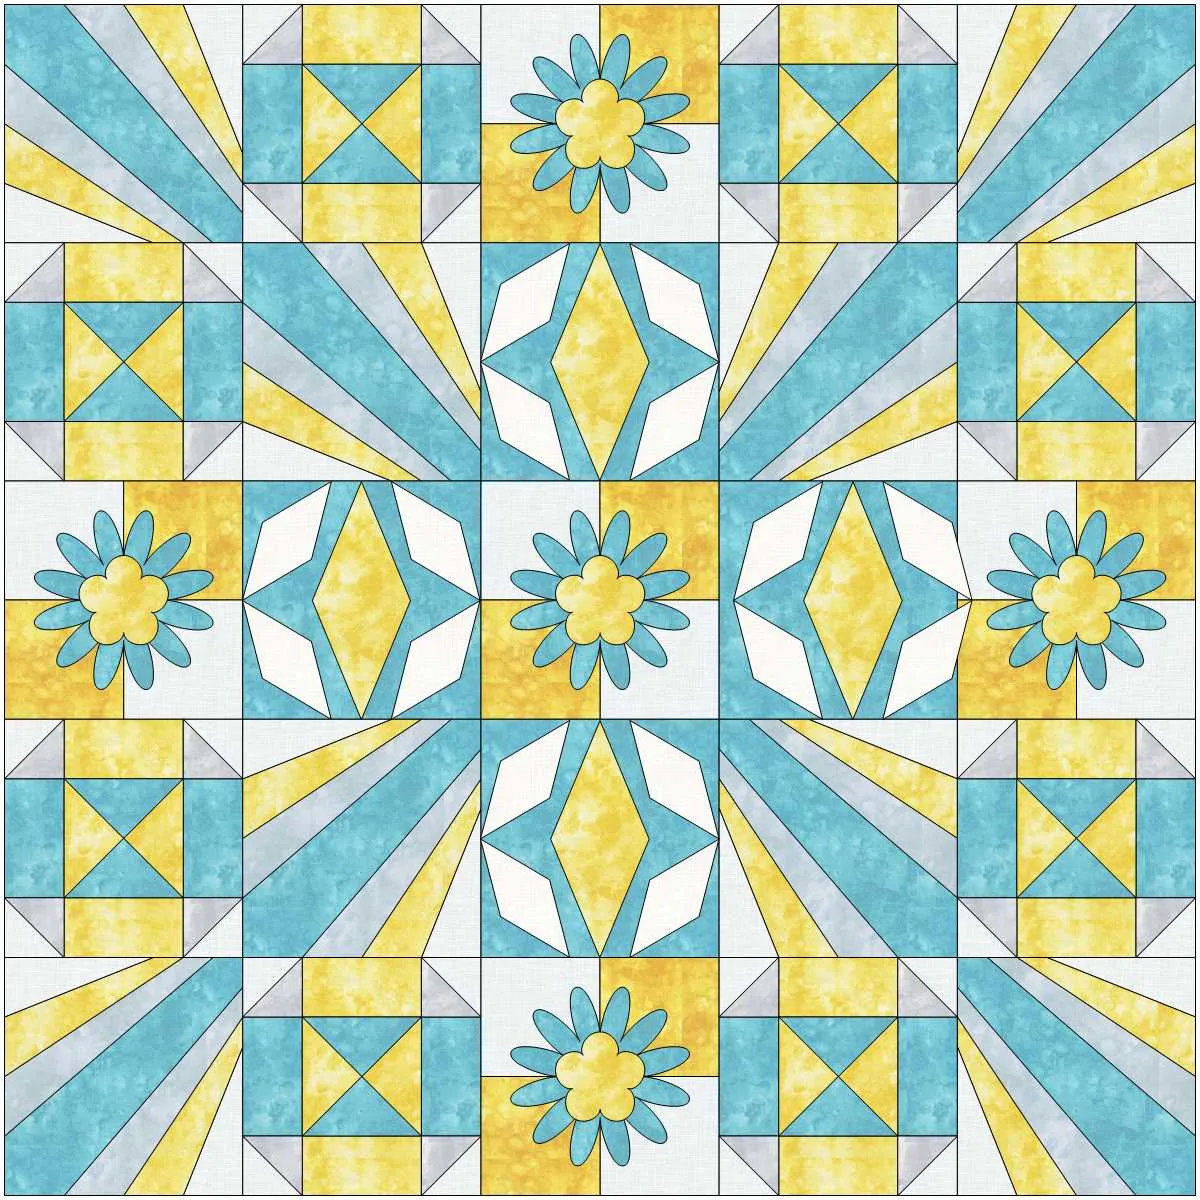
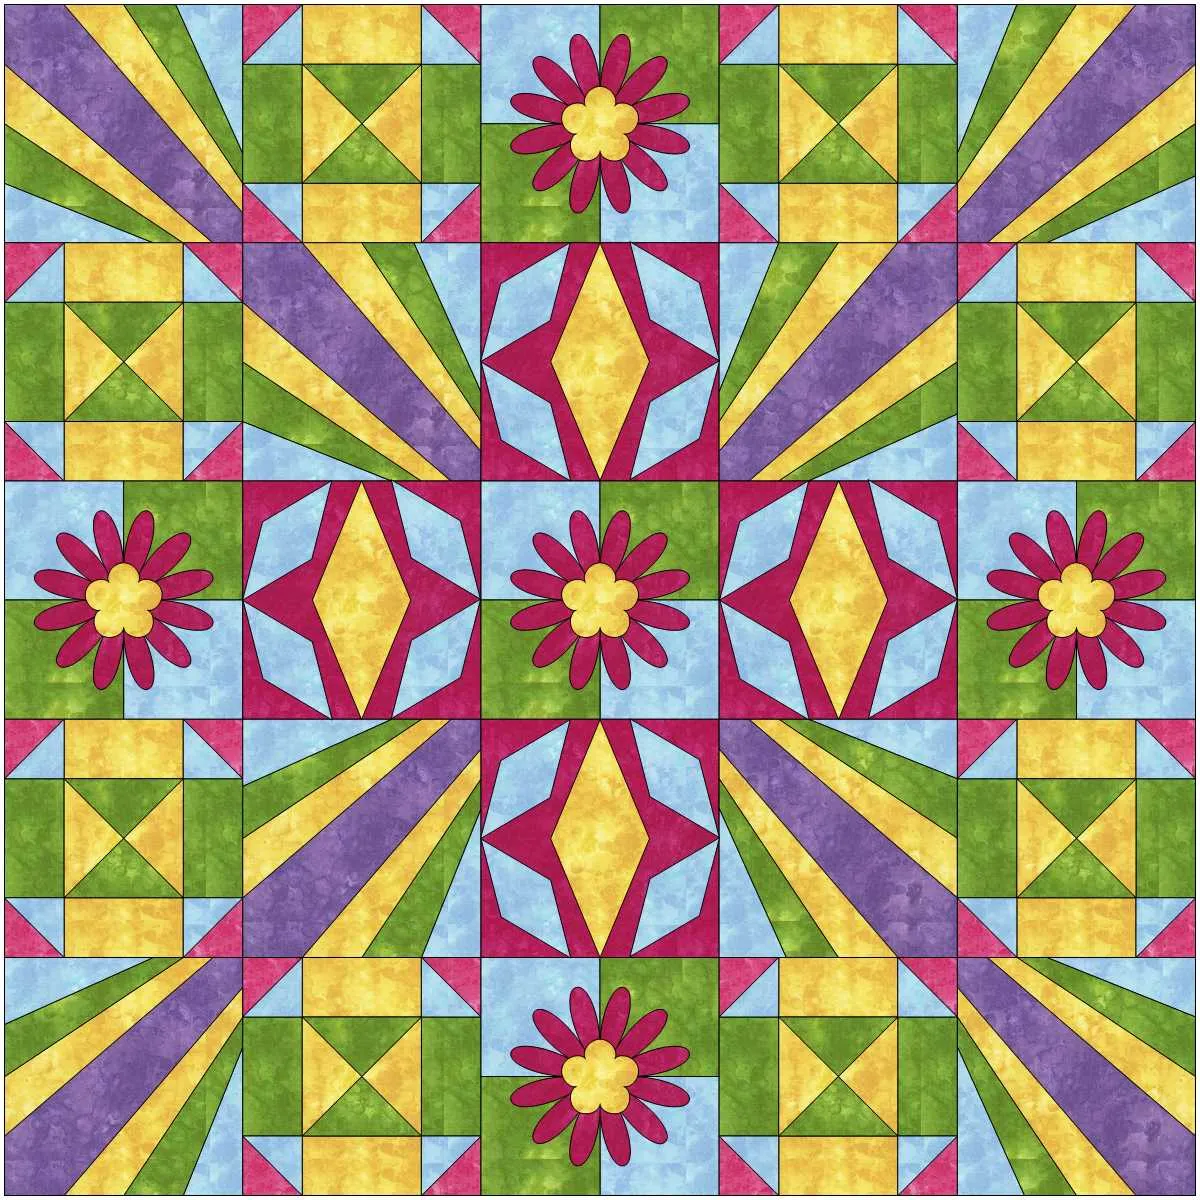
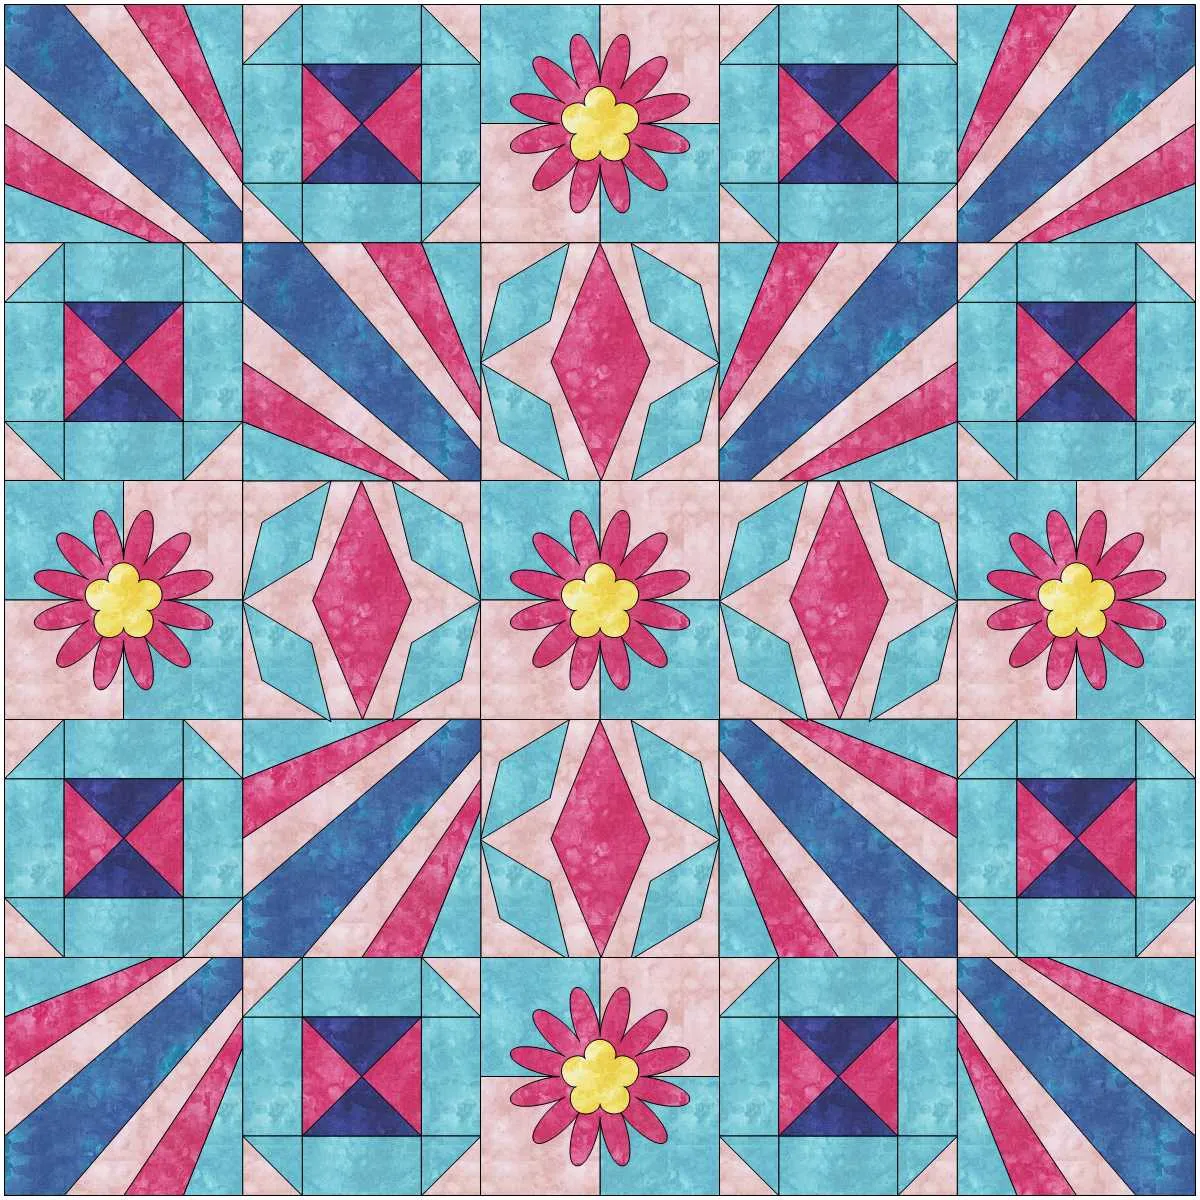
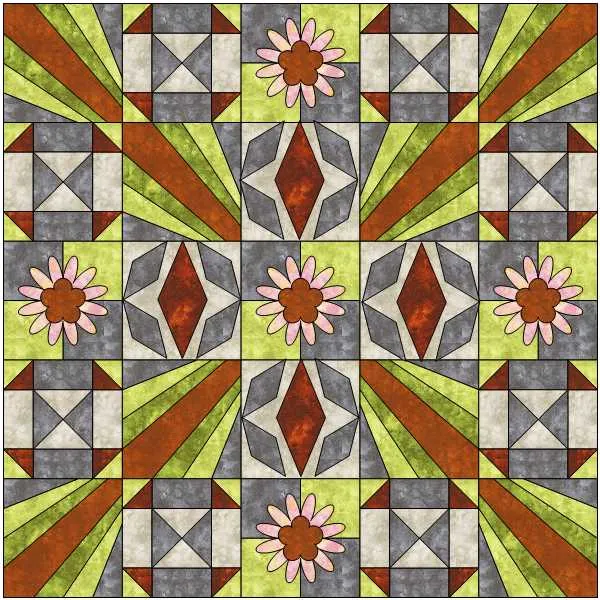
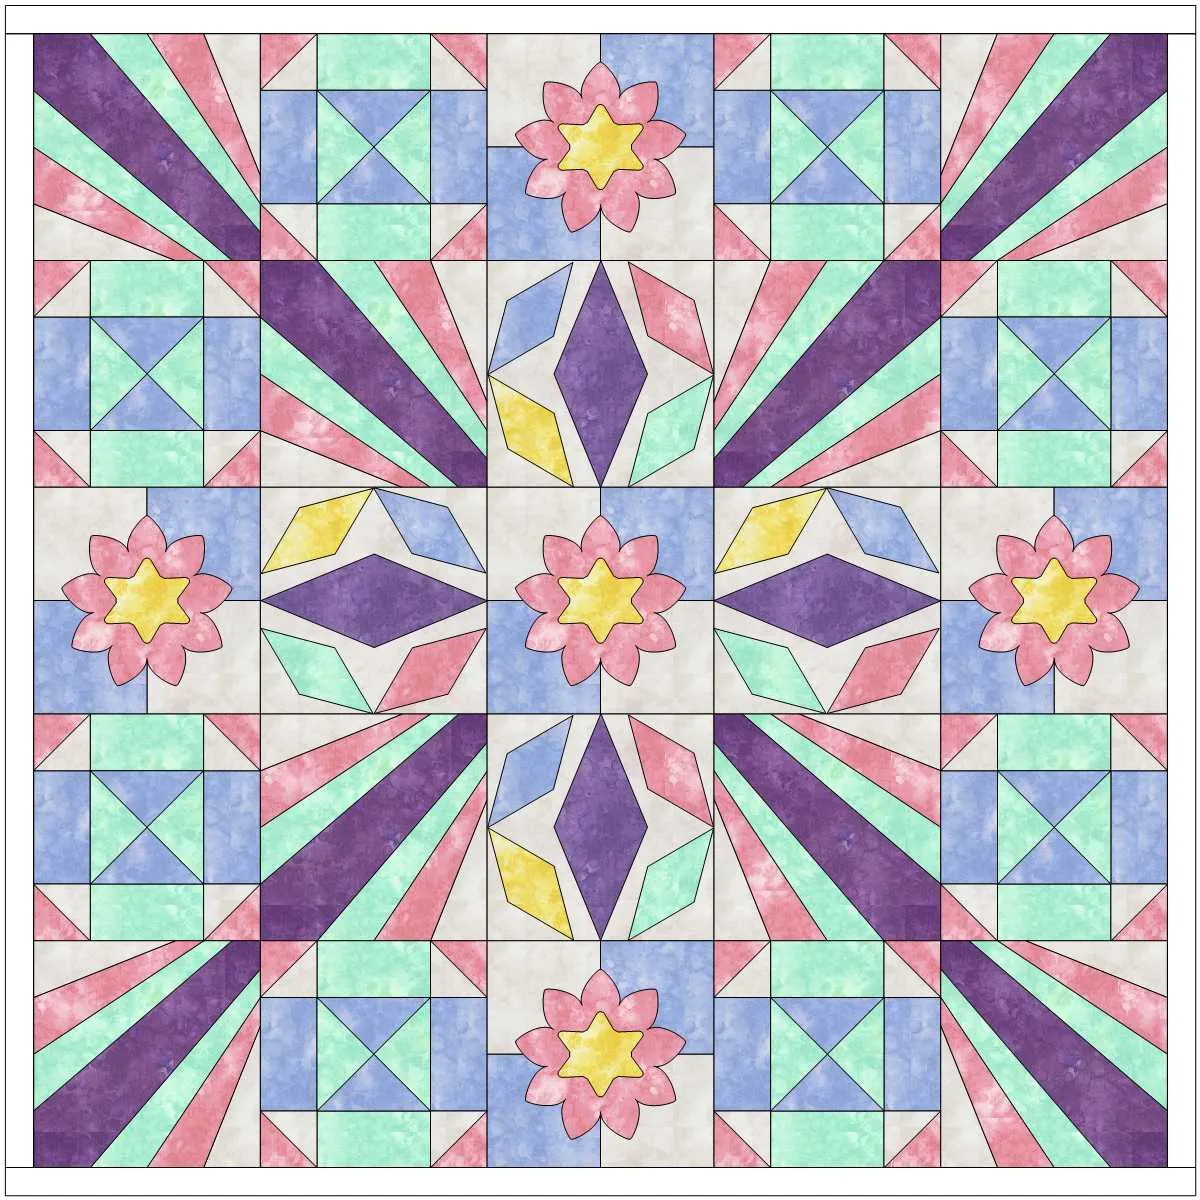
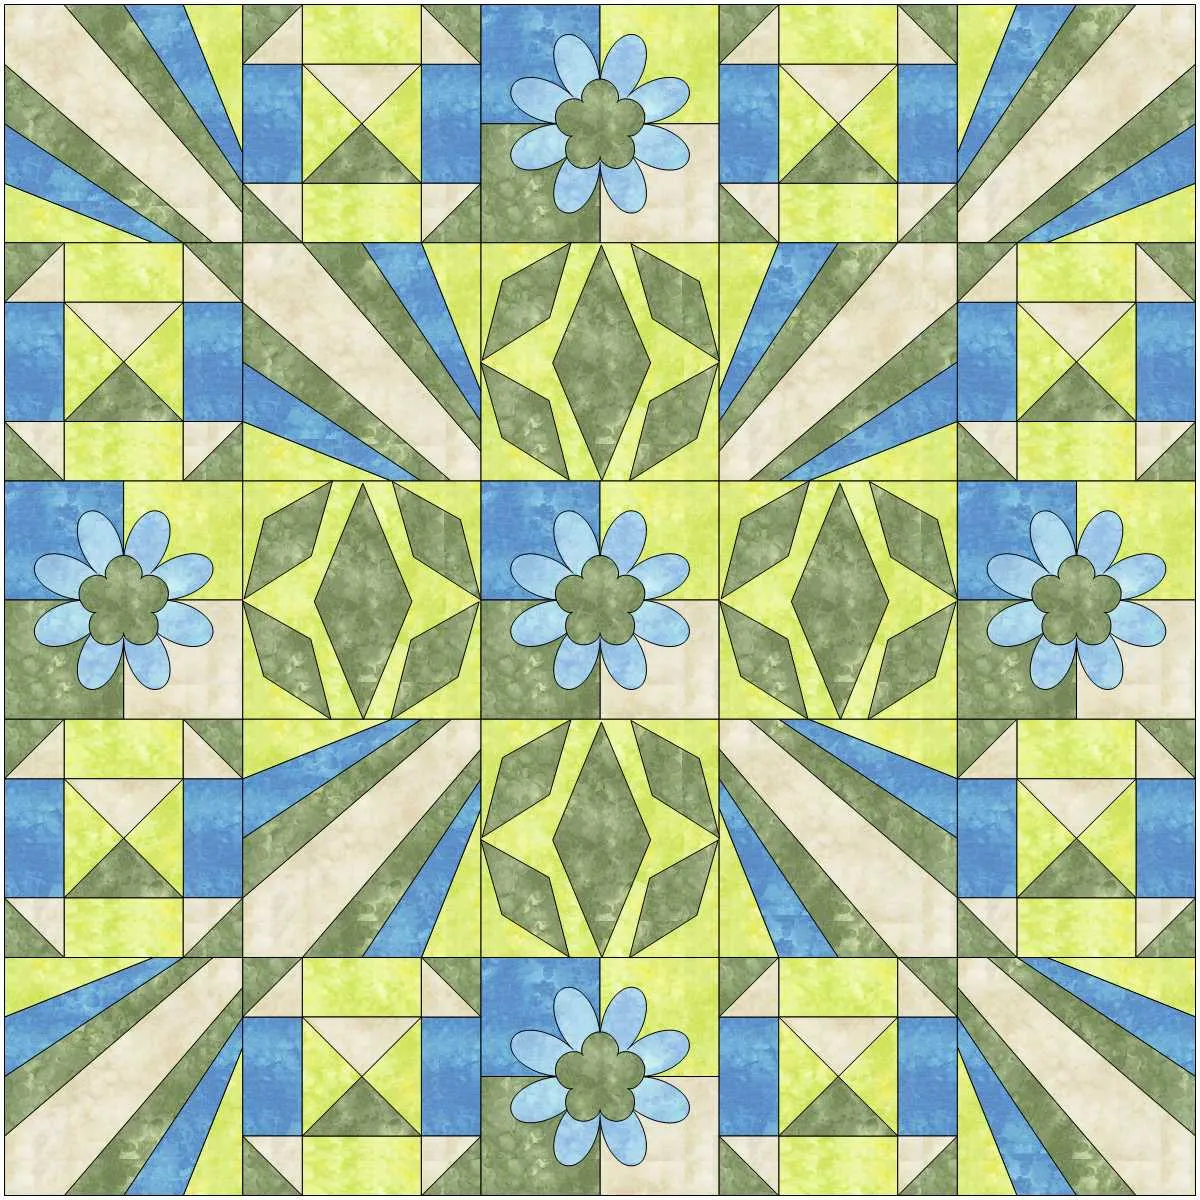
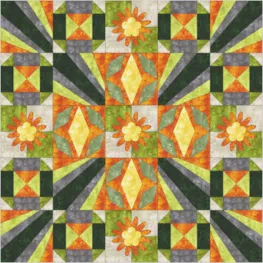
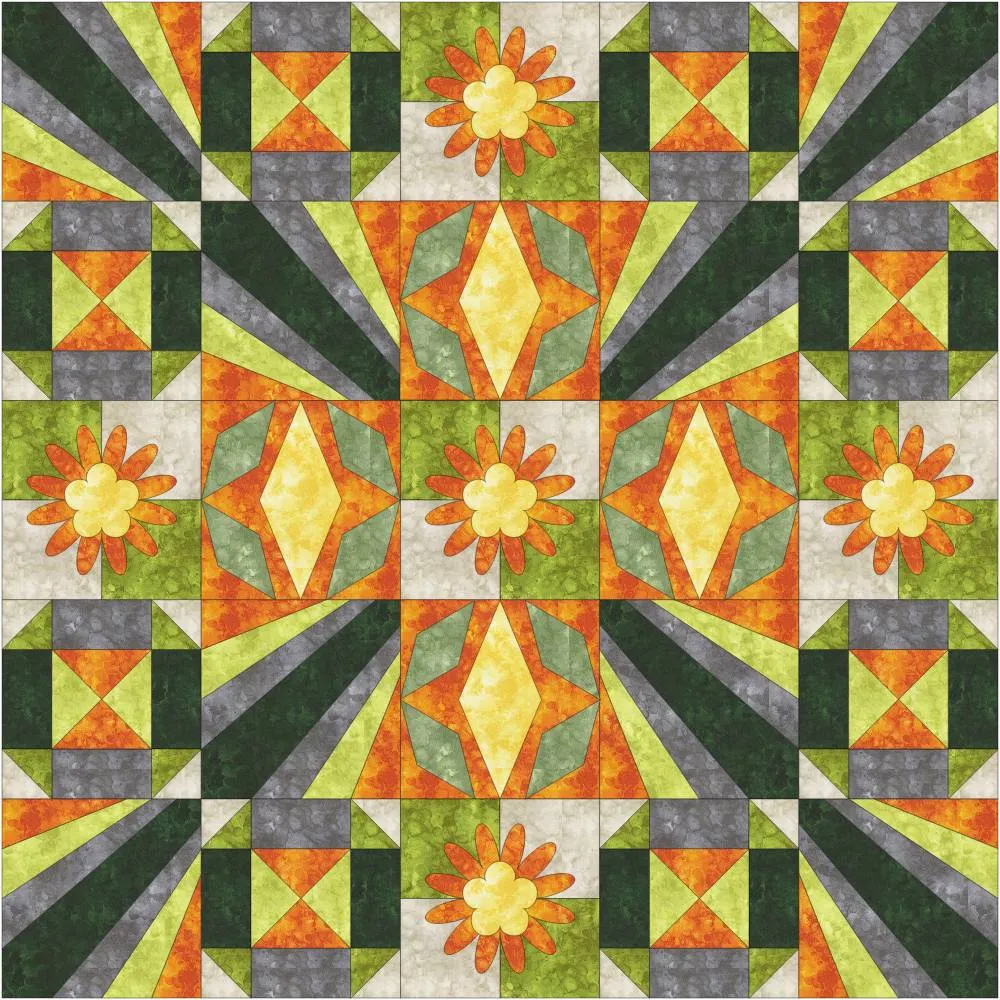
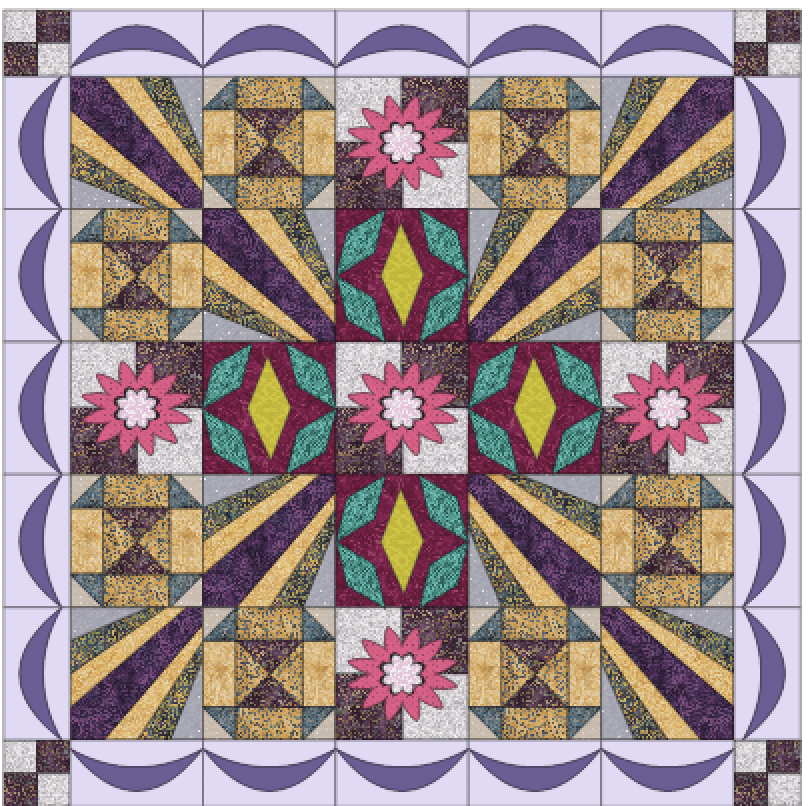
Move the cursor over to the foundation blocks and click until the block is rotated to the proper position. Angle the blocks with the rotate tool to look like the layout below.
 Add to sketchbook
![]()
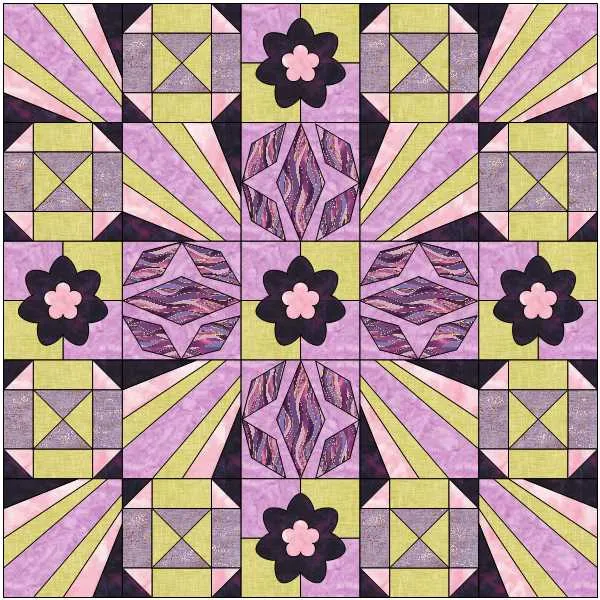
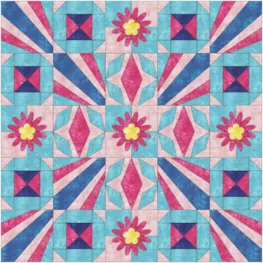
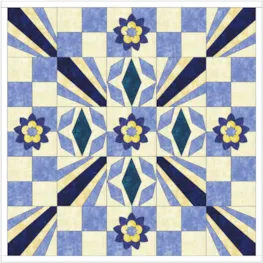
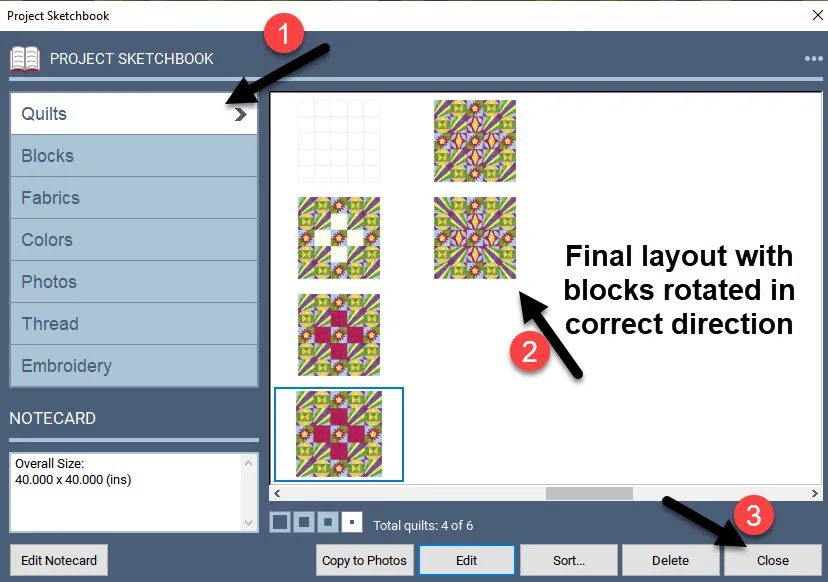
Click on the ‘view sketchbook’ icon![]() and check under the ‘Quilts’ heading that the final layout of the quilt is in the sketchbook. Close the sketchbook after confirming the layout is added.
and check under the ‘Quilts’ heading that the final layout of the quilt is in the sketchbook. Close the sketchbook after confirming the layout is added.
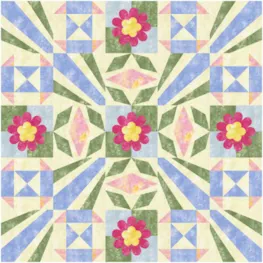
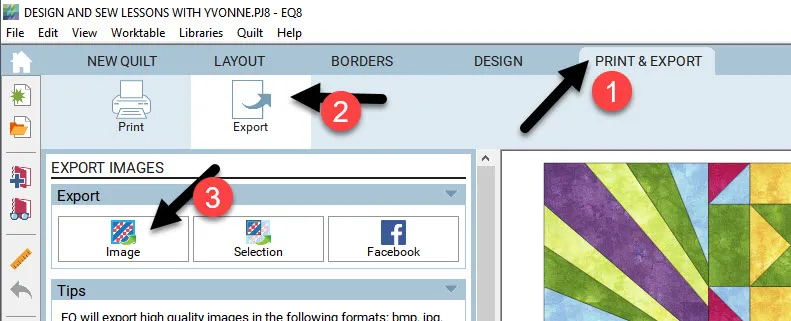
Click on the print and export tab at the top of the screen and then export an image of your layout to save in the image folder of EQ8. This is the image you will add to the comment section at the bottom of the blog page along with your comments on the class. Refer back to lesson two to refresh your memory on how to export an image to the EQ8 image folder.
The main body of the quilt is now finished. In the next session, we will see how to add a border design and how to print the fabric requirements for the entire quilt.
Watch a Video Lesson!
Click play to watch the video for this lesson.

Want to download the video to watch later? Click an option below: