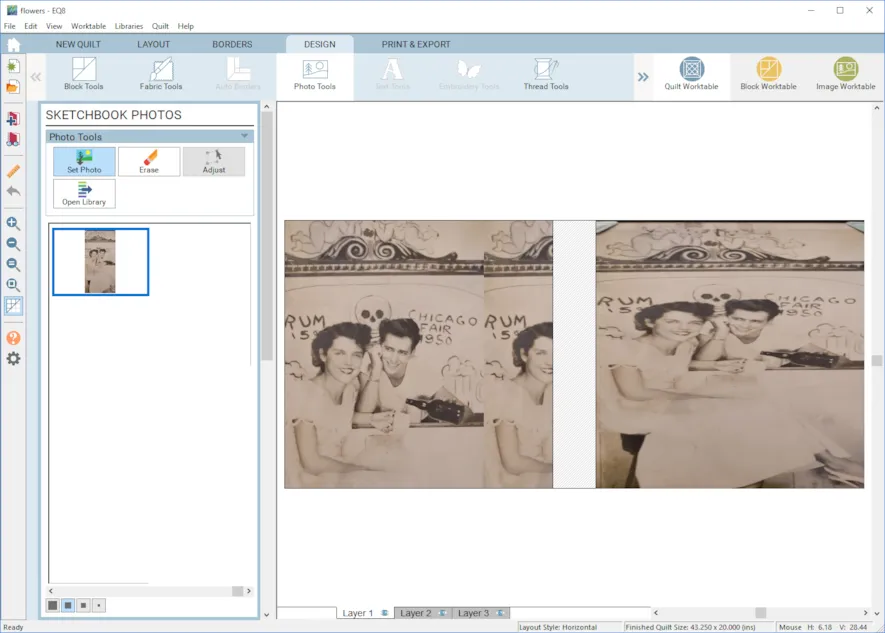
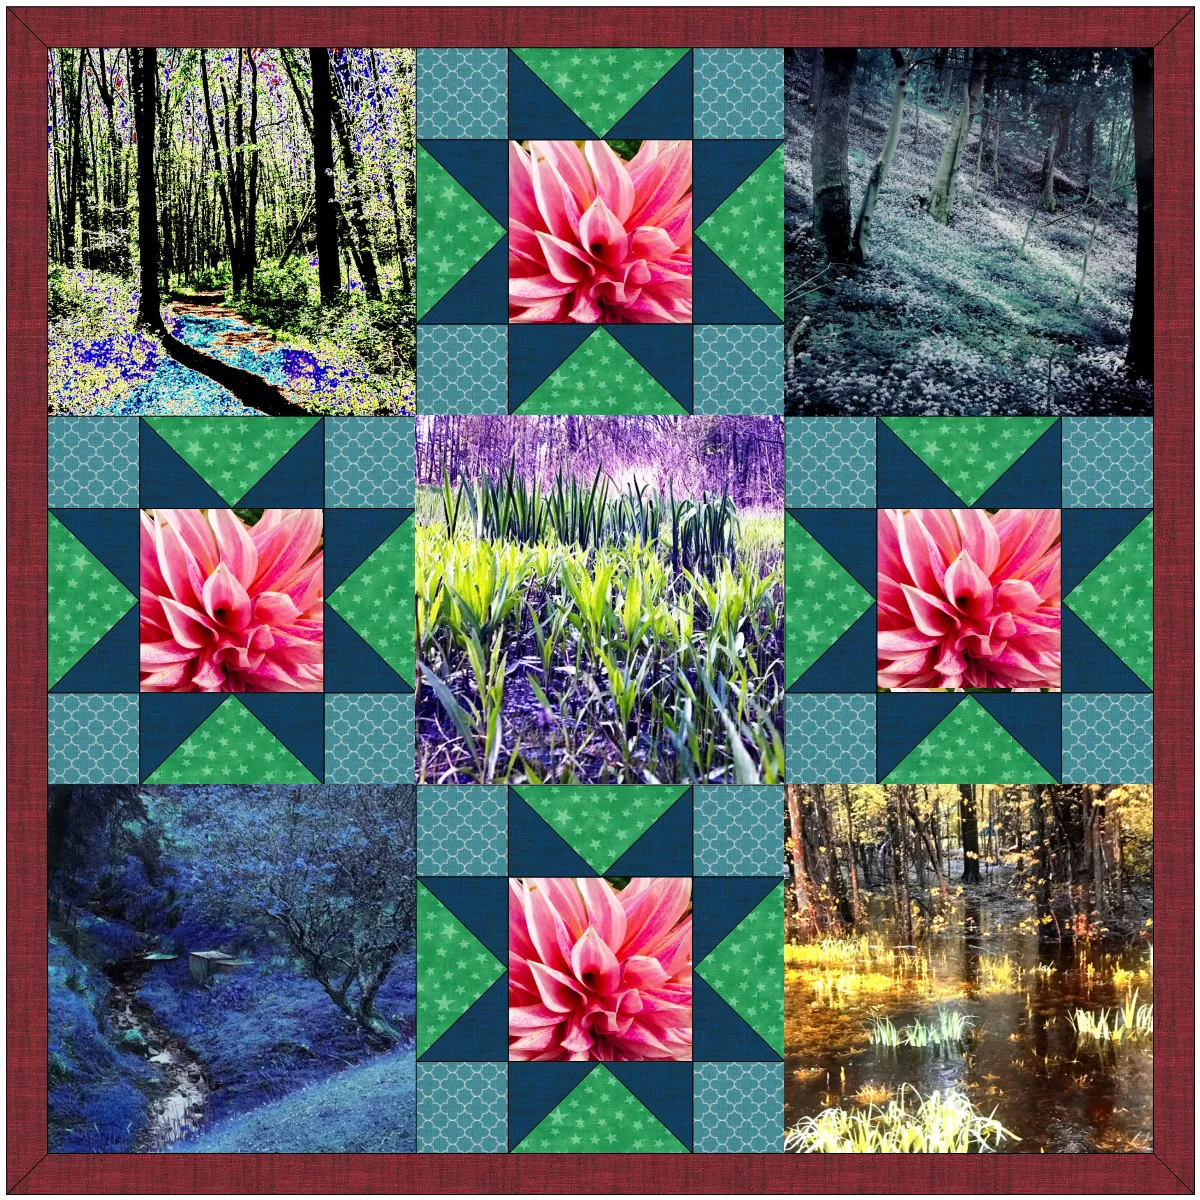
Sometimes it is hard to know if you should import your image as a photo or a fabric. The main difference between the two options is that if you import the image as a fabric, the image will tile. An image imported as a photo will not tile, it will stretch to fit the patch you place it in (on Layer 1). Here is more information.
Here the first patch has an image imported as fabric, and it is tiling. The second patch shows an image imported as a photo and it is stretched. Neither image is the right size for the patch.
To fix this you can either change the size of your patch (by clicking the Layout tab), resize the image to fit or crop the image to fit. Here are some more tips and information. In this case I changed the layout to fit the size of the photo. The image is 15 x 30 so I made each patch 15 x 30.
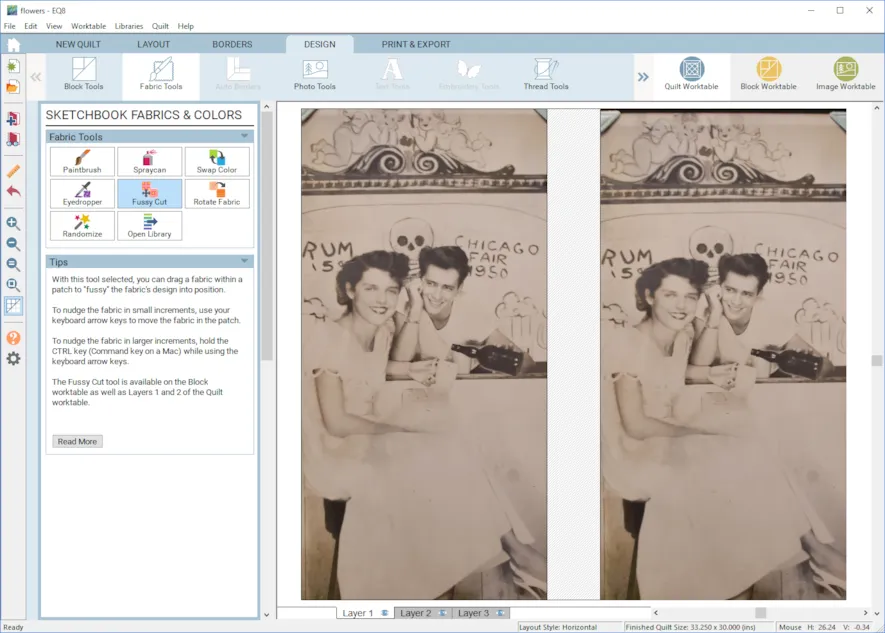
Let’s explore some more with using images as photos and fabrics.
- Click NEW QUILT > Horizontal
- Click LAYOUT
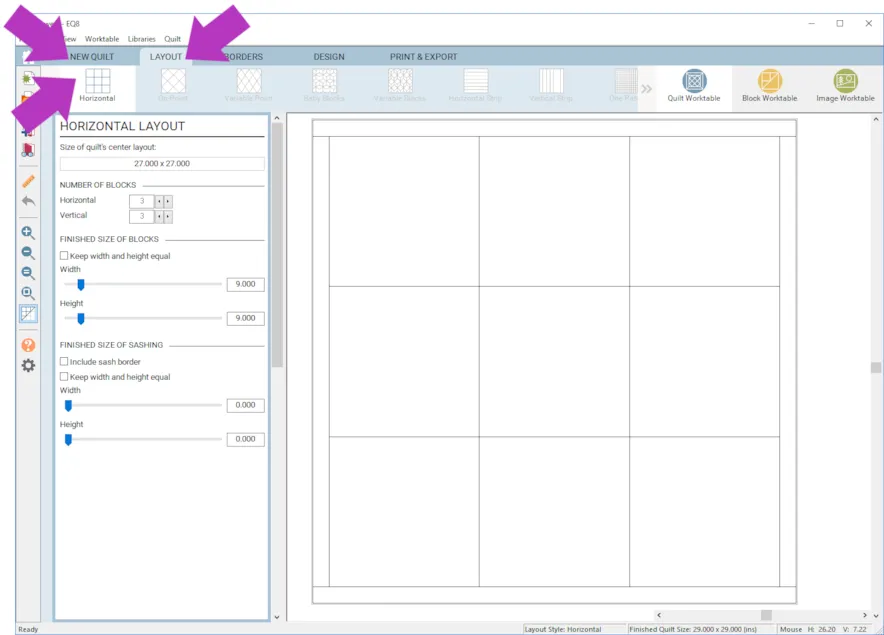
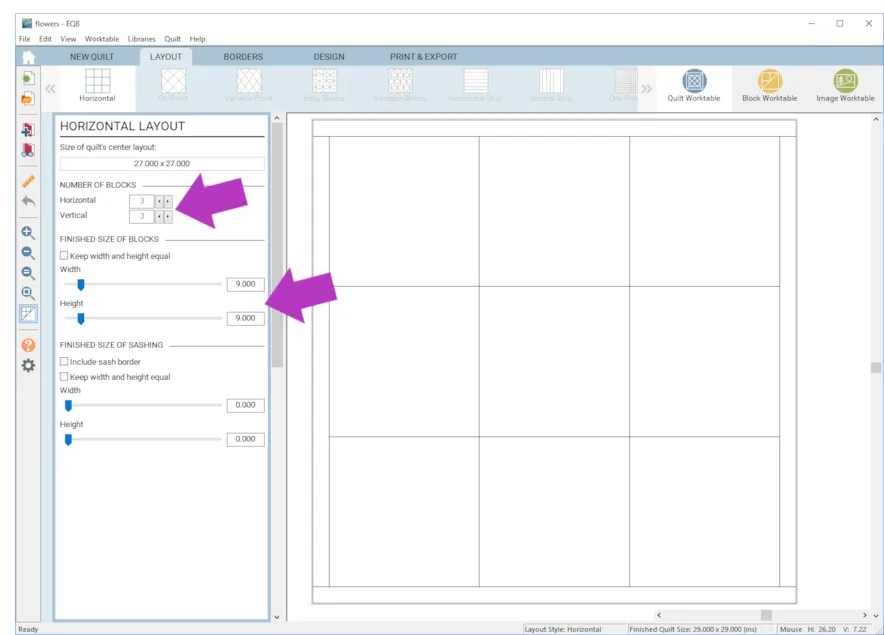
- Make your layout 3 x 3 with 9 inch blocks.
- Click the DESIGN tab > Photo Tools > Open Library
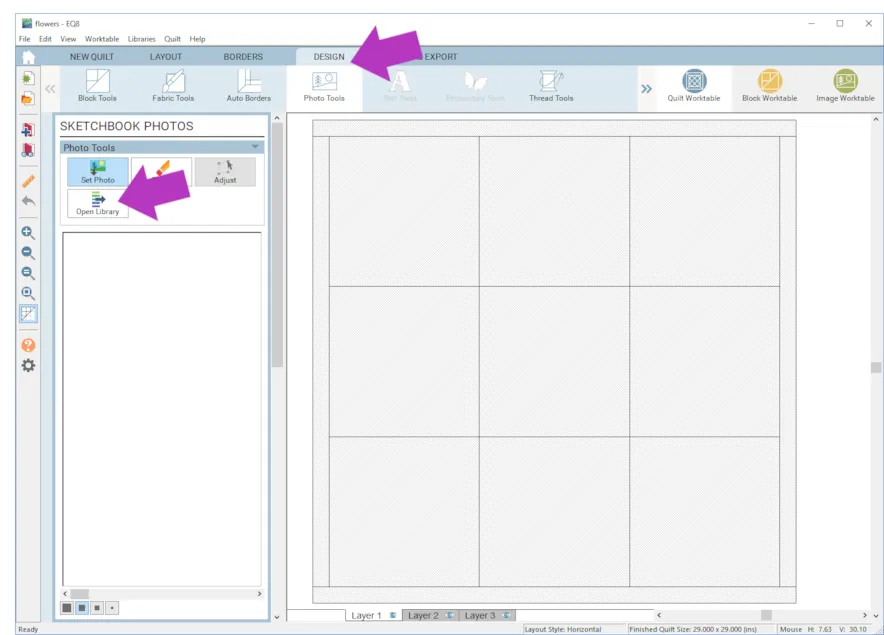
- Choose at least 5 photos that go together and click Add to Sketchbook OR, you can import your own images to use as photos.
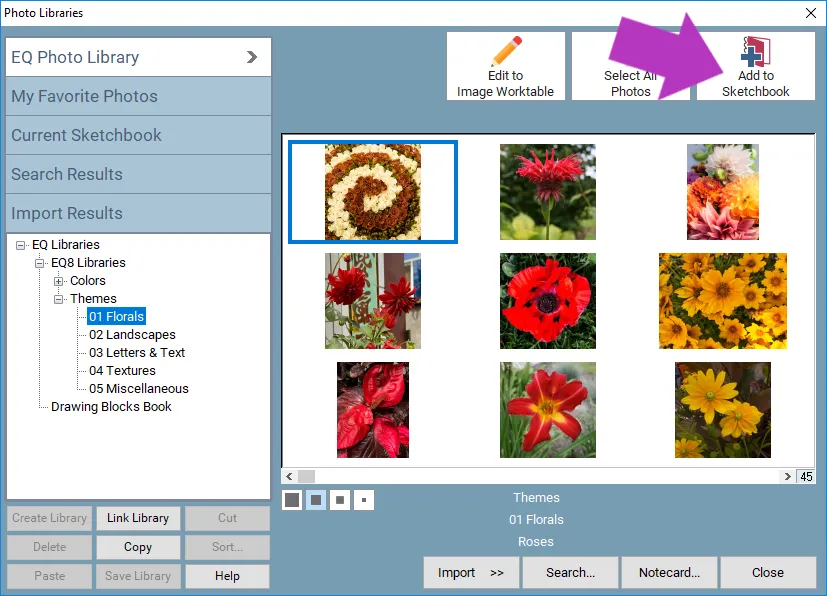 We’ll be using these images as photos.
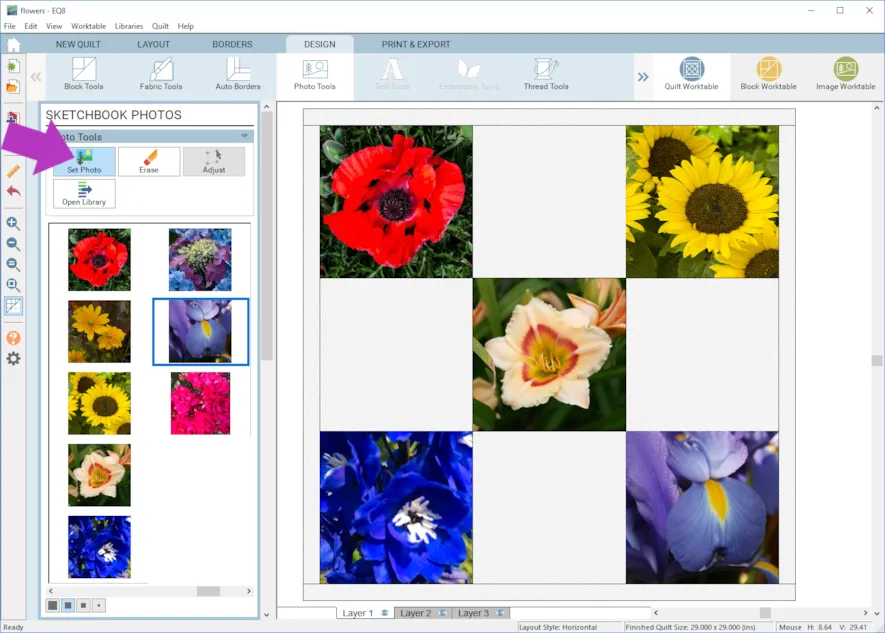
 - Click the Set Photo tool
- Click on a photo and click in a patch on the quilt.
- Repeat until you have placed five photos.
- Click Add to Project Sketchbook
 If you haven’t named your project yet, EQ8 will prompt you to do so. (To be saved, your item needs to be in the Sketchbook AND your project needs to be named. Here is more information.)
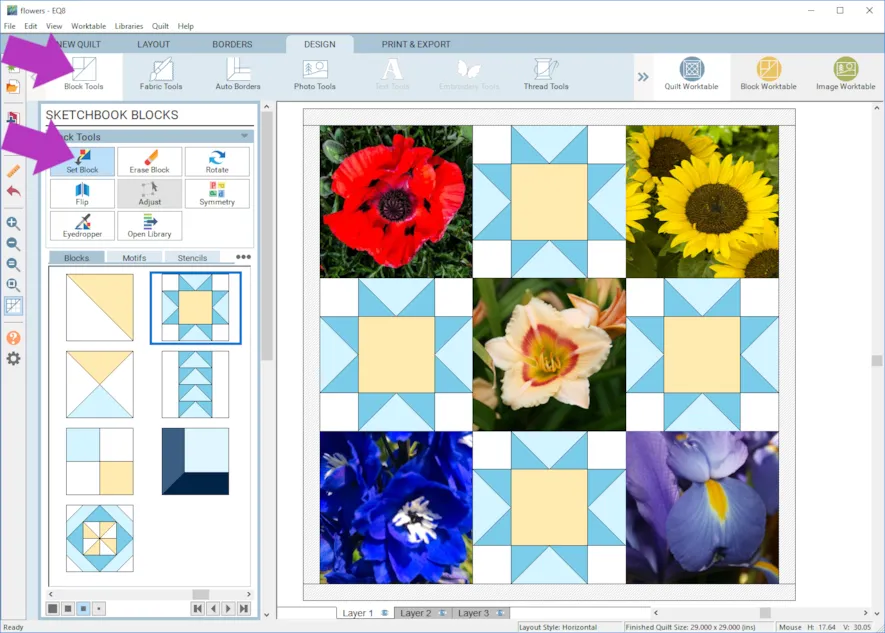
 - Click Block Tools > Set Block
- Place a block in the four empty squares in the layout. Make sure the block you choose has a large space to show off fabrics.
- Click Photo Tools > Open Library OR, you can import your own images to use as fabric.
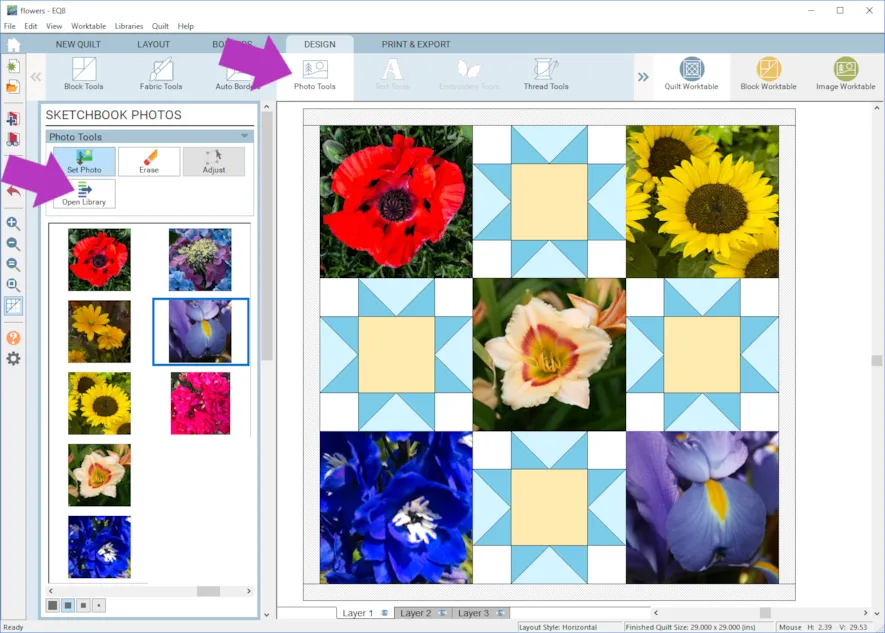
- Click on the image and click Edit to Image Worktable.
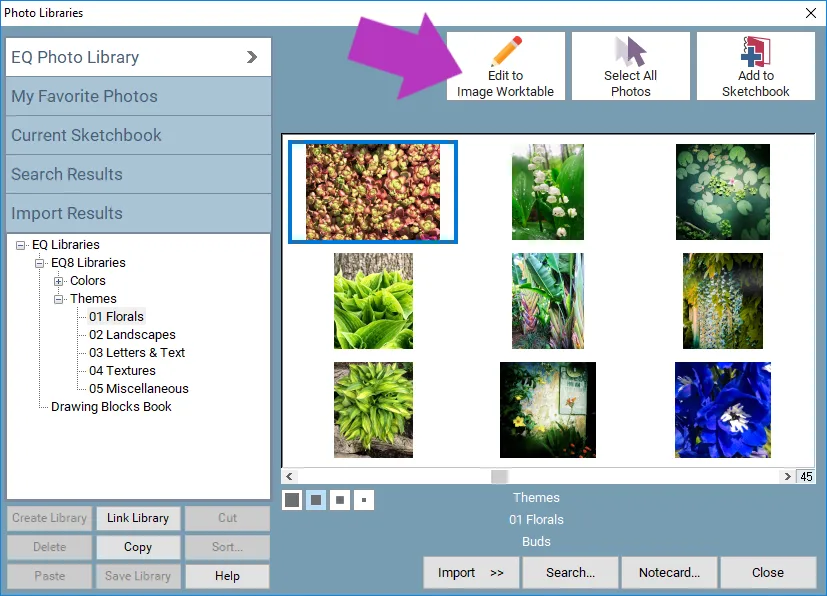
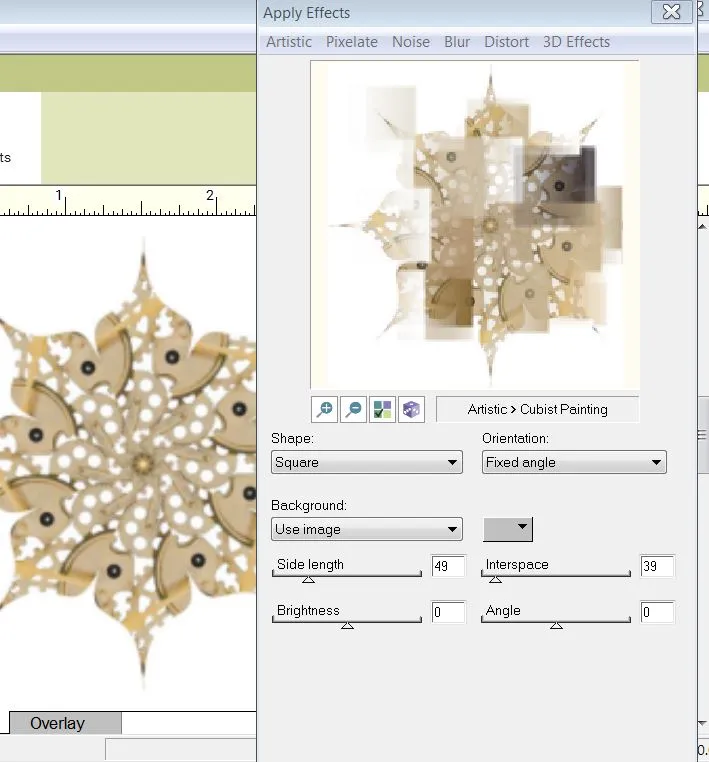
- Click Special Effects > Effects and experiment with all the choices available. (I used Artistic > Cubist Painting) You can also try Filters, Circular Symm and Square Symm. Here is more information on how all of those options work.
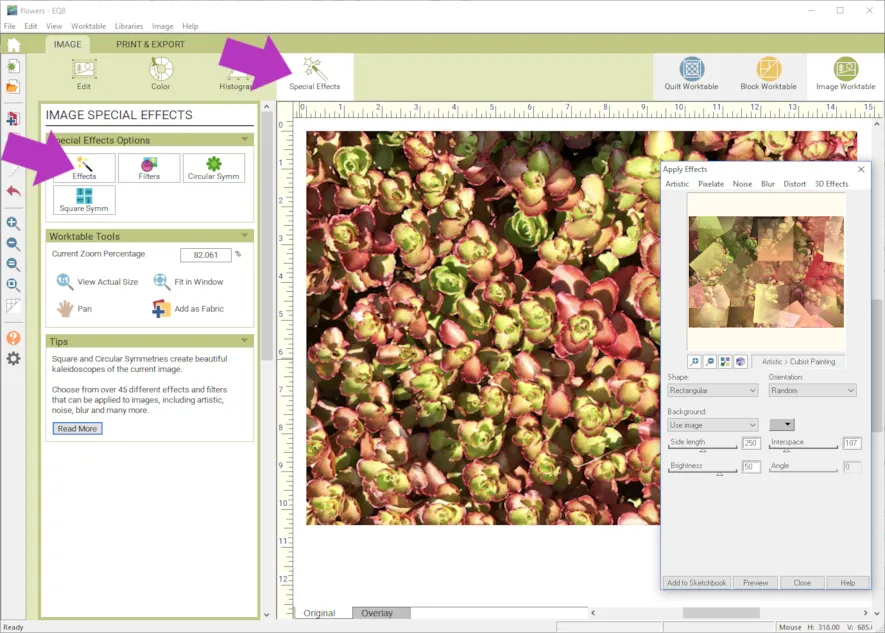
- When you get something you like, click Add to Sketchbook within the Special Effects menu and then click Close.
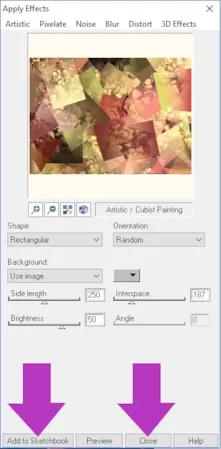
- Click Edit > Crop
- Use the mouse to click and drag the nodes surrounding the part of the image you want to keep.
- Click Apply Crop
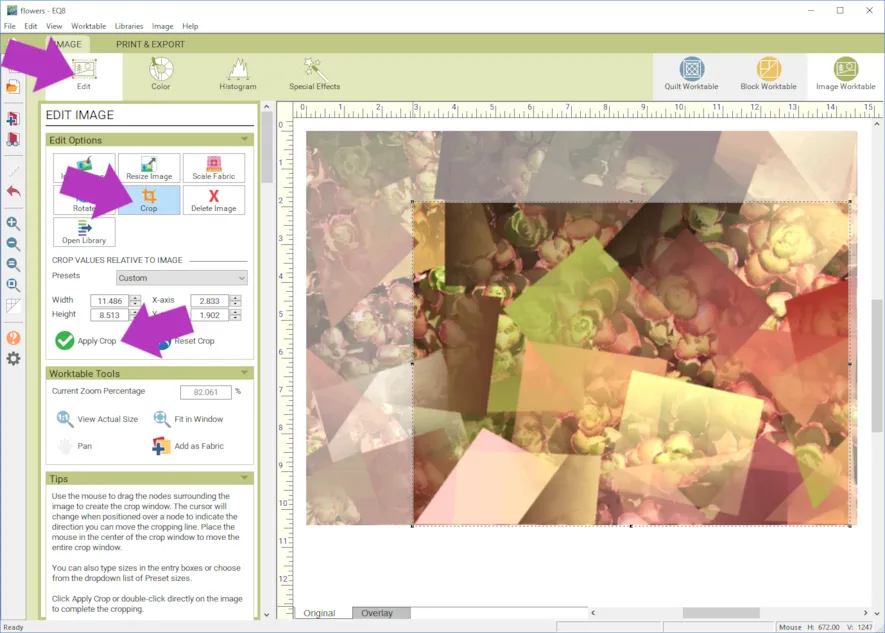
- Click Add as Fabric
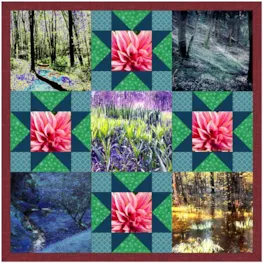
You can create as many as you’d like. We’ll be using this as a fabric in the quilt. It will work just like all the other fabrics from your Fabric Library.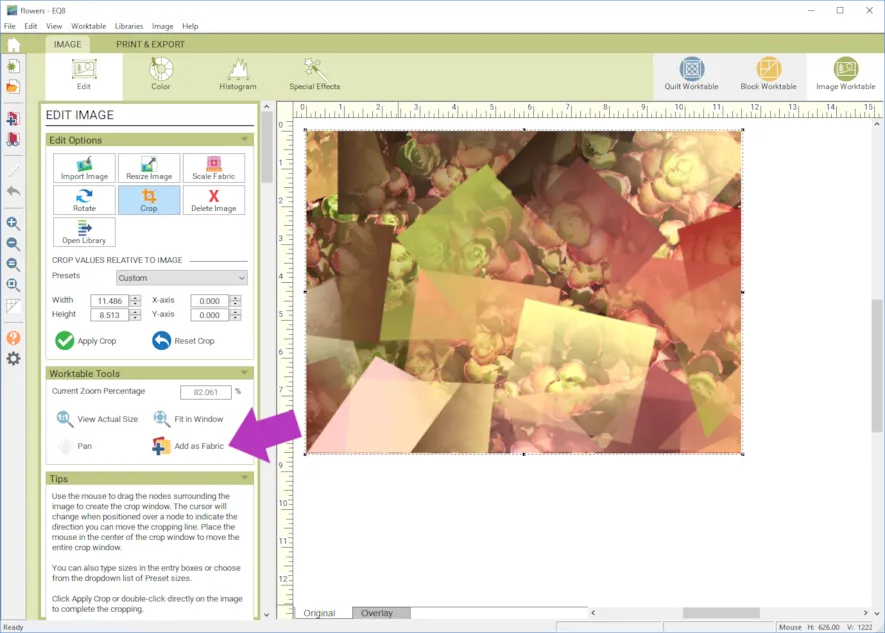
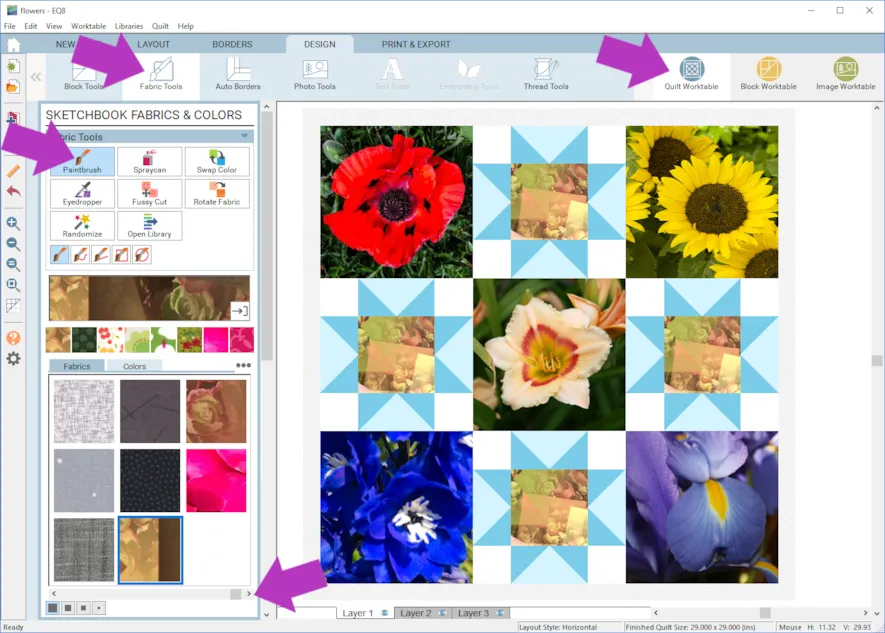
- Click Quilt Worktable > Fabric Tools > Paintbrush
- Scroll all the way to the end of your fabrics and you will see the ones that you created.
- Recolor the quilt using the fabrics you created and any other fabrics you would like.
- Use can use Fussy Cut to adjust the image around in a patch for a little variety.
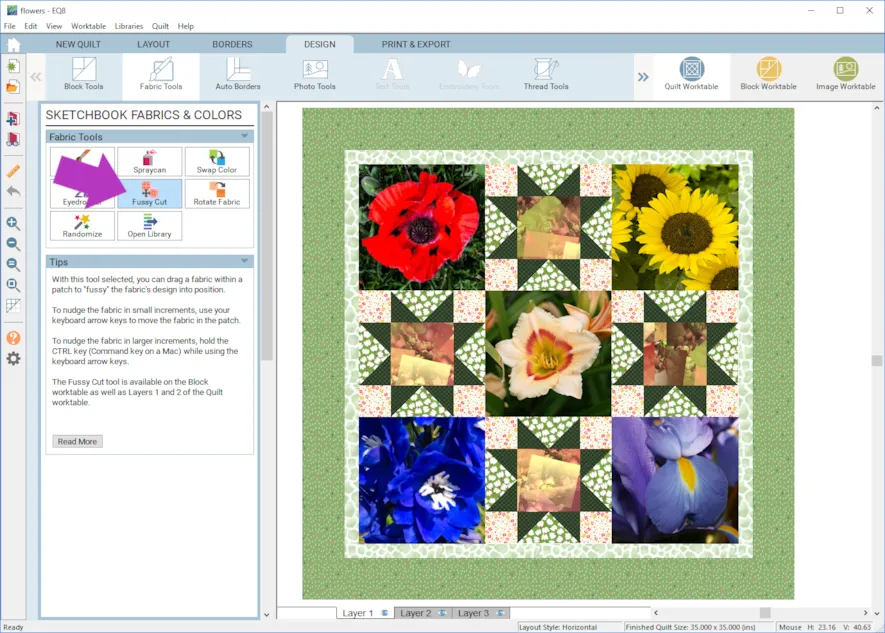
- When you are done, click Add to Project Sketchbook

If you want to post images of your blocks or quilt, here is how to export the images.
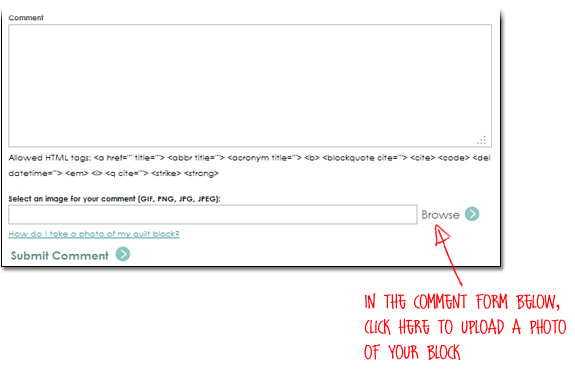
To post your image click to comment on this post.
Fill in your info and then click Browse.
Go to: Documents\My EQ8\Images
I can’t wait to see what you’ve done! I hope you enjoyed the lesson!
If you have questions about the lesson feel free to post them below.
If you have questions about something else EQ related, please contact techsupport@electricquilt.com.


