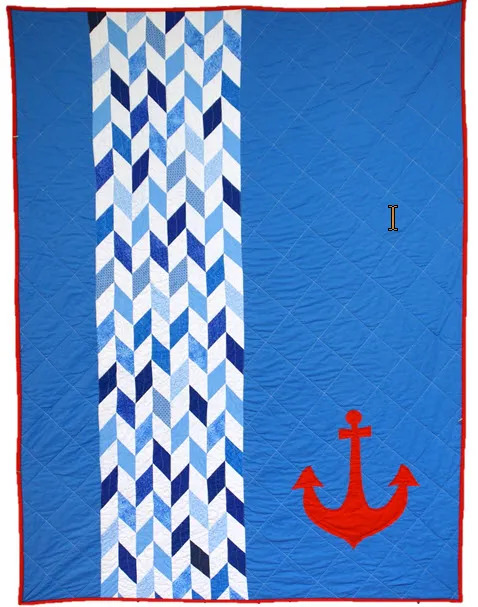
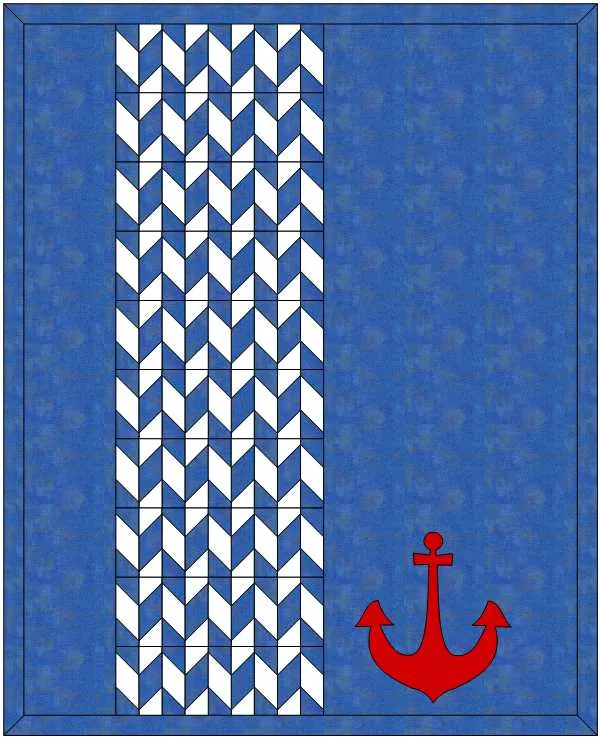
It’s been a wonderful summer and I wanted to add a cute throw quilt to compliment the pillow we designed last year. I came up with this Nautical themed quilt with an interesting inset of scrappy diamonds. And of course, I needed that cute red anchor to set it off. Let’s get right into the design!
Anchors Away Quilt
Skillset: Beginner/ Advanced Beginner
Size: 48″ x 60″
Skill Builders:
- Working with Vertical Strip layout
- Working with repeating block design
- Convert an applique block to a motif
Let’s take a closer look and analyze this quilt. I have designed it as a Vertical Strip quilt with applique. First we are going to focus on the diamond insets.
These are 45 degree diamonds that are lined up to form a chevron type pattern. This is a repeating diamond shape that I designed as an individual block. The block just had to be square to work in the Vertical Strip design.
I cut the diamonds from a 2 1/2 ” strip of fabric and the unfinished diamonds were 2 1/2′ wide by 3 1/2′ tall.
On to the DESIGN…
- Open EQ8.
- Let’s name the Project. The project name appears at the top left of the EQ8 Window. Right now the project says Untitled – EQ8.
- On the left side toolbar, click the New project button.

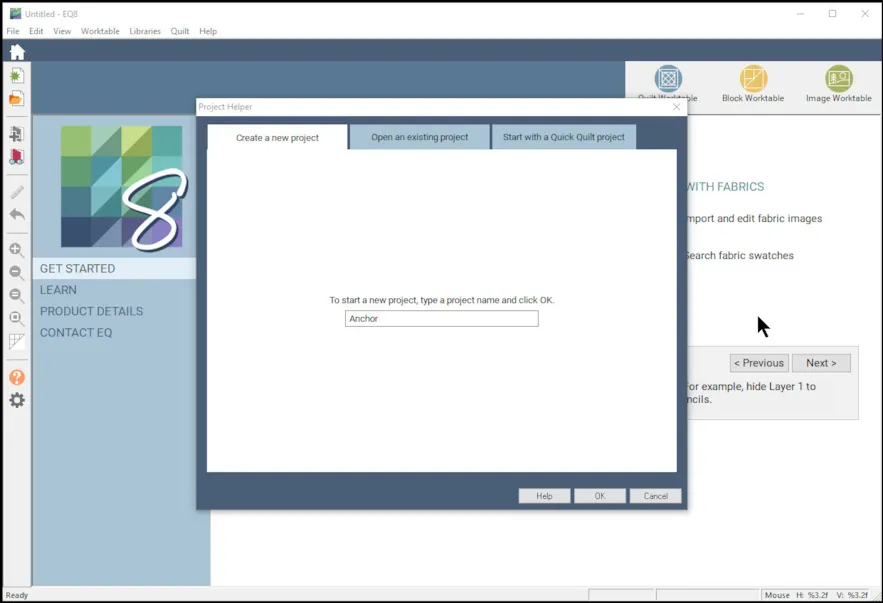
- On the Create a new project tab, type in the project name field Anchor.
- Click OK. The box will close. Notice the project name Untitled has been replaced with Anchor.
- Lets start with designing the repeating diamond block.
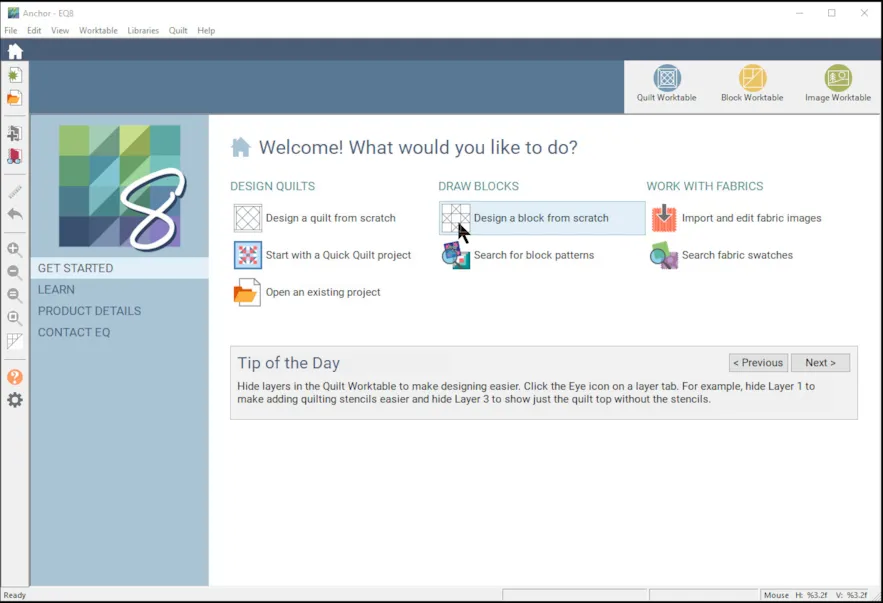
- Under DRAW BLOCKS, select Draw a block from scratch.
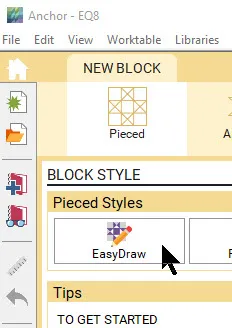
- Choose New Block, then select EasyDraw.
- We are going to create a 6″ x 6″ block. That is because we have a diamond that is 2″ x 3″ finished and both 2 and 3 are divisible by 6 so the repeat will work with a 6″ block. Hang in there and this quilty math will make sense.

- So in the precision bar above the grid, set the block width and height to 6″.
- Set the Snaps horizontal and vertical to 24
- Set the Graph paper horizontal and vertical to 6
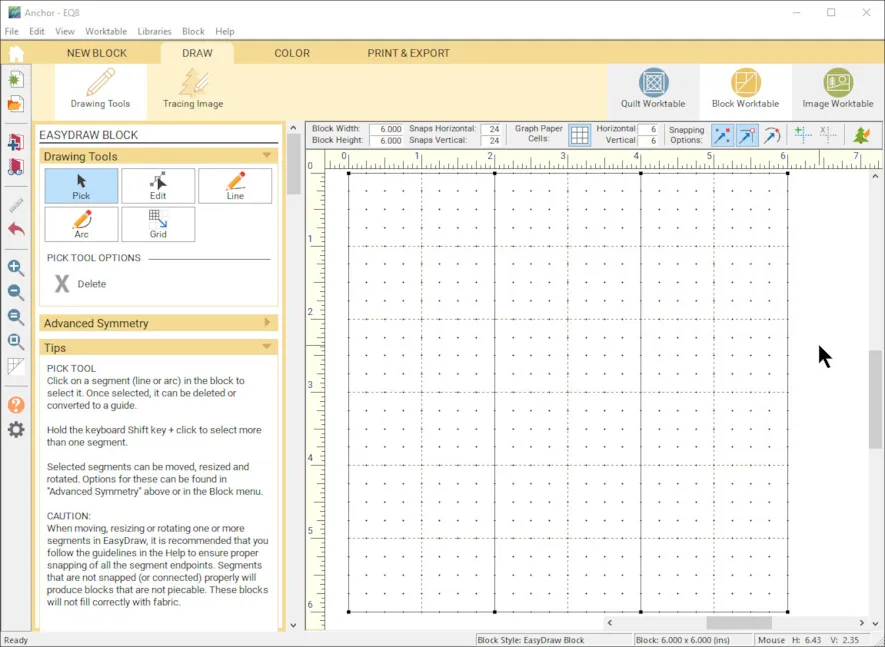
- Choose the line tool and draw a vertical line at the 2″ and 4″ marks since the finished width of the diamond is 2 inches.
- Next we are going to draw the blocks with diamonds that are facing right, left, right.
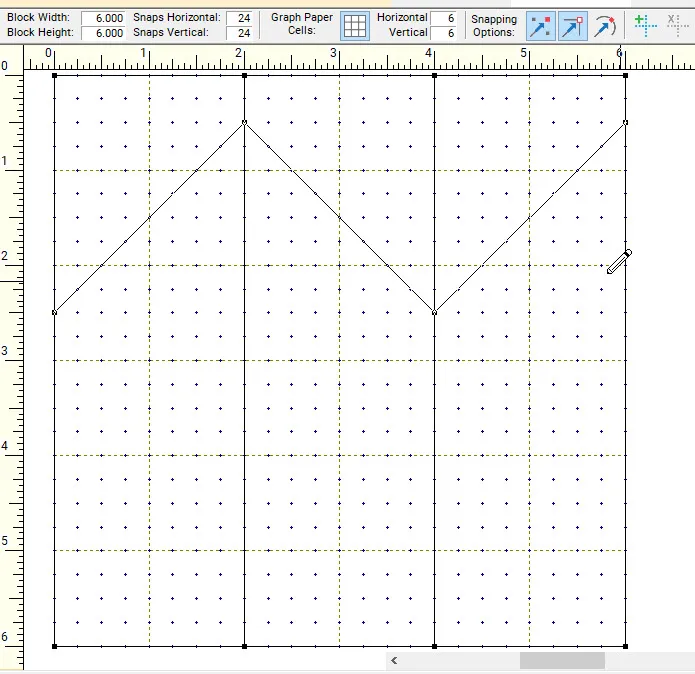
- Starting from the left, go down 2 1/2″ at 0″ and draw a 45 degree angle up to the 1/2″ mark at 2″, back down to the 2 1/2′ mark at 4″, and back up to the 1/2″ mark at 6″.
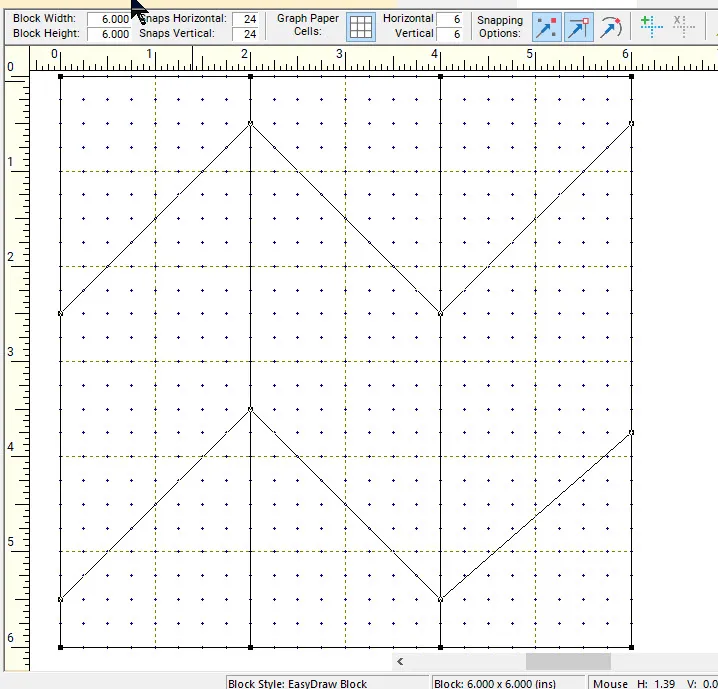
- Now draw the next set of lines, go down to 5 1/2″ at 0″ and draw a 45 degree angle up to the 3 1/2″ mark at 2″, back down to the 5 1/2″ mark at 4″, and back up to the 3 1/2′ mark at 6″. This gives us one full diamond at 3 ” tall and two half diamonds at 1 1/2″ tall. You will see when we stack the blocks in the quilt, the full diamonds will come together.
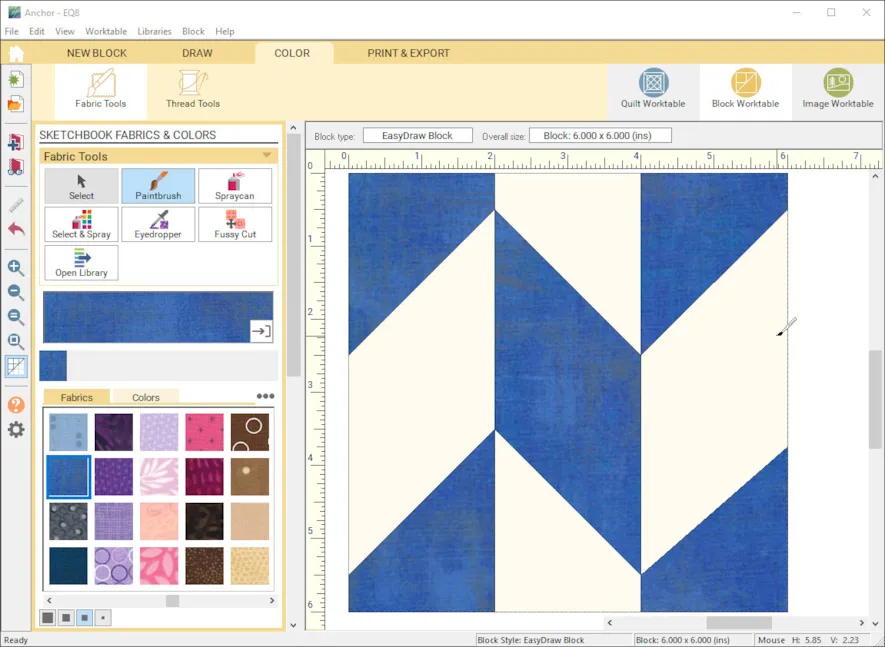
- Go to the Color tab.
- With the paint brush, color the diamonds and partial diamonds by alternating with a blue color or fabric. Add to Project sketchbook.
- Now go back to step 8 and start a new block. The only difference is that this will have the diamonds facing the opposite, left, right, left.
UPDATE NOTE: Creating another block is for practice. If you want to save time and not draw another block, you can use the first block you drew and use the flip tool under block tools when you get to the Quilt Design. Then color it accordingly.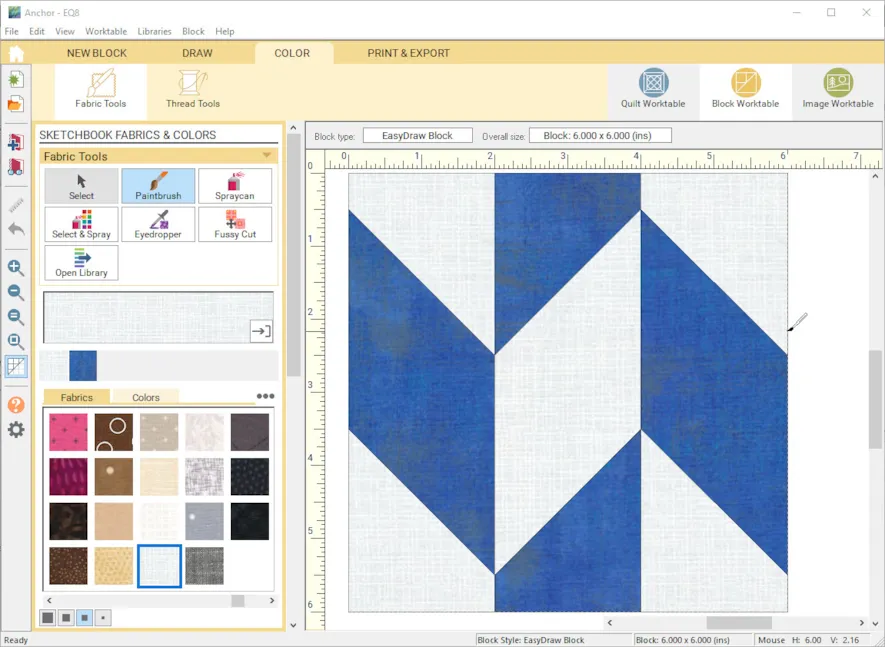
- Starting from the left, go down 1/2″ at 0″ and draw a 45 degree angle down to the 2 1/2″ mark at 2″, back up to the 1/2′ mark at 4″, and back down to the 2 1/2″ mark at 6″.
- Now draw the next set of lines, go down to 3 1/2″ at 0″ and draw a 45 degree angle down to the 5 1/2″ mark at 2″, back up to the 3 1/2″ mark at 4″, and back down to the 5 1/2′ mark at 6″. This gives us one full diamond at 3 ” tall and two half diamonds at 1 1/2″ tall.
- Color the second block as above. Add to Project Sketchbook.

- We are ready for the QUILT DESIGN. Go to the Quilt Worktable.
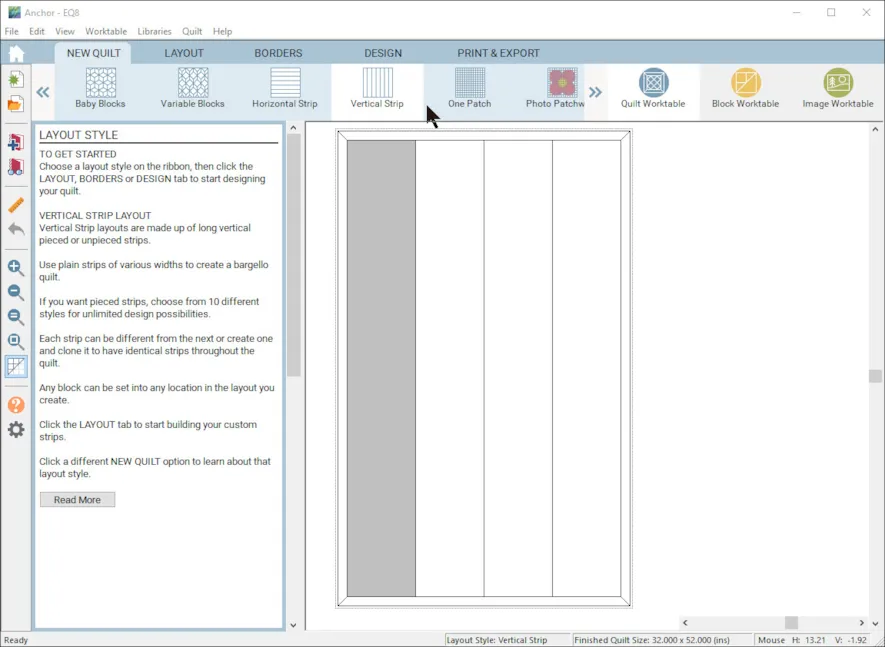
- Select New Quilt, Vertical Strip.

- Select the Layout tab.
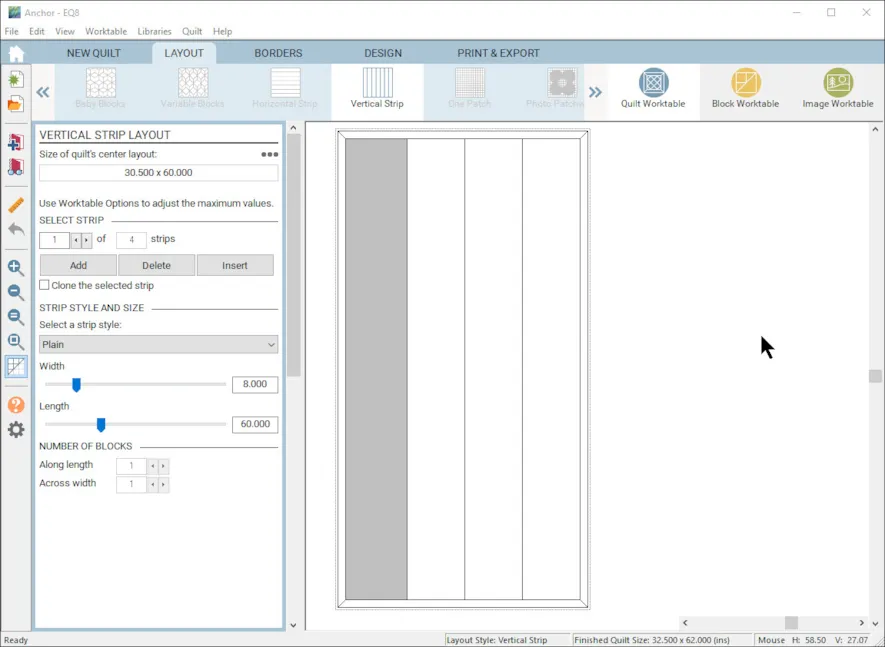
- Strip 1 – Strip style – Plain, Width – 8, length – 60
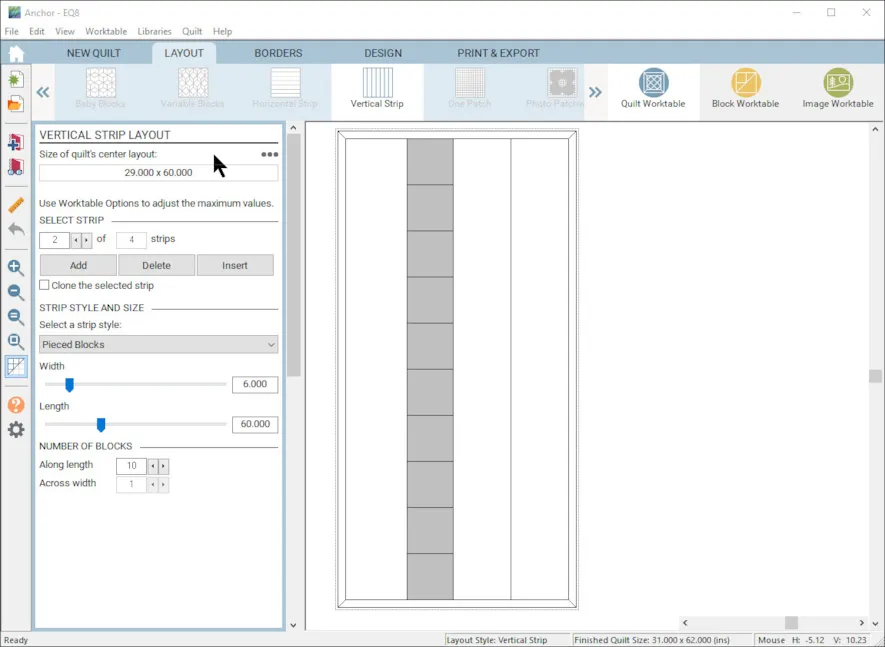
- Strip 2 – Strip Style – Pieced Block, Width – 6, Length – 60, Number of Blocks along length – 10
- Strips 3 and 4, leave strip 2 highlighted, select CLONE the selected strip. Choose Insert twice.
- Delete the next strip to leave a final strip on the end.
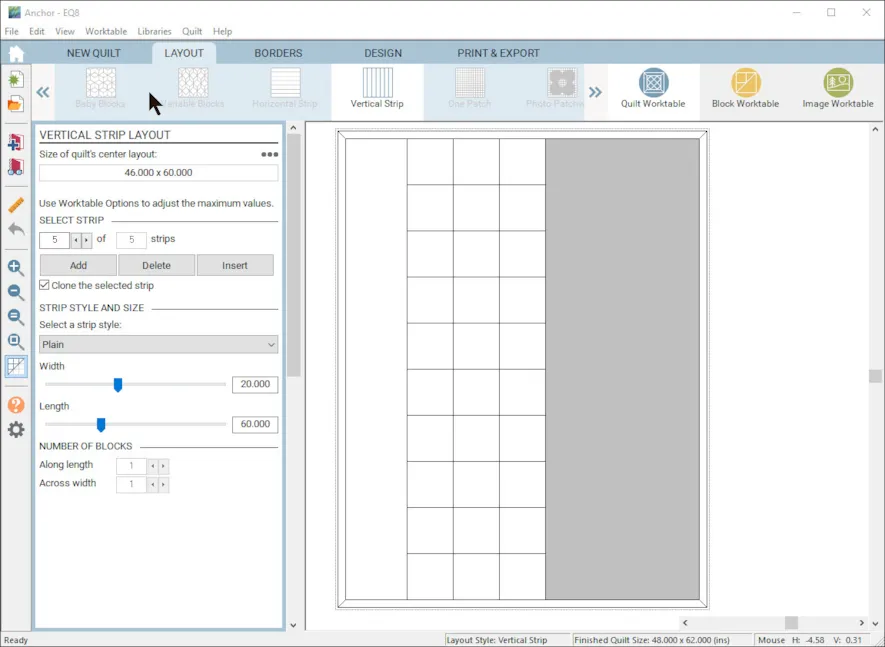
- Last Strip – Strip Style – Plain, Width – 20, Length – 60

- Go to the BorderTab. Select Mitered and 0.25 for the outer border to mimic binding.

- Go to the DesignTab.
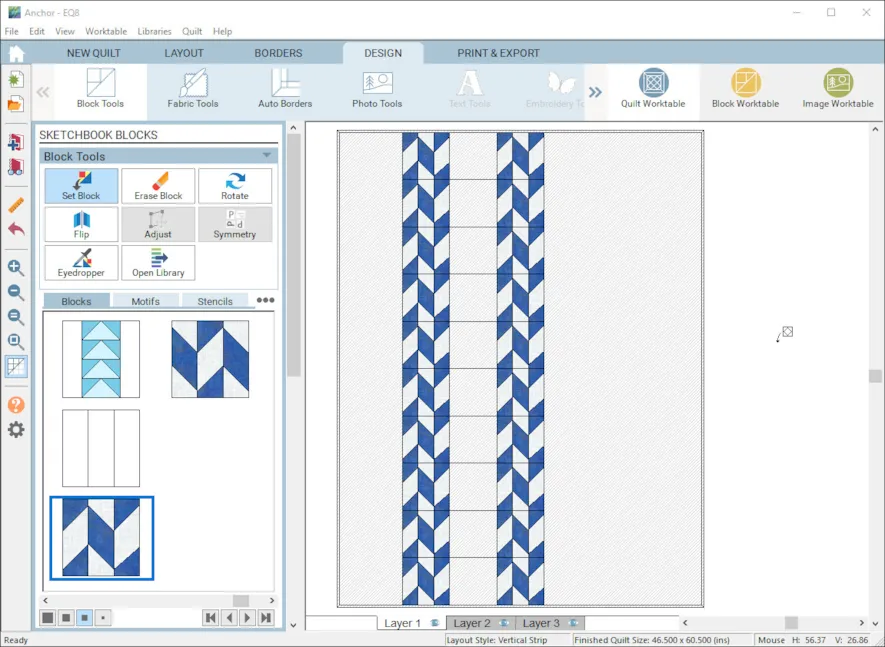
- Go to Block tools. Select the first block (RLR) and set it into all the blocks in strip 2 and 4.
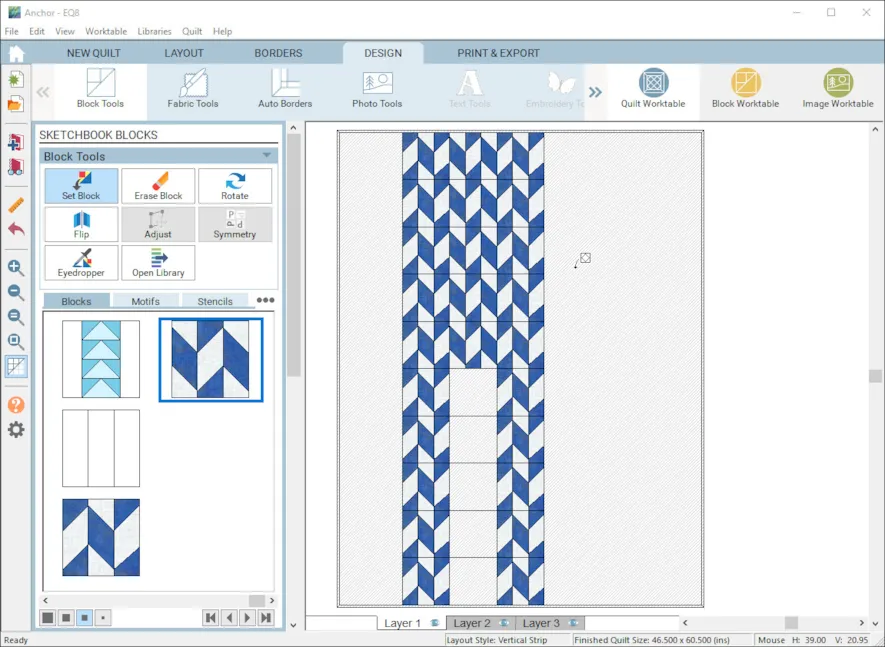
- Select the second block (LRL) and set it into all the blocks in strip 3.
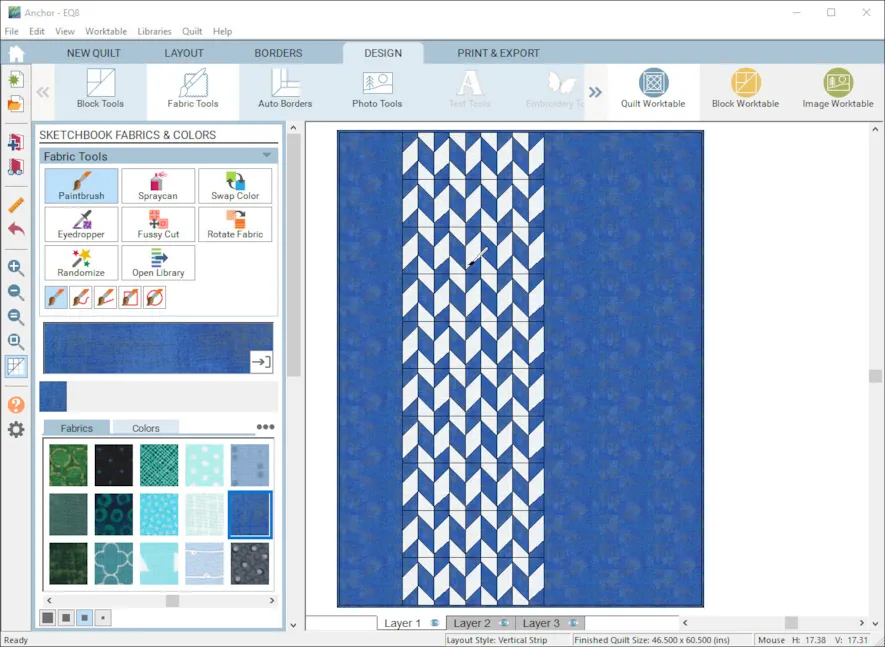

- Go to Fabric Tools. Using the paint brush, Color Strip 1 and 5 and the border. Add to Project Sketchbook.
- Now lets add that anchor applique. Go back to Block Tools. Select Layer 2.
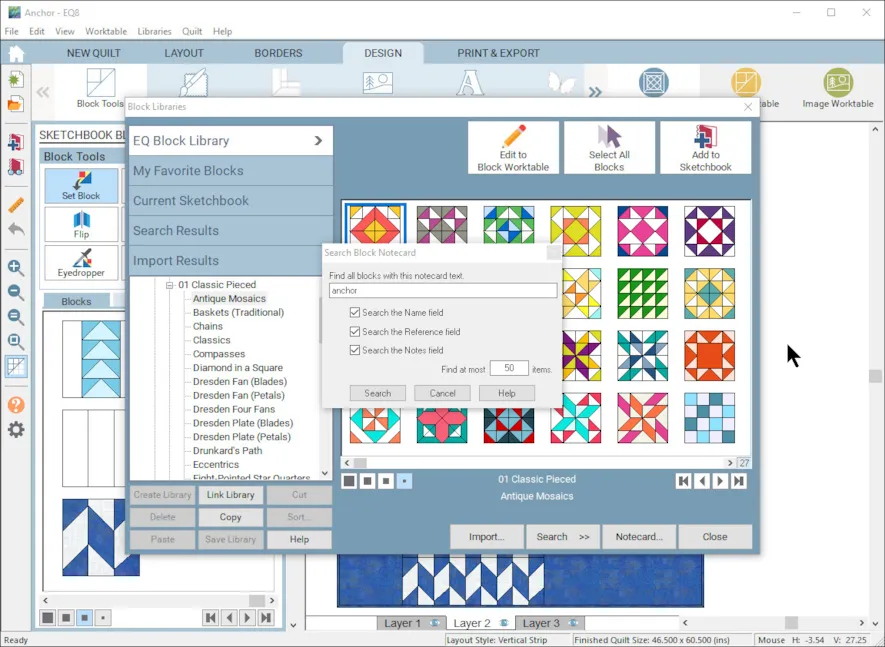
- Open the Block library. Search by Notecard for Anchor.
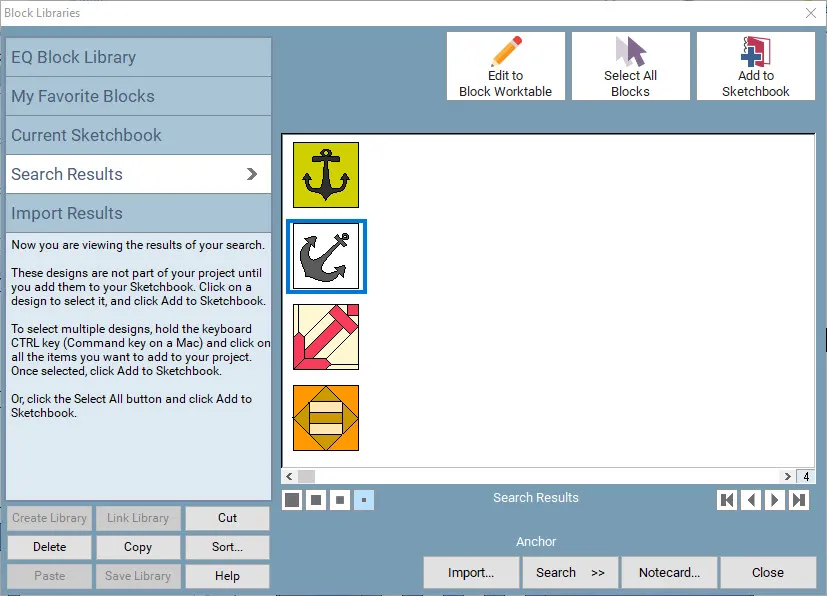
- Choose the second anchor found. Edit to the Block Worktable.
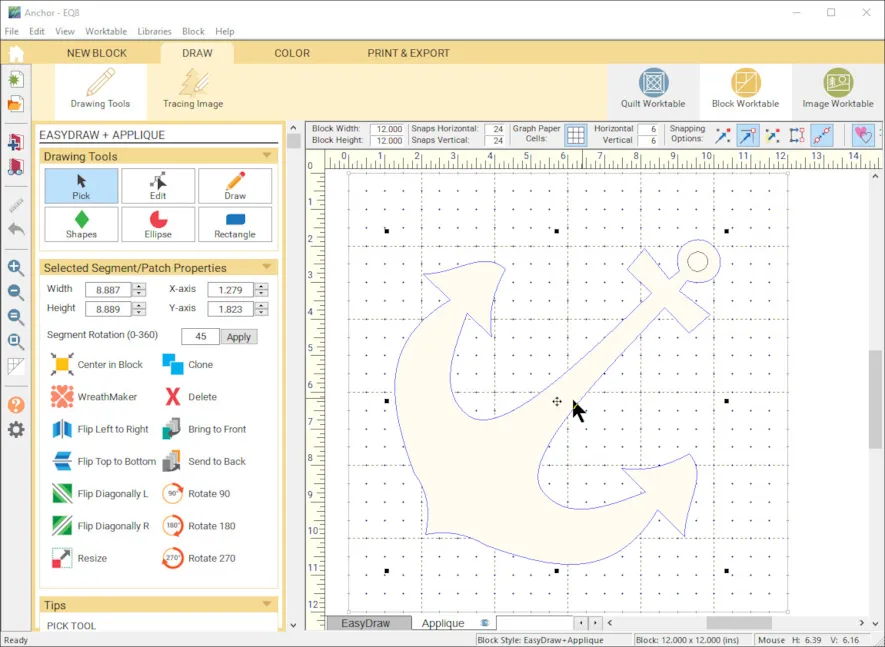
- Choose the Pick tool and click on the anchor to select it. Click CTRL/CMD Copy to copy the anchor.
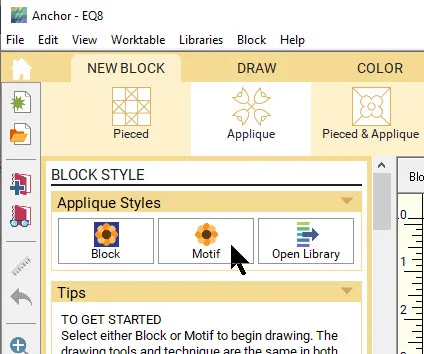
- Select new Block, Applique, Motif
- Make sure the block height and width in the precision bar are both 12.
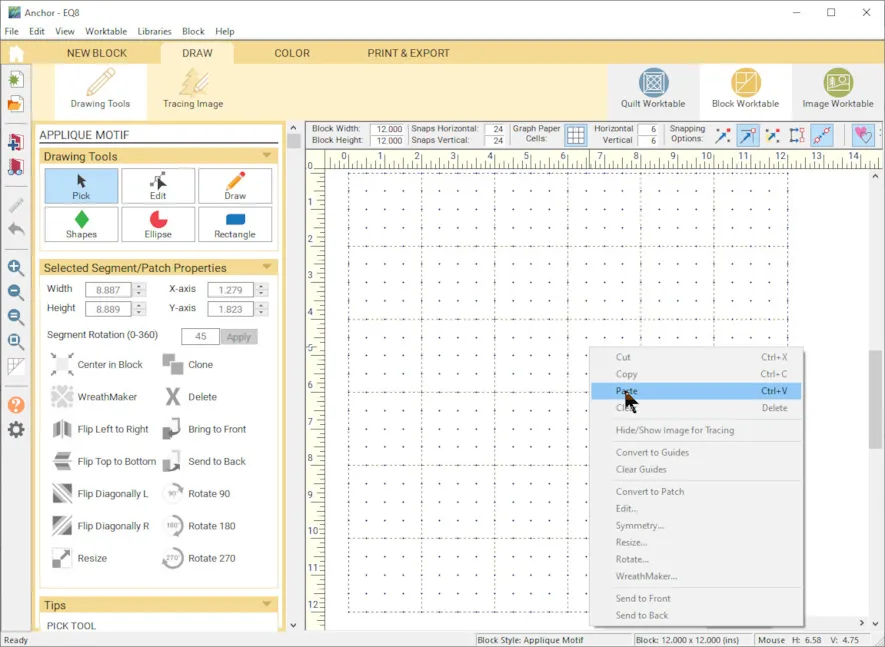
- Right click in the center of the drawing grid and Paste the anchor shape .
- In the Segment rotation field, type 315 and click apply. This should place your anchor right side up.
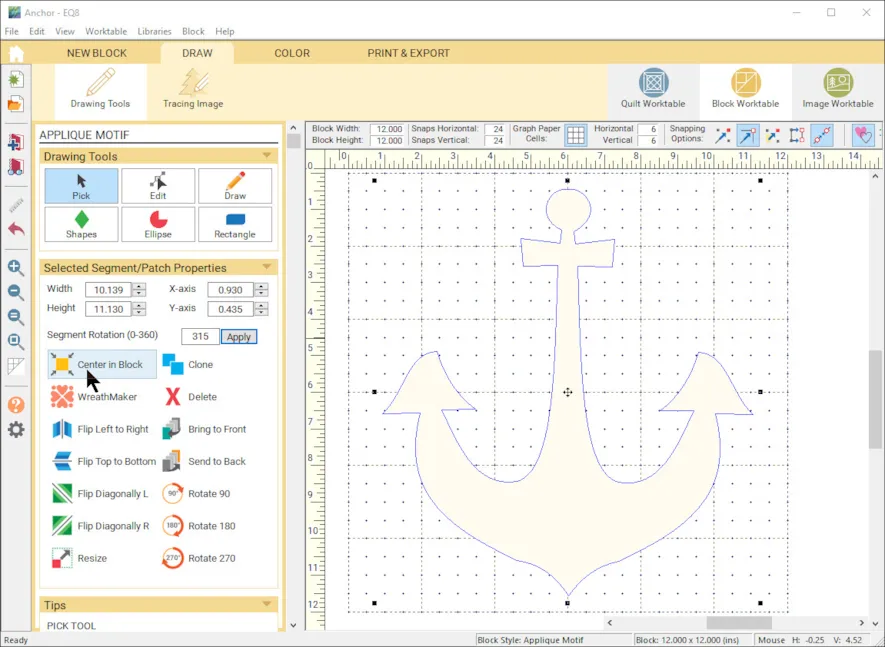
- While the Anchor is selected, choose the center in the block button.
- Go to the Block color tab and color the anchor motif Red. Add to sketchbook.
- Go to the Quilt Worktable.
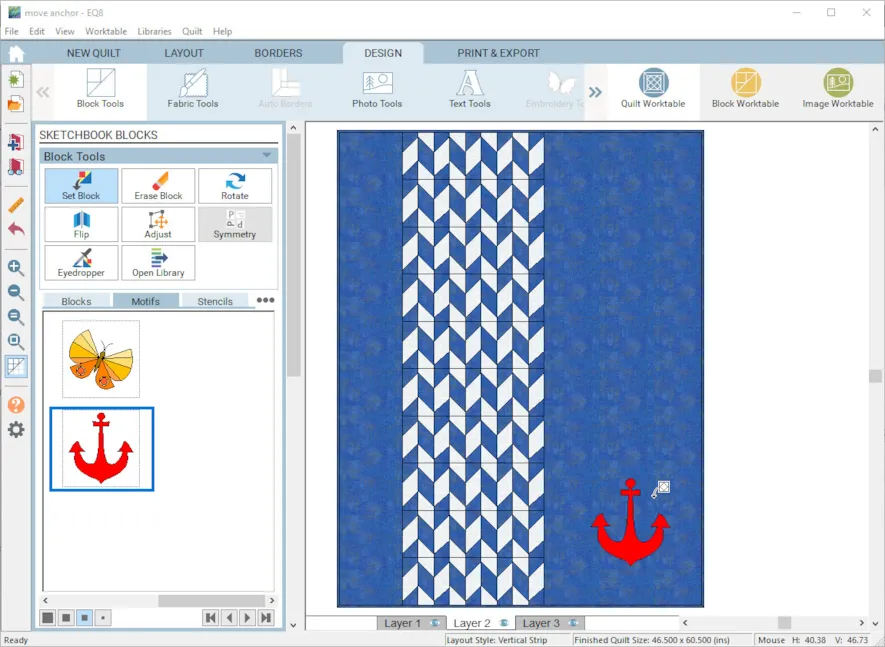
- Select layer 2. Set blocks. Select the Motifs tab. Select the Anchor and drag it over to the quilt. Move it around to where you want it. You may have to use the Adjust button to select it again to move it. When it is where you want it, Add it to the sketchbook.
Now that you have designed this fun Nautical quilt with EQ8, why not stitch up this Anchors Away quilt? You can find more information to make this throw on my Lori Miller Designs Blog.
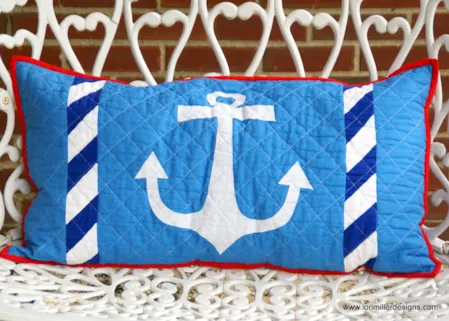
Don’t forget to check out my previous post for a coordinating pillow! Shipmates Bench Pillow
Lori J. Miller lives in Oxford, Michigan, where she designs, stitches and sews quilts and quilty things. She loves experimenting with fun colors and designs to make playful and clever products for the modern sewist. Sewing since age 11, Lori has deep roots in sewing and quilting traditions that add a unique dimension to her designs. She loves designing using Electric Quilt 8, Electric Quilt Mini and EQ Stitch. You can follow her quilting adventures on her blog at lorimillerdesigns.com or on instagram @lorimillerdesigns




09-02-2019
2:09 pm
I think this would make a great baby quilt as well. You could just change the color scheme and add a teddy bear or other kid friendly image instead of the anchor.
09-02-2019
10:26 pm
Yes, it would be a cute design with other colors to suit the recipient. Great idea!
09-02-2019
10:05 pm
I really enjoyed learning with Lori on the Anchor Quilt presentation. She did a great job explaining and I did it! Thanks so much!
09-02-2019
10:27 pm
Janelle, you’re very welcome. I hope it was helpful and you learned something new.
09-04-2019
9:56 pm
love the lesson. I did a short to for the second block. I took the block and flip it. Then recolor it with the correct color placement. Thanks for the lesson
09-05-2019
10:10 am
Tea, that is the perfect short cut, great idea! Sometimes I have you do things the long way for practice, but I think everyone loves a short cut to save time. I will update the post to share your idea! Thanks!
11-23-2019
3:14 pm
Love all I can about quitting and more
02-19-2020
11:25 pm
what fun was that, It was quick and to the point. I agree with one of the other posters on making the other block, I just copied and flipped it was that easy. Thank You I am now off to do the shipmates bench pillow.