
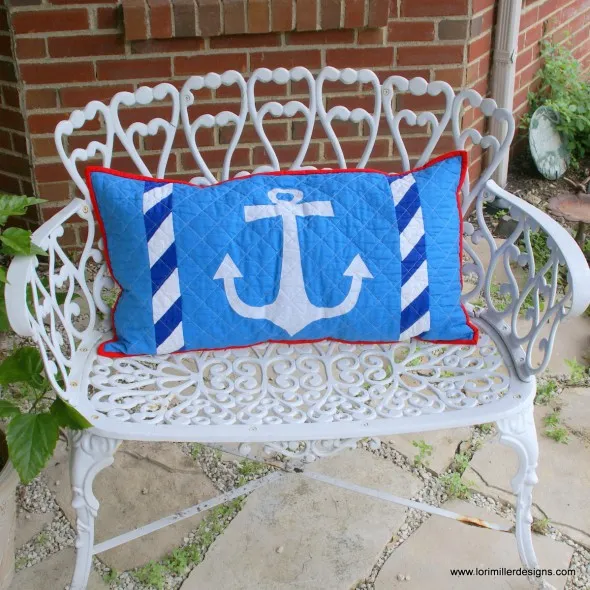
Ahoy! It is summer and thoughts turn to heading to the lake or beach and enjoying being outdoors. This month’s design shows how a simple small quilt design can still be quick and fun. You don’t always need to design an intricate, detailed pattern. Sometimes you just want to design a fun themed gift or create some home decor with fun motifs. The design for this nautical bench pillow fits the bill and it is something you can design and still have time left to get out in the sunshine.
Lets get on board!
Shipmates Bench Pillow
Size: 16″ x 28″
Skill Builders:
- Clone a strip
- Add an applique block
- Print an applique template
Lets Begin!
- Open EQ8.
- Let’s name the Project. The project name appears at the top left of the EQ8 Window. Right now the project says Untitled – EQ8.
- On the left side toolbar, click the New project button.

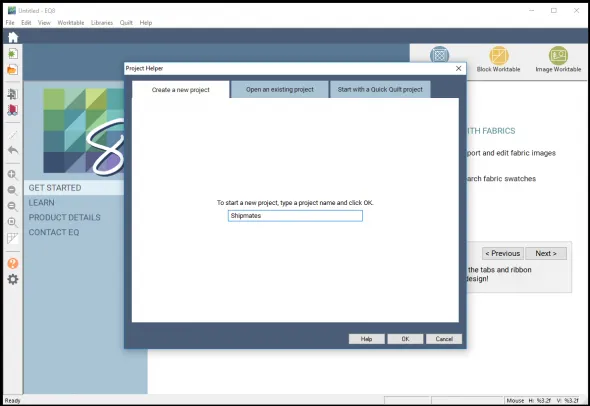
- On the Create a new project tab, type in the project name field Shipmates.
- Click OK. The box will close. Notice the project name Untitled has been replaced with Shipmates.

- Under DESIGN QUILTS, select Design a quilt from scratch.
- Choose the NEW QUILT tab.

- Under the NEW QUILT tab, select Vertical Strip from the ribbon bar.


- Under LAYOUT, Update the Vertical Strip Layout Palette.
- Delete the number of strips until you just have one to start designing from scratch.
- For the first strip, select a strip style of Plain, width is 4 and length is 16. Leave the number of blocks at 1.
- Select Add a strip. The strip will be added to the right side of the first strip you set up. This is a strip we will set up to mimic rope. Select a strip style of Pieced Block, width is 2 and length is 16. Under NUMBER OF BLOCKS, enter across length of 8 and across width is 1.
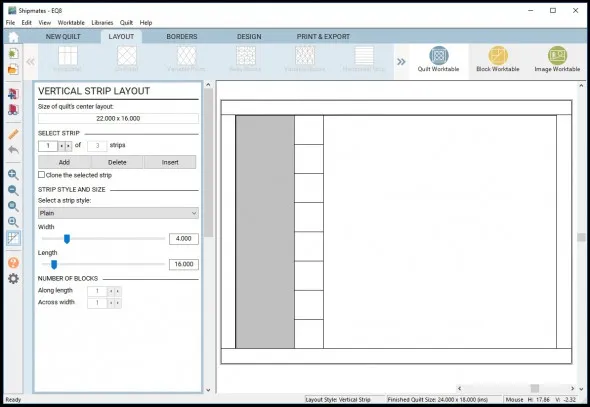
- Select Add a strip. The strip will be added to the right side of the last strip we worked on. This is the center of the pillow. Select a strip style of Plain, width is 16 and length is 16. Leave the number of blocks at 1.
- Before you add the next strip, select Strip number 2 and check Clone the selected strip box. Now click to Add a strip. EQ8 will clone a copy of strip 2 into strip 4.
- Add the final strip by selecting strip 1 with the clone box still checked, click to Add a strip. EQ8 will clone a copy of strip 1 into strip 5.

- Select the Borders tab to display the Borders Palette.
- Select a border style of Mitered using either the ribbon bar or the drop down menu.
- Under Lock size adjustments, select all and move the borders to 1/4″.

- Select the Design tab.
- Select BLOCK TOOLS
 on the ribbon bar.
 - In the Sketchbook blocks palette, choose the Set Block Tool.


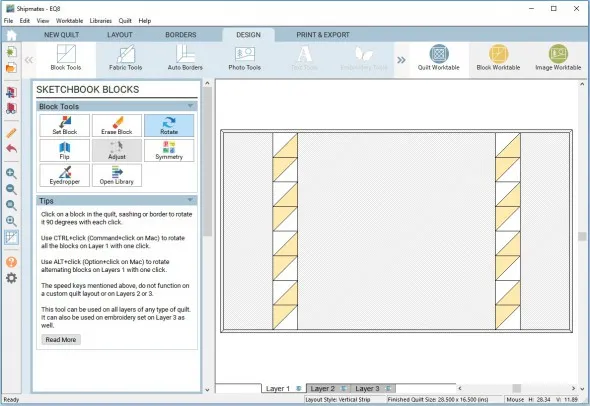
- Choose the EQ Default Half Square Triangle. Hold down the CRTL key and click in one of the squares of strip 2. It should fill up all of the squares with the half square triangle. Then using the rotate button
 , arrange the squares to look like rope.
- For the center strip, we need to get a nautical style applique, in this case, an anchor. Under block tools, Open the library
 .
.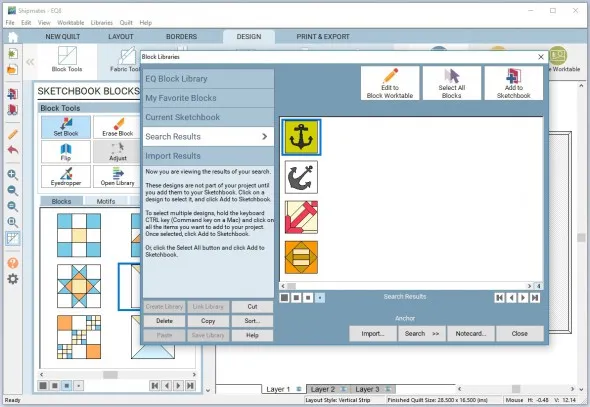
- Search by notecard for Anchor. There should be several entries. Choose the first applique anchor. Add it to the Sketchbook.
 Close.
- Under Block Tools, select Set Block, select your anchor applique block and add it to the center strip of the quilt. It will automatically size to the block size we chose of 16″.
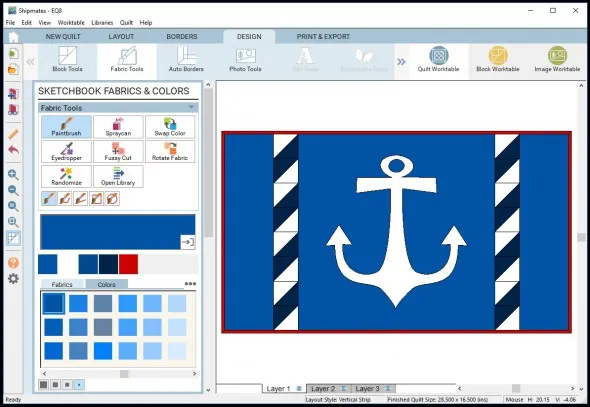
- Go to Fabric Tools and color your design. I chose red, white and blue that made me think of nautical colors.
- From here you can print your yardage estimate and print out your applique template.
How to print the template for the applique block to make the quilt.
- Select the PRINT and EXPORT tab.
- Select Print
 in the ribbon bar.
 - Click on the center block with the applique, you should see a green highlight around it when it is selected and the Templates button
 will become available.
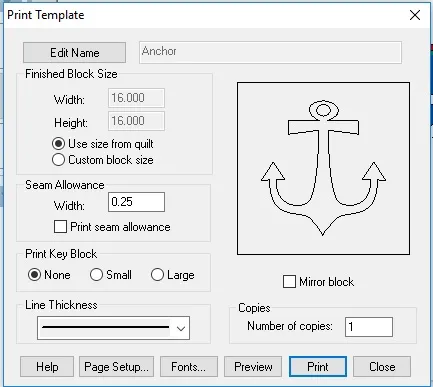
- Select the Templates button to bring up the Templates dialogue box. make sure to choose Use size from the quilt.
- Since I know I want to use machine applique to make my applique block, I am going to uncheck the Print Seam allowance box. I am also not going to print out the key block.
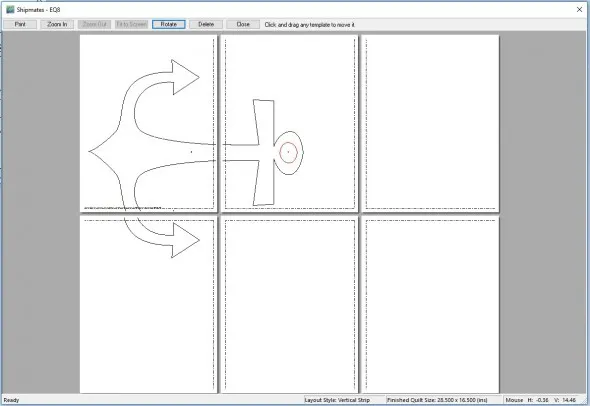
- Select Preview. I deleted the box shape to just have the anchor pieces. I rotated the anchor to best fit with the least number of pages. I also moved the small circle in the top of the anchor over the top of the template as I will just use that as a cut out for a one piece template. Play around with the move and rotate features to try this out to best fit your large applique. It is large enough that you will need to tape the pieces together using the guidelines. Then just print.
Design Variations
Make several pillows with other Nautical designs. EQ8 has plenty of built in applique ideas.
Here are Tips and Help Articles to help you get ready to sew up your design.
Ready to Quilt?
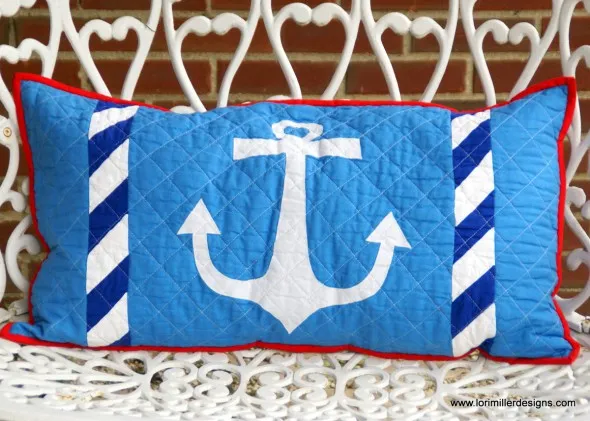
Now that you have designed this with EQ8, why not stitch up this adorable Shipmates Bench Pillow? You can find a DETAILED TUTORIAL for this quilted beauty on my Lori Miller Designs blog.
Please share your ideas, questions and feedback in the comments. I would love to hear from you. Thanks!
Lori J. Miller lives in Troy, Michigan, where she designs, stitches and sews quilts and quilty things. She loves experimenting with fun colors and designs to make playful and clever products for the modern stitcher. Sewing since age 11, Lori has deep roots in sewing and quilting traditions that add a unique dimension to her designs. She loves designing using Electric Quilt 8, Electric Quilt Mini and EQ Stitch. You can follow her quilting adventures on her blog at lorimillerdesigns.com or on instagram @lorimillerdesigns







07-10-2018
1:04 pm
Love this simple design. Thank you so much for explaining it so well. I will be checking out your website for sure.
07-11-2018
1:25 pm
Linda, thanks for the kind comments. I have been dreaming of making this pillow for awhile. Enjoy!
07-10-2018
4:04 pm
I worked my way through this lesson and would like to sew it up. How does one finish this by having a cutting chart or making a cutting chart and directions? I realize that Lori has it on her website but I’d like to know how to do this so I can design other things and have a cutting chart. Thanks.
07-11-2018
1:24 pm
Karen,
Electric quilt offers suggested amounts of fabric required for your quilt as designed and they are pretty generous. However, the art of creating a pattern requires some critical thinking. I use the information from Electric Quilt as a guide and then use my own knowledge of piecing techniques, the methods I want to use, and sewing up samples to refine my cutting amount and directions. It is not a simple process but something learned over time and with experience. Good luck with your journey.