
I absolutely love Bargello Quilts. I love the colors, the movement, and the ability to create them so very easily in EQ8. I can choose to use an EQ8 quick quilt layout option or I can design my own strips. The options to create these are endless. These designs look complicated but they are so easy to design and stitch that even a beginner can create these beautiful masterpieces.
Bargello Quilts are simply, vertical strip quilts. On each vertical strip, you define the number of blocks and the sizes of the blocks. You also decide on the number of strips and the width of the strips. Of course, you can easily insert a strip with no blocks to section off your quilt layout. The design is entirely up to you.
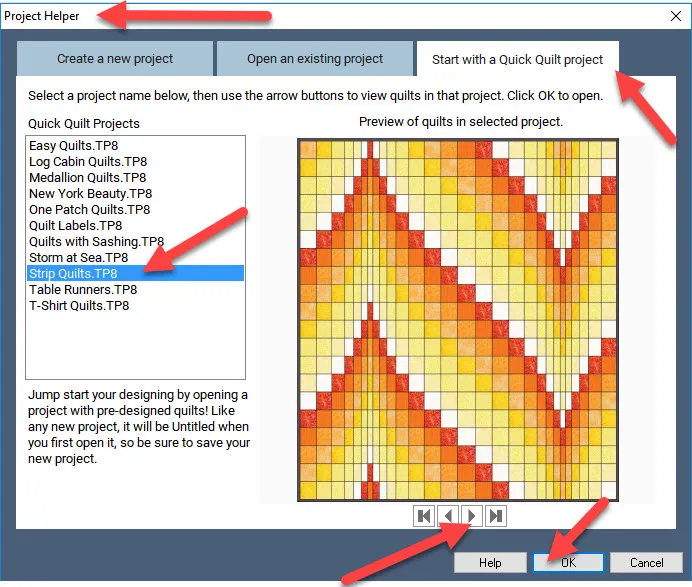
Open your EQ8 program.  On the opening page, click on the Start With A Quick Quilt project icon.
 ![]()
In the Project Helper box, click on the Strip Quilt.TP8 menu and then scroll to the right to see the bargello quilt layout. Click on the OK in the bottom of the box to open the project.
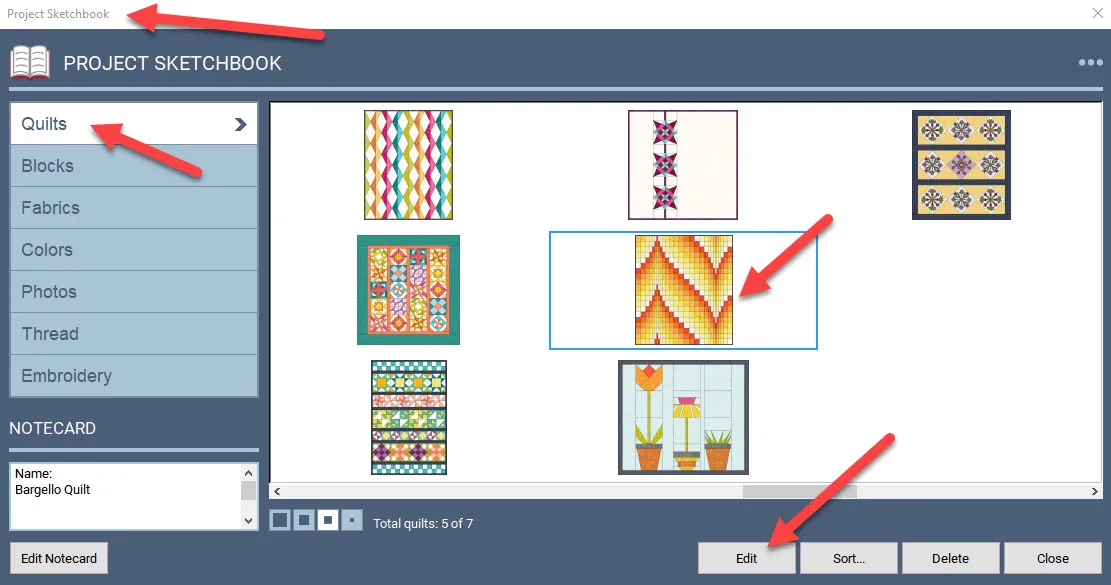
The project sketchbook will open. Click on the Quilts heading and then scroll through the quilts to select the bargello quilt. Click on the quilt and then click on ‘edit’ in the bottom of the box. The quilt will open on the quilt worktable.
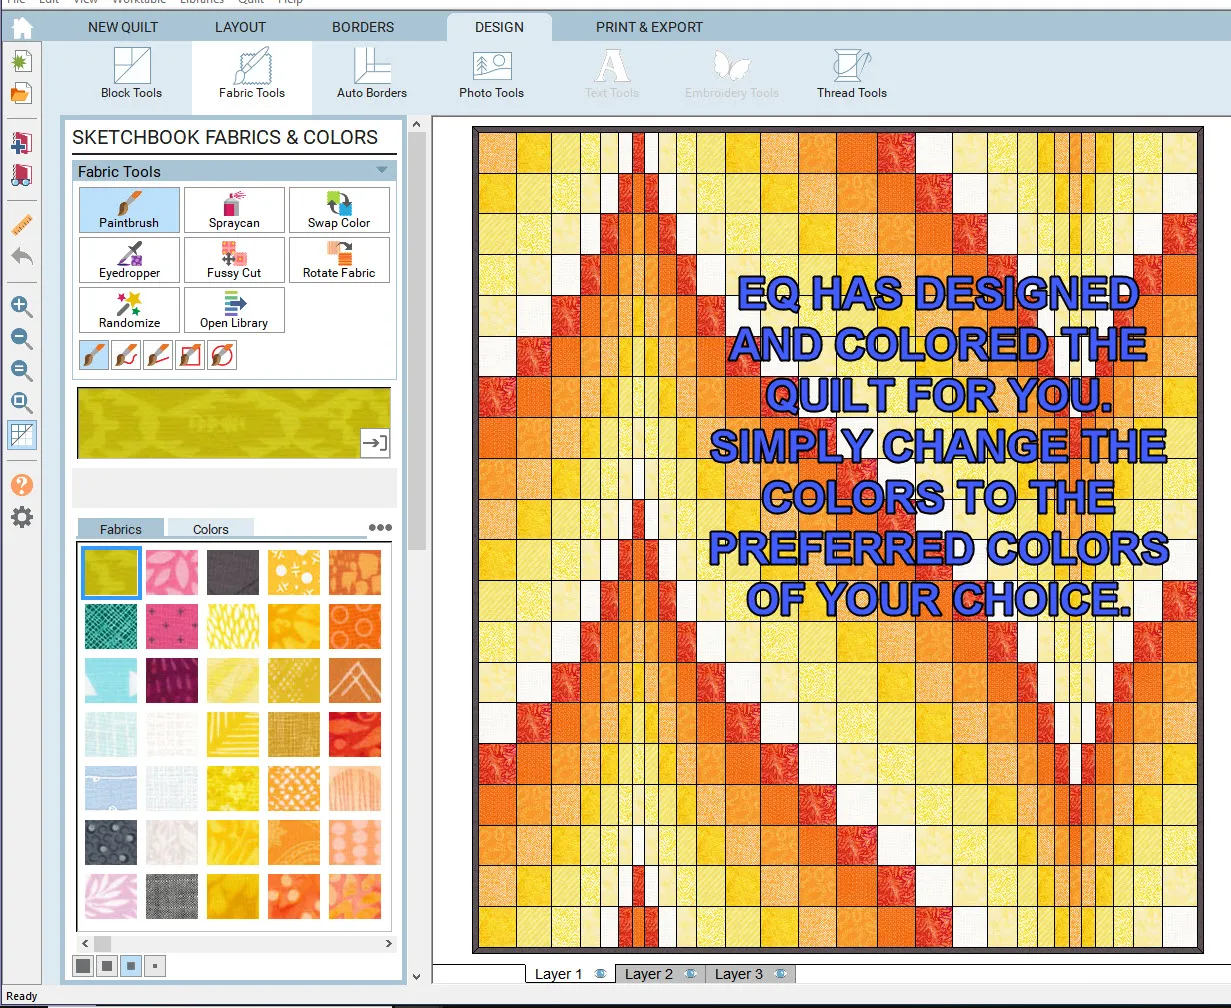
EQ has designed a traditional Bargello pattern in the quilt layout for you. If you like this layout, simply color the quilt with the fabrics of your choice and add it to the sketchbook. ![]() . Name your project in the pop up screen. It doesn’t get any easier than this!!
. Name your project in the pop up screen. It doesn’t get any easier than this!!
Recolor your design with the fabric color in the sketchbook under the fabric tools heading. Add to sketchbook when done.![]()
You can always draw your own unique Bargello Quilt layout using the Quilt Worktable tools.
Click on the quilt worktable icon at the upper right side of the screen.
Click on QUILT>New Quilt>Vertrical Strip at the top of the screen.
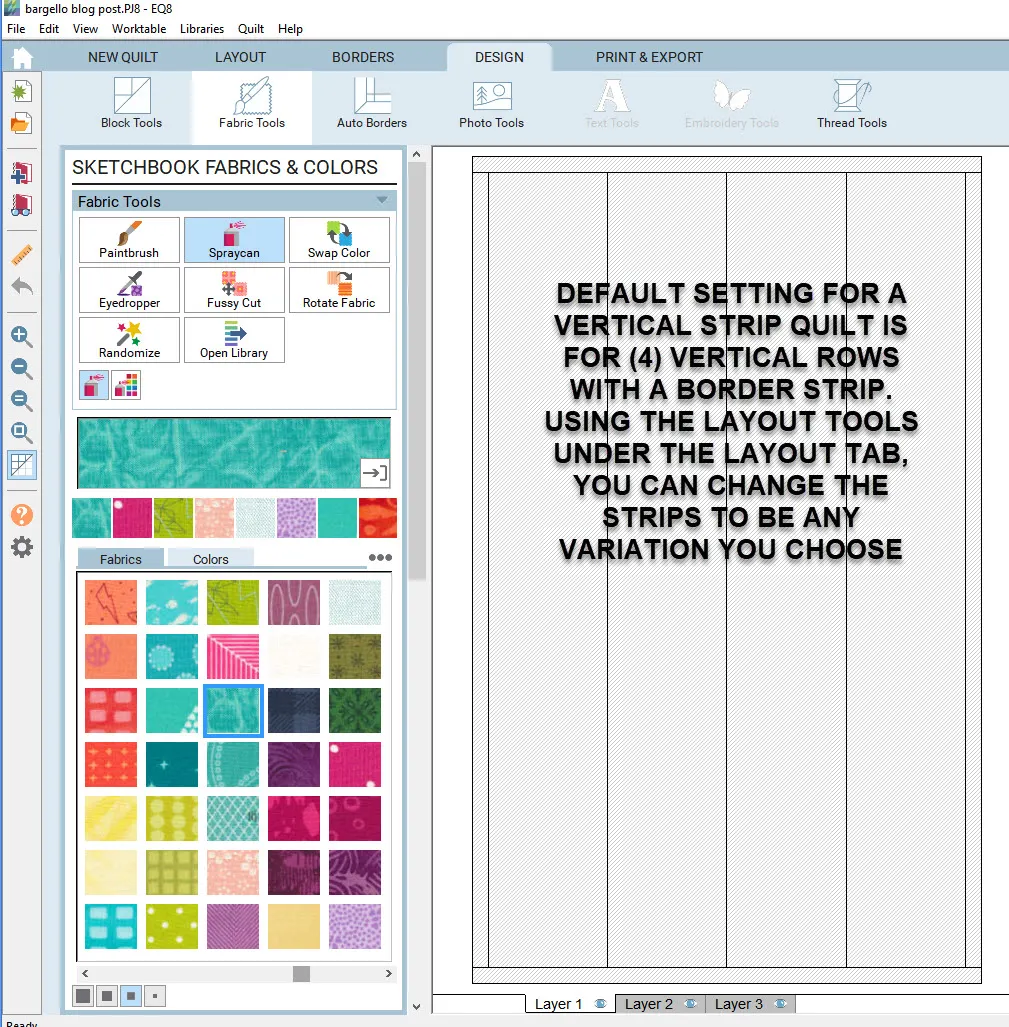
The default for the EQ8 program is to open a vertical quilt with four strips and a border. You can edit this to your liking.
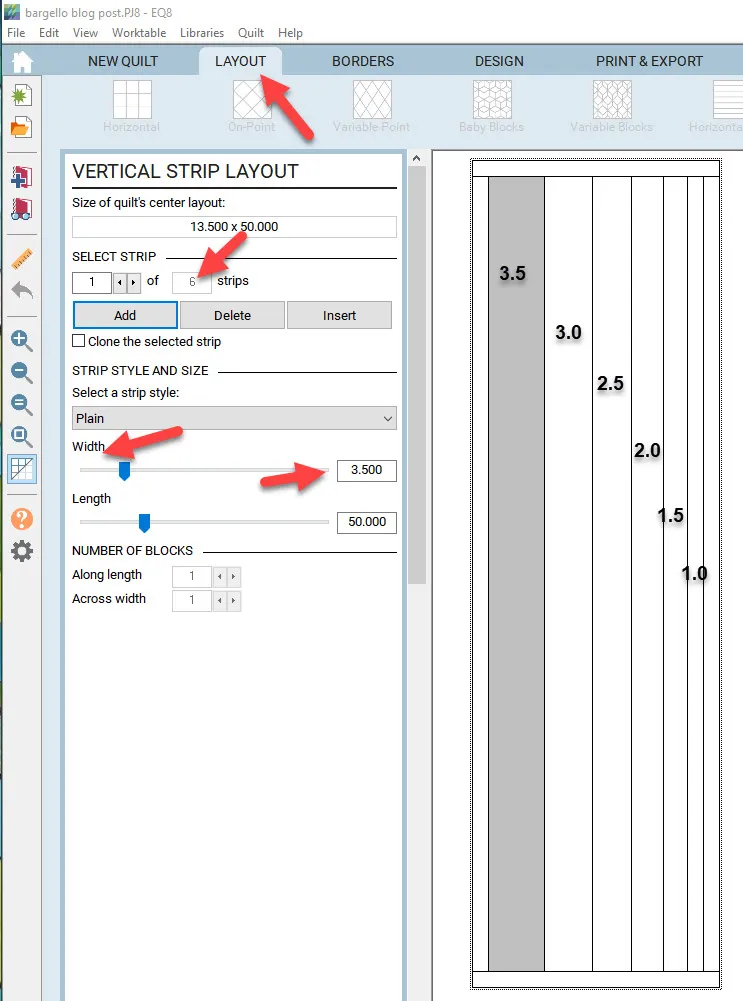
Under the layout tab I changed my settings to have 6 vertical strips to start with. I have the width of the strips vary by 1/2 inch increments starting with 3.5 inches and the smallest being 1 inch. You could set your strip sets to be whatever widths you want.
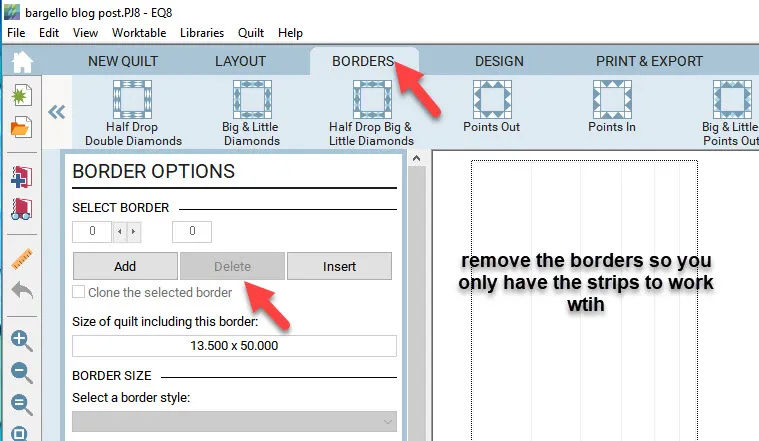
The borders throw off my eye so I click on the borders tab at the top of the screen and delete the borders. Add to sketchbook. ![]()
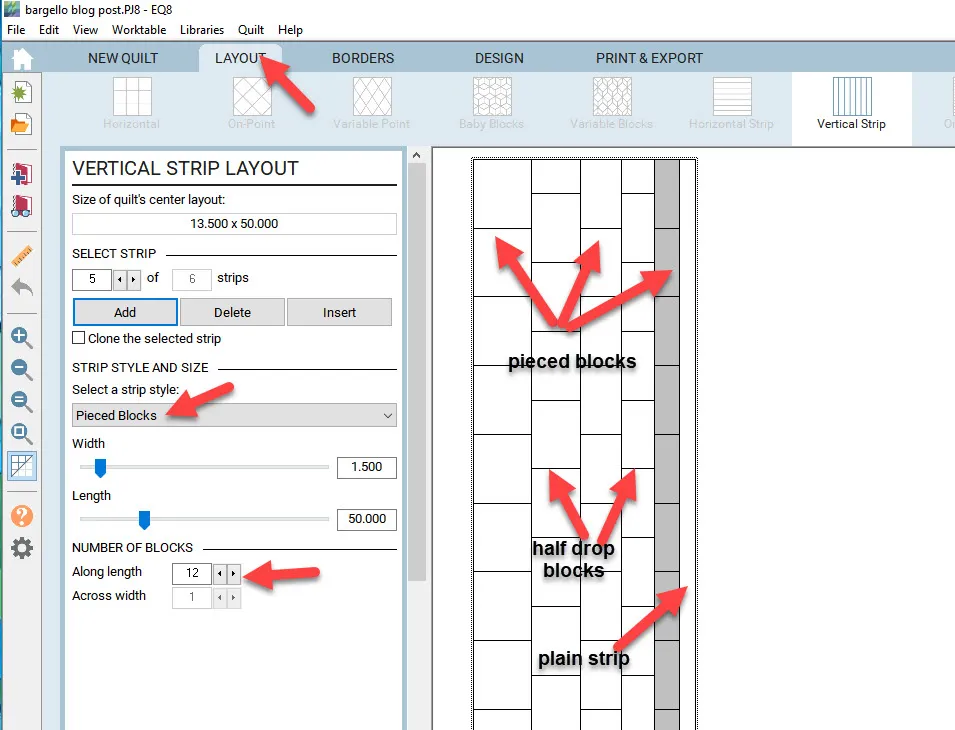
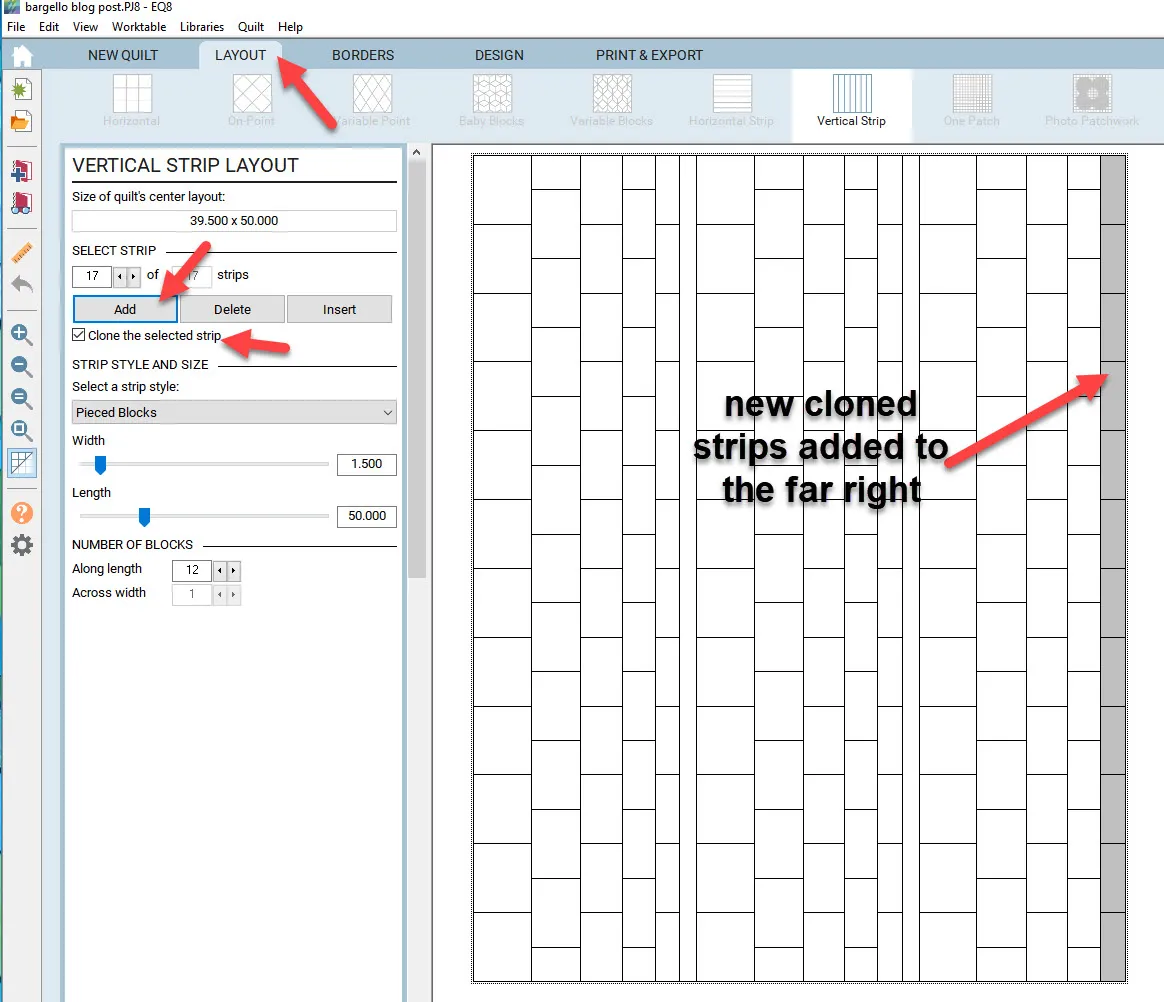
Click back onto the layout tab and assign the number of blocks for each row and the size of the blocks. Off set every other row. I leave the last row without blocks so I can create a spacer strip on my quilt.
Now that I have the strips width and block styles assigned, I can clone these as much as I want to create the strips across the quilt top. Click on a strip to select it and then place a check mark in front of the word clone and then click on add in the layout box. The new strips will be added with the design type you assigned to the far right edge of the quilt layout. Add the quilt layout to the sketchbook when you are done creating your strips. ![]()
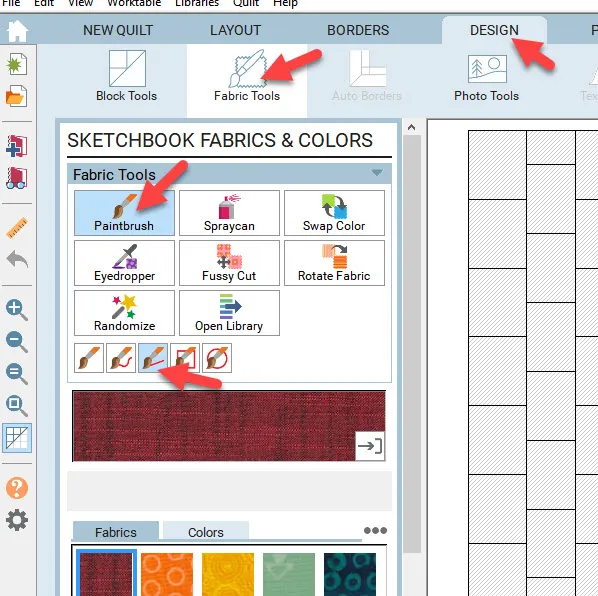
Now the fun begins. Click on the design tab at the top of the screen. Click on the fabric tools icon at the top of the screen to see the fabric palette. In the fabric tools box at the left, click on the paintbrush then select the straight line paintbrush from the selection box.
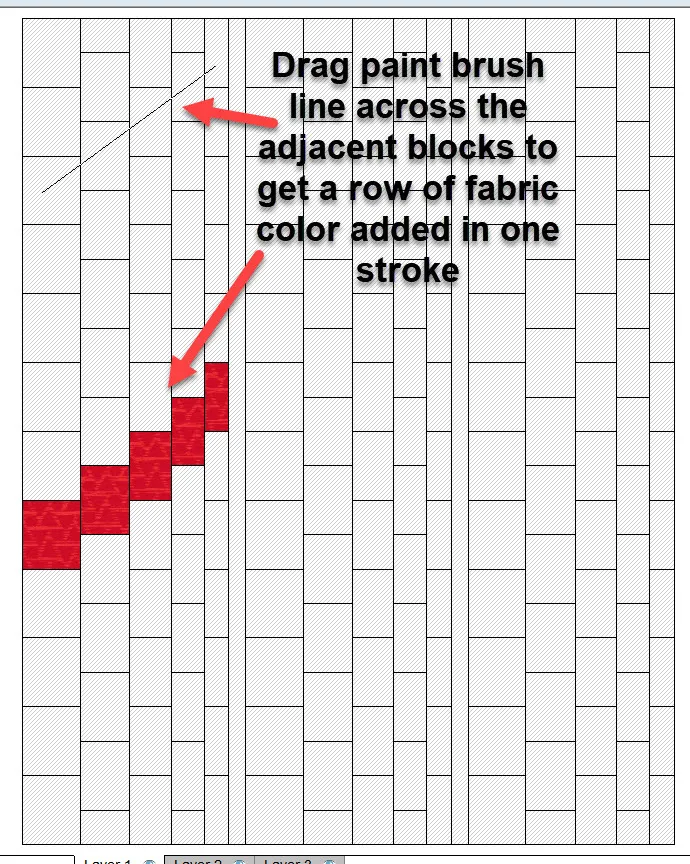
I find it easiest to create one or two stepped lines of fabric color and then add colors from that point on either above or below that first strip. Using the line paintbrush tool helps me to color all the blocks in a continuous stroke.
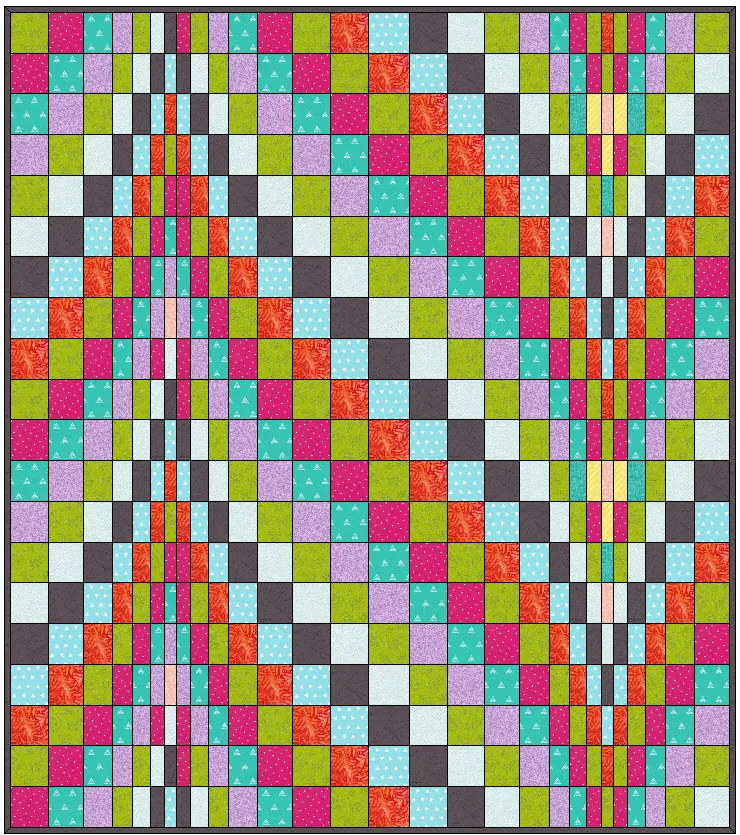
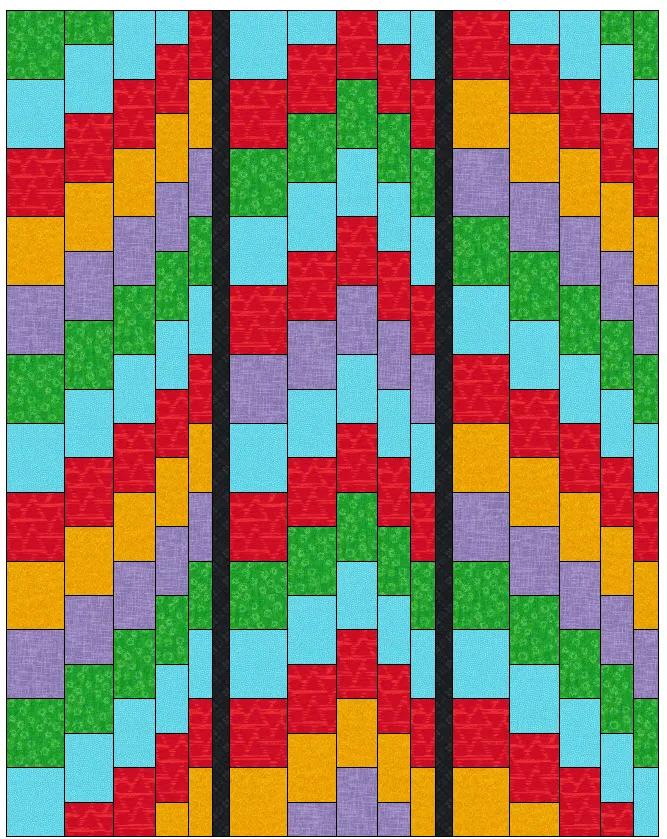
Continue painting in your rows of fabric colors staggered across the quilt to create flowing patterns of color repeats. I also include a solid strip to break up my design and change directions of the strip sets with my fabric choices. If you make a mistake, just click on the undo arrow ![]() at the left side of the screen to recolor your strip. Add to sketchbook.
at the left side of the screen to recolor your strip. Add to sketchbook.![]()
Get creative and have loads of fun with this type of quilt layout!





09-16-2018
11:17 am
This is awesome! I used the vertical strip technique and created a beautiful quilt top, but I knew nothing about using the paint brush / straight line technique for getting the fabric colors right. I clicked in every little box. It wasn’t that hard, but your way is so much better!!!
Thanks!
09-16-2018
2:27 pm
Diane–there are so many tools to use in the EQ program. I am still discovering how to use the tools in a unique way even after using the program for 20 years!! EQ8 is loaded with neat features you will love.
09-16-2018
1:31 pm
Thank you so much! Very useful article!
09-16-2018
6:28 pm
Yvonne,
I’m loving your tutorials and this one on Bargello’s is fantastic!! I love learning something new and I think EQ8 is the easiest to learn. You just need to use the program to learn all the tools. And like you said you’re still learning yourself! And you are a master at this. Thanks for sharing your talents.
09-16-2018
6:37 pm
Well Linda I would not say I am a master. There are always several different ways to design with EQ8 and I am sure I don’t know it all. That is why I love hearing from others how they approach the subject matter. I am always learning. Thanks for your kind words.
09-16-2018
7:45 pm
it’s amazing how one little tutorial can teach so very much in EQ8 – thanks you, Yvonne, for another great tut!! ♥
09-16-2018
11:25 pm
I’ve been doing the EQ8 lessons and LOVE them! I’d noticed other paintbrushes but never knew what they did or how to use them. I designed my bargello quilt layout, selected my colors, filled in the quilt using the diagonal brush and absolutely love the color scheme and design.
All the lessons I’ve done here have greatly increased my ability to use more of the options available in EQ8.
09-17-2018
6:27 am
Where do I find the app or tge computer program
09-17-2018
4:48 pm
SueAnn this is the Electric Quilt 8 program we are using here. You can purchase it through the Electric Quilt website https://electricquilt.com/
10-29-2018
2:12 pm
I love this tutorial on making a Bargello. Do you also have this in a Step by Step Video? Just wondering.
10-29-2018
2:23 pm
Jackie there are built in tutorials and videos in the EQ8 program. On the main page when the program opens, click on ‘LEARN’ and then video tutuorials. At the top of the next page, type in Bargello Quilts in the search bar and you will find a step by step lesson. Enjoy!!
10-31-2018
9:27 pm
I am trying to design a Bargello but don’t have enough space for the number of rows I want. Is there a way to include as many rows as you want?
11-01-2018
11:07 am
Hello Ira. Yes you can and more strips for your design. Go to the layout tab once you have the vertical strip quilt selected and set the number of strips there. To set the number of rows, you need to determine this by selecting the strip style and telling the program how many blocks you want along the length of the strip. You don’t mention how many rows you need so try these settings and see if you can produce what you want for rows and strips.
07-22-2019
12:24 pm
Hello, can you help.
I‘ve designt a bargelloquilt the way you‘ve shown und.
Now I eantet to print this quilt, but EQ8 say I‘ve to choose a block for printing…upps this bargello is the block.
I can print the quilt, but not the rotary cutting measurments.
Yours Maren