Sometimes the simplest designs have the highest impact on a quilt. Consider the modern quilt movement. Very little print on the fabric and very few design elements on the quilt allow the quilter to showcase the stitches themselves. Why not make a simple applique a focal point on a rather plain quilt and highlight that applique with some embroidery stitches. Applying the applique to a whole cloth background as an embroidery element can bring the quilt to life.
Click on your EQStitch icon on the desktop to launch the program.![]()
Click on the stitch worktable icon.![]()
Click on STITCHING>New Design>Machine Applique.
Click on the drawing board options icon![]() on the project bar at the top of the screen.
on the project bar at the top of the screen.
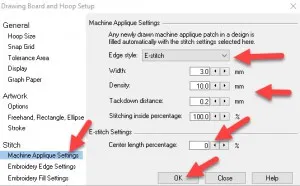
In the options box, click on the machine applique setting and select and ‘E’ stitch with the following properties. Be sure to click on the ‘OK’ in the bottom of the box to set the properties you have selected.
These settings will be applied to the applique shape when fabric is applied.
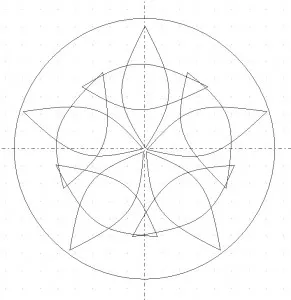
Click on the ellipse tool ![]() and click and drag a circle onto the artwork tab.
and click and drag a circle onto the artwork tab.
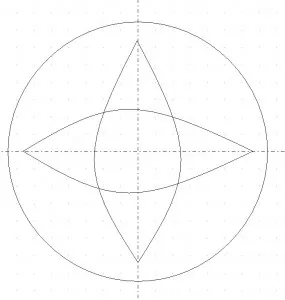
Click and hold the oval tool to get the fly out menu. Select the shape that looks roughly like a diamond.
Move the cursor over to the drawing board and click/hold/drag to create two shapes, horizontal and vertical inside the circle.
Select the two inner shapes with the pick tool.![]()
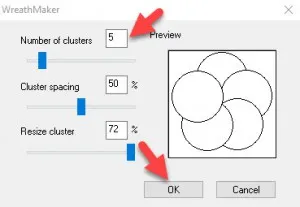
Once both elements are selected, click on the wreathmaker tool ![]() on the properties bar and set the properties to be five elements.
on the properties bar and set the properties to be five elements.
With the pick tool,![]() click/hold/drag a corner node so the design is resized to fit into the center of the circle element.
click/hold/drag a corner node so the design is resized to fit into the center of the circle element.
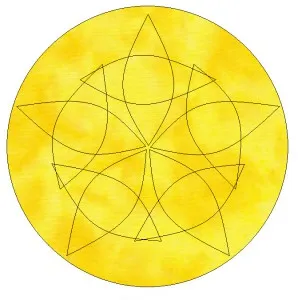
Click on the fabric tab and choose a fabric for the circle area only. Click once inside the circle to apply the fabric choice.
Click on the stitch tab and the edge stitches of the design will automatically be added according to the settings on the drawing board.
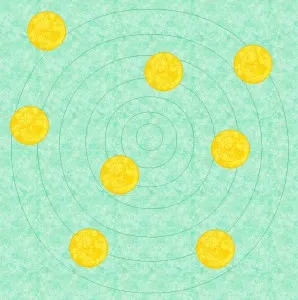
Click on the set edge stitches icon![]() and select the bean stitch from the properties bar.
and select the bean stitch from the properties bar.
Click on the center elements to apply the bean stitches.
Click on the set thread icon![]() and choose a color thread for your designs. Click on each of the elements to set the thread color.
and choose a color thread for your designs. Click on each of the elements to set the thread color.
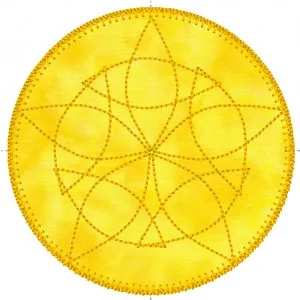 Add the design to the sketchbook
![]()
Use this design to create a modern style quilt on a whole cloth background. The applique circles themselves applied on top of the quilt sandwich helps to quilt the layers of the quilt together while creating the applique/embroidery design.





10-15-2017
11:00 am
Beautiful design and great tutorial too!
QuiltShopGal
www.quiltshopgal.com
10-15-2017
11:25 am
Do you cut circles out of fabric and fuse them on then embroider them or how do you get the yellow part of the circle in the picture to be on the top? If you have to fuse circles on first how do you make sure the embroidery will line up in the right place to applique down the circles do you use a placement guide or some such thing?
11-04-2017
4:12 pm
Having a problem changing the E-stitch to the Bean Stitch. I choose the Set Edge Stitch Icon, select the Bean Stitch, click on the stitch lines on the inner stitching and all I hear is a “ding” and nothing changes. I have redone it 3 times from the beginning. Obviously I am doing something wrong but am unable to figure it out. HELP!
11-04-2017
4:45 pm
Joni–E-Stitch is only available when you are creating applique. If you applied fabric to your shape then the E-Stitch is available. In order to use the shape with the edge stitches, you can not fill it with fabric as an applique. Without the fabric fill the shape is then just an embroidery shape that you can set the edge stitch to a Bean stitch.
Yvonne
11-05-2017
11:22 am
Thank you so much Yvonne, I thought I was losing my mind! Of course, I now see the instructions say to pick a fabric for the back circle ONLY. Well, I guess I learned a good lesson from that. Again, thank you! BTW, I just discovered this series and love it, also your video lessons are awesome too! Thank you.