There’s a quick and easy way to create your own nested block designs in EQ7. Once you learn to create these fun designs, you won’t be able to stop!
The best candidates for nested blocks are those with large plain squares in the center, like these:
We’ll be using the Serendipity feature called Merge Blocks to create these designs. You must have blocks saved in your Sketchbook in order to use the Serendipity tools.
Follow the steps below to create your first nested block!
- Open EQ7 and create a new project called Nested Blocks.
- Click LIBRARIES > Block Library.
- Scroll down and click the Variable Stars style on the left (under 01 Classic Pieced).
- Click on the second block to select it.
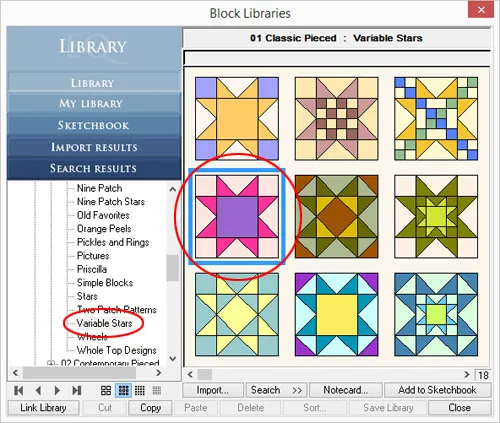
- Click the Add to Sketchbook button. Then click the Close button.
- Click the Work on Block button
 .
. - Click BLOCK >Serendipity > Merge Blocks. Because the Variable Star block is the only block in the Sketchbook, you’ll only see that block on both the left and right sides on the Merge Blocks window.
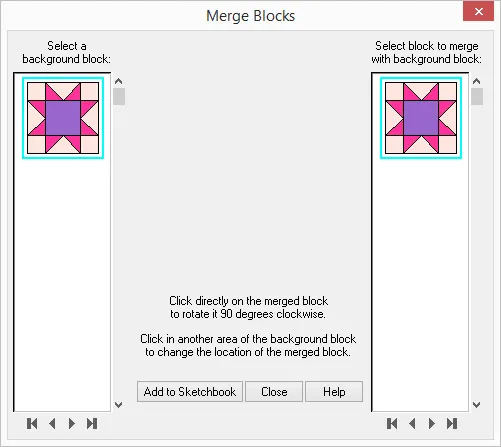
- Click on the Variable Star in the Select a background block column on the left. You’ll then see the a smaller Variable Star “nested” in the large center square of the Variable Star background block.
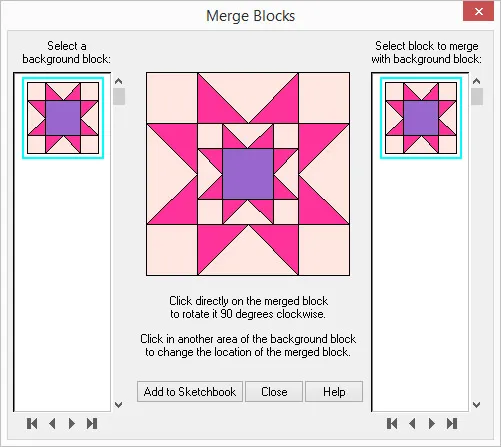
- Click Add to Sketchbook.
- After adding to the sketchbook, you’ll see a second block appear on the right. That’s the new nested design we created! Click on the new design to merge it with the background block again.
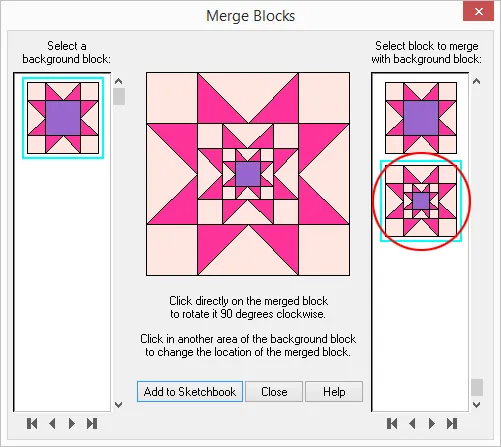
- Now we have a three-block nest showing in the center. Click Add to Sketchbook.
- You can keep repeating this process (select new block on right, Add to Sketchbook) as many times as you’d like to create the number of “nests” you’d like to use.
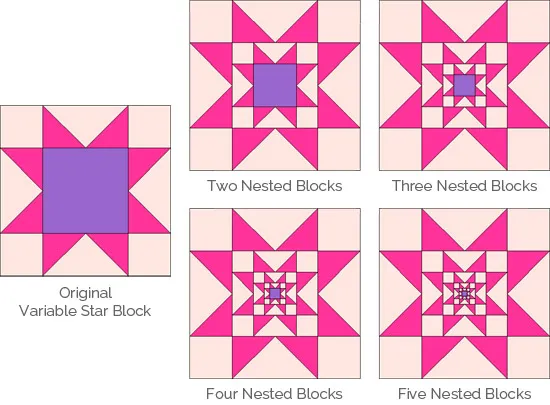
- When you’re done merging blocks, click the Close button. Your new blocks will be in the Sketchbook, ready for you to use in your quilt designs!
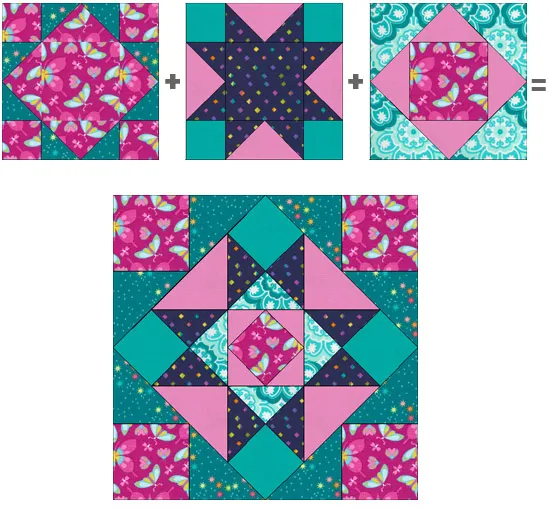
Just because we’ve used the same block for merging in the steps above doesn’t mean you can’t mix it up! Try combining all different kinds of blocks.
Don’t forget that you can edit an existing block design to make it more suitable for nesting.
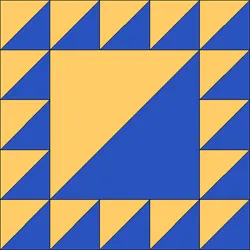
I thought Lady of the Lake (01 Classic Pieced > Five Patch) would make an interesting background block.
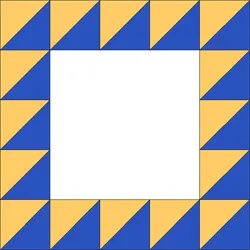
But I had to get rid of that center diagonal seam. So I edited the block to the Block Worktable, selected the diagonal line with the Pick tool ![]() and hit the Delete key on the keyboard. Now I have space to merge!
and hit the Delete key on the keyboard. Now I have space to merge!
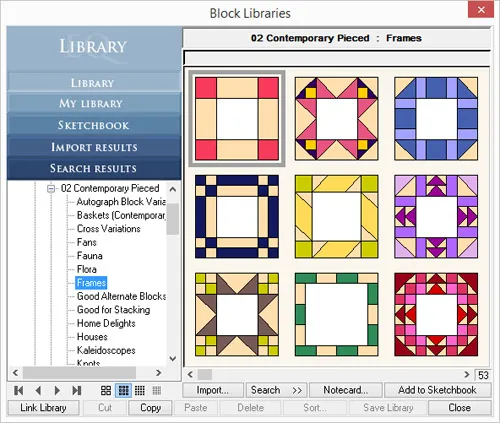
Hint: Check out the 02 Contemporary Pieced > Frames section of the library. These blocks were designed for framing printed fabric photos, but they’re perfect for nesting blocks too!
When choosing blocks for merging/nesting, keep the following guidelines in mind.
The background block must fit the following criteria:
- Blocks must be created on the EasyDraw drawing board, or blocks from the Library that have been drawn using EasyDraw.
- The block must have at least ONE parallelogram that’s larger than other patches.
- The size of the parallelogram must take up a certain amount of space in the block.
Any block in your Sketchbook can be merged with that background block.
Have you used any of the Serendipity tools before? I’d love to hear what you’re designing!




11-19-2015
8:25 pm
Very cool tip! I have typically gone through the pain staking process of redrawing something like this myself. Can’t wait to use this great feature!
11-20-2015
12:35 pm
Glad I could share something new with you! All the Serendipity tools are fun to play with– create all kinds of new blocks with just a few clicks!
11-22-2015
10:20 am
Why do you have to rotate 90 degrees. The inserted block seems to be the same as the first one. Thanks for your answer. I am learning to use EQ7 and Stitch more to their potential.
11-23-2015
9:24 am
You don’t have to rotate 90 degrees. Rotating only occurs when you click directly on the merged block in the center of the window.
That option is useful for blocks that are asymmetrical. Rotating an asymmetrical block produces different looks.
11-22-2015
11:11 am
Thank you for your tutorial. I have not yet played with block in a block. But I am sure I am going to in the future. I see so many possibilities.
11-23-2015
9:53 am
It’s so much fun! I’d love to see what you design with it!
11-22-2015
6:08 pm
Hi Thankyou for the nesting block tutorial. I am having difficulties trying to merge cross 8 with road to california in each of the 4 corners . Is this possible please?
11-23-2015
10:48 am
Hi Diane
I tried doing the same thing and couldn’t get it to “merge” again after the first time. I’m thinking it has something to do with the new background block not following the “rules” after the first merge (something about the existing parallelograms not taking up a large enough percentage of the entire block anymore maybe?).
But with EQ7 there’s almost always another way to go about doing something, so here’s what I’d do:
Merge the first block in one of the corners and add it to the sketchbook. Close the Merge Blocks window.
View the Sketchbook and edit the new block to the Worktable.
Click the Pick tool. Drag a marquee box around the Road to California block in the corner to select all of its lines.
Click EDIT > Copy, then EDIT > Paste.
Drag the new block to another corner of the block. Rotate if necessary. Make sure have Snap to Grid and Snap to Nodes turned on in the Precision Bar. This will help ensure this new block snaps into the proper place.
Repeat the process two more times to fill in the other corners.
Click Add to Sketchbook to save the block.
Not quite as fast, but still pretty easy!
11-22-2015
10:09 pm
Loved the nested block tutorial, but how can I get a PDF download of the procedure.
11-23-2015
10:04 am
I don’t have a PDF of this lesson, but you can print this blog post by clicking the title of the post (Creating “Nested” Blocks in EQ7) and then using your browser to Print.
You can also find this info in the User Manual (if you have a print manual, you can find it on page 191).
You can also find it in the built-in Help in EQ7. Click HELP > Search. Type “merge blocks” and hit Enter. Then click on the first search result- “6 Serendipity – Merging Blocks”.
11-23-2015
8:33 am
I made a 70 inch quilt and I actually drew the outside block and then drew the smaller one inside it. This is a fantastic and easy way to do what took me an hour. Thank you.
11-23-2015
10:07 am
Have you made the quilt yet? We’d love to see it! You can submit it to our Quilt Gallery here:
https://doyoueq.com/quilt-gallery/
01-18-2016
10:50 pm
Another great tutorial! Thank you.