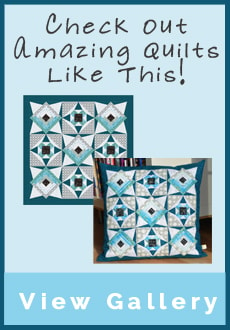
| Inspired by Barbara Brackman. |
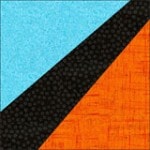
| Did you realize that a simple block like this…. |
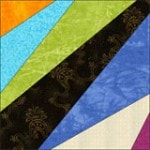 |
| Could produce a sophisticated design like this? |
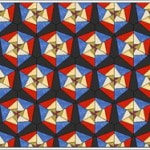 |
| This block is similar to a Spider Web, and its uneven strips give it an informal “improvised” look, perfect for scrap quilts. (If you did the EasyDraw lessons that came with EQ7 [HELP > EQ Lessons] you learned to draw a somewhat similar Spider Web block.) |
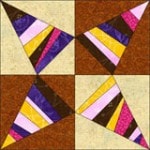 |
| Let’s draw an easy block. Along the way you’ll learn the EQ secret of putting square blocks into non-square spaces. Magic can happen there… |
| START A NEW PROJECT |
| 1. Click FILE > New > name your new project: Victorian Puzzle > click OK. |
| DRAW THE BLOCK |
| 2. Click WORKTABLE > Work on Block. |
| 3. Click BLOCK > New Block > EasyDraw. |
| 4. On the Precision Bar, above the block [VIEW > Precision Bar] set the following: |
| Block Width: 8.00 Block Height: 8.00 Snaps Horizontal: 24 Snaps Vertical: 24 Graph Paper Cells: ON > Set Horizontal and Vertical both to: 8 Snapping Options- Snap to Grid: ON Snap to Nodes: ON Snap to Line: OFF |
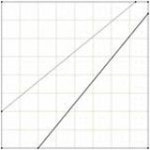
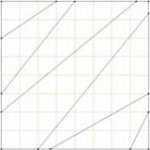
| 5. Following the block drawing below, draw 2 diagonal lines. You’re drawing a band across: one end narrower; one end wider. The lines need not be exactly as shown. |
 |
| 6. Click the Color tab (at bottom) > color the block, making the center dark. Choose any two colors for the corners. |
 |
| SET THE BLOCK IN A LAYOUT |
| 7. Click WORKTABLE > Work on Quilt. |
| 8. Click QUILT > New Quilt > Baby Blocks. We won’t change the block size. |
| 9. Click the Set Block tool > click to select the block you just made and colored. |
| 10. CTRL+click the quilt 4 times until all block spaces are filled. |
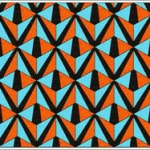
| Magic: Watch the square block skew, fitting into the diamond block shape. |
 |
| 11. Click the Rotate Block tool. |
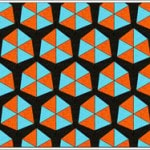
| Use CTRL+click to rotate blocks until you get the effect shown below. |
| Note: all dark centers point thin sides together. And the 2 colors alternate as in pinwheels. |
 |
| 12. Click the Paintbrush tool > color your small border the dark color. |
| 13. Click Add to Sketchbook. Now let’s draw more block lines. |
| EDIT THE BLOCK |
| 14. Click View Sketchbook > Blocks section > click the block > click the Edit button. |
| 15. Draw 2 or more new lines across the block corners. You’re on your own. Draw them straight across if you’d like, or at angles like this if you like an improvised look. Or draw only across one corner, leaving the other half blank. Each creates a different effect. |
 |
| 16. Click the Color tab (at bottom) when through drawing. (If lines disappear, it indicates they are not snapped to the Snap points along the block edge – go back to EasyDraw and draw again.) |
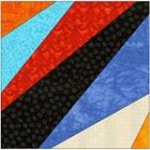
| 17. Color the block. Color the inner center black. Color the outer parts each a different color that you like, like this: |
 |
| 18. Add to Sketchbook when you are through. |
| CREATE A NEW QUILT WITH SAME ROTATION |
| 19. Click WORKTABLE > Work on Quilt. Your previous quilt is still on the Worktable. That’s good, because we want to use the same rotation. |
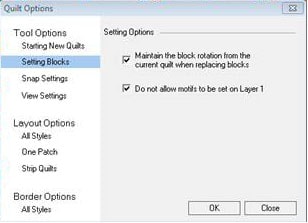
| 20. Here’s how: Click QUILT > Quilt Worktable Options > Setting Blocks > click the top box “Maintain the block rotation from the current quilt when replacing blocks.” |
| Note: REMEMBER YOU’VE DONE THIS, because you may want to undo it later. |
 |
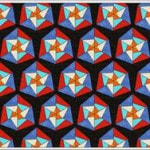
| 21. Click the Set Block tool > click to select your new block in the palette. CTRL+click 4 times on the quilt on blank spaces. You want to replace all your earlier blocks with your new block. Notice the blocks rotate when set, matching the rotation in your earlier quilt. That’s because you chose this “Maintain the block rotation from the current quilt” option in the Quilt Options a few steps ago. |
 |
| 22. Click Add to Sketchbook. |
| COFFEE BREAK |
| 23. This Victorian Puzzle idea came from a blog post on Barbara Brackman’s Material Culture. So take a break and admire when you want to. Victorian Puzzle Saga I Victorian Puzzle Saga II |
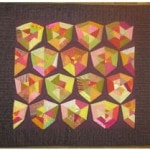 |
| 24. You’ll note the design is more interesting as a scrap quilt (see Barbara Brackman’s design, above), since the this emphasizes the improvisational quality of varying strip widths. |
| OPTION: Click the Paintbrush tool and start recoloring here and there, scattering different colors across the quilt. Just keep the dark block centers, which form the “web” effect. |
| TRY THIS: Change the color of the “dark web” block center to a light fab, or even a stripe. |
| PRINT THE PATTERN |
| 25. Click the Select tool. Though you drew the block as a square, you can print the pattern as a diamond, right from the quilt. |
| 26. Click any diamond in your quilt, to select it. |
| 27. Click FILE > Print > Foundation Pattern > click the Options tab > choose “Use size from quilt”for the size. |
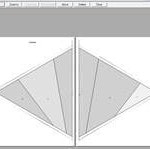
| 28. Click Preview. The pattern orientation on the paper depends on the block orientation on the quilt. If you select a horizontal diamond, your preview will look like this: |
 |
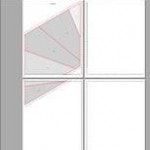
| But if you select an angled diamond, your pattern will be angled similarly, like this: |
 |
| Knowing that the block orientation on the quilt affects the pattern orientation will sometimes help you save paper. (And at times changing from Portrait paper orientation to Landscape can help as well.) But don’t worry if your large pattern spans several sheets. That’s fine. (We’ve had people print EQ foundations spanning 48 sheets, then sew the quilt without problem.) Just match each sheet with the next along the printed edge guides. Then connect the sections using a few small pieces of tape. And start sewing.And if you have *not* tried the EQ7 EasyDraw lesson — Lesson 5: Creating a Foundation-Pieced Priscilla – in EQ7 you might want to click HELP > EQ Lessons and print that one out now. Learn while the mind is hot! |
Victorian Puzzle Lesson
Print this Page


