by Andrea Bishop
Welcome to the club! If you have EQ software and the Kaleidoscope Collection add-on installed, you’ll be able to follow along.
This is the ninth of twelve Kaleidoscope lessons.
Intro
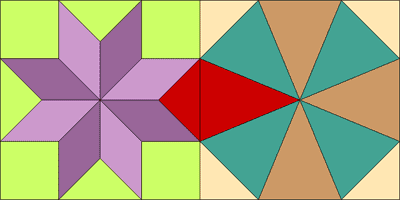
This month we are going to plan layouts that work with big octagons. So even if you haven’t done the mystery side-sewing project, the techniques presented will hopefully be new to you and something that will help with other projects.
Download the project
- These 2 projects have different layouts according to the capabilities of the software version and the type of image inside. You can download either the project with the transparent background (PNG) or with the square background (JPEG).
(If you plan to import your own image into EQ, pick the project that matches the type of image you will import. If you don’t have your own image to import, I recommend the PNG project, just because you can get the coolest results.)
Note:
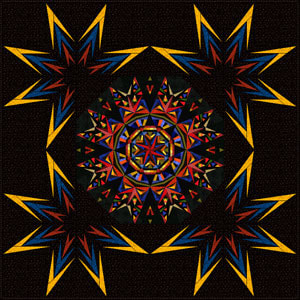
The project you download has a picture of my kaleidoscope, so you can follow the lesson whether or not you did the sewing project or have had a chance to take a picture of your own sewing project.
Lay your wedges on top of any background fabric. Move all the wedges close together and take a picture of it.
Try to be over your kaleidoscope and not at an angle when you take it. I stood on a ladder when I took my picture. You could also pin the background fabric to a wall or design wall and then pin your wedges in place on top of it and take the picture.
Crop the resulting photo to a square. This is just for design purposes and not for print, so make the image about 400 pixels by 400 pixels and 72 dpi.
Your picture will look something like this when you save it.
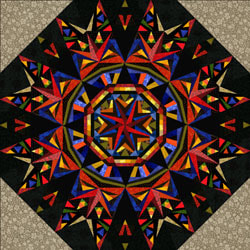
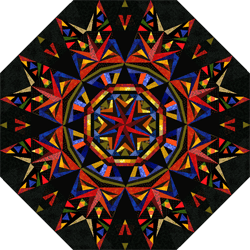
If you know how, you can make a transparent background. (PNGs and GIFs allow for transparent backgrounds.) If not, that’s okay.
-
Open the file.
- Then from within EQ, choose FILE > Save As and save the file in your project folder:
EQ7 project goes in My Documents > My EQ7 > PJ7 - In this project you will find some quilts (I’m begging you to ignore these until later in this lesson), a few blocks, and my photos so everyone can try this. Close the Sketchbook.
Adjust quilt settings
- We’re going to be working with some big blocks and fractions, so let’s change our quilt options to accommodate them.
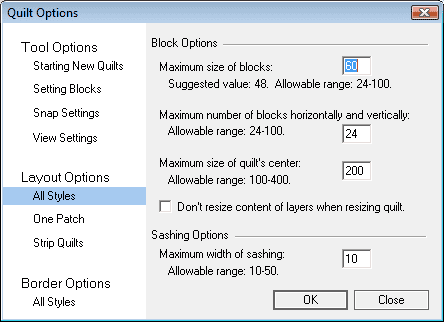
Click QUILT > Options.
Under Layout Options, click on All Styles.
Change the “Maximum size of blocks” to be 60.
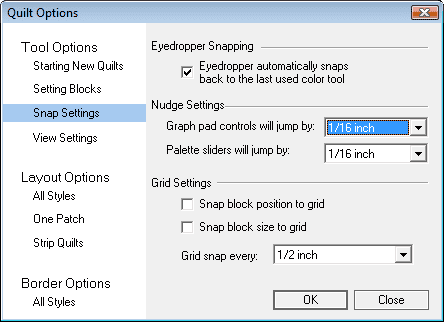
Under Tool Options, click Snap Settings.
Change “Graph pad controls will jump by:” to 1/16 inch.
Change “Palette sliders will jump by:” to 1/16 inch.
Uncheck Snap block position to grid.
Uncheck Snap block size to grid.
Click OK.
Layout #1 – Just bind it
OK, so this isn’t really one you’d lay out in EQ, but it is an option for those of you who made the sewing project. If you just want your quilt center to be your whole quilt, just make your layers of backing+batting+top, quilt it and bind it. If you add a sleeve, watch out, it may not hang as well as a square quilt because of the octagon shape.
Layout #2 – Make it square
Sewing Difficulty Level – Easy
For this one you sew your wedges together, just square it off and add borders within your comfort zone.
- Click WORKTABLE > Work on Quilt.
- Click QUILT > New Quilt > Horizontal.
- Click the Layout tab in the bottom-left corner of your screen.
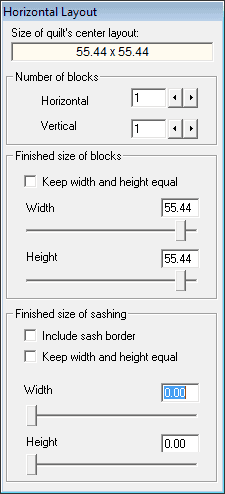
- Change the palette settings to match mine:
55.44 is 55.4375 or 55 + 7/16.
- Click the Layer 1 tab.
- OPTIONAL: The following steps are used to bring in your picture of your kaleidoscope if you have one.
- Click LIBRARIES > Photo Library.
- At the bottom of the library, click the Import button and choose > From Image Files.
- Browse to find your image.
- Select it and click Open.
- Now that it’s in the Import Results section, click Add to Sketchbook to put it in your project.
- Click Close to put the library away.
-
- If you don’t have the Set Photo
 tool on your toolbar, click the
  button at the bottom of the right-hand toolbar and choose Add/Remove buttons. Put a check next to Set Photo and click away from the list to turn the list off.
 - You can use either one of my images or your own image:If your image has fabric in the four corners, click the Set Photo tool, click the image, and click it in the center of your quilt.If your image has the corners cropped out and is saved as a PNG or GIF, click the Layer 2 tab.
Click the Set Photo tool and click the image in the palette.
Hold down SHIFT on your keyboard.
Move your cursor over the top-left corner of the quilt center, click and hold on that corner, keep holding as you move your cursor down to the bottom-right corner of the the quilt center.
Release the SHIFT key and your cursor.
Click the Adjust tool on the right-hand toolbar.
Click the photo to select it.
Make sure your Graph Pad it turned on (VIEW > Graph Pad should have a check next to it).
Change the photo’s size to be 55.438 in the Graph Pad.
Click both Center buttons
 (on the Graph Pad) to center the photo vertically and horizontally in the quilt.
Click the Layer 1 tab.
- If you don’t have the Set Photo
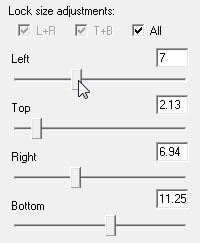
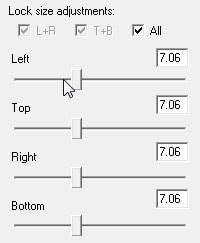
- TIP: Our sliders are accurate to 1/16 of an inch. This means there are a lot of decimals they will go through if you are used to just clicking on the line. I suggest putting your borders locked on “All”. Then double-click the number for Left, type in your new number and hit ENTER. Then with your mouse cursor tap the rectangle floating on the line for Left. This will make all of the other numbers jump to the number you entered.
If it slides to 7.06 instead of 7.00, just tap once on the line for Left to the left of the rectangle.
- Click the Borders tab and start adding borders and changing their styles and sizes.
- Go back to the Layer 1 tab.
- Set any blocks in your borders or just color them in with the Paintbrush
 tool.
tool. - Repeat steps 14-16 as needed until you have your borders looking the way you want them.
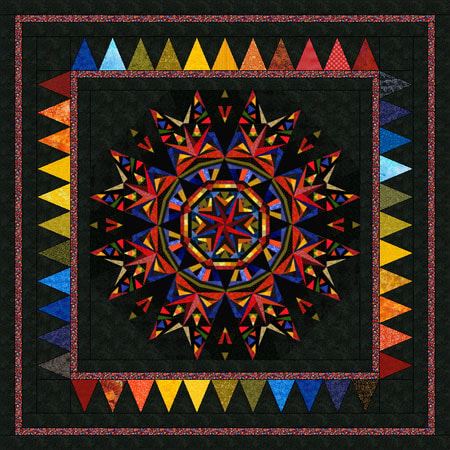
TIP: If you add a Points In or Points Out border and want the triangles to be roughly the same size as your wedges, just measure a template of a plain wedge. I measured just shy of 5.75 by 7 tall. I used “Size of quilt center including this border” feature to do the math. I made my quilt center plus borders as close to 63.25 (5.75 * 11) and put in 11 triangles for blocks in border.
Borders:
Border 1 – 2.50″ Long Horizontal
Border 2 – 1.50″ Long Horizontal
Border 3 – 7.00″ Points Out + 11 blocks
Border 4 – 3.00″ Long Horizontal
Border 5 – 1.50″ Long Horizontal
Border 6 – 3.00″ Long Horizontal
- Your blocks clip automatically.
- Click the Add to Sketchbook
 button to save your quilt.
Layout #3 – Make it On-Point
Sewing Difficulty Level – Still Easy
For this one you sew your wedges together, just square it off, make the triangles as one unit, add those, and add borders within your comfort zone.
- Click QUILT > New Quilt > On-Point.
- Click the Layout tab in the bottom-left corner of your screen.
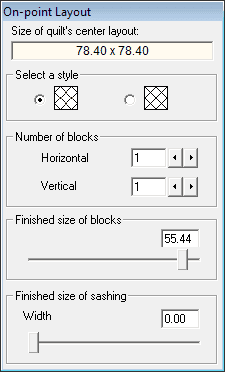
- Change the palette settings to match mine:
- Click the Layer 1 tab.
- You can use either one of my images or your own image:
- If your image has fabric in the four corners, click the Set Photo tool, click the image, and click it in the center of your quilt. If your image has the corners cropped out and is saved as a PNG or GIF, click the Layer 2 tab.
Click the Set Photo tool and click the image in the palette.
Hold down SHIFT on your keyboard.
Move your cursor over the top-left corner of the quilt center, click and hold on that corner, keep holding as you move your cursor down to the bottom-right corner of the the quilt center.
Release the SHIFT key and your cursor.
Click the Adjust tool on the right-hand toolbar.
Click the photo to select it.
Make sure your Graph Pad it turned on (VIEW > Graph Pad should have a check next to it).
Change the photo’s size to be 55.438 in the Graph Pad.
(Because your kaleidoscope is most likely symmetrical, there is no need to rotate the image 45 degrees because there will be no change in what you see.)
Click both Center buttons
 (on the Graph Pad) to center the photo vertically and horizontally in the quilt.
Click the Layer 1 tab.
- If your image has fabric in the four corners, click the Set Photo tool, click the image, and click it in the center of your quilt. If your image has the corners cropped out and is saved as a PNG or GIF, click the Layer 2 tab.
- Click on the Set Block tool
 . Check out the block I’ve designed for you. It uses this technique I’ve mentioned on our blog before. This block is drawn at Kaleidoscope proportions to fit perfectly in these on-point spaces.
 - Click on this block in the palette to select it.
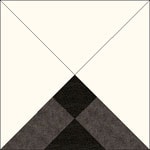
- Click in each of the four corners of the on-point layout to set the block there. (Some corners are ivory and need to be rotated.)
- Click on the Rotate Block tool
 .
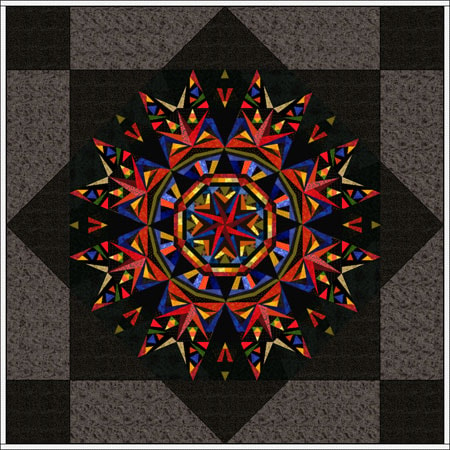
. - Click repeatedly on each corner until you see the black corner design appear. Stop when all four corners are showing the black corner design.
- Click the Borders tab and start adding borders and changing their styles and sizes.
- Go back to the Layer 1 tab.
- Set any blocks in your borders or just color them in with the Paintbrush
 tool.
tool. - Repeat steps 31-33 as needed until you have your borders looking the way you want them.
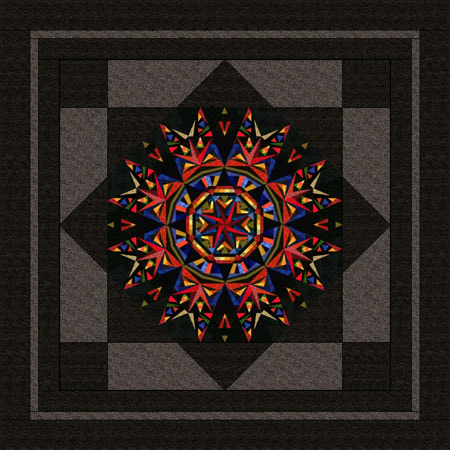
Borders:
Border 1 – 5.00″ Long Horizontal
Border 2 – 2.00″ Long Horizontal
Border 3 – 7.00″ Long Horizontal
- Click the Add to Sketchbook
 button to save your quilt.
So it’s been a while since our “Alternates” Kaleidoscope lesson, but…. remember how Eight-Pointed Stars went great with Kaleidoscopes? They use the same grid. So …. how about we play with that whole entire Star Layouts section of the Layout Library?! : )
In the project you downloaded are a bunch of star layouts that I’ve edited to work with Kaleidoscopes.
- Click the View Sketchbook
 button.
 - Click the Quilts section.
- Scroll to find quilt number one in the Sketchbook.
- Click Edit to take this quilt down to your worktable.
- You can use either one of my images or your own image:
- If your image has fabric in the four corners, click the Set Photo tool, click the image, and click it in the center of your quilt.If your image has the corners cropped out and is saved as a PNG or GIF, click the Layer 2 tab.
Click the Set Photo tool and click the image in the palette.
Hold down SHIFT on your keyboard.
Move your cursor over the top-left corner of the quilt center, click and hold on that corner, keep holding as you move your cursor down to the bottom-right corner of the the quilt center.
Release the SHIFT key and your cursor.
Click the Adjust tool on the right-hand toolbar.
Click the photo to select it.
Make sure your Graph Pad it turned on (VIEW > Graph Pad should have a check next to it).
Change the photo’s size to be 55.438 in the Graph Pad.
(Because your kaleidoscope is most likely symmetrical, there is no need to rotate the image 45 degrees because there will be no change in what you see.)
Click both Center buttons
 (on the Graph Pad) to center the photo vertically and horizontally in the quilt.
Click the Layer 1 tab.
- If your image has fabric in the four corners, click the Set Photo tool, click the image, and click it in the center of your quilt.If your image has the corners cropped out and is saved as a PNG or GIF, click the Layer 2 tab.
- Click on the Paintbrush
 tool. The palette will appear.
 - Use solids or fabrics and color the 8 triangles to match.

- Click LIBRARIES > Block Library.
- Find any blocks you like and click Add to Sketchbook in the bottom corner.
- Add as many blocks as you want. Don’t go overboard though.
- Click Close when you’re done.
- Click on the Set Block tool
 . (Click the Blocks tab of the palette if necessary.)
 - Click on one of the blocks you added.
- Click in the star points of the layout.
- Click on the Rotate Block tool
 .
. - Rotate the blocks in any manner that looks good to you. They can be any block, any way, and the corners don’t have to match if you don’t want them to match.

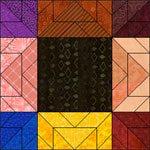
- Since this quilt does involve 8-Pointed stars and Y-seams. I will mention a way to make it beginner-friendly before you start coloring everything. In the Sketchbook is a Half-Square Triangle, Four X and One Goose.Click the Half-Square Triangle block in the four corners of the quilt.
Click the Four X block in the triangle to the left and right of the corners you filled.
Click the One Goose block in the large empty rectangle at the midpoint along each side.In the image below I shaded how this helps. Do you see how this helps? Put the 3 triangle units together to form the center rectangle. Put the two triangle units together to make the corner squares. Then it’s as easy as this block below:

- Click on the Paintbrush
 tool. The palette will appear.
 - Color the entire quilt.
Note: Pay attention to the status bar that tells you your quilt size.
These quilts can get pretty big pretty fast.
Mine is already 112.88 inches with only one 1.00″ border.
![]()
- Click the Borders tab and start adding borders and changing their styles and sizes.
- Go back to the Layer 1 tab.
- Set any blocks in your borders or just color them in with the Paintbrush
 tool.
tool. - Repeat steps 56-58 as needed until you have your borders looking the way you want them. Here are some quilts I came up with using this layout:
Uses the Bluebell block from Library 3 > Flowerbed Foundations.
Any New York Beauty is cool. Rotation gives you an entirely different look between these two:
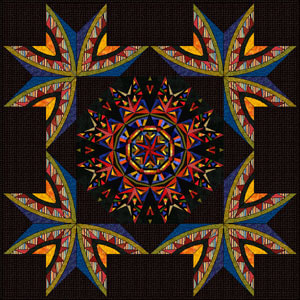

Uses the Double Tulip block from Library 3 > Flowerbed Foundations.
- Click the Add to Sketchbook
 button to save your quilt.
HOMEWORK: Keep playing with the other layouts in this quilt project until you find one you like. Use any blocks or fabrics that look cool to you.
TIP: To avoid future confusion, you may want to change your Nudge and Grid settings back to 1/4 inch. Otherwise your palette sliders and graph pad will have a lot of decimal places. See step 4 at the beginning of this lesson.
OPTIONAL MYSTERY SIDE PROJECT – SEWING INVOLVED
MONTH 8 of Sewing Project
This month we’re going to work on finishing our quilt tops. This may be a 2-3 month endeavor.
Pick one of the layouts you designed in this lesson and print out the patterns.
To print out a pattern, click the Select tool ![]() , click on the block in the quilt, and choose Print > Templates or Print > Foundation Pattern.
, click on the block in the quilt, and choose Print > Templates or Print > Foundation Pattern.
Print all the pieces needed and start sewing!


